The post What Everyone Needs To Know Before Remodelling appeared first on Creative Sides.
]]> 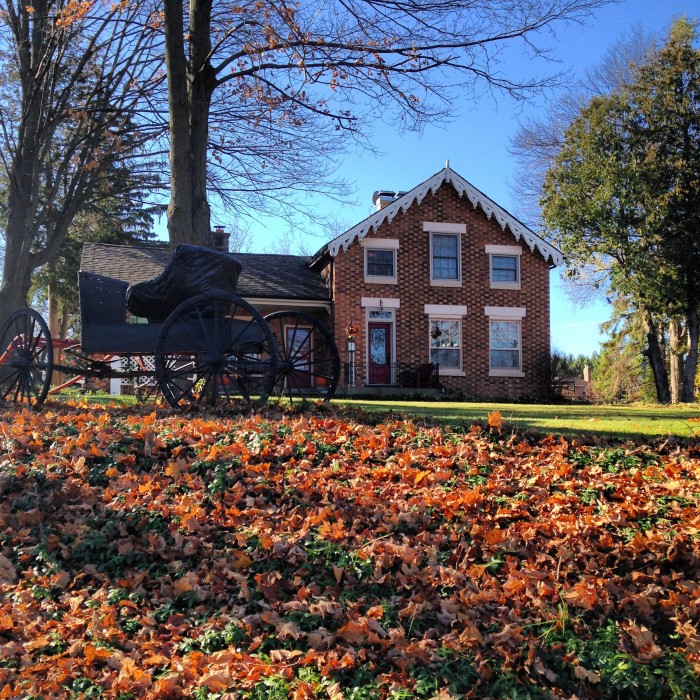
Until the day when I can have the older home of my dreams and embark on that adventure, I will happily settle on being about halfway there with our current home that is approaching the 50 year mark. This place has garnered us with plenty of experience in fixing and repairing, but without the charm of a front porch. Any part of our place that looks nice to date is because we have made it that way. We bought this place because we could see the potential and liked the space it afforded us (not because we were won over by things like pink sinks and yellow bathtubs or a lack of doors on most of the rooms…including the bathrooms…). Of course it has meant replacing some plumbing and electrical along the way, as well as many ascetics (orange melamine countertops anyone?), and due to the age of the building, there is asbestos. We didn’t know it initially, but we learned that it was present in the drywall tape. This is hardly unusual. In fact, older homes are not the only ones with the problem (unless you are young enough to think that 1990 is old – in which case get out your smartphone and look up asbestos and shoulder pads – both are bad…. but in different ways…). Asbestos was used in construction up until 1990, believe it or not. Often times it seems to slip people’s minds, but asbestos is something that should be at front of mind when considering renos.
By living in a place that has been on this planet longer than I have, I have been afforded unique insights along the way, thanks to my DIY-happy husband. I’ve learned to say things aloud like, “When I come home today, please let there still be stairs.” After all, in his defense, he can’t read my mind. I learned this when I returned home from work one day, shortly after purchasing our current home, and was shocked to hear myself say, “Where are the stairs that were here this morning?!”
It has also taught me phrases like, “What is your asbestos abatement plan?”. No seriously, my husband’s career is related to safety and the words ‘abatement plan’ are in fact part of our regular vocabulary and riveting dinner conversation.
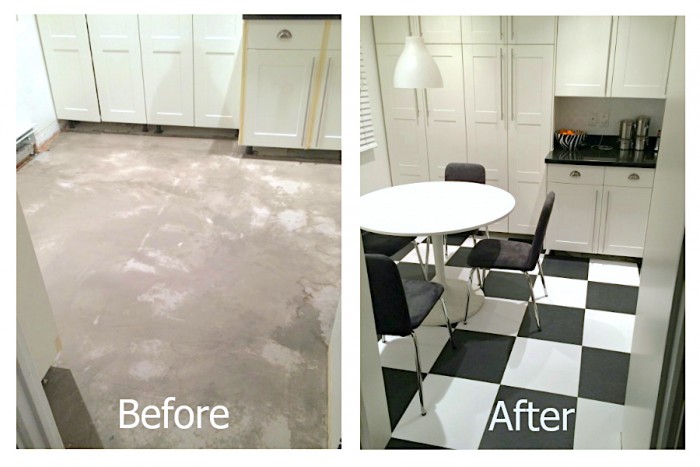
Asbestos is not uncommon, as most houses built between 1950 and 1990 in BC contain some form of asbestos. In our case, it’s in the drywall tape on the walls. Drywall, insulation and vinyl flooring are very common places to find asbestos. You can find a list of other common places asbestos is located here.
Turns out that buying a place built in the 70’s didn’t just leave us the building legacy of no overhead lighting, sunken living rooms and strangely hued decorative glass panels! The use of asbestos in residential finishes (between 1950-1990) became commonplace because of its incredibly hardy nature and resistance to heat. Now the presence of asbestos in itself is not harmful, but the act of removing it is. If you have ever lived through any type of renovation or demolition, you will know about the dust. The never ending, insidious, possibly make you lose your mind trying to clean it up, dust. There is no way around it. Unfortunately, this is where asbestos becomes incredibly dangerous. As soon as something containing asbestos is disturbed, it can become air born and harmful. You do not want breathe in asbestos particles and there is no renovation without dust (though how I wish there was) and so asbestos protection/removal plans need to be in place.
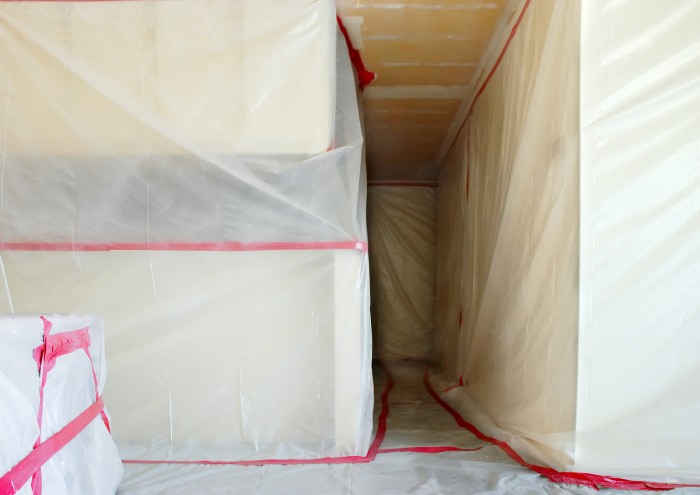
Before fixing up our homes, we all need to make sure our renovation plans include looking for and safely removing asbestos before any workers come into do the work.
WorkSafeBC is educating homeowners in BC about the danger of asbestos exposure and how we can work together to keep everyone healthy and safe on our projects. Because asbestos was so widely used in BC construction, it’s important that any asbestos is identified and properly removed to ensure the health and safety of everyone contributing to the project or living in the home. Take asbestos seriously. It can only be removed (or remediated) by qualified professionals.
Consider these sobering facts. Breathing in asbestos fibres can cause serious health problems, lung diseases and cancer. Asbestos-related disease is the leading cause of work place death in BC. In fact 584 workers died from asbestos-related diseases between 2006 and 2015, 30% of which were in the construction industry alone.
Clearly, we need a greater awareness of asbestos and how prevalent it can be in structures built before 1990. Educate yourself before taking on a home renovation. Click here to learn more about asbestos.
It’s important to take the necessary steps to ensure your home is asbestos-free before starting any demolition or renovation project.
Disclaimer: this post has been generously sponsored by WorkSafeBC, the opinions and language are my own.
The post What Everyone Needs To Know Before Remodelling appeared first on Creative Sides.
]]>The post Goodbye Perfectionism appeared first on Creative Sides.
]]>
I often struggle with having everything just so. Perfectionism is a slippery slope, especially when children are involved. Children are not perfect; they are glorious and wonderful. Learning how to do things comes with mess – lots and lots of mess. That mess and clutter makes me shy away from all day cleaning binges in order to make my house appear uninhabited for when company comes calling. I don’t want to teach my girls that their selves and their homes must be perfect to be hospitable. That’s just not true.
I decided to make ‘goodbye expectations’ my new motto. Embracing that spirit means it’s time to say:
“Goodbye, see you later, adios, so long expectations!
Here we are in all our imperfect glory!!!
Take us as we come, because we are great!
Welcome to ‘how we do things in our family.
Hello friends – my kids are learning and growing here.”
I want them to know it might be a bit of a circus, but it’s our circus. Life would be awfully dull without it. All this fun and life happens in our home. It happens in our sometimes cluttered, sometimes noisy, sometimes ‘where-is-the-dining-table-under-all-these-crafts-and-blanket-forts’ kind of home and more often than not, with a dirty kitchen floor.
After all, a lot happens in our kitchen. There are chairs dragged up to the counters (sometimes running over my toes), with flour flying everywhere. Sometimes we have more baking than we know what to do with, but the neighbours never complain about that. I hope that spirit of sharing teaches my girls to be generous and giving. The spirit of hospitality is about more than housekeeping.
Who’s idea is it anyway that a home must appear un-lived in and flawless to entertain guests? We have enough people expecting us to be perfect, do we really want that from our near and dear too? And when, oh when, did someone decide there should be no sign of children around the home (and especially not in living rooms)? It’s just plain weird that 50% of our household should leave no evidence of their existence.
Do we really only want friends who know this version of ourselves, the version that – if we succeed in portraying – will only make them feel ‘less than’ about themselves? Shouldn’t our friends and loved ones enjoy our company, comfy sofa and yummy kitchen creations?
Yummy kitchen creations make for messy floors. It’s science. You can’t argue with science. Aren’t the best meals the ones that happen naturally with many hands contributing a little of this and a little of that (in comfy pants, with lots of laughter for good measure)?!
This is why Ikea’s new campaign #letsrelax really spoke to me. Ikea’s new global campaign challenges the expectations and starts conversations about the things that make life unnecessarily demanding. It’s about time we all relax and start enjoying the perfectly imperfect life we have to share with family and friends.
Here are some of the great ways our family has found to do just that:
Location, location, location. For daily family meals we all sit around our kitchen table, it makes for much better conversation – plus you are closer to the food for seconds or, dare I even say, thirds.
Embracing the dining table. Our dining space (referring to it as an actual room might be a stretch) is rather tight. To seat everyone at the table comfortably we need to slide the living room sofa further into the living room. It’s painstaking, but we are not to be denied. We love sitting around the table, and not just because we are statistically more prone to spills!
Make room! When it comes to entertaining, cozy or not, we slide the sofa out, insert the dining table’s extra leaf, and add more chairs. We can (and do) seat up to ten. Once the food starts flying being eaten, no one really seems to notice the close quarters. Our most recent family gathering boasted out of town relatives, with our numbers rising to twelve. The kids pulled up their play table and chairs next to the adults table and away we went!! Make room in your heart and your house for family.
Delegate! Kids can help you embrace imperfection. No one will have to wonder if you did things to a grade or preschool level because the kids will be proud enough to take ownership when your guests cross the threshold. A collaborative approach teaches that entertaining is a family affair. It should not just fall on one person. This lesson is important for me and my kids.
Start Small. Setting the table for guests is a great start. Bonus: a table set with mismatched dishware is adorable because the kids did it. No one suspects you don’t have twelve matching place settings (which my cupboards don’t currently boast).
For Everything There is A Season. My beautiful place settings for twelve are carefully packed away in the basement with very fragile and non dishwasher friendly china. They patiently await another season in our lives. This is not the time for that; it is the time for occasionally broken dishes and everything dishwasher friendly.
Leave Room For Creativity. Once our eight year old set such a beautiful table, it would rival that of any adult! Our ‘Fancy Nancy’ made the everyday very beautiful and special, even the single flower she choose for a vase in the centre matched. As I cooked in the kitchen, she looked up on youtube how to turn napkins into roses! I didn’t even need to lift a finger. Truly, it meant more to our family that she’d taken such pride and pleasure in doing it than if I’d unearthed all the fine china.
There’s never too many cooks. My kids love to help in the kitchen, sometimes even a little too much. My youngest once ‘helped’ cover the cupboards and both of us in chocolate cake batter turning the mixer on high prematurely! While it means four times the mess, I am bound and determined my kids will learn to cook and clean. This is why I’ve said goodbye to keeping kids out of the kitchen for fear of a mess.
Nobody expects perfection. Years of entertaining taught me people do not in fact have more fun when everything is just perfect. They may ooh and ahh over it at first, but they have more fun when you are relaxed and enjoying their company, not striving for the impossible or worrying something may get ruined.
Add a little extra (to dinner). More times than I can count last minute dinner invitations have made for some of our most memorable times. Put a little extra on for unexpected guests (and memories!)
Many hands make light work. Let those who offer, bring something! I hate going places empty handed. I am relieved when someone tells me how I can contribute. Our last few dinners, I’ve happily made the main, the dessert (there is just no way I could ever outsource the dessert) and a side dish. My husband made the mashed potatoes (truly, no one makes them better than him anyways). Someone brought a salad and two others brought sides and another provided the wine. It turned out great – delicious food, great company and I wasn’t exhausted!
Strut the Stuff You Love When You Fancy. I really enjoy decorating cakes and of course, that has its place. Those old fashioned, hand written recipes that have been passed down through generations, those cakes covered in glorious swirls or mounds or nuts that you just can’t wait to dive into, those somehow have my heart. That being said, Ikea and I agree on their suggestion to ‘keep it simple (but delicious)!’
Simplify. Sometimes I struggle between what tastes amazing and what looks great when it comes to entertaining. I don’t think I need to say which one wins when it’s just me. The meals and recipes I get asked for the most by friends and family are the quickest and simplest to prepare. These are the ones that won’t win any competitions on looks but get asked for again and again because they are so comforting or downright delicious!
It’s all about the guest list. Yummy food just tastes better with the ones you care about (again I believe this is pure science – like dirty kitchen floors). Invite those you care about, that make you laugh over and embrace the way you do things. It doesn’t need to be the way the neighbours do it or the media says it needs to be done, but rather just the way that works for you and your family. It turns out that is more than enough.
So join the movement! #letsrelax
The post Goodbye Perfectionism appeared first on Creative Sides.
]]>The post Two Tier Flower Power Cupcakes appeared first on Creative Sides.
]]>
Maybe it’s the string of teasingly sunny days we have experienced lately after weeks of rain. Perhaps it’s the fact that my oldest has the flu again a whole two and half weeks after the last bout. Whatever the cause, I find myself longing for spring and I feel like it’s just around the corner.
I may just be feeling this way because I need to hold out hope for a time with less runny noses, but I did see the first inclinations of cherry blossoms on my block the other night. When Travis got home from work I ran out of the house as fast as I could rushing around the block to soak up any sun left and stretch my legs after being stuck inside all day with a sick kid!
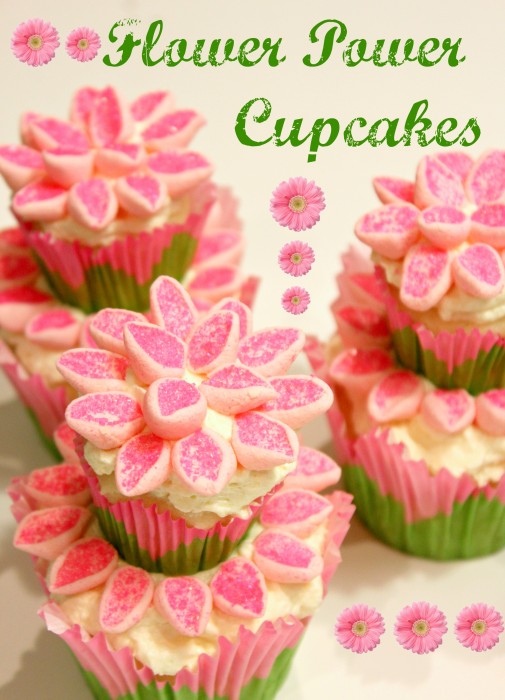
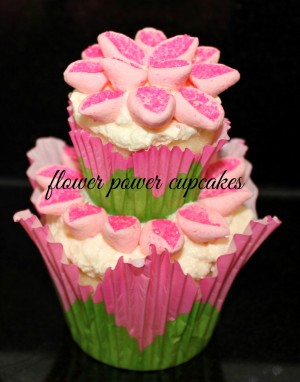
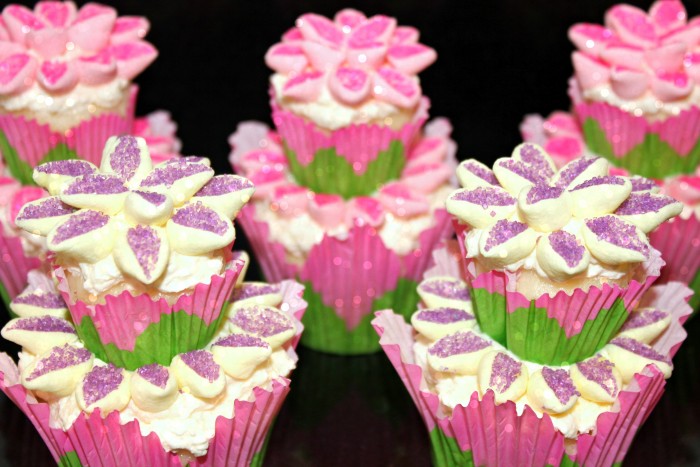
Safe to say I think we need spring and what better way to celebrate and coax on springtime than with a double decker cupcake covered in charming flowers?! Better yet, made with simple flower petals out of marshmallows! Yeah, you’re right, there simply is no better way to prepare for warmer weather and bathing suits than with not one, but two cupcakes.
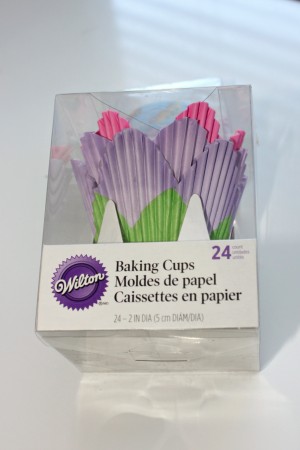
My initial inspiration came from these Wilton cupcake liners I found at Micheals, pink and purple, in both mini and regular size.
Flower Cupcake Instructions
What you will need:
Vanilla cupcake batter (either homemade or a mix works well)
Vanilla frosting
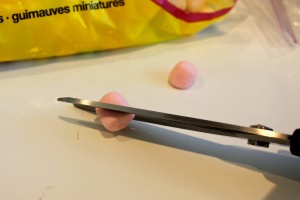
Multi-coloured miniature marshmallows
Wilton Sprinkles in Pink and Purple Sparkling Sugars.
Paper cupcake liners (optional). I chose Pink and Lavender Petal Baking Cups from Wilton
Kitchen scissors
Small ziplock bags
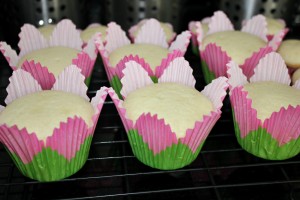
Step 1: Bake a batch of both mini and full sized cupcakes and allow to cool.
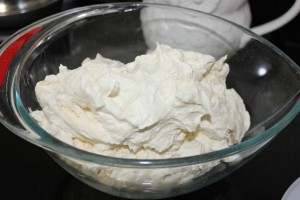
Step 2: Make a fluffy vanilla frosting. I left it white, because it gets mostly covered, but it would be great if it was pink or yellow as well.
Step 3: I choose to use multi-coloured miniature marshmallows and picked out the colours I wanted – pink and yellow.
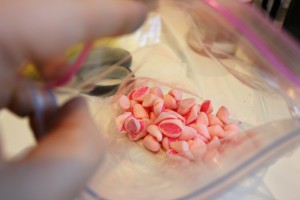
Step 4: Next place sparkling sugar in a ziplock bag (about a 1/4 of cup). I did one with purple and another with pink.
Step 5: Cut each marshmallow diagonally in half with sharp kitchen scissors.
Step 6: Once the marshmallows are cut, place in the ziplock with the decorating sugar and shake. The sugar will adhere itself to the cut, sticky side.
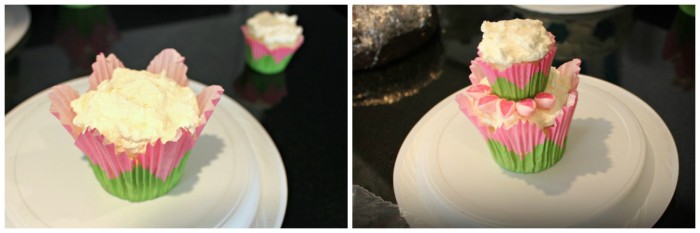
Step 7: Generously frost the bottom, larger cupcake. Frost the mini cupcake and place in the centre, on top of the larger, frosted cupcake to make two tiers.
Step 8: Place the marshmallows, sugar side up onto the frosting as petals, in circular patterns.
Step 9: On the top cupcake, begin with the petals in the centre and work your way out, creating a flower from the marshmallow petals.
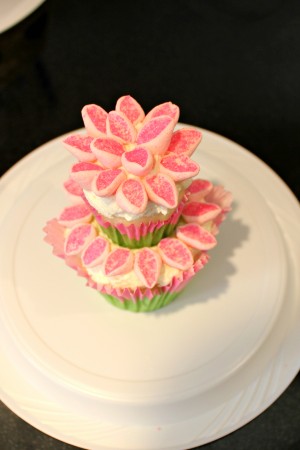

Enjoy!
The post Two Tier Flower Power Cupcakes appeared first on Creative Sides.
]]>The post DIY Birdcage Chandelier appeared first on Creative Sides.
]]>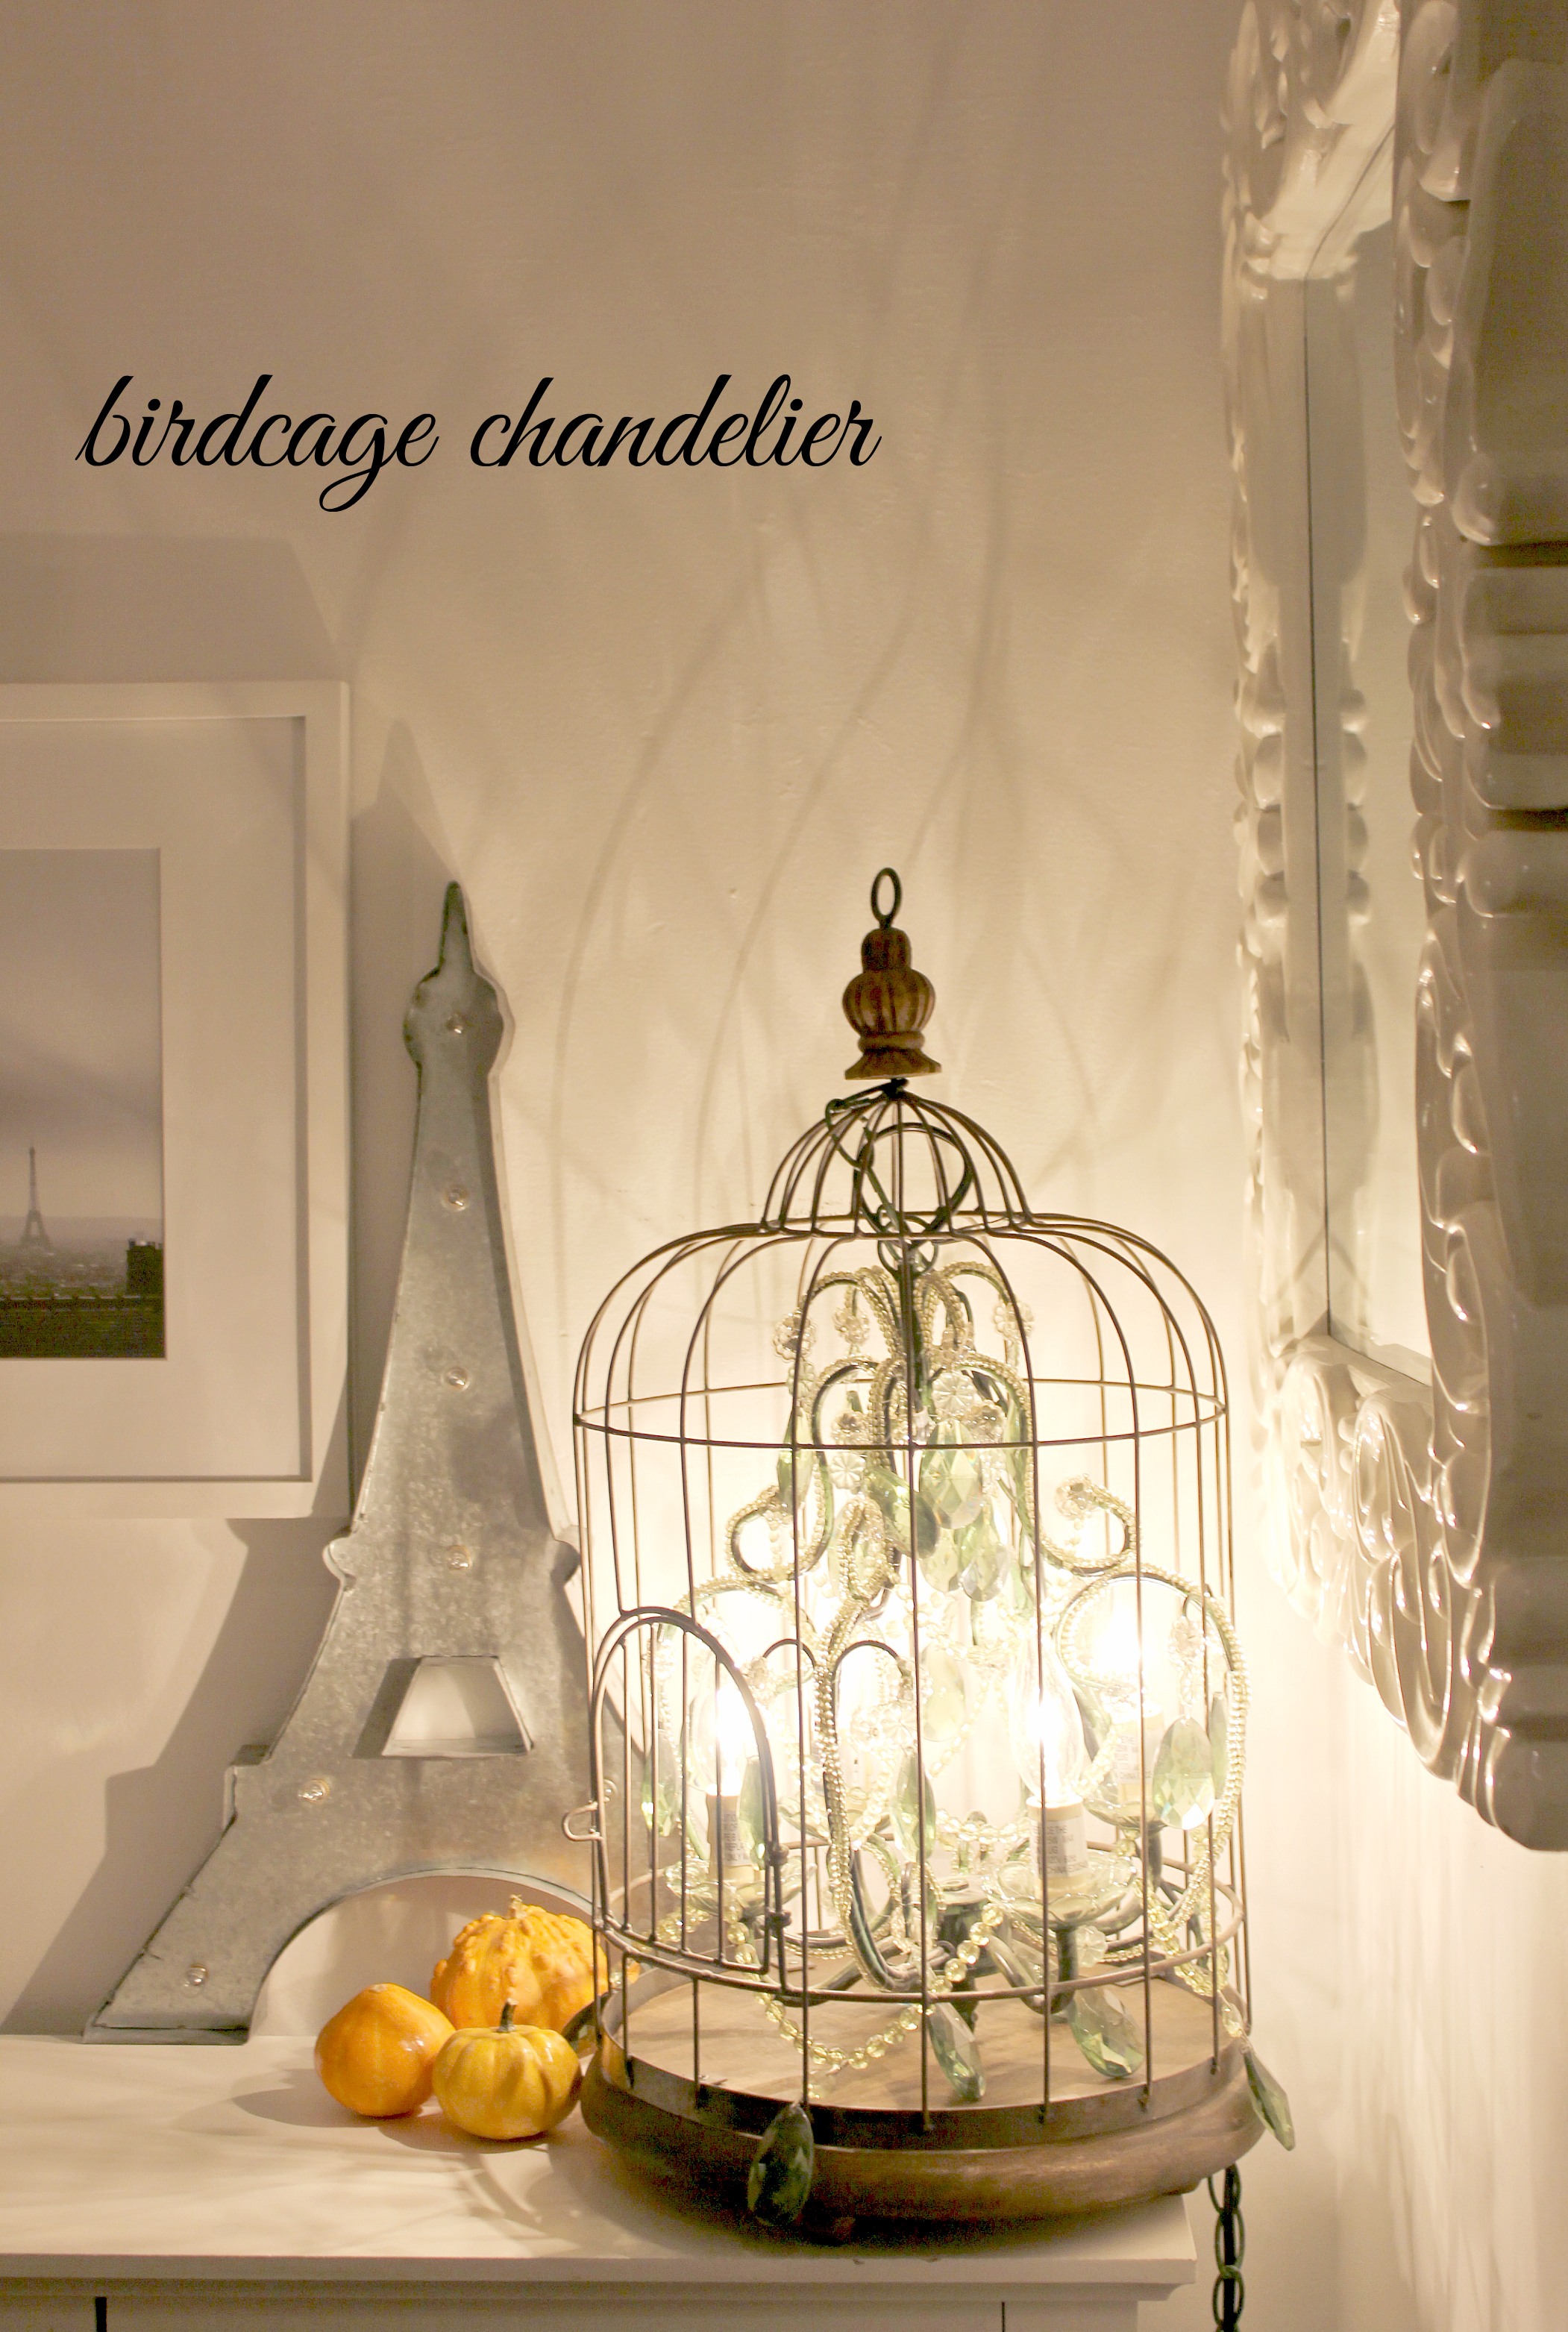
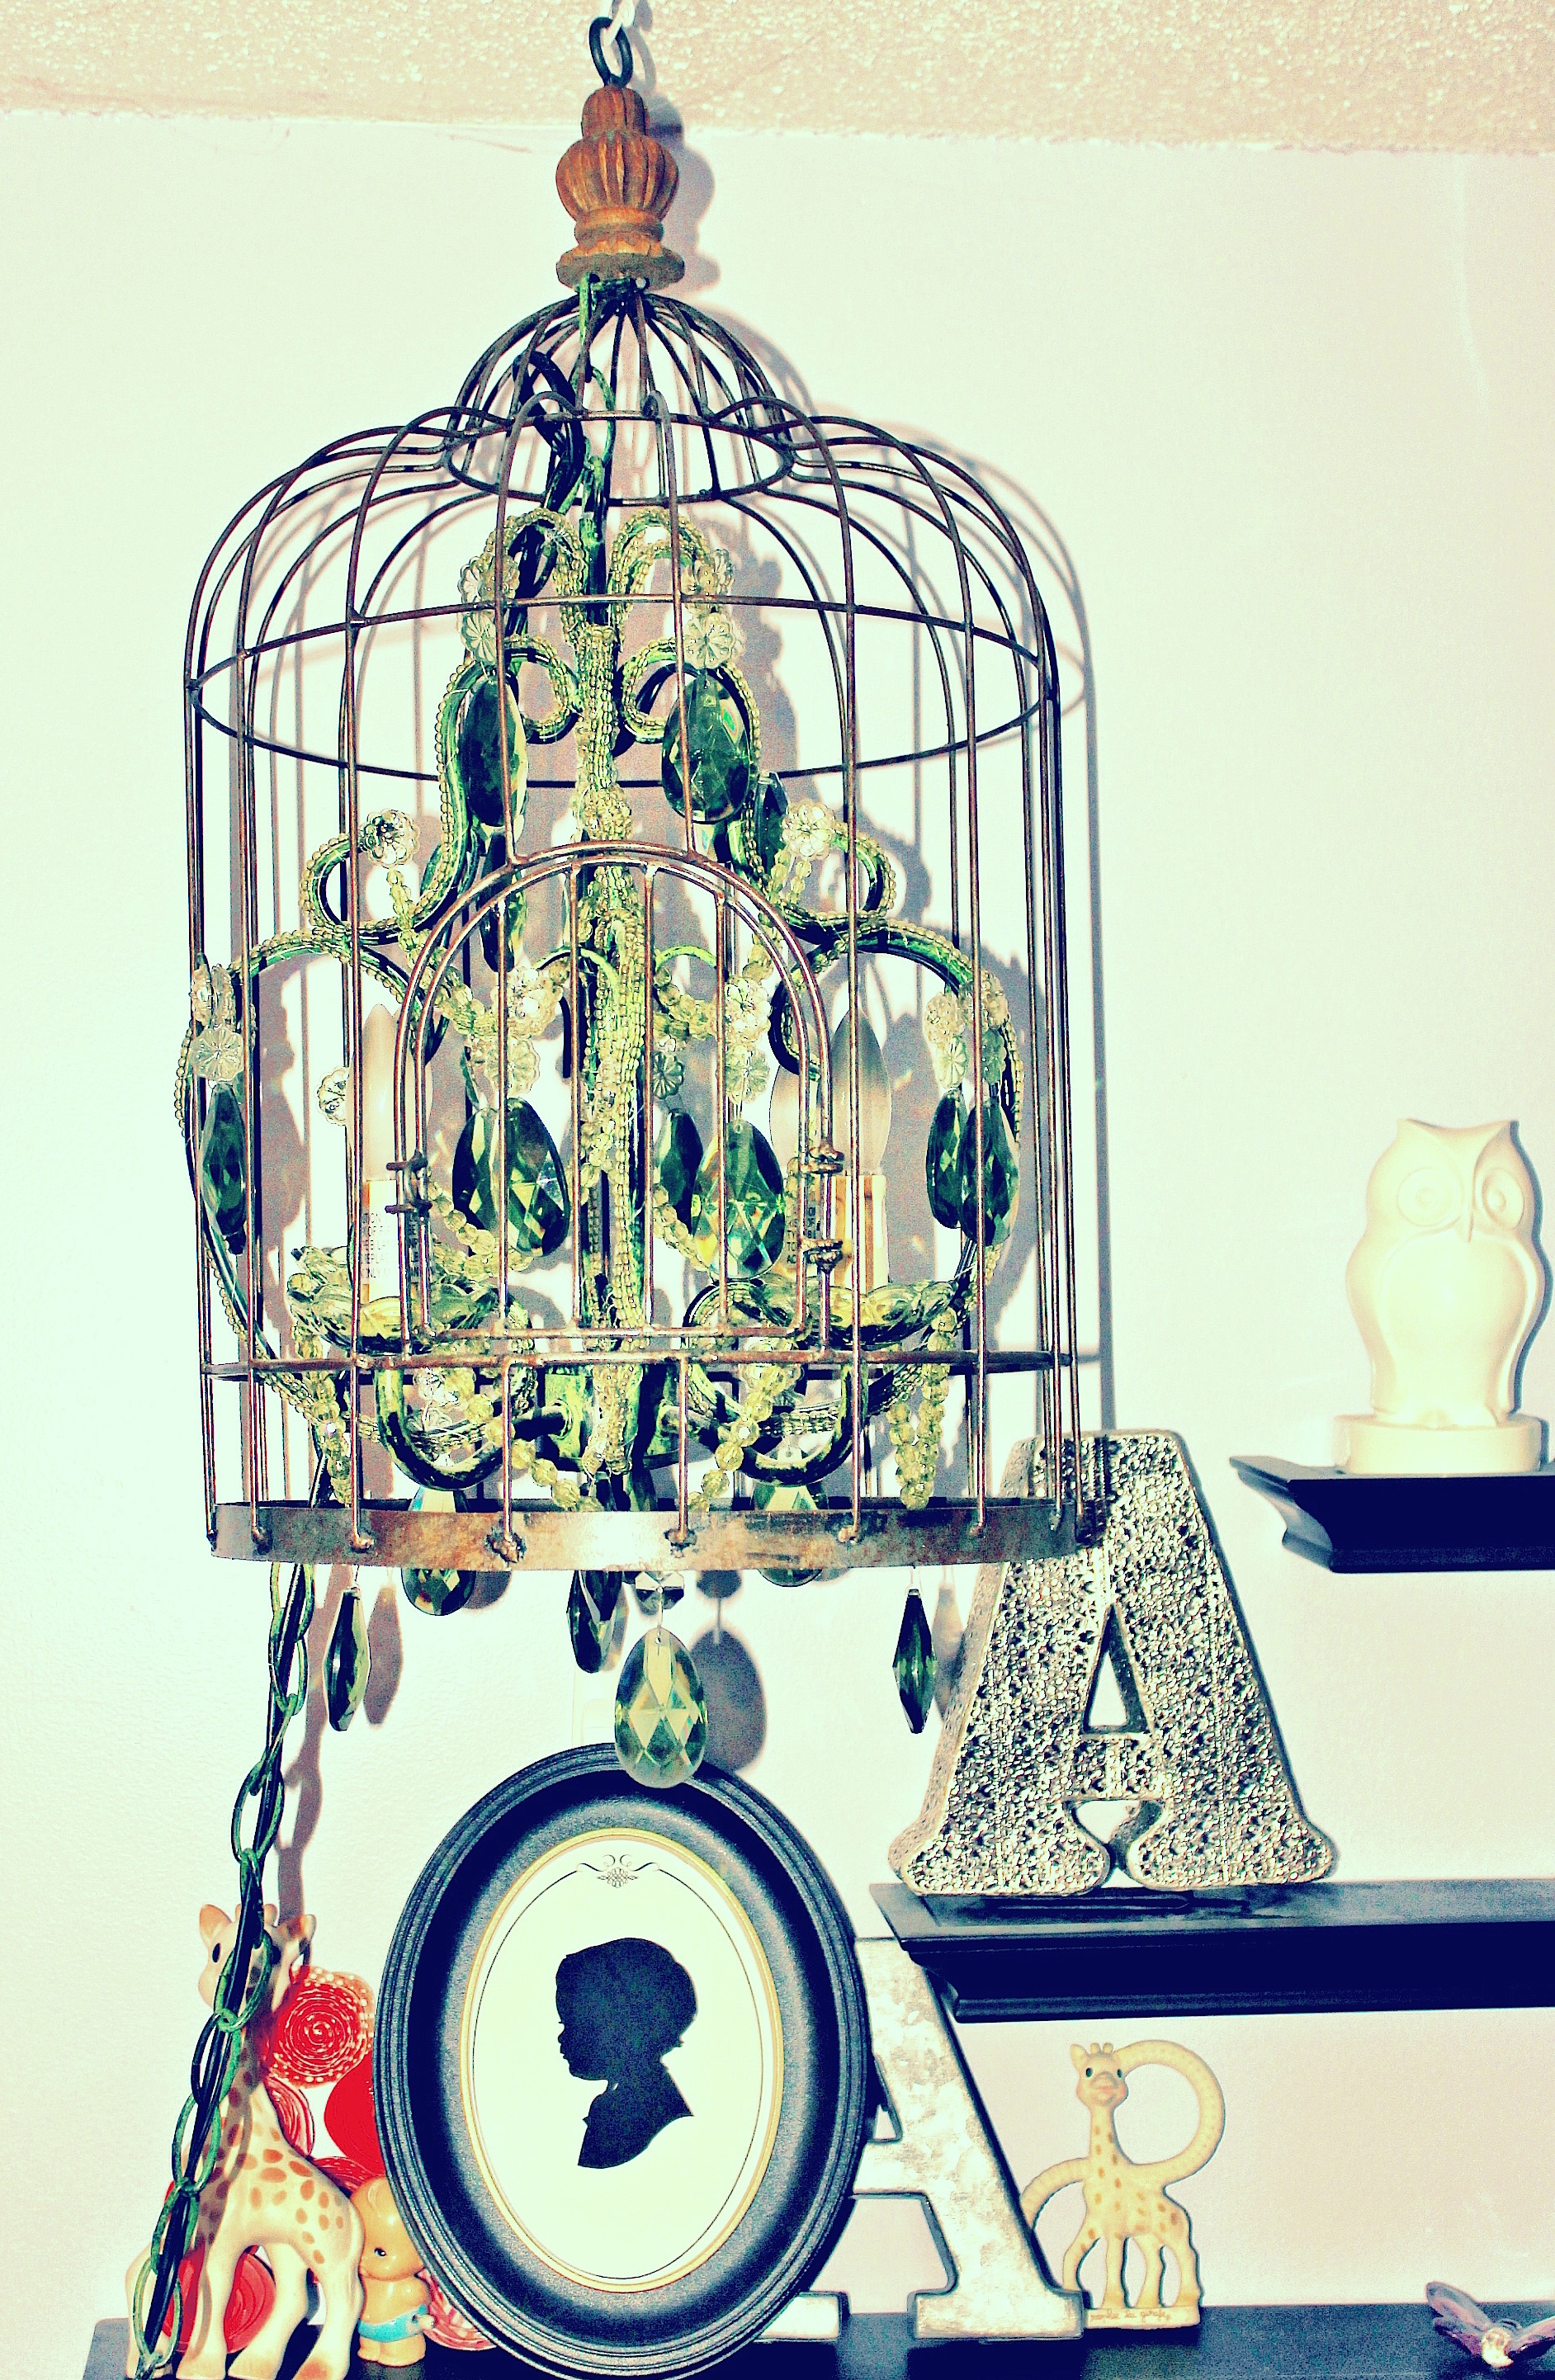
Sometimes the only thing I wish for more than extra wall space in our home (for more photos of course), is a larger need for chandeliers in my life. I have a rather insatiable love of chandeliers and photos and tufted furniture and monograms and and and….need I really go on? Basically, I just love decor and beautiful, unique things. My latest obsession interest has been in the form of birdcages, especially when paired with lighting. Ever since we fashioned the overhead light in our youngest’s room out of a birdcage, my interest has grown. You might think that I would have gotten it out of my system….but if one is good, might more be even better! Why not combine a forgotten chandelier and a new found birdcage? Why not indeed. I mean if the all knowing and ever impressive Restoration Hardware thought it a good idea and did it, why couldn’t I?! Since I had no convincible argument to not create a birdcage chandelier, here are the 12 steps I went through in order to do so.
What I used:
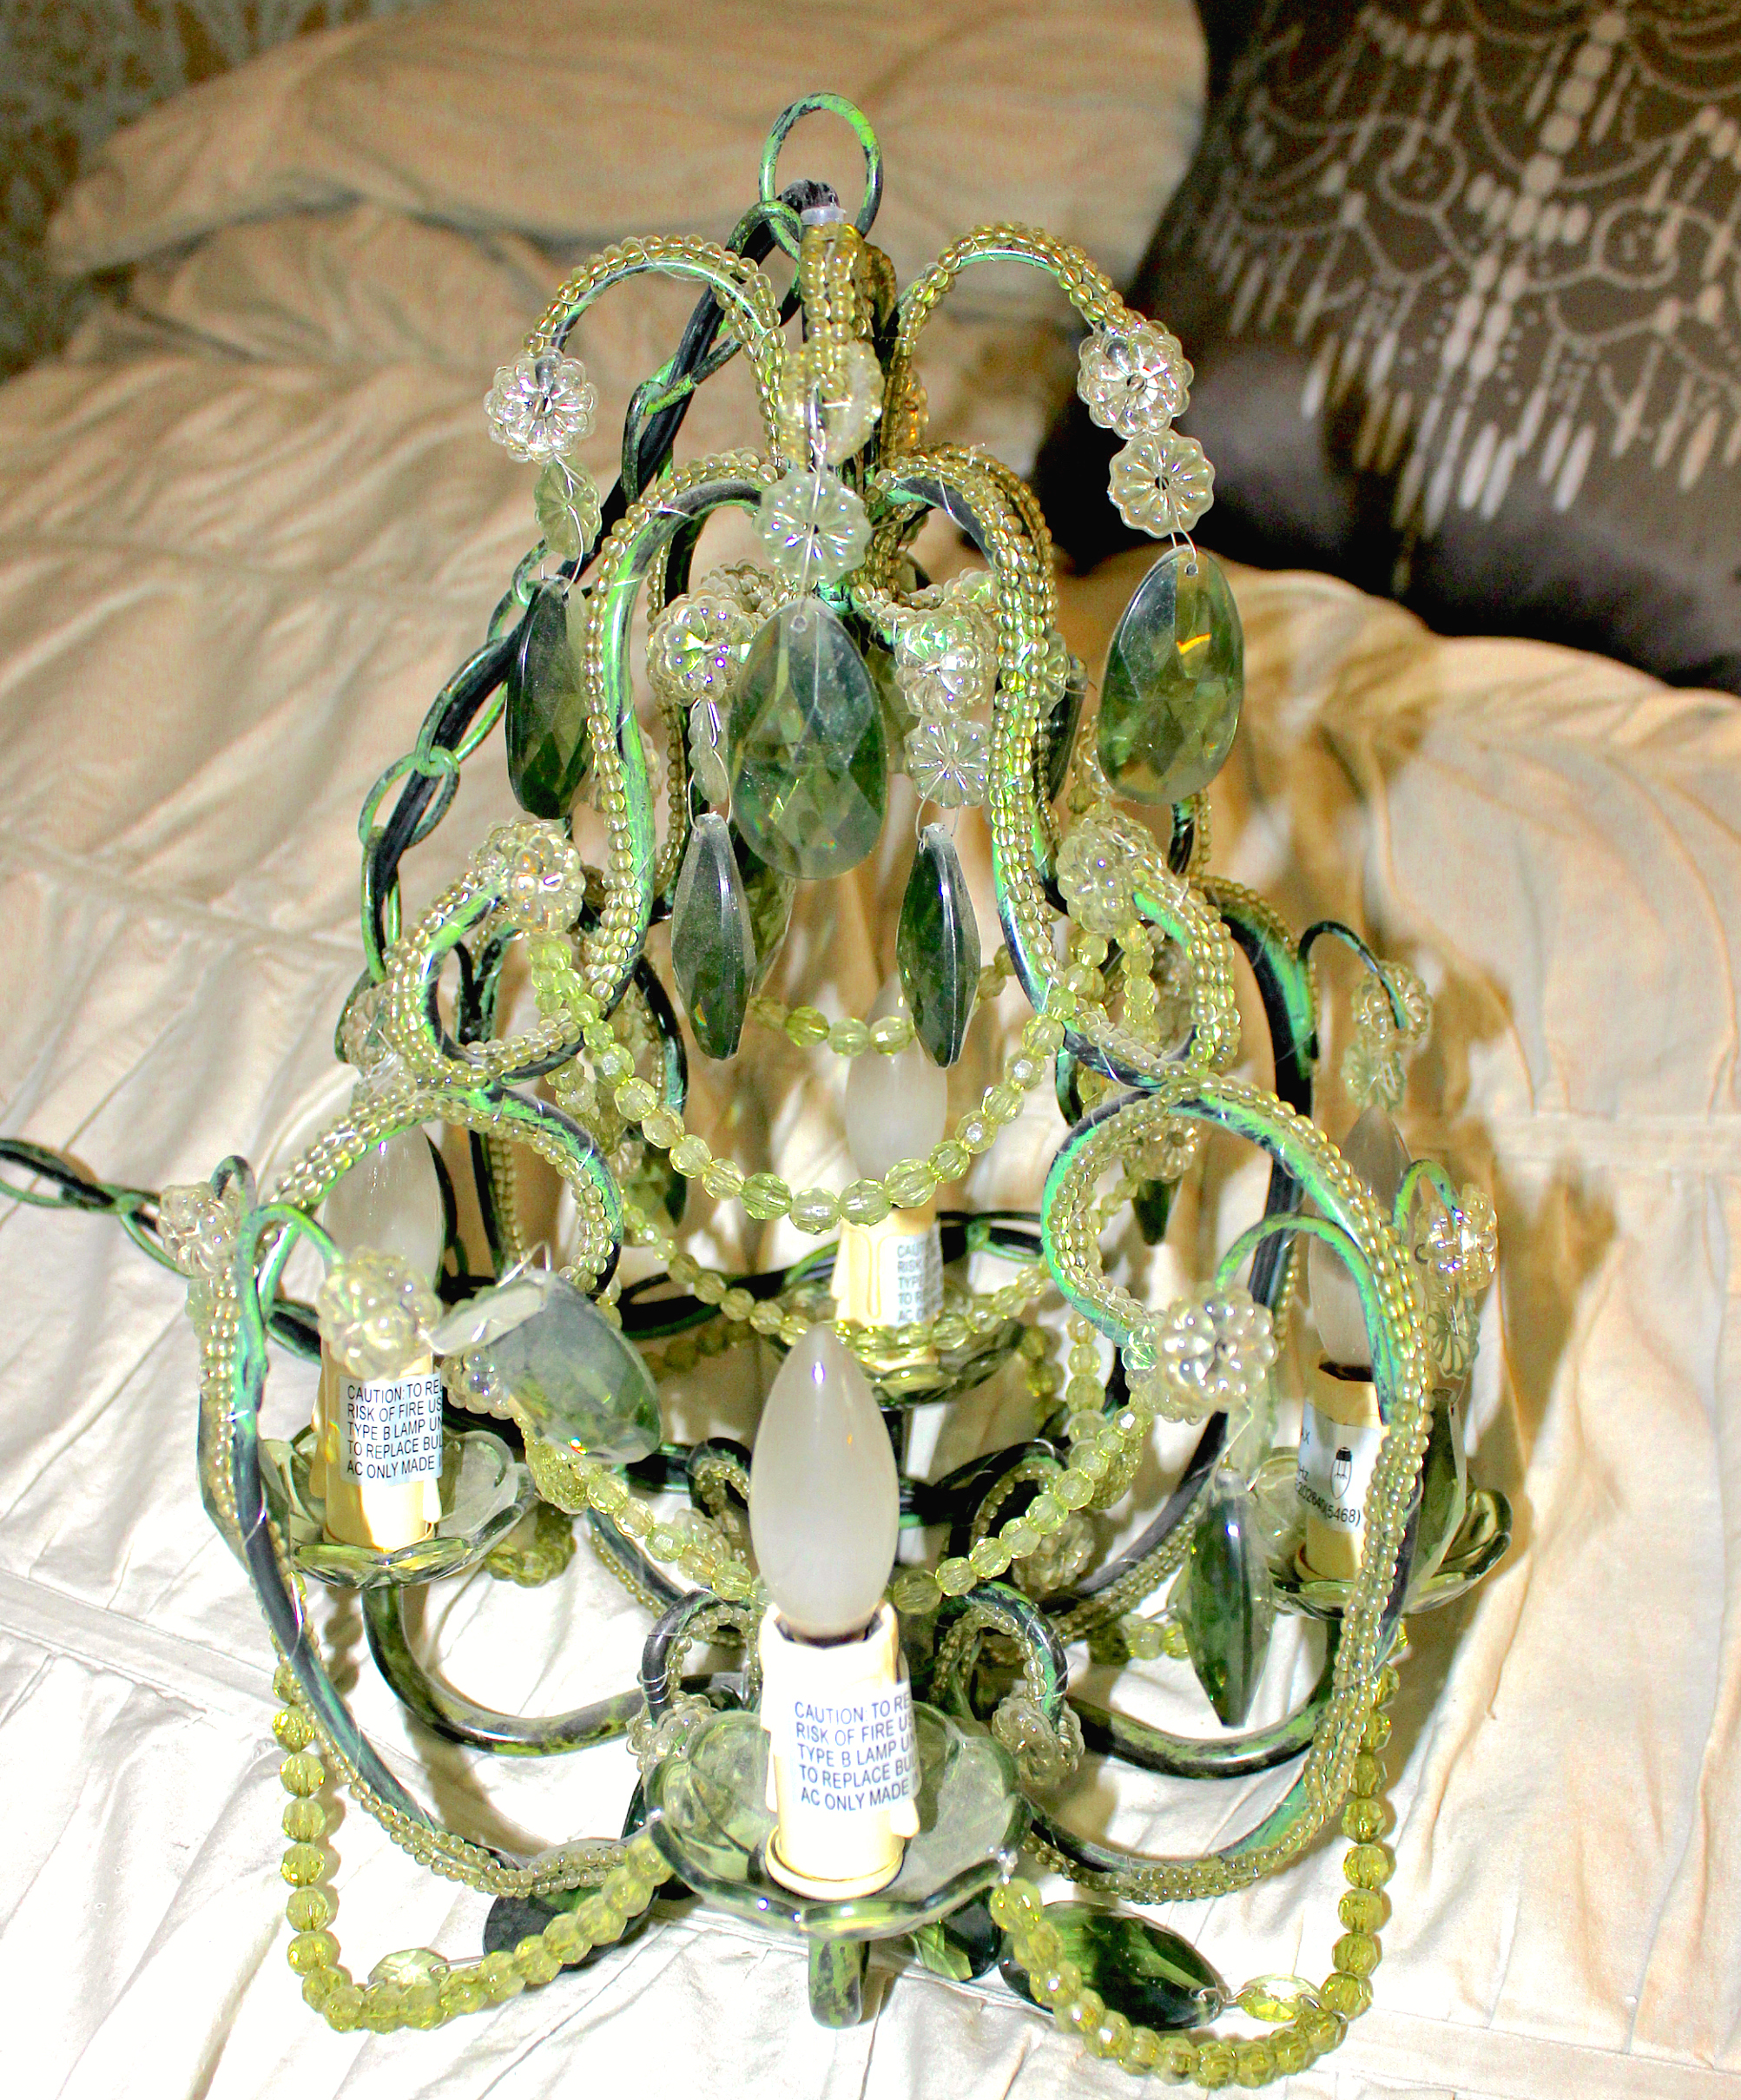
Chandelier – green acrylic 18″ x 12″ chandelier found years ago at HomeSense
Birdcage (large enough to house chandelier) – found more recently at HomeSense
Screwdriver (to remove base)
Pliers (2 pairs work best)
Bendable Wire (if needed to centre chandelier in cage)
DIY Birdcage Chandelier Instructions
Step 1: Select a chandelier and remove the light bulbs if you don’t want to have to replace them all. Ours had originally been used in our old place, and had just stayed packed away in box since we moved. This particular style plugged into an electrical outlet and so I didn’t have any extra electrical components to consider.
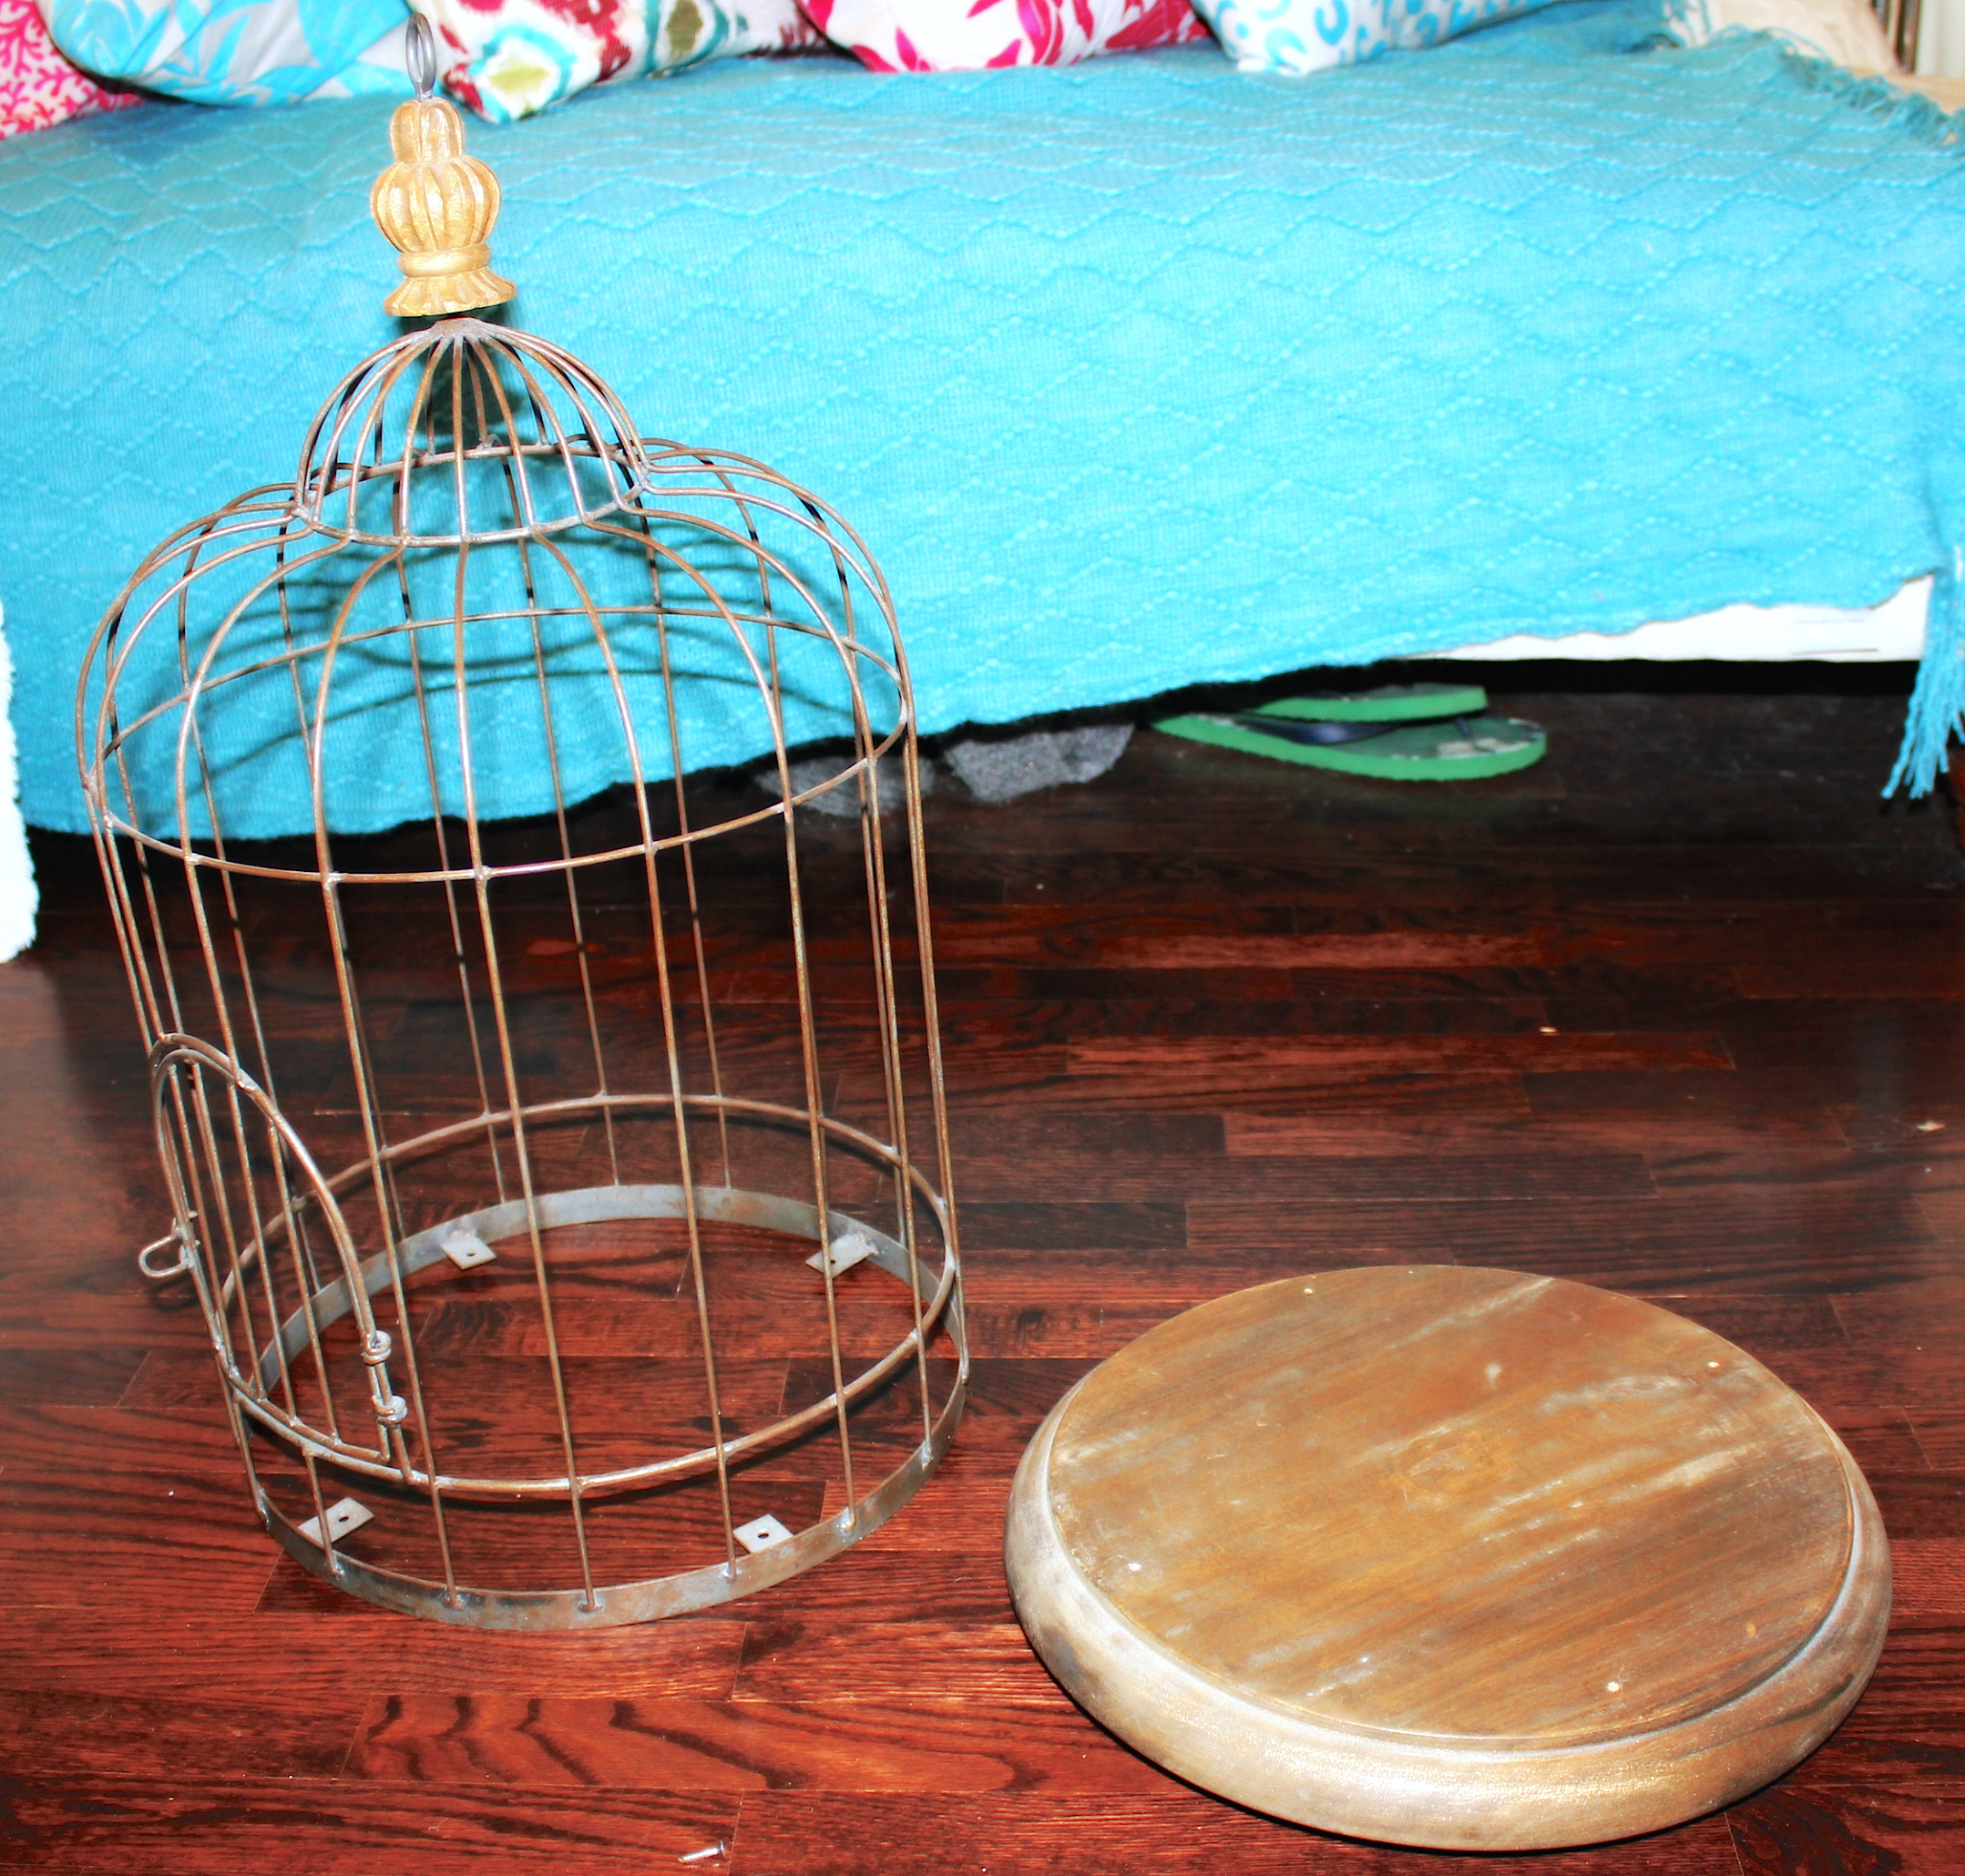
Step 2: Aquire a birdcage of suitable measurements. Not only will it need to be large enough to fit the chandelier, it will also need to have a removable base.
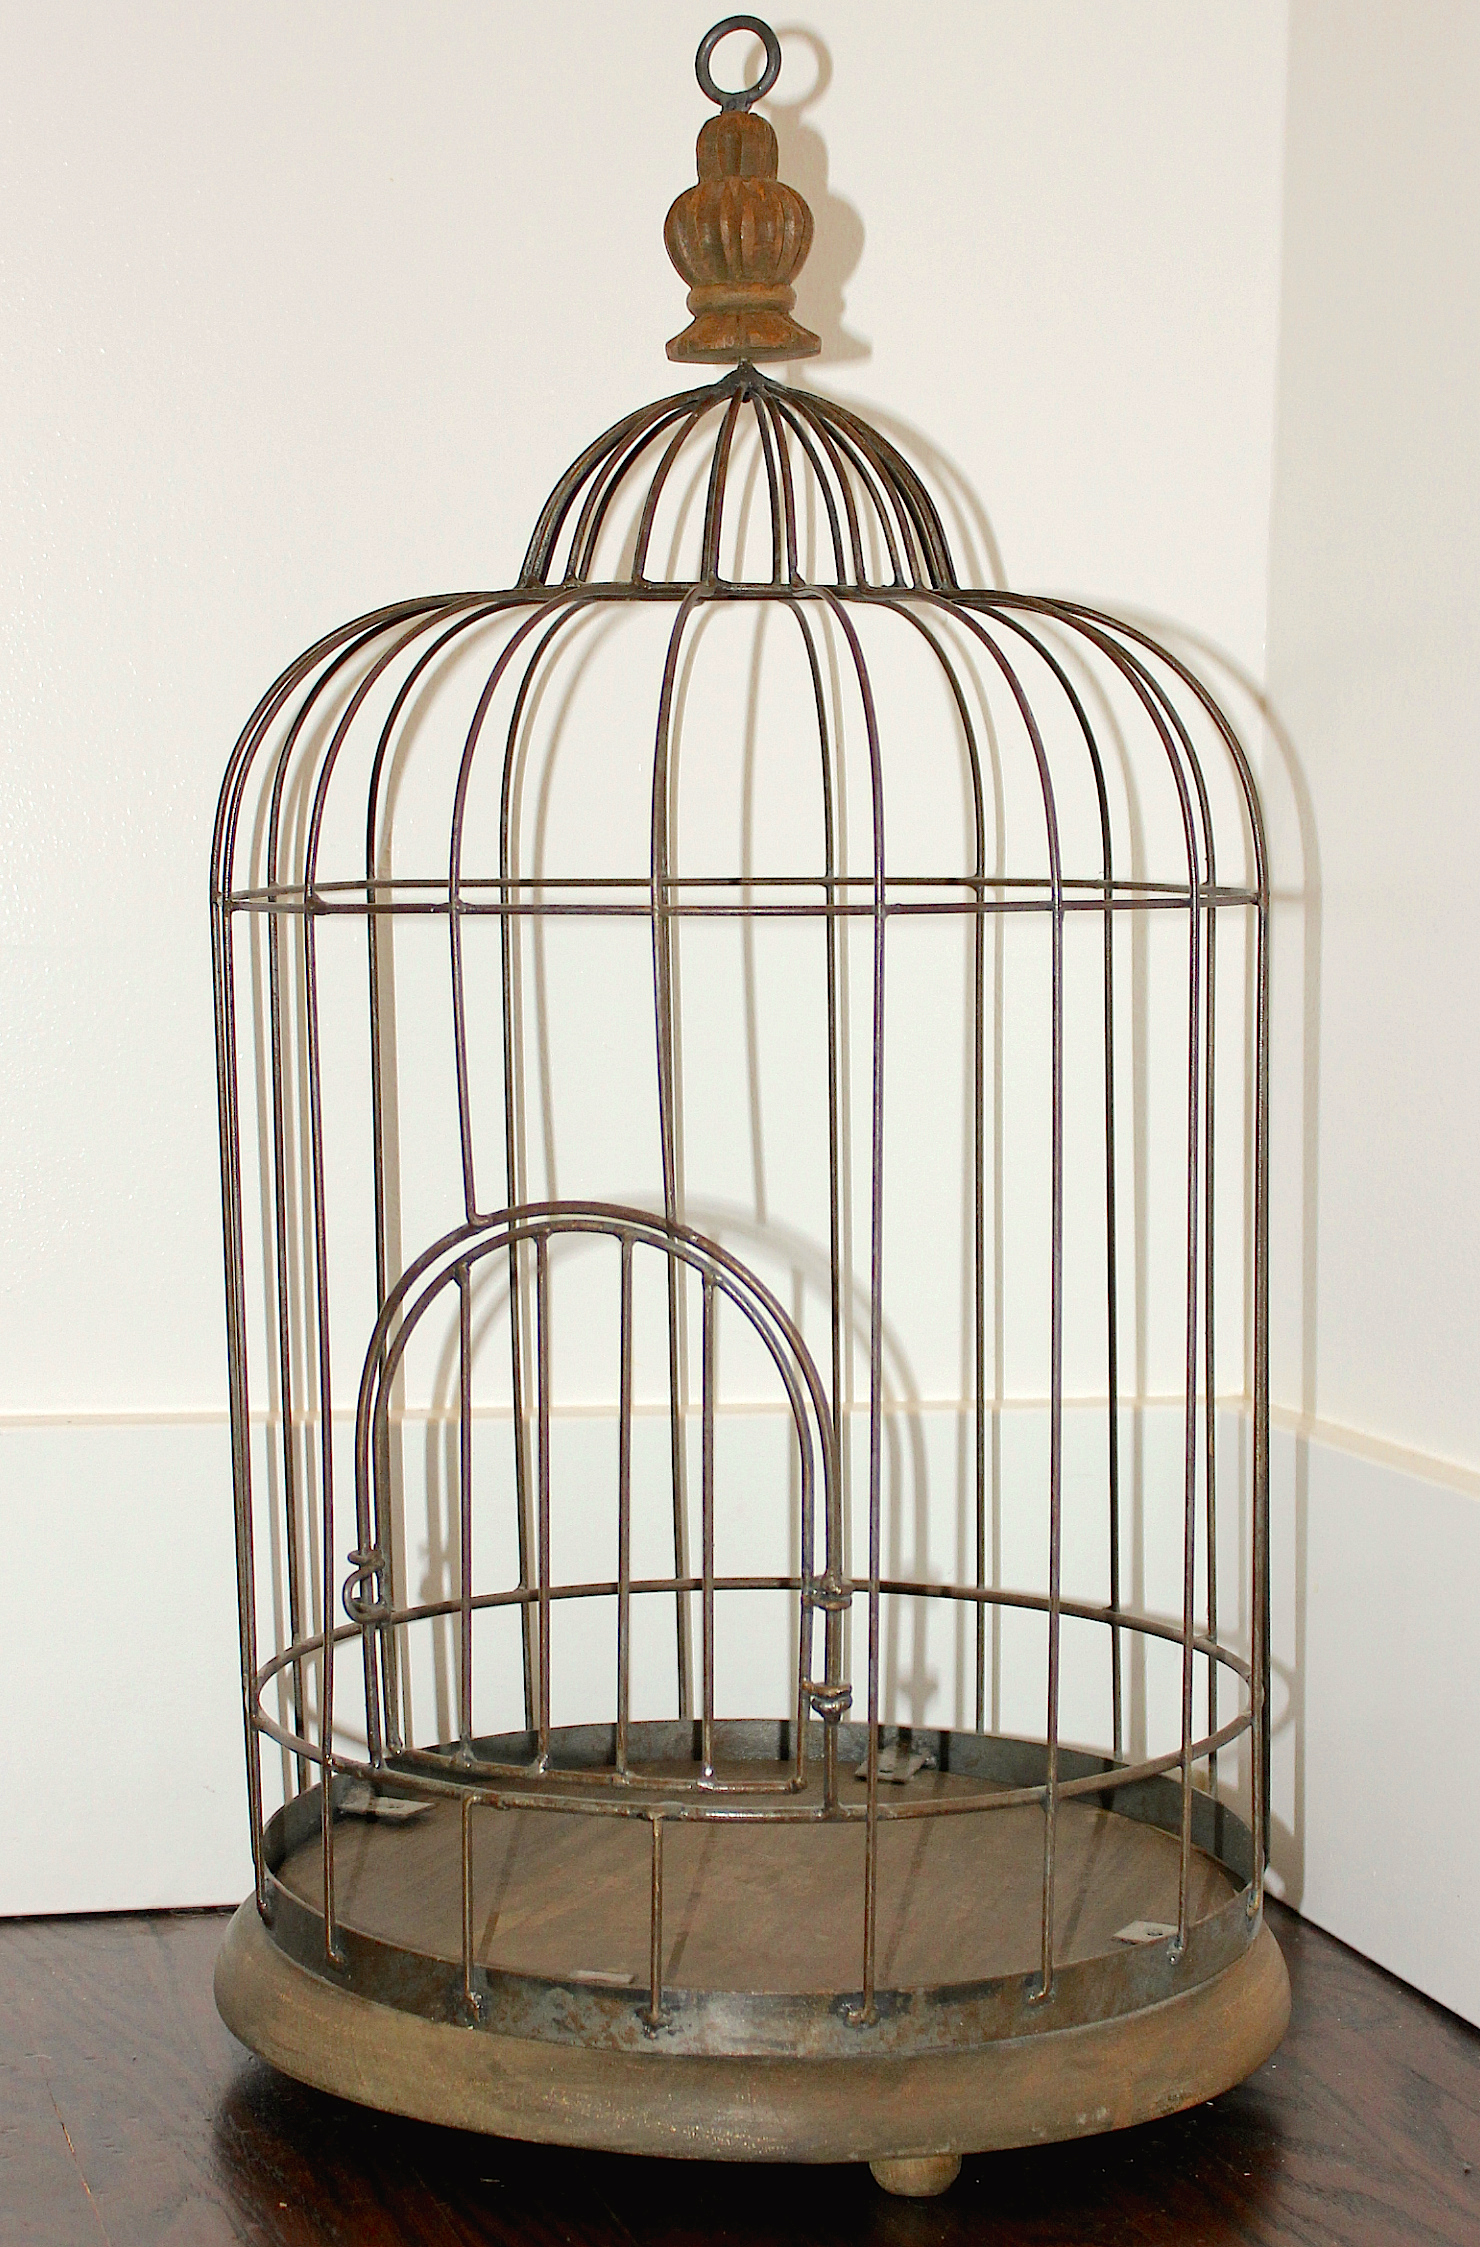
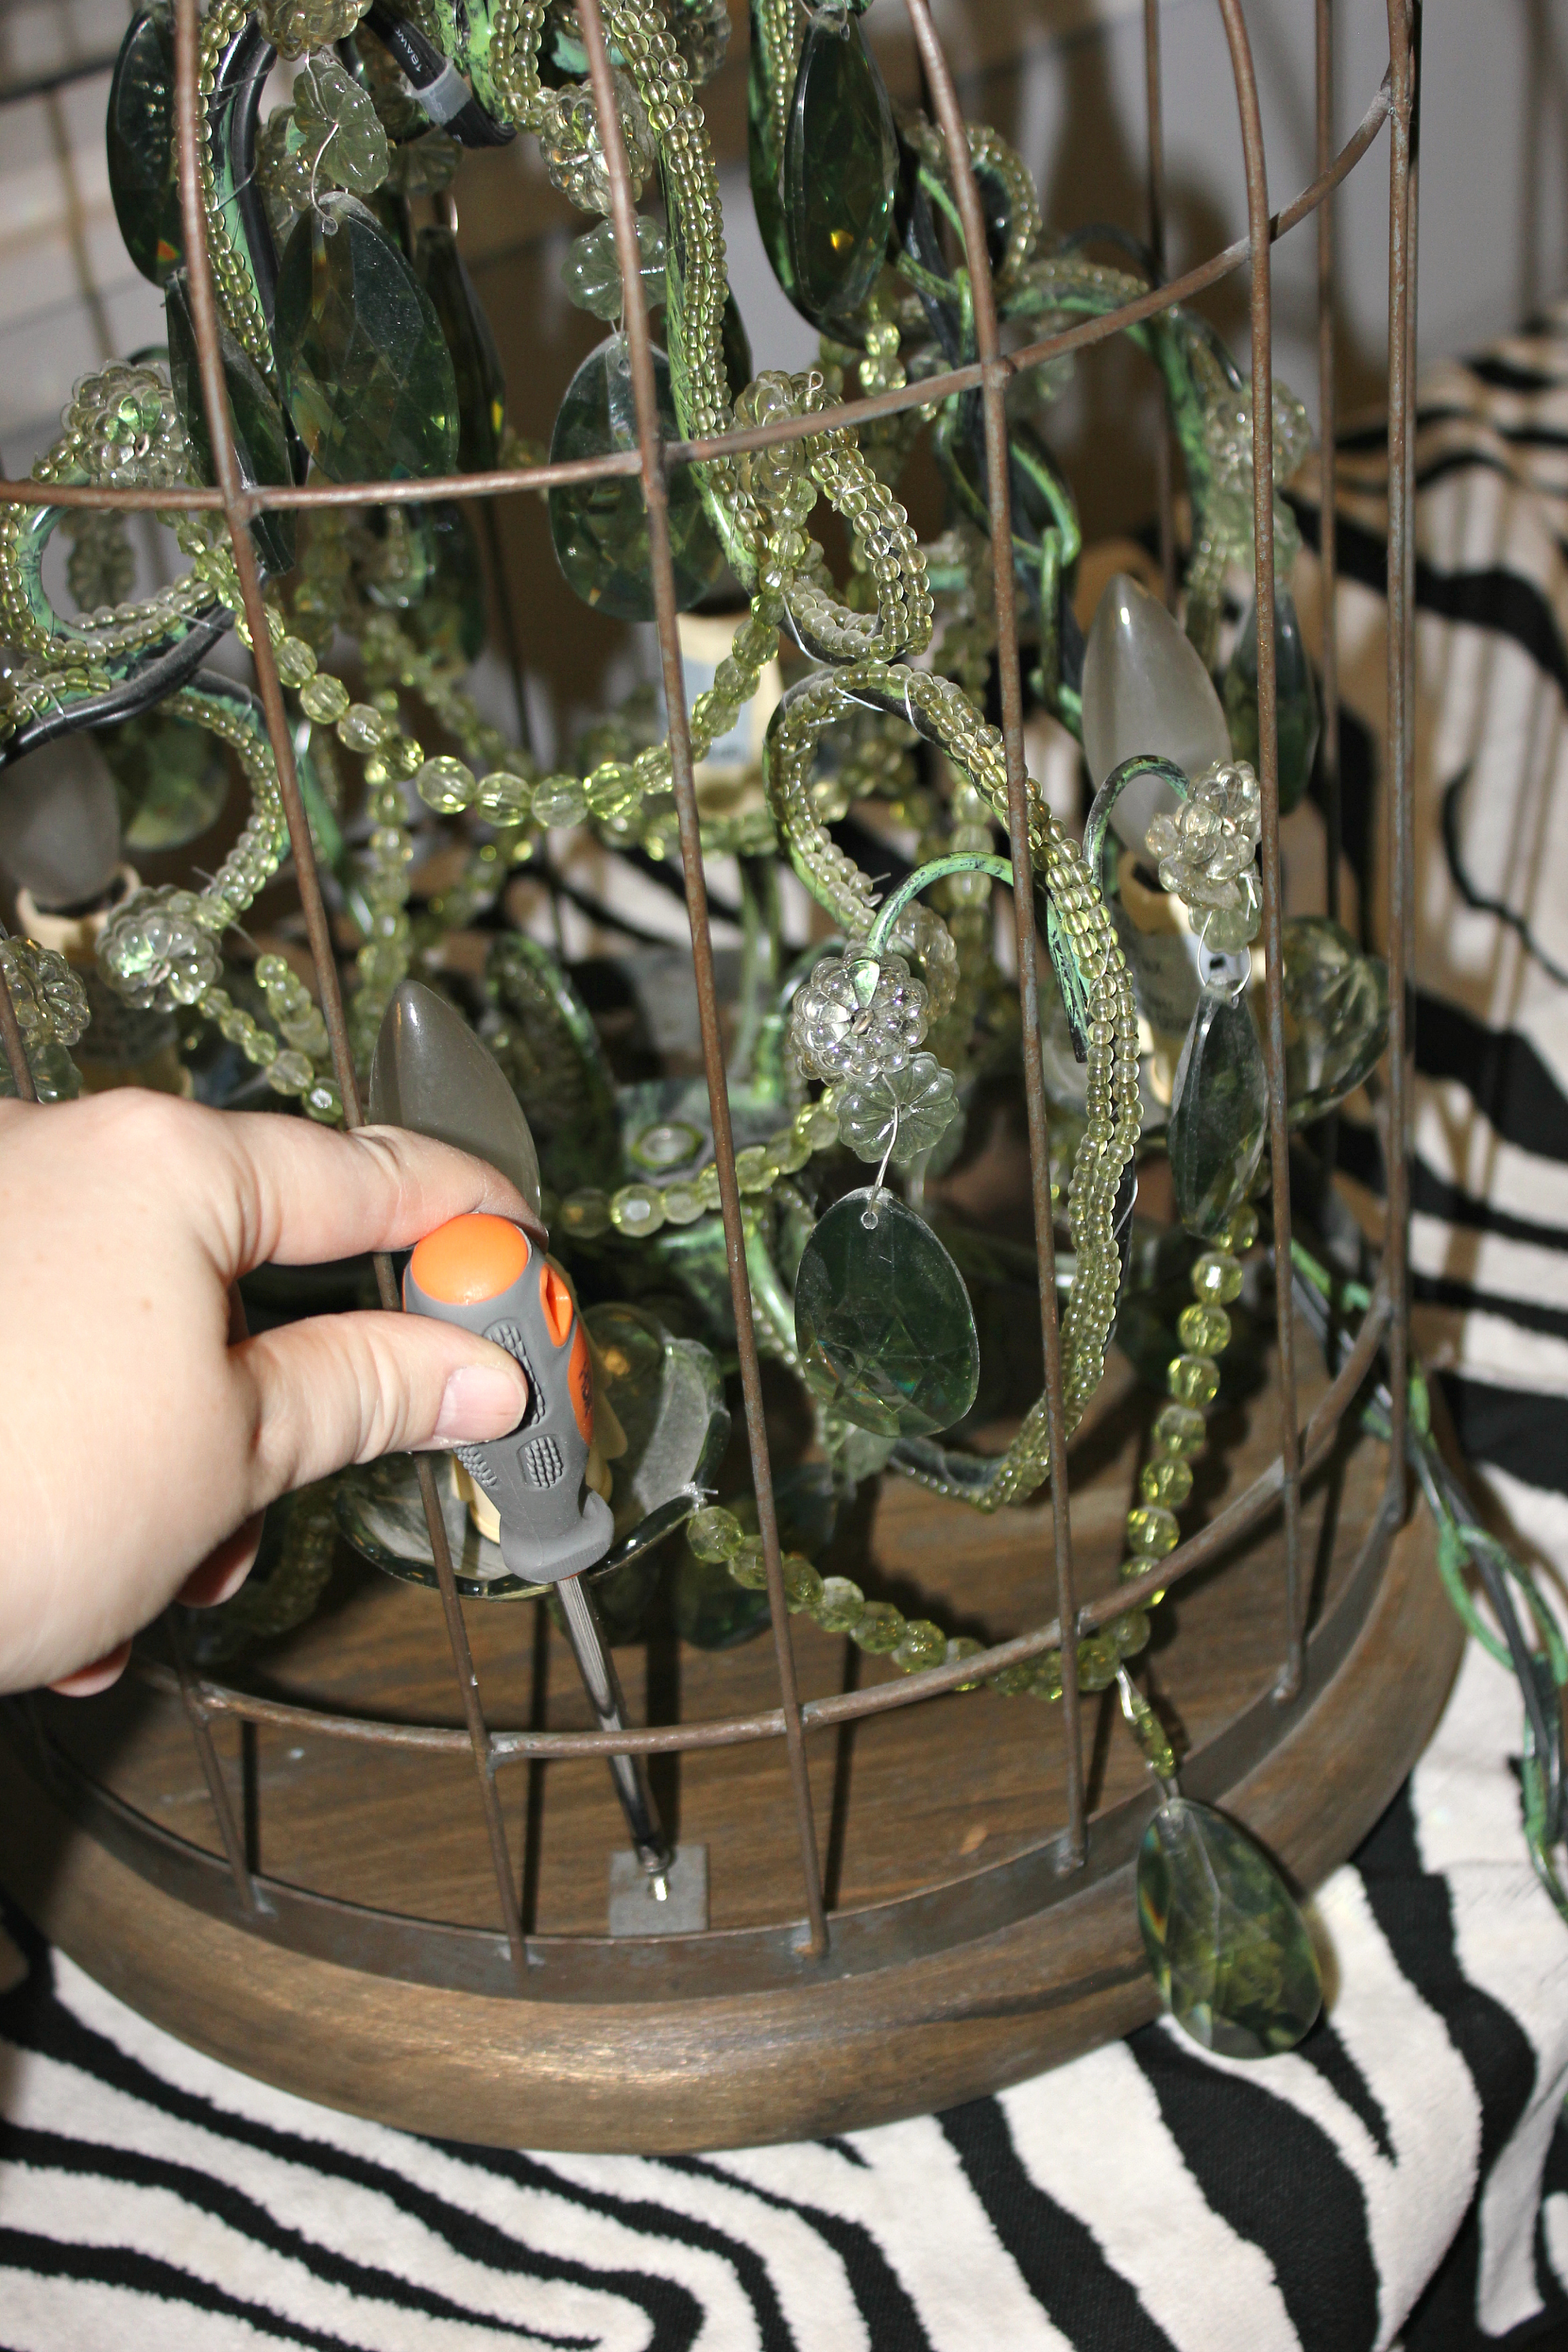
Step 3: Detach the base. This one had four small phillips screws attaching the wooden base to the cage.
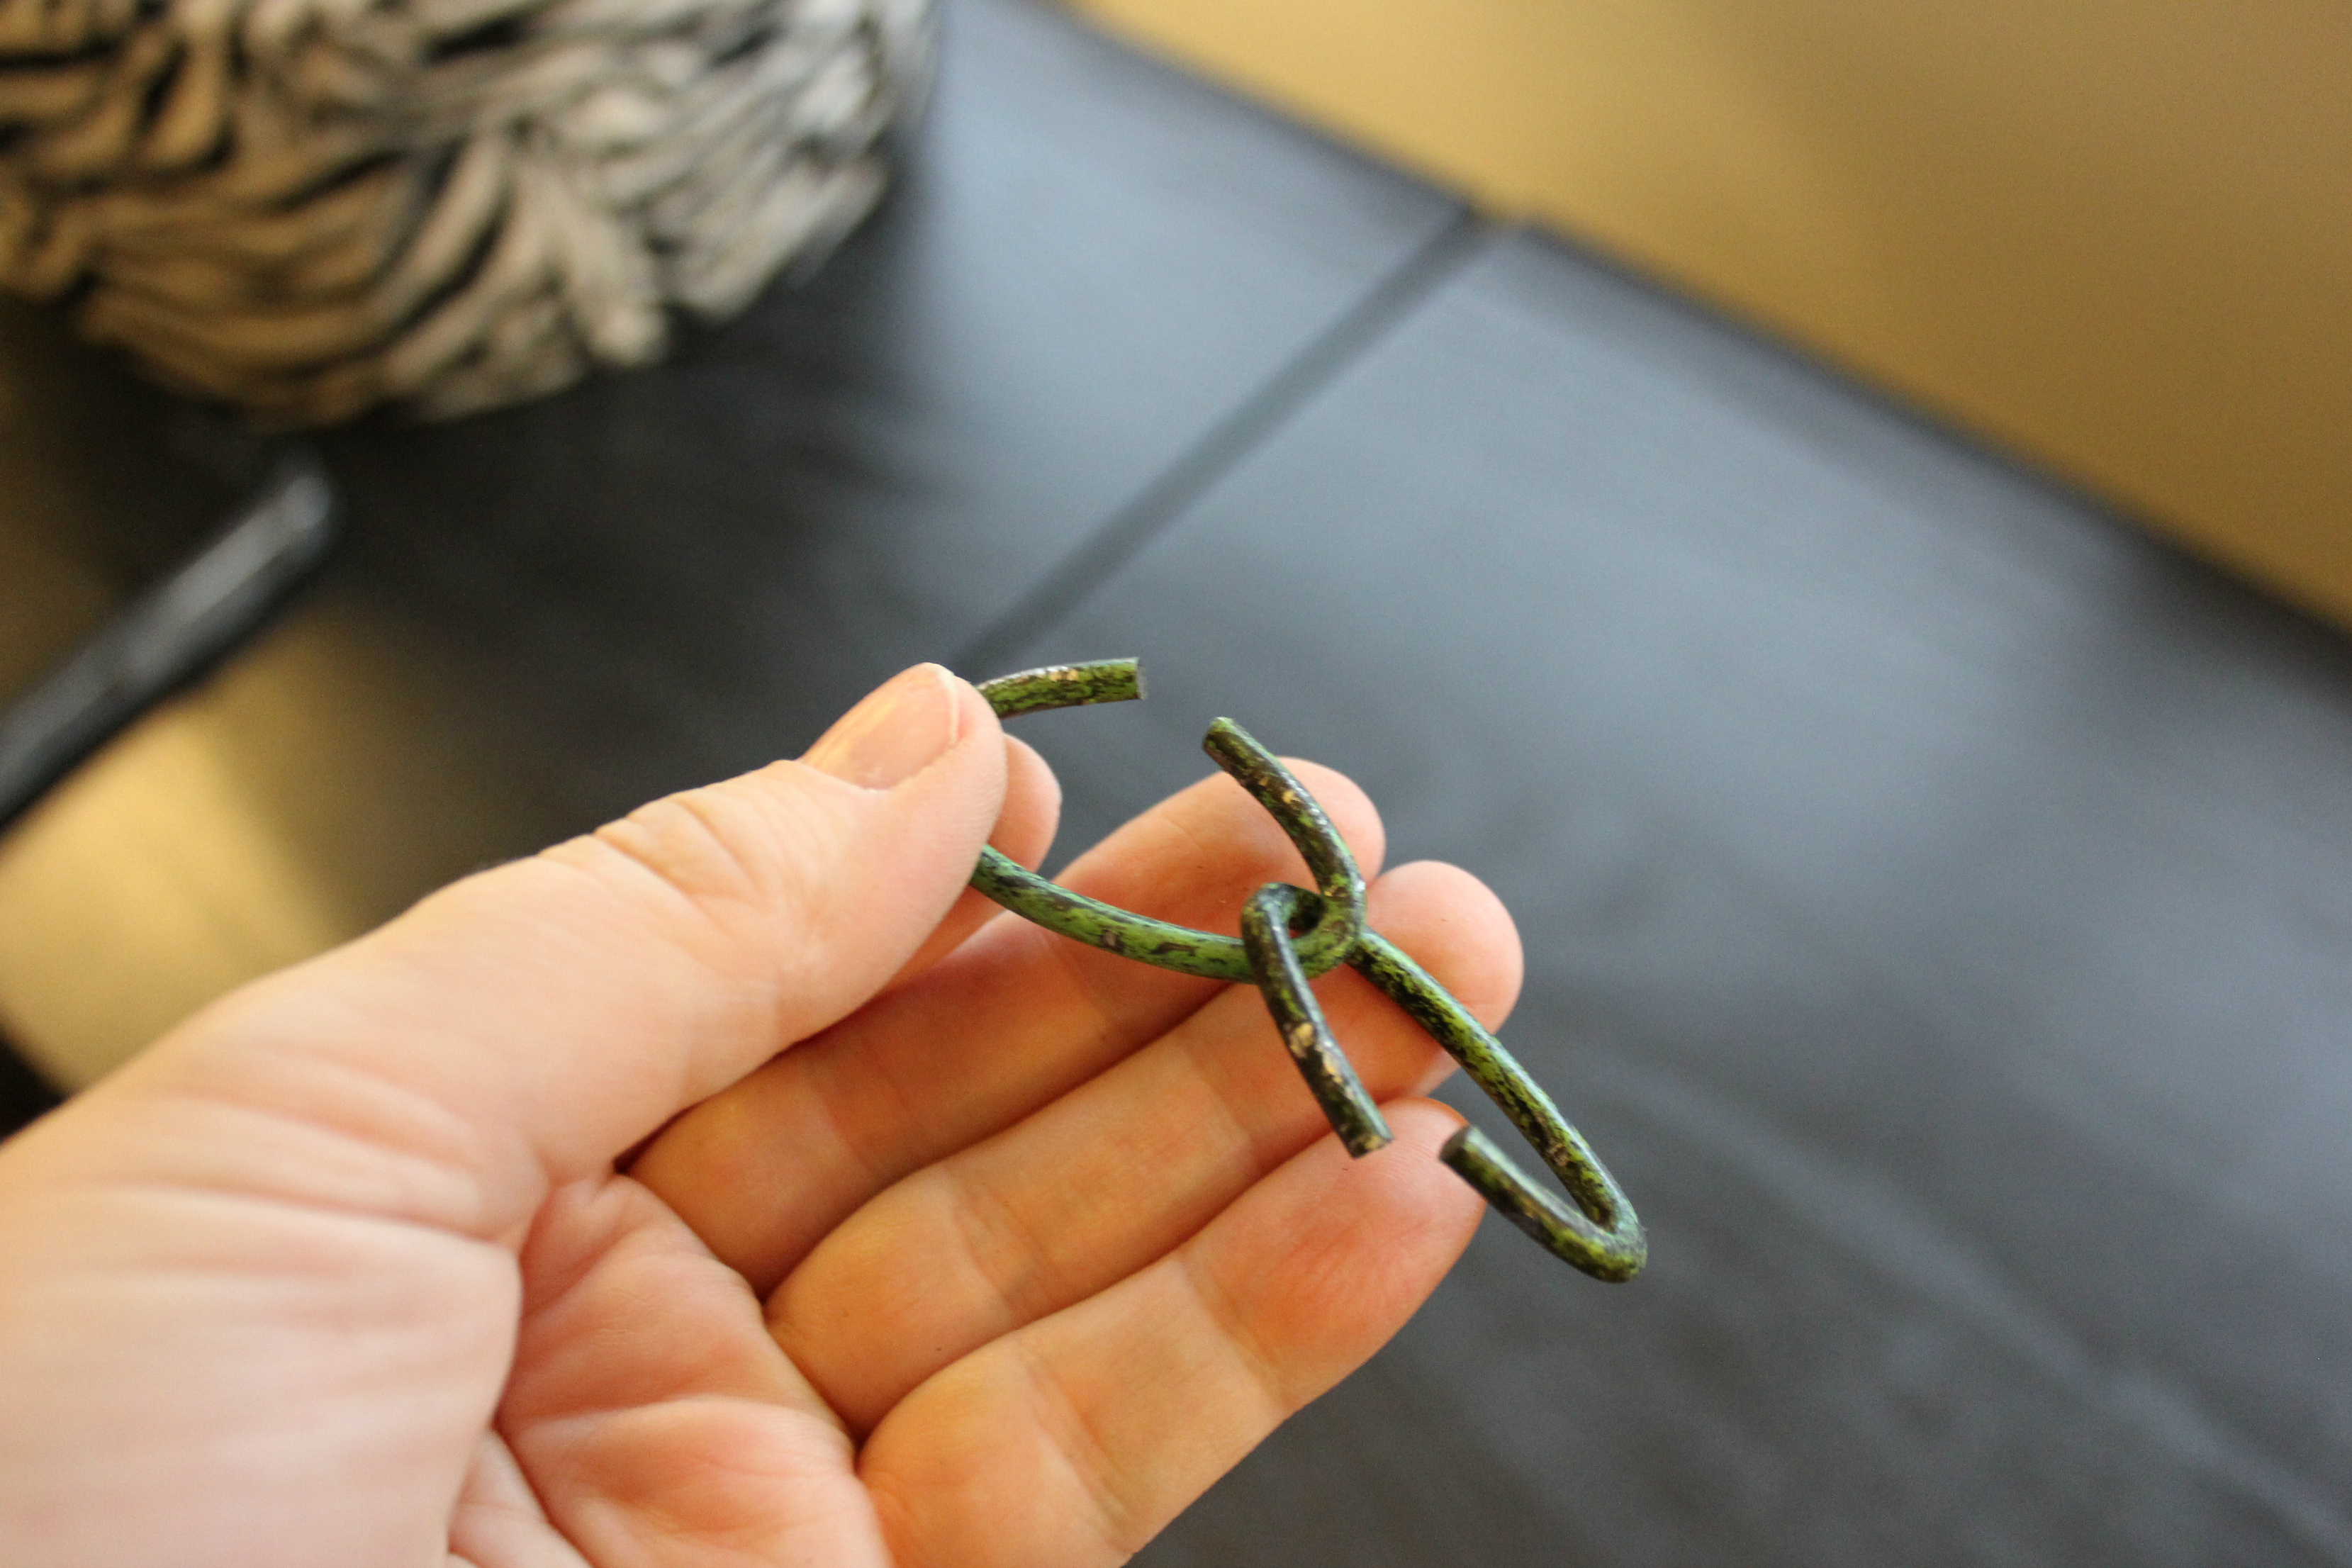
Step 4: Using 2 sets of pliers, detach the bottom 2 links of the chain on the chandelier. This chandelier’s chain had several extra links at the bottom, otherwise you could purchase links or other suitable hardware at any home improvement store.
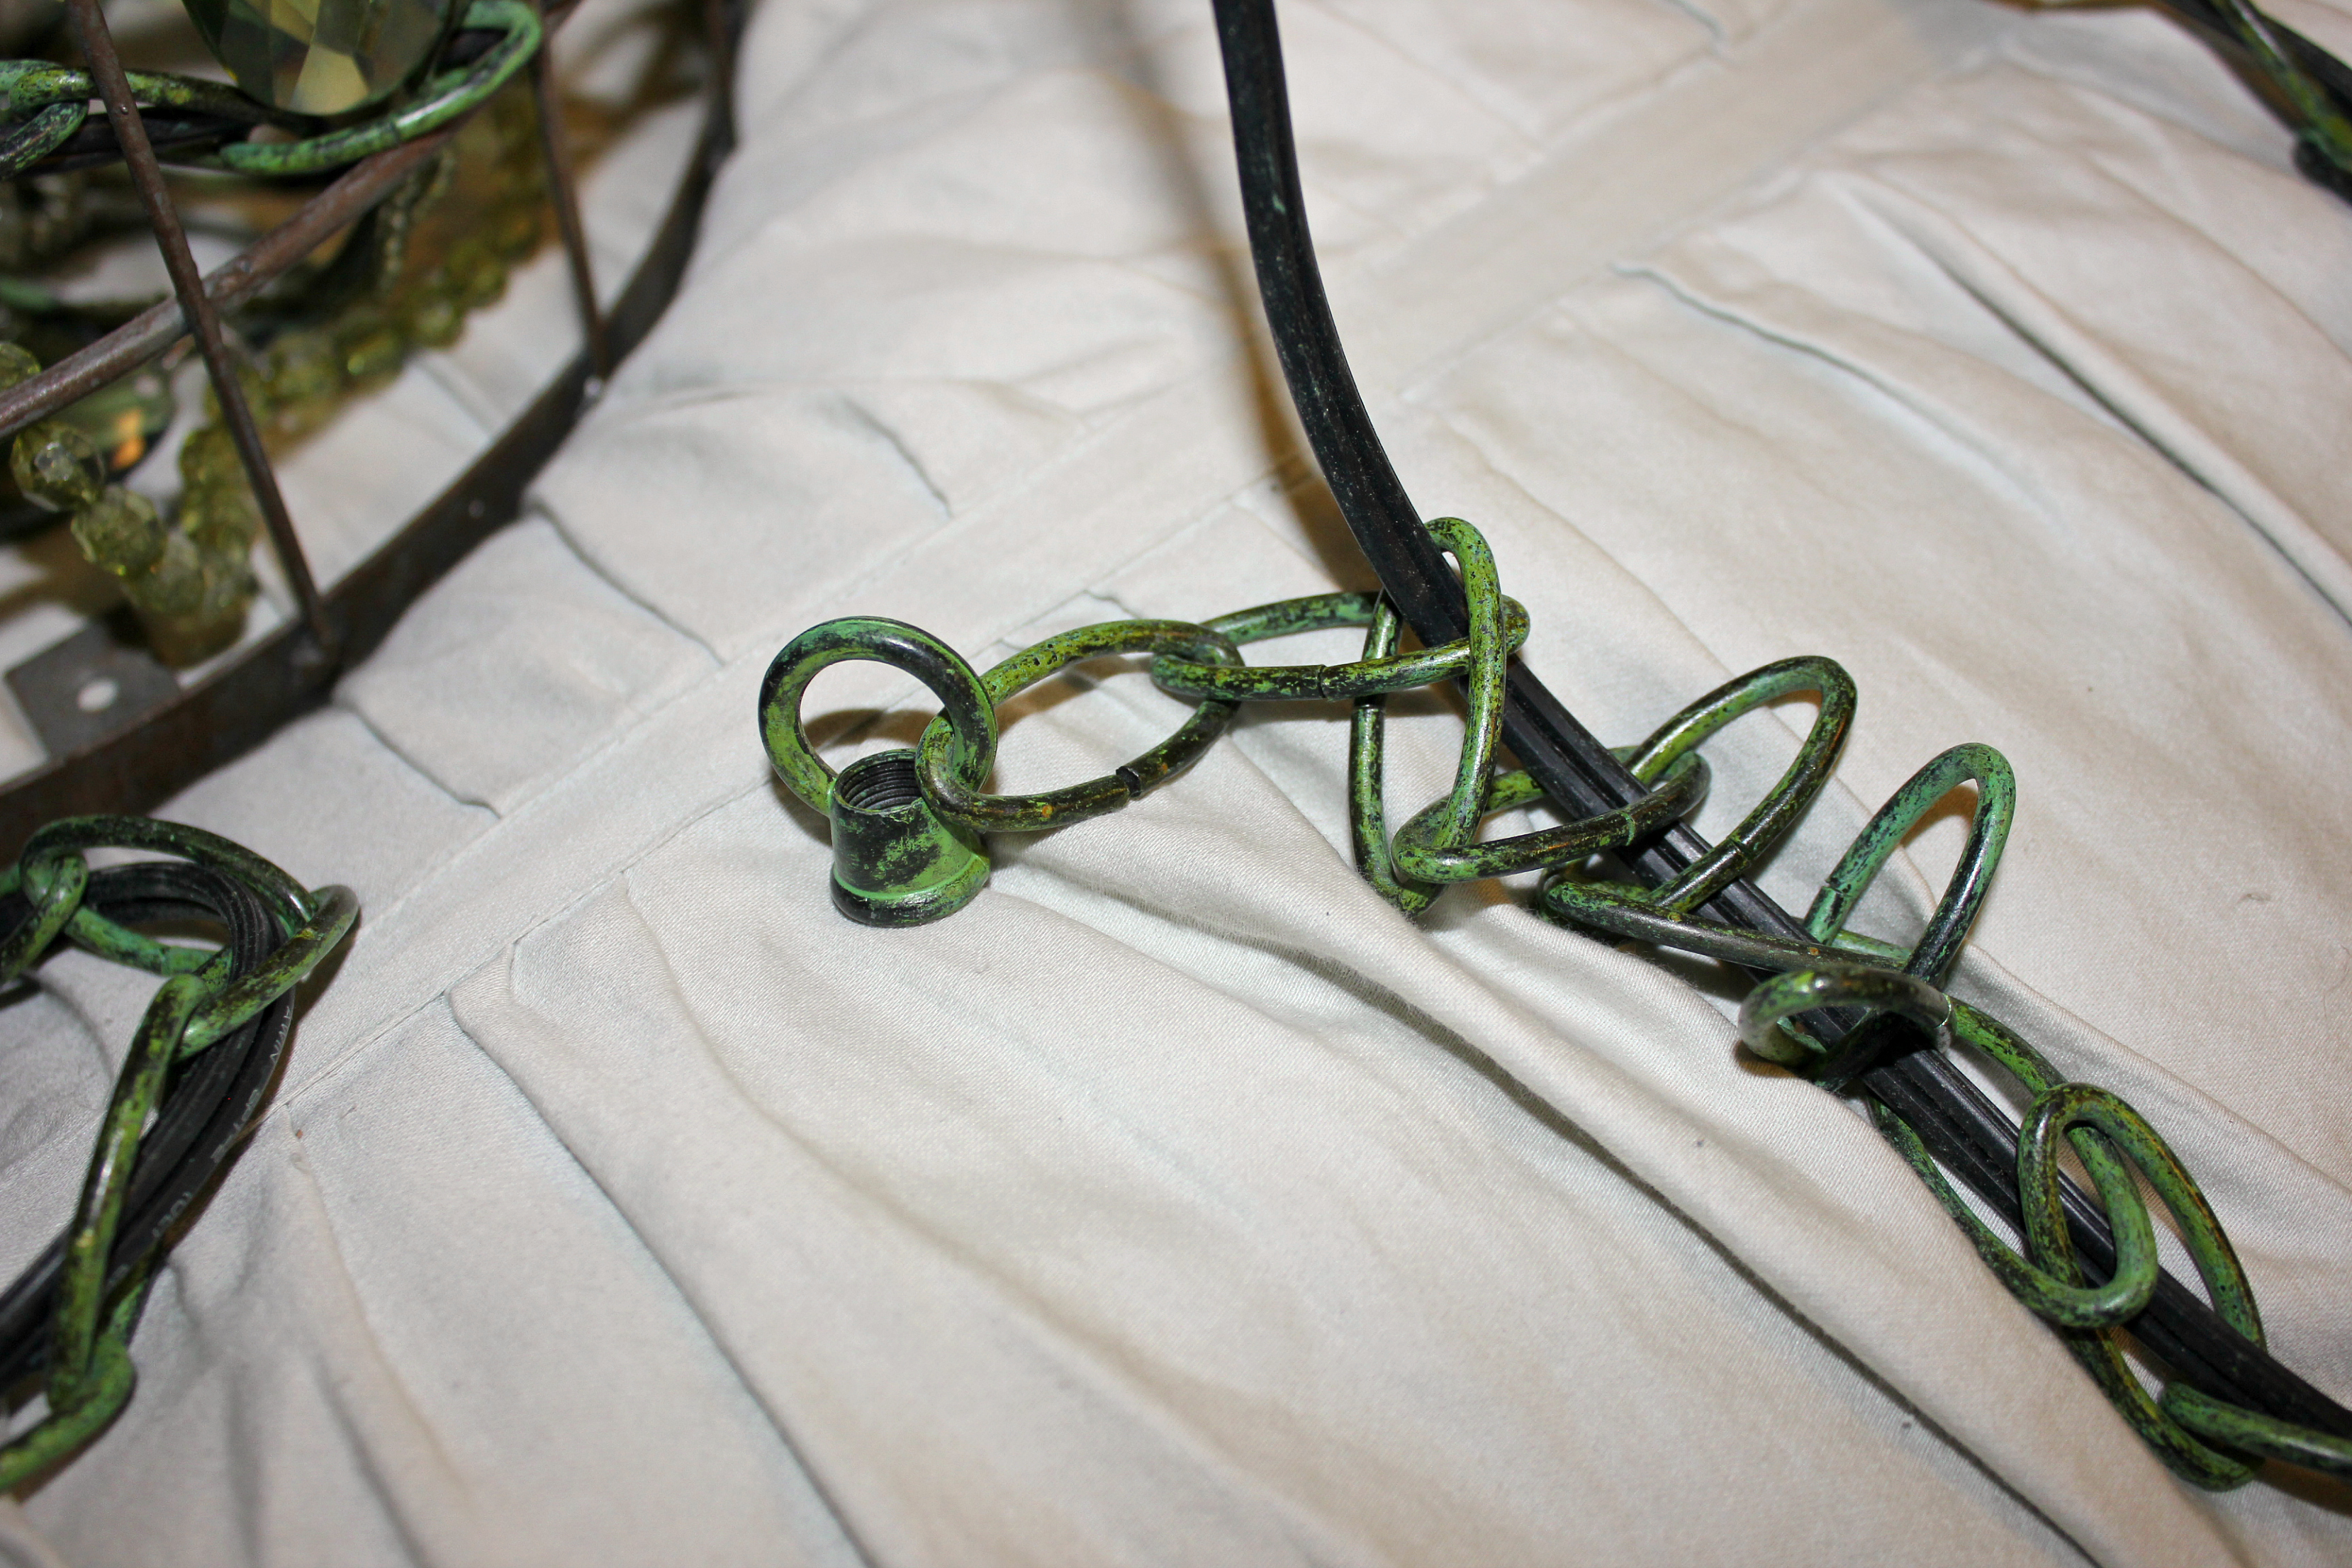

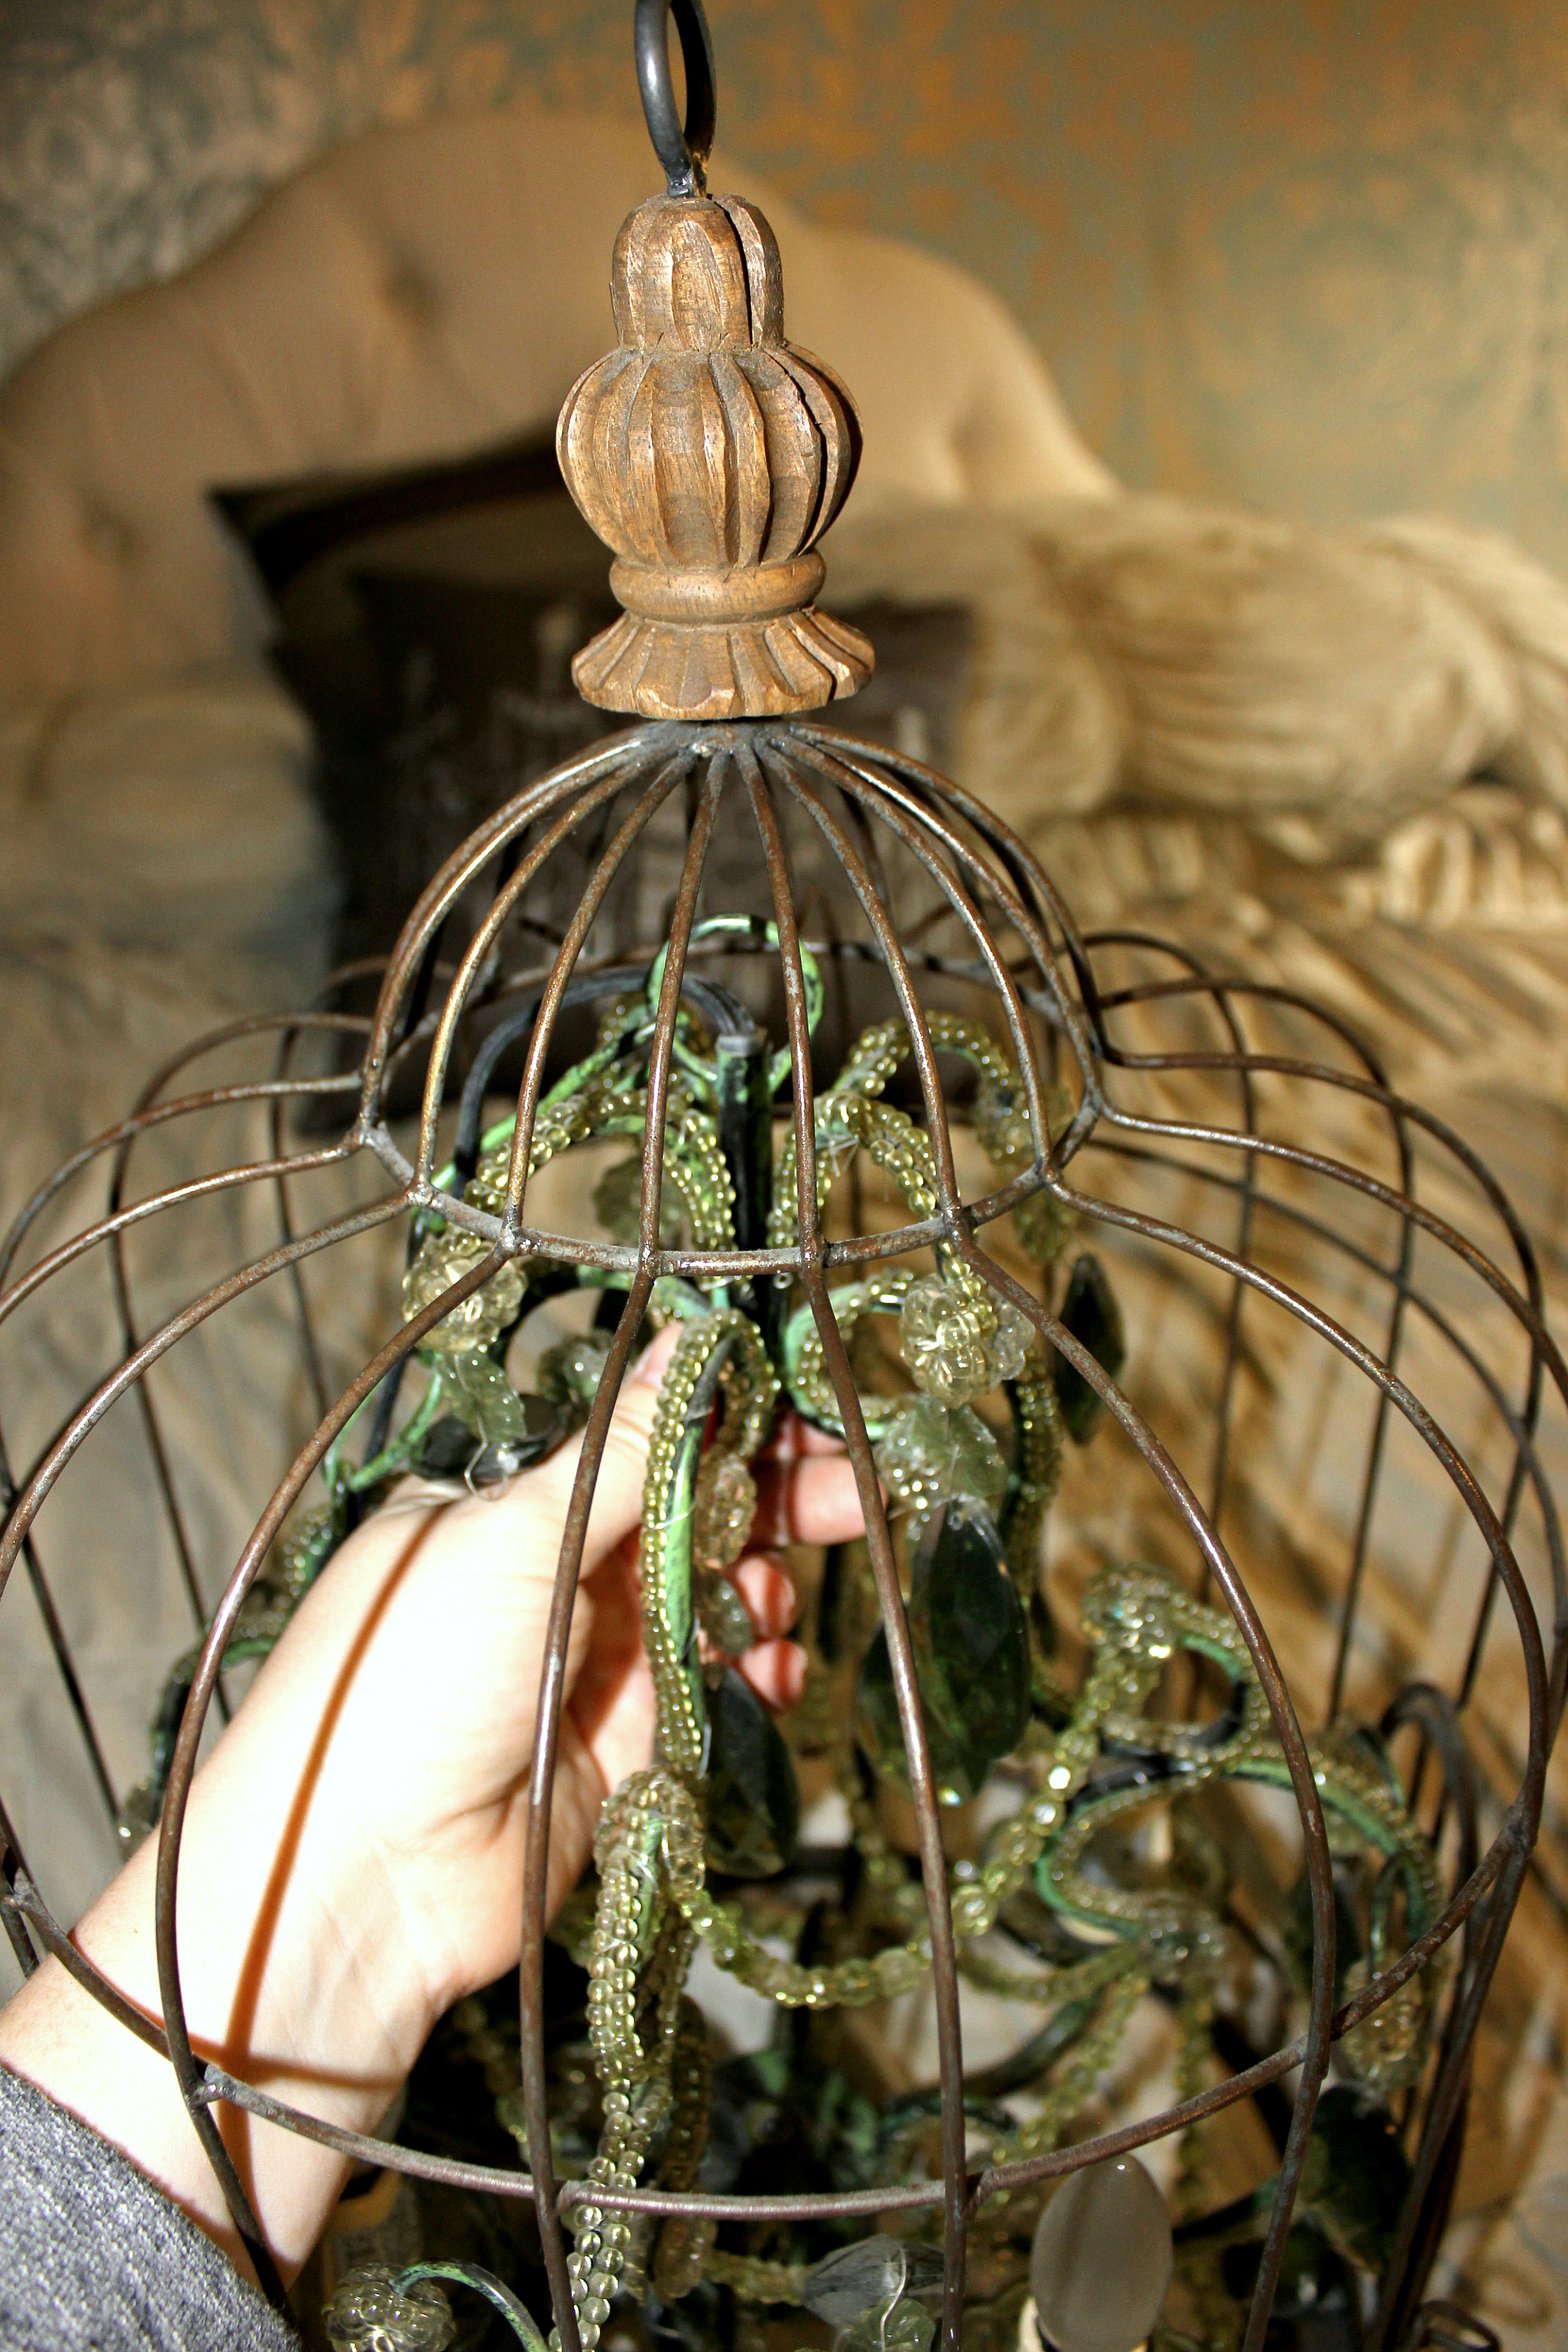
Step 5: Next carefully slide the birdcage top down over the chandelier. I found this easiest accomplished on something soft, like a bed, or a couple towels because the chandelier is not flat and you will find it is one of those moments where you could use two more hands.
Step 6: Next take the 2 links of chain you removed and loop them together.
Step 7: Slip one of the links around the top of the bird cage, allowing the other to hang down inside.
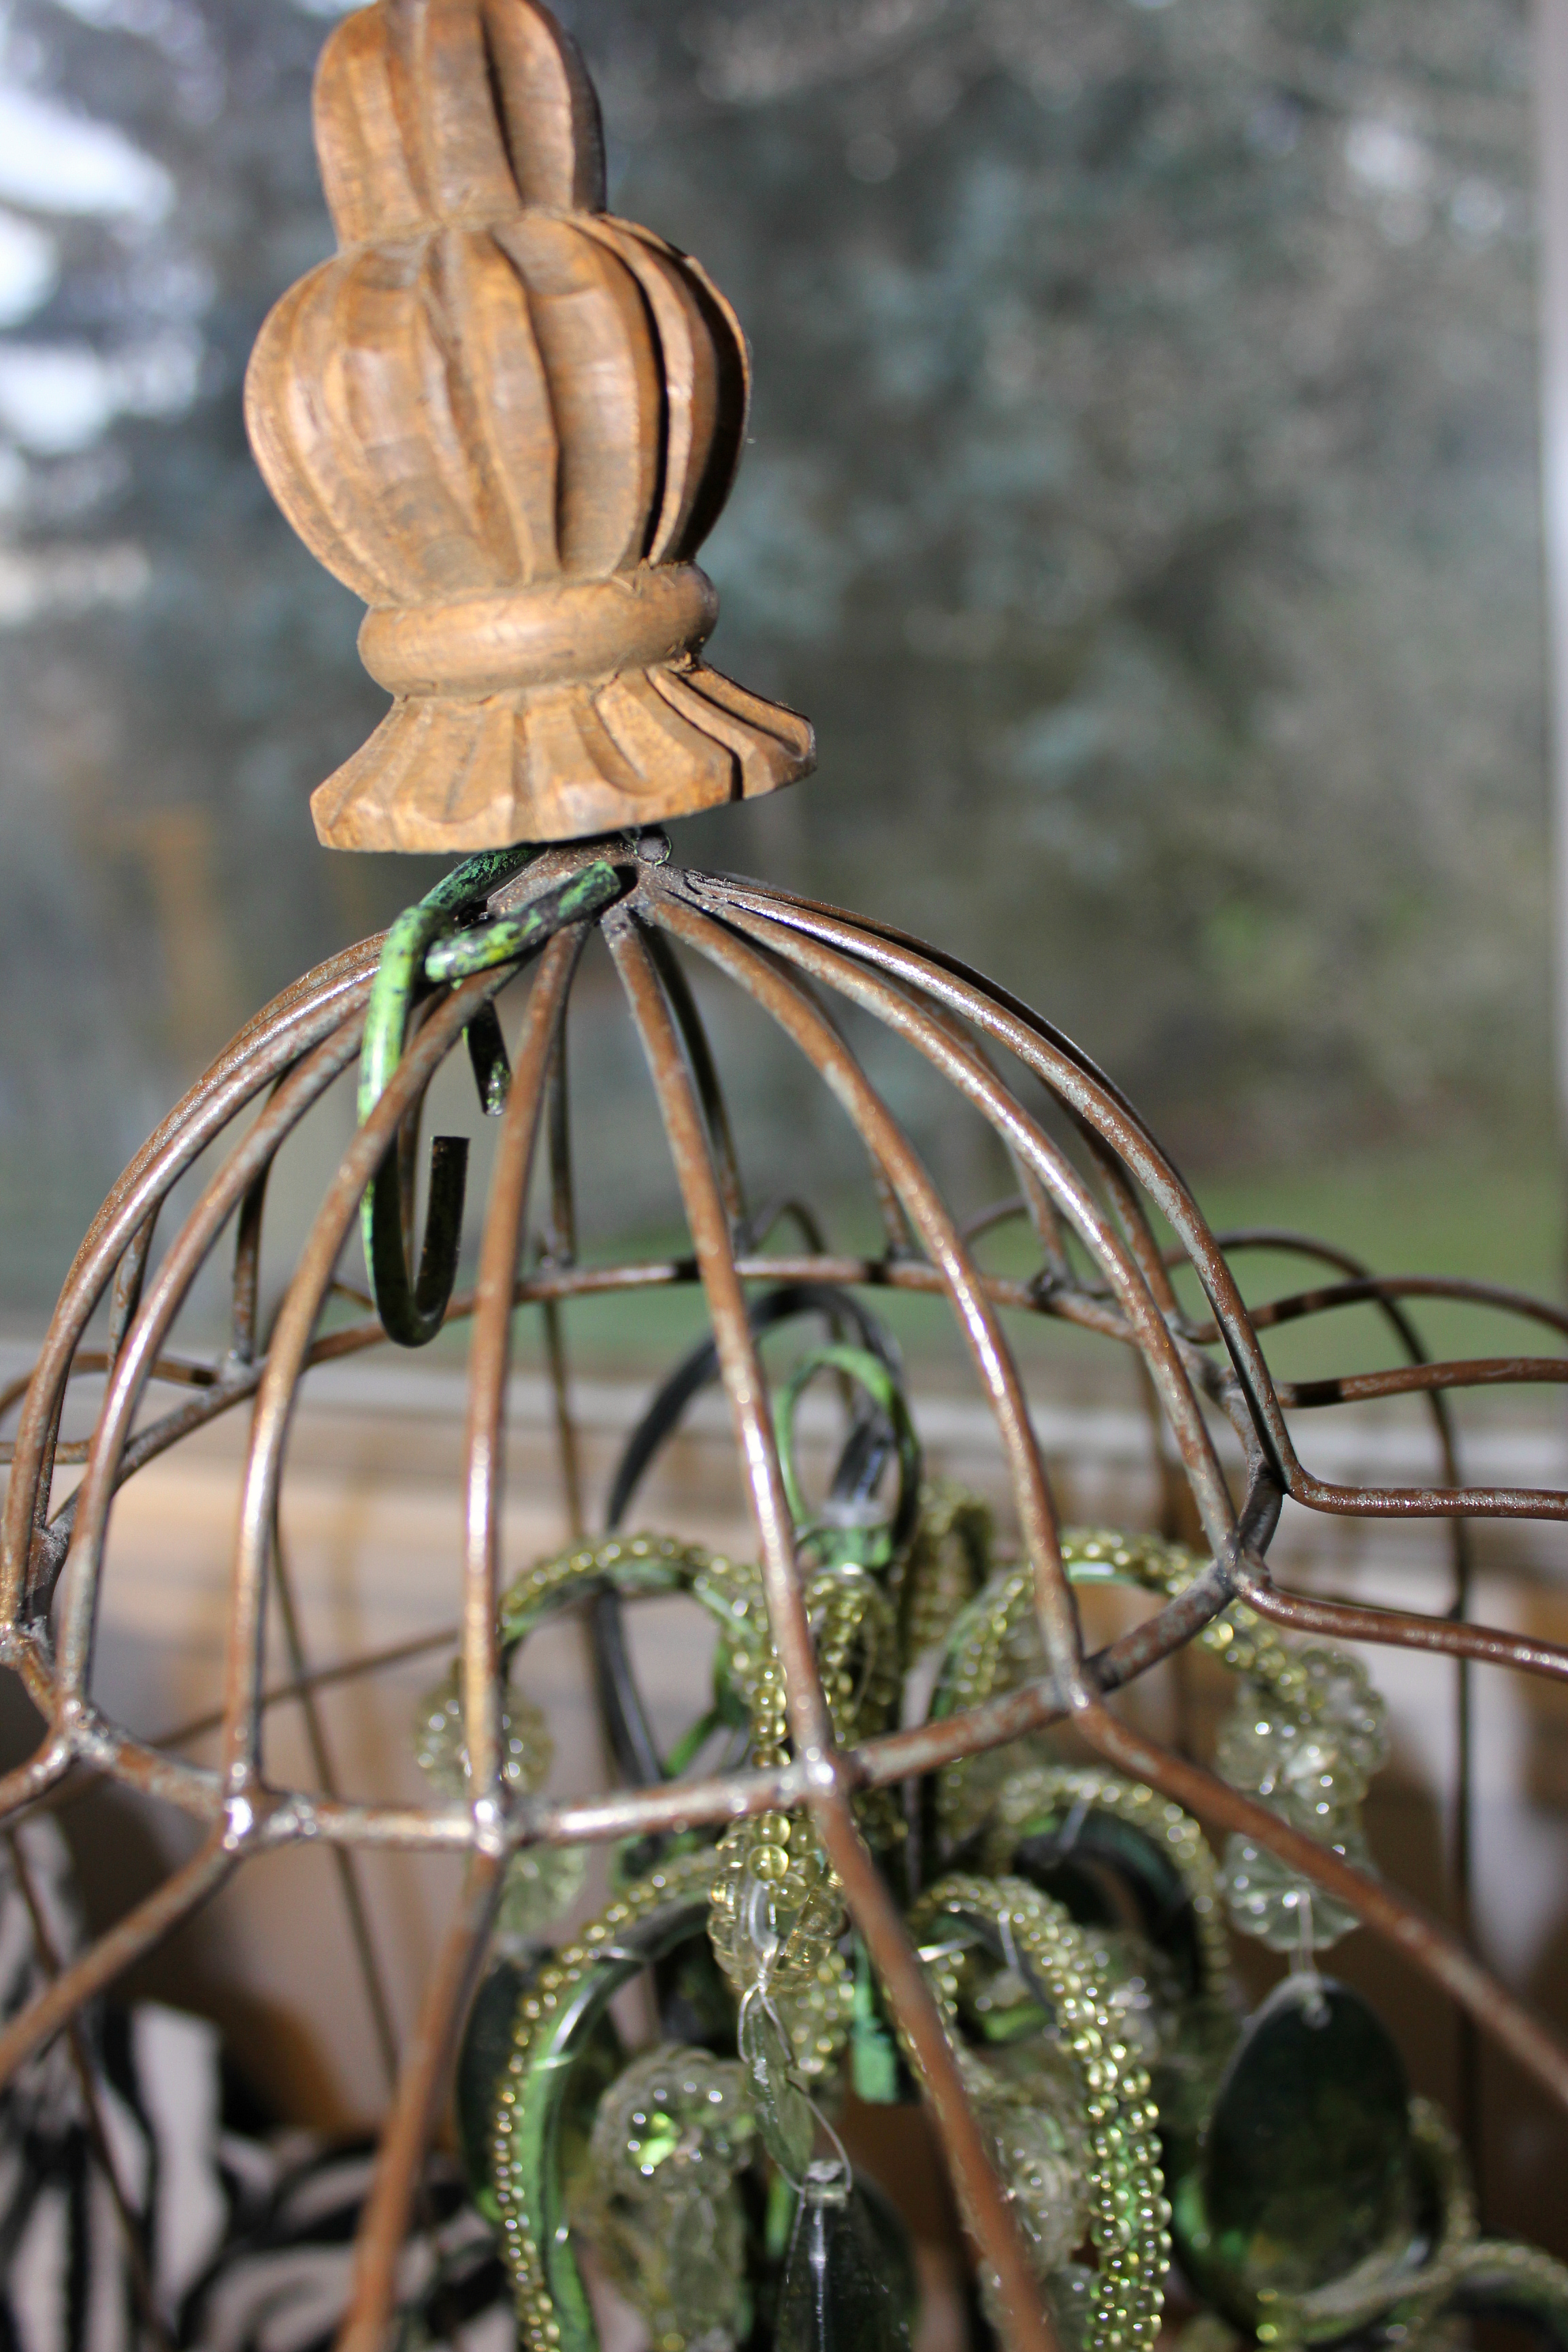
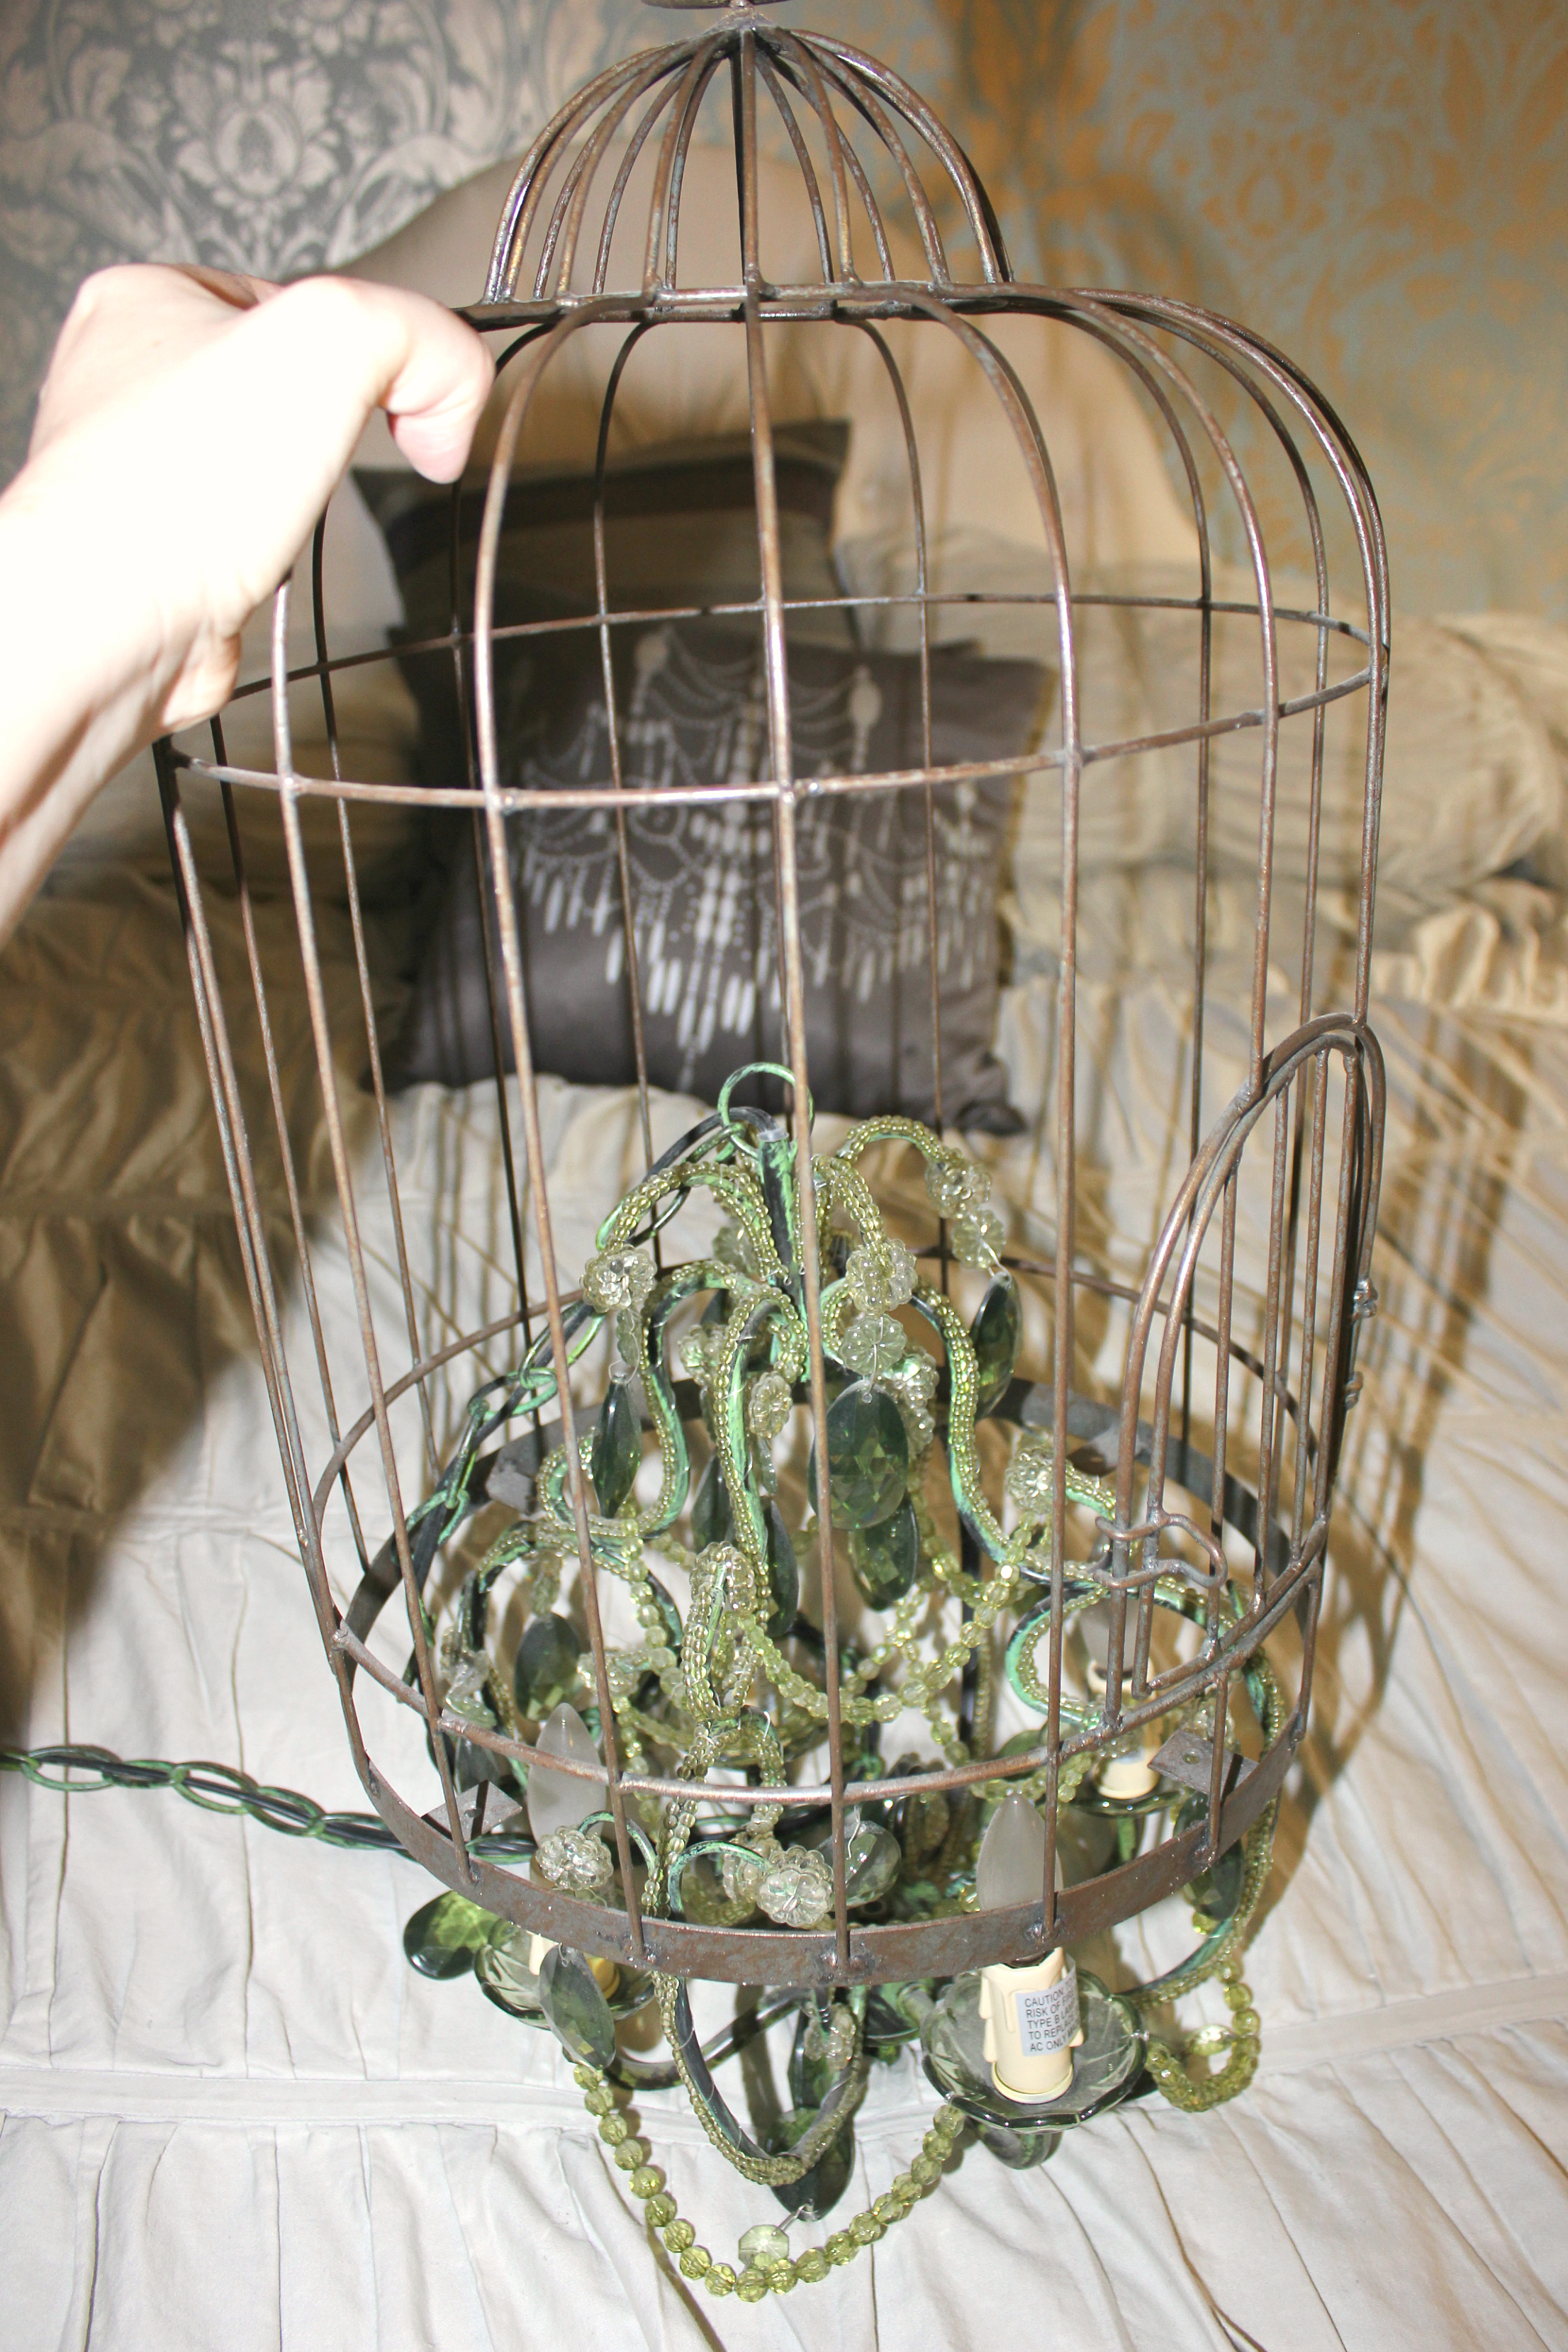
Step 8: Lift up the chandelier by the chain and attach to the hanging link (alternately it may be easier to remove the hanging link and loop it thru the chain and then reattach to the top). Never have my hands felt so large as trying maneuver them around the inside of this birdcage, but who’s not up to a good challenge!
Step 9: Close the 2 links back up again. This is best accomplished with needle nose pliers, and two hands with no pictures.
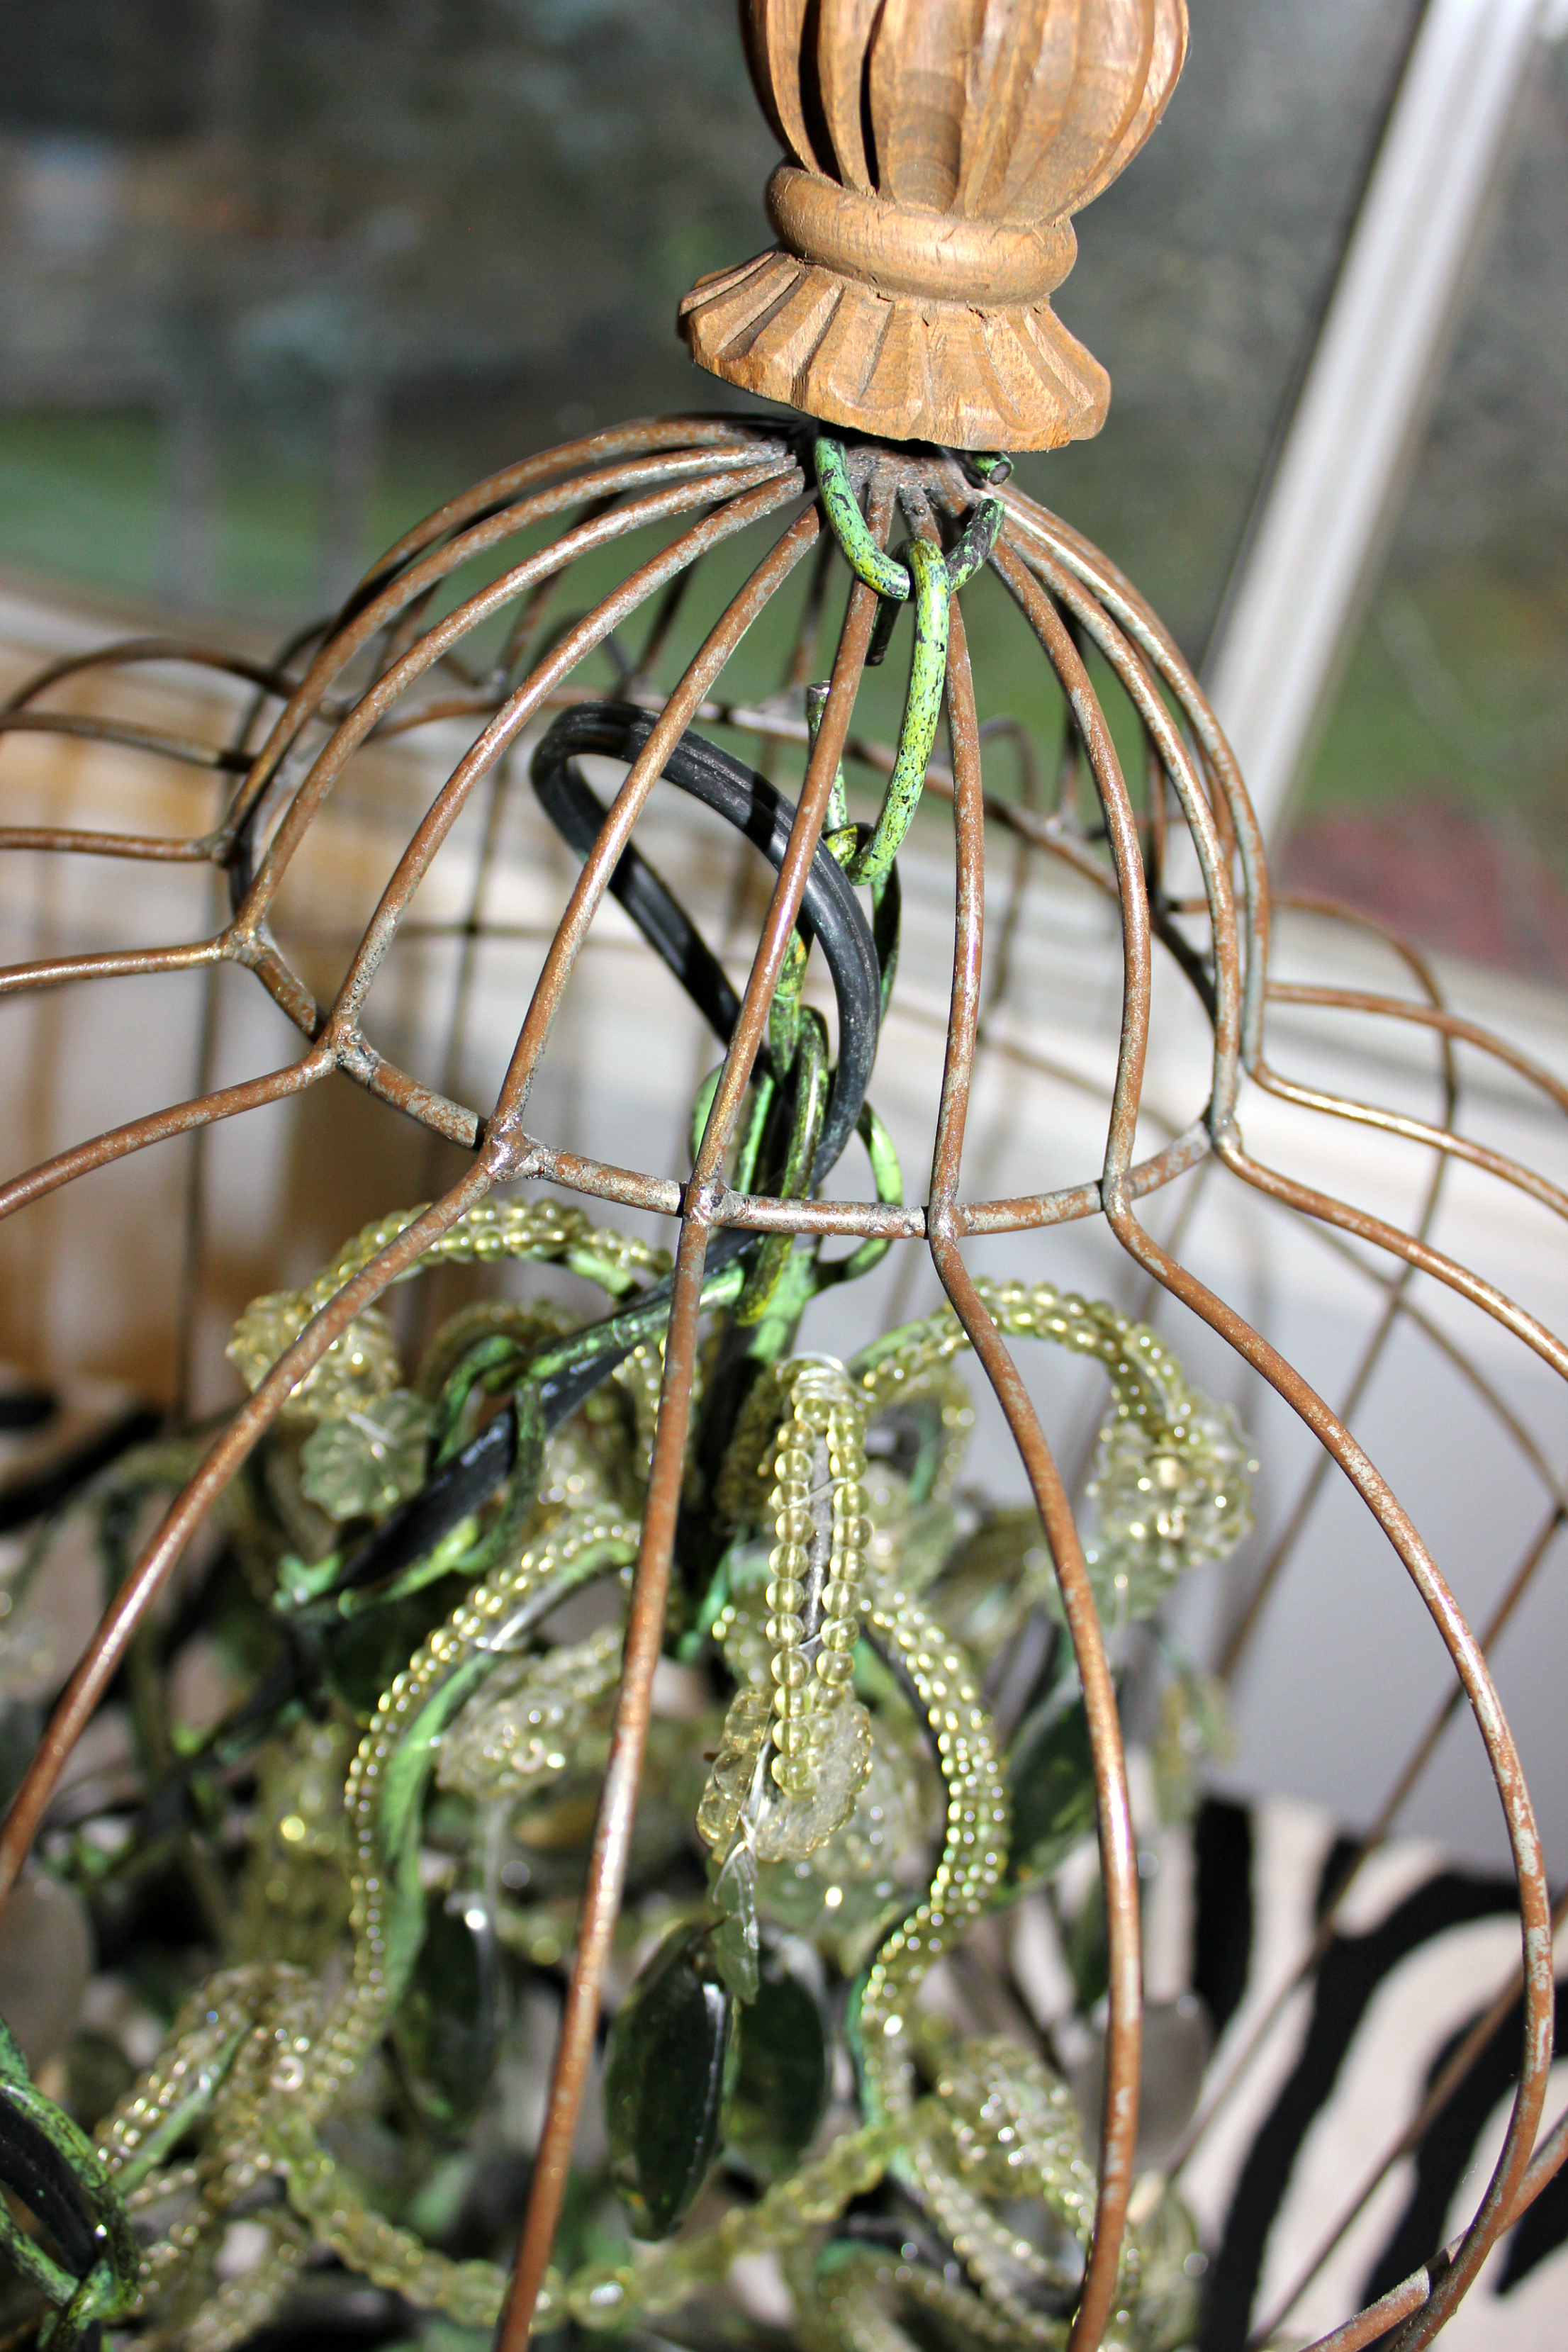
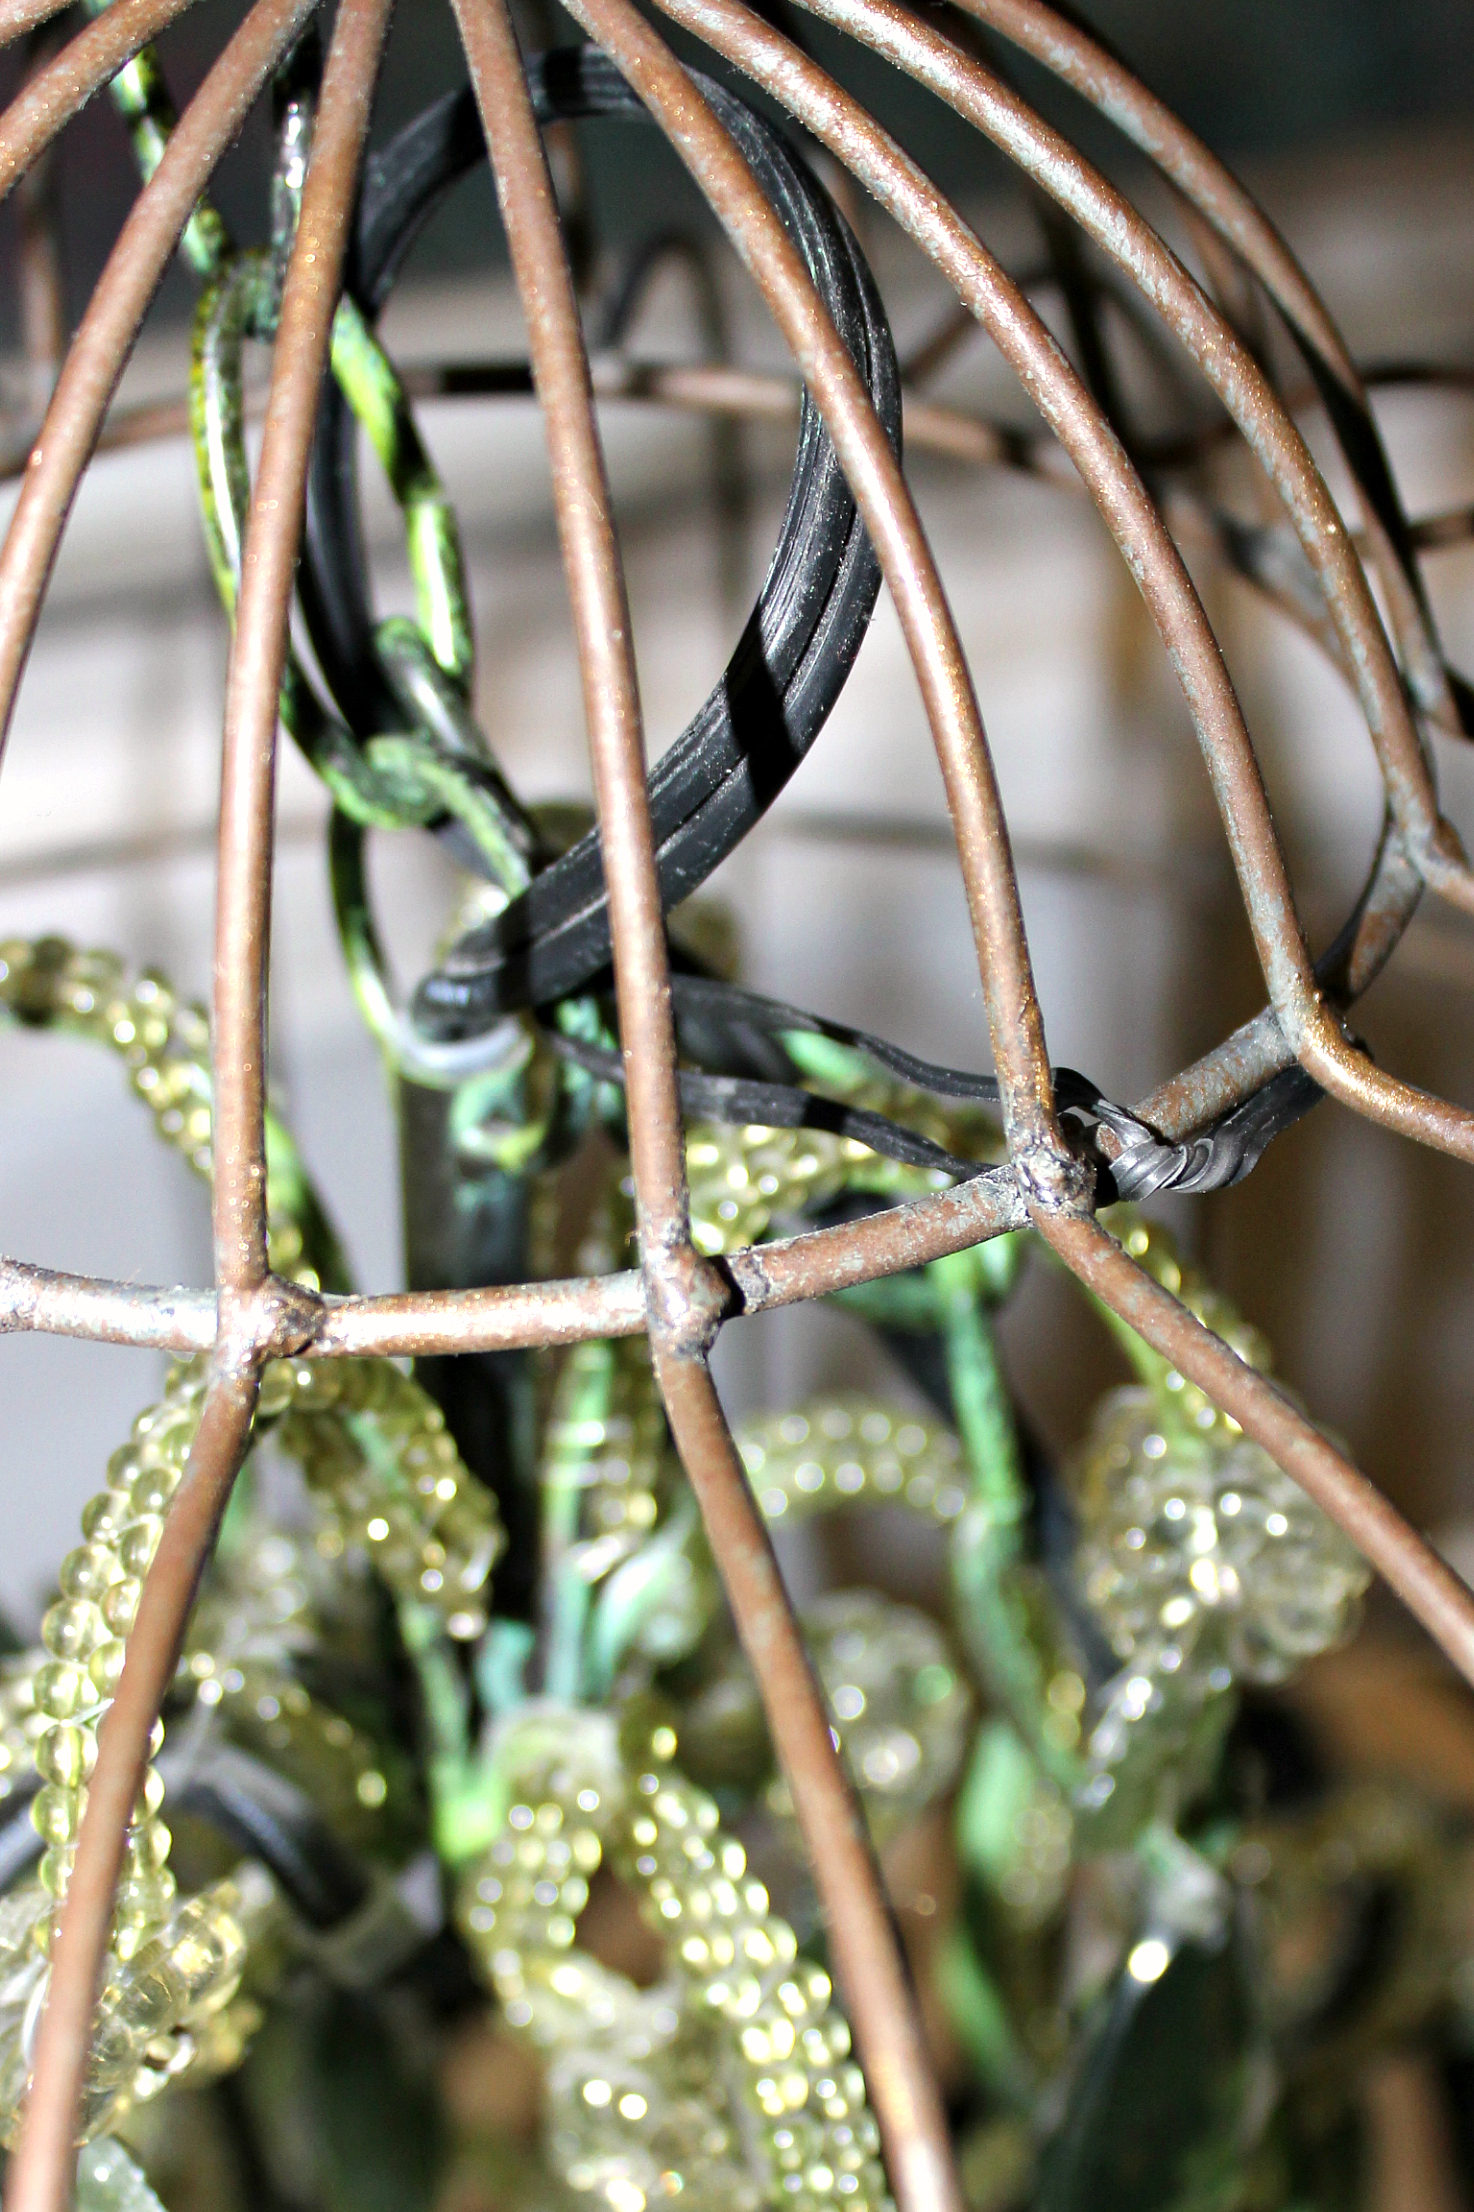
If the links are off centre and cause the chandelier to pull to one side, use bendable wire (that sometimes comes with the chandelier) to pull the light back centre and twist off around one of the cage bars to keep in place.
Step 10: If a hanging light fixture is what you are looking for (and unlike me you actually still have space for one) this would be a great place to stop.
But in my case, this particular chandelier of a birdcage was destined to be a table lamp, so I continued on with step 11.
Step 11: Place the base of the birdcage on a hard surface and carefully align the chandelier and cage back in place on top.

Step 12: Using the same 4 screws removed earlier, reinstall the base back onto the cage and you are done!
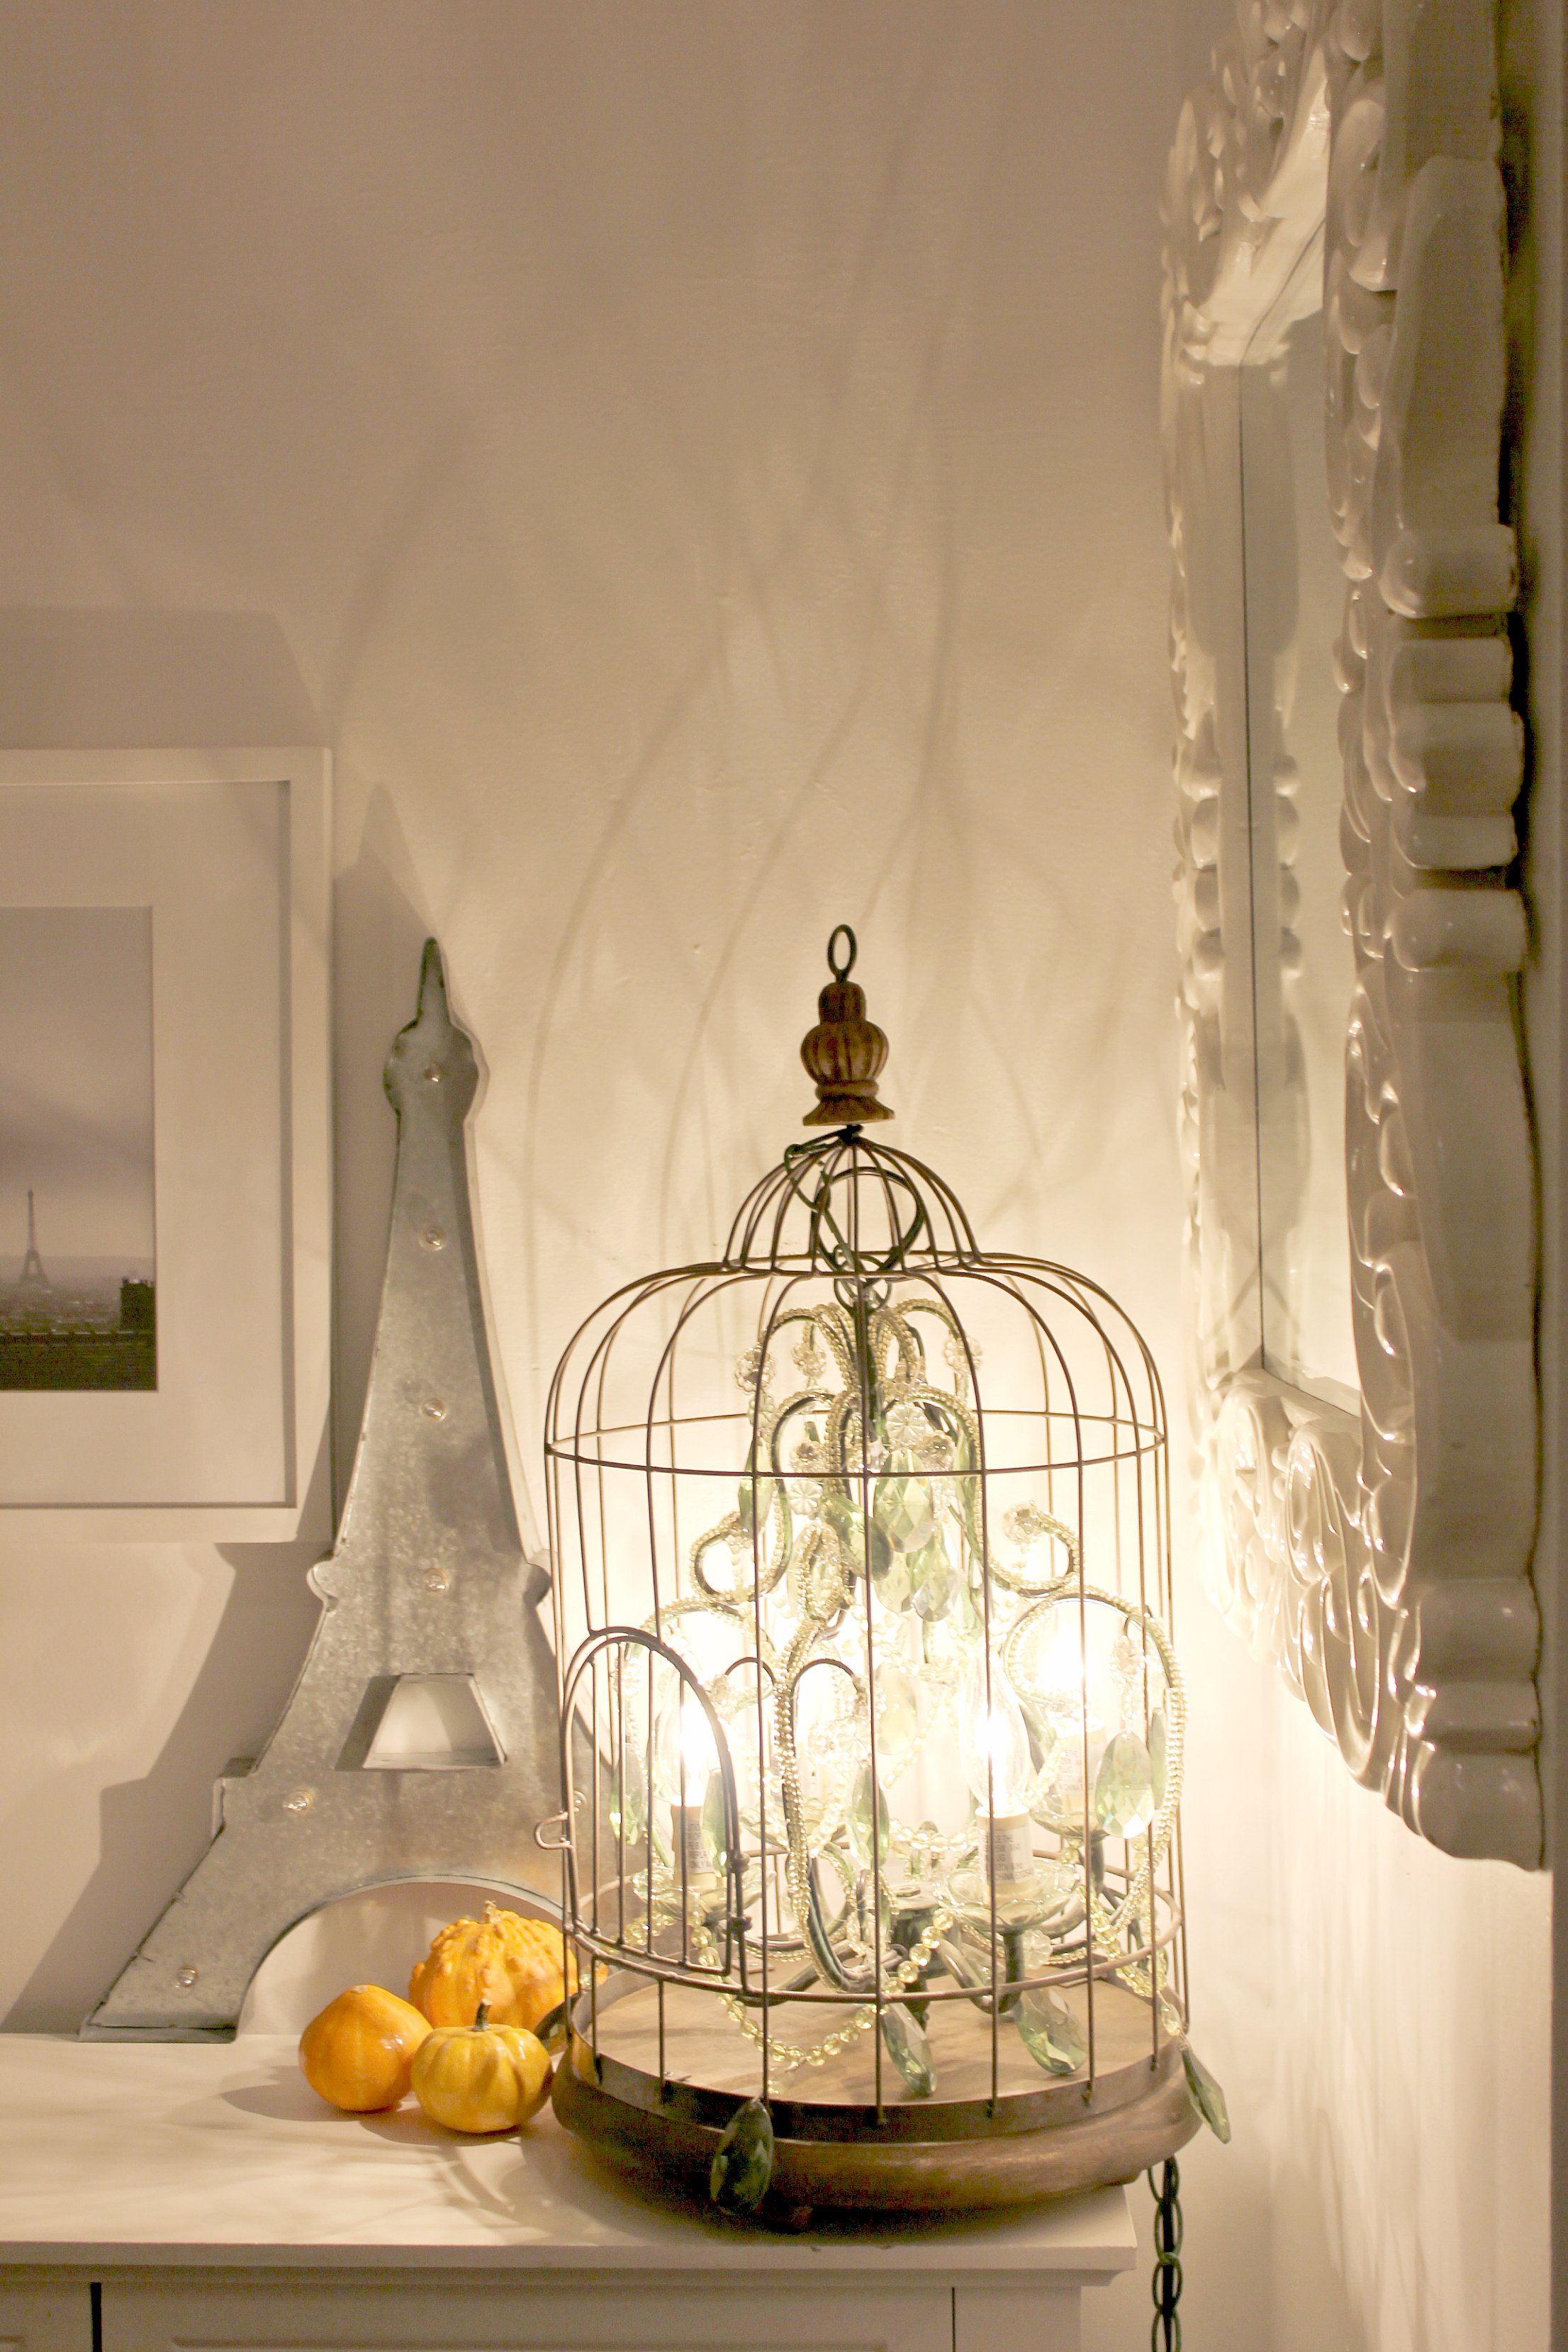
Rejoice in the fact that you do not have to try to fit your hands in and around the bars of this particular birdcage anymore!
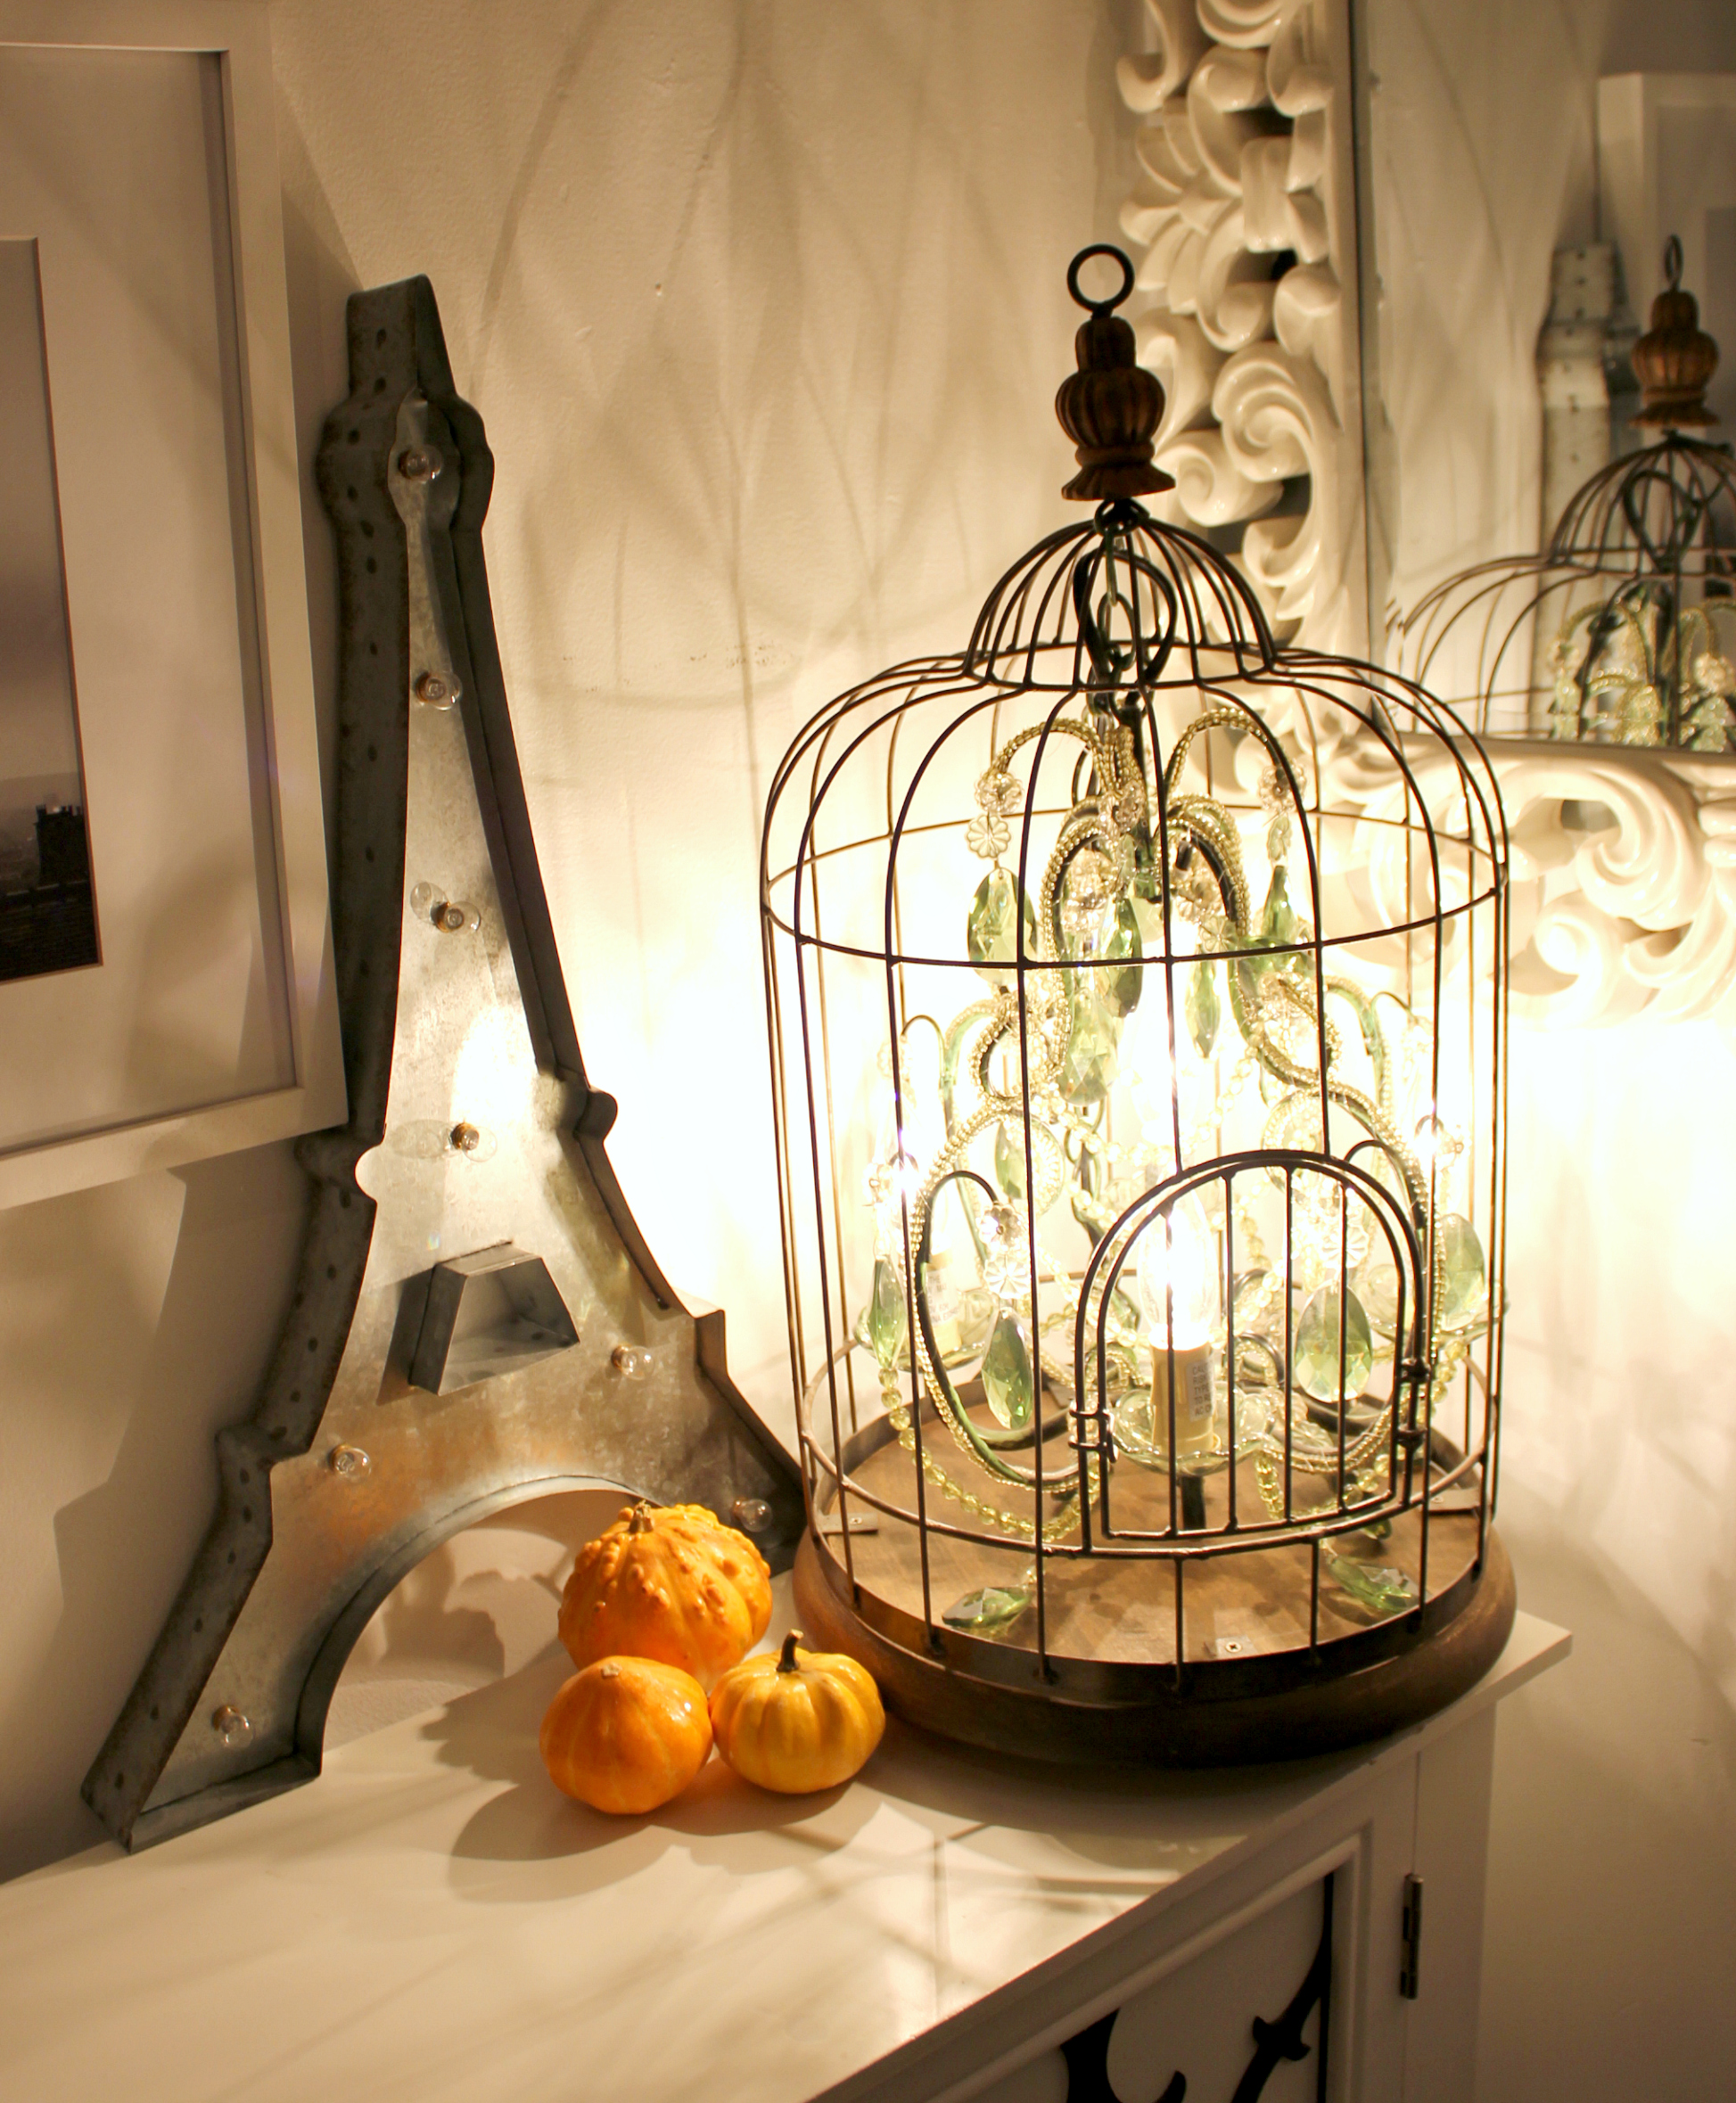
Wahoo! My very own birdcage chandelier shining in all it’s glory.
The post DIY Birdcage Chandelier appeared first on Creative Sides.
]]>The post Pumpkin Rice Krispie Treats appeared first on Creative Sides.
]]>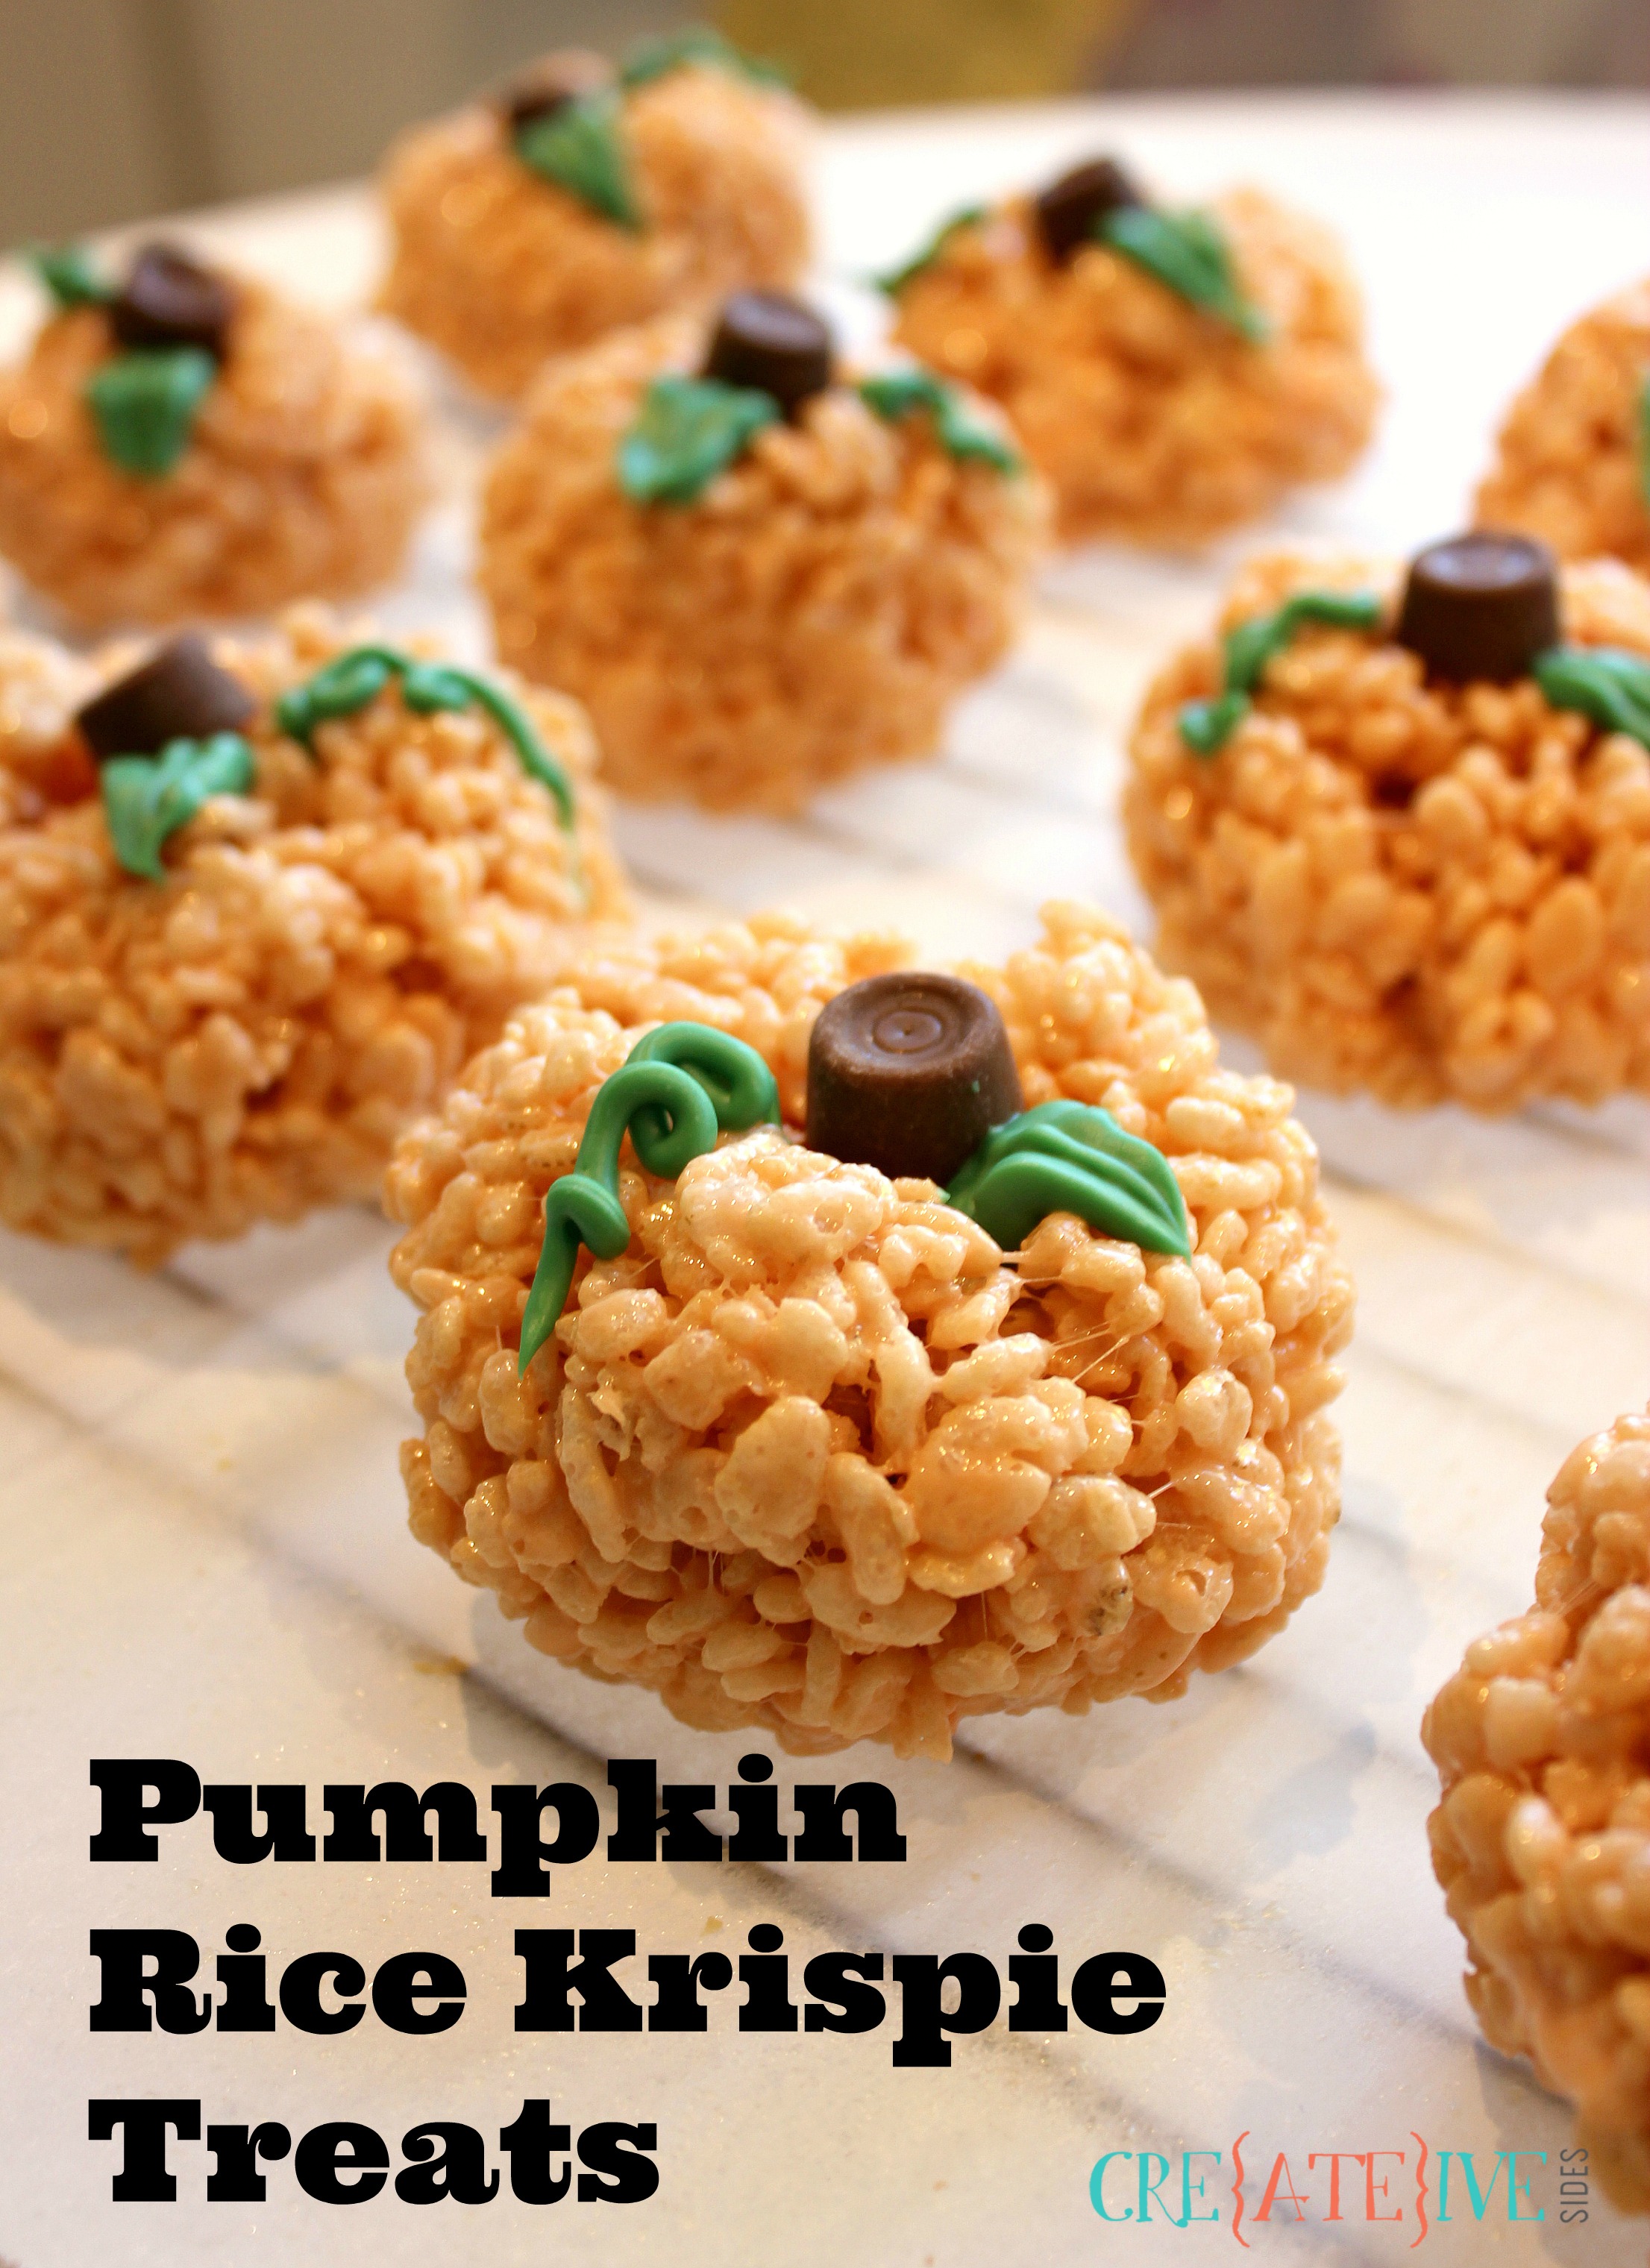
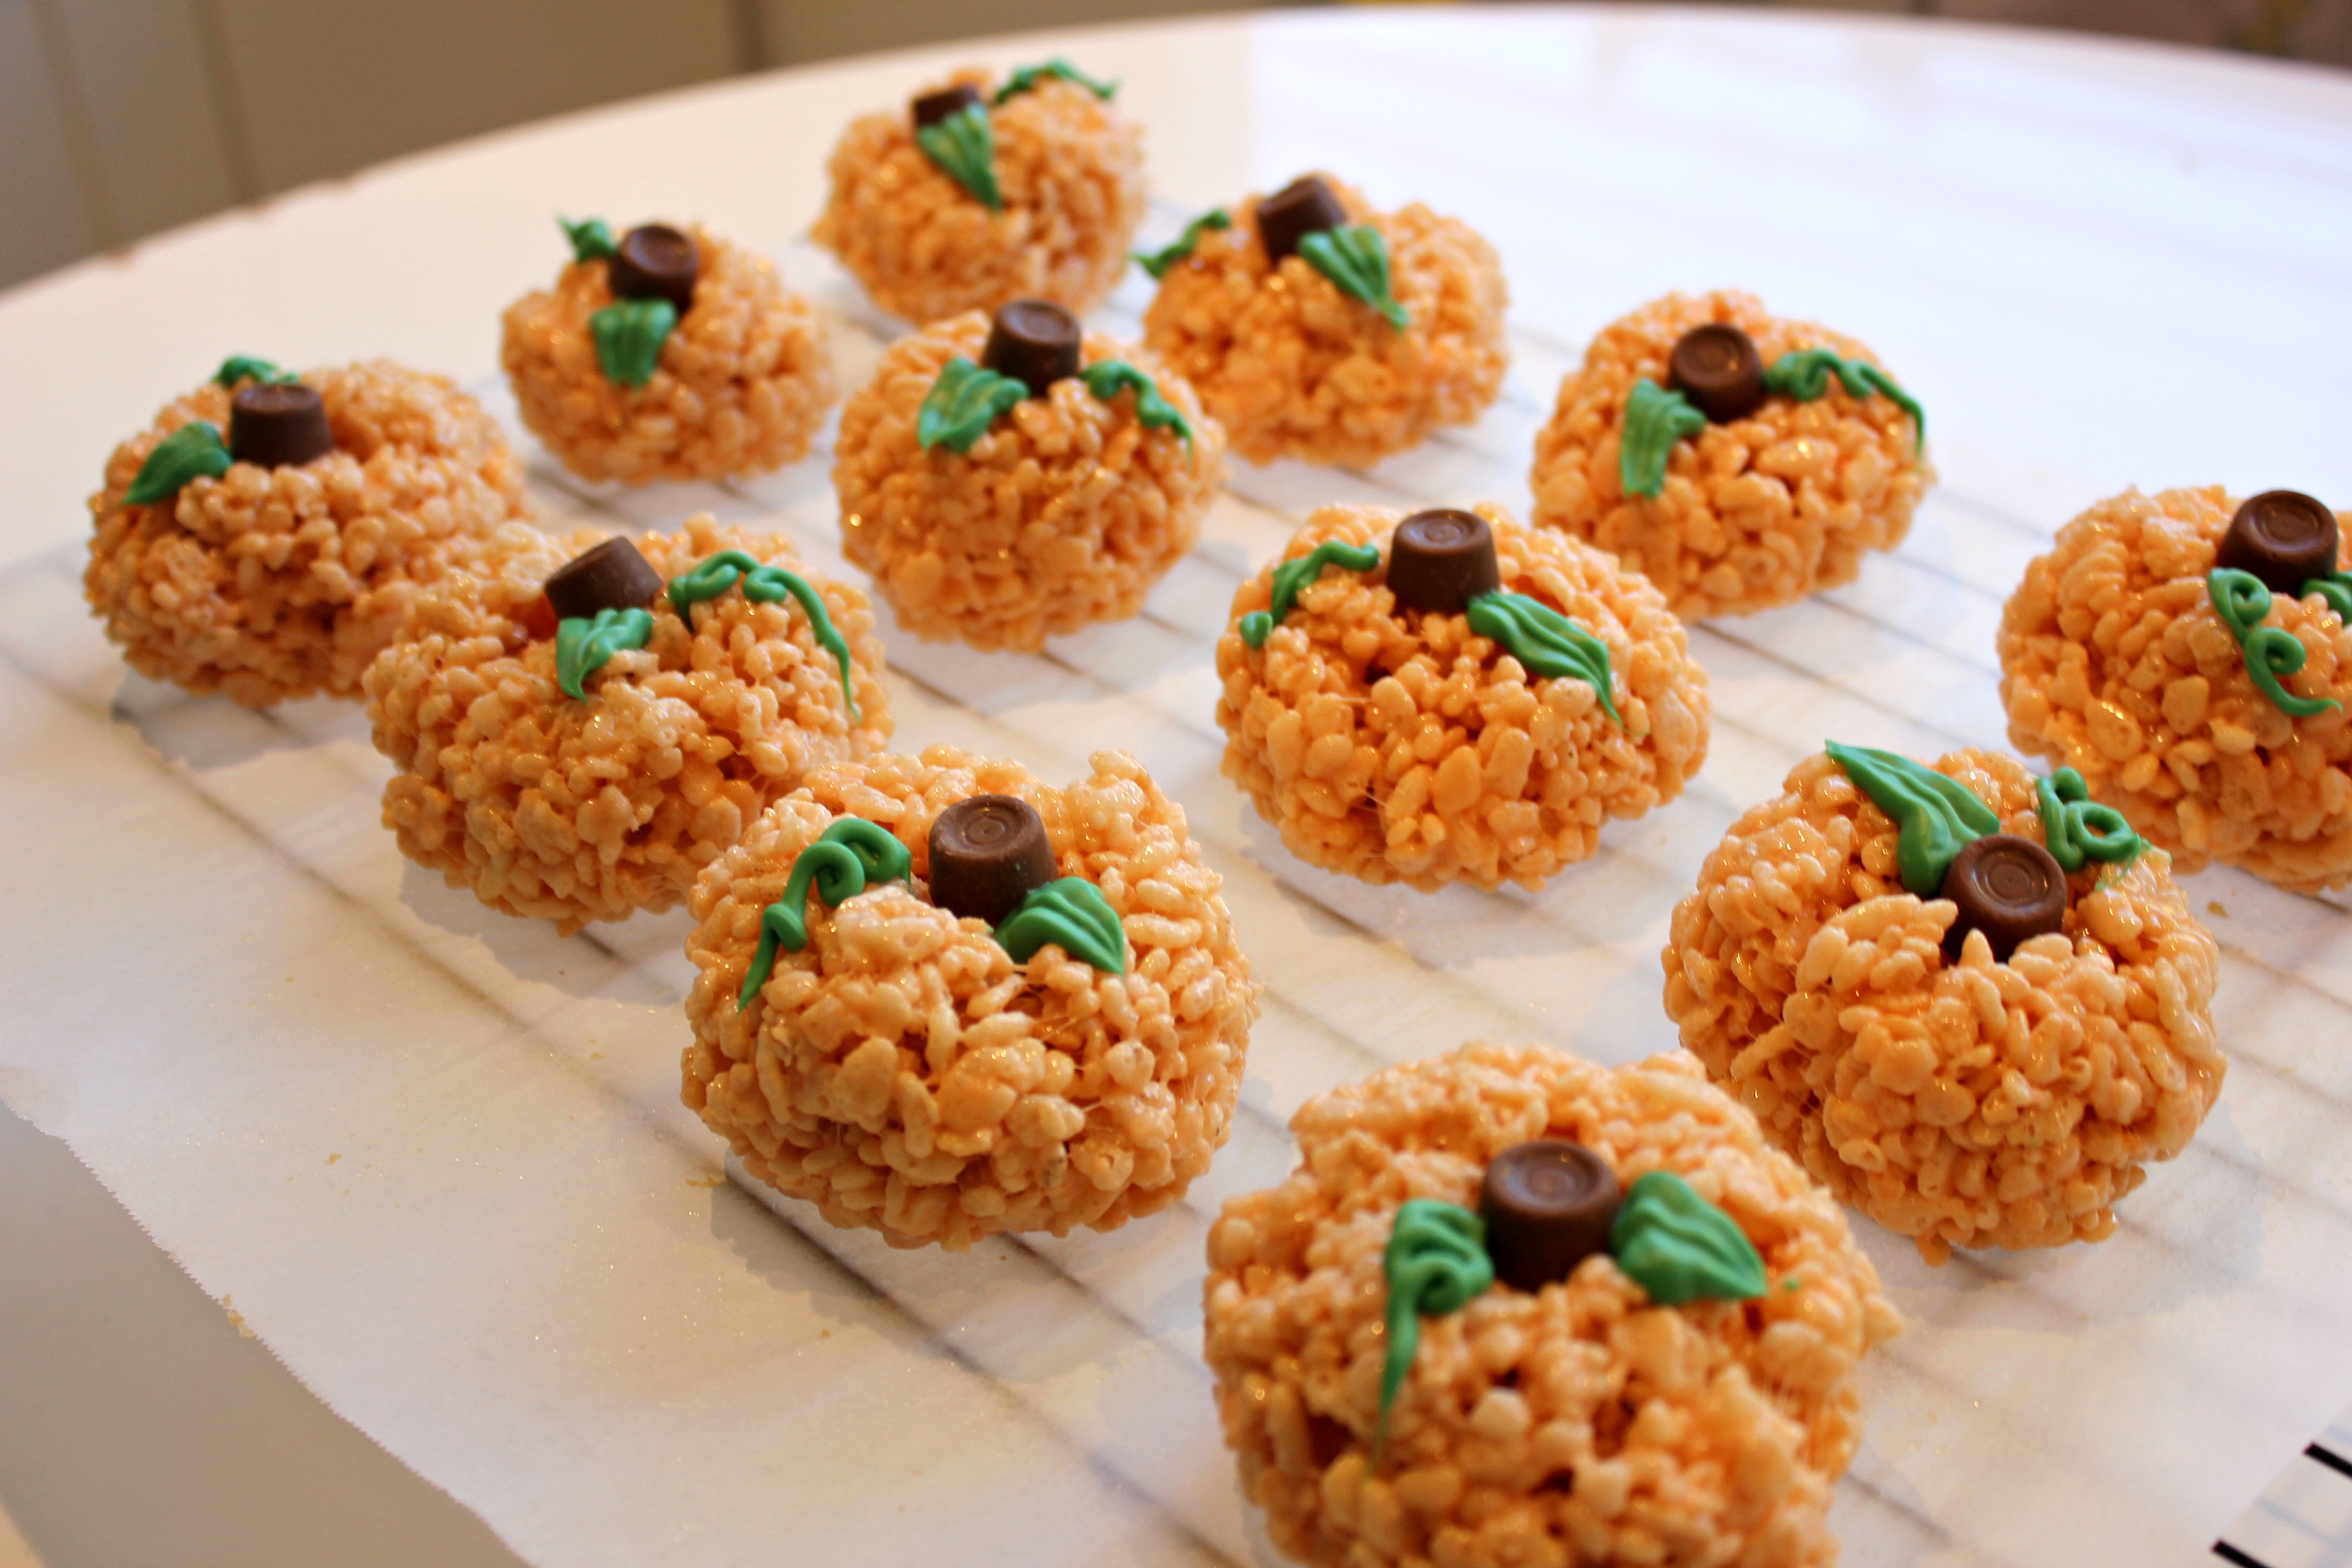
There is no denying that summer is gone. We wear sweaters now and say things like “no, it’s a school night!” and never think twice anymore about warming up the place too much by turning on the oven. Sometimes I find myself reluctant to immediately embrace fall because it means admitting summer is gone, but really autumn days are so beautiful, the colours are so terrific and all the fall fashions are pretty incredible too! So, here I am embracing fall with reckless abandon and creating some pumpkin Rice Krispie treats for Peyton and her classmates to enjoy. These are a fairly simple variation of classic Rice Krispie squares and come together just about as quickly.
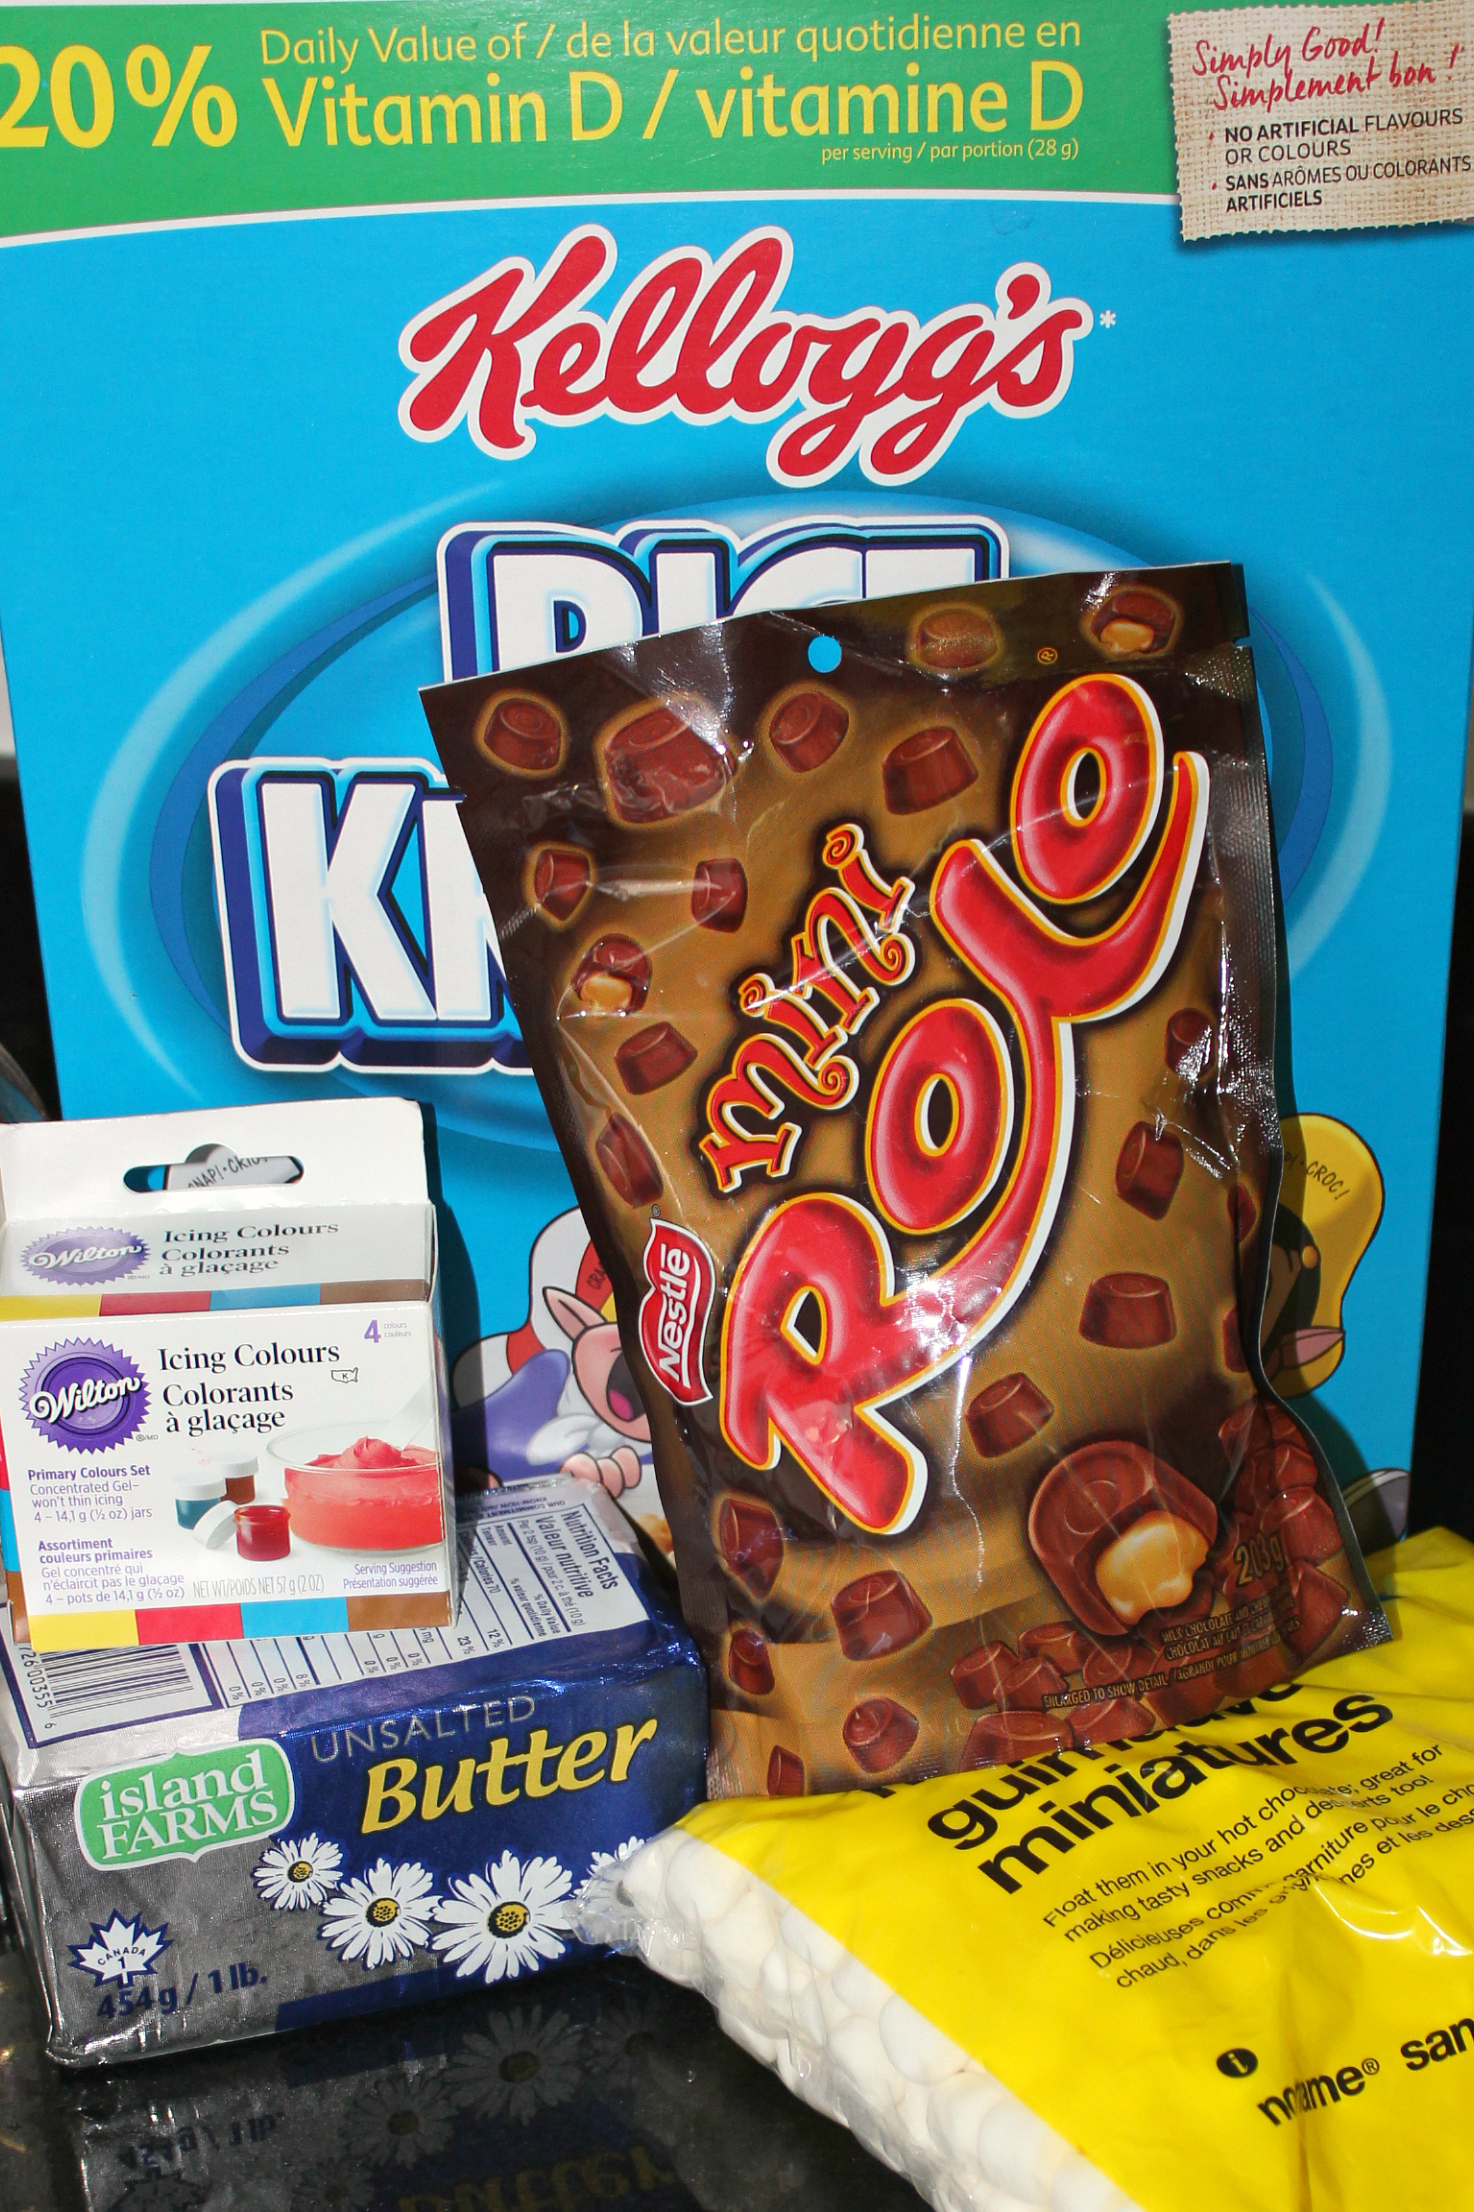
Ingredients (yields 12):
3 Tbsp butter
250g marshmallows (approx 4 cups of mini marshmallows)
5 cups of Rice Krispies
1 tsp vanilla (optional)
Orange (or red and yellow) Wilton Gel Icing Colours
Mini Rolos ( 12 for pumpkin stems)
1/4 cup dark green Wilton Candy Melts
Non stick cooking spray
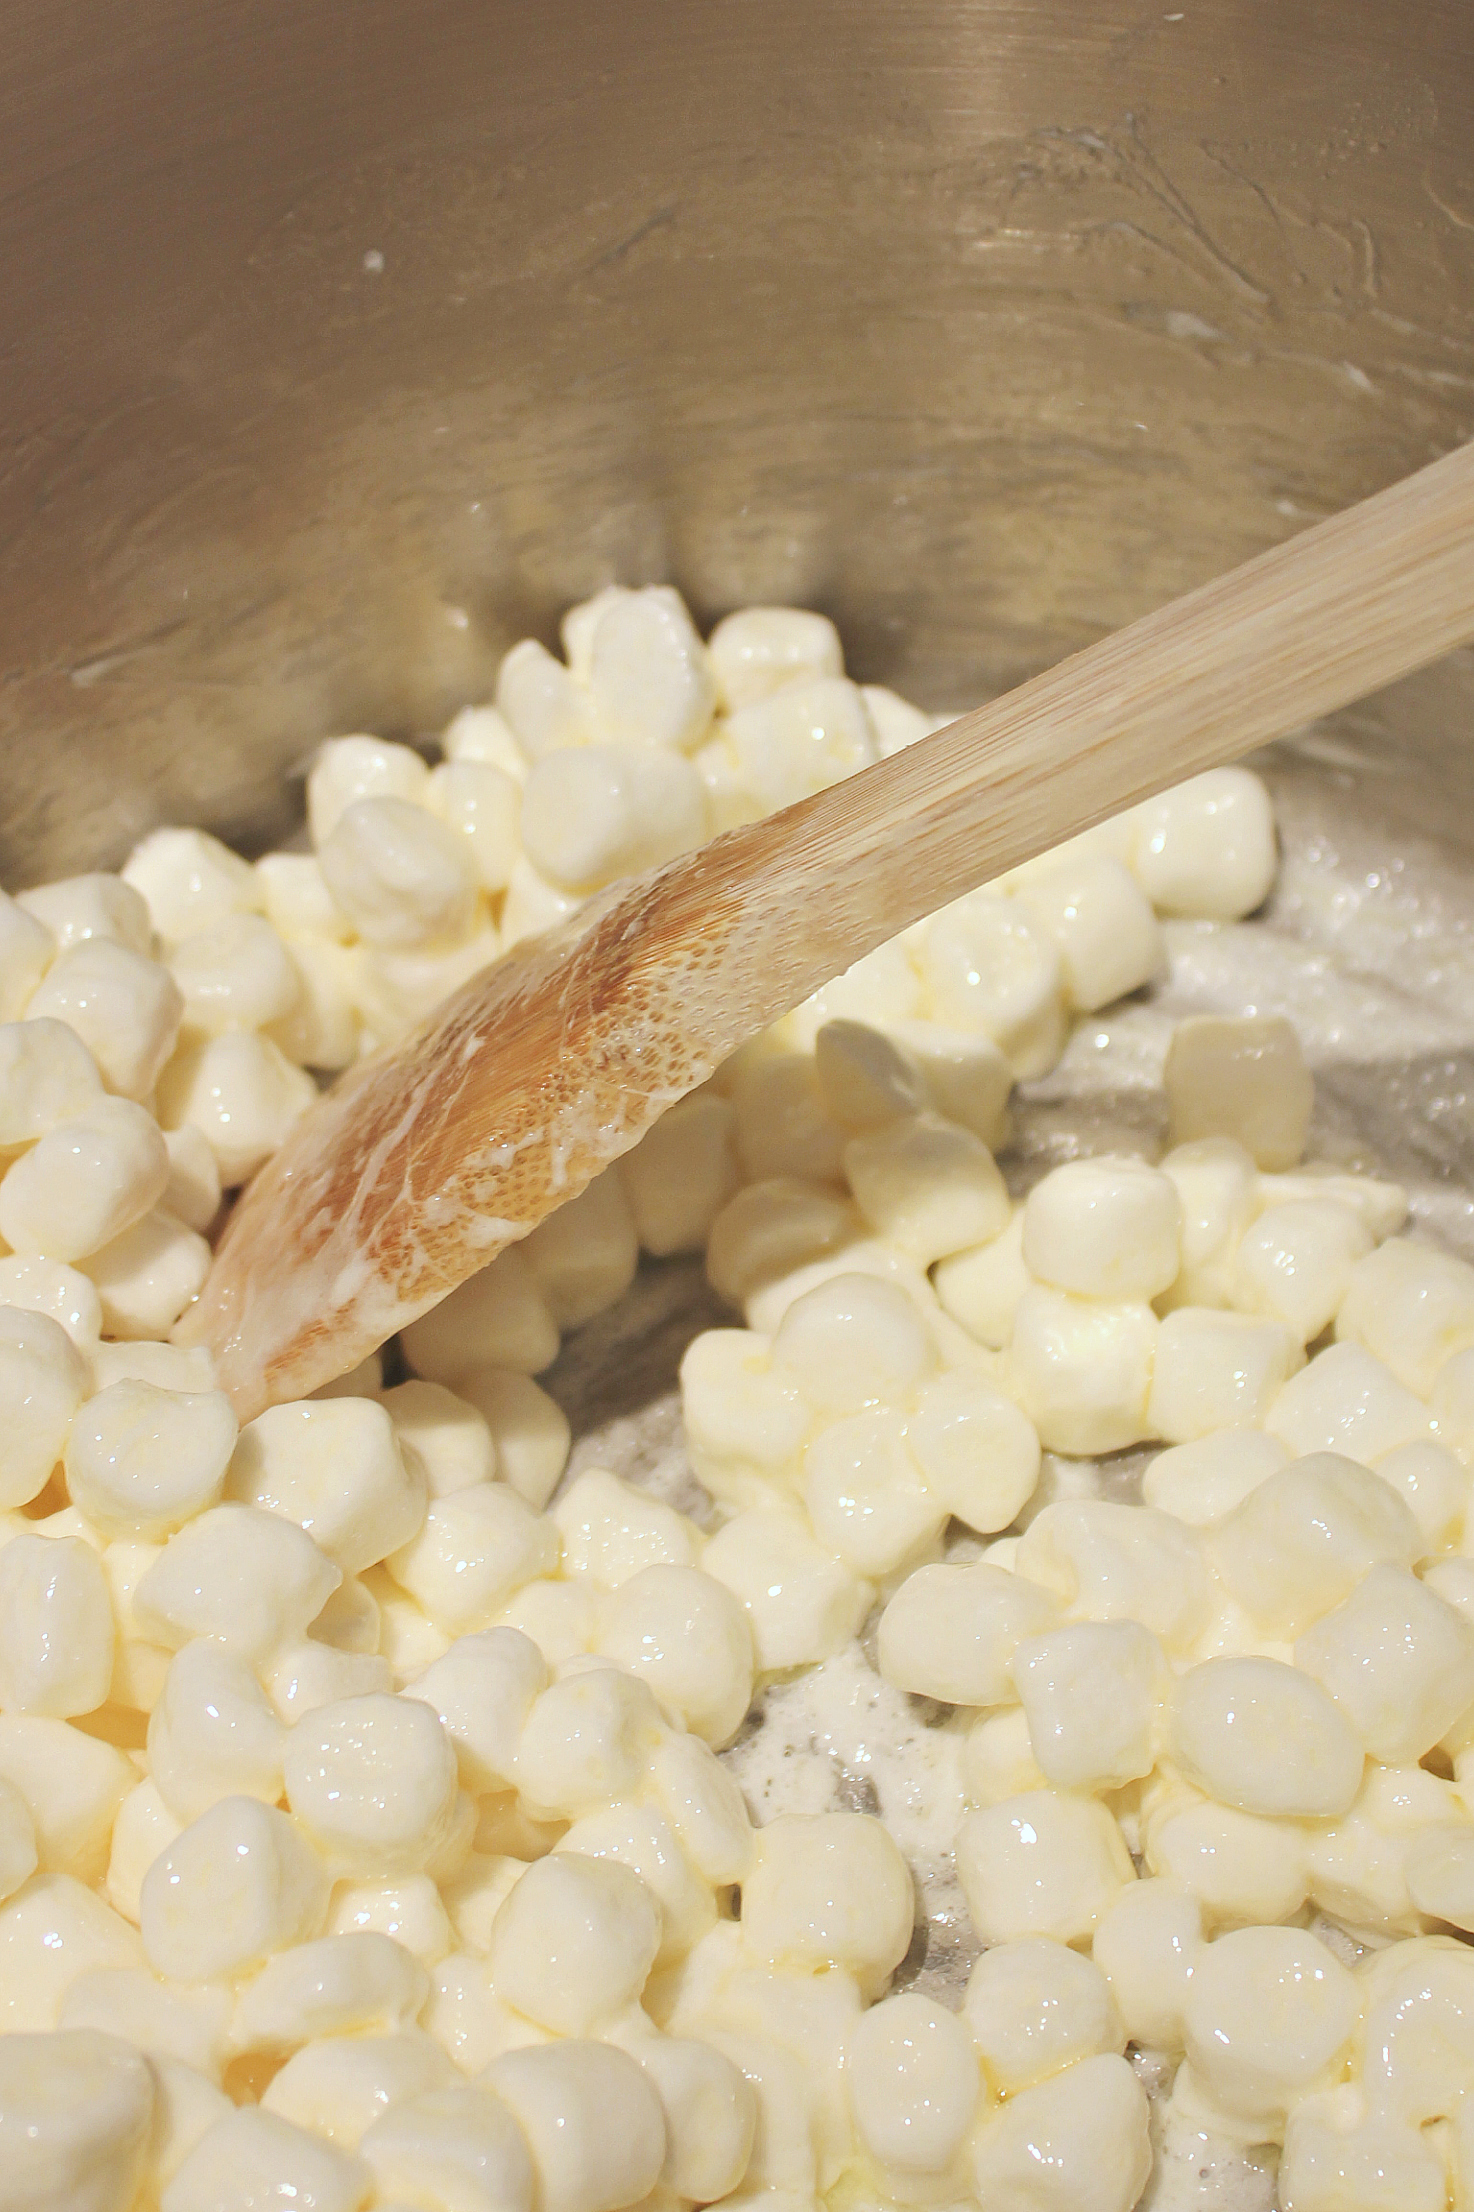
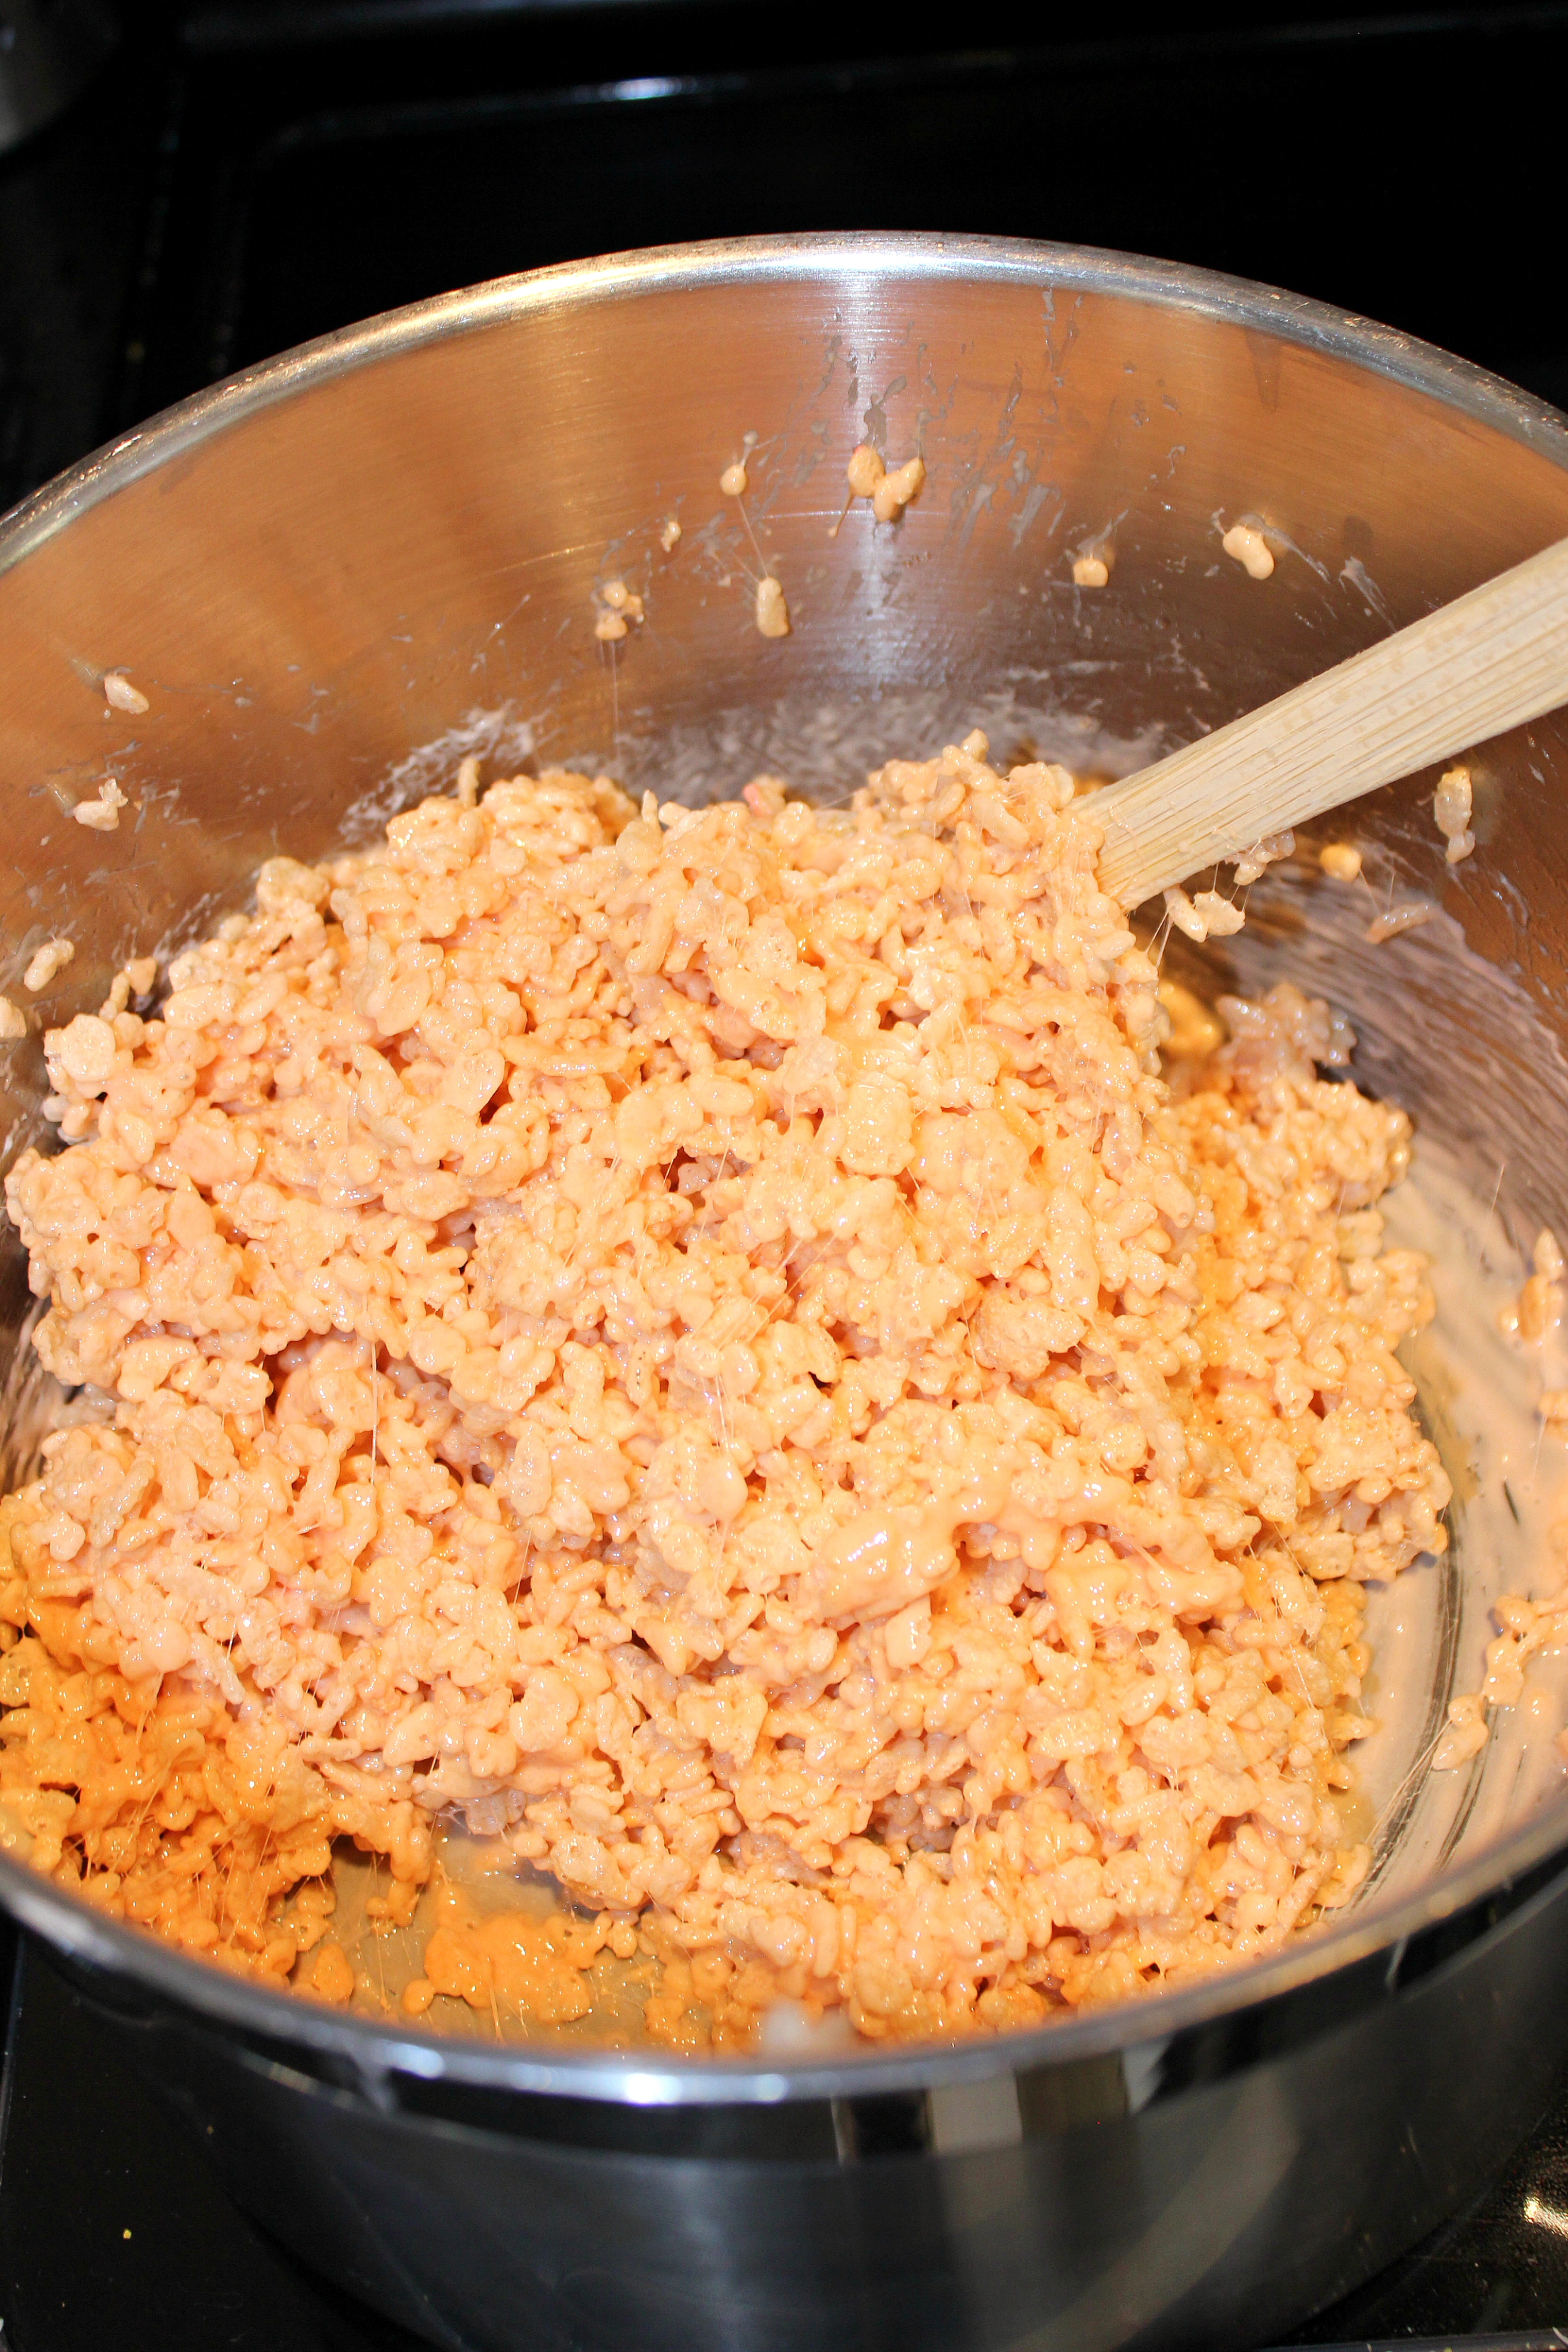
Step 1: In a large pot melt butter and marshmallows over medium heat, stirring until nearly completely melted. Turn off heat.
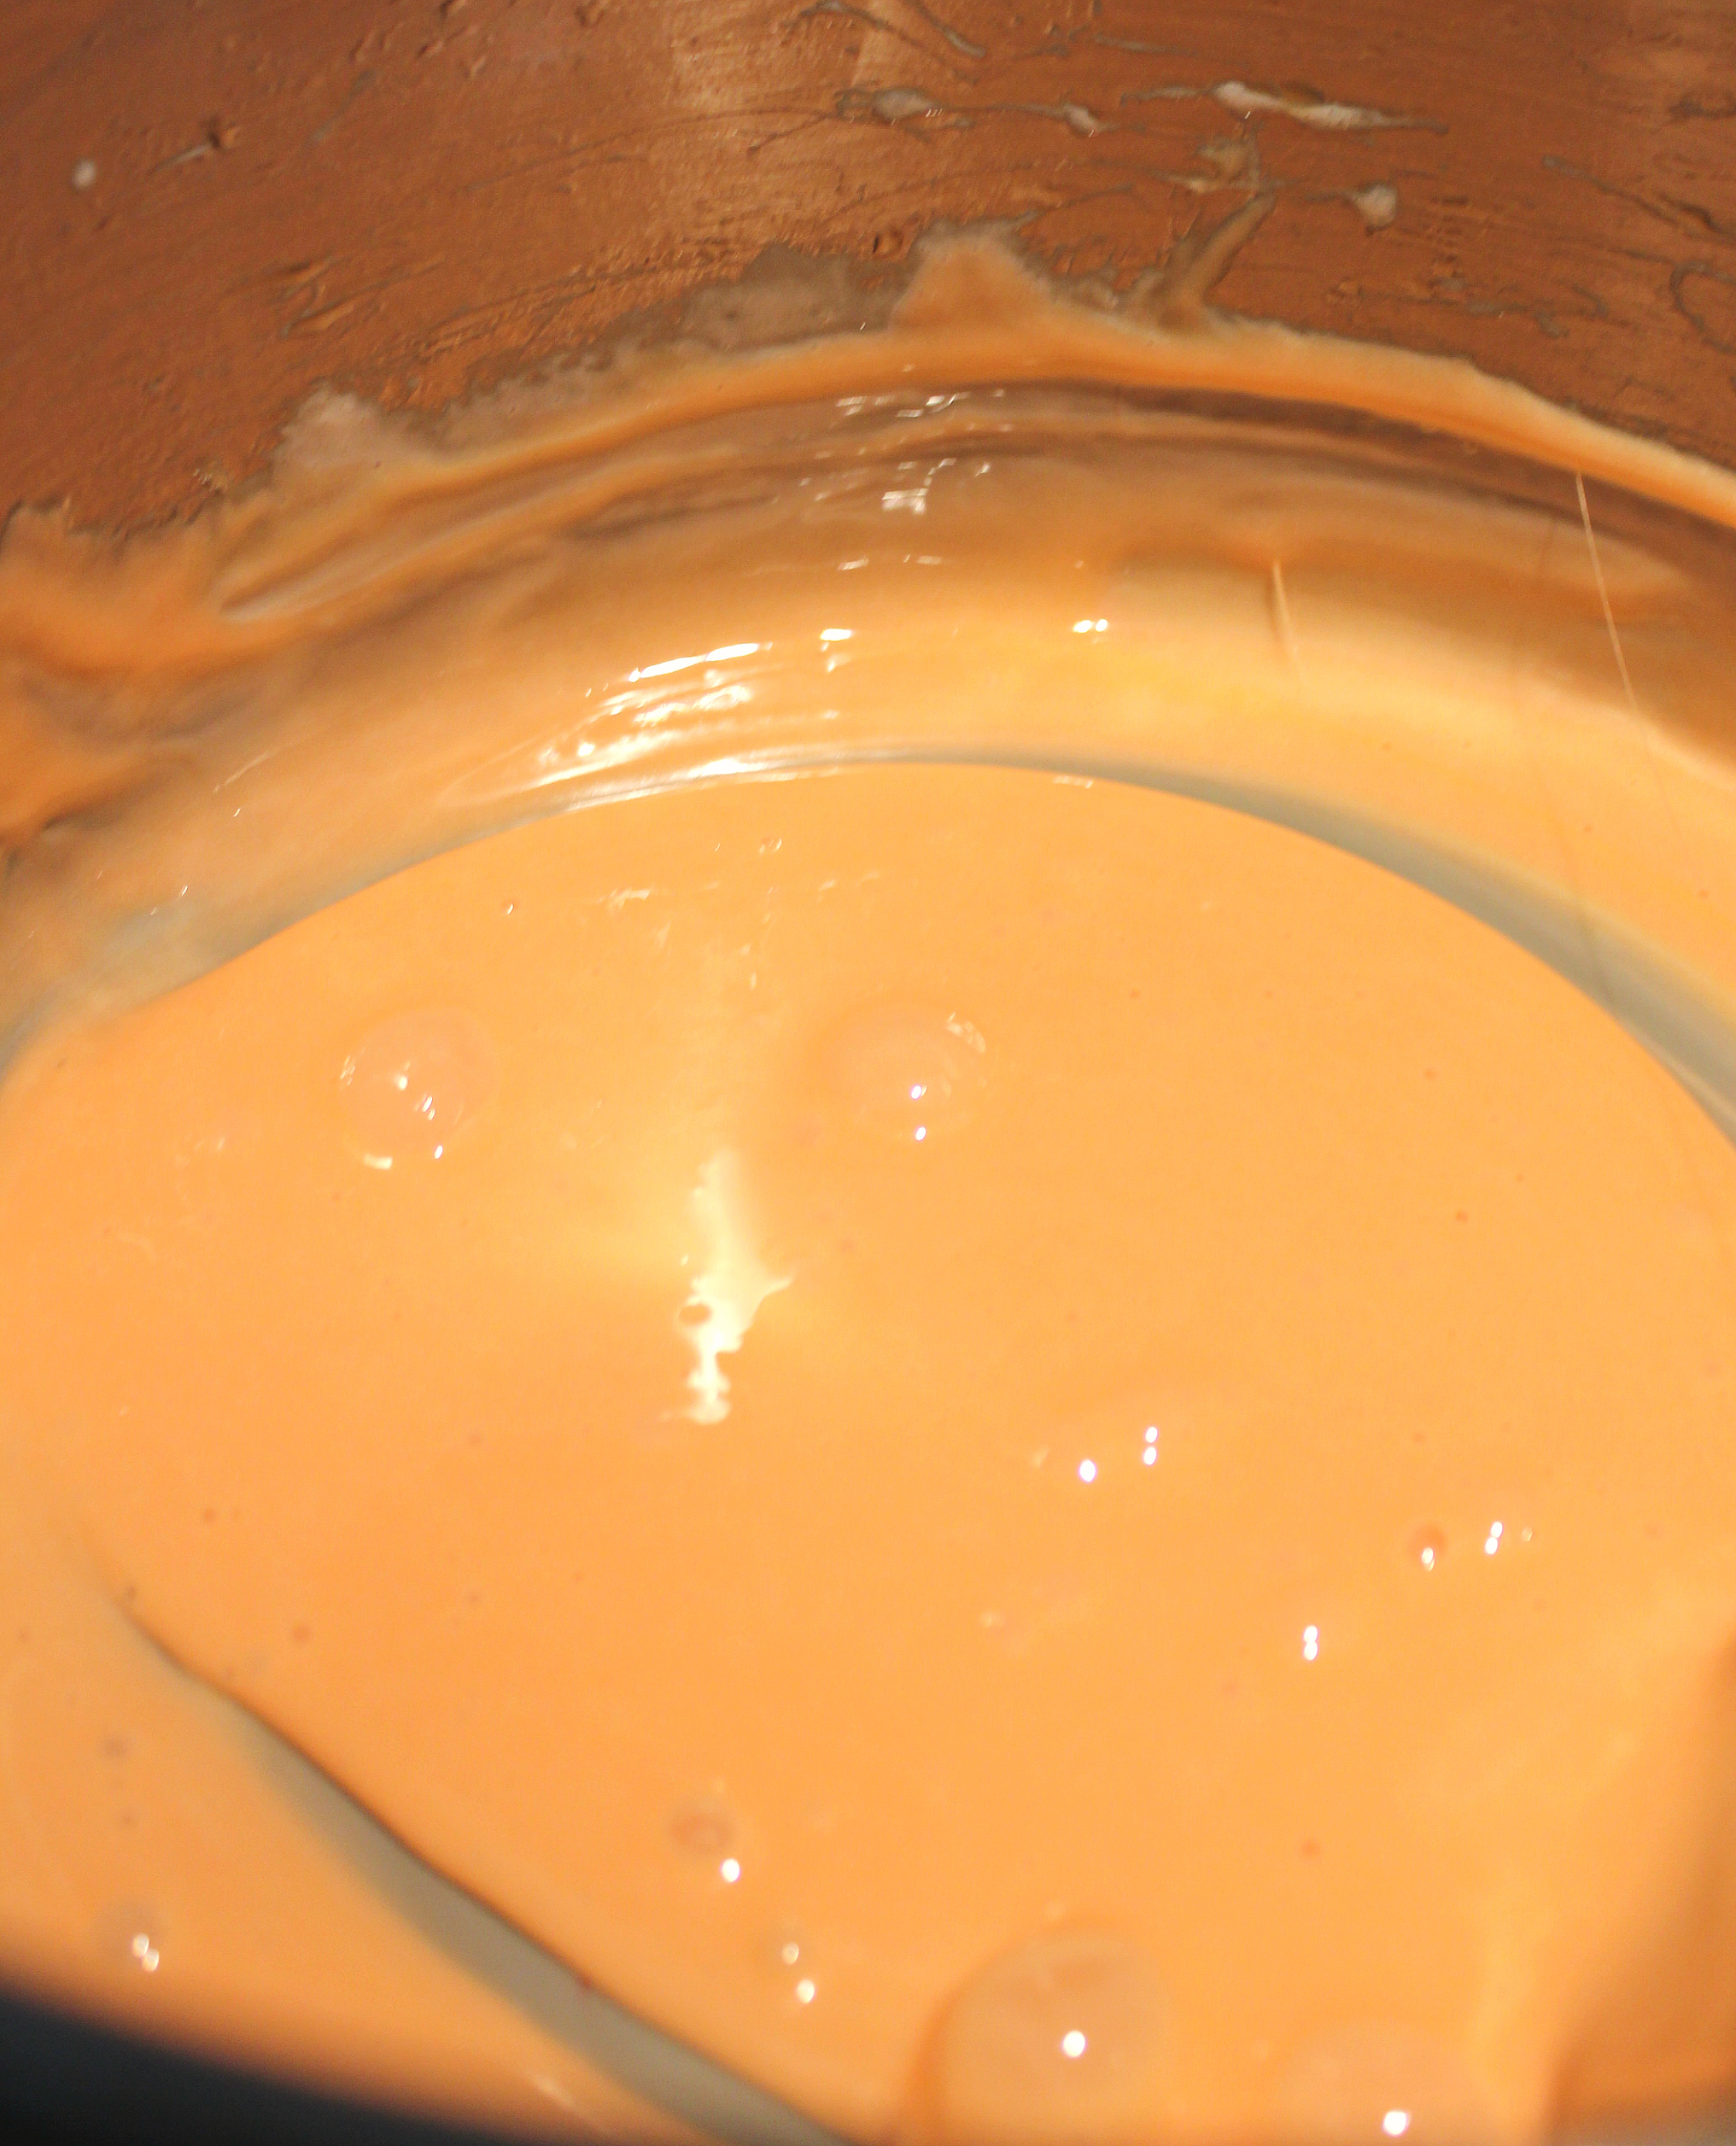
Step 2: Mix in vanilla, if using, and then add colouring until as orange as you dare, keeping in mind that once the rice cereal is mixed in the colour will not be as strong.
Step 3: Working quickly, pour in the five cups of rice cereal and stir until evenly combined.
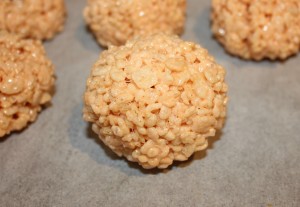
Step 4: Next spray your hands with non stick cooking spray (this makes all the difference between success and a sticky mess) and start shaping the Rice Krispie mixture into balls with your hands (think making small snowballs and firmly roll into a ball between hands) and placing on a parchment lined tray.
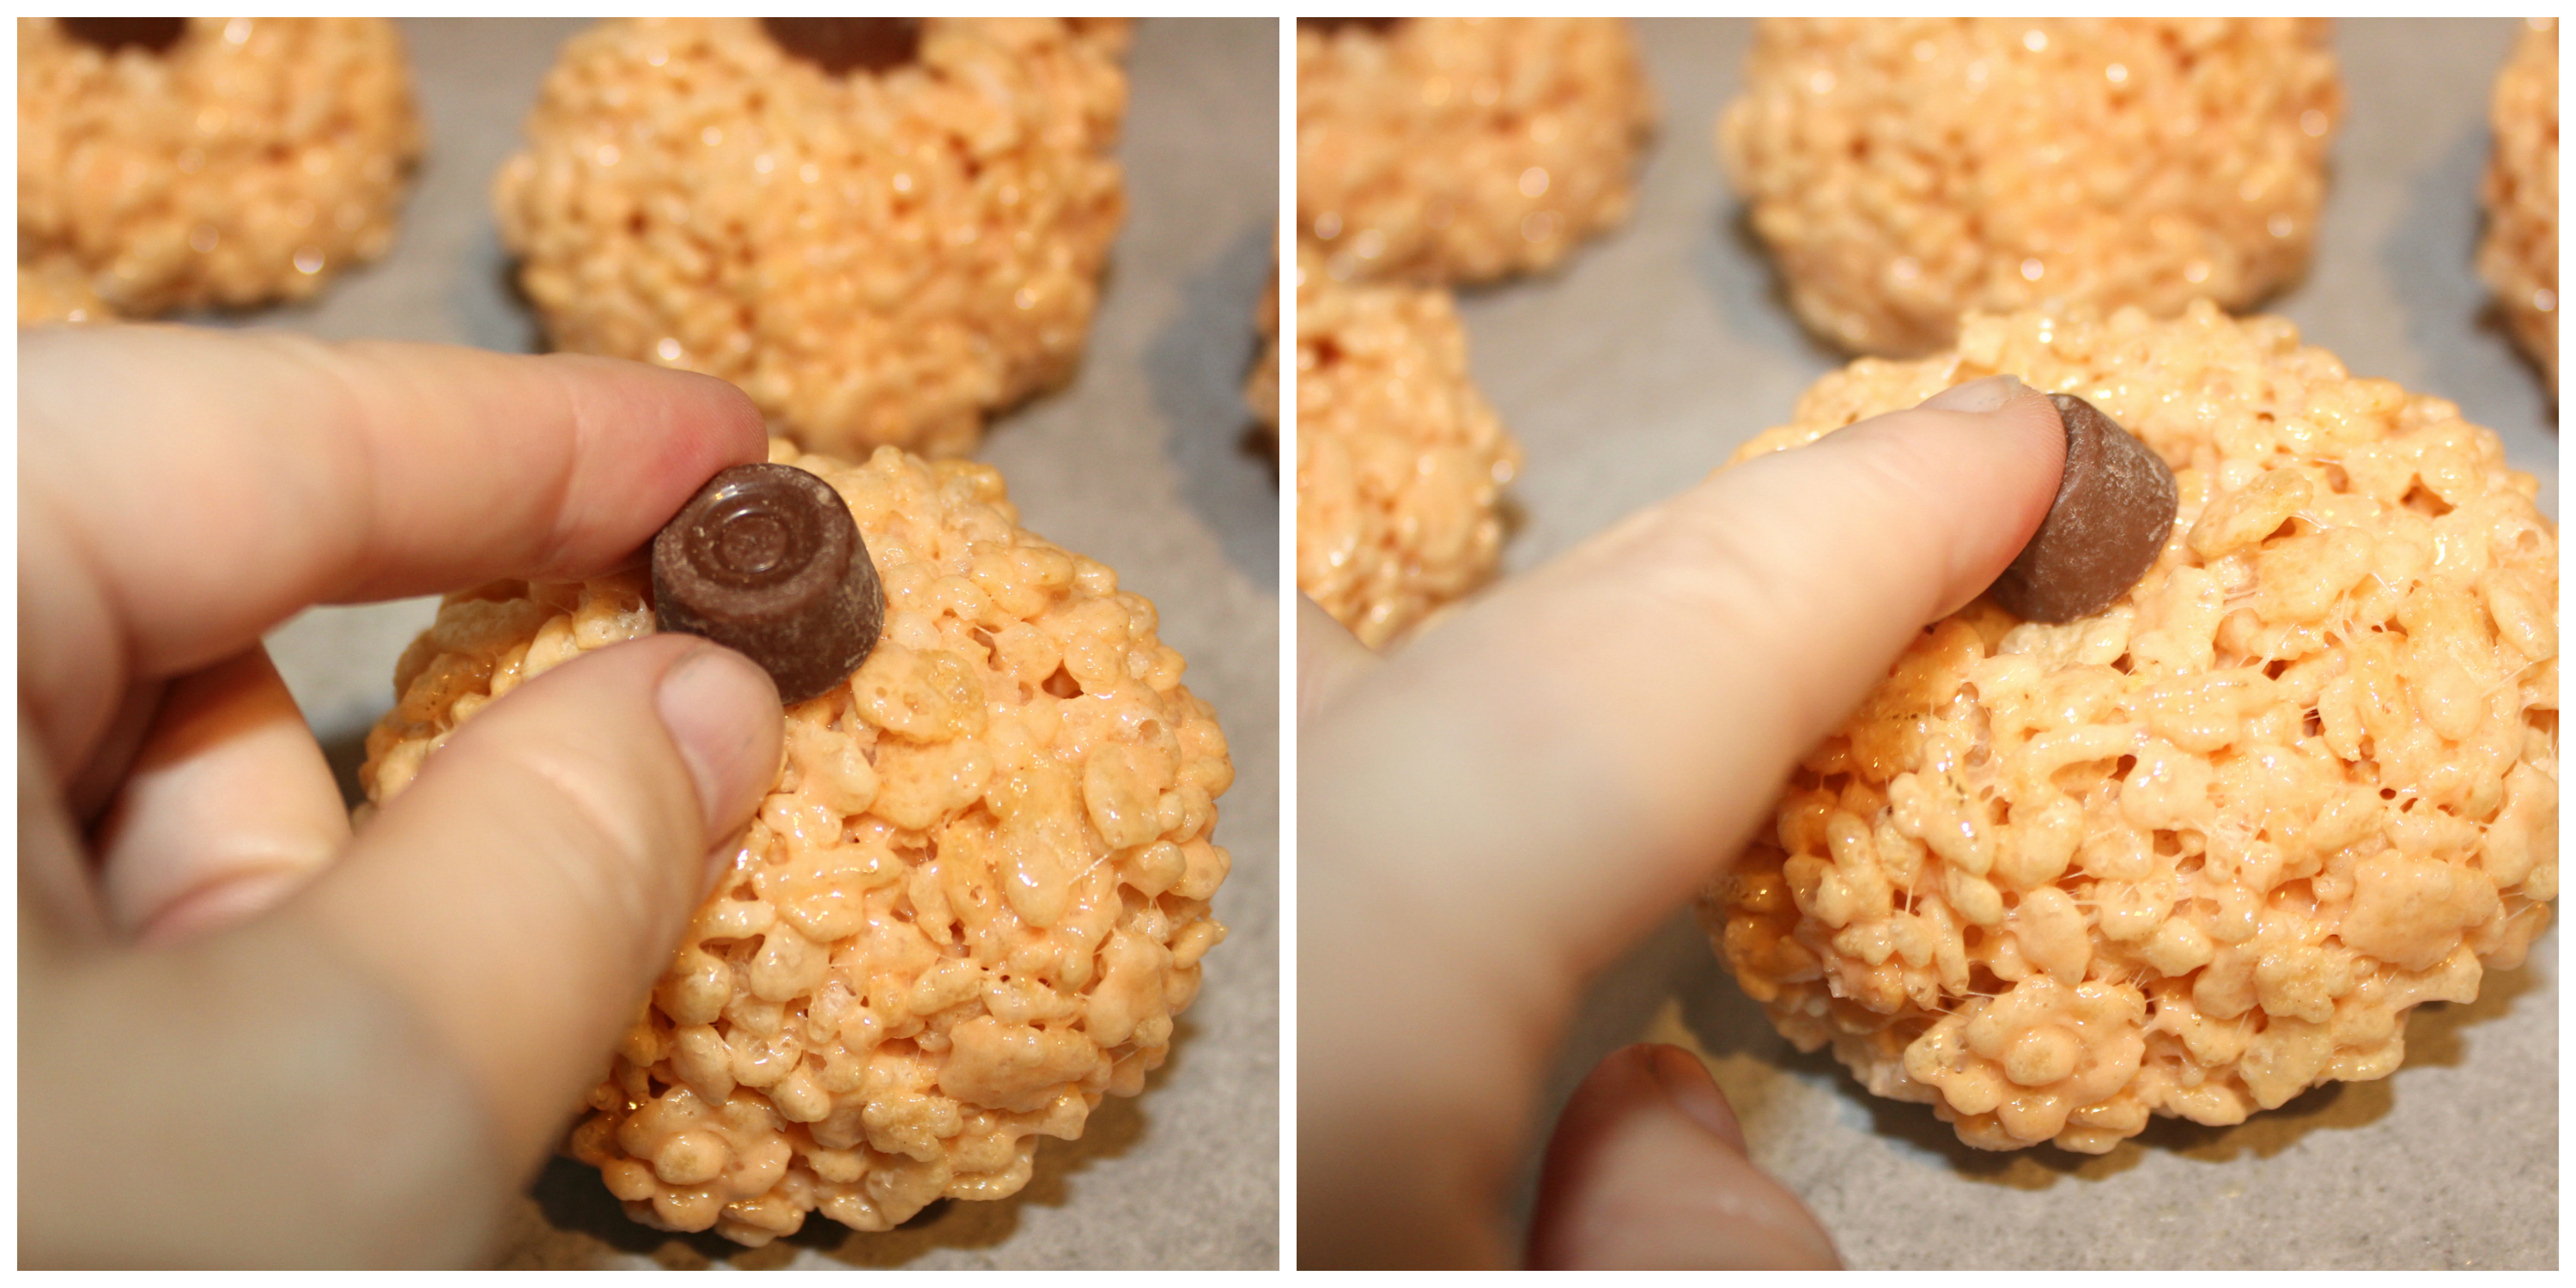
Step 5: Take a mini Rolo and press down into the centre, causing the pumpkin shape.
Step 6: Prepare a piping bag with a medium sized leaf tip (like Wilton #69), and melt the green Candy Melts in the microwave for 30 seconds and stir. Continue in 10 second increments and stirring until completely melted. Pour melted Candy Melts into piping bag and pipe a leaf on each pumpkin top.
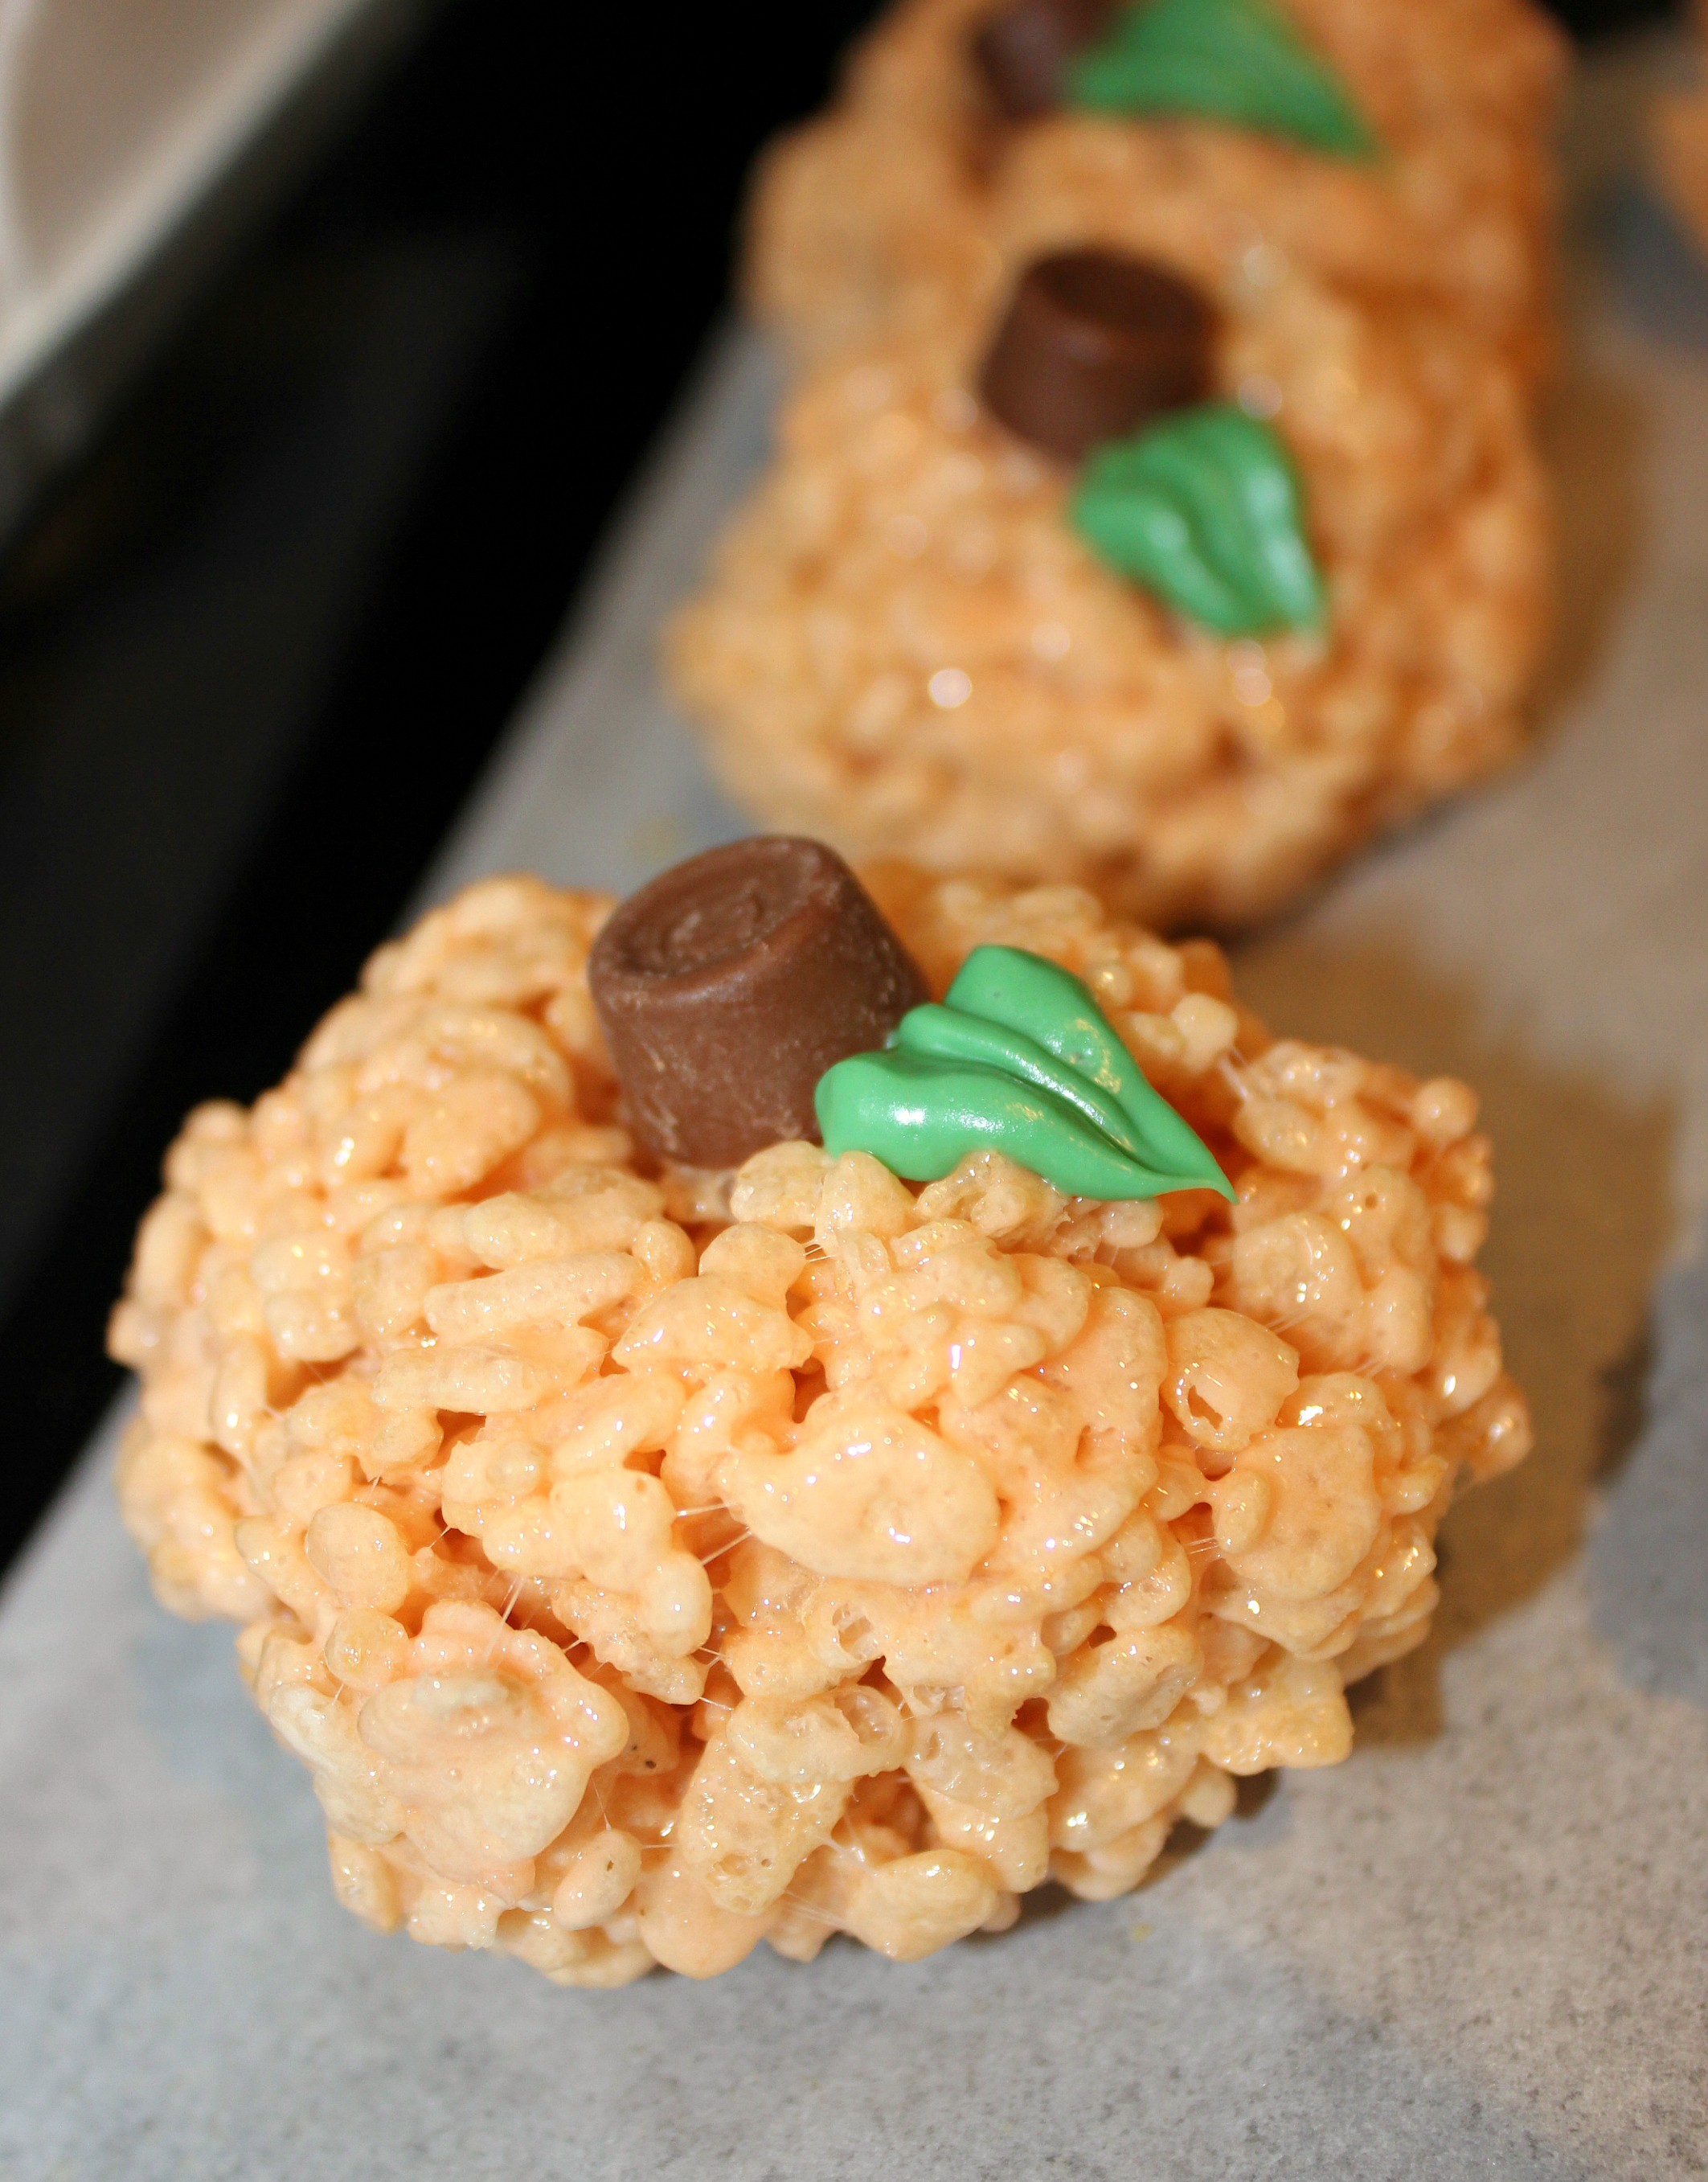
Step 7: Change to a small round tip on the piping bag and add a tendril coil to each of the pumpkins.
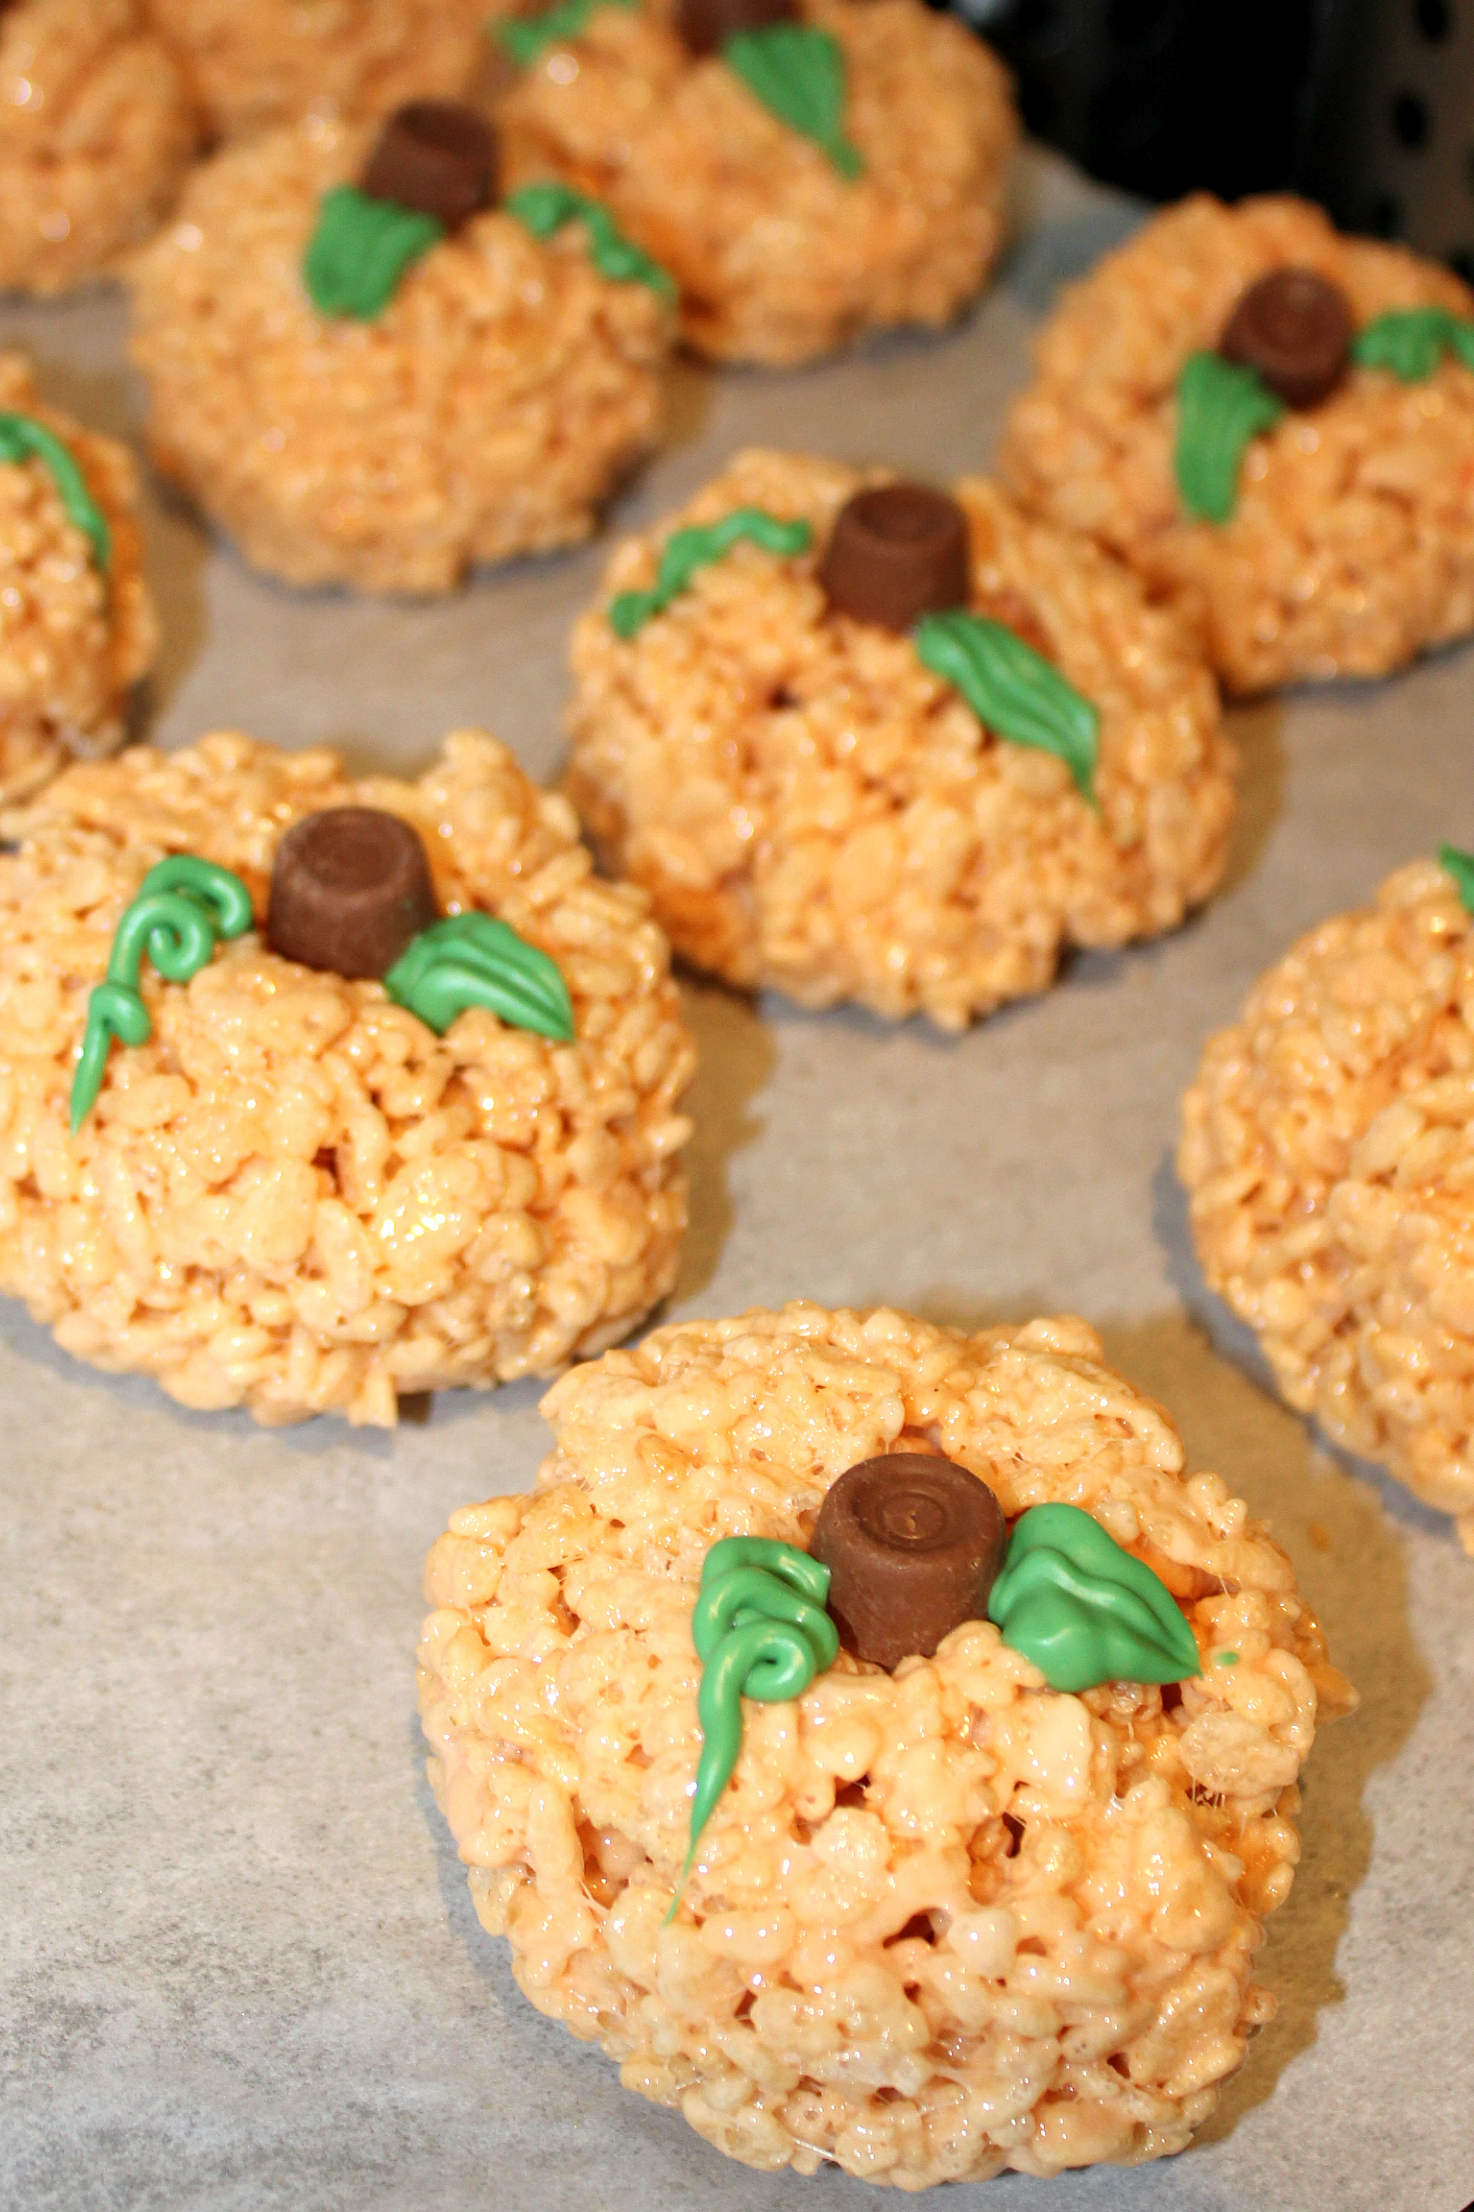
Step 8: Step back and think “hello autumn!” and allow everything to harden and set. Store in an airtight container at room temperature and then go run around embracing everything autumn and fall related!!!!
- 3 Tbsp butter
- 250g marshmallows (approx 4 cups of mini marshmallows)
- 5 cups of Rice Krispies
- 1 tsp vanilla (optional)
- Orange (or red and yellow) Wilton Gel Icing Colours
- 12 Mini Rolos
- 1/4 cup dark green Wilton Candy Melts
- Non stick cooking spray
- In a large pot melt butter and marshmallows over medium heat, stirring until nearly completely melted. Turn off heat.
- Mix in vanilla, if using, and then add colouring until as orange as you dare, keeping in mind that once the rice cereal is mixed in the colour will not be as strong.
- Working quickly, pour in the five cups of rice cereal and stir until evenly combined.
- Spray your hands with non stick cooking spray (this makes all the difference between success and a sticky mess) and start shaping the Rice Krispie mixture into balls with your hands (think making small snowballs and firmly roll into a ball between hands) and placing on a parchment lined tray
- Take a Mini Rolo and press down into the centre, creating the pumpkin shape.
- Prepare a piping bag with a medium sized leaf tip (like Wilton #69), and melt the green Candy Melts in the microwave for 30 seconds and stir. Continue in 10 second increments and stirring until completely melted. Pour melted Candy Melts into piping bag and pipe a leaf on each pumpkin top.
- Change to a small round tip on the piping bag and add a tendril coil to each of the pumpkins.
- Allow everything to harden and set. Store in an airtight container at room temperature.
Inspiration found and recipe adapted from here at Grin and Bake It
The post Pumpkin Rice Krispie Treats appeared first on Creative Sides.
]]>The post Baby Carriage Diaper Cake appeared first on Creative Sides.
]]>
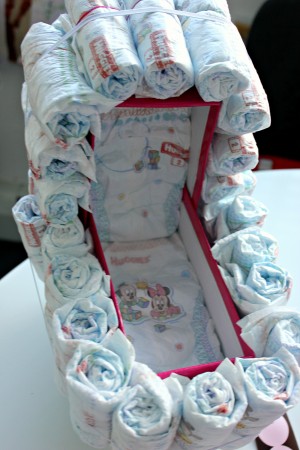
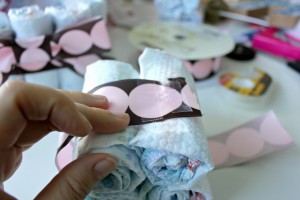
For my second attempt at turning diapers into a ‘cake’, Pinterest and I agreed on a baby carriage design. I thought it was a fun way to gift diapers to a new mom. I made sure that all the diapers were in fact usable by using elastics, ribbon and double sided tape to assemble this little carriage of diapers. So even though it looked cute at the baby shower it was actually functional in the long run as well.
 To Make A Diaper Cake Baby Carriage You Will Need:
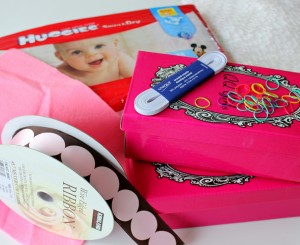
2 kids size shoe boxes (about 8″x 4″)….bigger boxes work well too, they just require more diapers and result in a larger carriage
Diapers (I used 38 Huggies size 2)
Tiny elastics (I find the rainbow loom style from the dollar store work great)
2 Large elastics or 2 lengths of elastic and two safety pins
Thick decorative ribbon
Scissors
Double-sided tape
Small doll (optional)
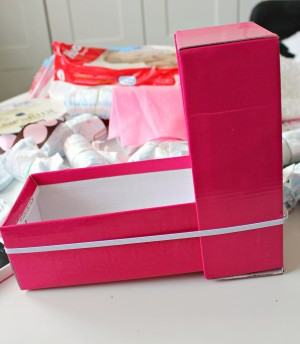
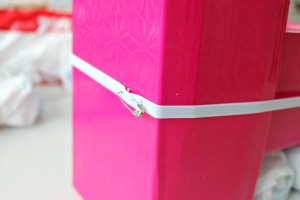
Step 1: Put one box into the other to form an ‘L’ shape. This will be the base of the carriage. Make sure the boxes are a snug fit, otherwise glue into place. Take a large, thick elastic or create your own by safety pinning two separate lengths of elastic to fit the box, one horizontally and one vertically. Attach the elastic that runs vertically first and then place the elastic that will run horizontally along the base overtop.
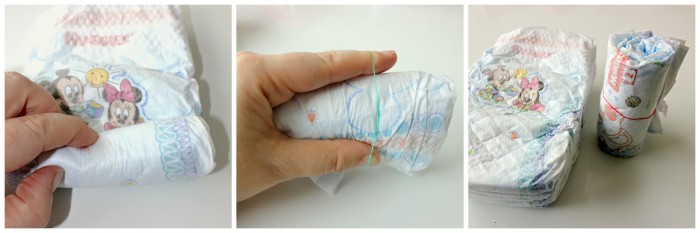
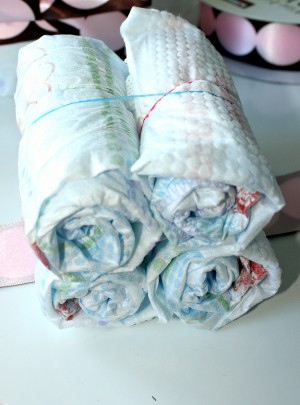
Step 2: Roll the diapers one by one and securing with the tiny elastics (white or clear work best because you don’t see them). The rainbow loom elastics work well because they are thick, if using the thinner tiny hair elastics, you may need 2 per diaper.
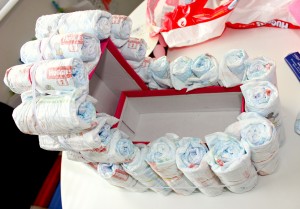
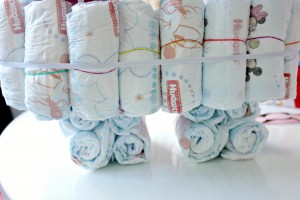
Step 3: Place the diapers around the carriage by slipping each one under the elastic around the outside of the box that forms the base of the carriage.
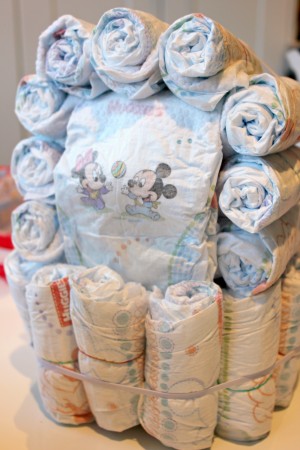
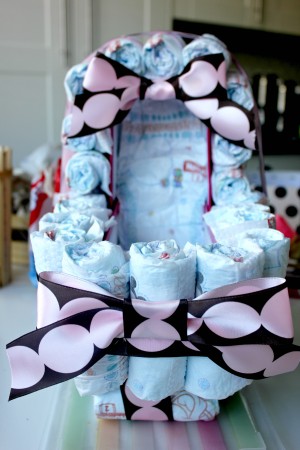
Step 4: Once the base of the carriage is covered, begin working your way up and over the top of the carriage in the same way, with rolled diapers slipped horizontally under the elastic.
NOTE: Make sure the elastic that runs vertically goes on first beneath the elastic that runs horizontally.
Step 5: Take a diaper (unrolled) and cover the exposed back of the box. Tuck in the top and bottom under the rolled diapers to secure.
Step 6: Line the inside of the carriage with two diapers.
Step 7: Next, make the wheels by putting 4 rolled diapers together with an elastic for each wheel.
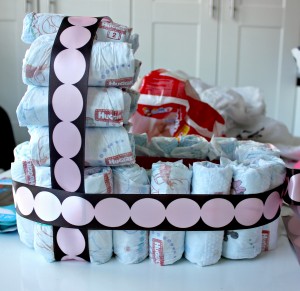
Step 8: Cut a length of ribbon long enough to wrap around the carriage and cover the elastic. Using double-sided tape attach the two ends overlapping and together, making sure to pull the ribbon tight so that it will stay in place.
Step 9: Next measure and cut a length of ribbon to cover the elastic running up and over the carriage, securing again with the double sided tape, once the ribbon has been pulled taut in place.
Step 10: Cover the elastic on the wheels with ribbon as well, and using the double-sided tape or hot glue (on the ribbon not the diapers), attach the wheels to the underside of the carriage on the exposed bottom of the box.
Step 11: Create a bow out of the ribbon by folding the ribbon into a bow shape and wrapping a 1.5″ piece of ribbon around the centre and using the double-sided tape or glue to secure in the back. Use the double-sided tape to attach to the front of the carriage.
Step 12: Using the same process, create a slightly smaller bow and attach it to the top of the carriage.
Step 13: Create a small bow for the back, I did this by attaching a clear elastic to the centre of the ribbon and then attaching to the back with more double-sided tape (this is the only diaper that actually had something adhered to it, because I wanted them all to be usable).

Step 13: Lastly, and this is optional (unless you are my daughters in which case this step becomes completely mandatory), add a small doll to the carriage 
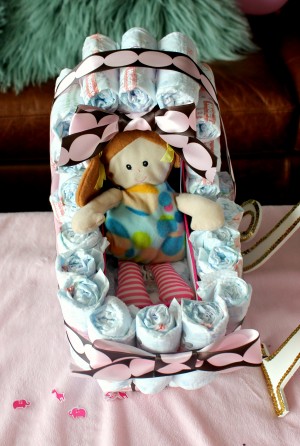
And there you have it, a mini baby carriage out of diapers!!
Inspiration for this design came from www.myloveofstyle.com
This post may contain affiliate links. See our disclosure policy for more information.
The post Baby Carriage Diaper Cake appeared first on Creative Sides.
]]>The post DIY Wooden Letter Monogram appeared first on Creative Sides.
]]>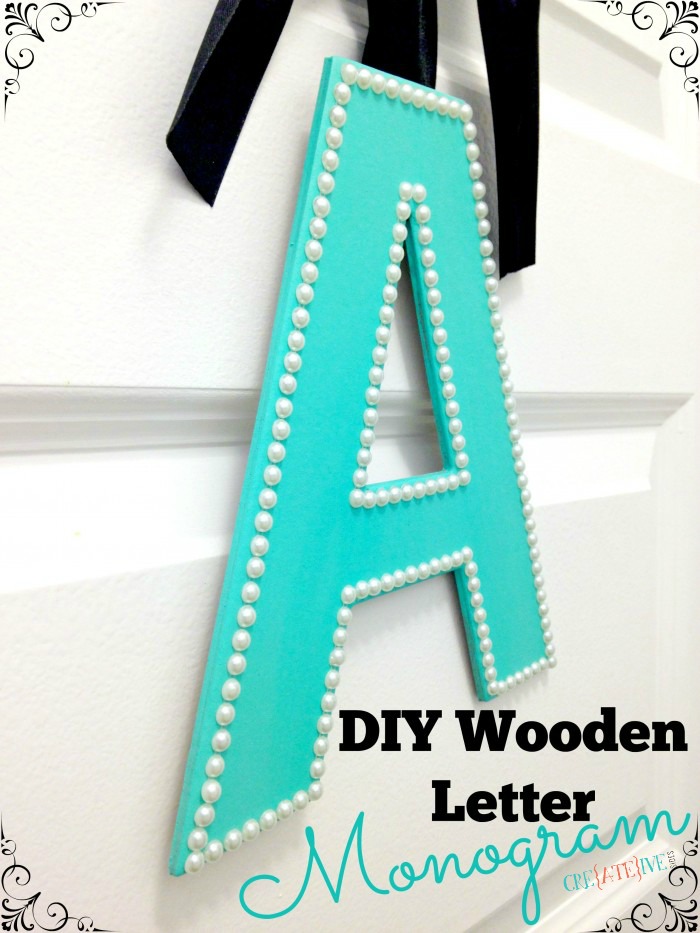
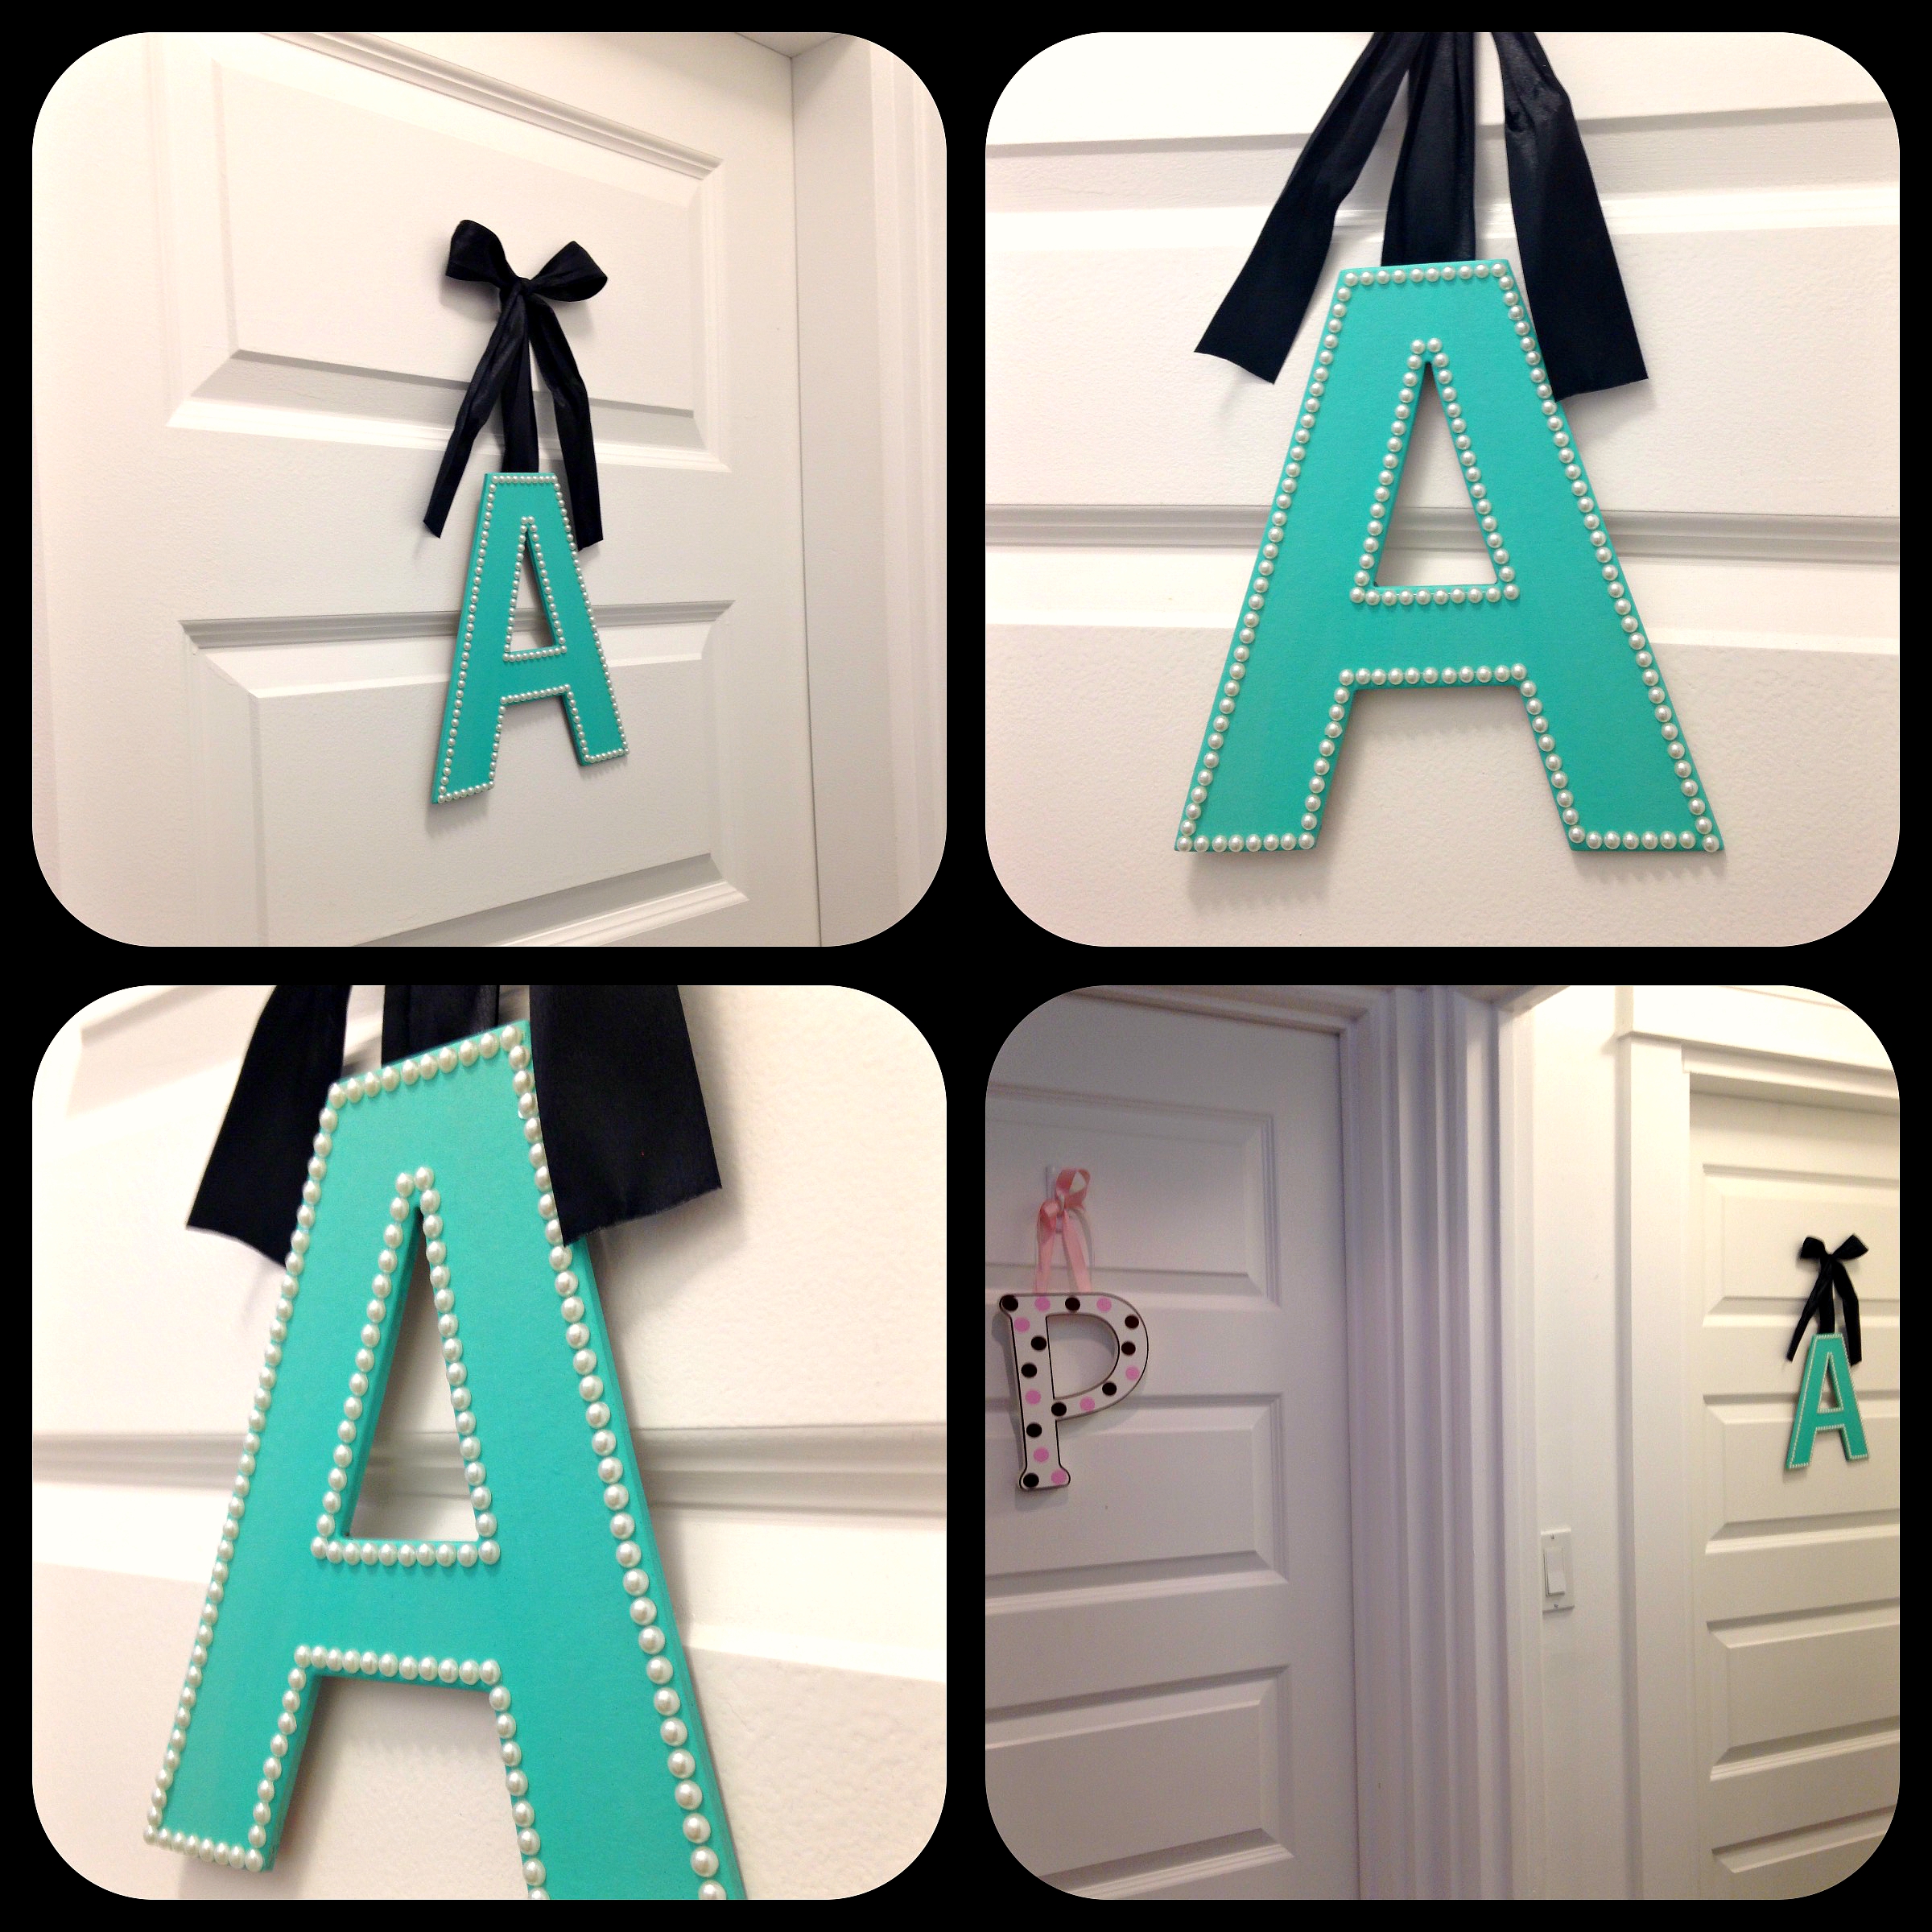
I am really rather taken with monograms and initials. I don’t really know why, it seems kind of silly really, but I have different letters and initials up all over our place. So even though it’s not a true ‘monogram’, both of my girls have the first letter of their names on their bedroom doors. Now after three years of searching for just the right ‘A’ for my younger daughter’s bedroom door, I decided to make one myself. Delightedly it only cost me about $3 in supplies. But to be perfectly honest, I could not endure the conversation regarding why the letter ‘P’ on her older sister’s bedroom door was larger than her letter ‘A’ again. Really, seriously not again. I don’t believe words could even do justice to conveying the grave importance Acacia felt this held. Of course her door had a letter ‘A’ on it (I am not a monster), but it was in fact smaller than her sister’s (and all the sparkles in the world couldn’t change that).
So a whole $3 dollars lighter and prompted with the motivation to never have to discuss this again (heaven forbid the older sister has something the little sister has not), I embarked on this incredibly simple project. I have to admit I am very pleased with the way it turned out. More importantly Acacia was over the moon happy and actually gasped out loud when I surprised her with it on her door! Thus freeing up more time for never ending conversations regarding more important things like why is the sky blue and how rainbows are made and why when we cut our own hair, it will not grow back the next day…. (and of course my personal favourite of why I won’t buy her a unicorn).

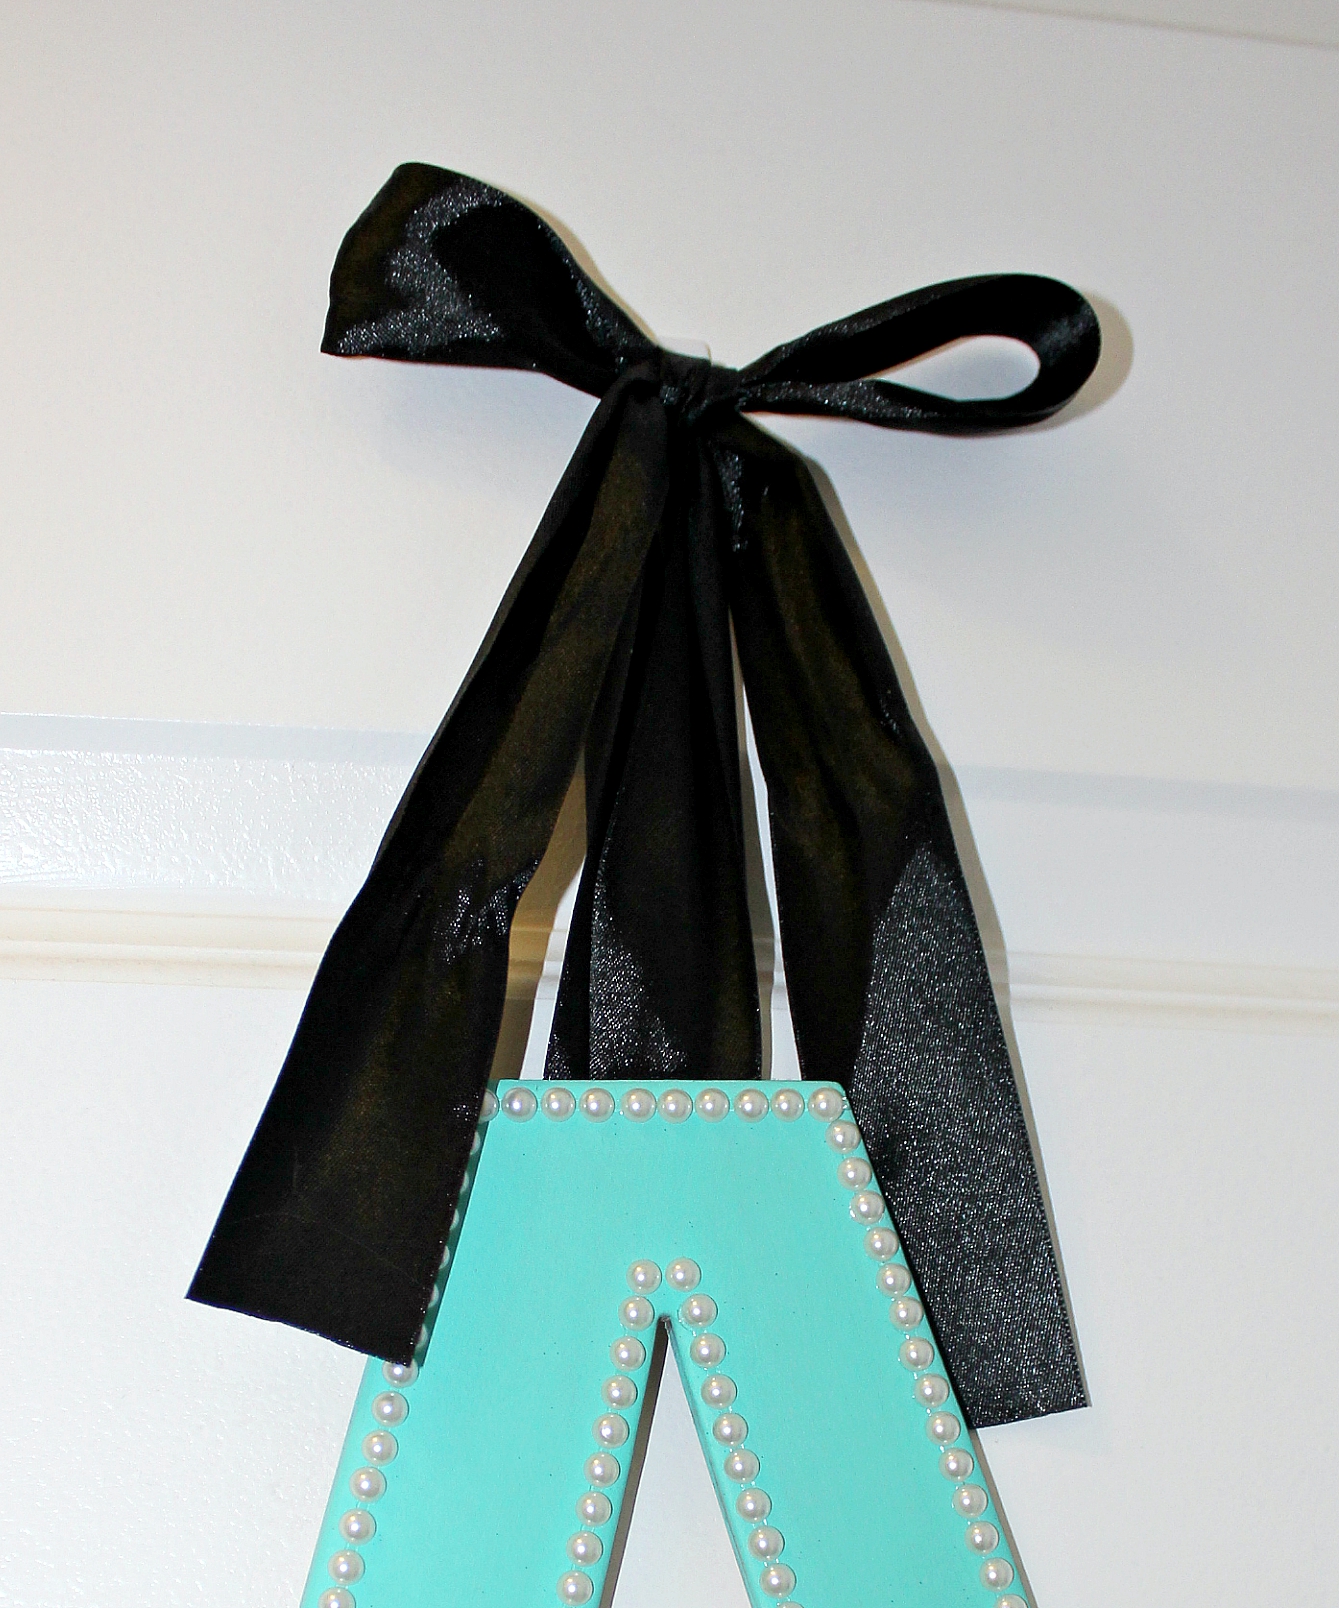
My love of all things Tiffany’s was the inspiration in both my colour and style choice. The actual ‘A’ and paint were found at Michaels (in the sale section at about .50 cents each if I remember correctly). The ribbon I already had, but can also be found at Michaels or Fabric Land. As for the pearls, they were stickers from Dollarama, making this project a breeze!
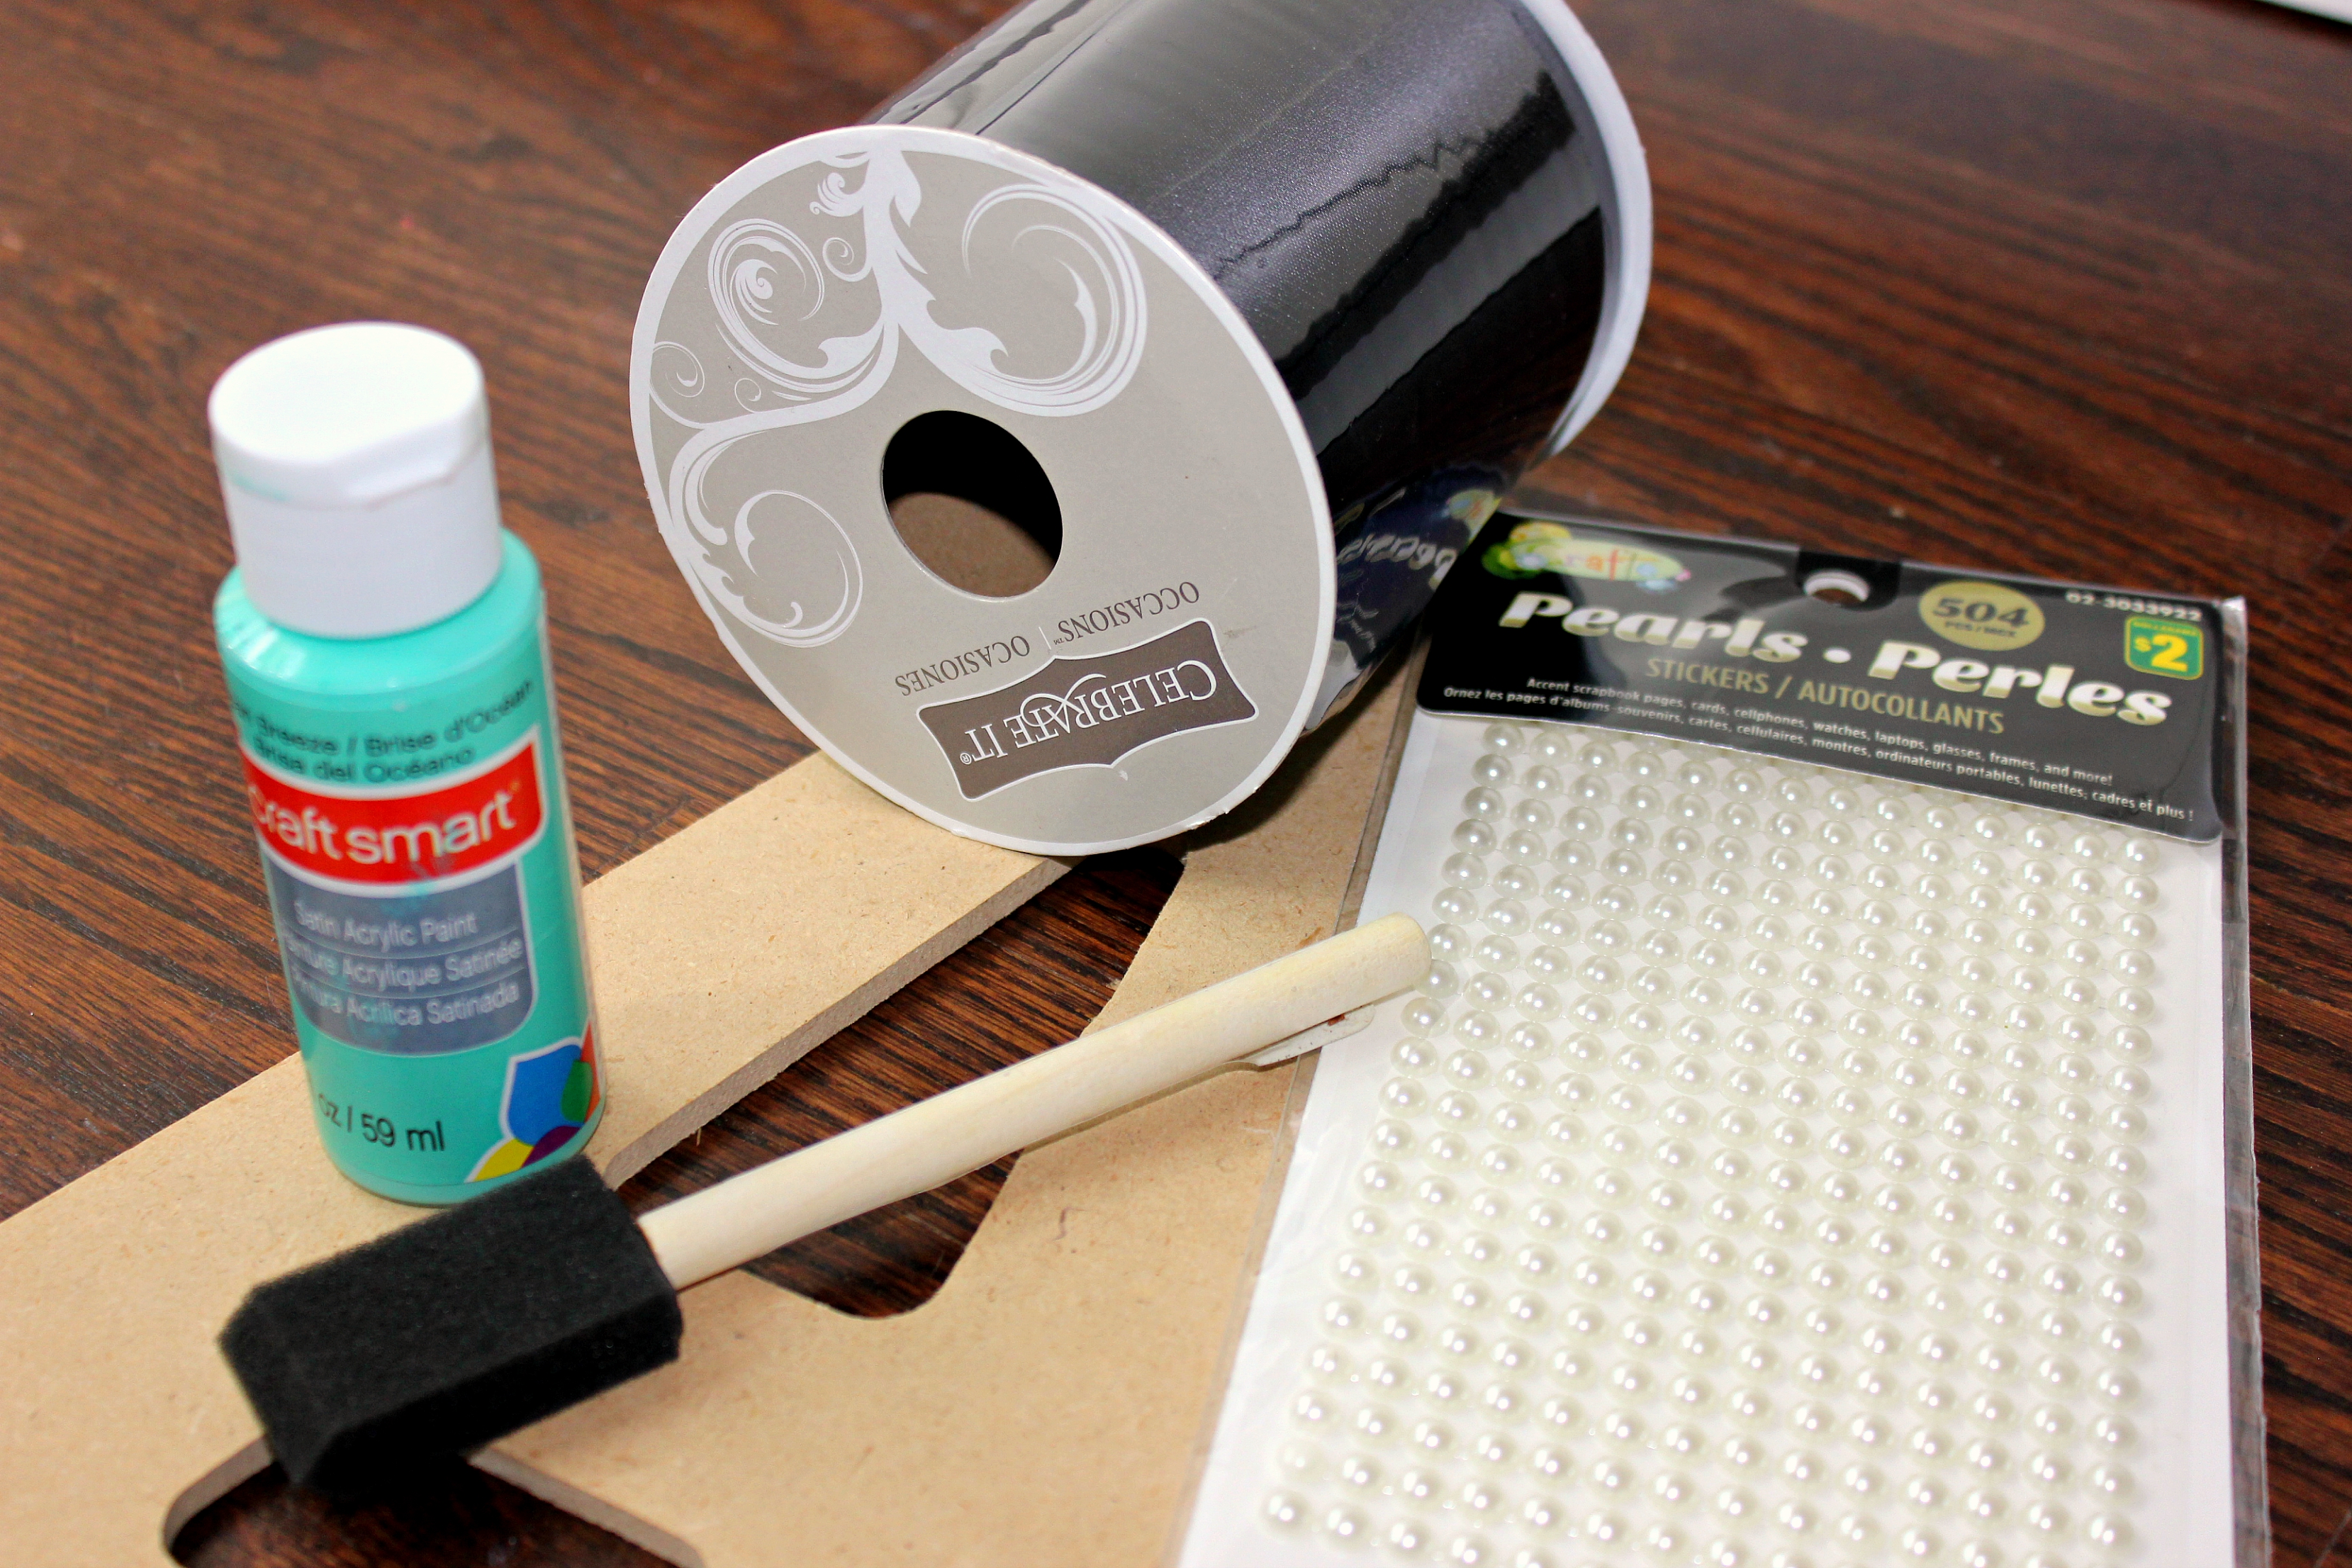
For a similar project you will need:
A wooden letter
Craft paint (I used craft smart satin acrylic paint in ocean breeze)
A foam paint brush
Embellishments (I chose pearl stickers)
Ribbon
Hot Glue Gun (or craft glue)
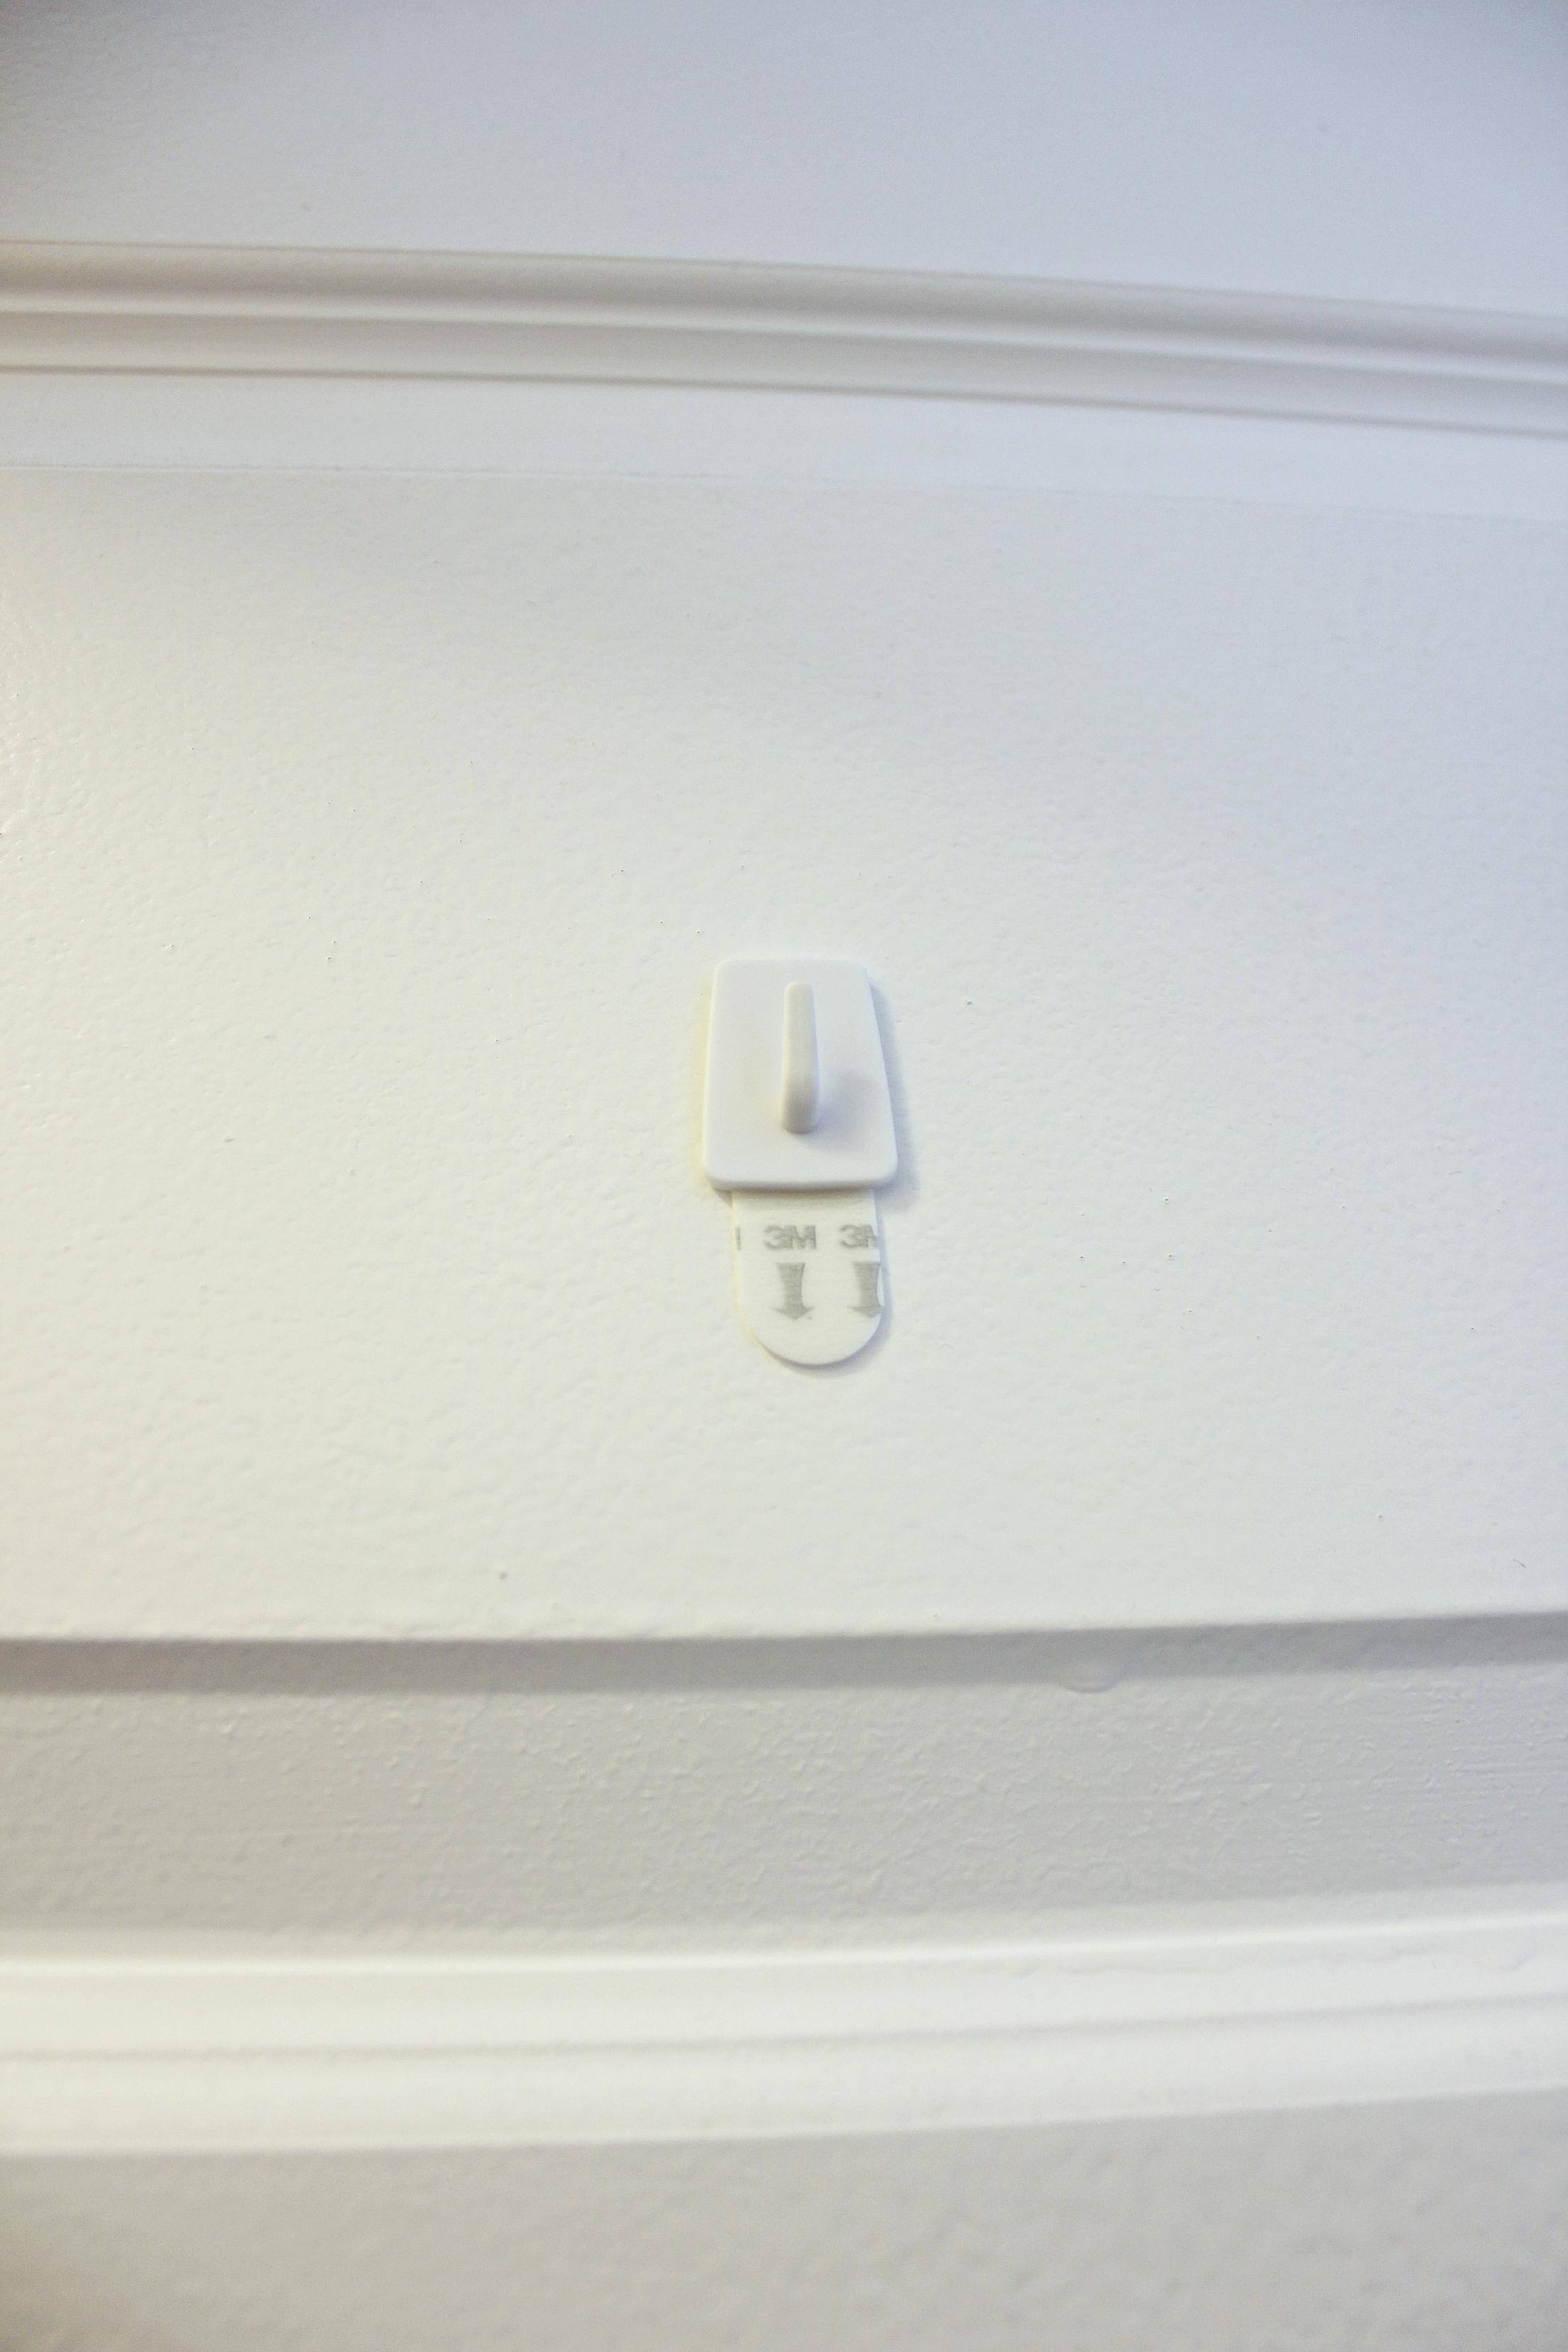
A hook (I went with a small Command Damage-Free hook so as to not leave a permanent mark on the door)
Scissors
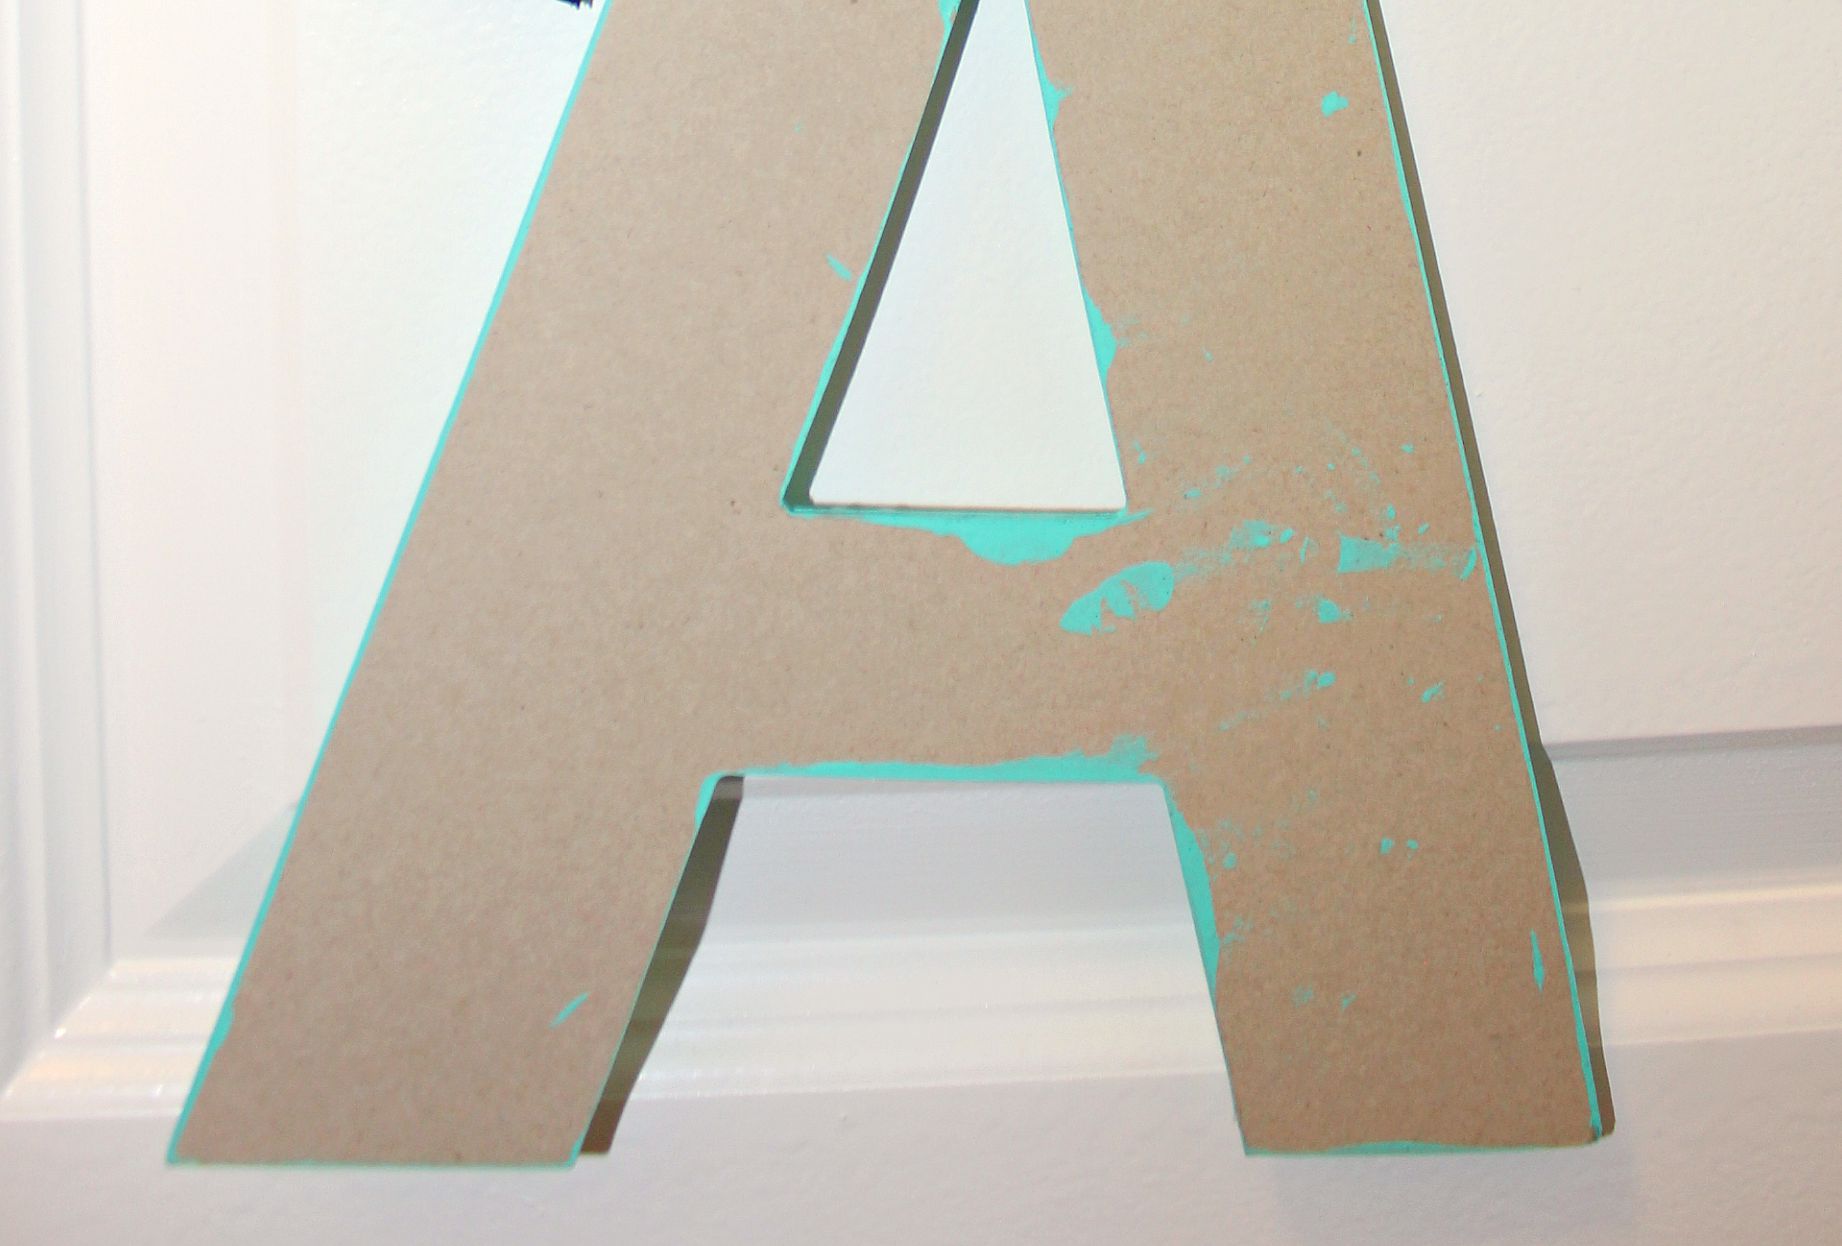
Step 1: Paint the letter, starting with the sides. I used two coats of paint, allowing the letter to become ‘dry to the touch’ in-between coats (this really only took a few minutes). Then allow to dry completely (if it is not completely dry the stickers will not adhere properly in the next step).
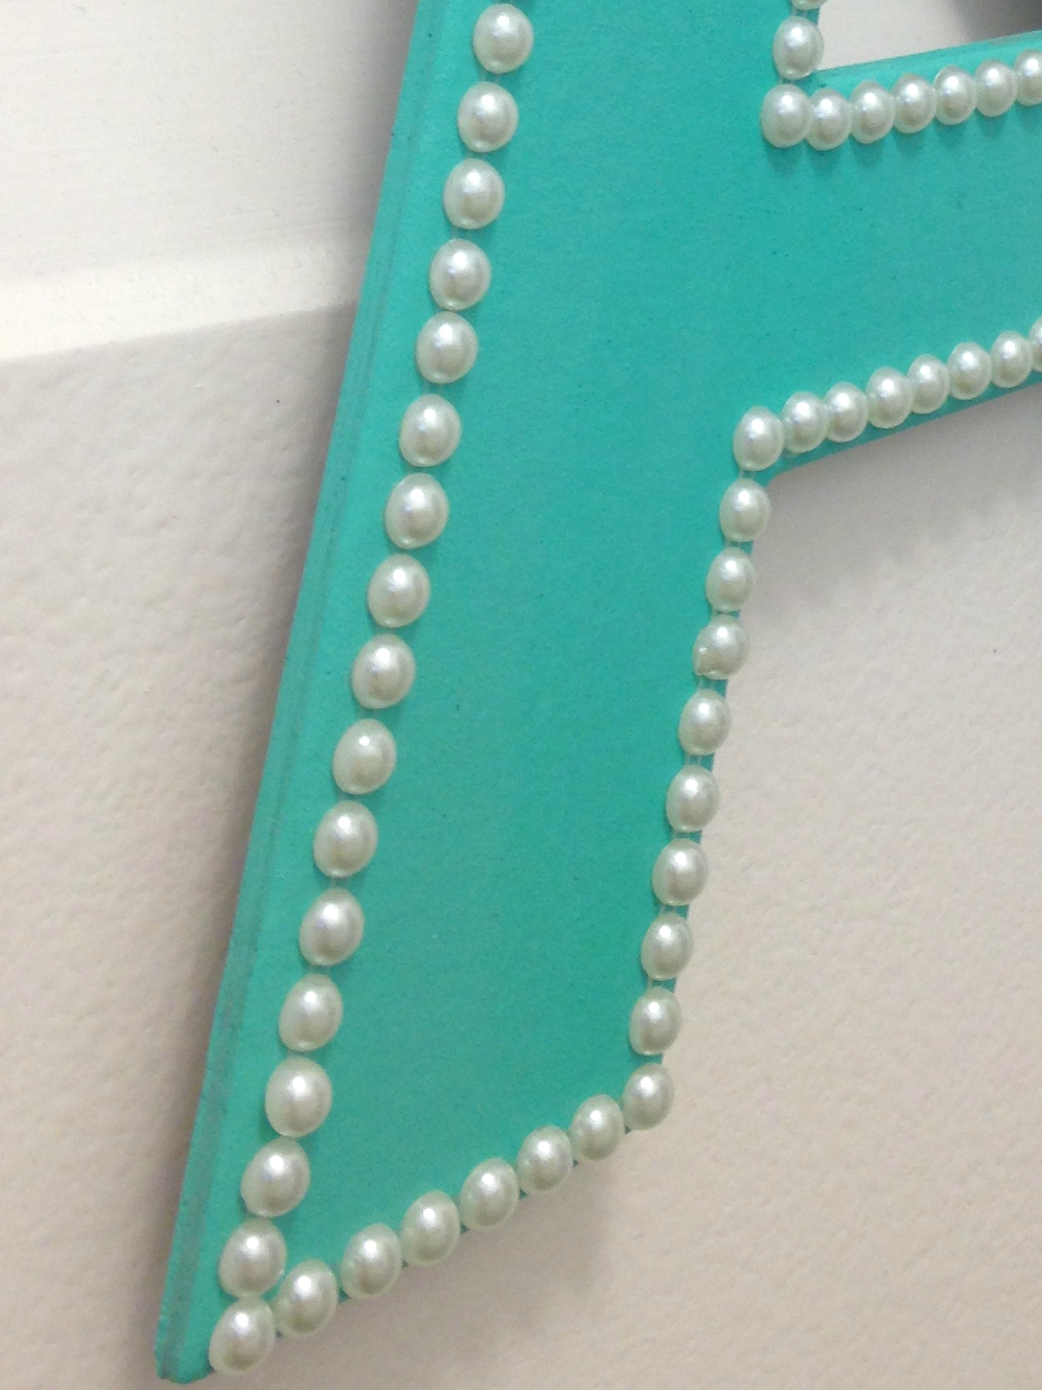
Step 2: Once completely dry, outline the letter in pearls. Following the shape of the letter, lay the pearls down just inside the edge. My ‘pearls’ came in sticker form, with 14 in a row on a clear sticker backing. I trimmed the stickers to fit with scissors (cutting the sticky plastic backing not the pearls themselves), especially on the corners, trying to get as uniform a look as possible.
Step 3: Cut a length of ribbon. I cut a length of about 36 inches. Fold in half at the centre point and glue to the back of the letter top and centre (so it will hang straight). I used my glue gun for this and it was quick and easy.
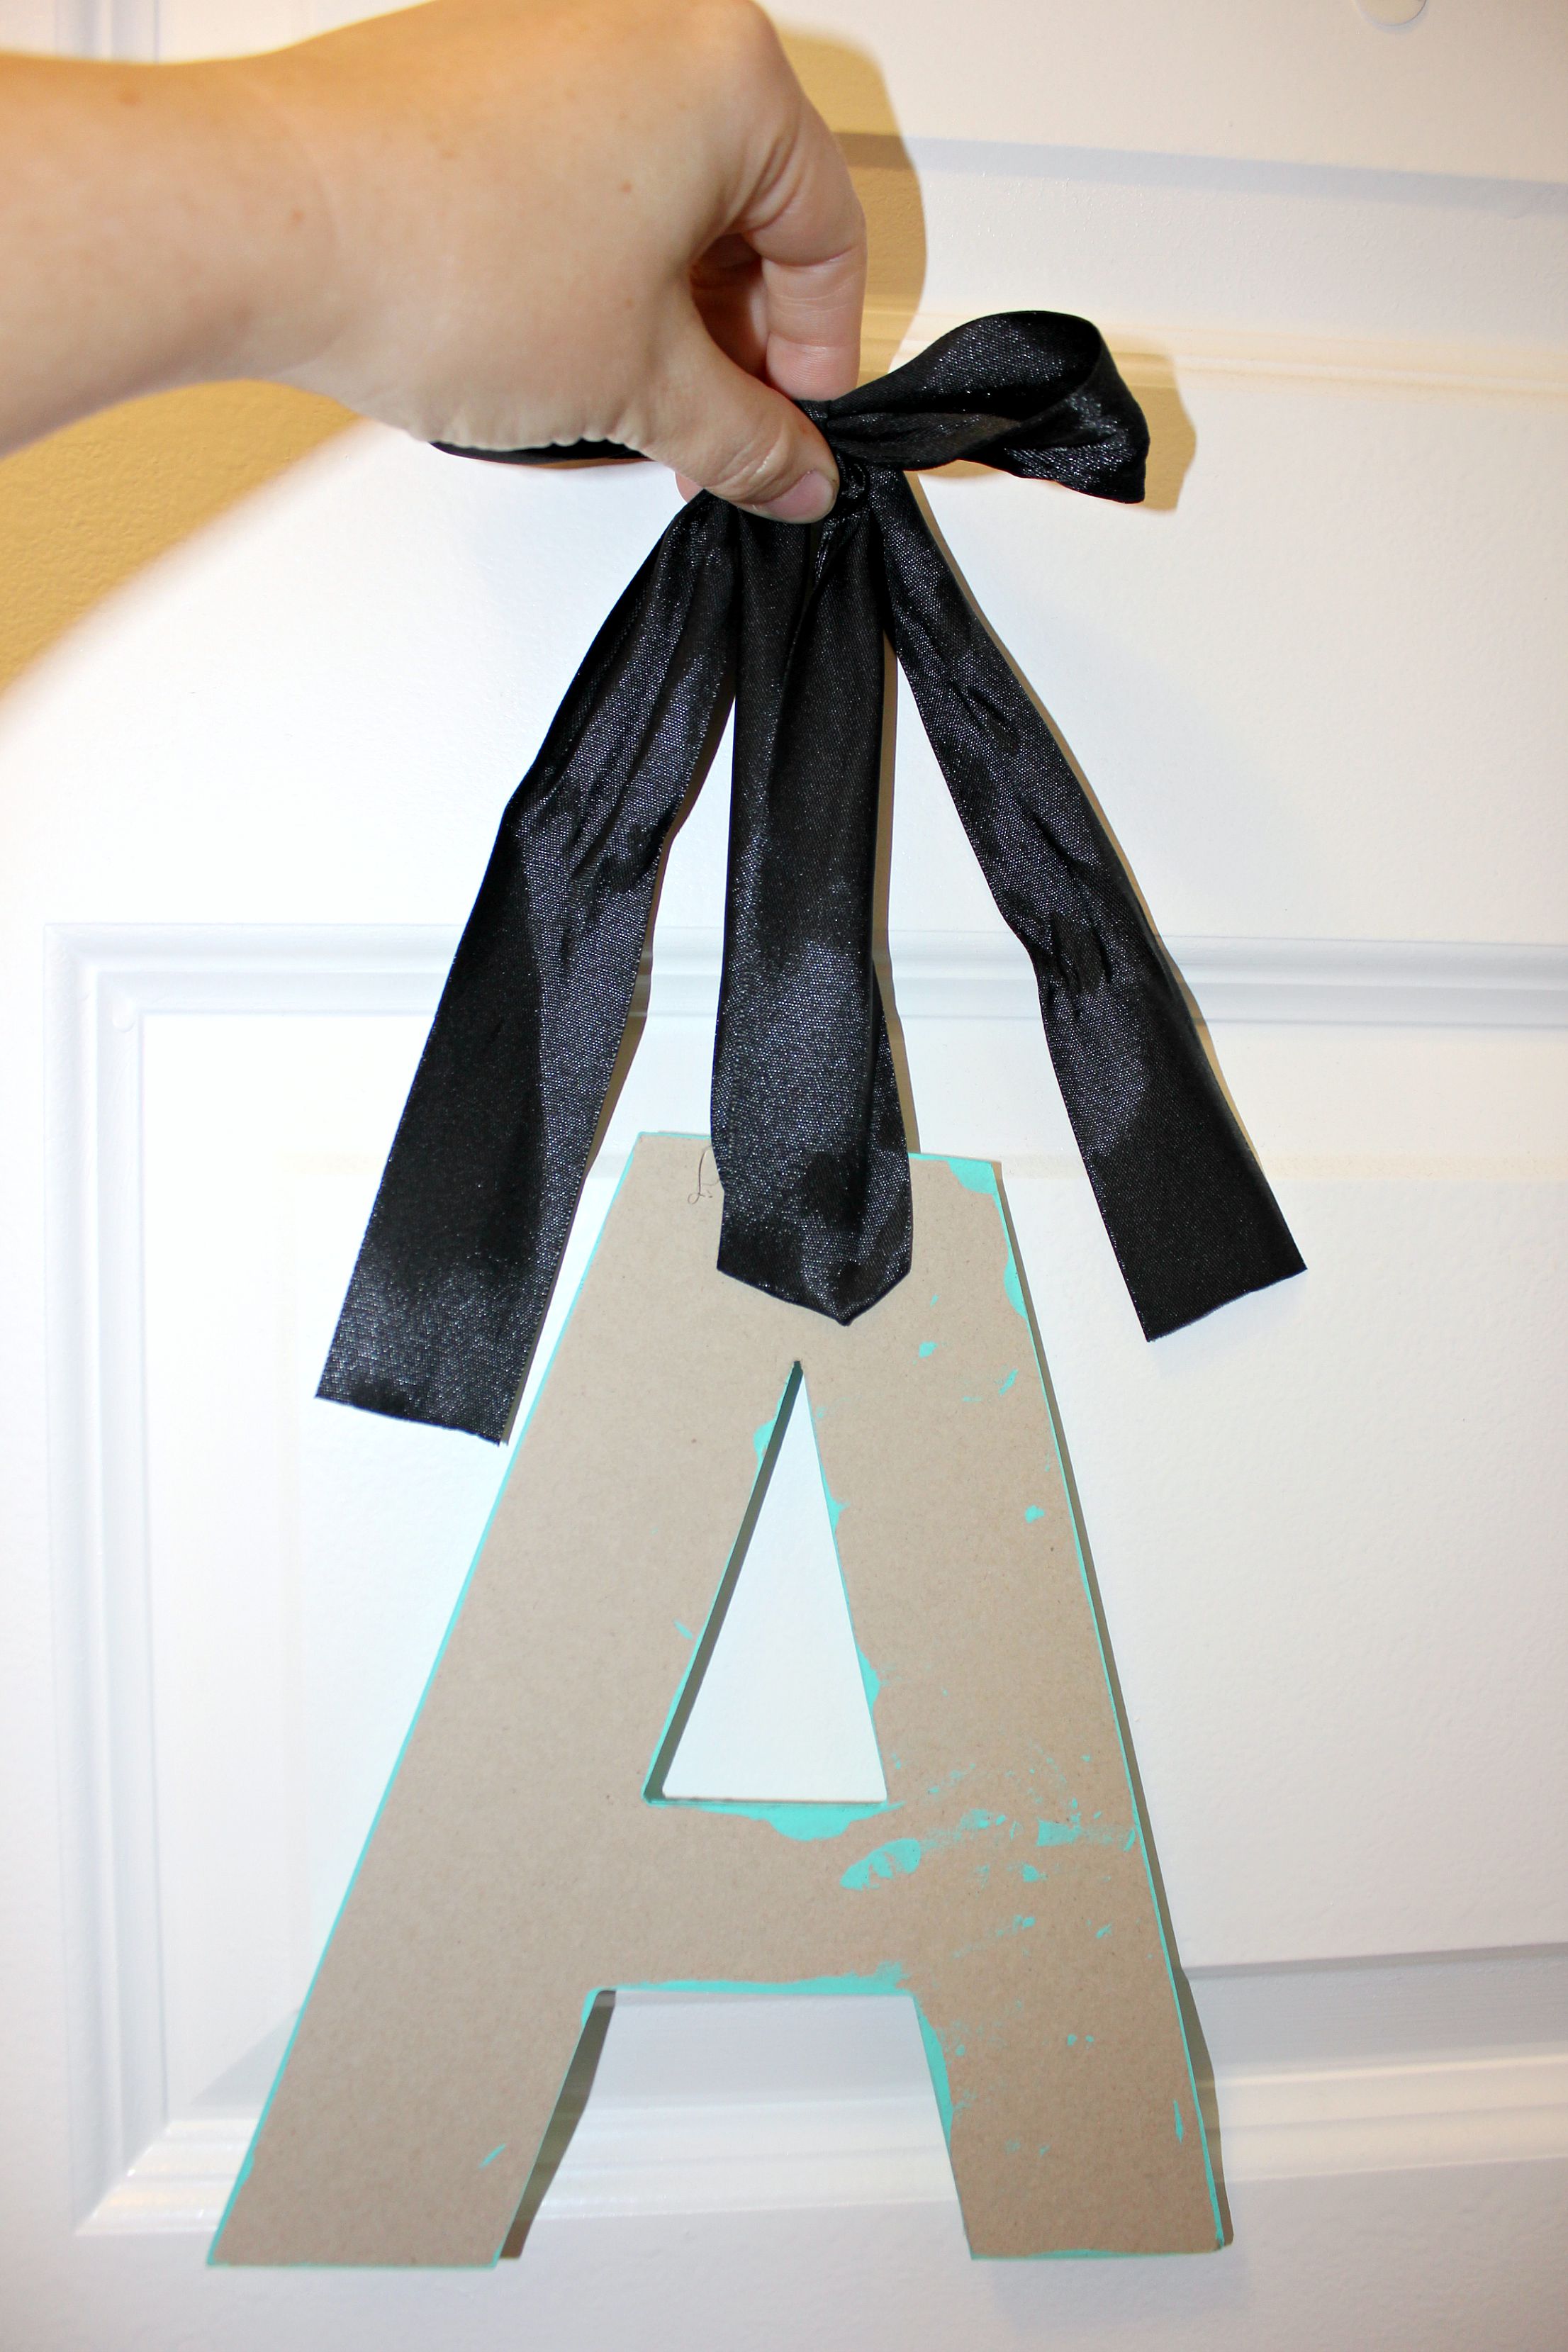
Step 4: Leaving the desired length of ribbon, tie into bow at the top. Trim the edges of the ribbon so they hang evenly and are not frayed.
Step 5: Attach the hook to the door (following the directions that come with the command hooks, if using) and hang up the letter by the bow.
Step 6: Step back and admire your handy work and allow your child to gasp in glee!
This post may contain affiliate links. See our disclosure policy for more information.
The post DIY Wooden Letter Monogram appeared first on Creative Sides.
]]>The post S’mores Campfire Cake appeared first on Creative Sides.
]]>
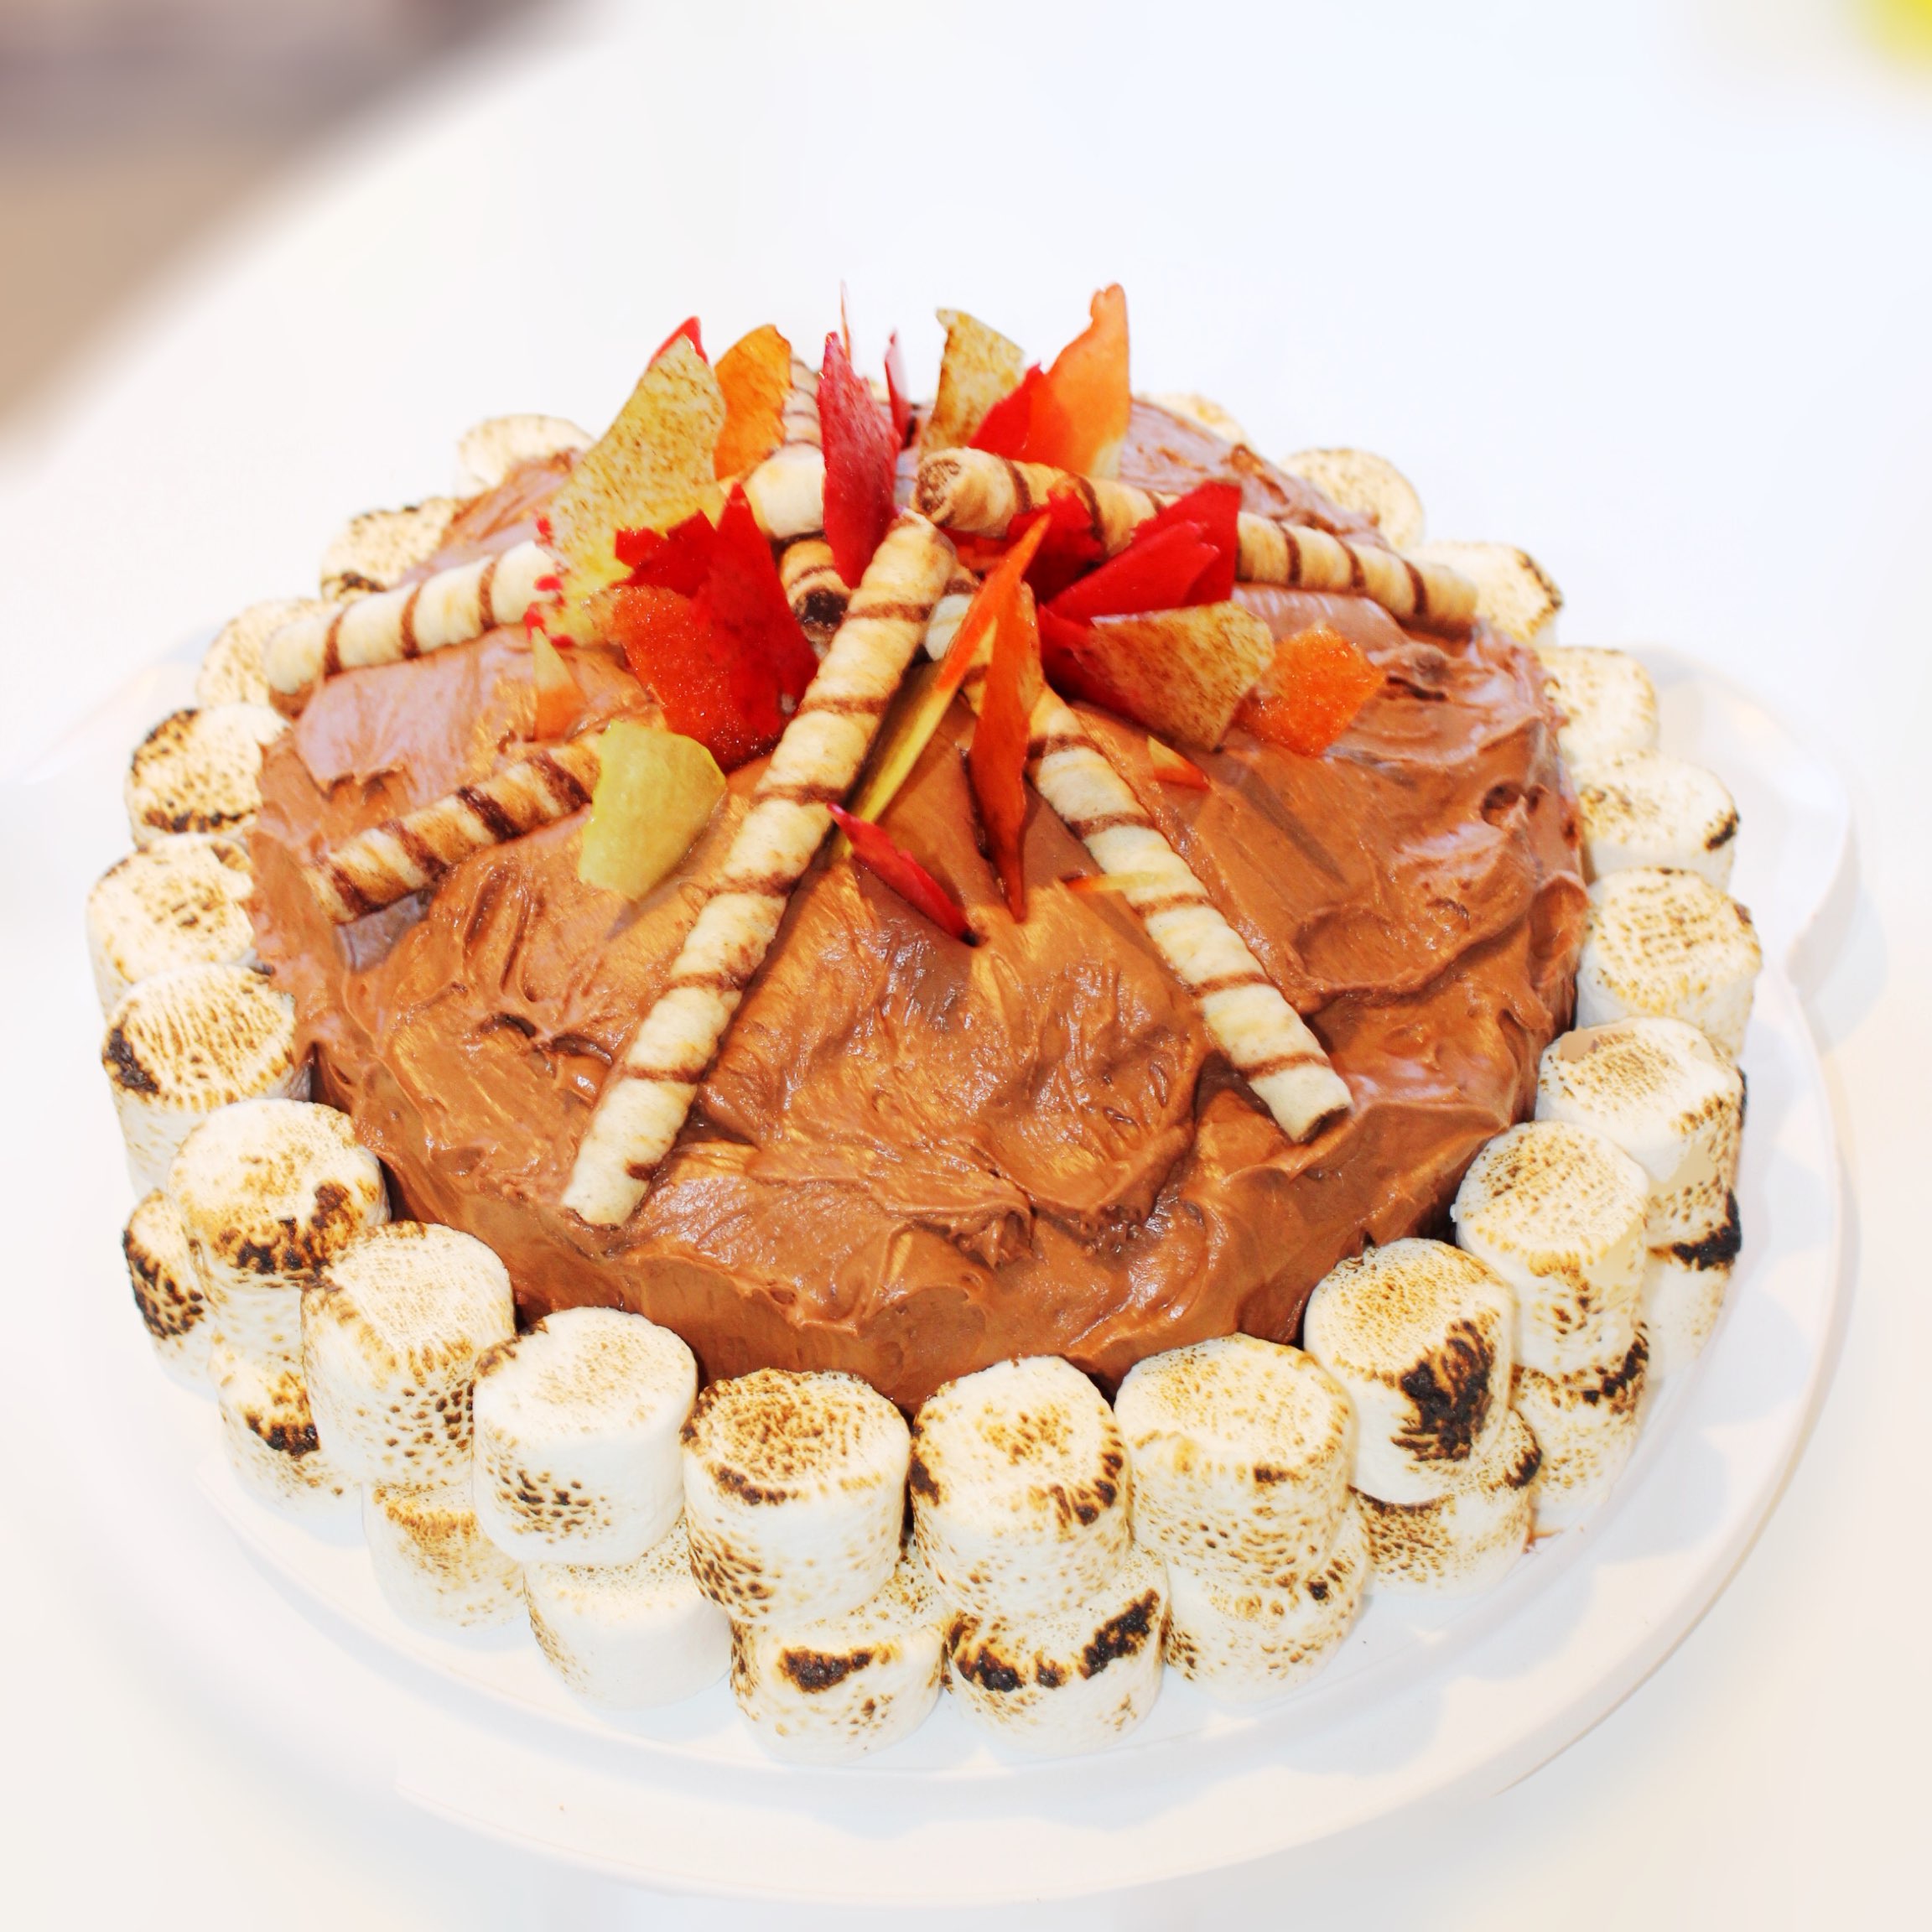
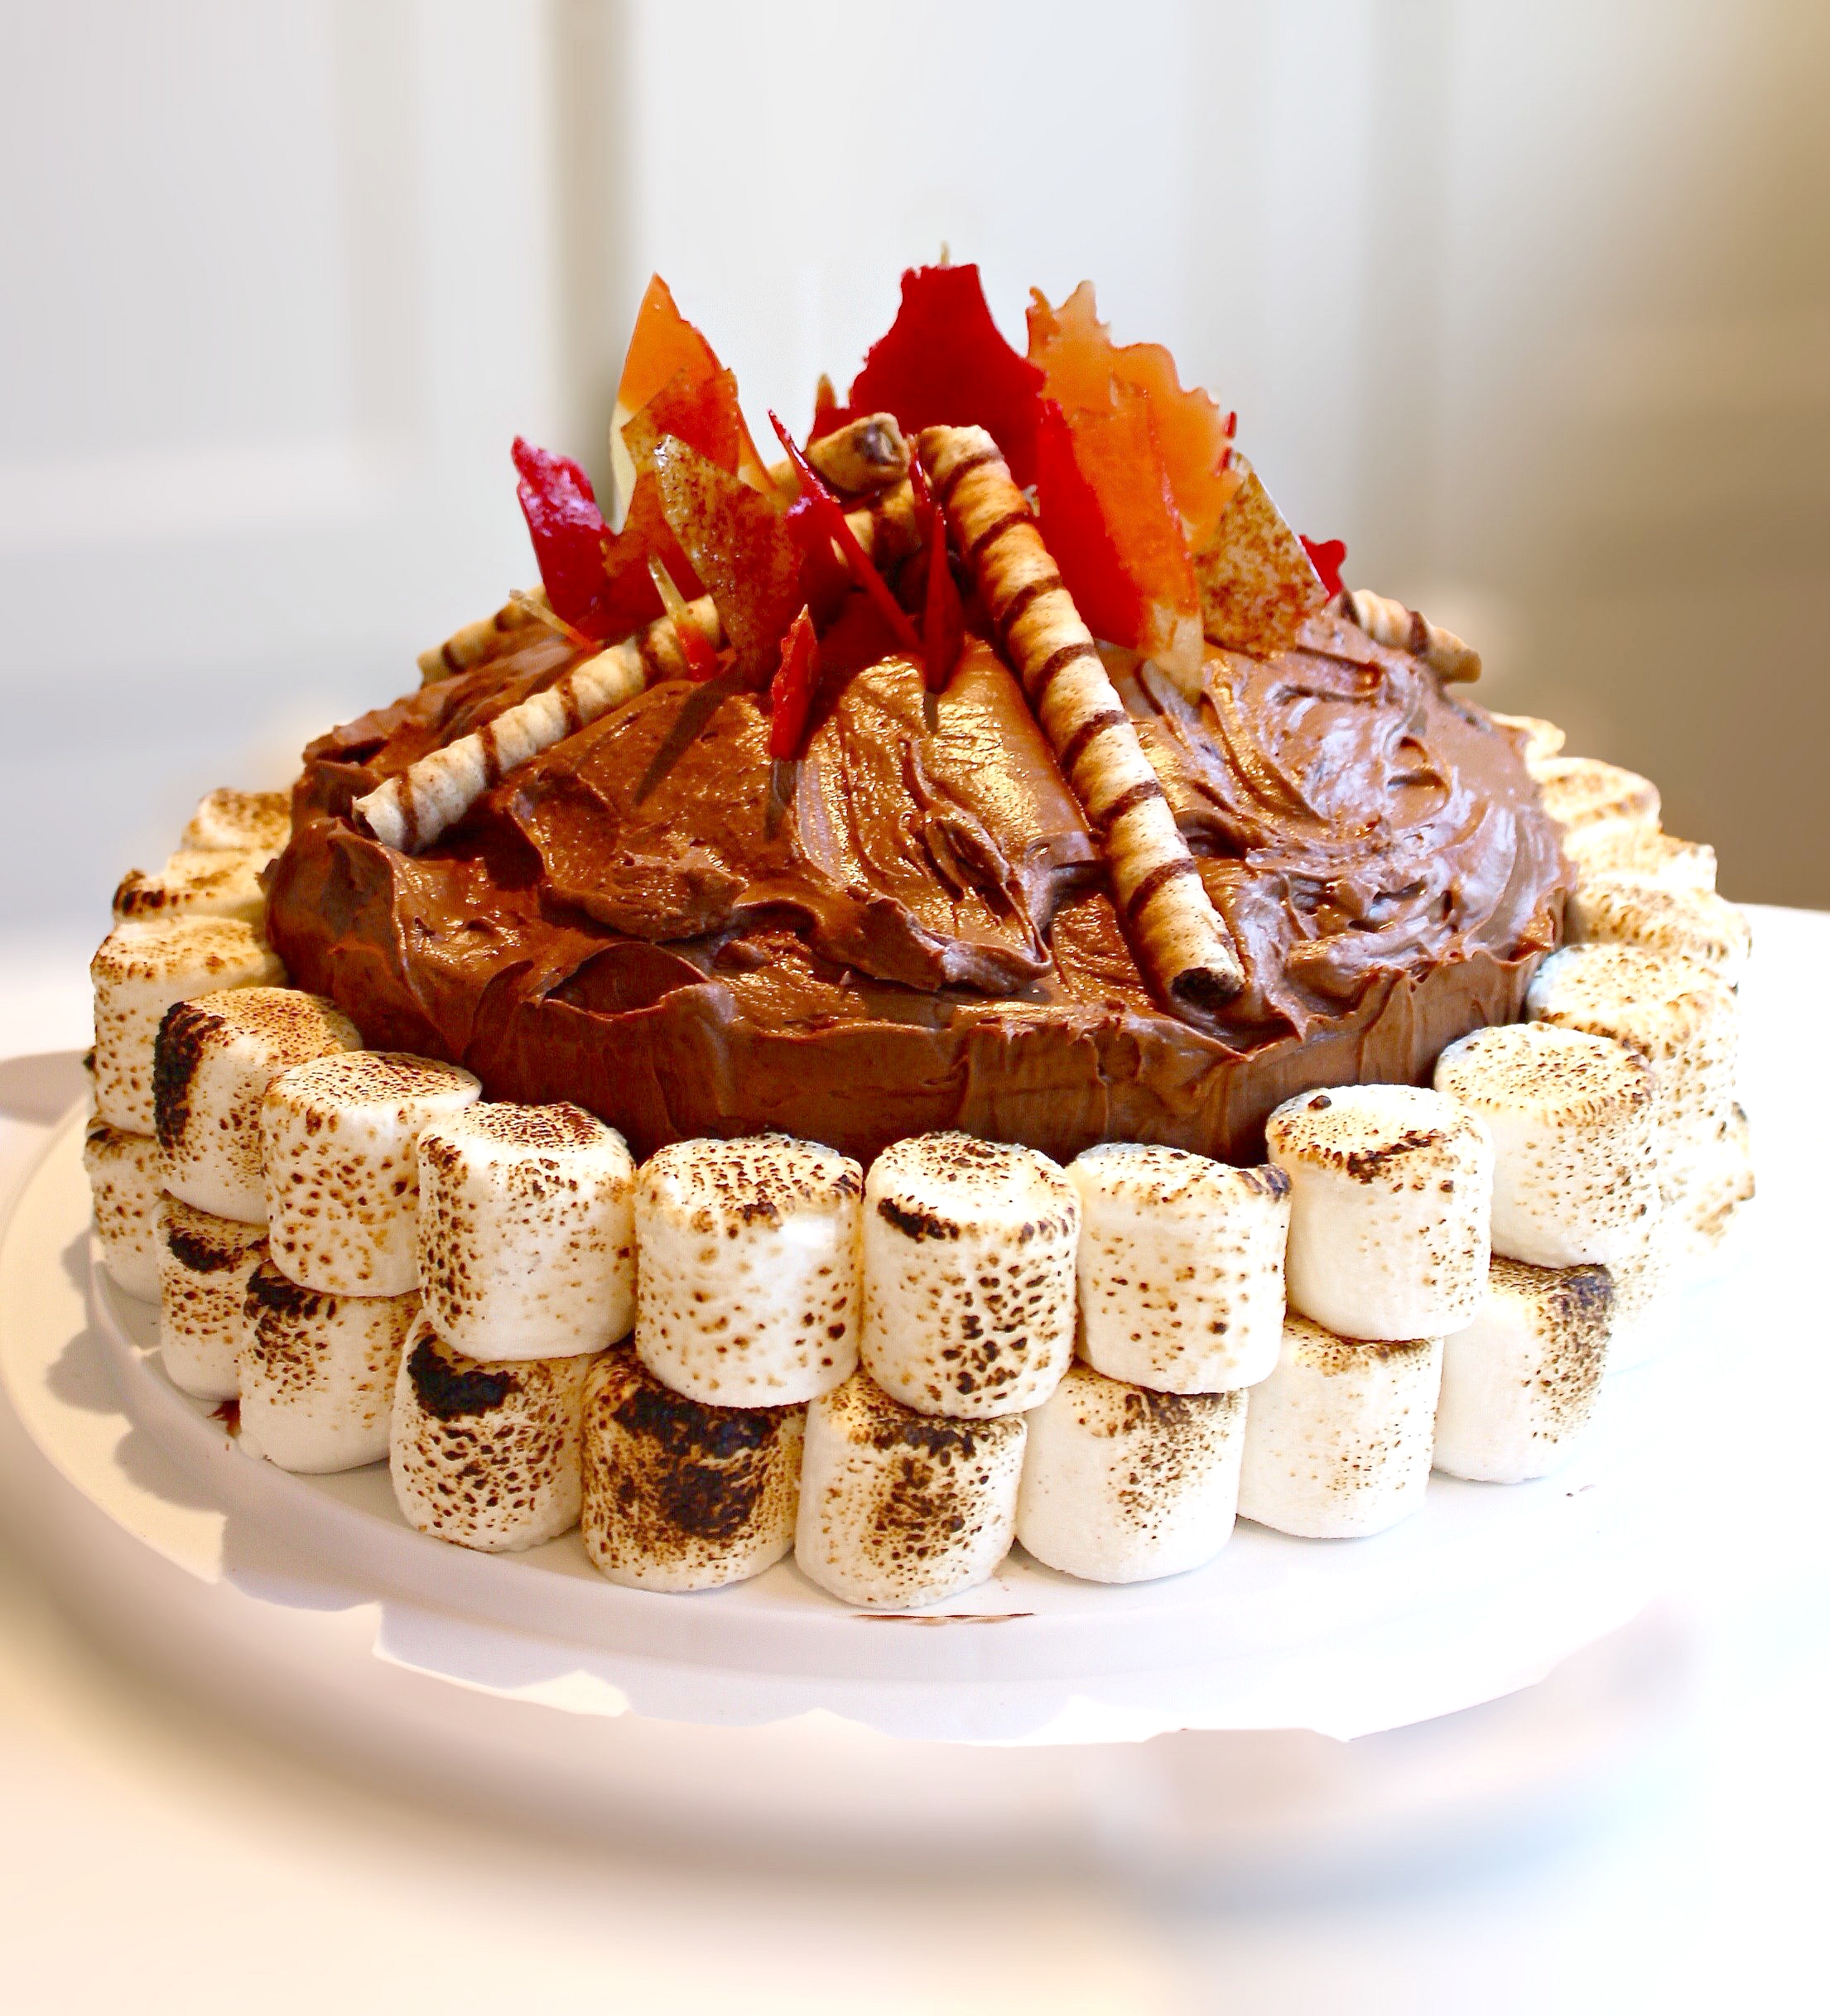
Every couple of years my husband’s (large, loud, fun) family has a reunion. Everyone gets together and camps, all 70 plus of us. I call it ‘Let’s Go Camping With the Crawfords!’ Unfortunately you have to understand something – I am a city girl. I am not saying I am proud of it (ok, I sort of am), but prior to our wedding I had never actually seen anyone outside of the movies wear cowboy boots. Not for real at least. But you learn fast that telling your husband’s uncle “I like your high heeled, snake skin boots!” will not make you any friends. Really the only thing worse is accidentally screaming when you unknowingly step on the head of the bear skin rug. Yup. There was actually an honest to goodness conversation regarding whether we would have an arm wrestling contest at our wedding or not. We did not (the gift opening was a different story mind you). So, clearly I have a lot of making up to do in many ways. Thirteen years later, cowboy boots and hunting are still not on my horizon, so how will I do that? Through food of course (and my winning personality…).
Even though both my parents were originally from small towns, we never once went camping. Not ever. Hawaii yes, camping no. My first camping experience was as a teen with a friend’s family. So I think it’s safe to say I do not come across it naturally. And to say I feel a little out of my element is an understatement. But that does not stop me from trying (and this will be the first reunion where I won’t have a new baby…. hello 34 degree weather and no nursing!!!). So with both kids clad in adorable cowgirl boots and hats, we will show up with this cake and leave the arm wrestling to hubby!
S’mores Campfire Cake
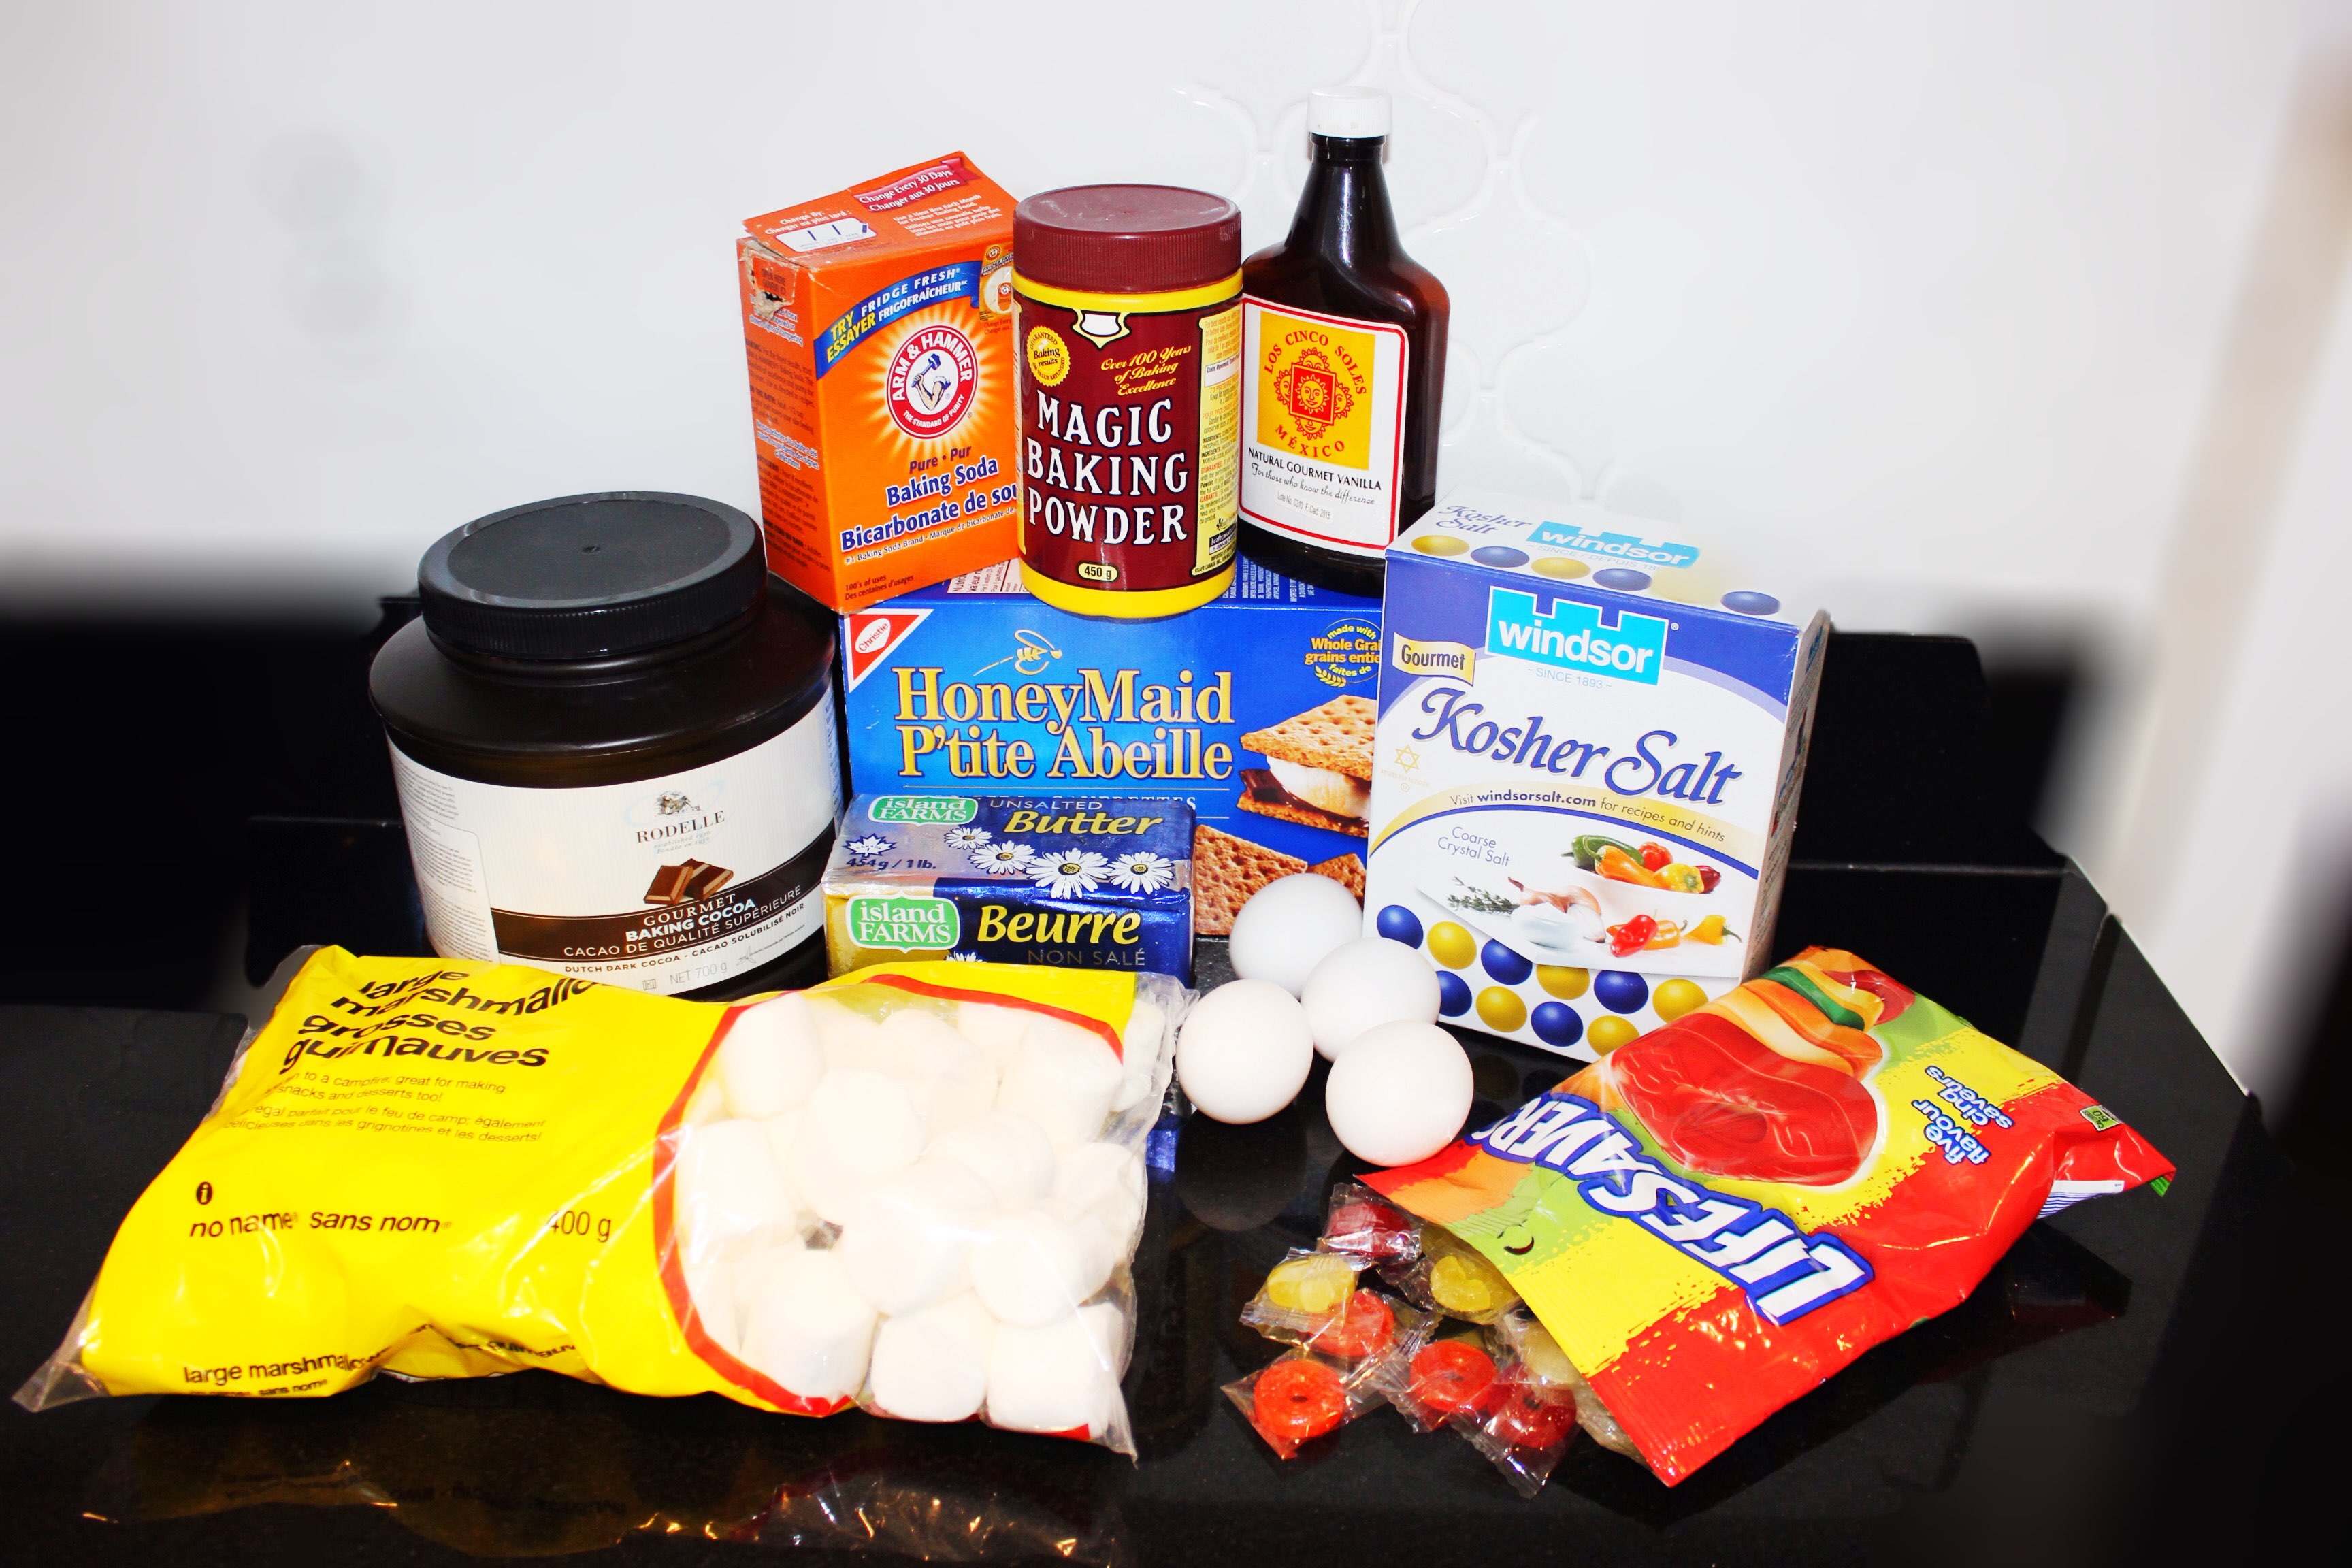
Items Needed:
Brown Butter Graham Cracker Crust
18 Large Graham Crackers
1/2 cup Granulated Sugar
1/2 teaspoon Windsor Kosher Salt
3/4 cup (12 Tbsp) Unsalted Butter
Dark Chocolate Cake
2 cups Boiling Water
1 cup Rodelle Gourmet Baking Cocoa (Dutch process cocoa powder)
1 cup soft Unsalted Butter
2 1/4 cups Sugar
4 large eggs
1 Tablespoon vanilla
2 3/4 cups All Purpose Flour
2 teaspoons Baking Soda
1/2 teaspoon Baking Powder
1/2 teaspoon Windsor Kosher Salt
Chocolate Ganache
2/3 cup Hershey’s Milk Chocolate Chips
1/2 cup Whipping Cream
Chocolate Frosting
1 cup Hershey’s milk chocolate chips
1 cup Hershey’s semi-sweet chocolate chips
1/2 cup Unsalted butter
1 cup Arvand double creme yogourt
4 1/2 cups Icing Sugar
1 teaspoon vanilla extract
Campfire Decorations
18 Lifesavers hard candies in red, yellow and orange
400g bag of Large Marshmallows (about 50 individual marshmallows)
Crème Roulée European style rolled wafers
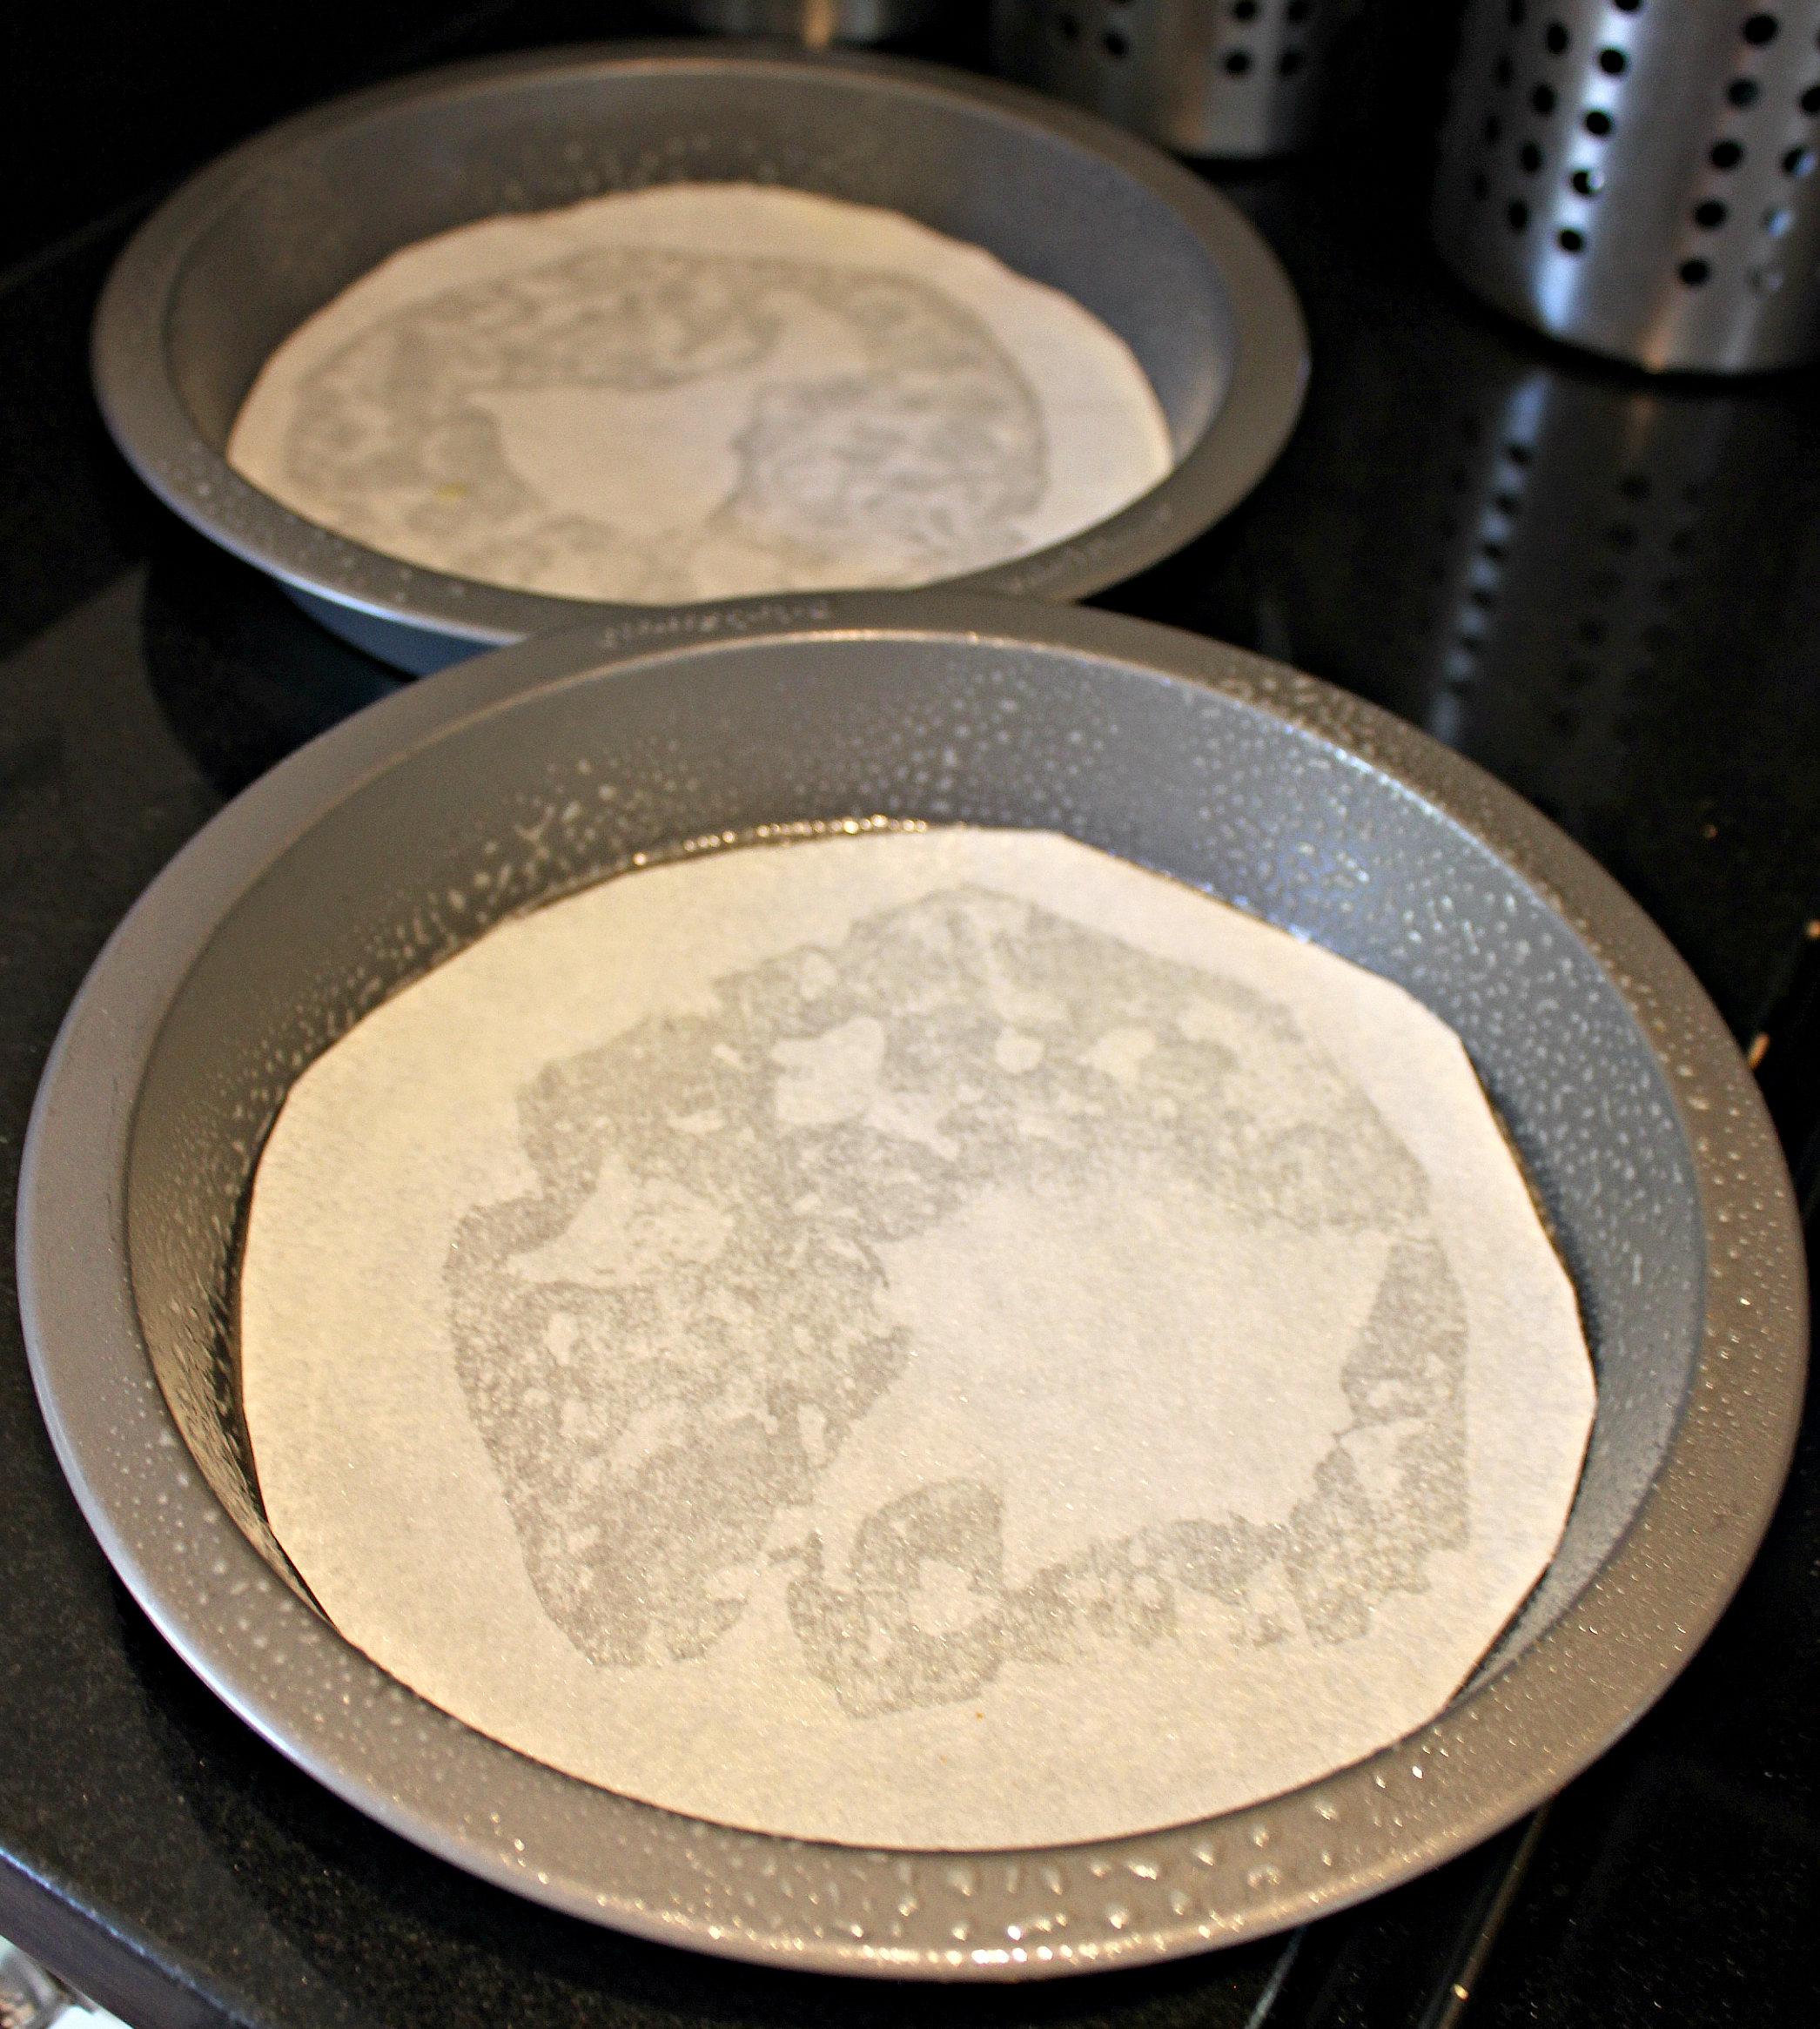
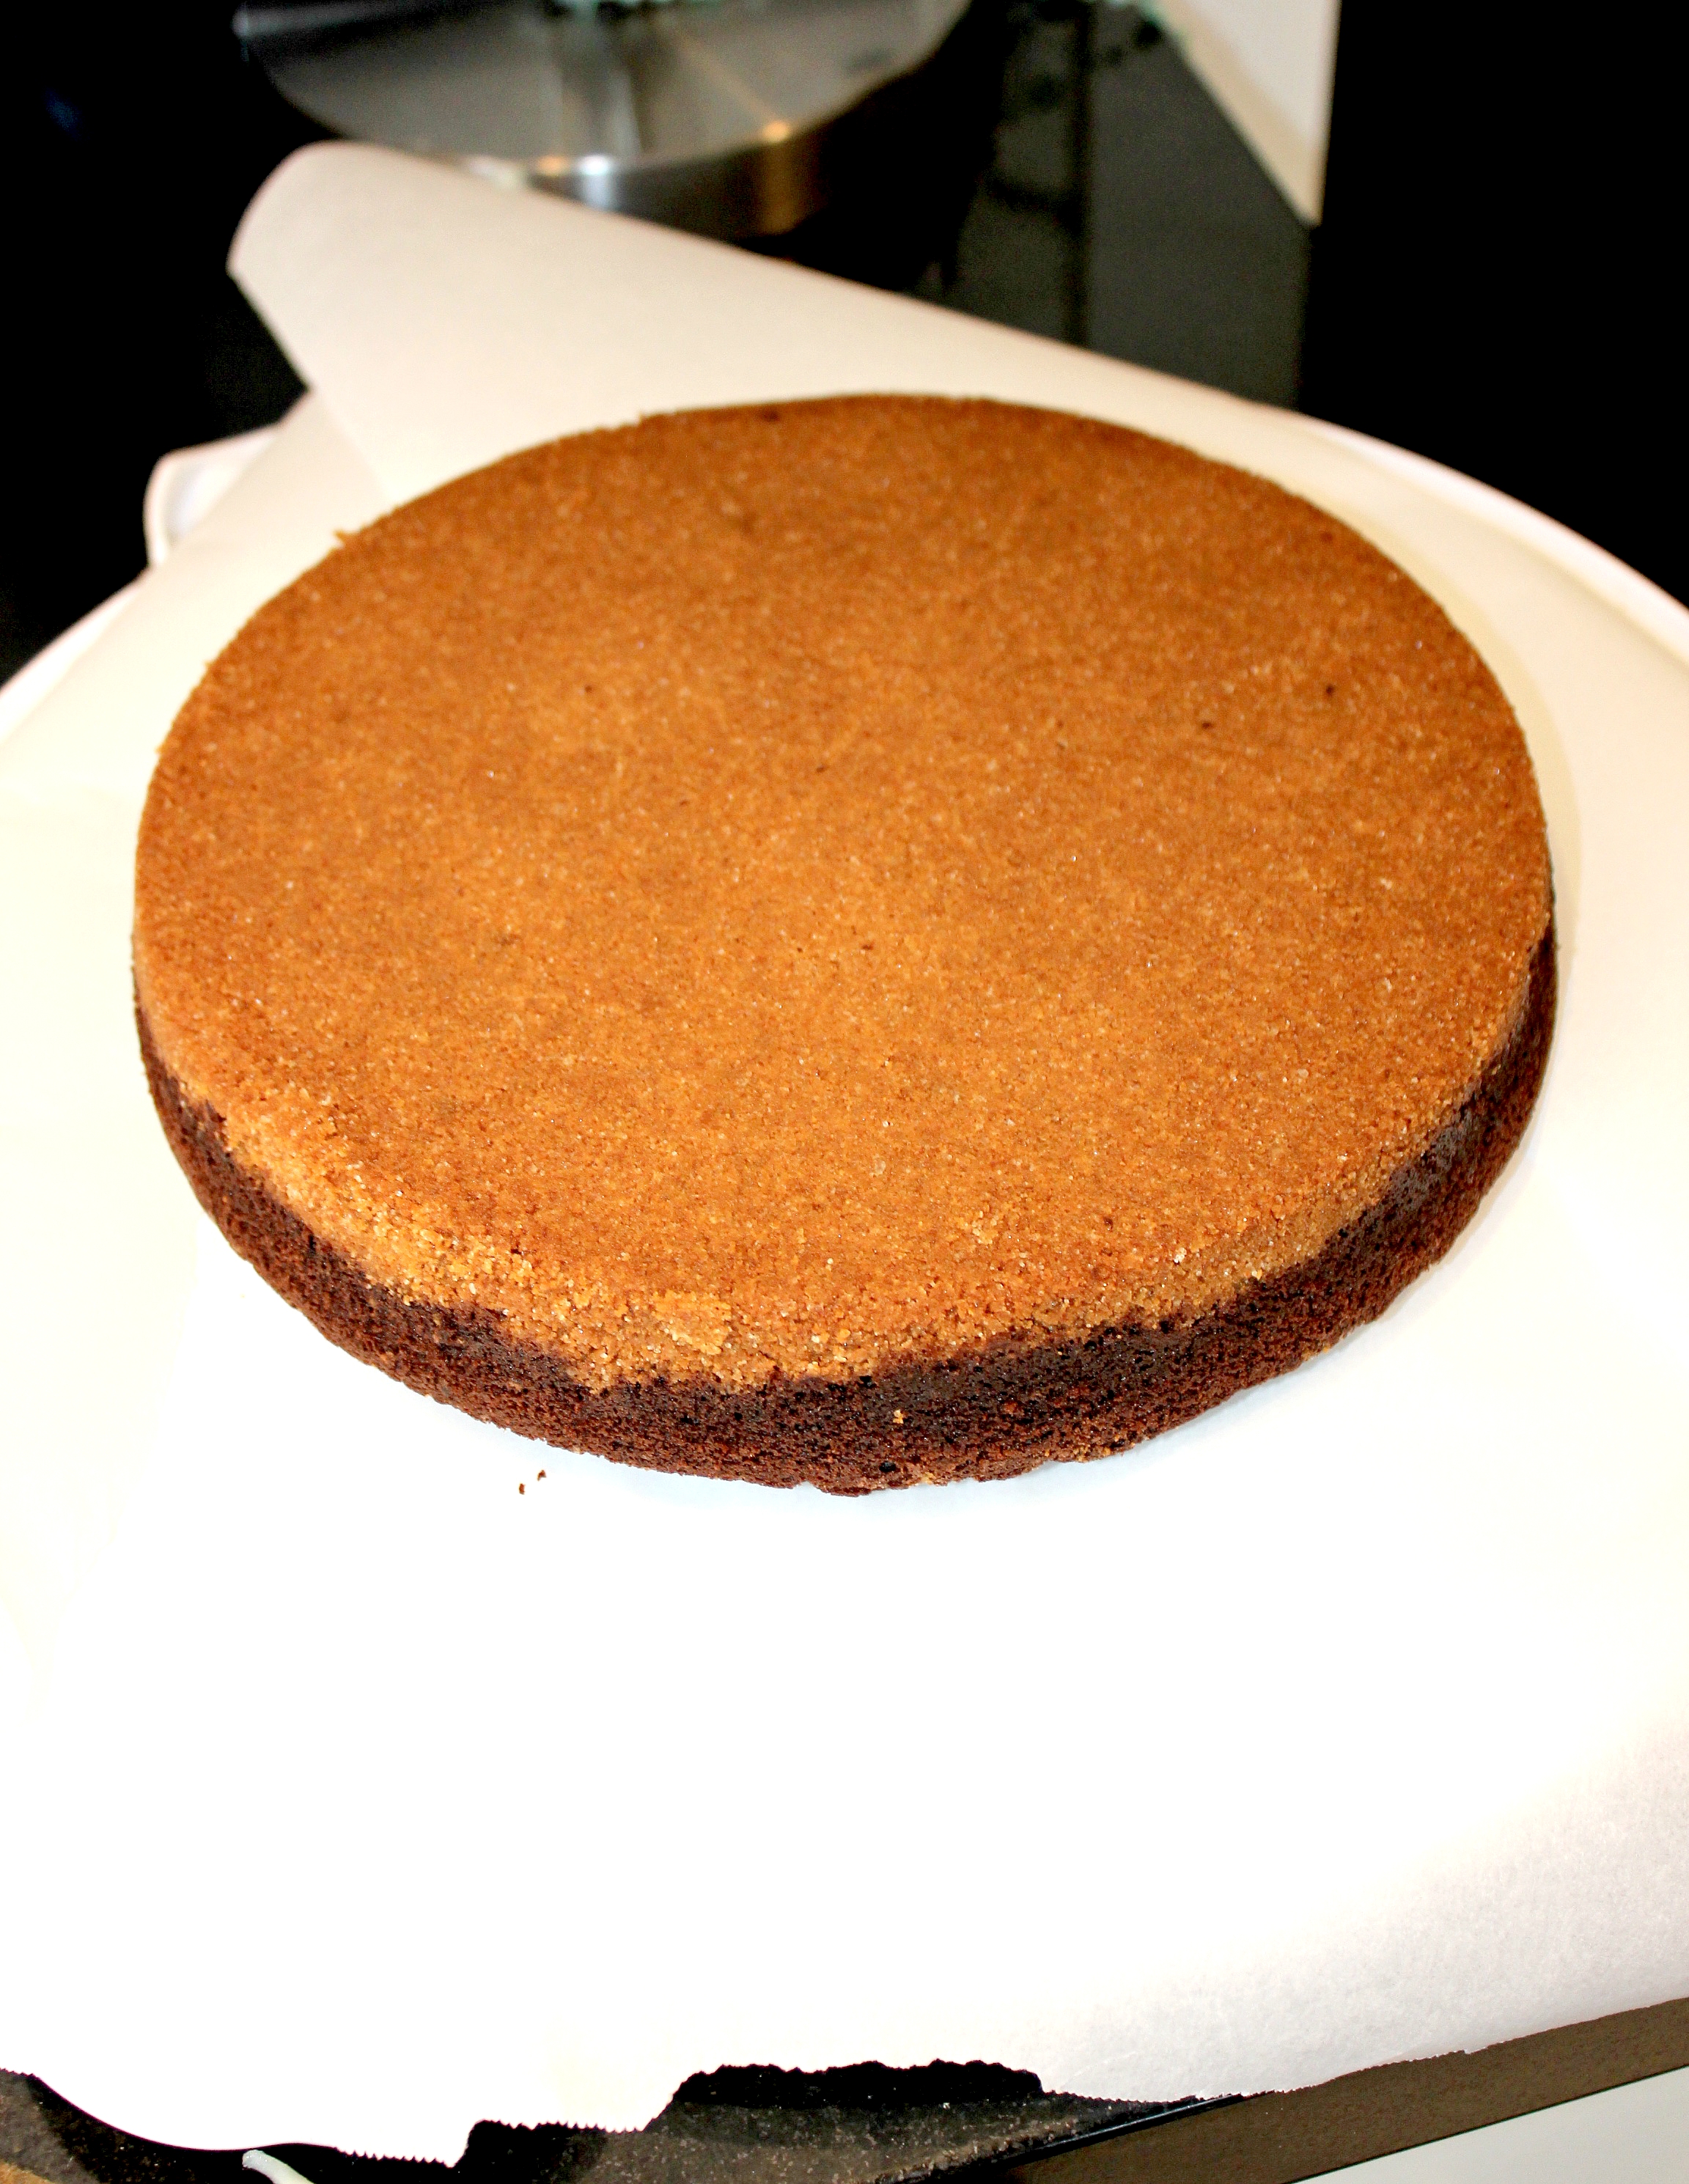
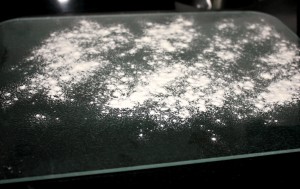
Step 1: Preheat oven to 350 degrees and line the bottom of two 9in cake pans with parchment paper, then spray sides and bottom generously with non-stick spray.
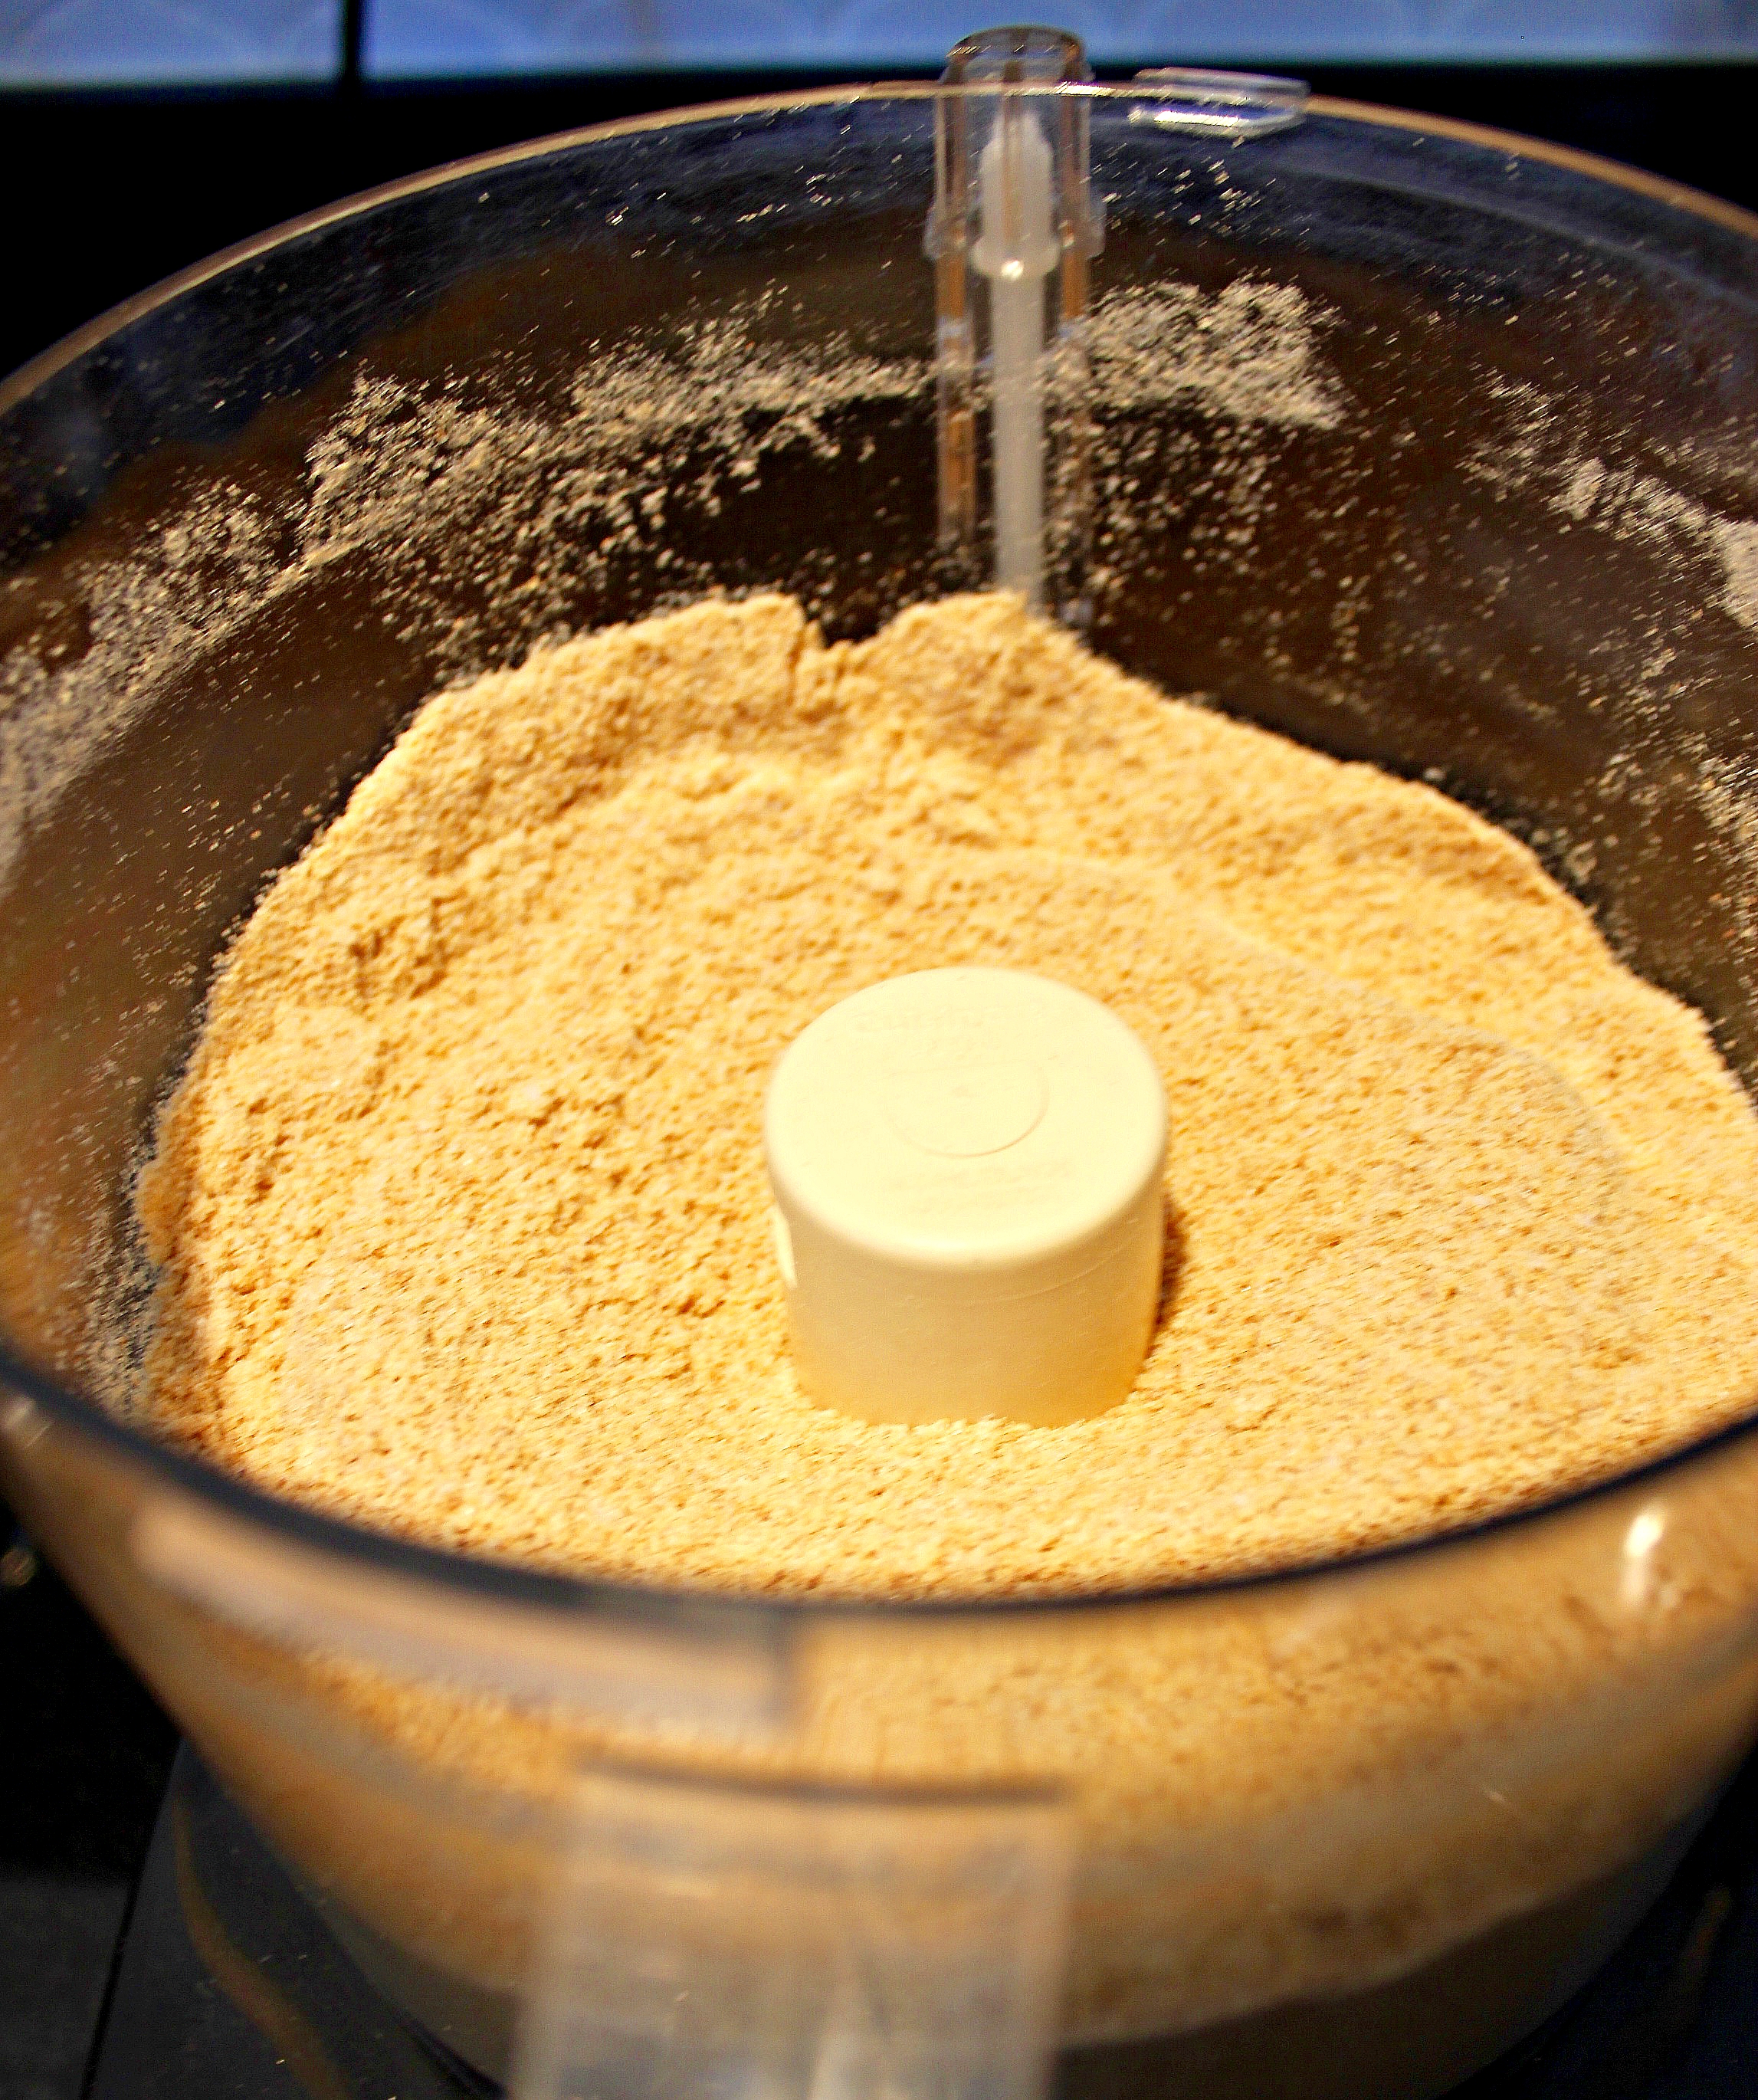
Step 2: Break up 18 Graham Crackers into a food processor (hello my trusty Cuisinart Food Processor!). Add 1/2 cup of sugar and 1/2 teaspoon salt.
Step 3: Pulse the food processor until very finely ground, uniform crumbs form.
Step 4: Brown butter by melting 3/4 of cup (12 Tbsp) butter in a medium, heavy bottomed pot over medium heat. Don’t stir, but swirl the butter around by moving the pot itself every few seconds. Watch the whole time, until butter is a golden brown colour. It will turn brown at the edges first, hence the swirling, so nothing burns. Watch carefully, the bits in the bottom can turn black and burn quickly, and it will continue to brown a few seconds even after you remove it from the heat.
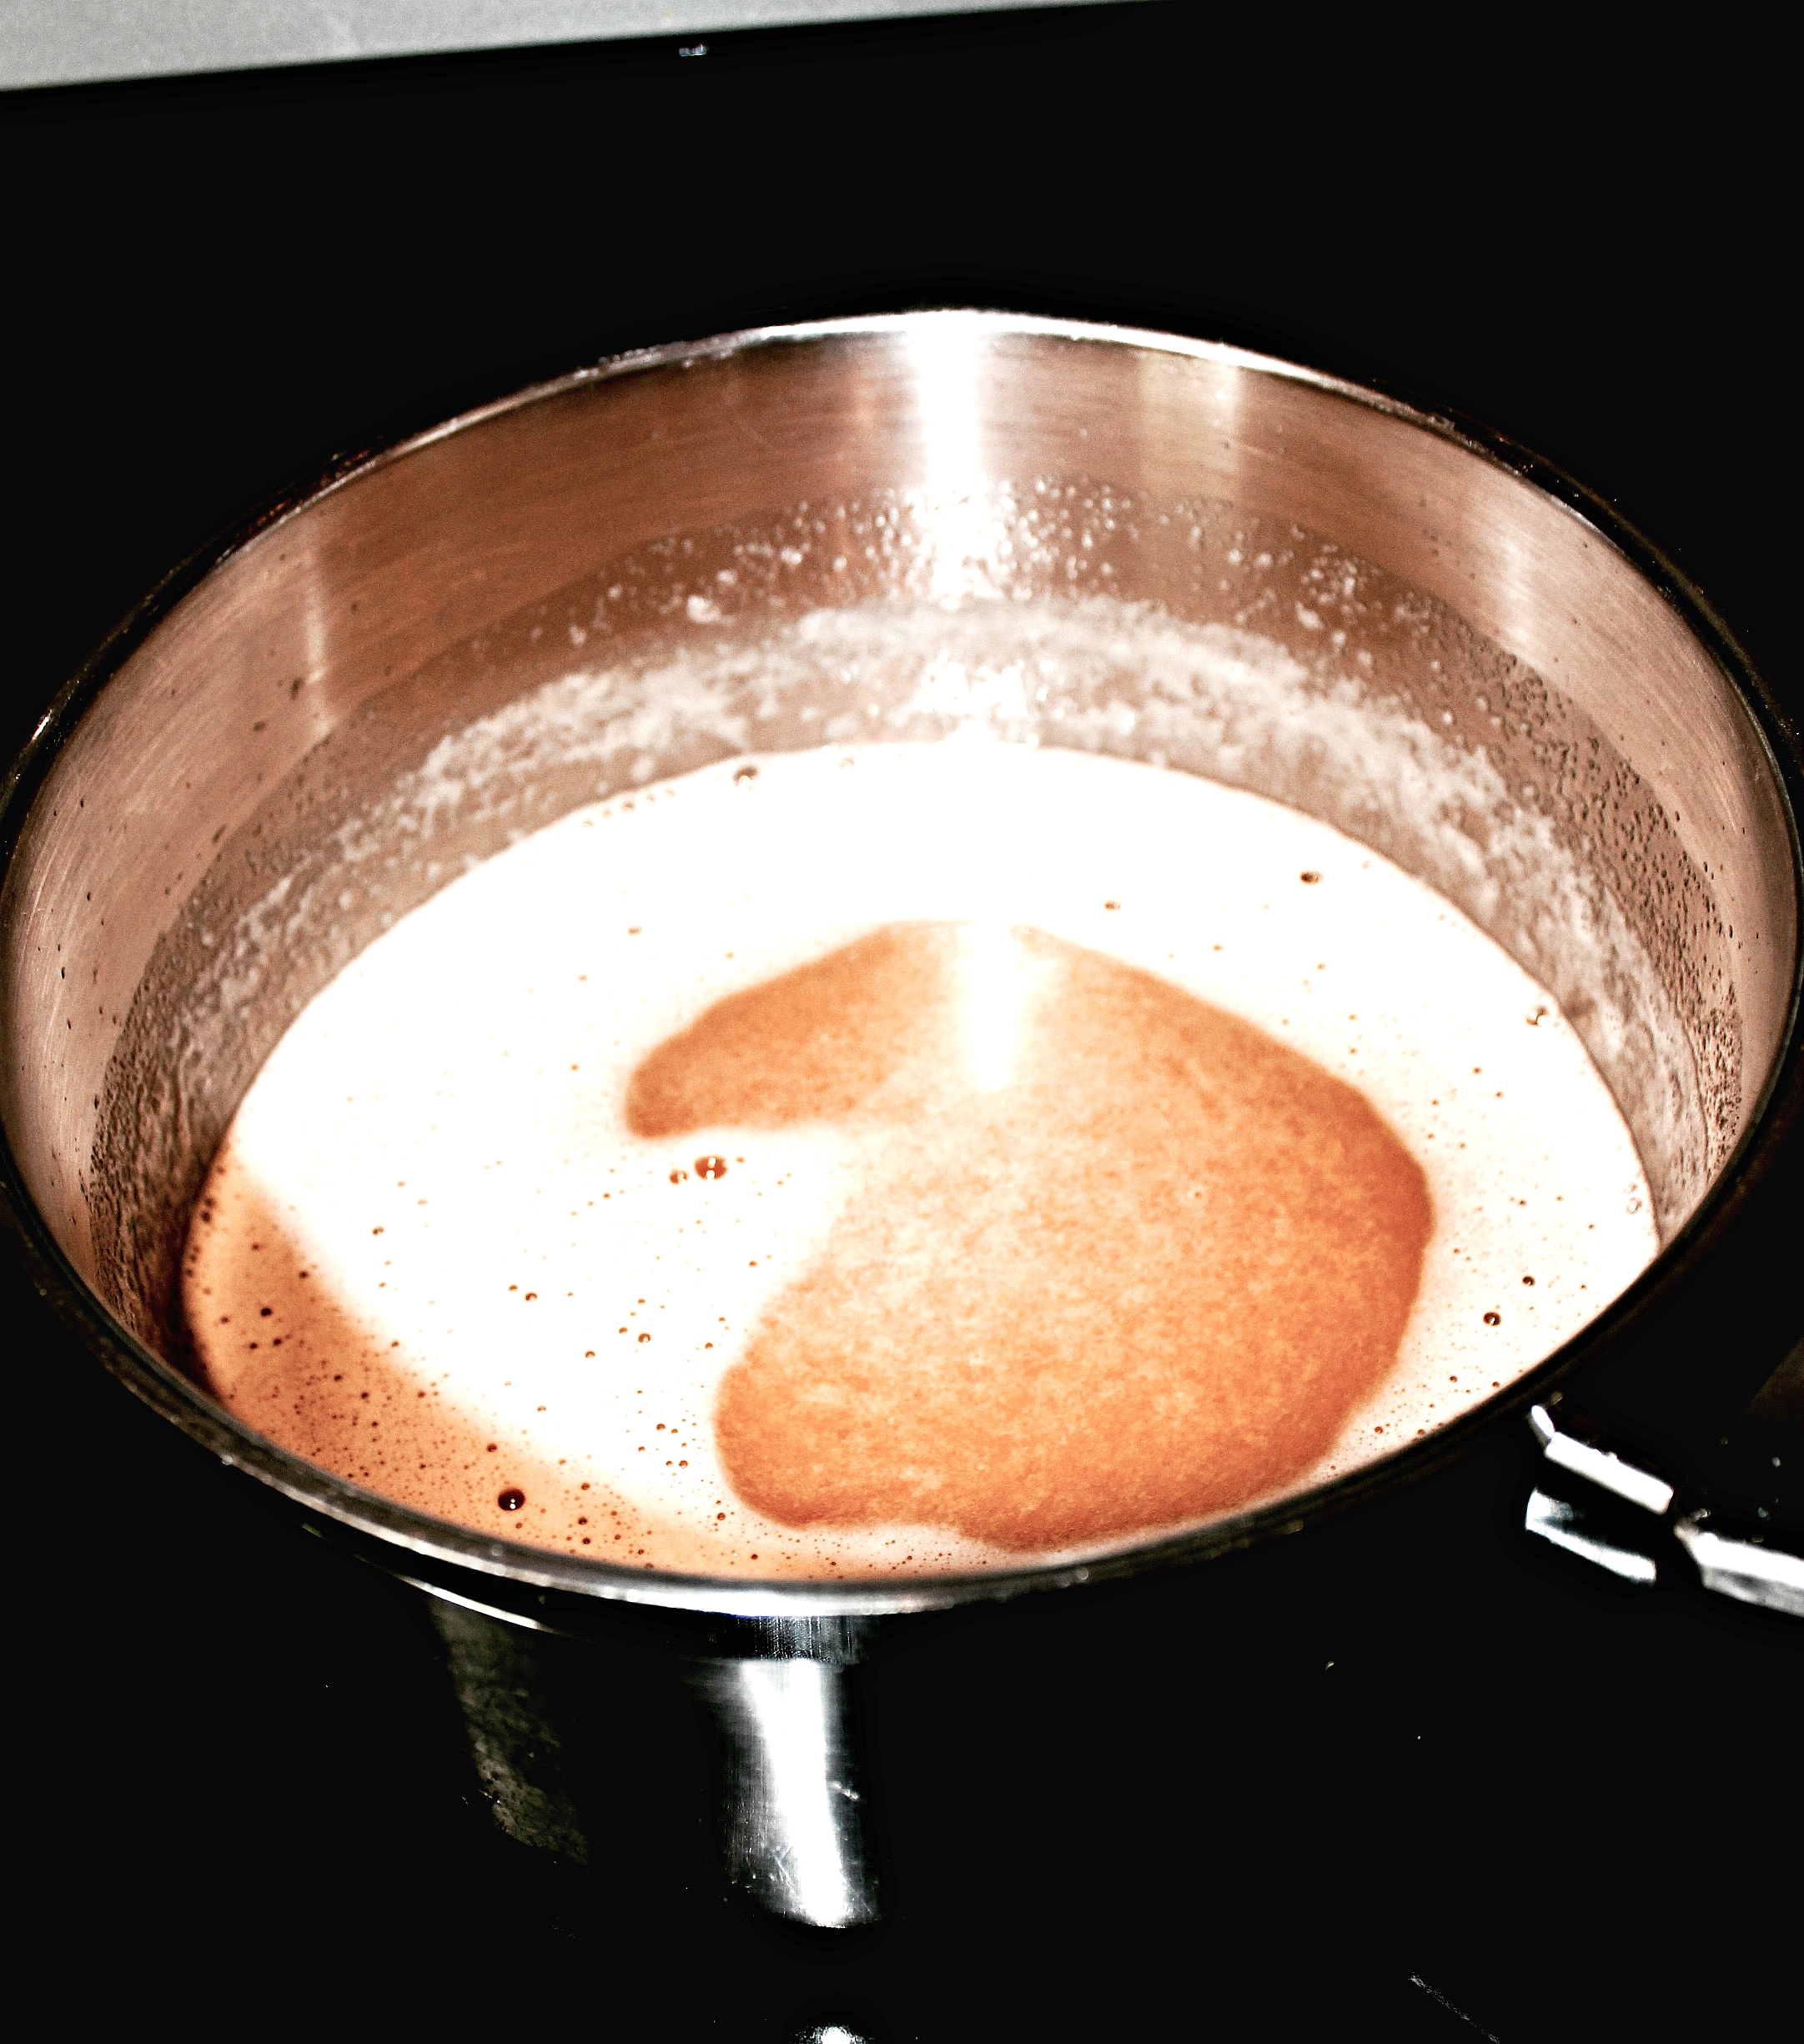
Step 5: Place graham cracker crumbs in a bowl and pour browned butter over top, making sure to scrape out all the brown bits in the bottom of the pan. Stir together, taste and decide that this alone could be dessert. Like an amazing graham cracker pudding dessert of sorts. It’s safe to say you have never had graham crackers taste this amazing before. Resist getting a spoon and sitting down. Remind yourself of the end goal. The in-laws, think of the in-laws!!!
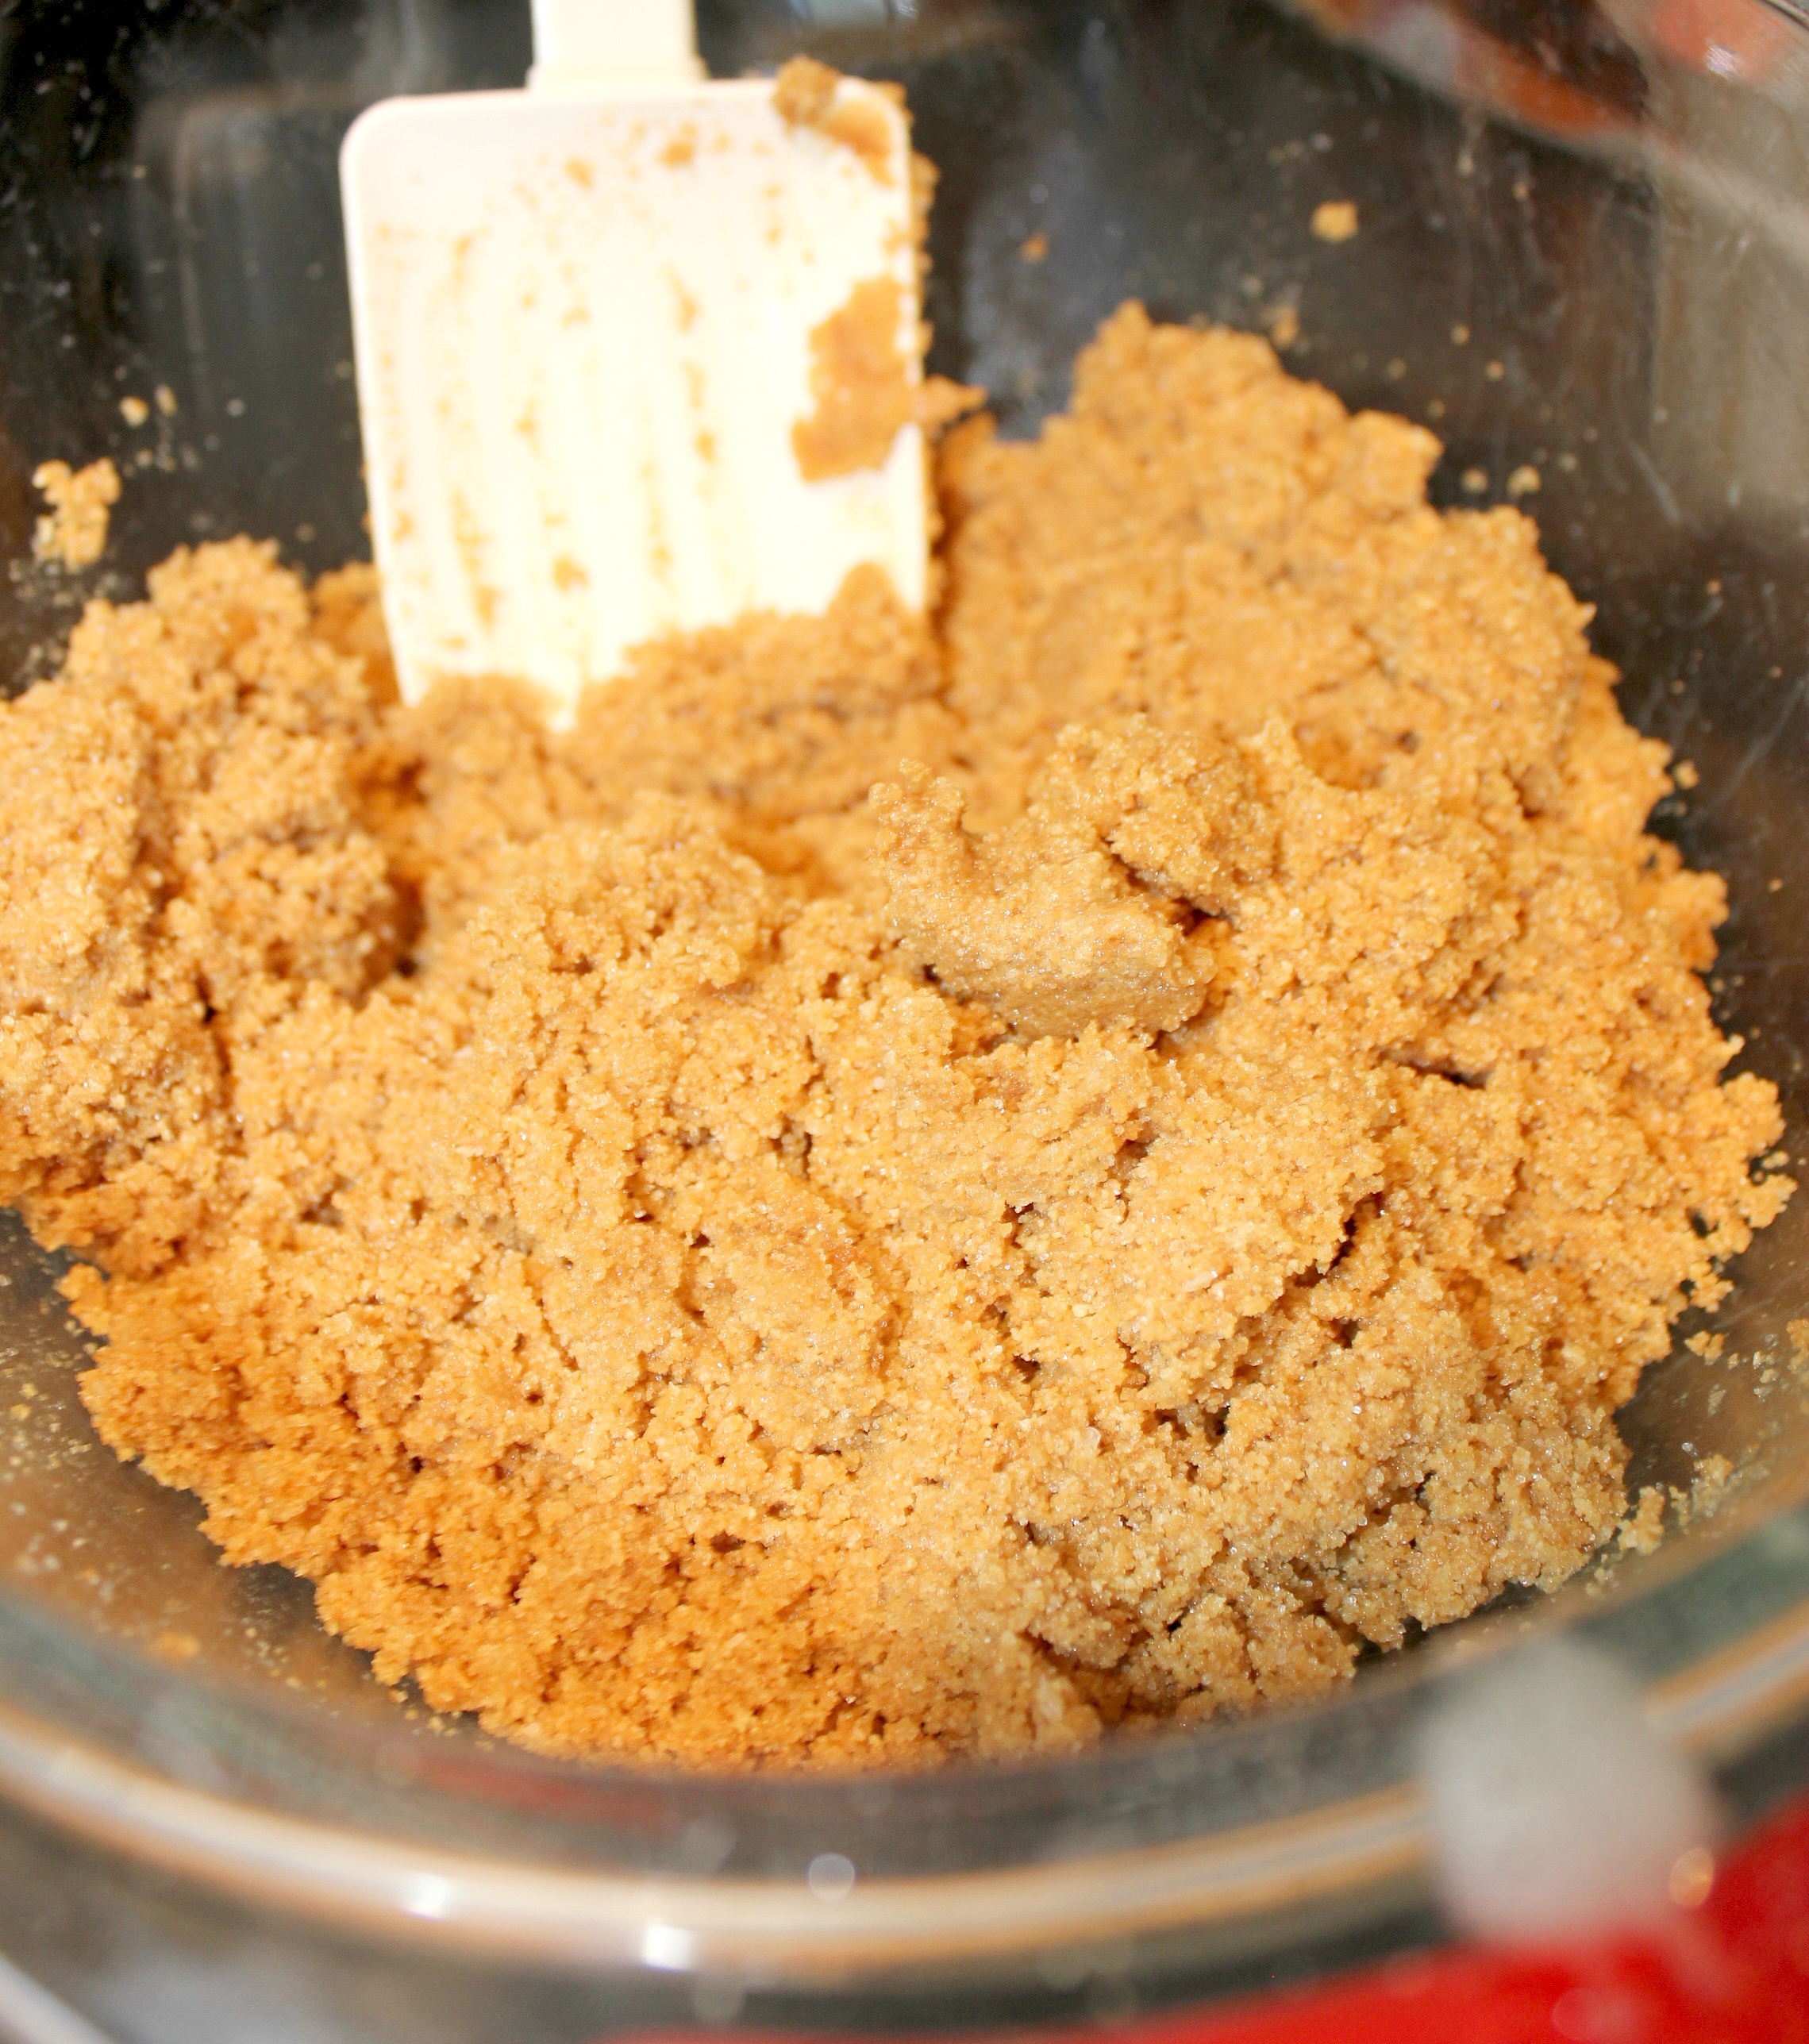
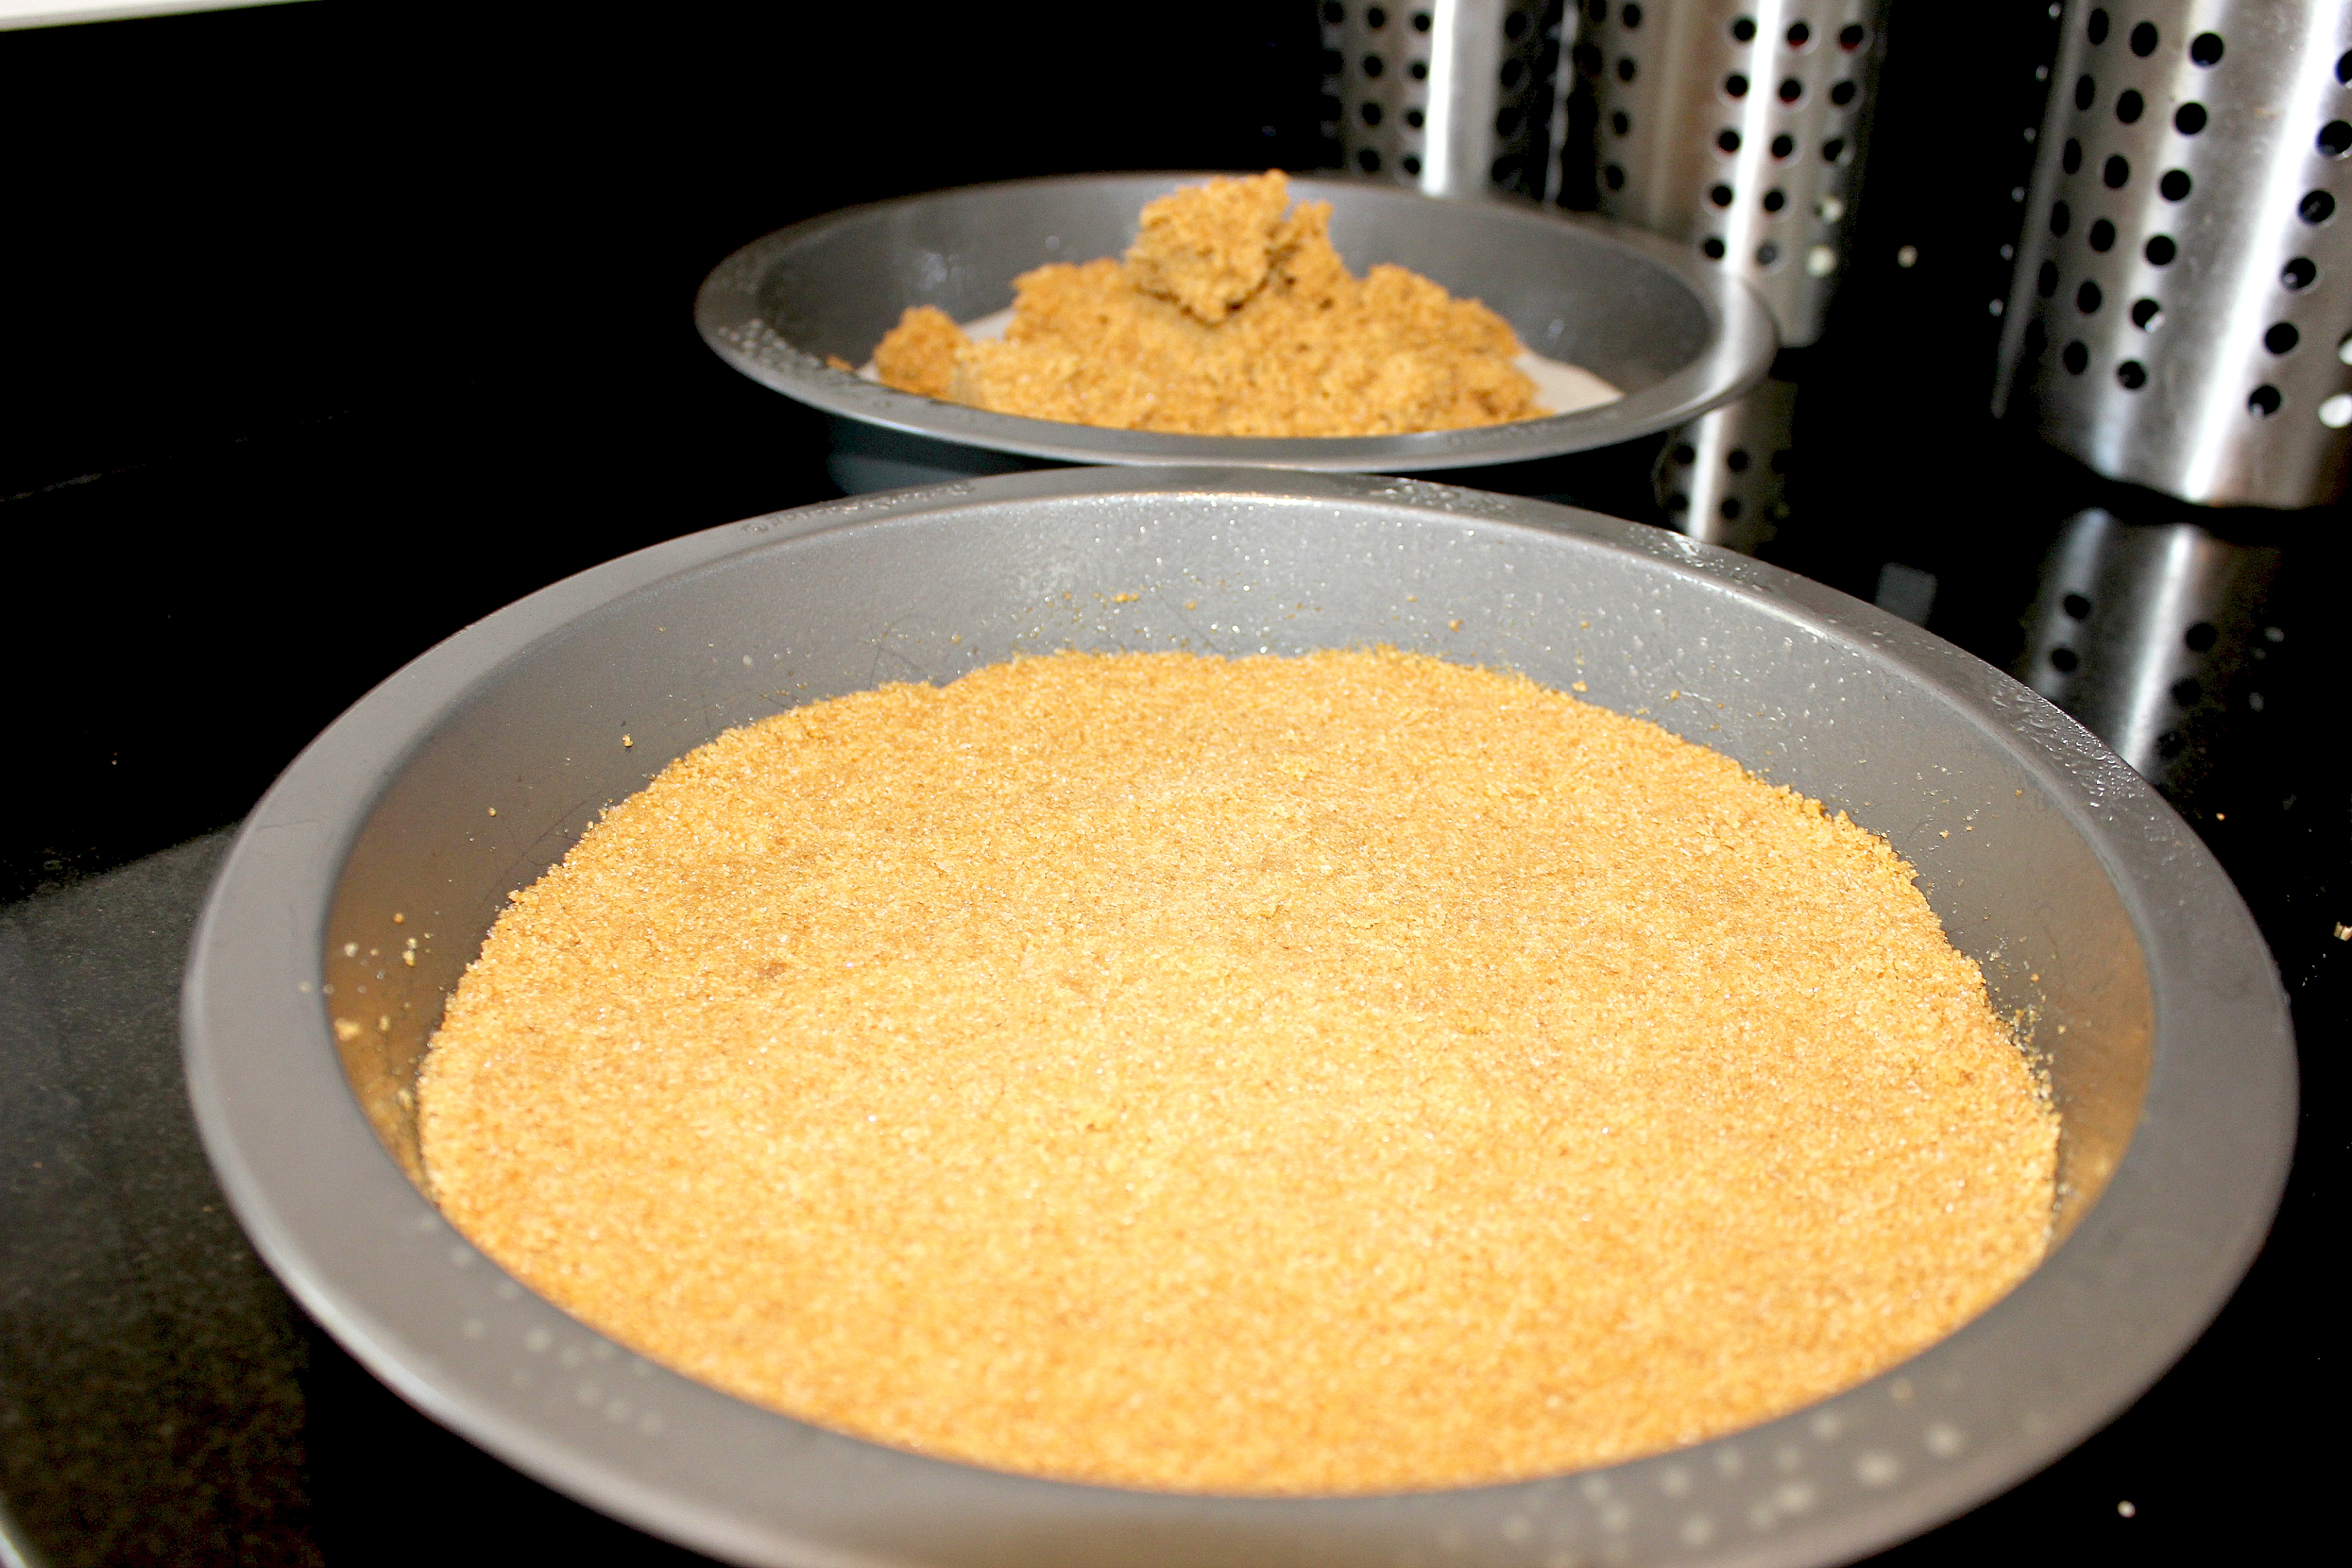
Step 6: Evenly press the graham cracker mixture of your dreams into each of the greased pans.
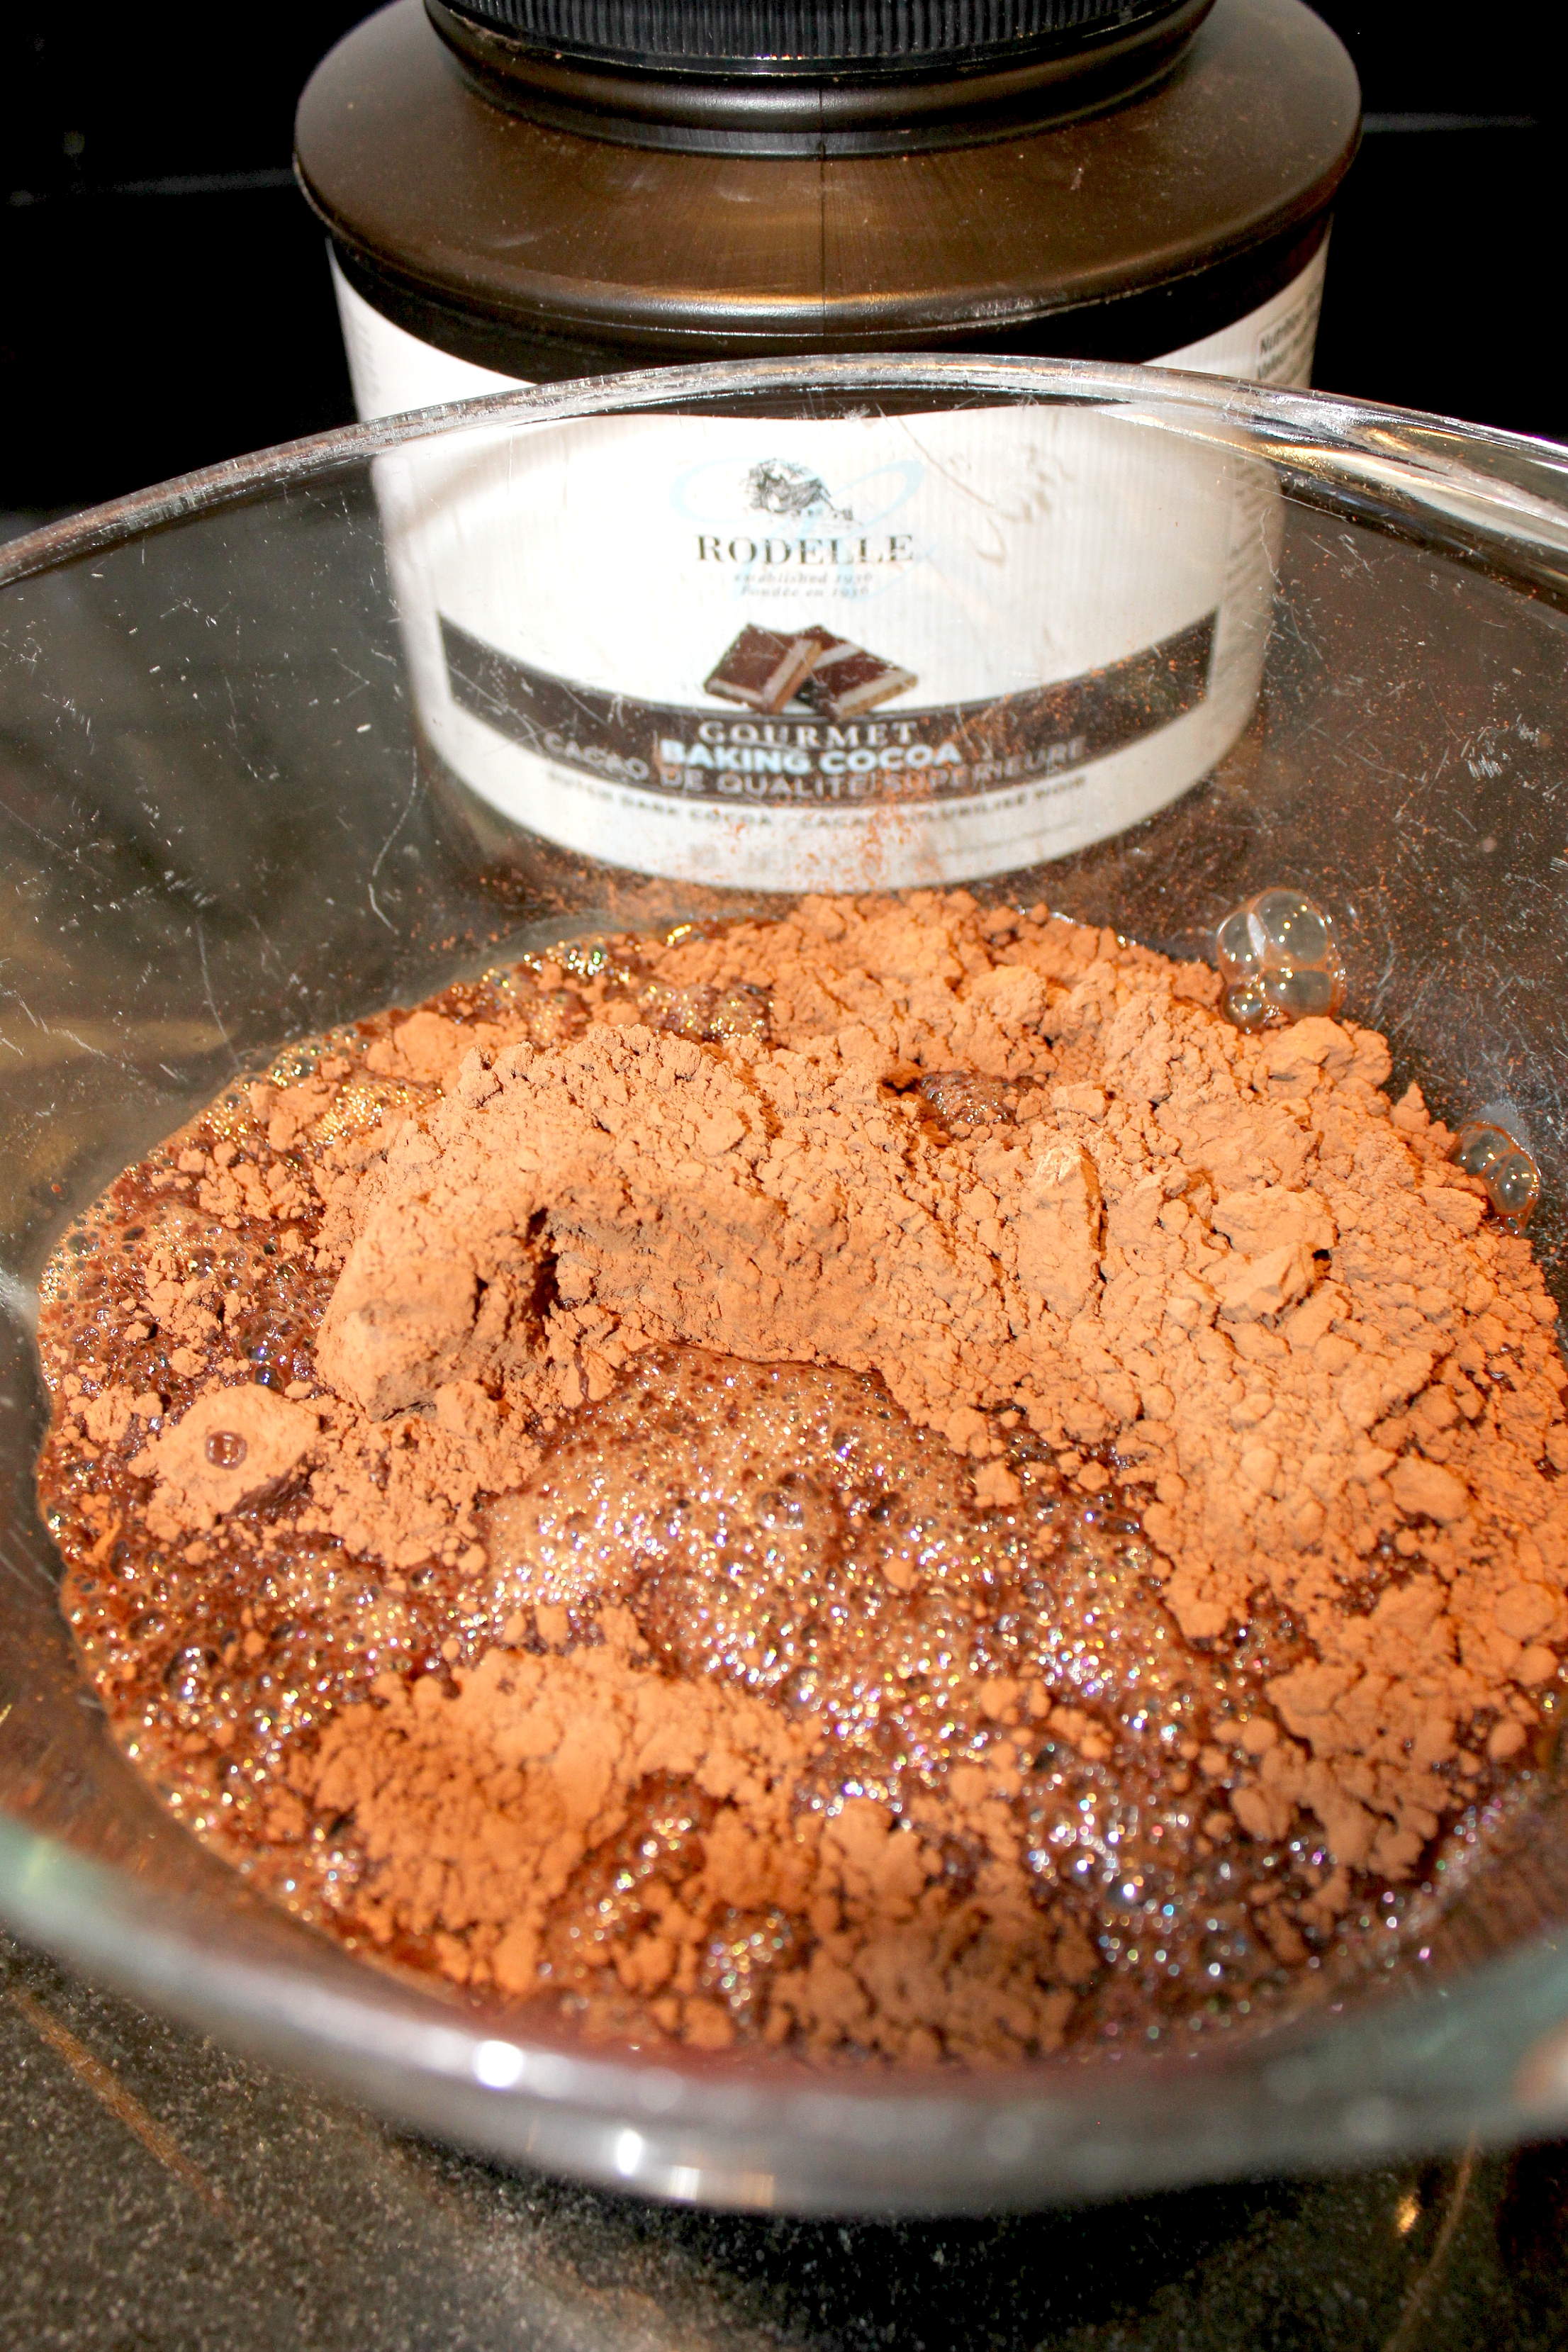
Step 7: Place 1 cup Rodelle Gourmet Baking Cocoa in a bowl. I get this Rodelle cocoa at Costco (several at a time, for the fear of them no longer carrying it next visit), because you know when recipes refer to using ‘Dutch process cocoa powder’ and you just use the stuff that your mother always used and wonder why people actually like cocoa? Well this is why. What a difference it makes. Seriously, one more level of yum to whatever you are making!
Step 8: Pour 2 cups boiling water over cocoa powder and whisk together. Set aside.
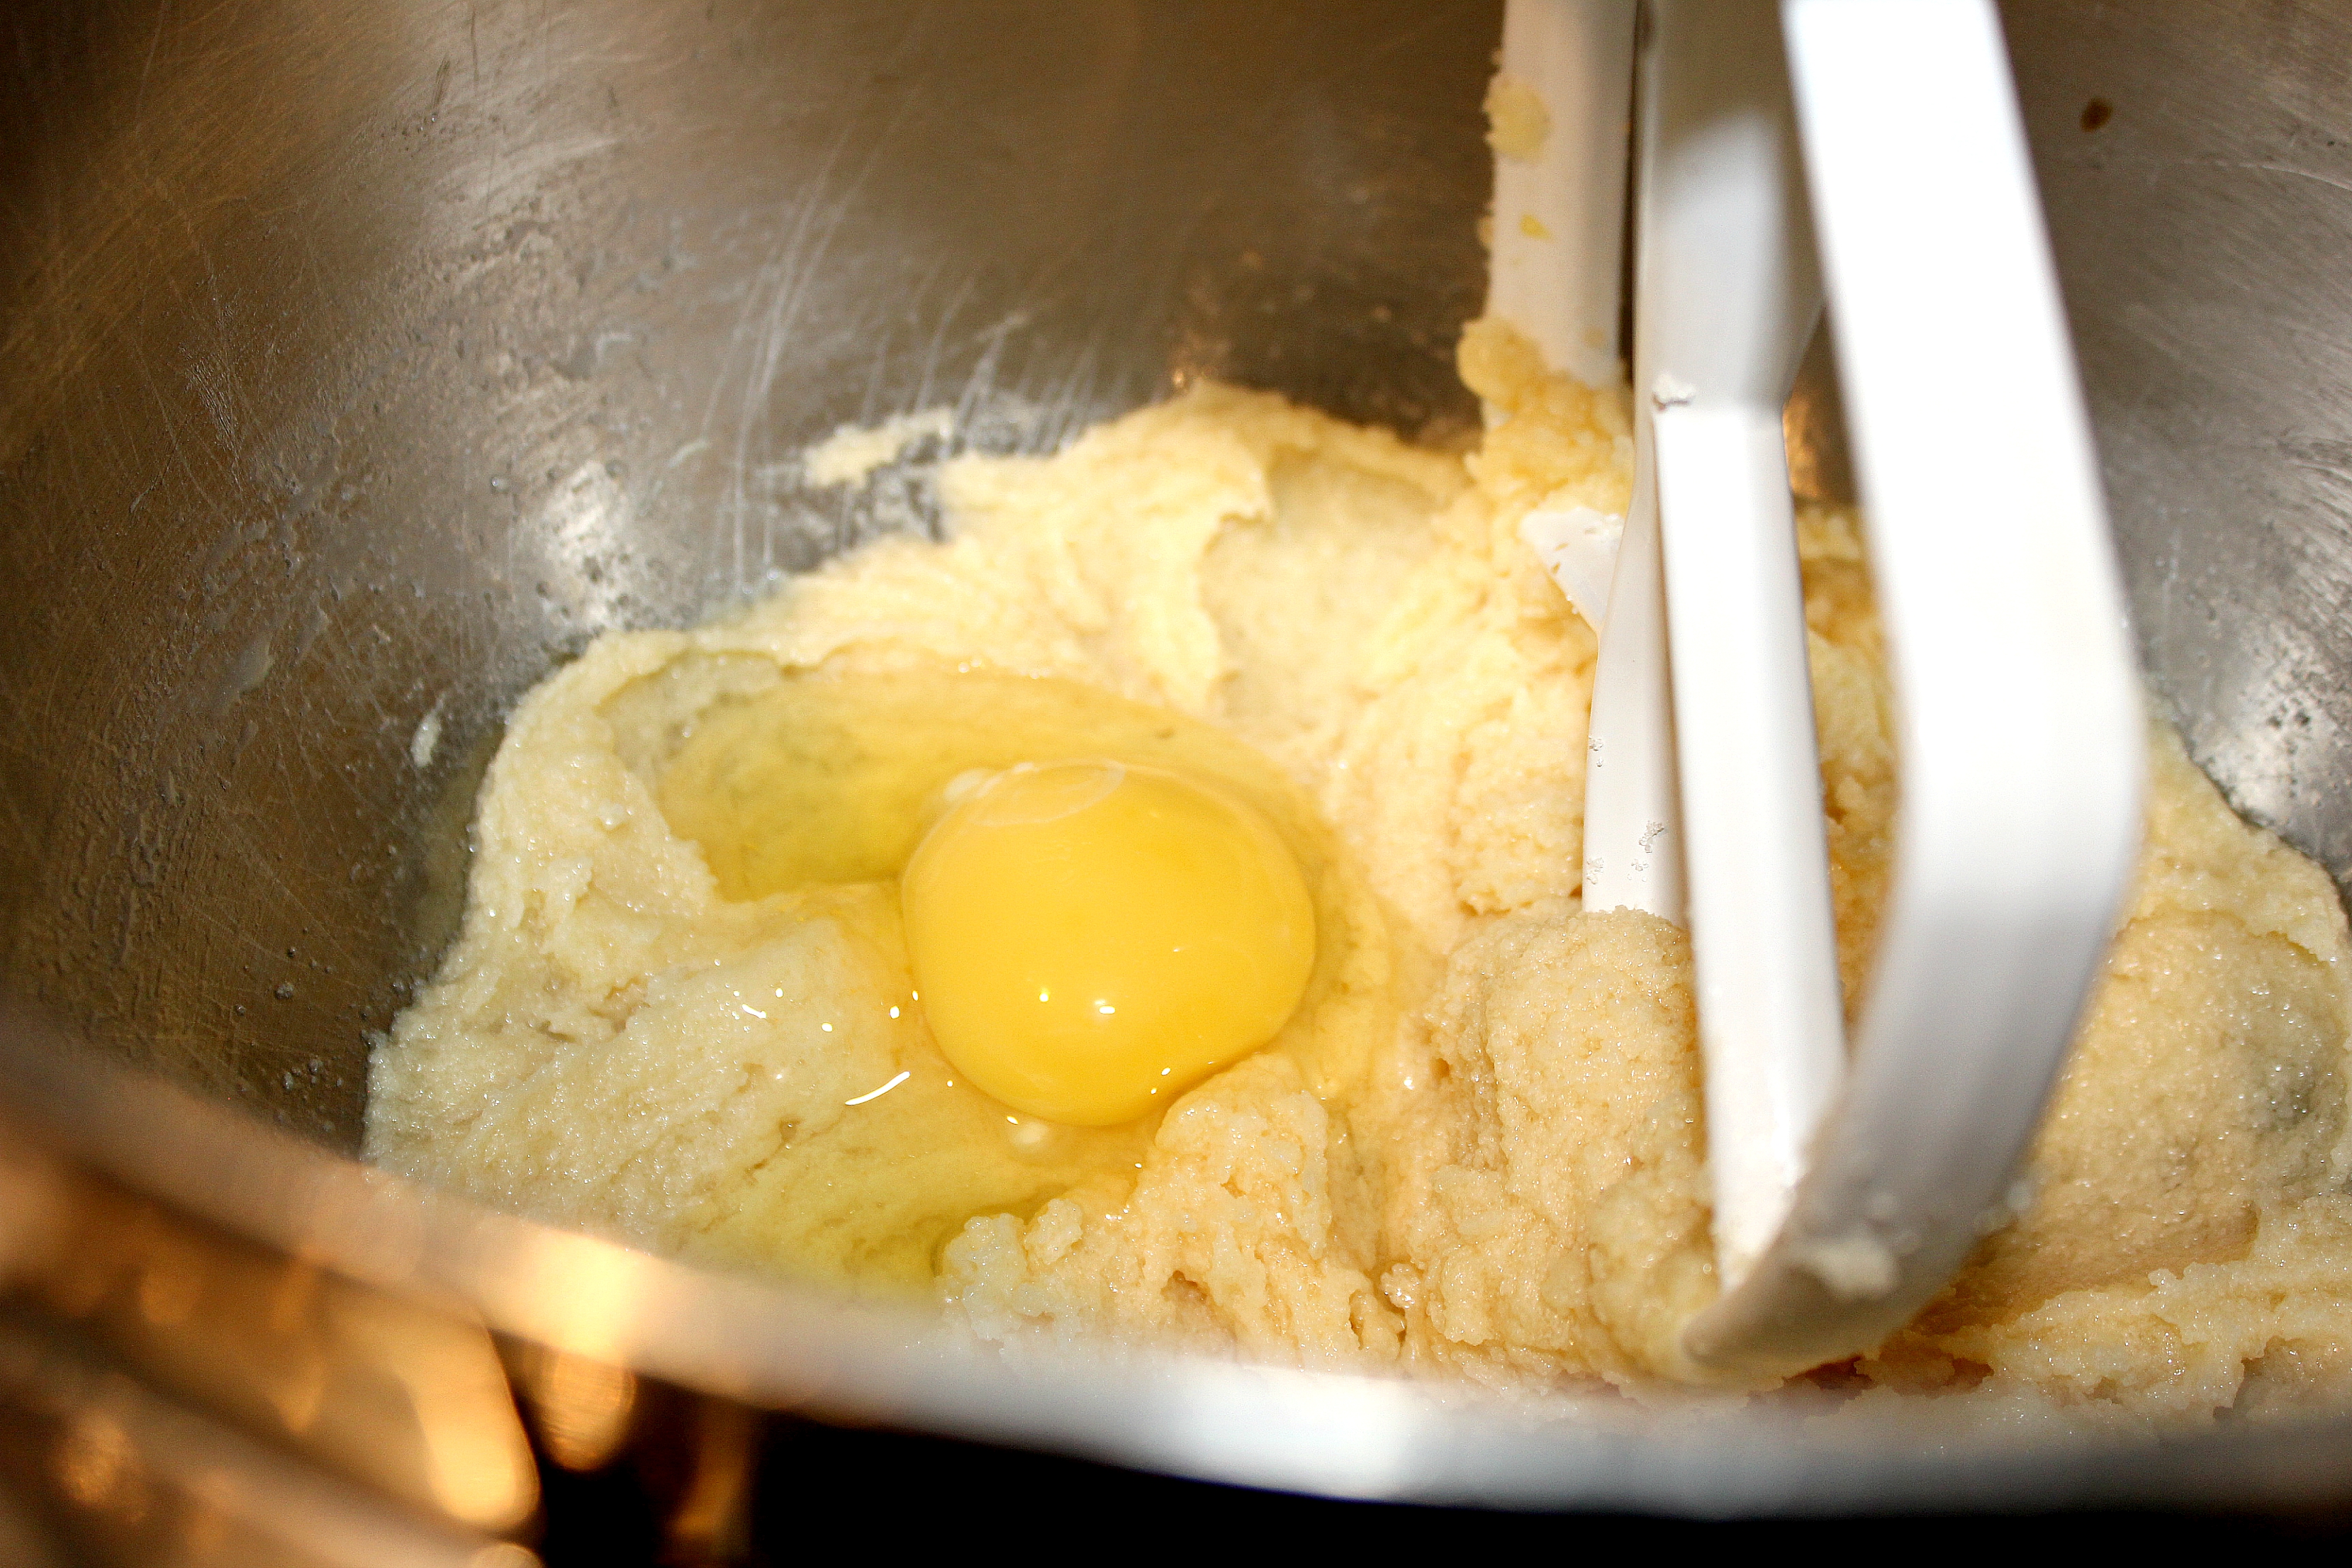
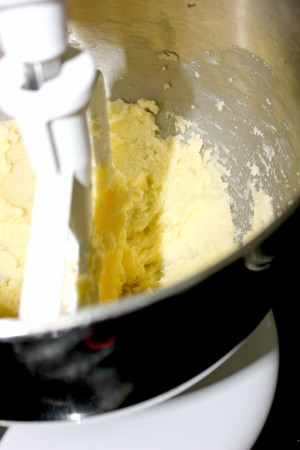
Step 9: Put 1 cup room temperature butter and 2 1/4 cups granulated sugar into a KitchenAid stand mixer and beat until light and fluffy.
Step 10: Add the vanilla and the eggs one at a time mixing until completely combined after each.
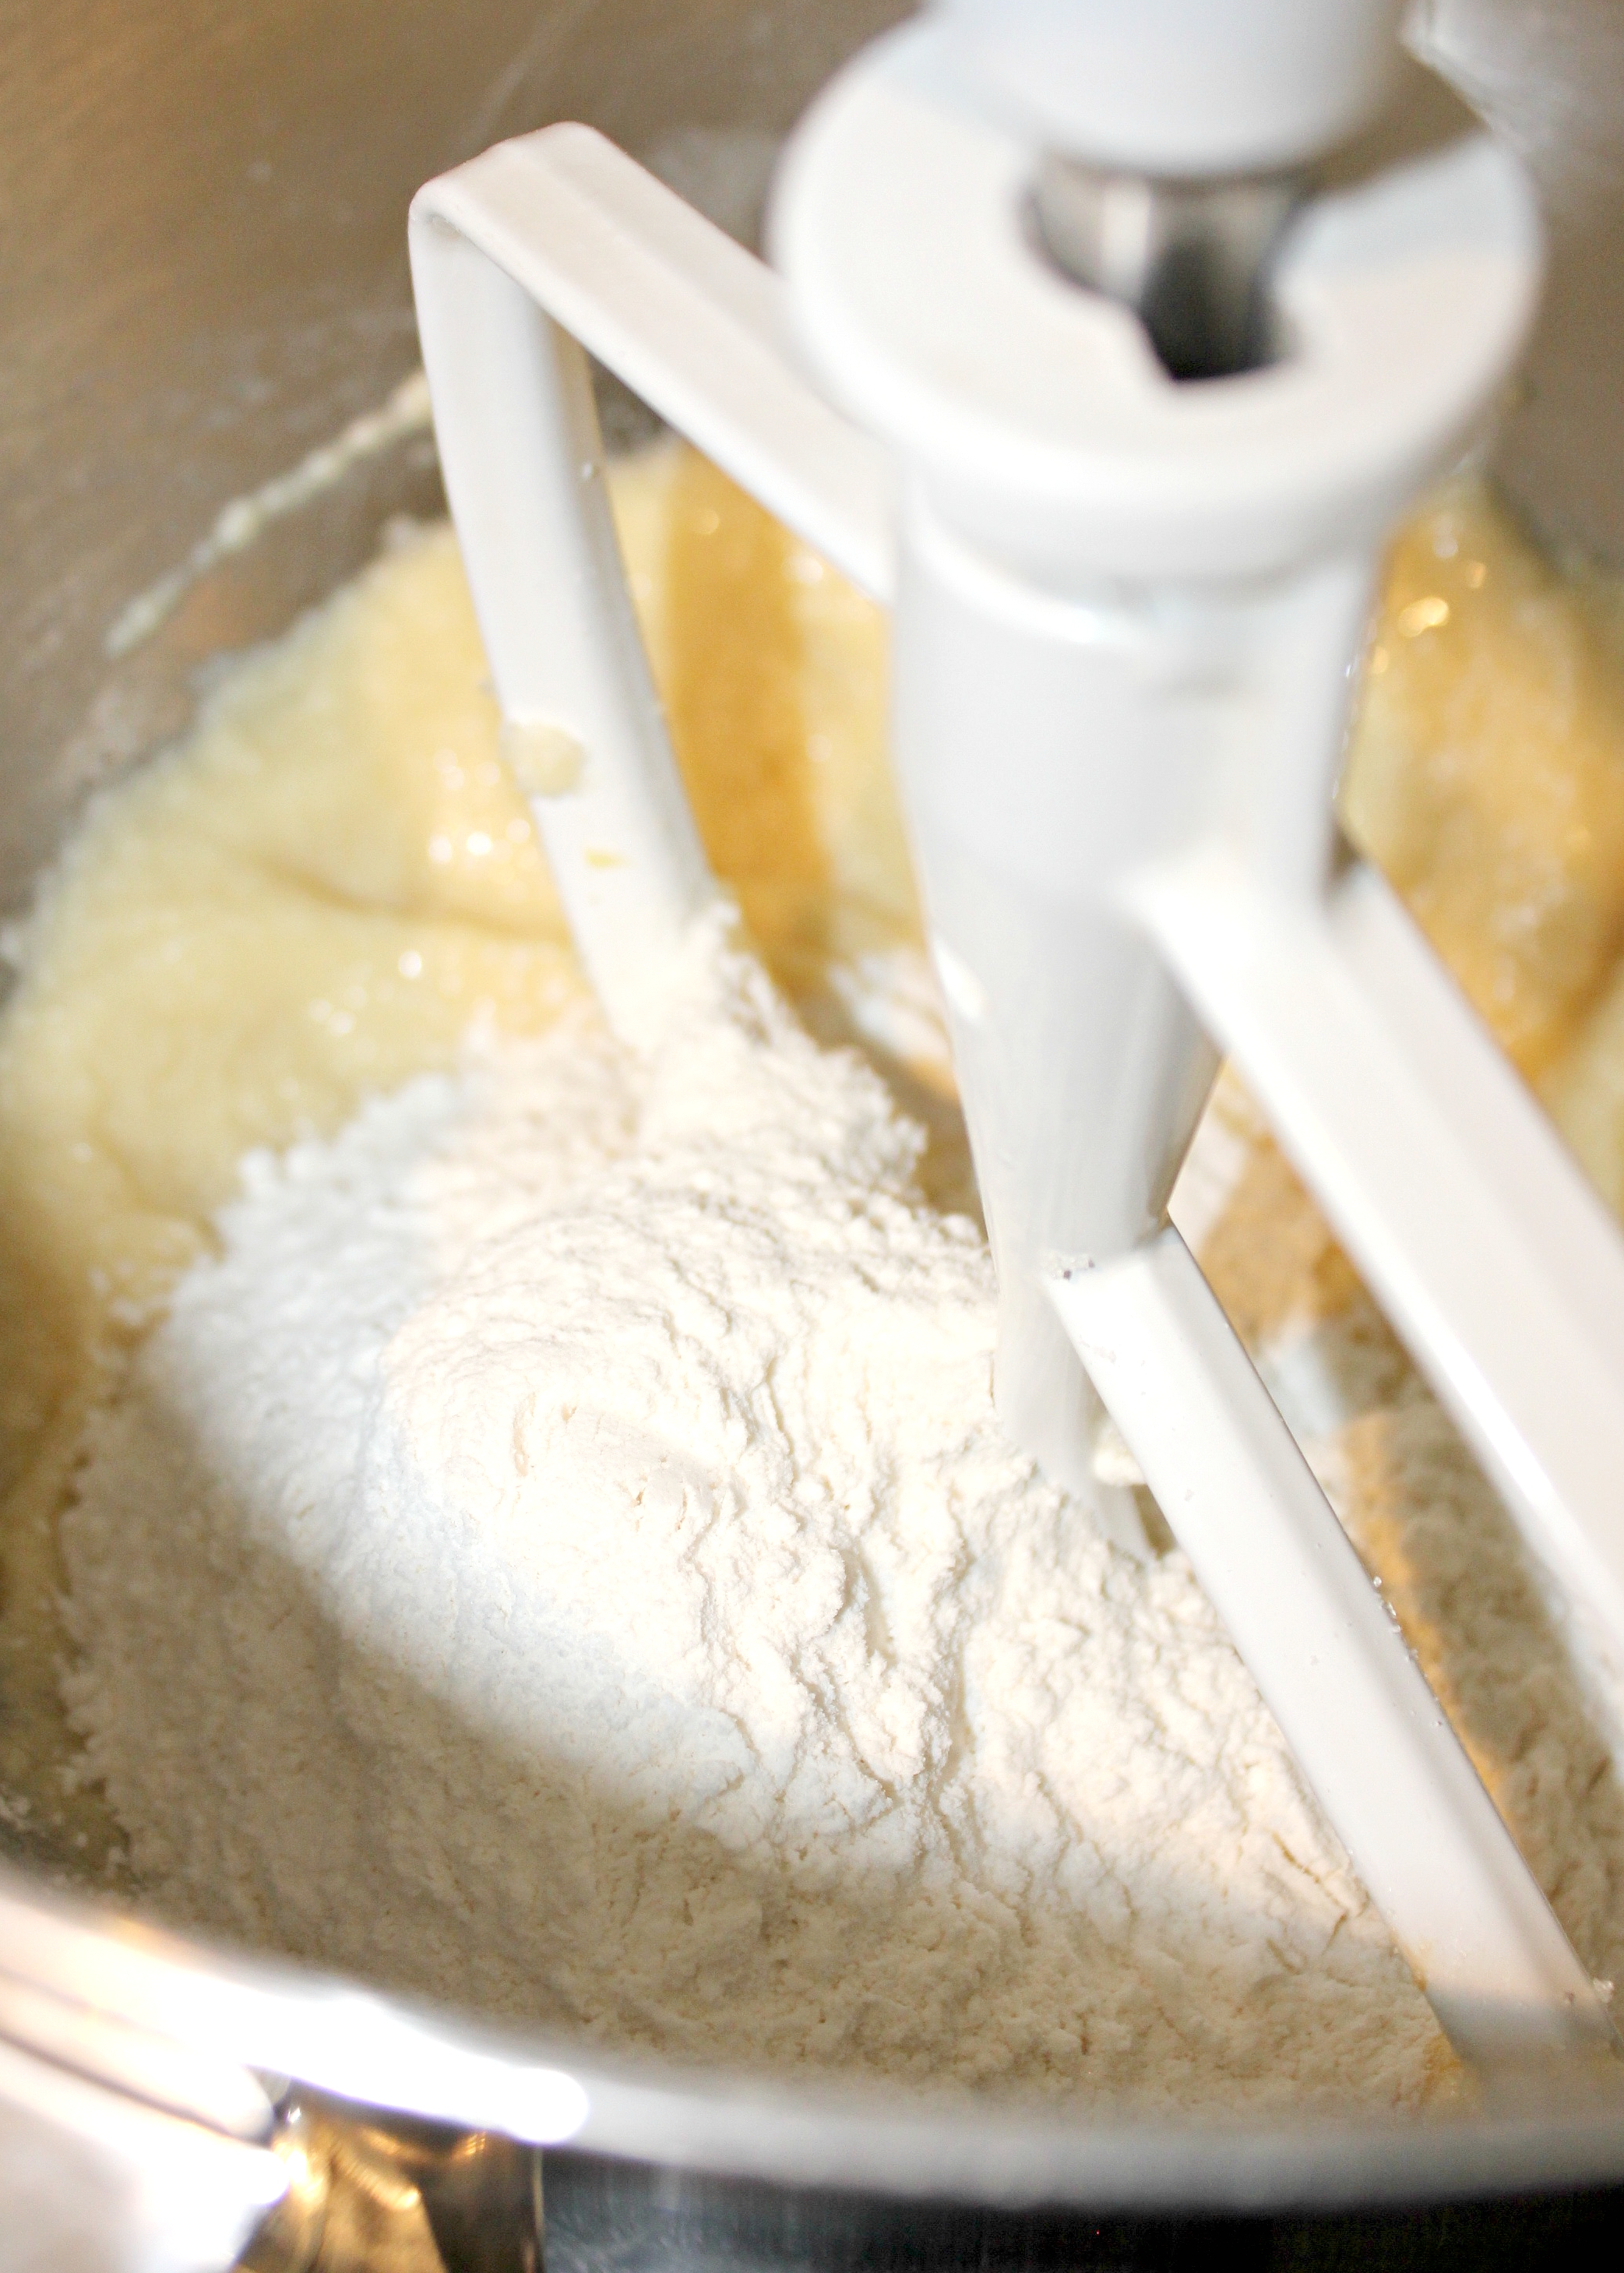
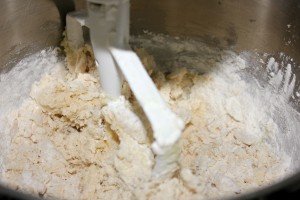
Step 11: Whisk the flour, baking soda, baking powder and salt together in a separate bowl.
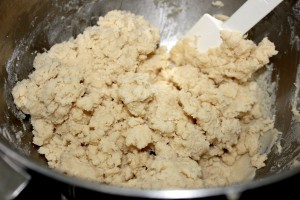
Step 12: Gently add half the dry ingredients to the mixer. Mix on low until combined. Then slowly pour in half the chocolate mixture to the batter with the mixer running on low. Repeat with the remaining dry ingredients and chocolate. Mix into a smooth batter.
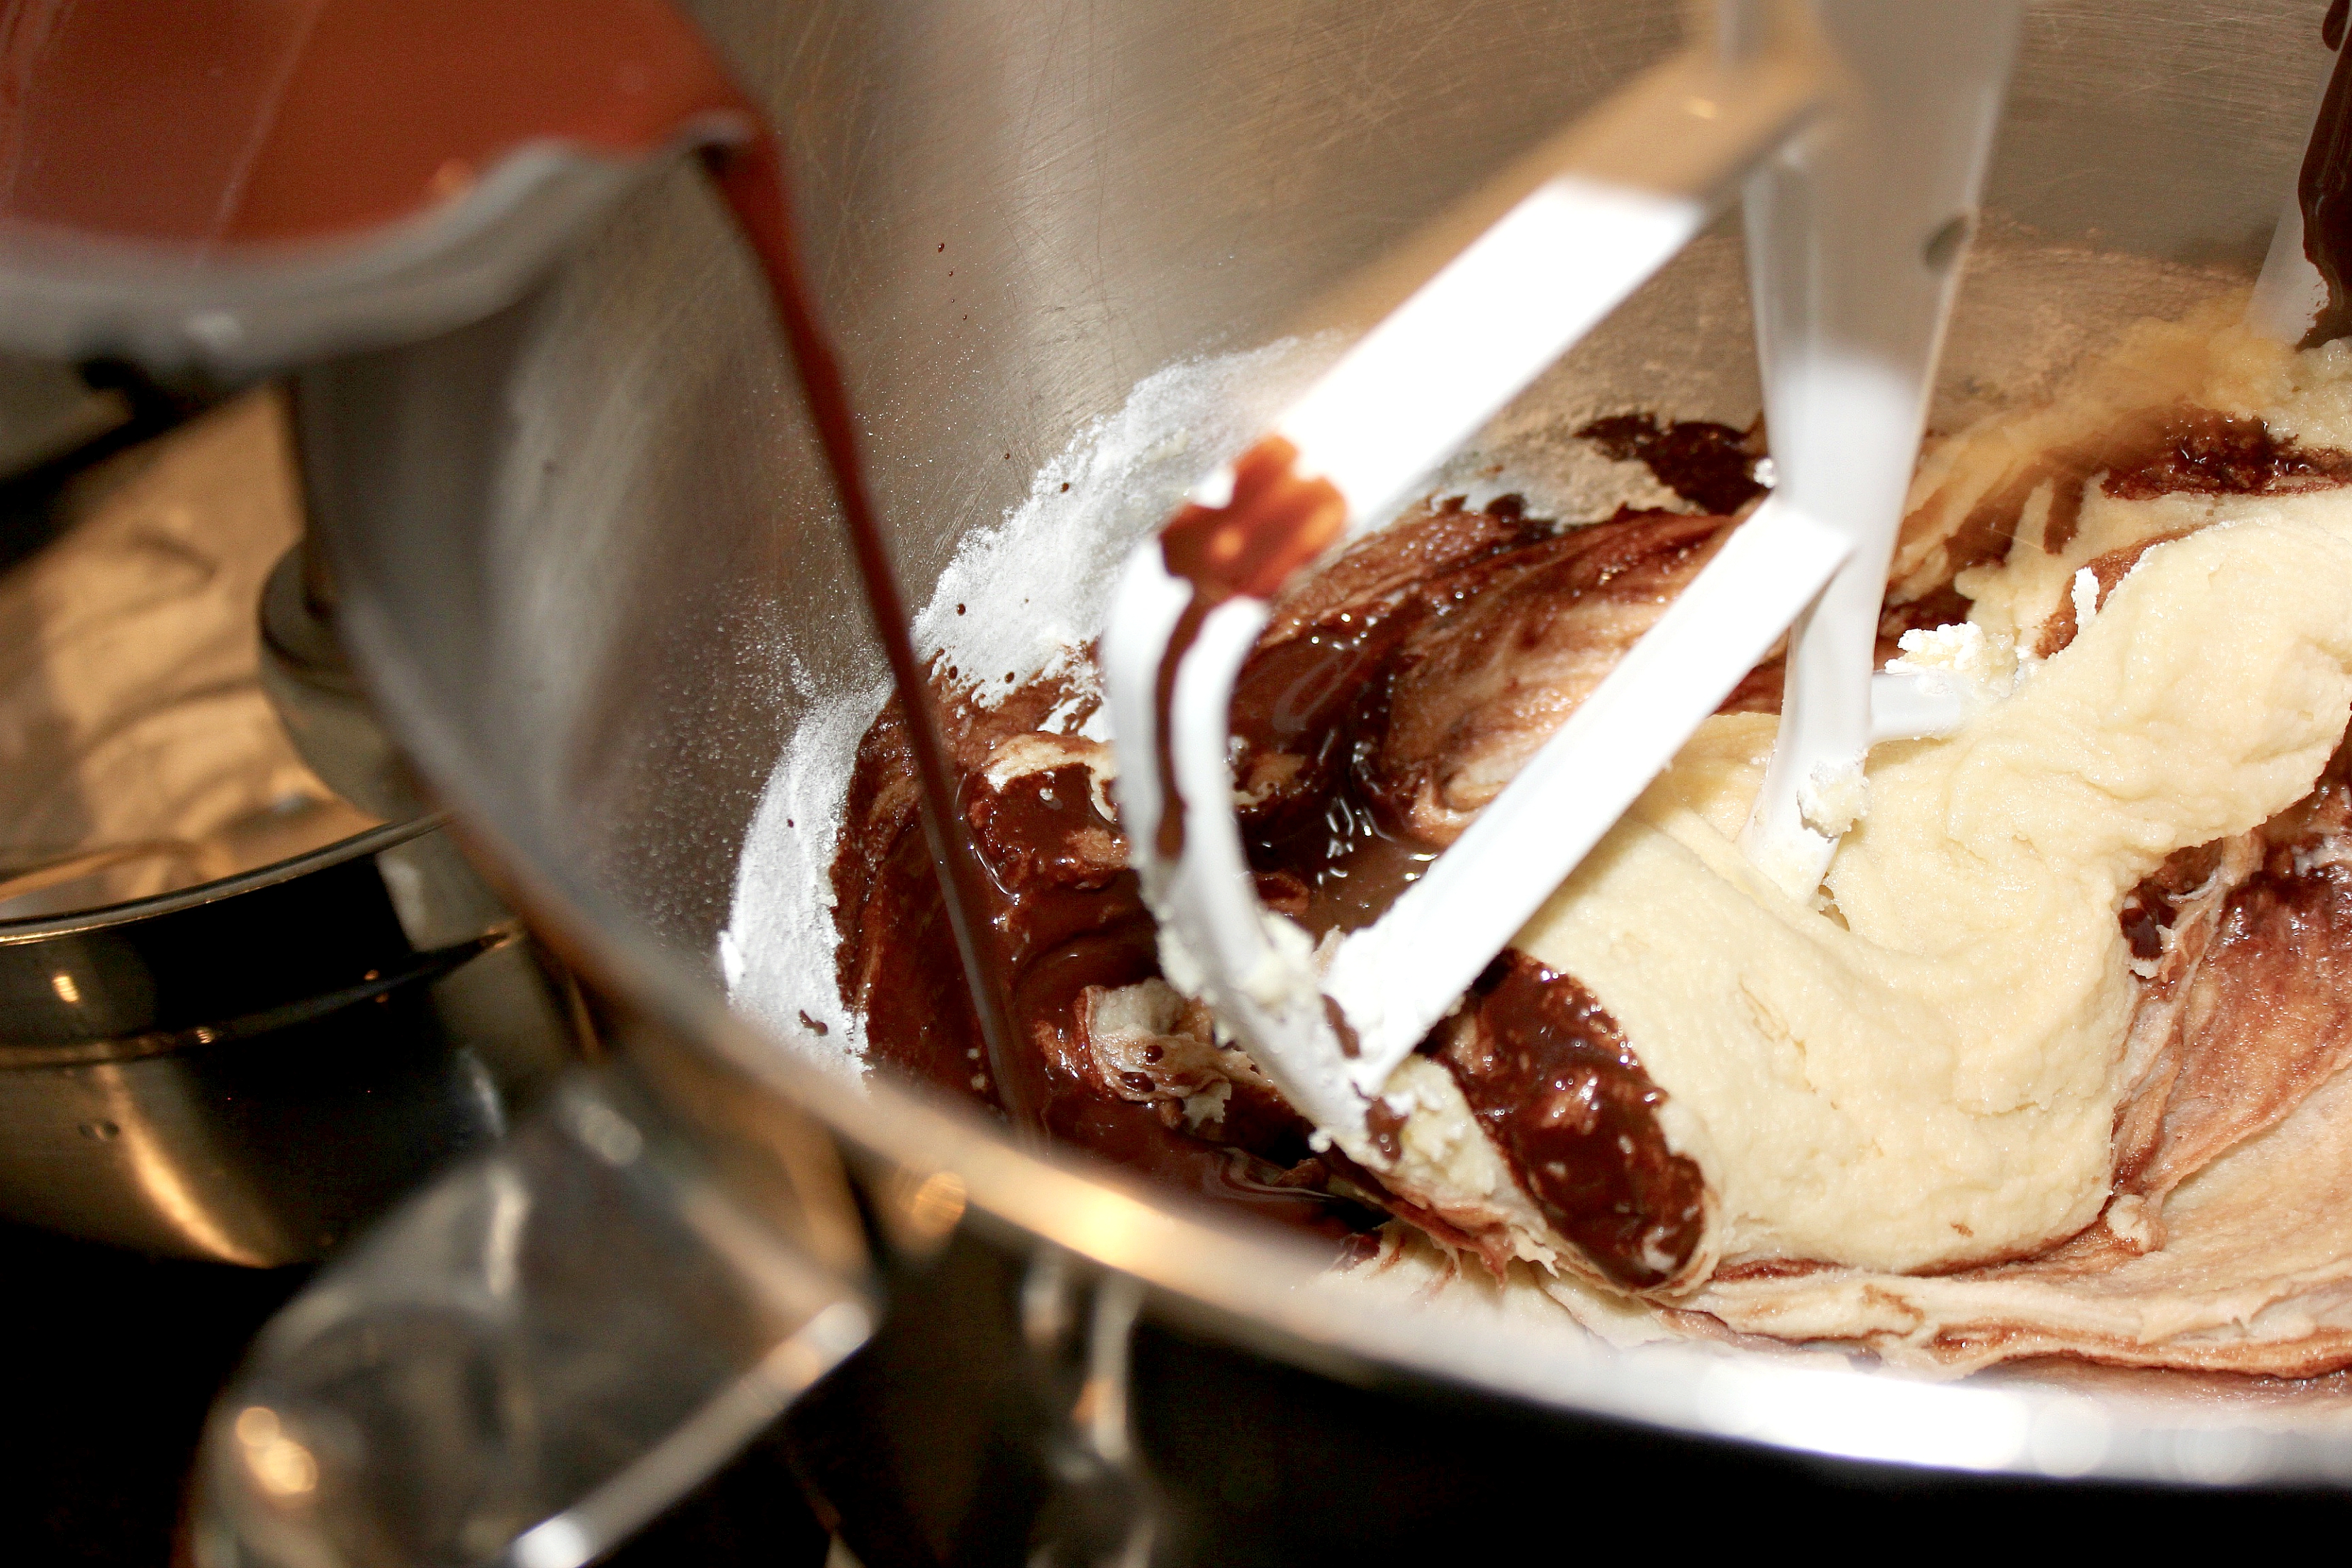
This makes a very velvety batter, when all is said and done.
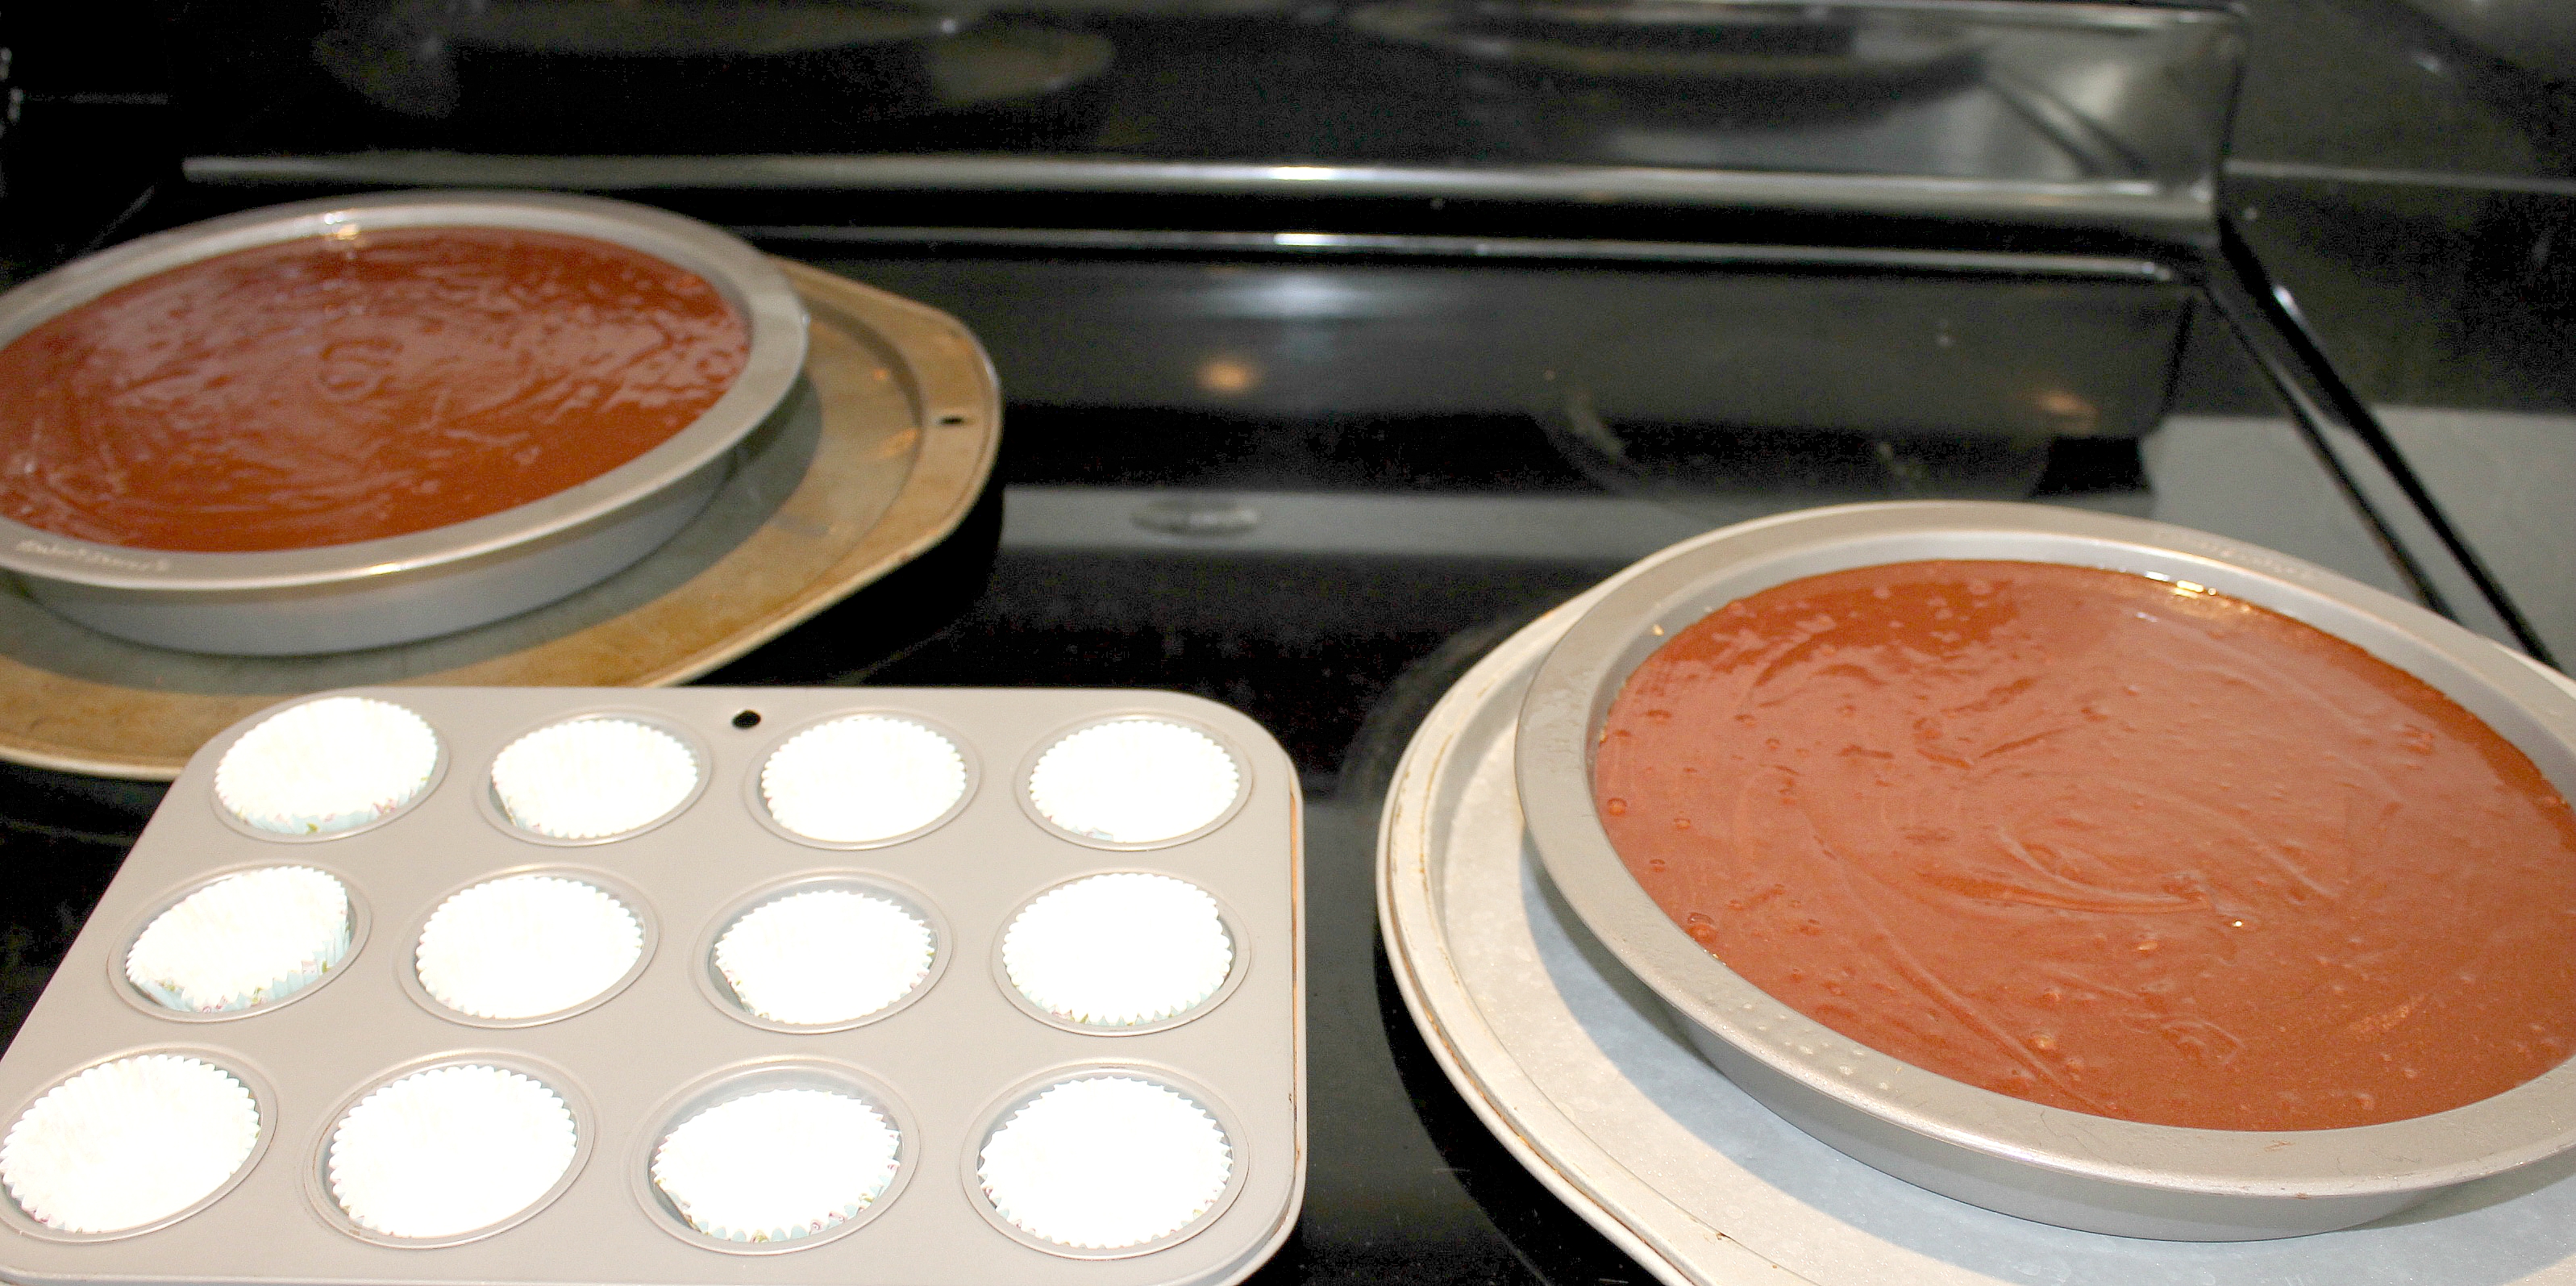
Step 13: Pour carefully into pans overtop of the graham crumb mixture and bake at 350 degrees for 30 minutes or until a toothpick comes out clean when inserted in the middle. There was actually a little more batter than I felt comfortable trying to fit into the 9 inch pans. And because all I could picture was this beautiful chocolate batter (that I had once again resisted just getting a spoon, pulling up a chair and telling myself I was having ‘chocolate pudding’ for lunch with) spilling over as it baked and me weeping, I actually made 12 mini cupcakes along side with the extra batter, much to the little’s delight.
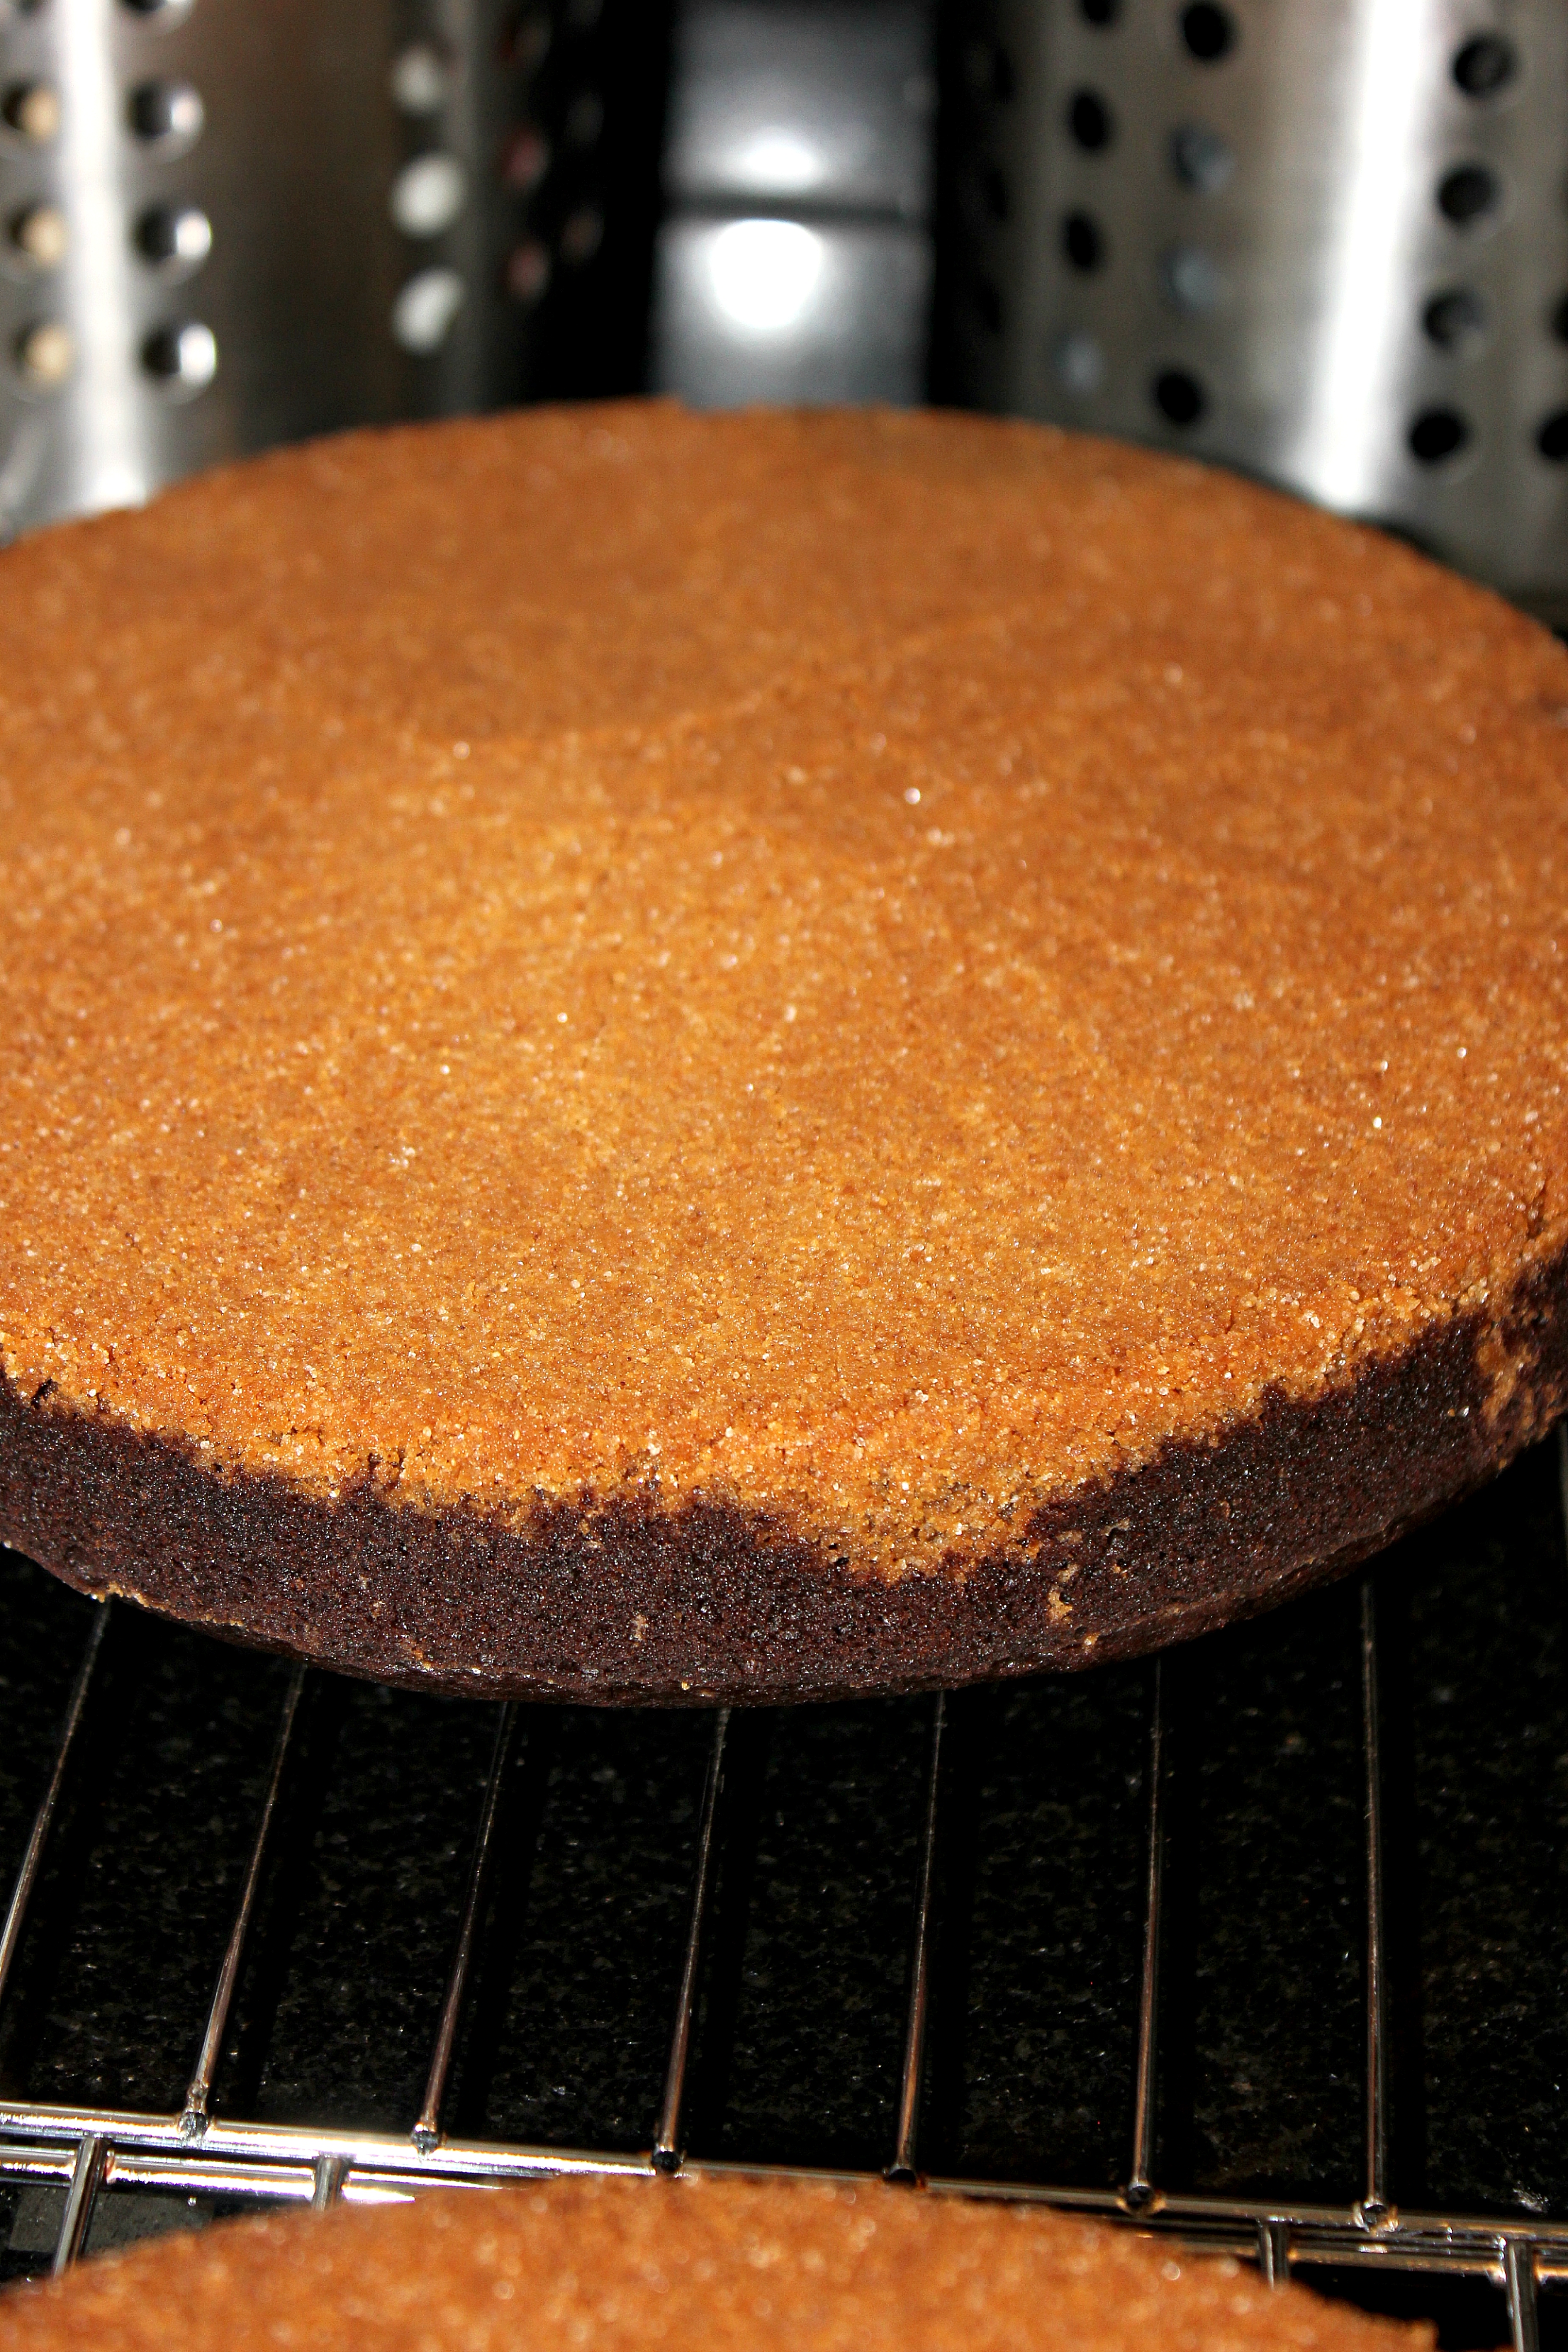
Step 14: Allow cakes to cool on cooling racks in the pans for twenty minutes. Then gently run a knife around the sides to loosen and carefully turn out onto cooling racks, graham crumb side up. Leave to cool completely.
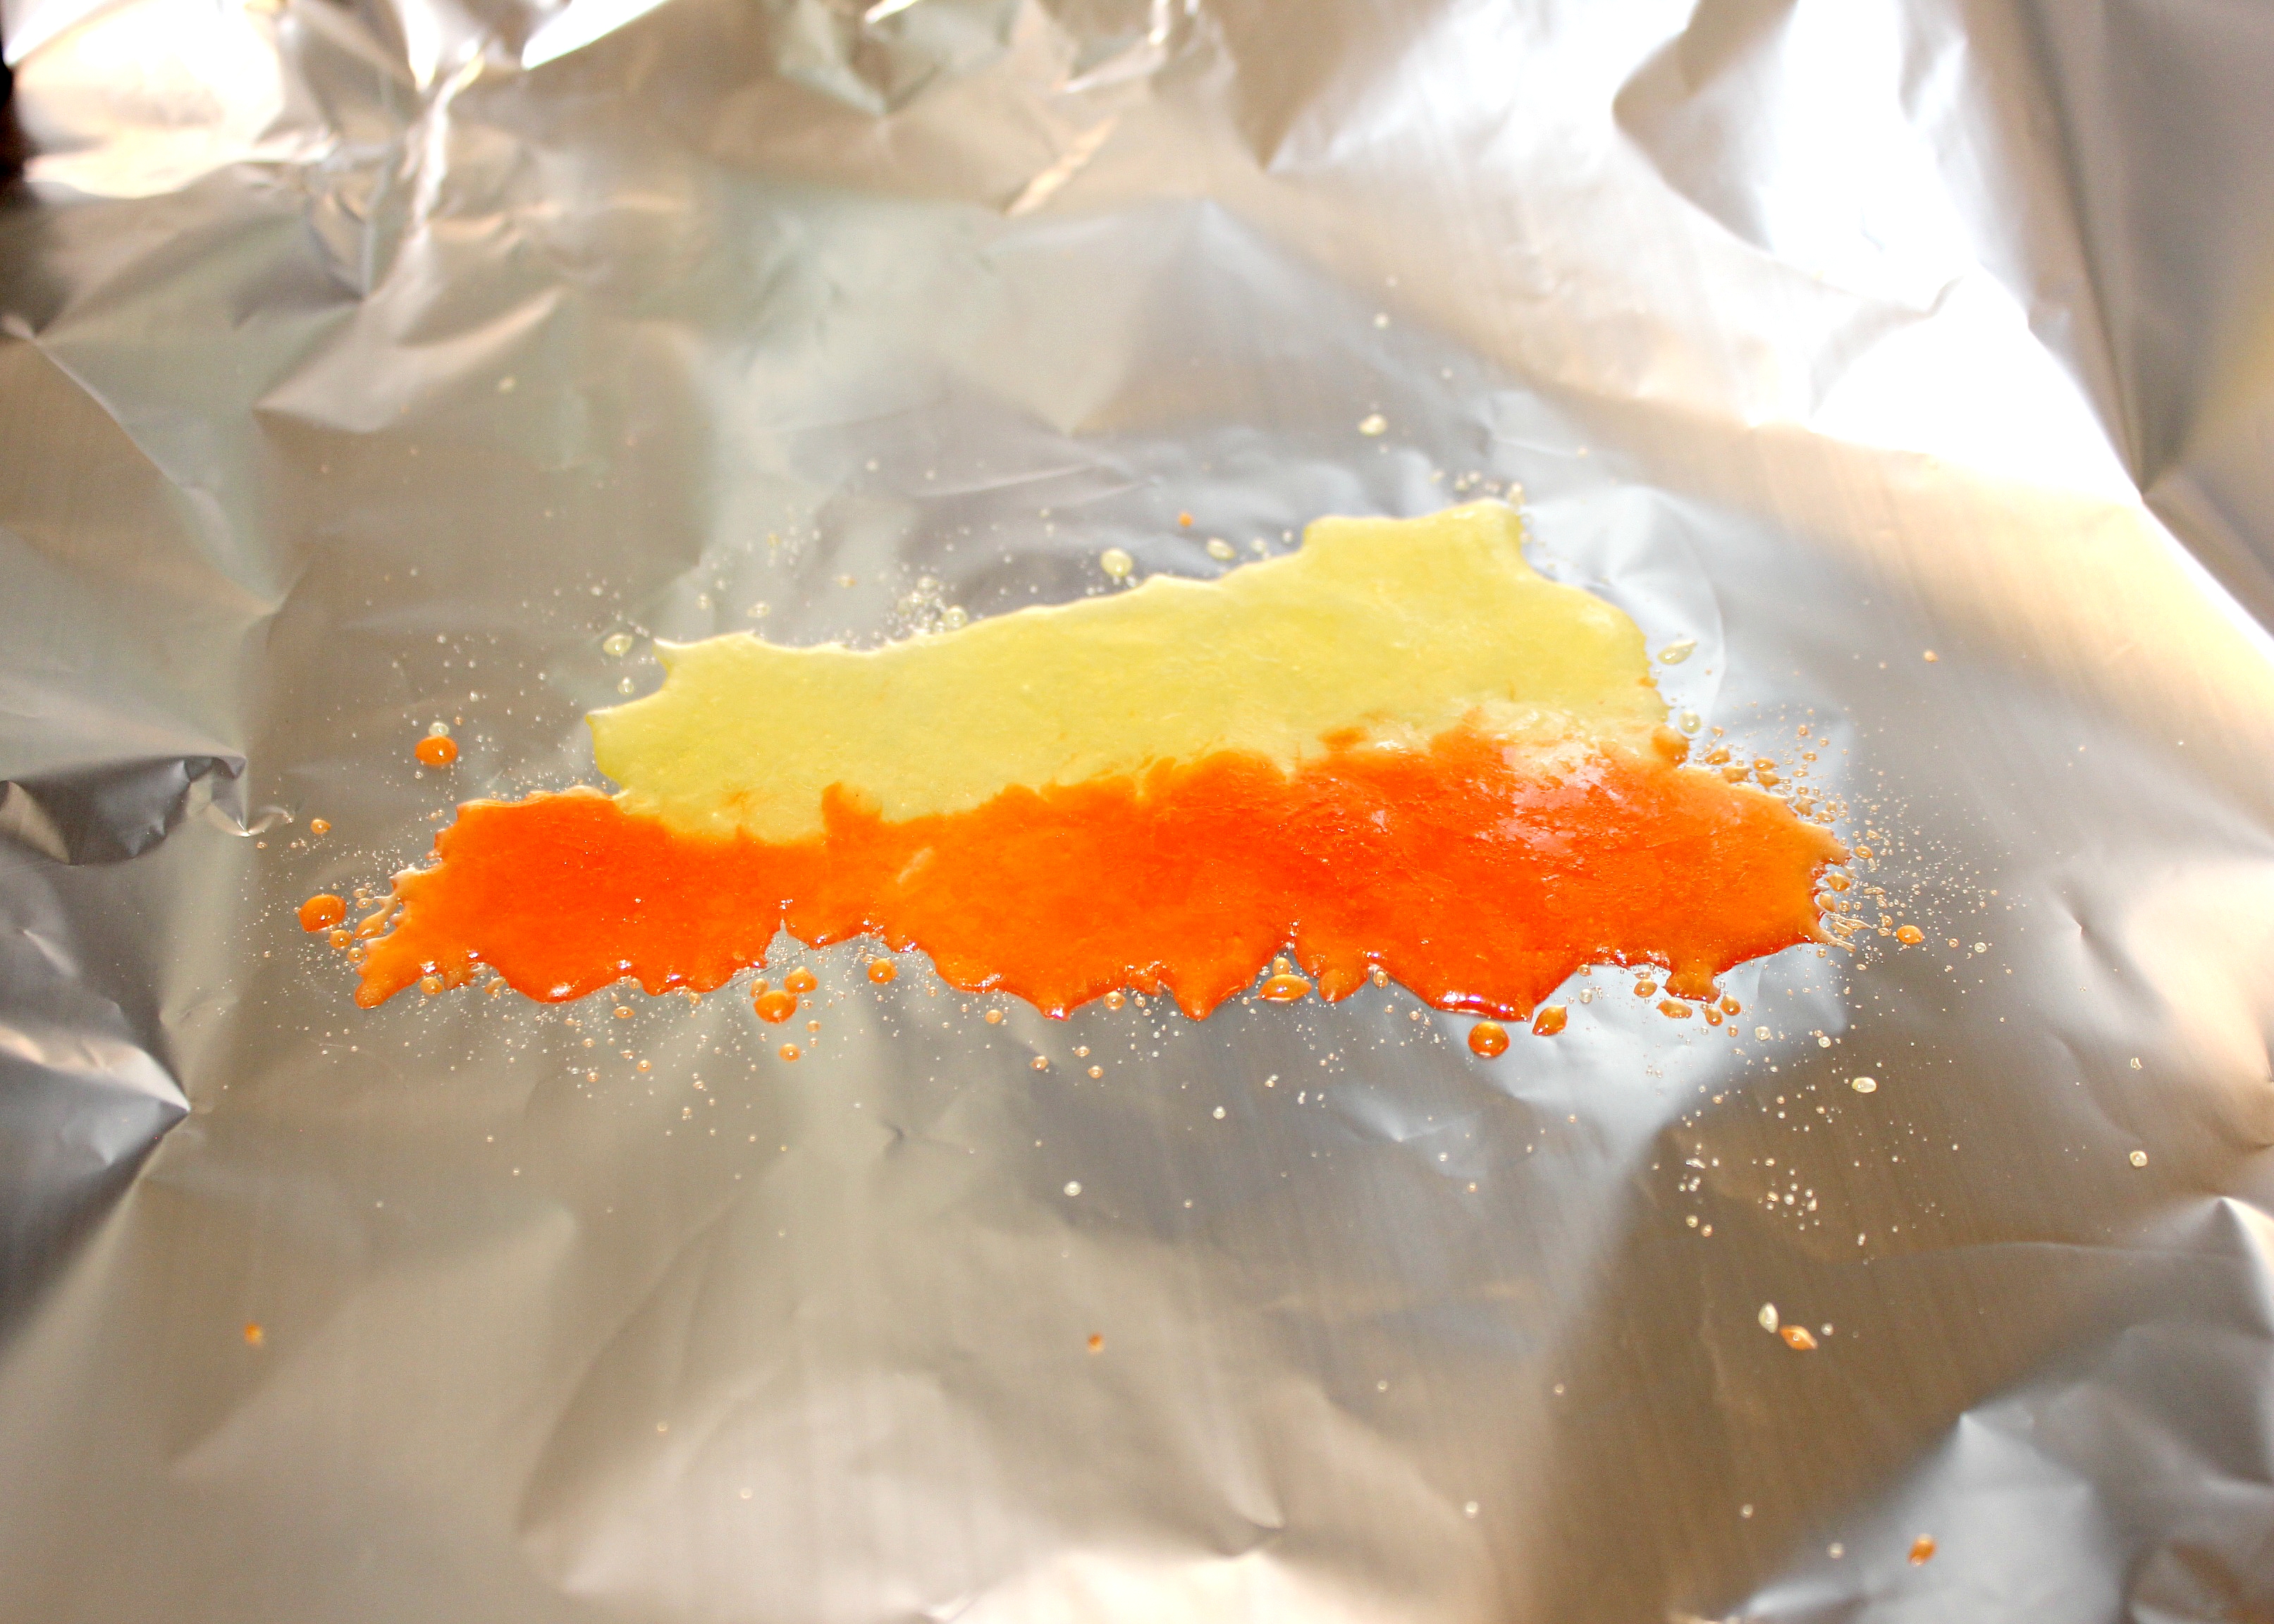
Step 15: To prepare the melted candy ‘flames’ line a cookie sheet with tinfoil and preheat oven to 270 degrees.
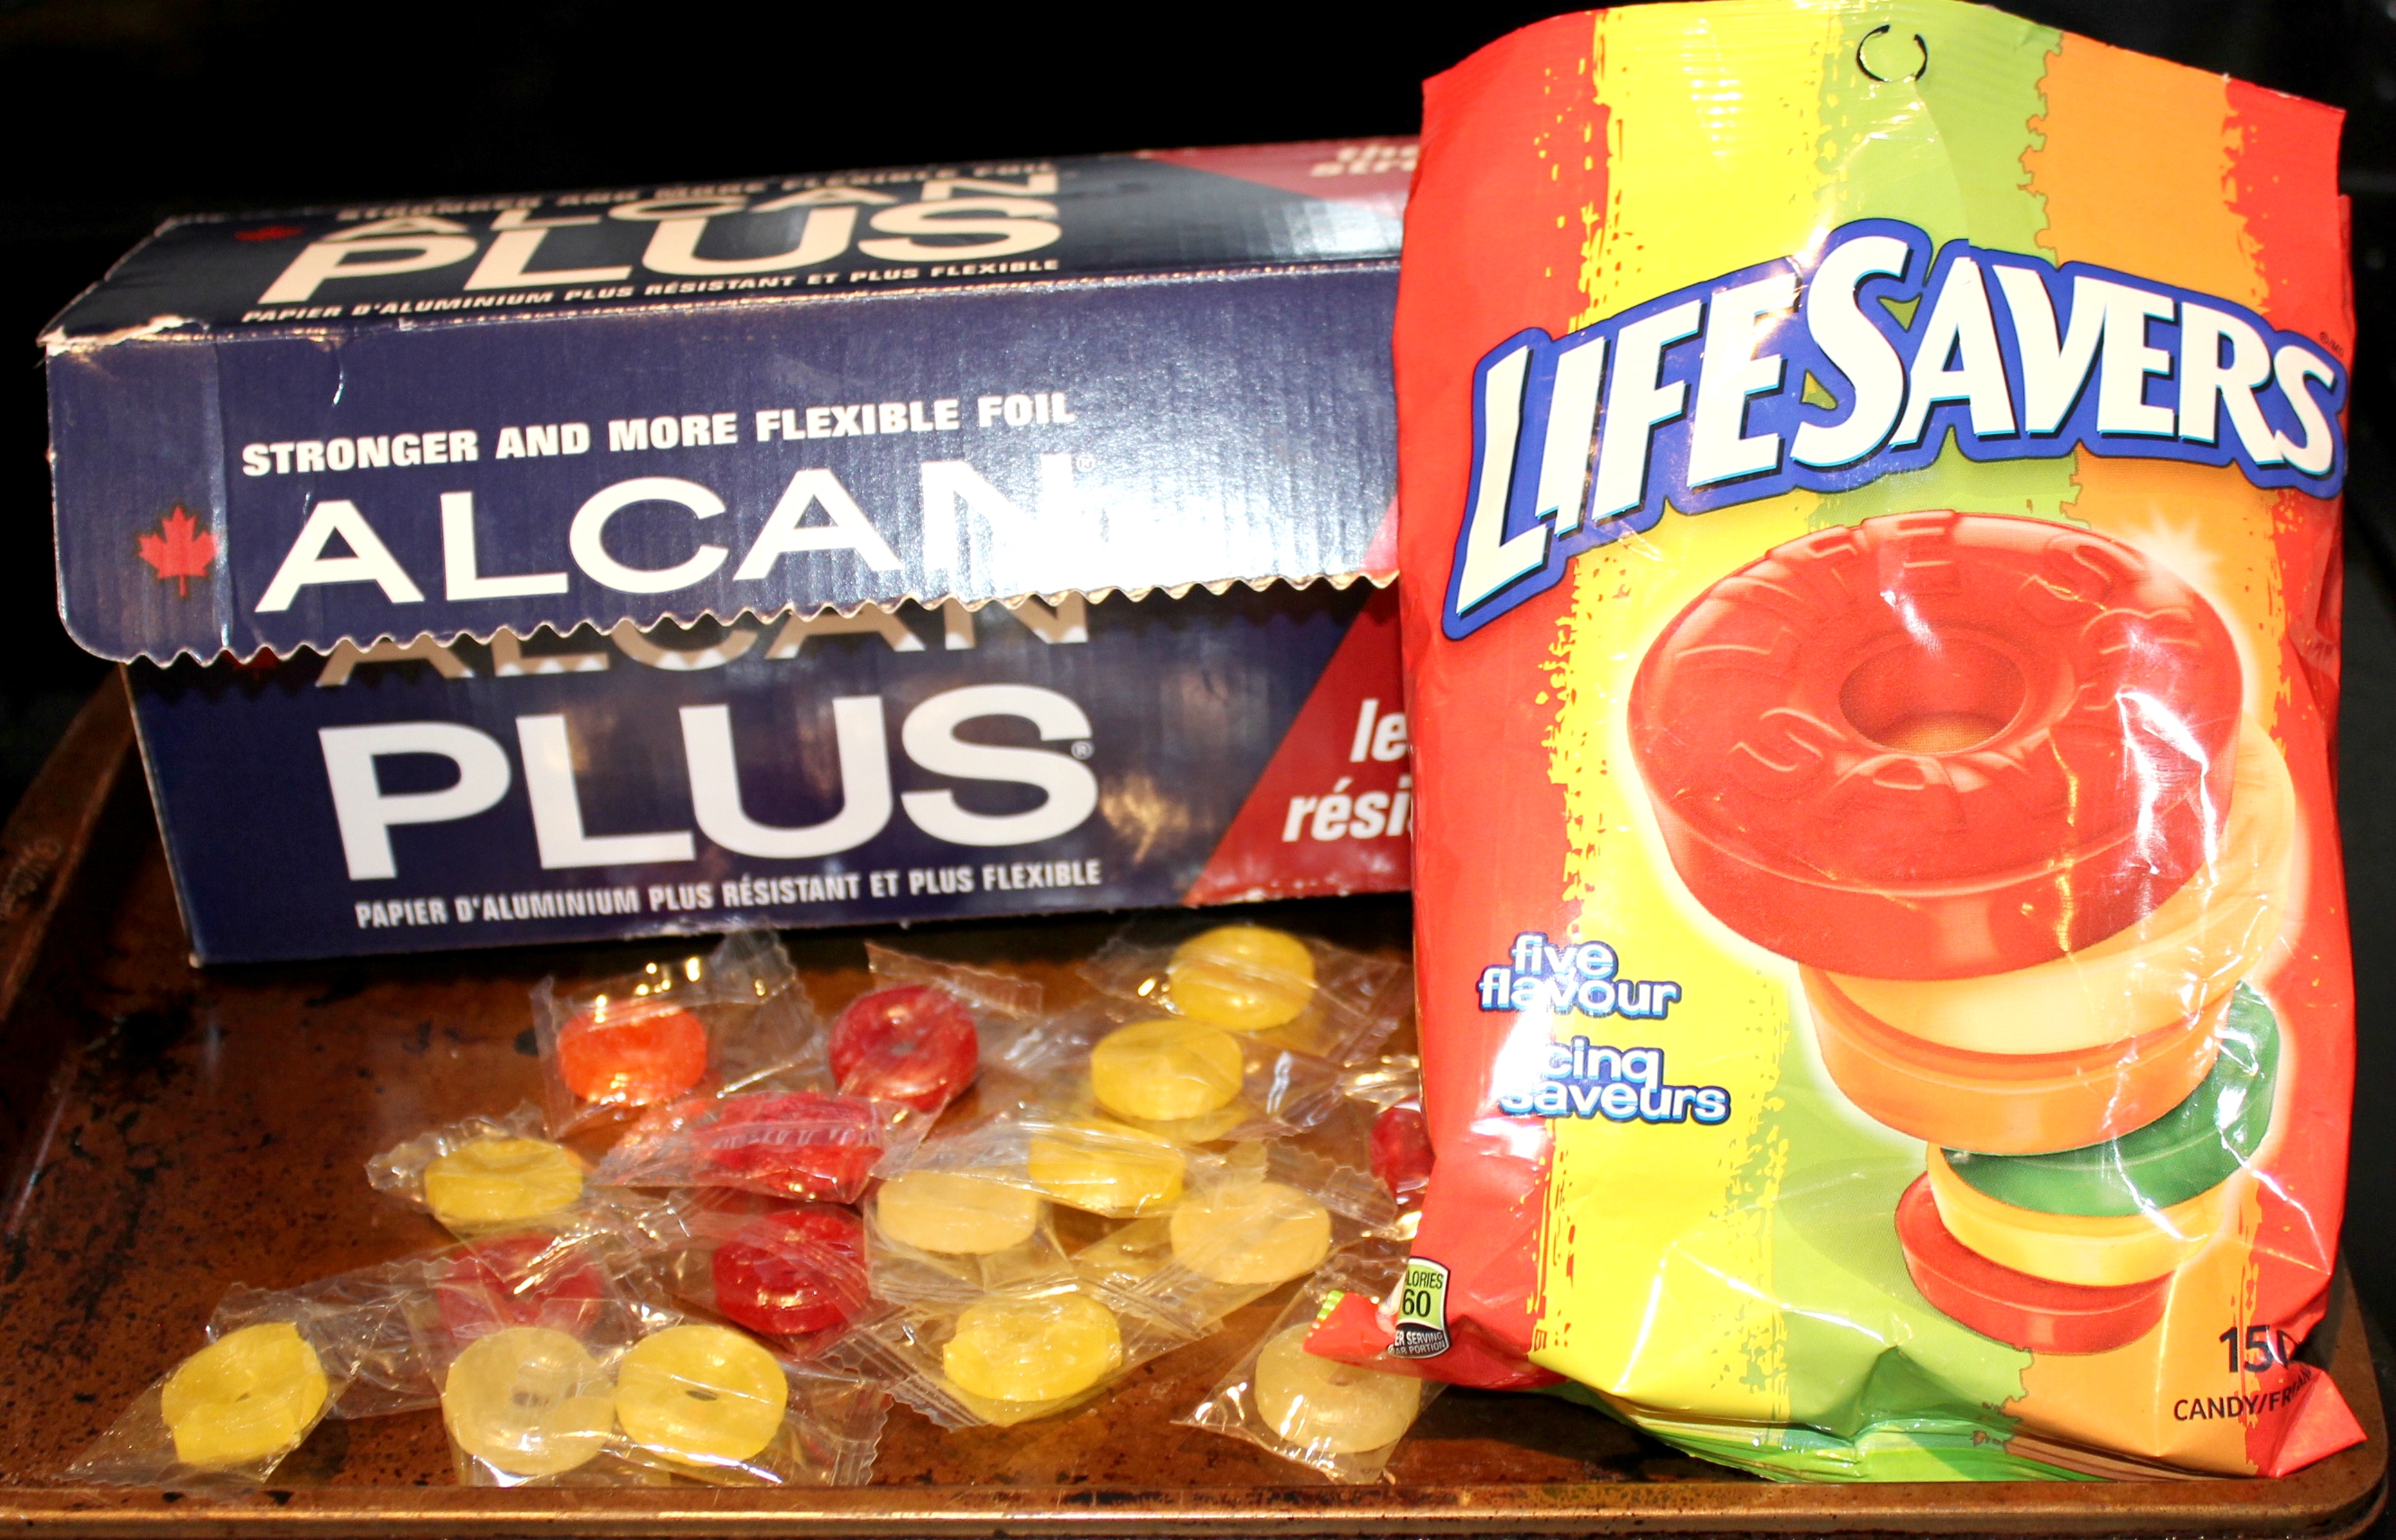
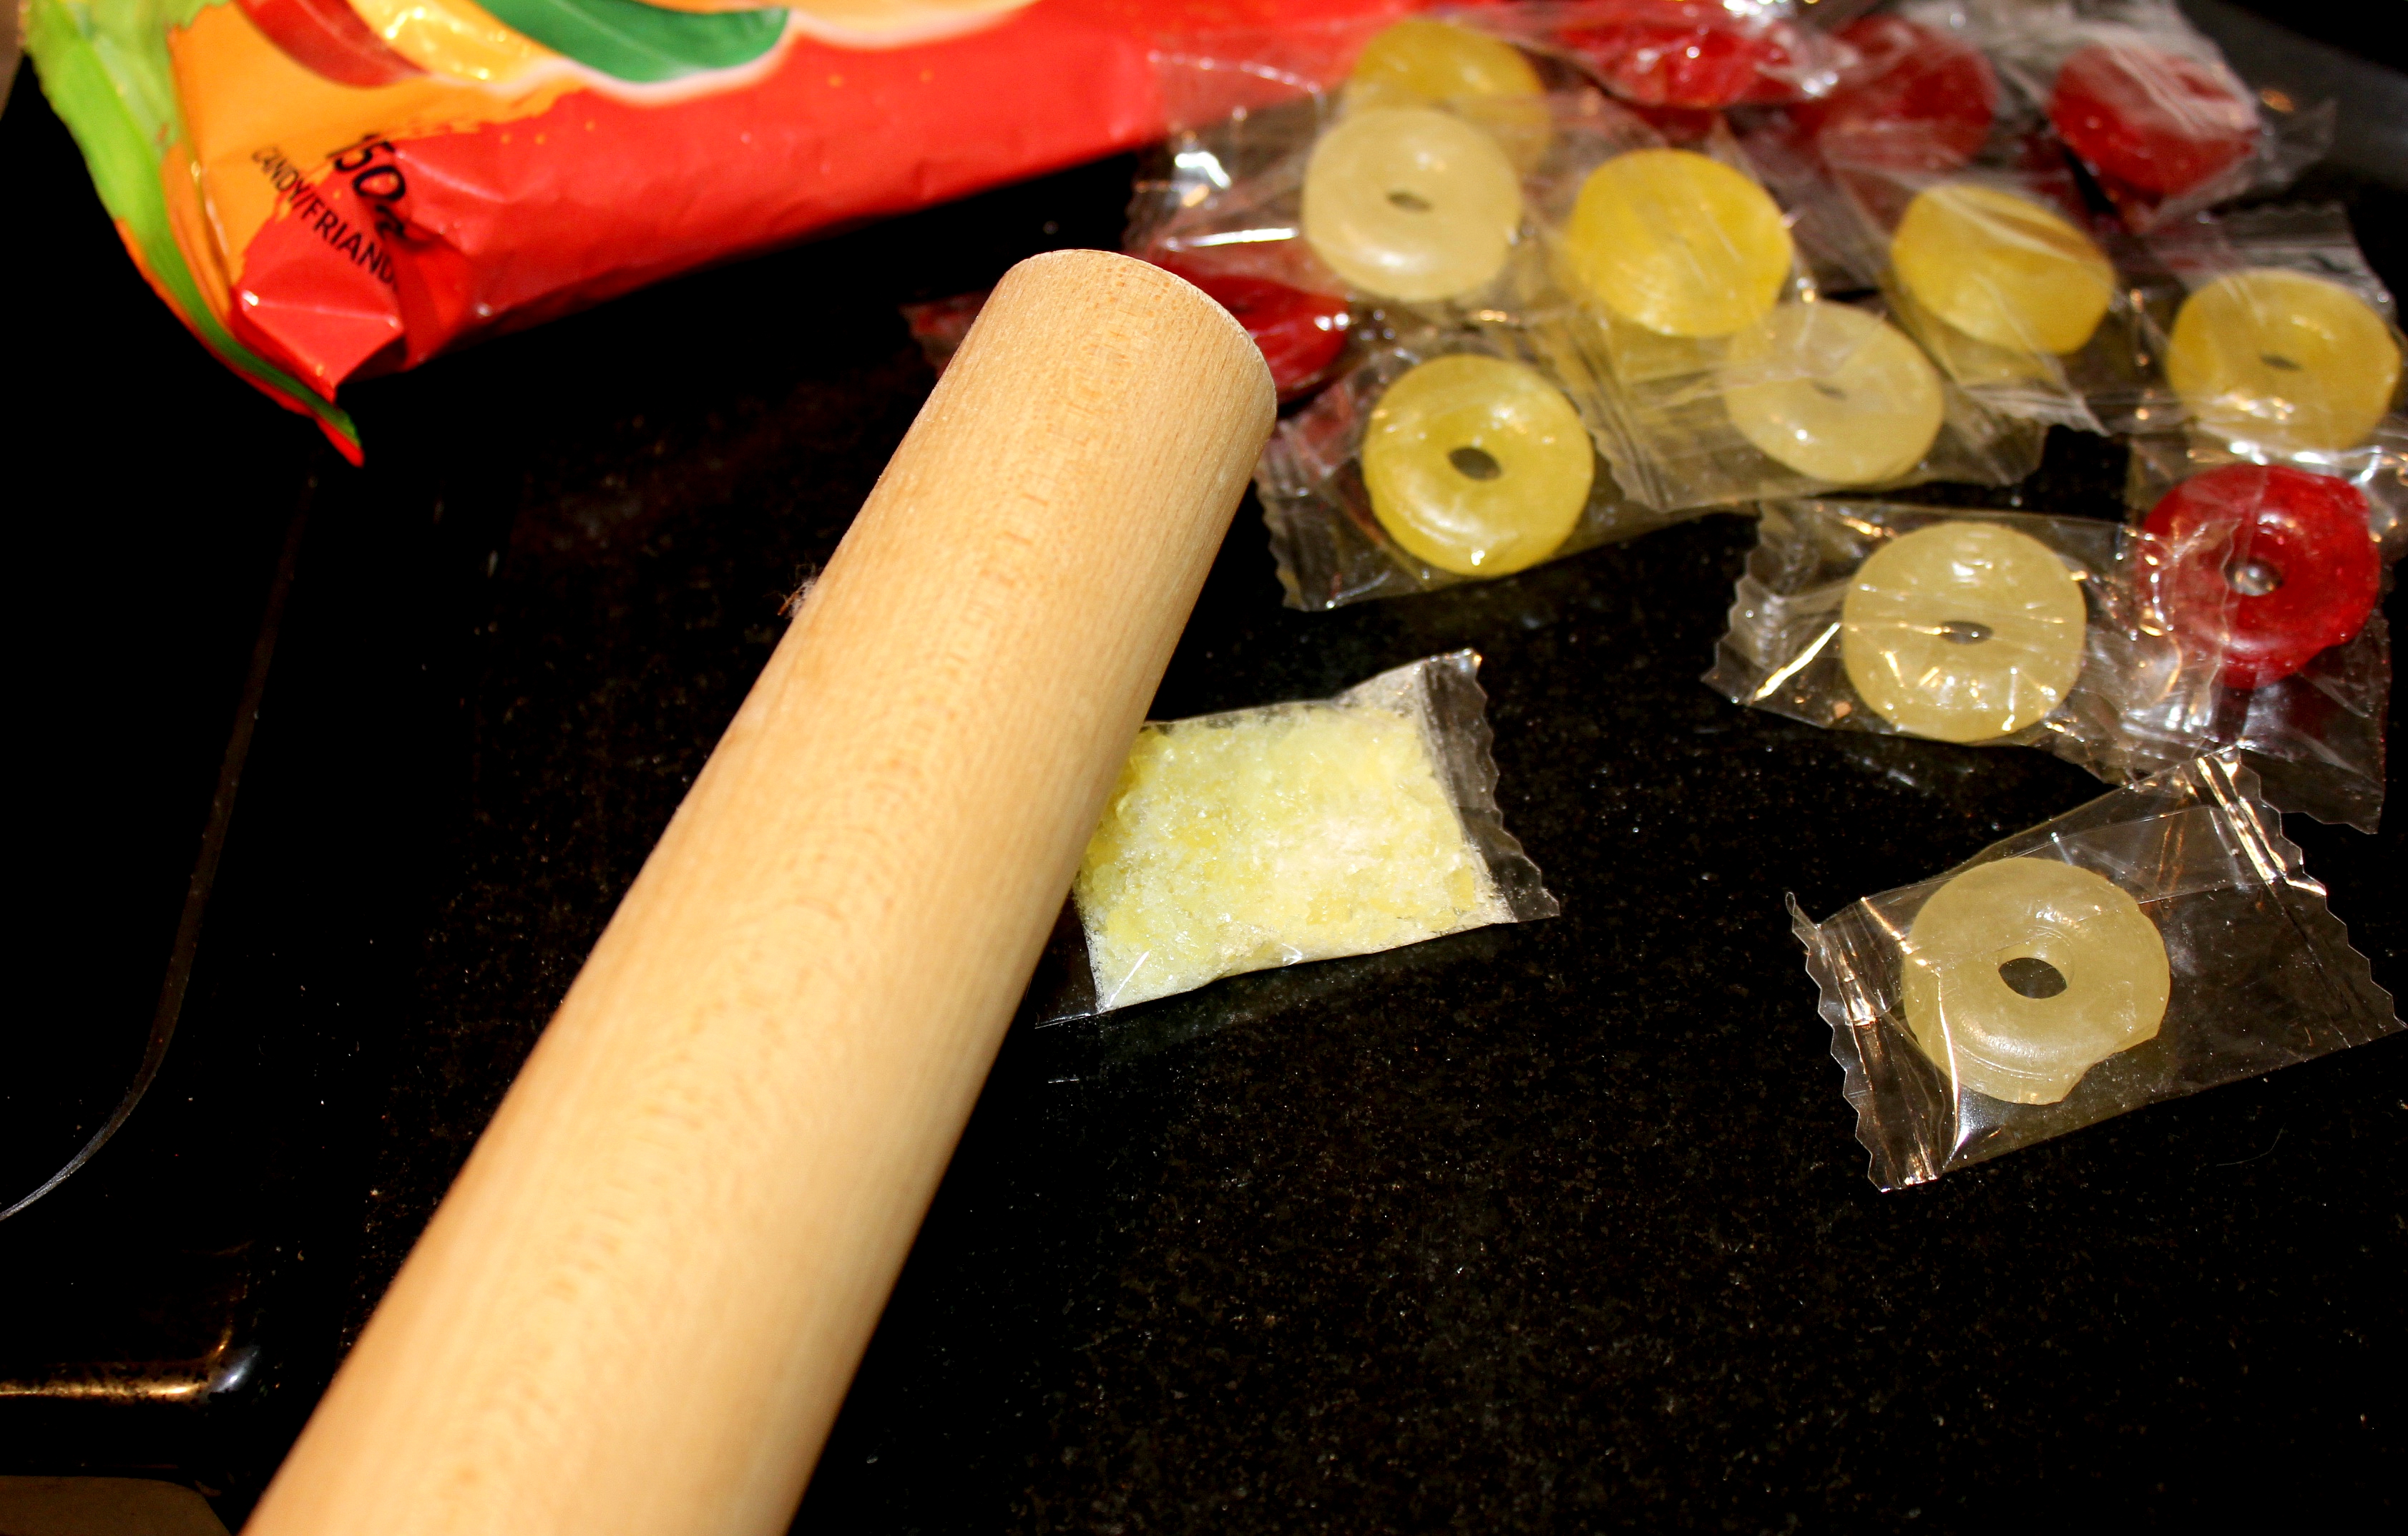
Step 16: I found the best way to crumble the Lifesavers candy was to leave them in their individually wrapped plastic and smash them with my wooden rolling pin. I used 3 matching candies for each stripe of colour, ultimately using 18 candies in total.
Step 17: Empty crushed Lifesaver packets into stripes or rows next to each other on the tinfoil lined sheet. I found that it worked best if the candies and colours actually touched.
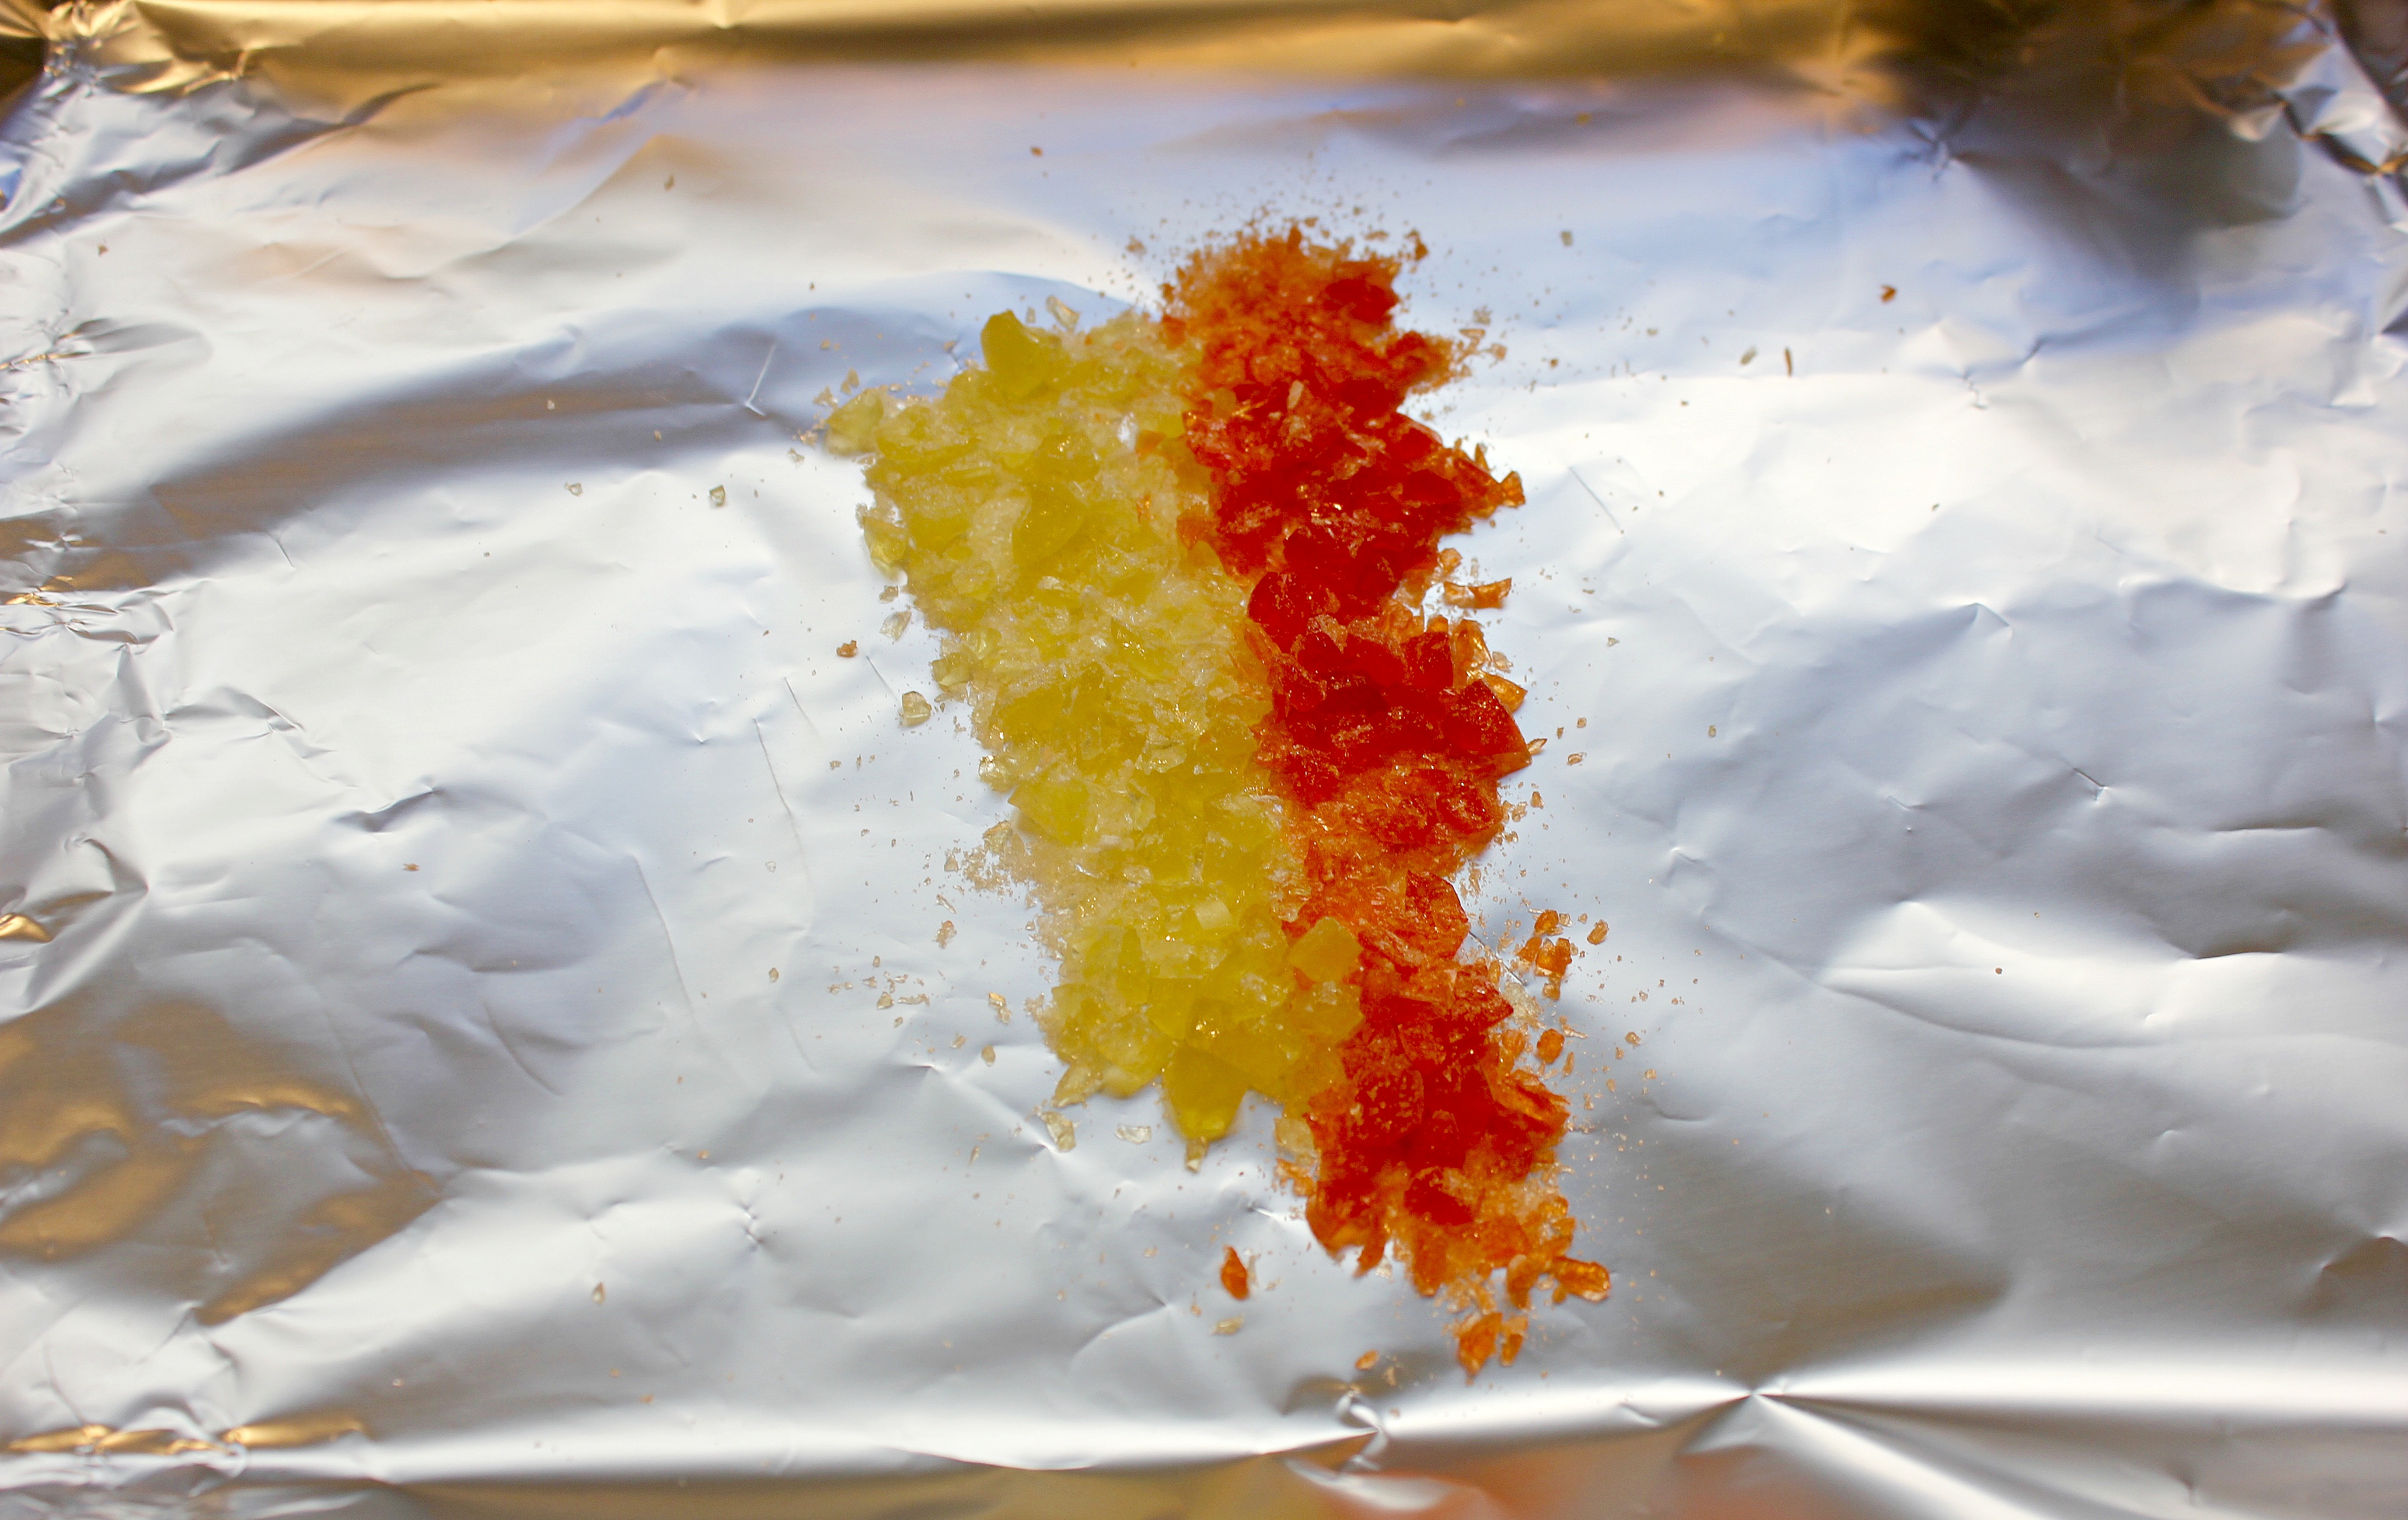
Step 18: Bake in a 270 degree oven for 5 – 10 minutes until liquid. Then remove and set aside to cool and harden.
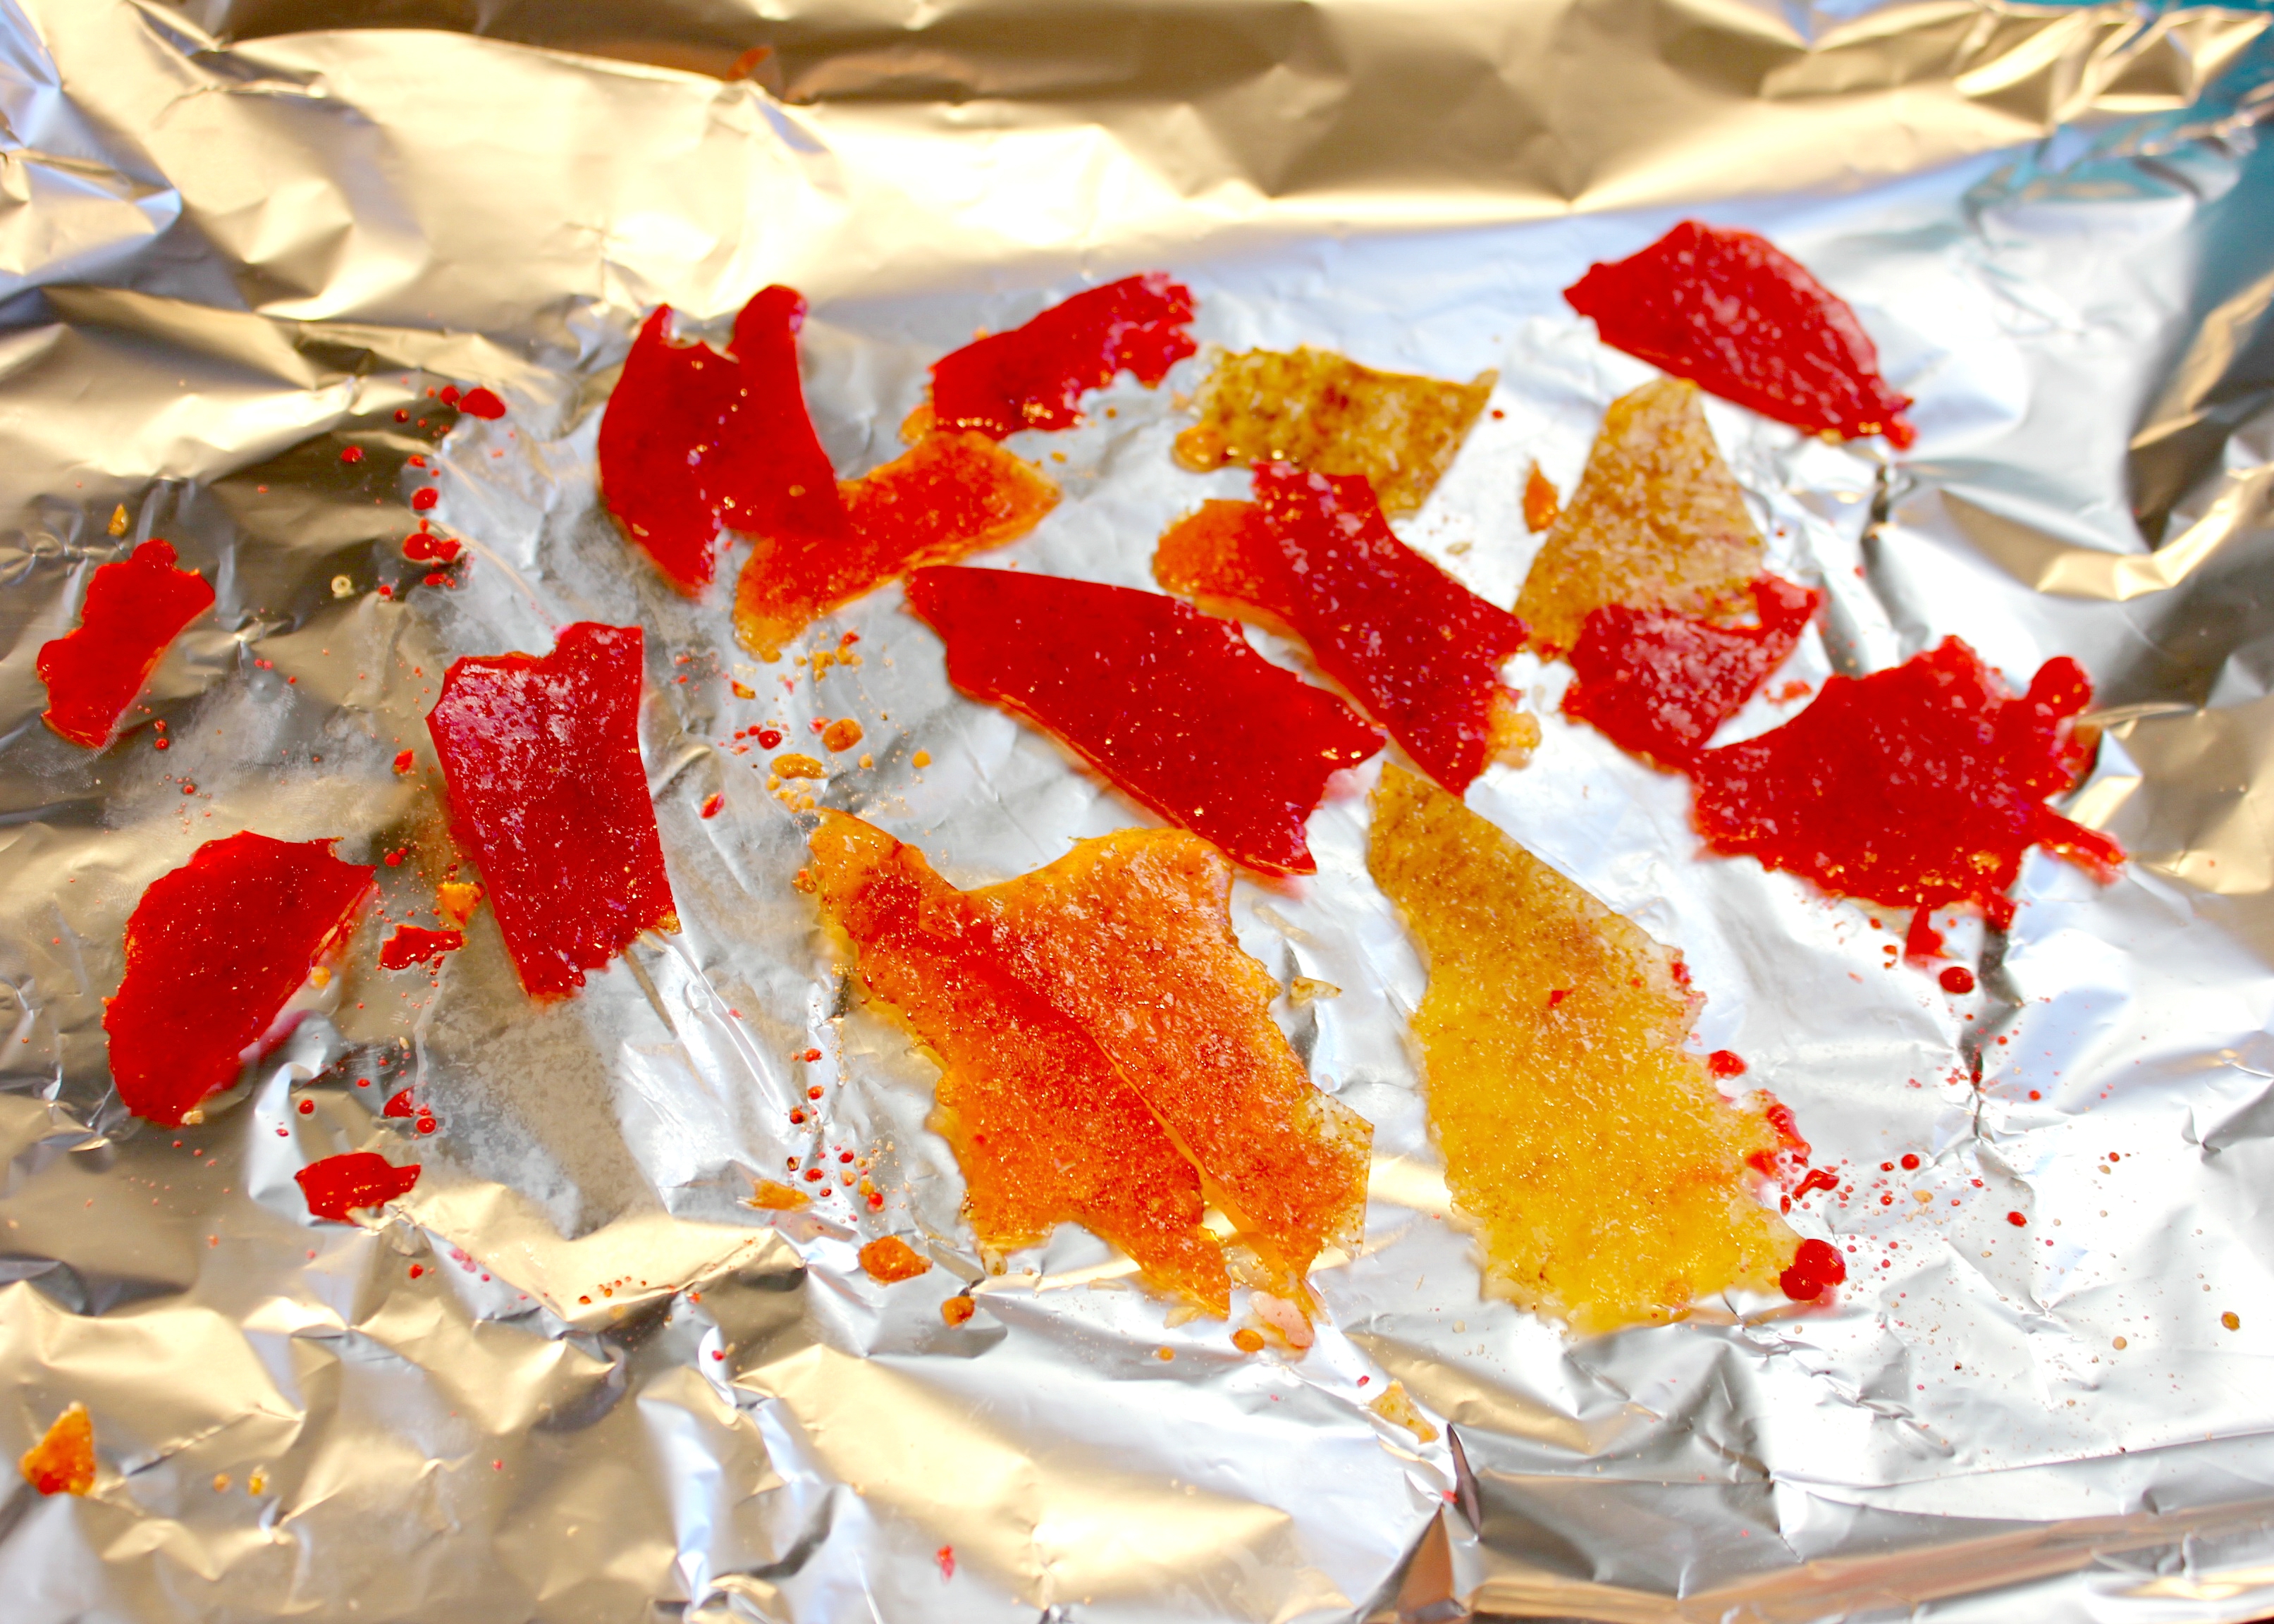
Step 19: Once the candy has cooled and hardened, peel it off the tinfoil and break apart to resemble flame-like pieces. Set aside.
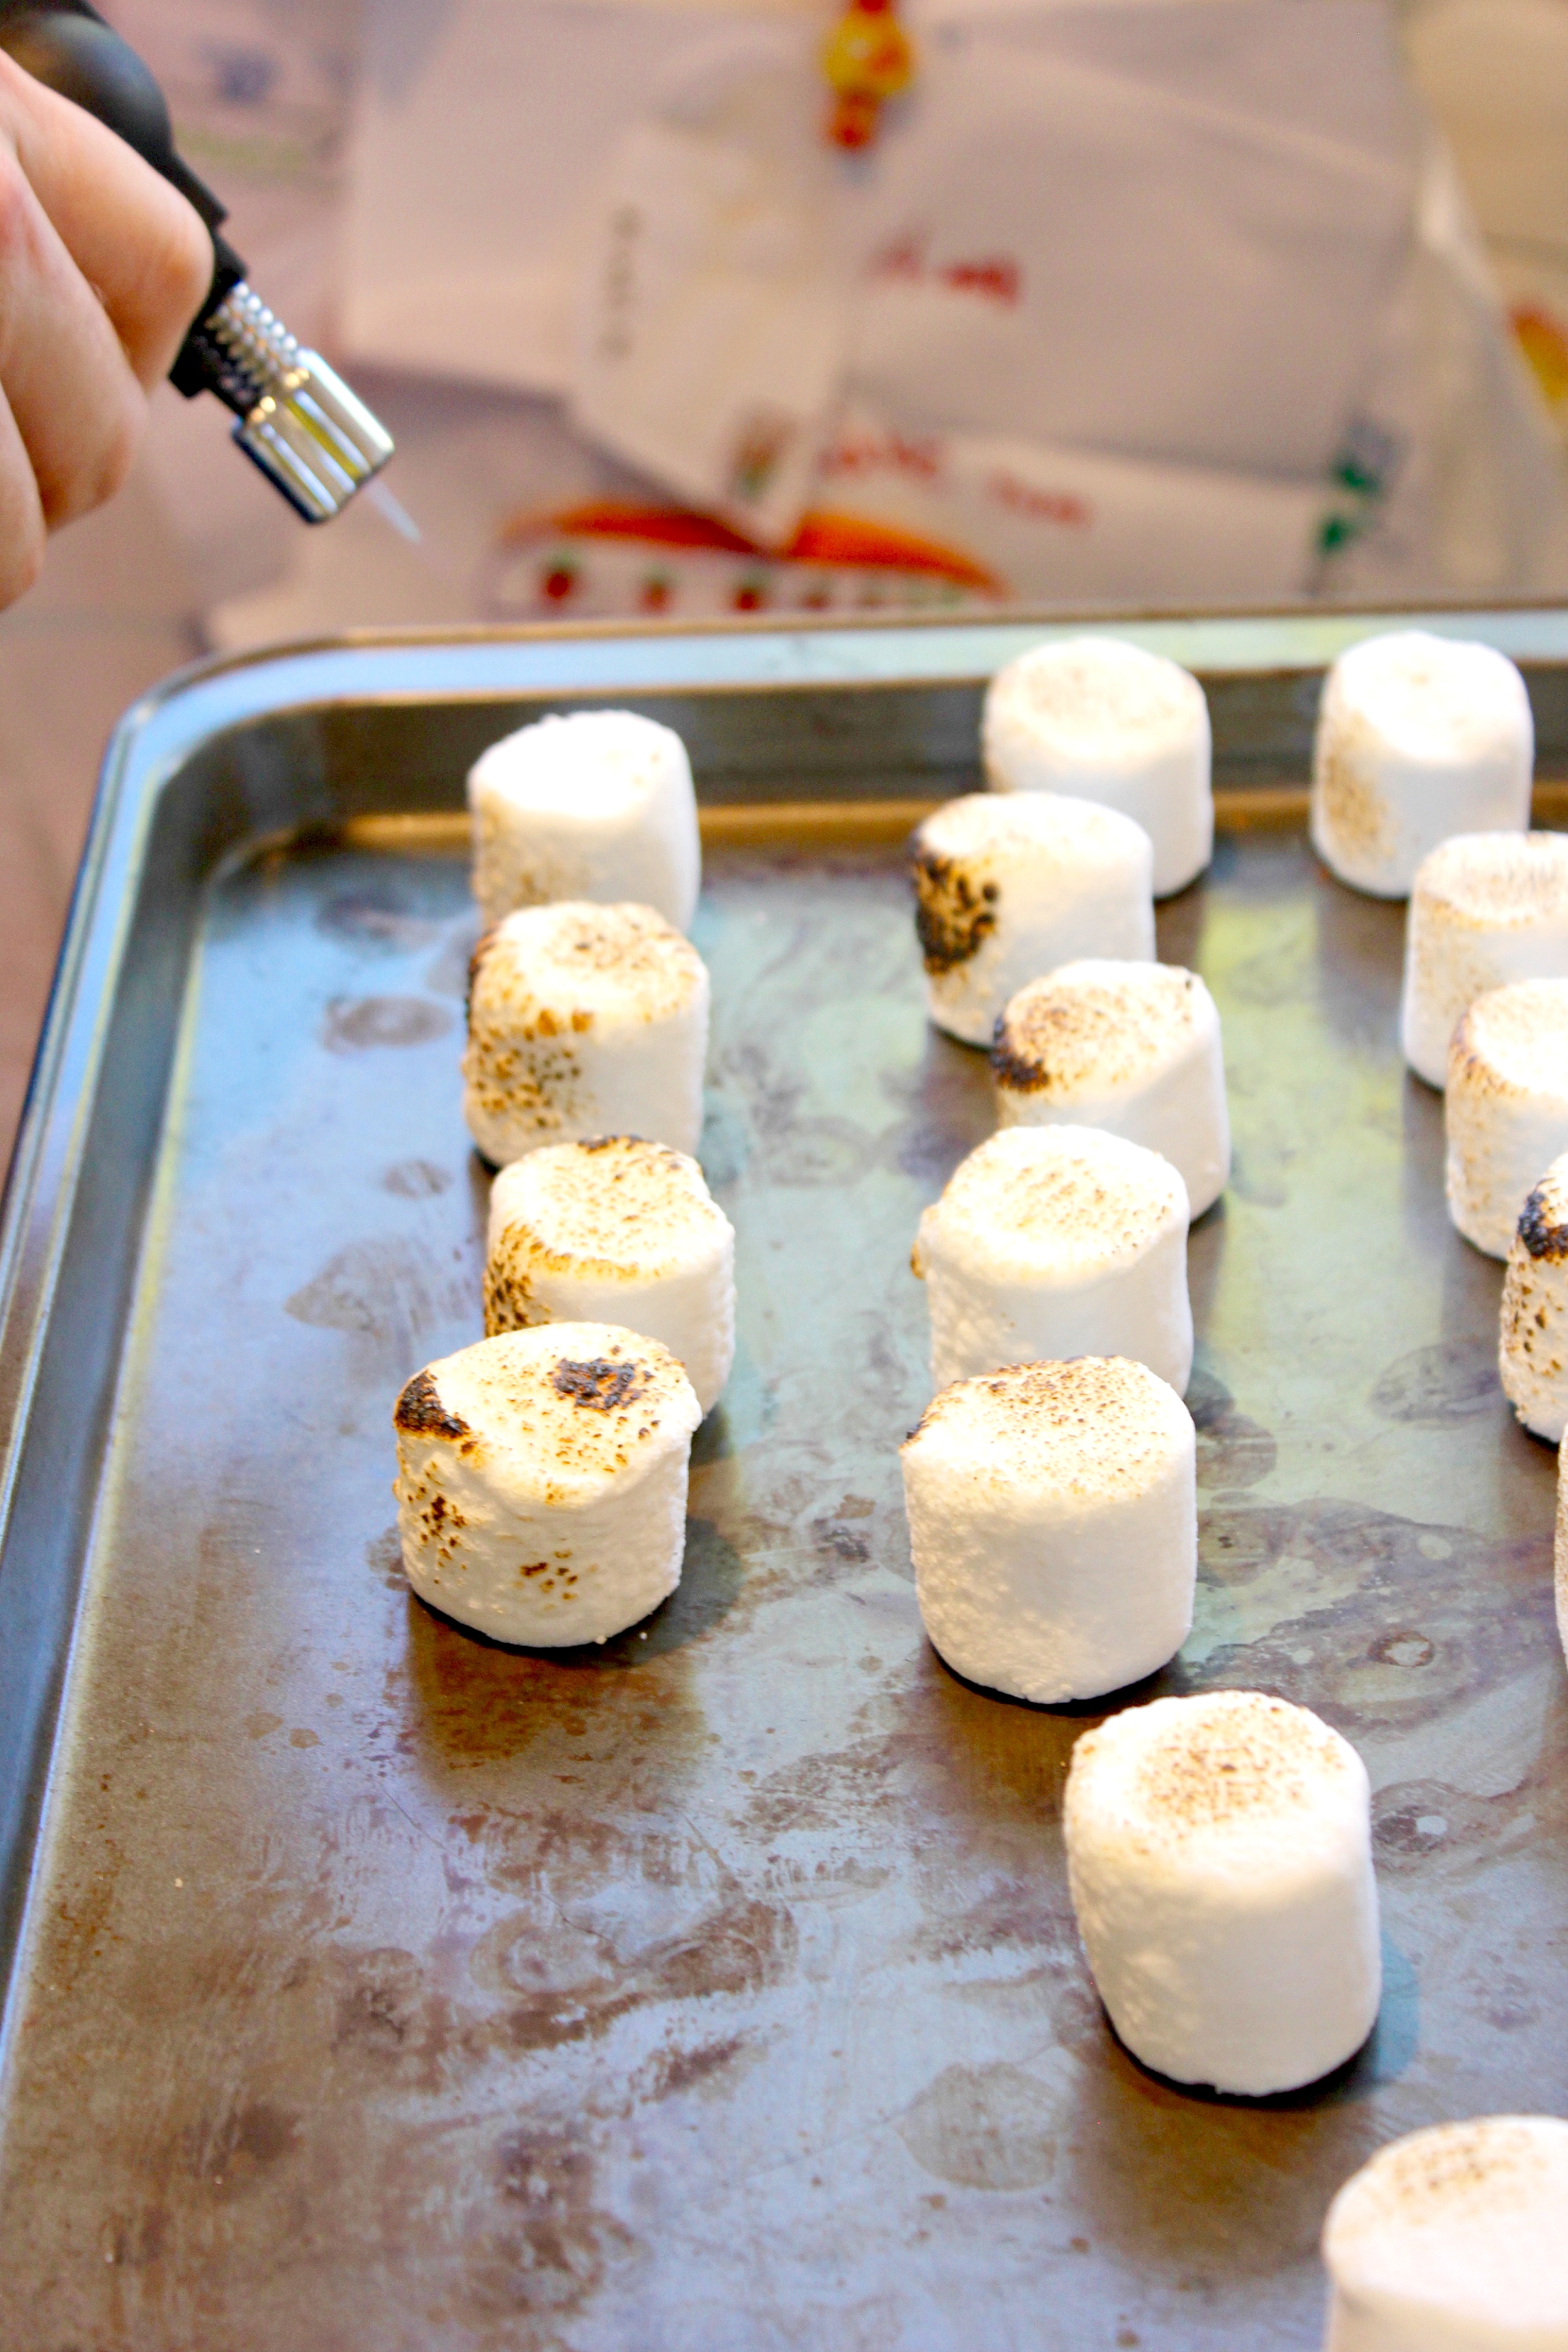
Step 20: To prepare the ‘roasted’ marshmallows, place a large cookie sheet on a heat resistant surface or hot plate divot (the pan will get quite hot). Set out a row of marshmallows and using a kitchen torch char the top and front sides of each marshmallow. This cake took the entire bag of marshmallows, 50 in total (25 per row). I chose to use Loblaws No Name Marshmallows because they seem to be less sticky (not getting all stuck together in the bag) and keep their shape better in my opinion.
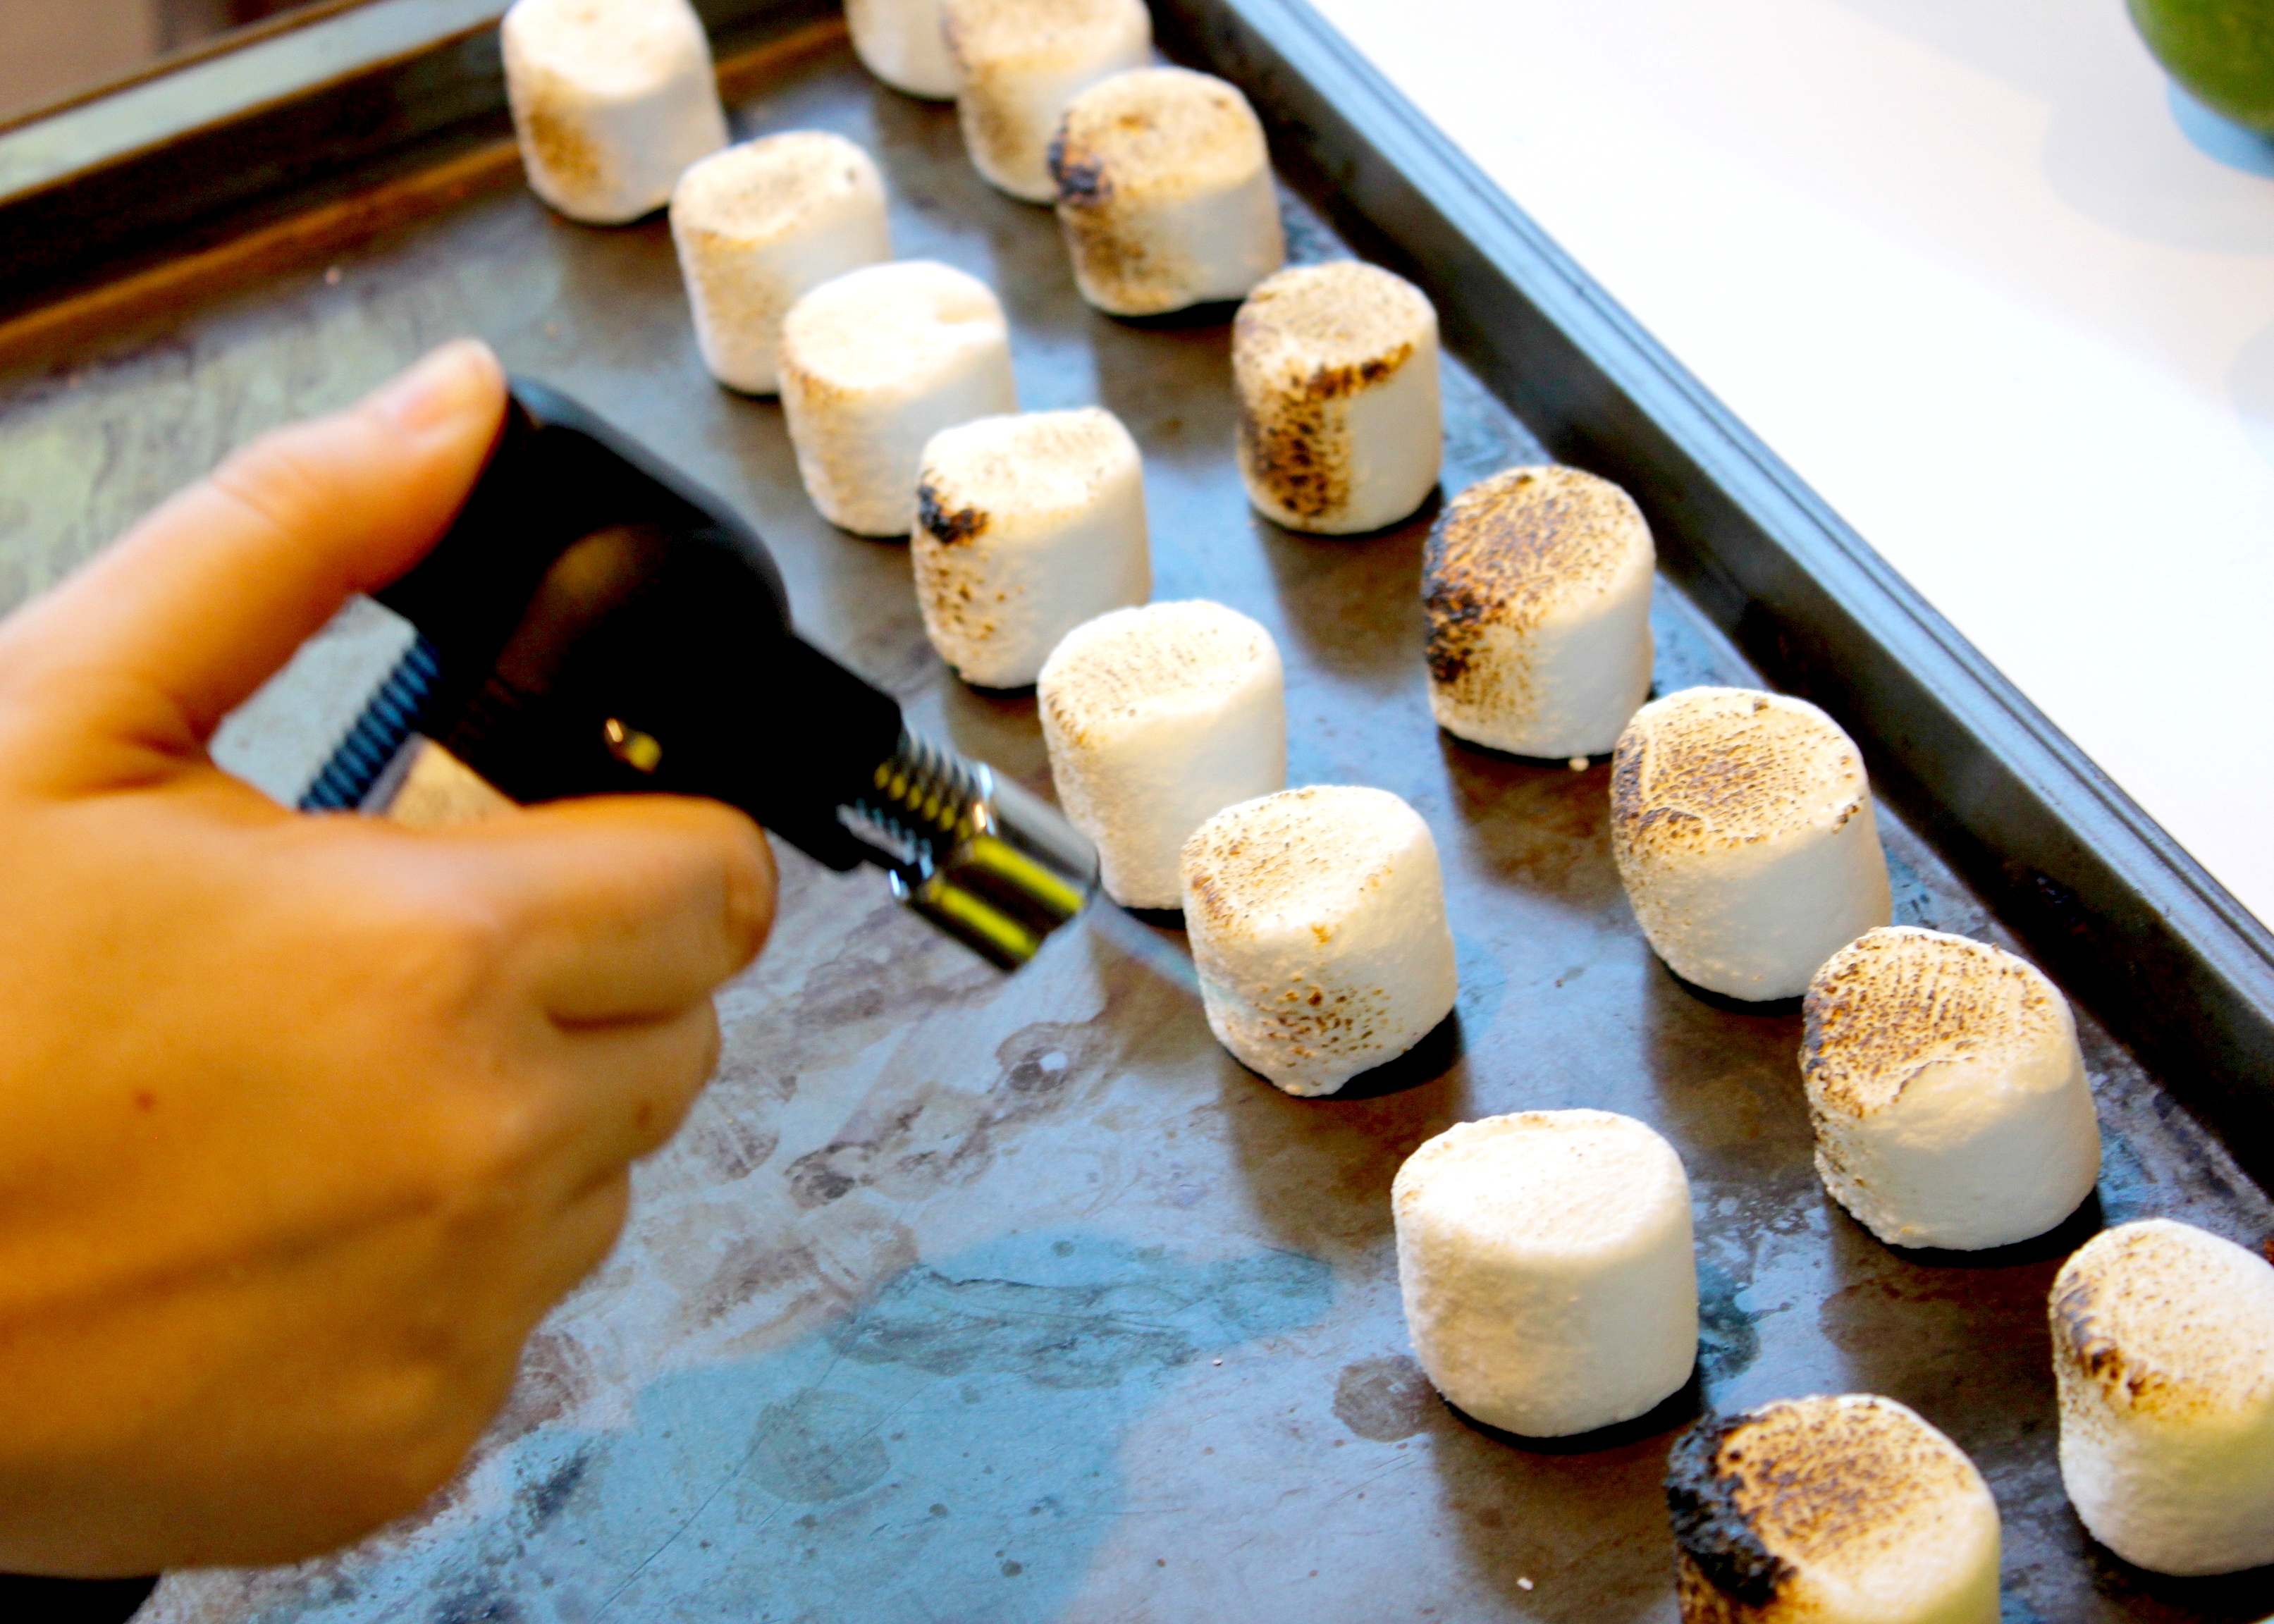
Do not hold the flame too close to the marshmallow you are charing or it will light on fire just as quickly as roasting them on an open fire (simply blow it out). This proves very entertaining to one’s husband if they enjoy watching your lack of patience and finesse in open flame endeavours, light one marshmallow after another on fire (just like when I am roasting marshmallows over an actual campfire might I add) and who just takes over instead of standing over you laughing. Hence why my knuckles start to look remarkably manly in the later photos!
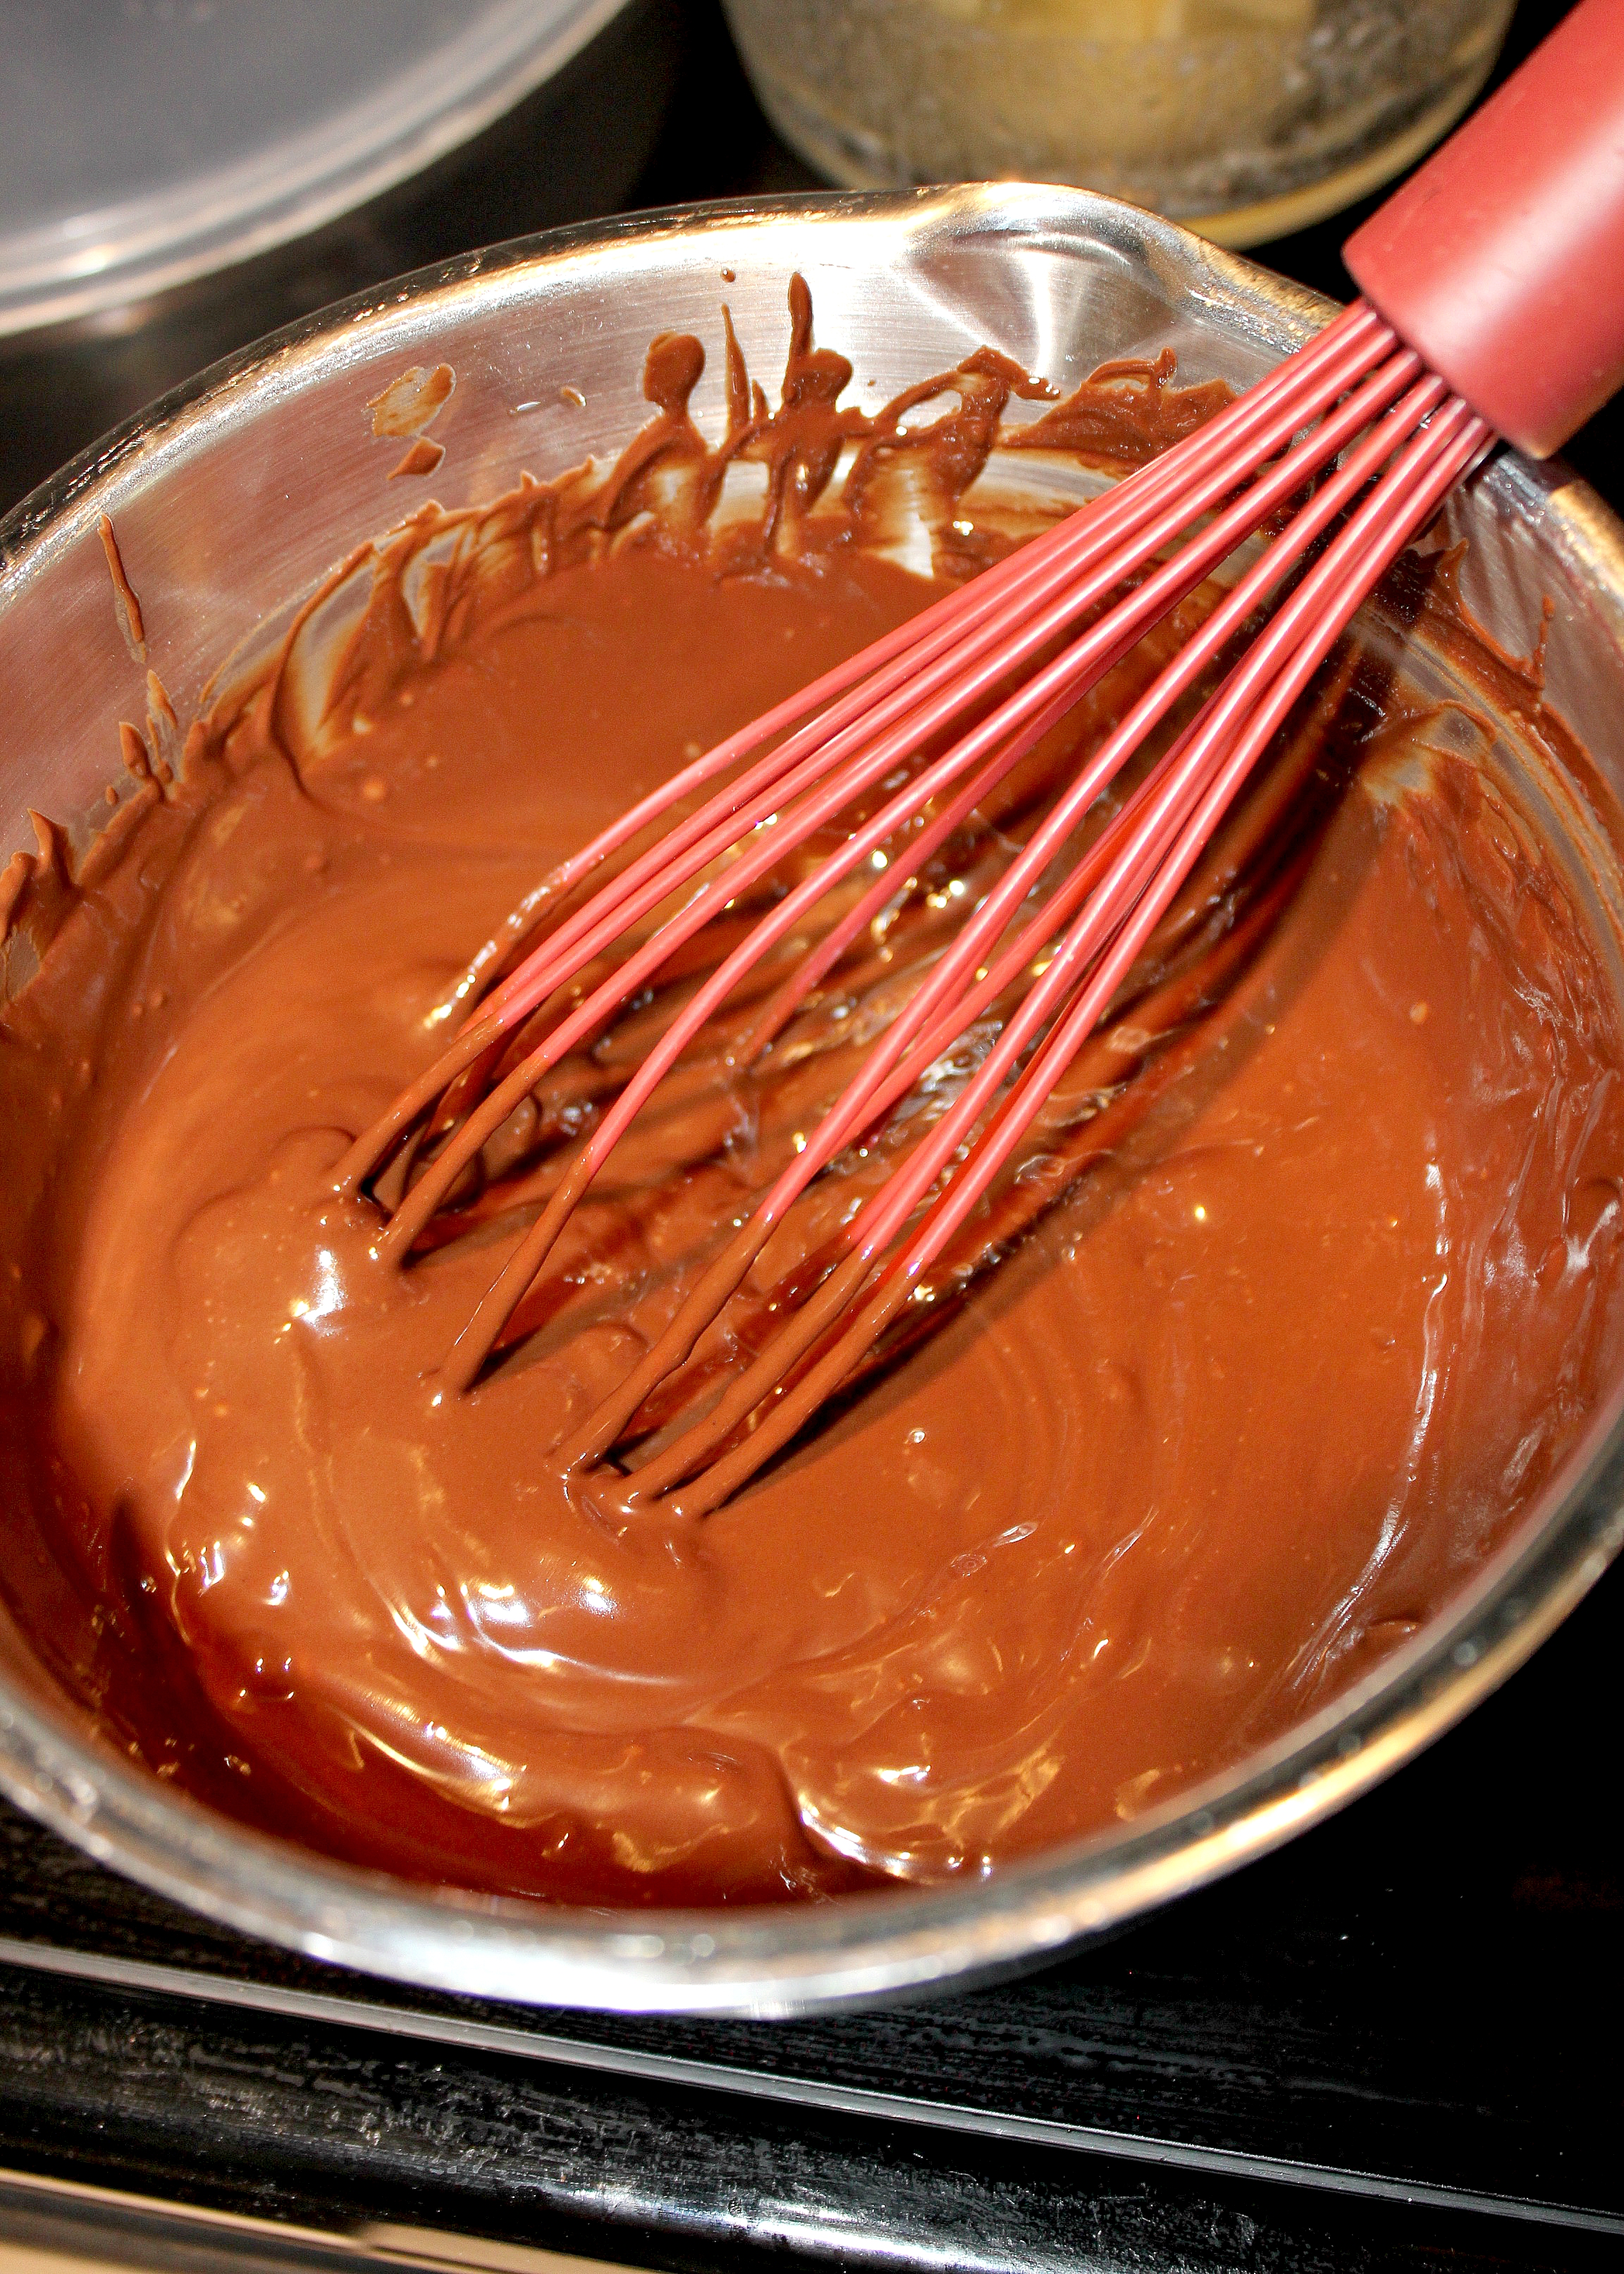
Step 21: Make the chocolate ganache by measuring out 2/3 a cup of chocolate chips (I may or may not have used the same measuring cup that I just measured the cream in…).

Step 22: Bring a cup of whipping cream to a simmer in small pot over medium heat. Pour over the chocolate chips and let sit about 5 minutes.
Step 23: Using a small whisk, whisk the ganache until smooth and shiny. Set aside. If it seems really runny, put it in the fridge to firm up.
Step 24: Place a cake round onto the cake plate or stand, graham crumb side up. Make sure the plate will be large enough to accommodate the marshmallows all the way around the base of the cake! Slide pieces of parchment paper underneath for a cleaner finish.
Step 25: Spread ganache over first layer of cake. Top with second layer of cake, graham crumb side down this time. A somewhat domed cake is desirable for the top, to help pile up the camp fire. Refrigerate until ready to frost. Chilling helps prevent the layers from sliding too much during frosting or squishing out all the ganache. I used two plastic toothpicks to hold the layers even and together while they chilled in the fridge and I prepared the frosting. (If hoping for a more pronounced marshmallow taste in each bite, a jar of marshmallow fluff or mini marshmallows themselves could be added between the layers as well).
Step 26: For the frosting combine 1 cup milk chocolate and 1 cup semi-sweet chocolate chips in a small bowl.
Step 27: Microwave 1/2 a cup of butter for 1 minute or until completely melted. Pour over chocolate chips and let sit for about 5 minutes.
Step 28: Whisk until chocolate chips are completely melted and smooth.
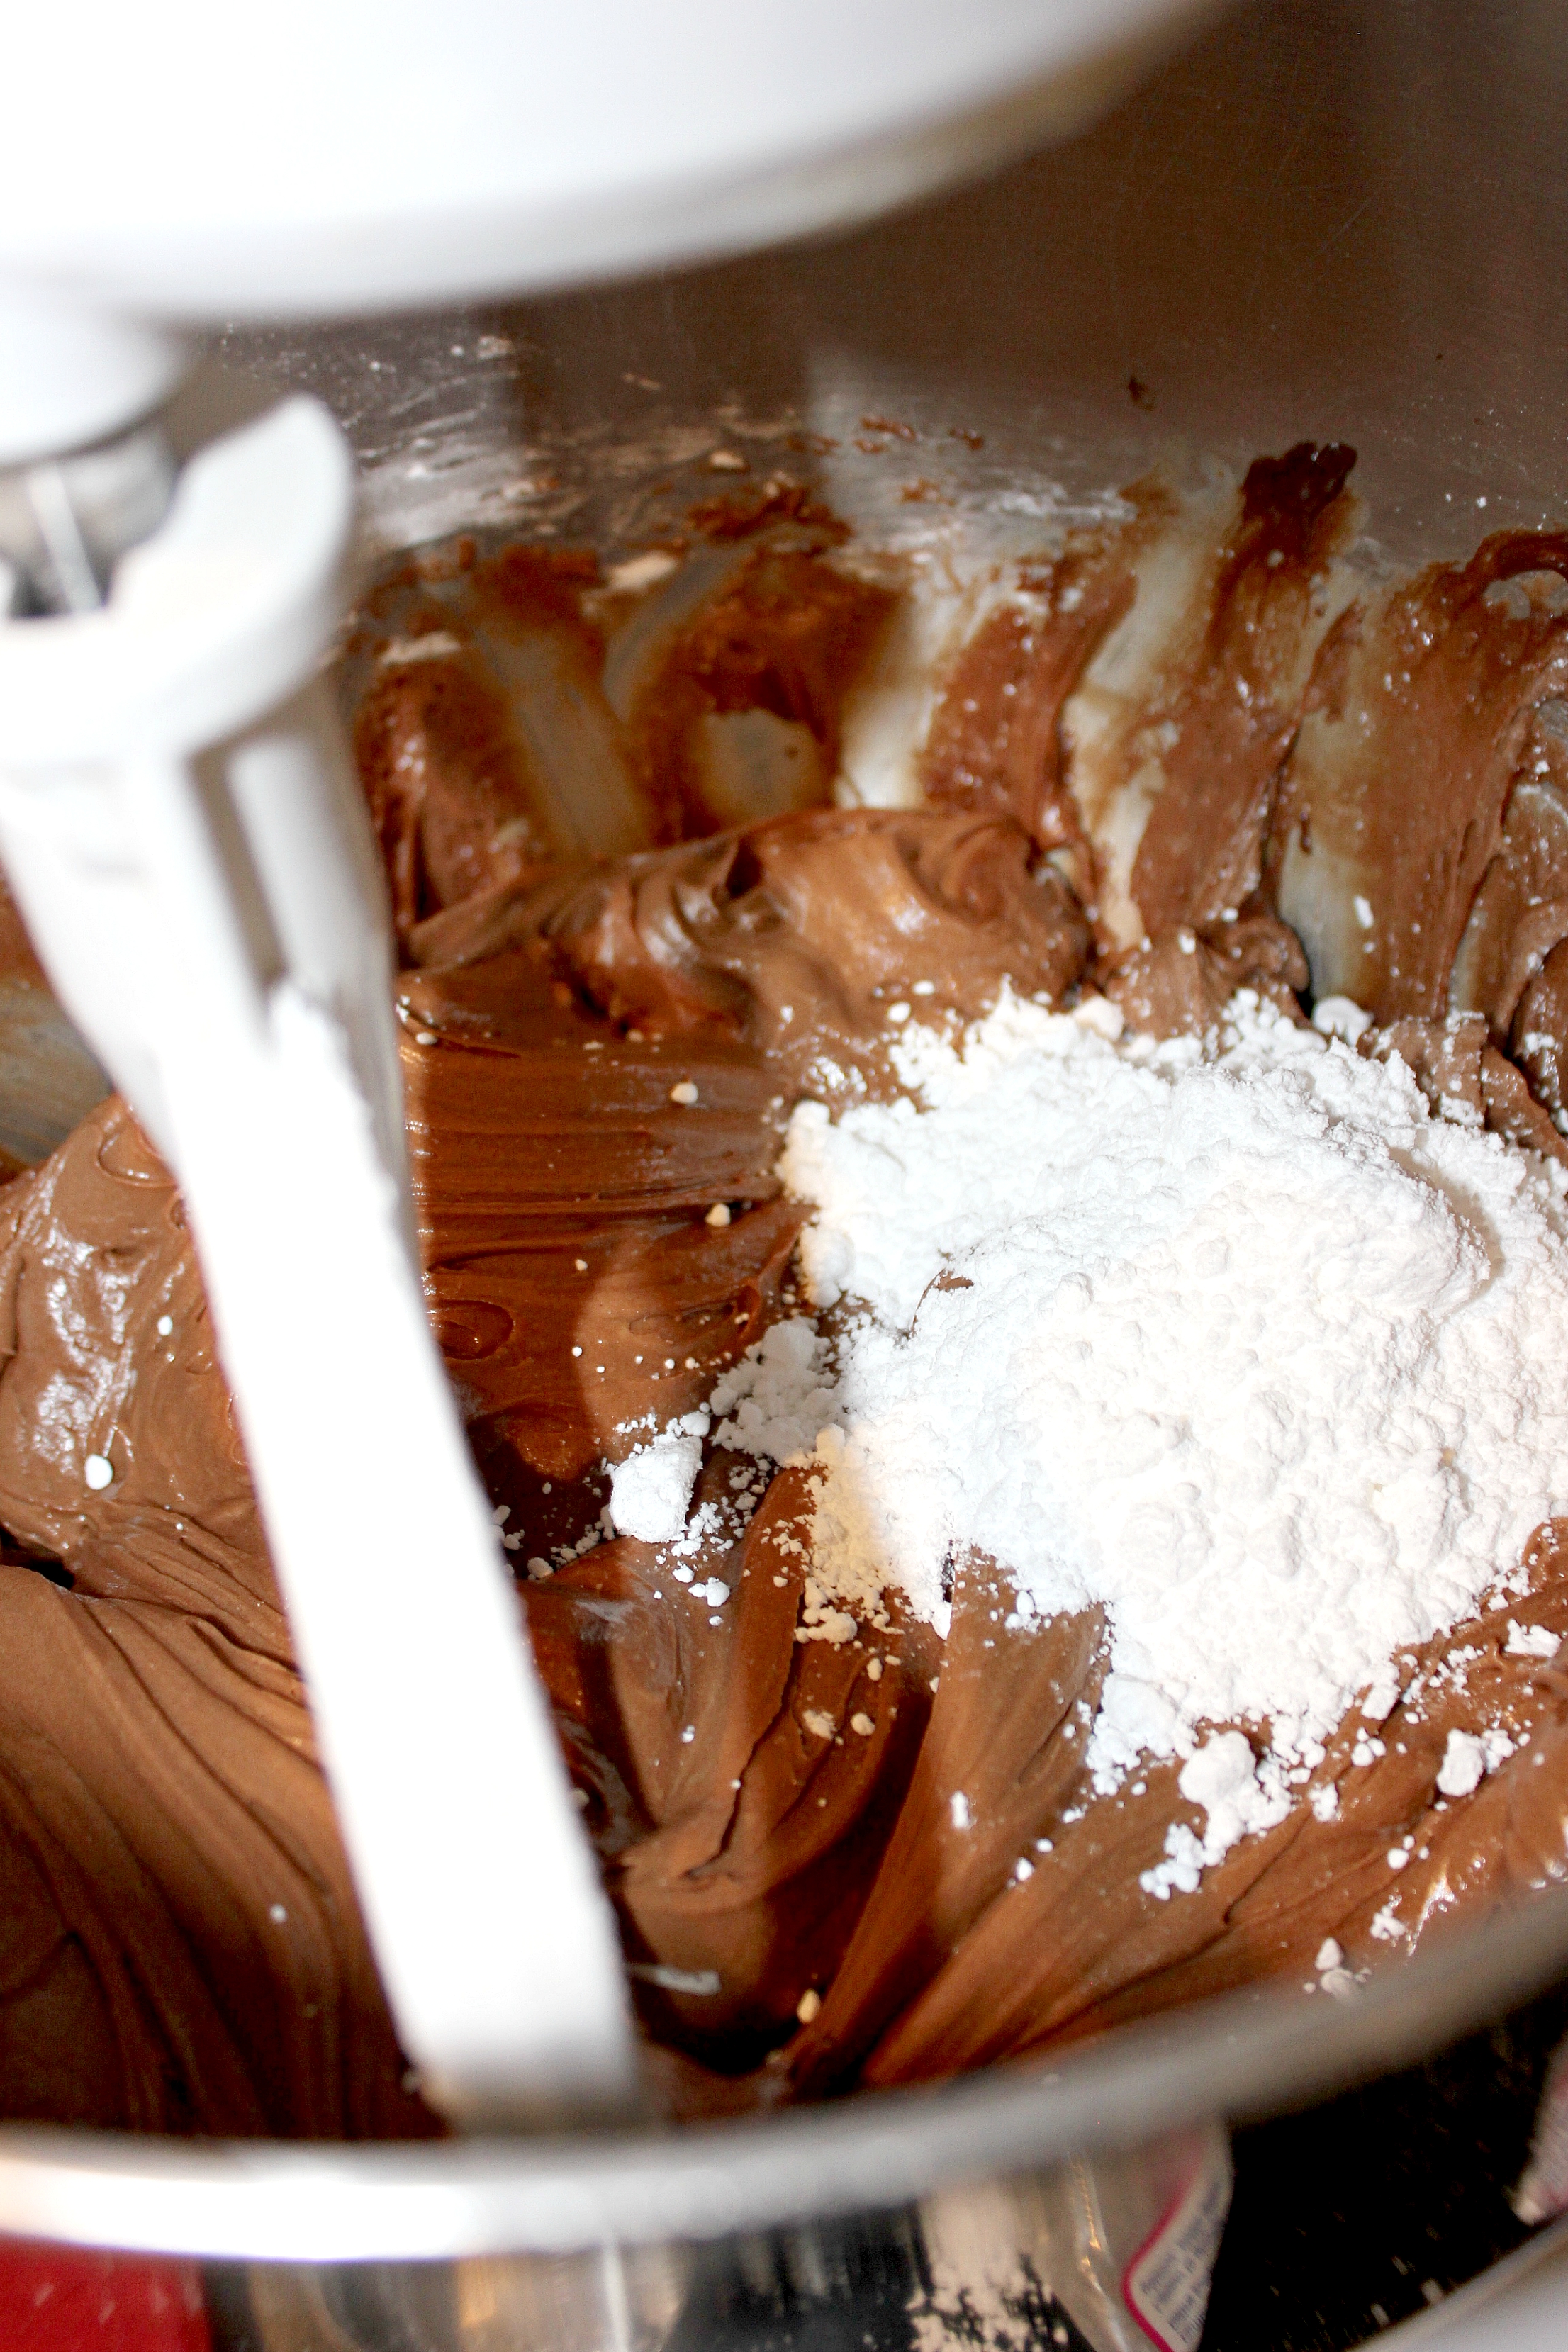
Step 29: Put 1 cup of Arvand Double Creme yogurt in a Kitchen Aid mixer, fitted with a paddle attachment. With the mixer on low slowly pour in the melted chocolate. Mix until combined.
Step 30: Add the Rogers powdered icing sugar a cup at a time (4 1/2 cups in total) and the vanilla extract, mixing well between each addition. Continue to beat until a creamy frosting consistency is reached.
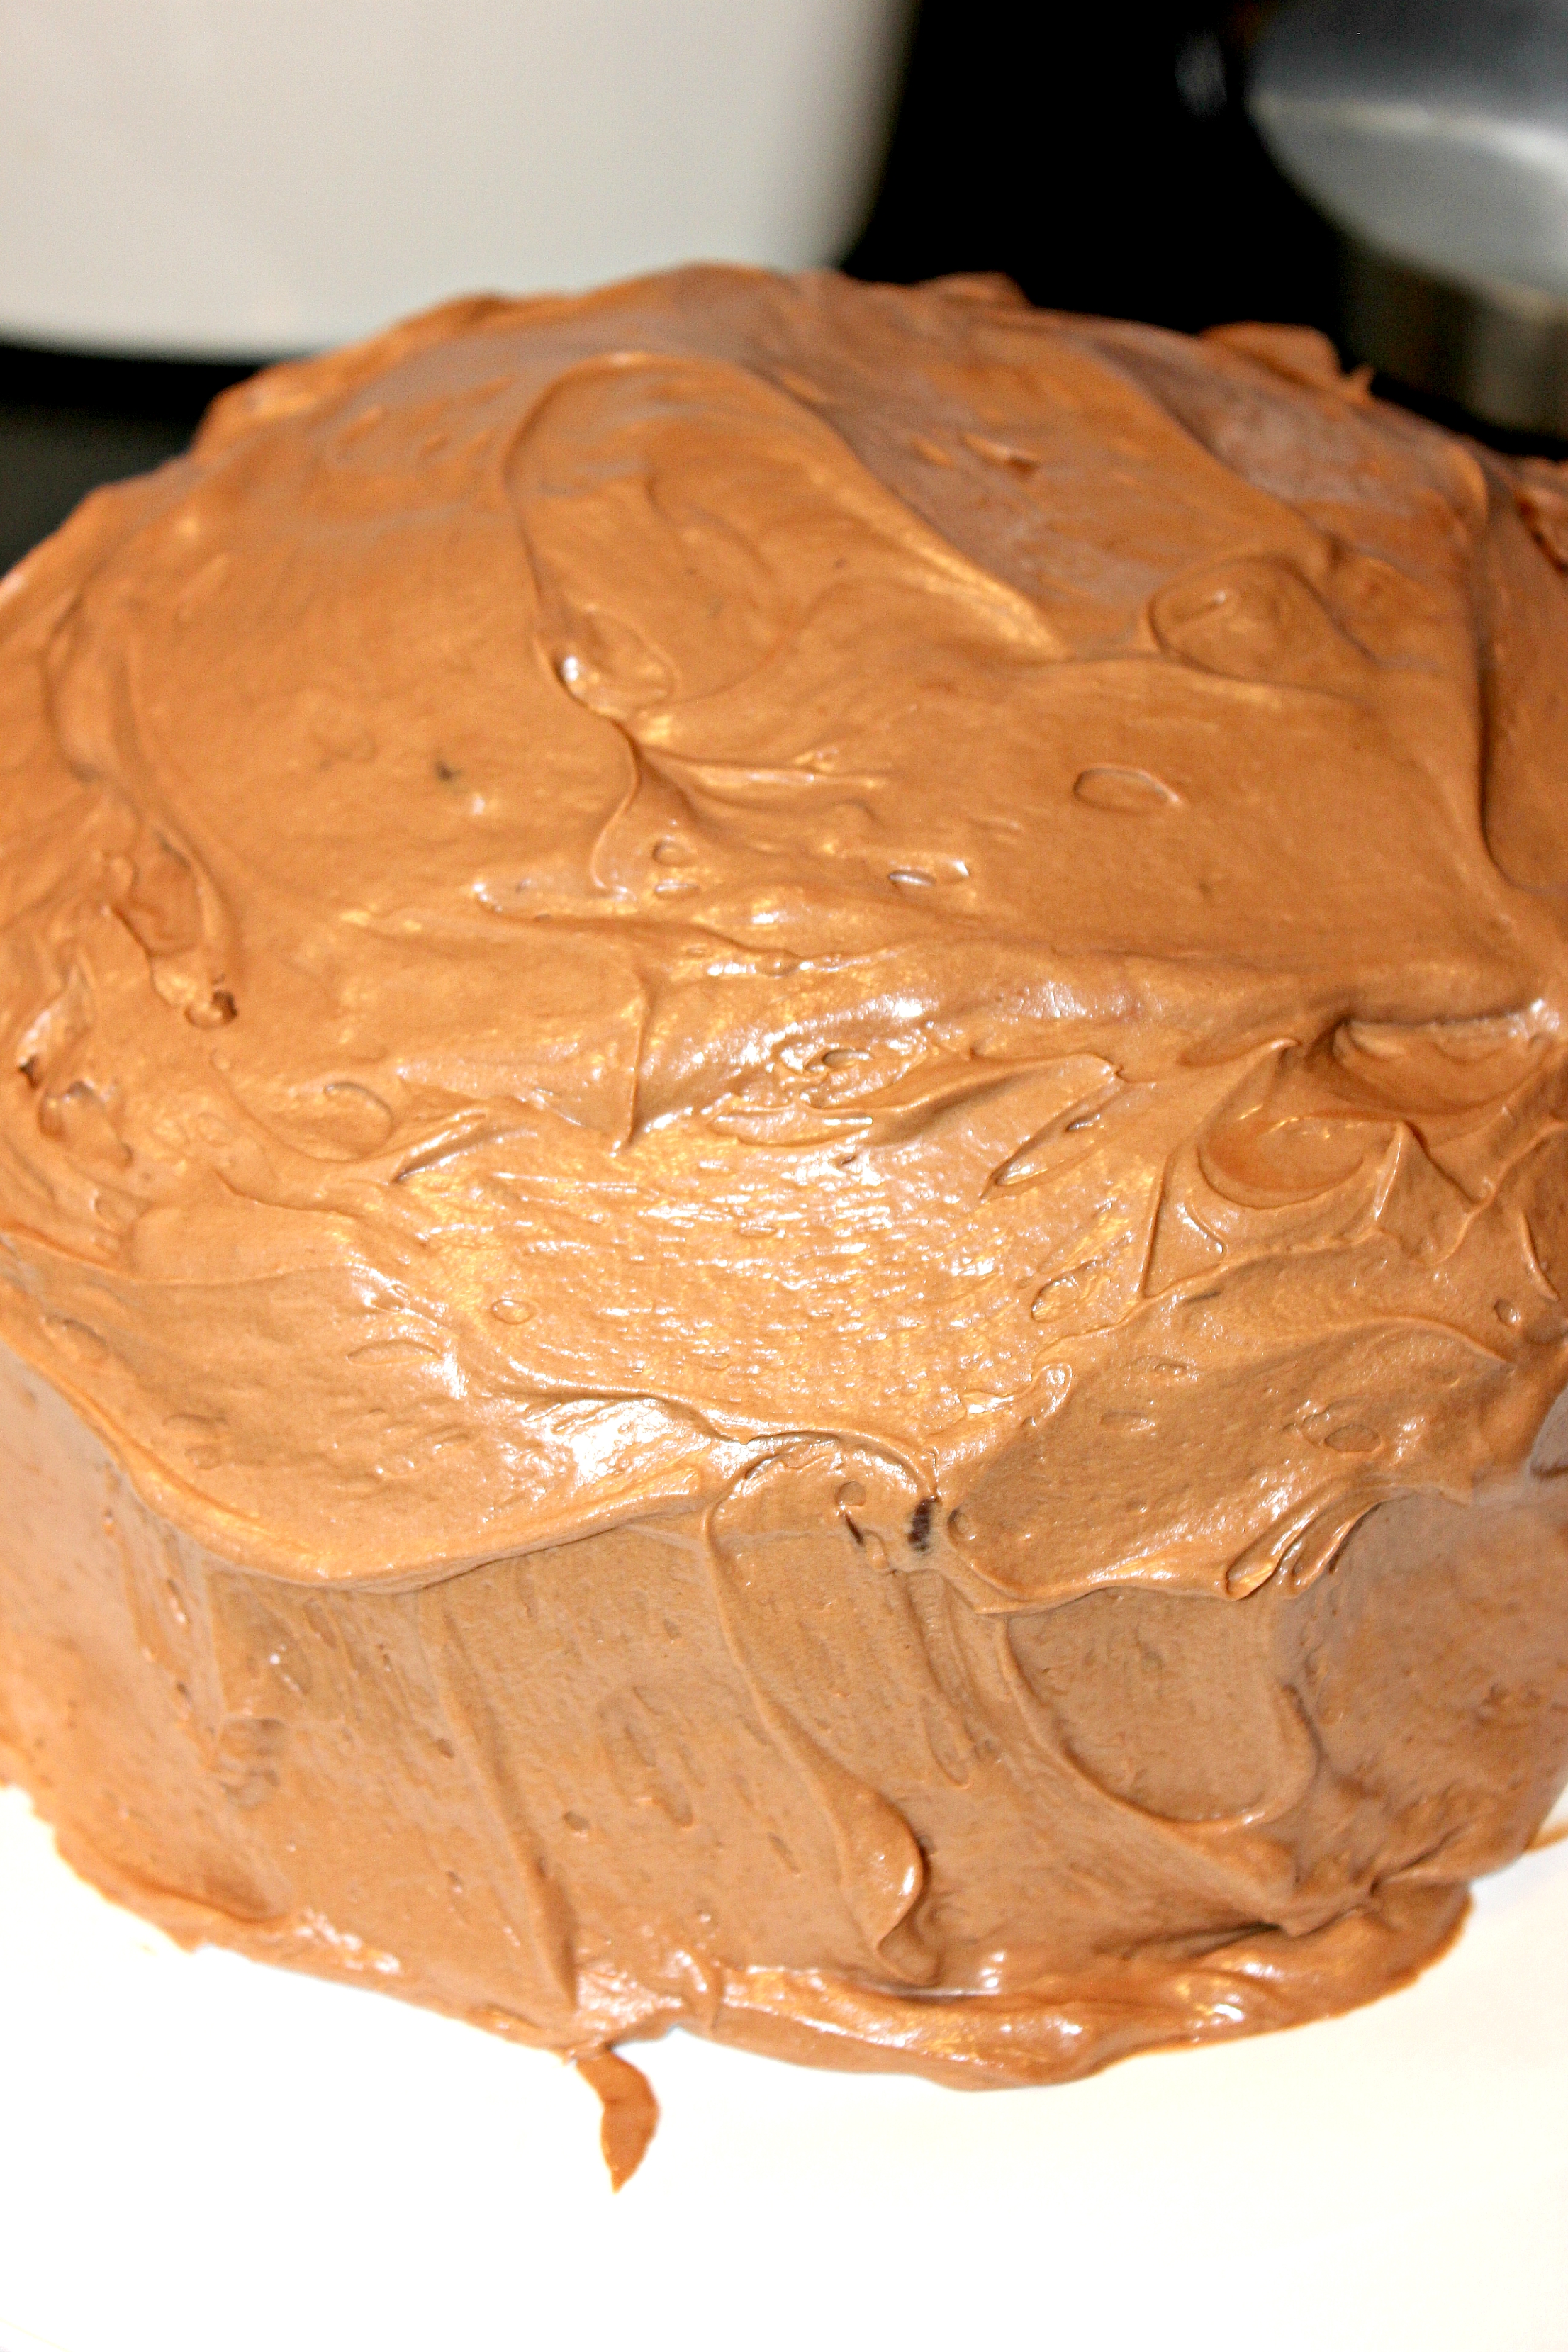
Step 31: Begin frosting the cake and remove toothpicks, if used, after the sides have been frosted in place.
Step 32: Continue frosting until the whole cake is evenly covered, piling any extra any up on top. Remove the parchment paper lining the cake plate.
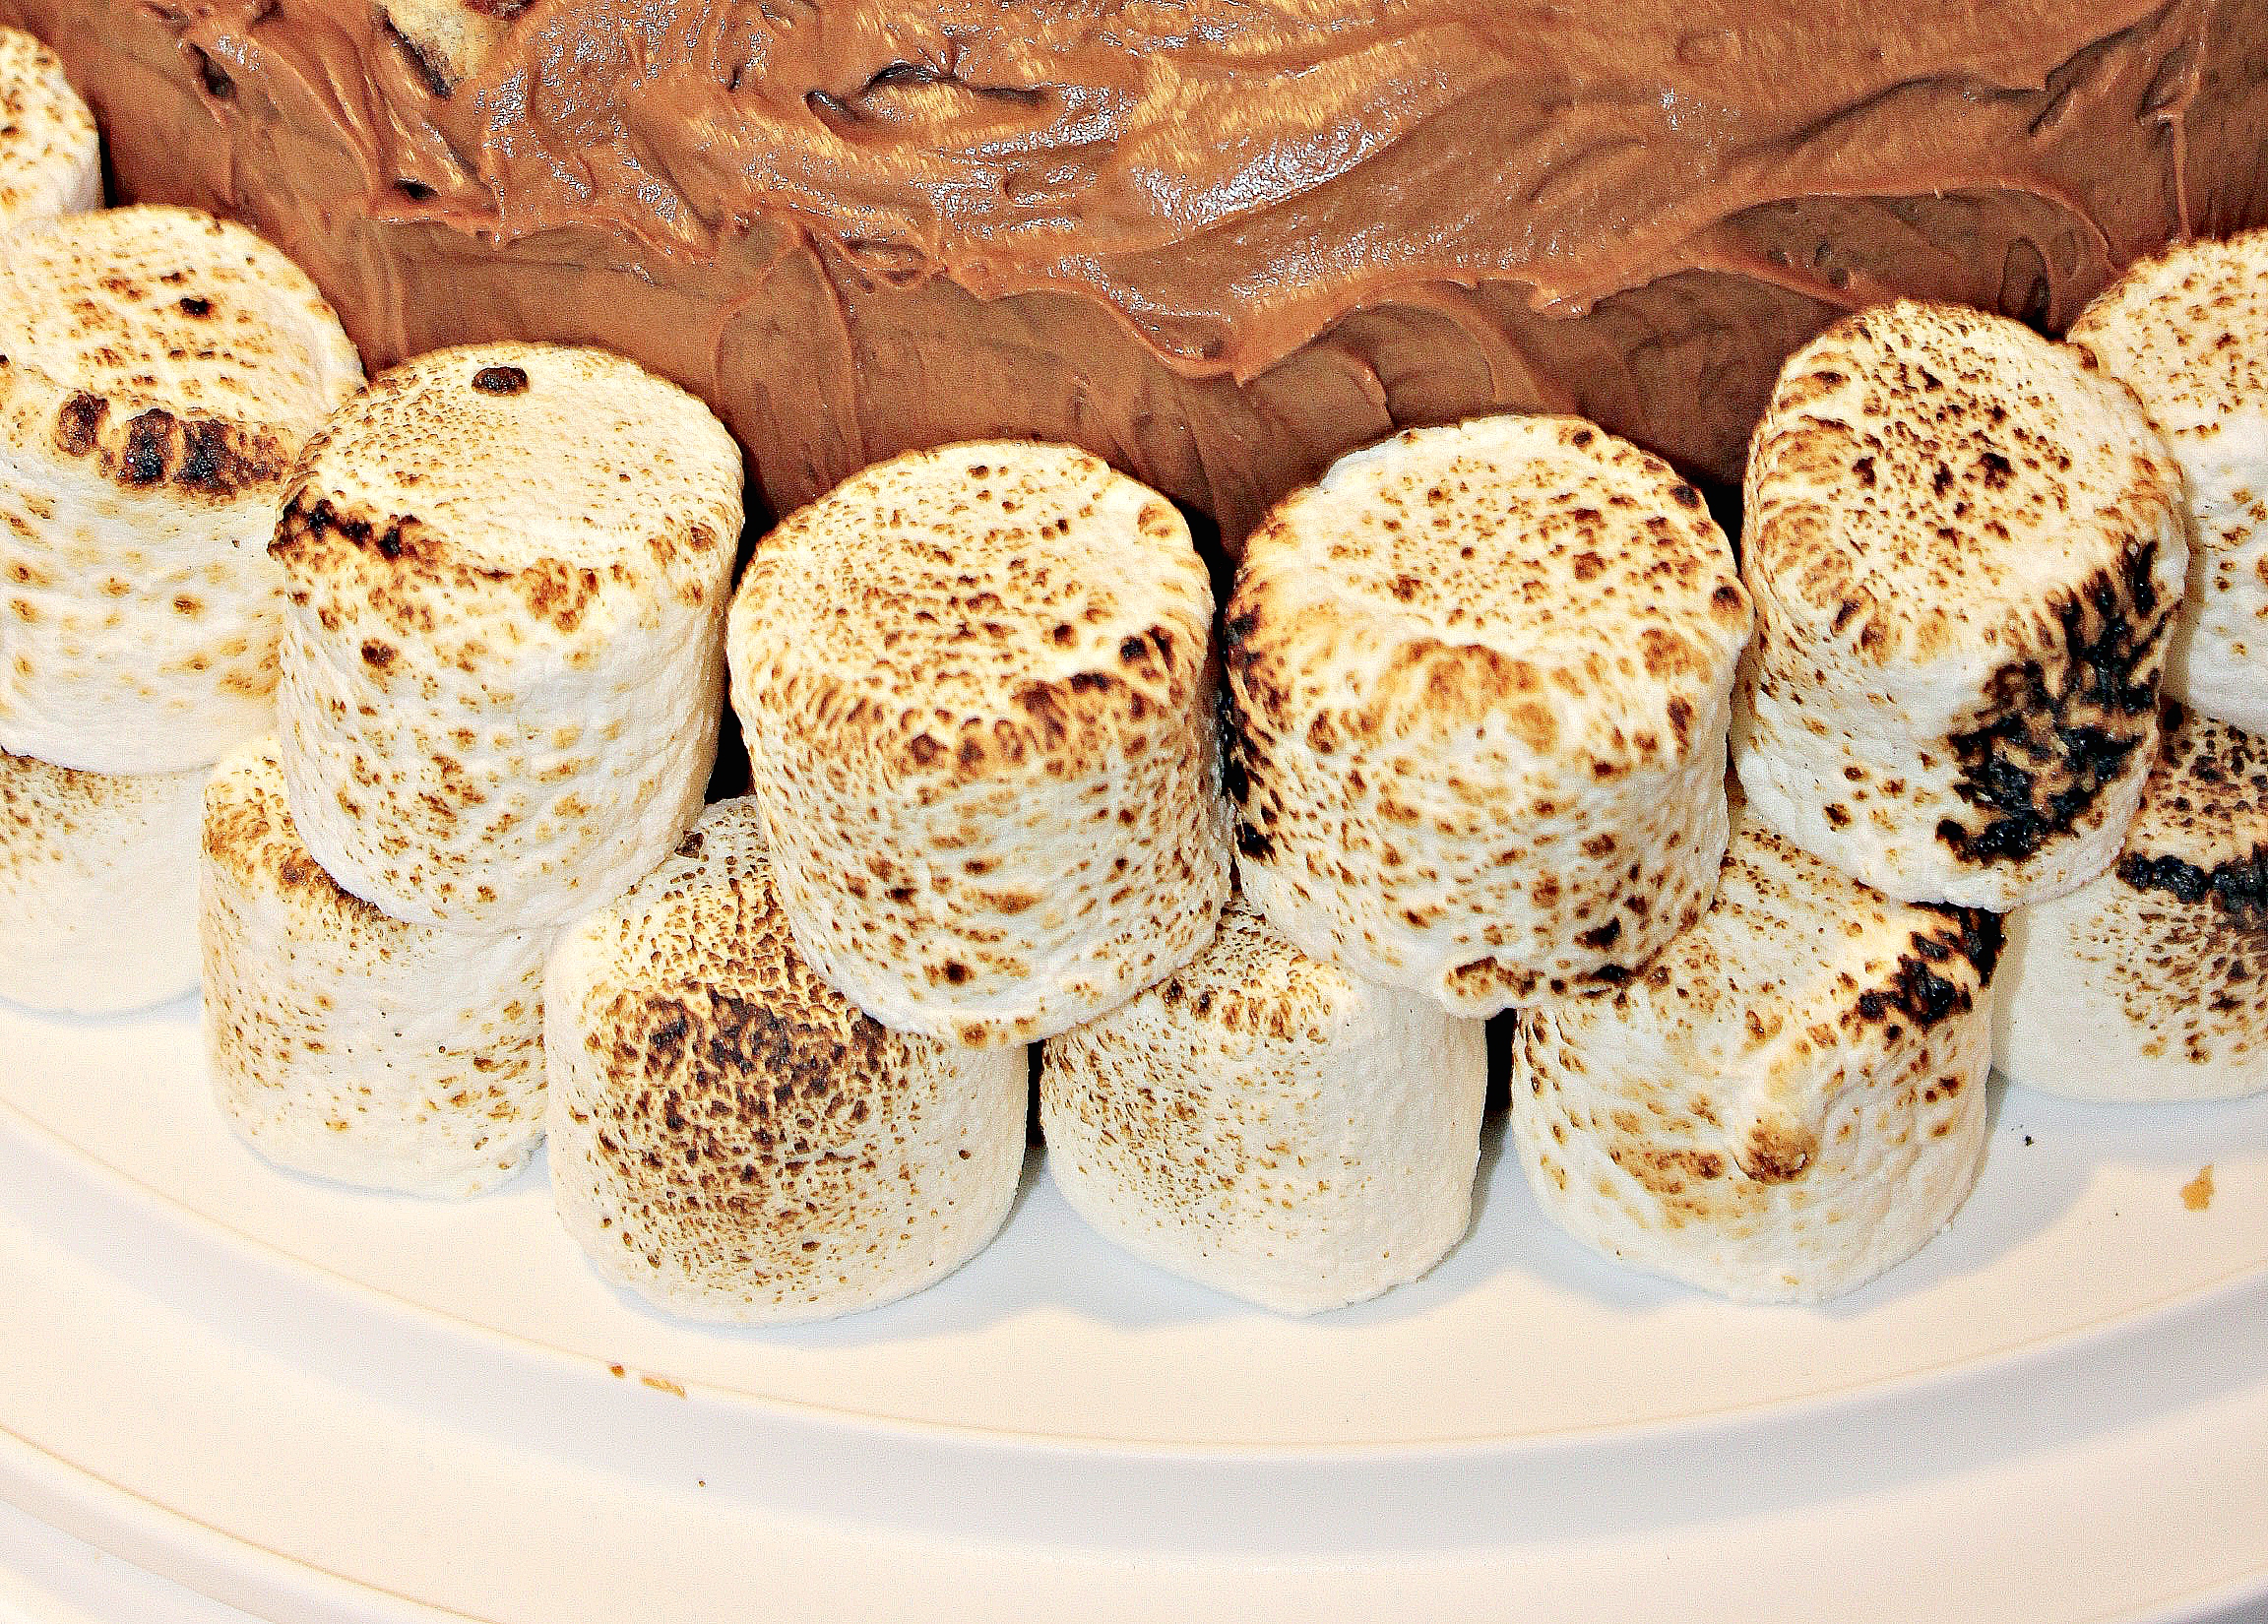
Step 33: Start placing the toasted marshmallows side by side along the base of the cake, all the way around (this took approximately 25 on my cake).
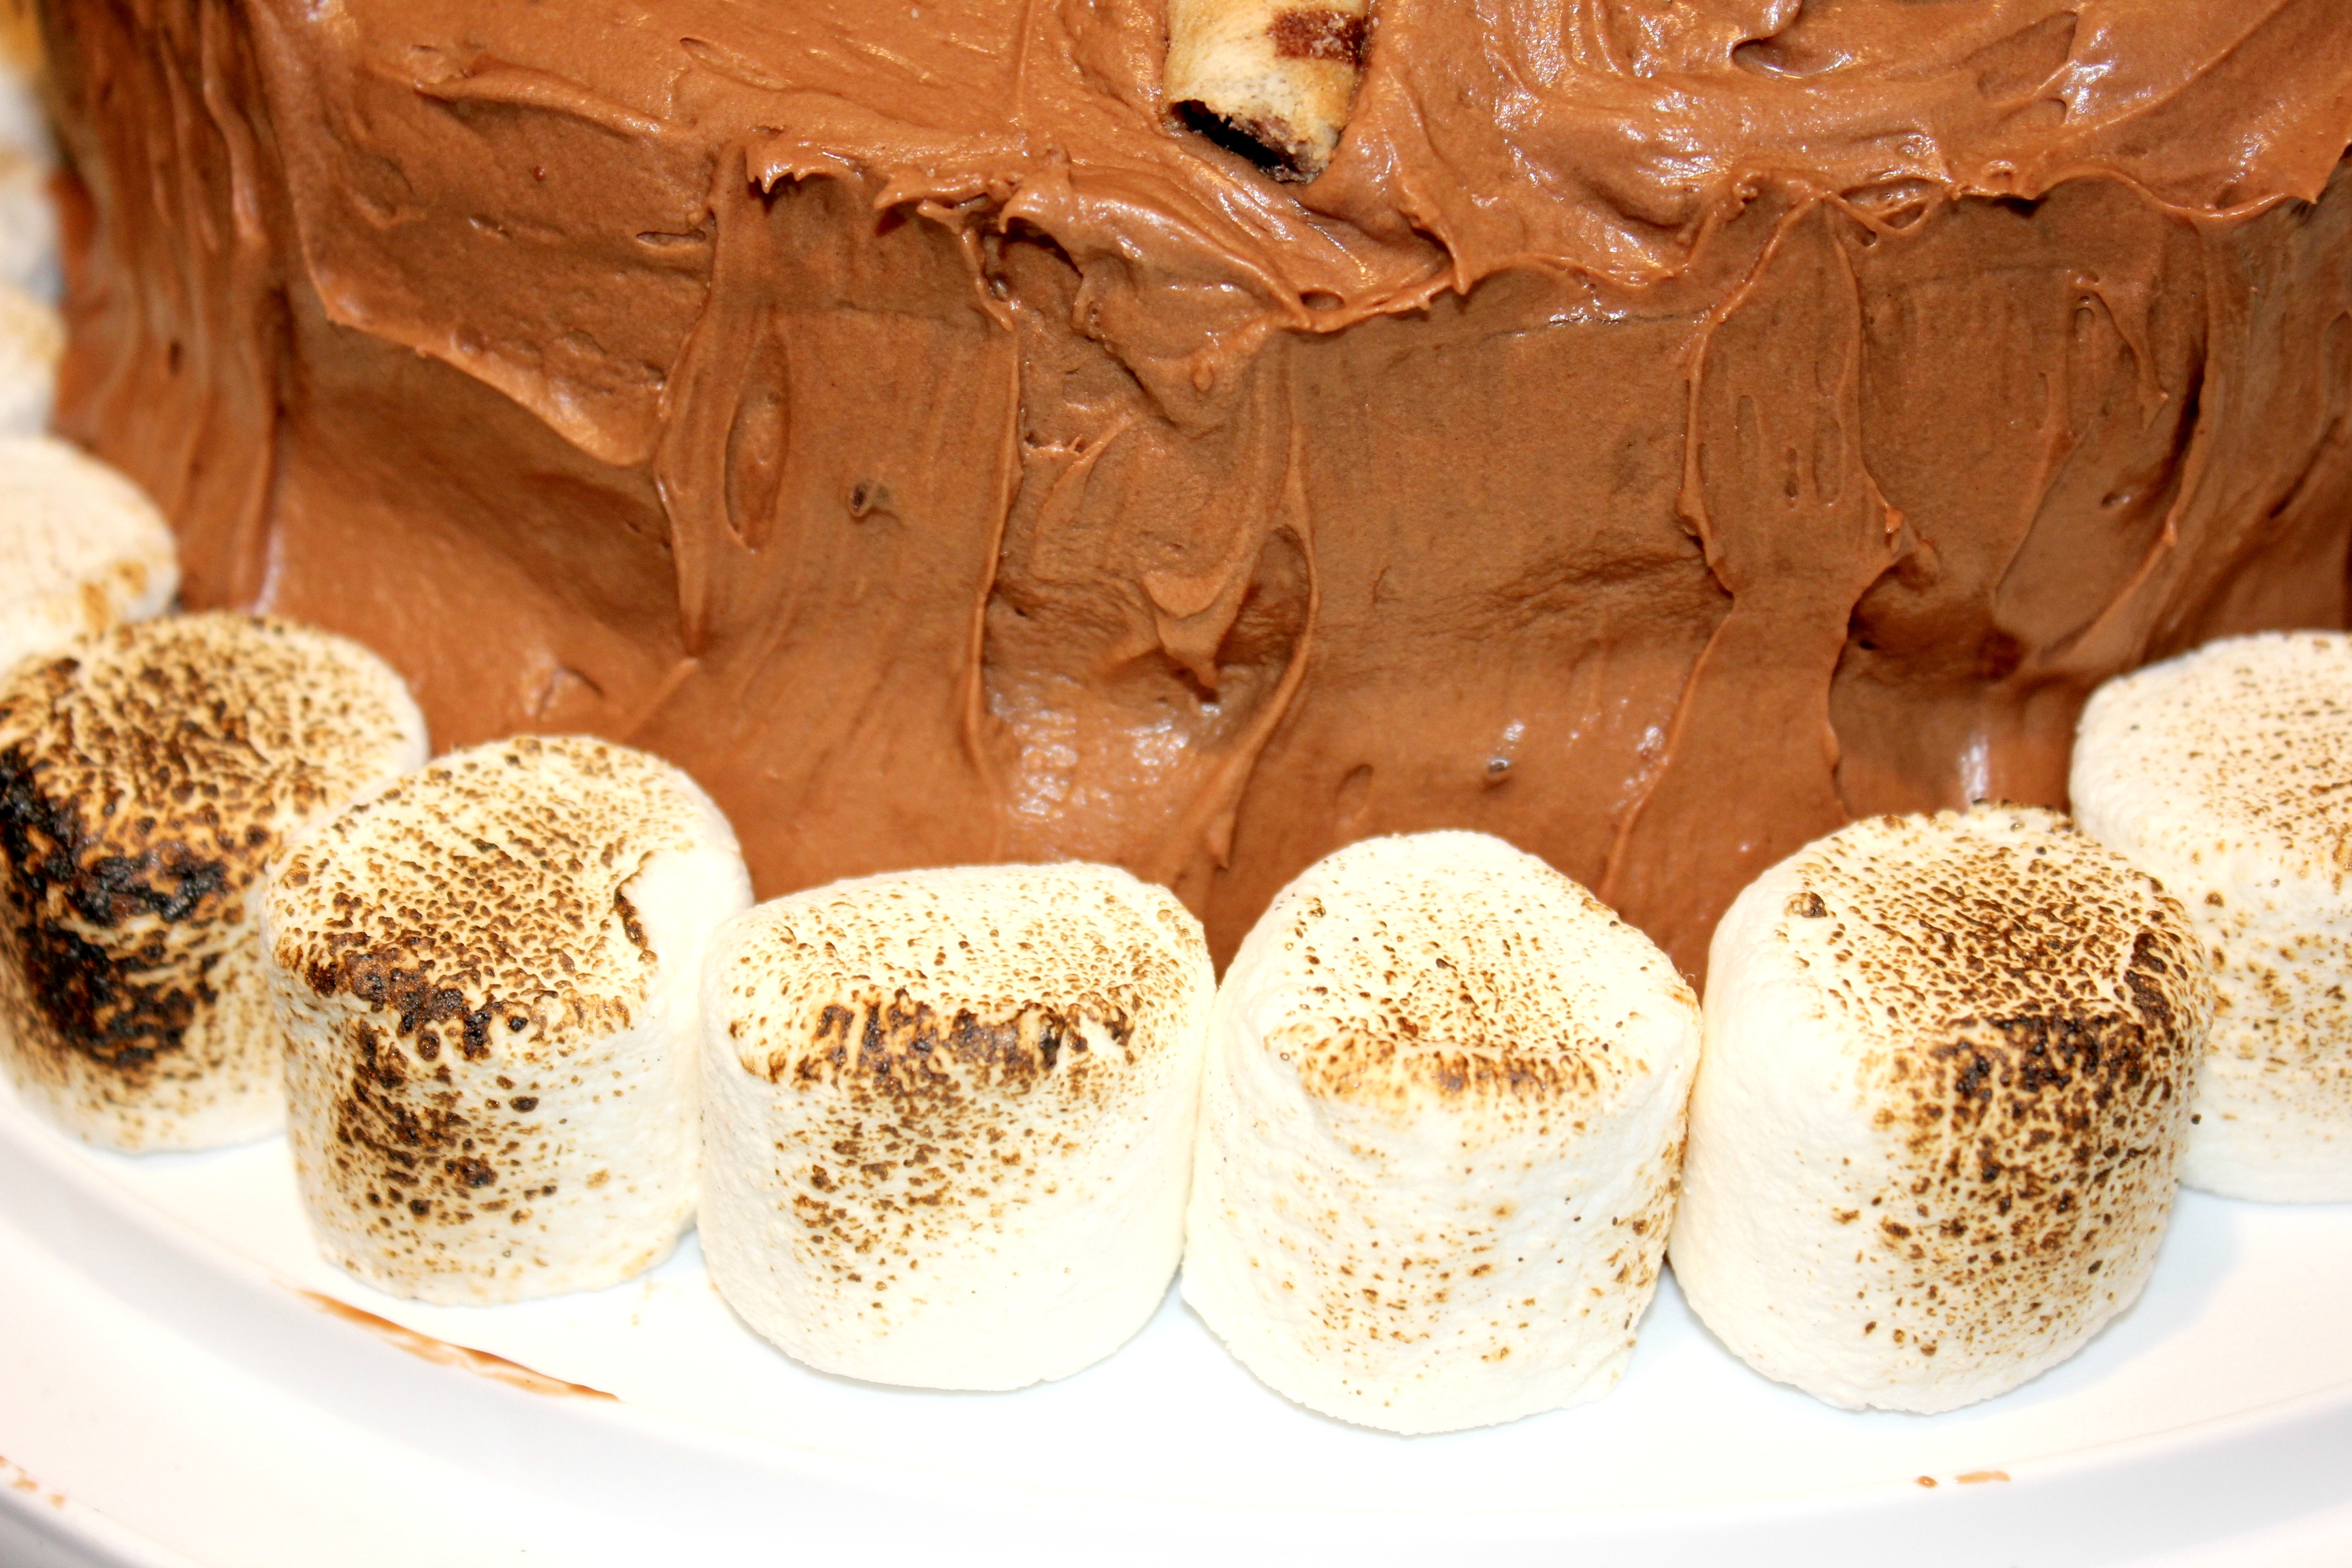
Step 34: Continue with second layer, on top of, but between the original row for an even look and better balance. Pushing the back side of the marshmallows into the frosting holds them in place.
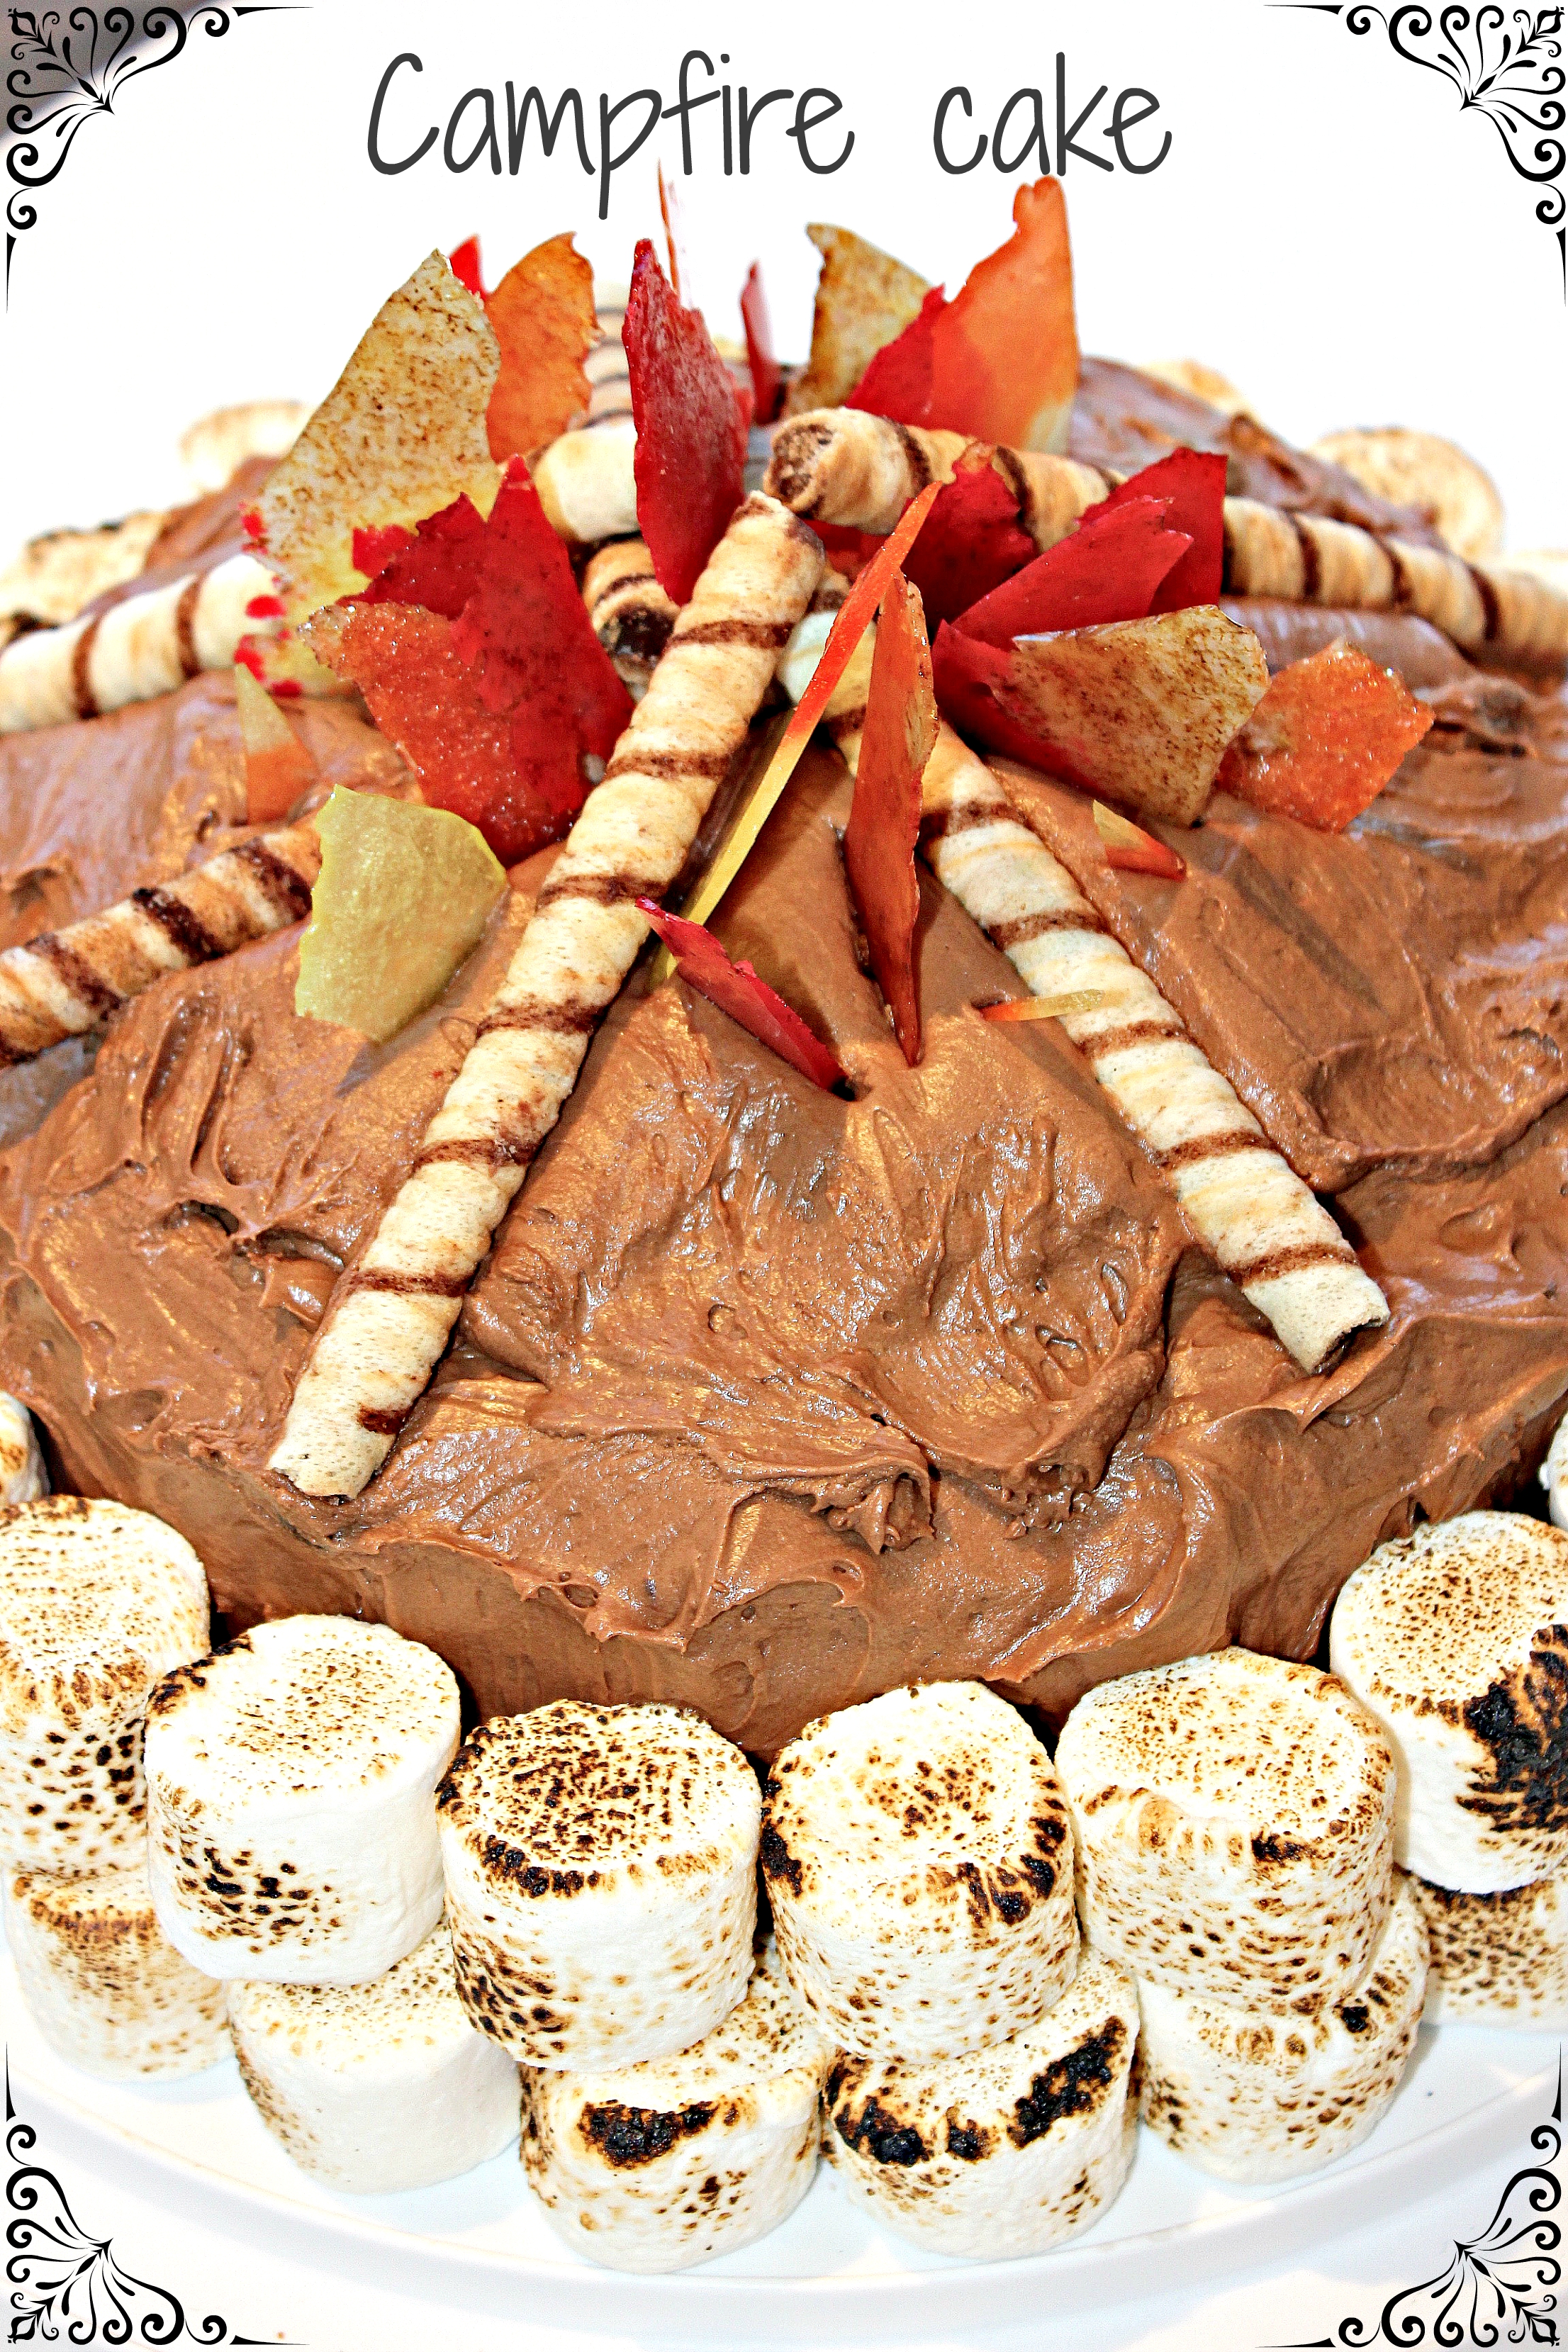
Step 35: Using chocolate rolled wafer cookies, place them on top of the cake in a campfire log formation.
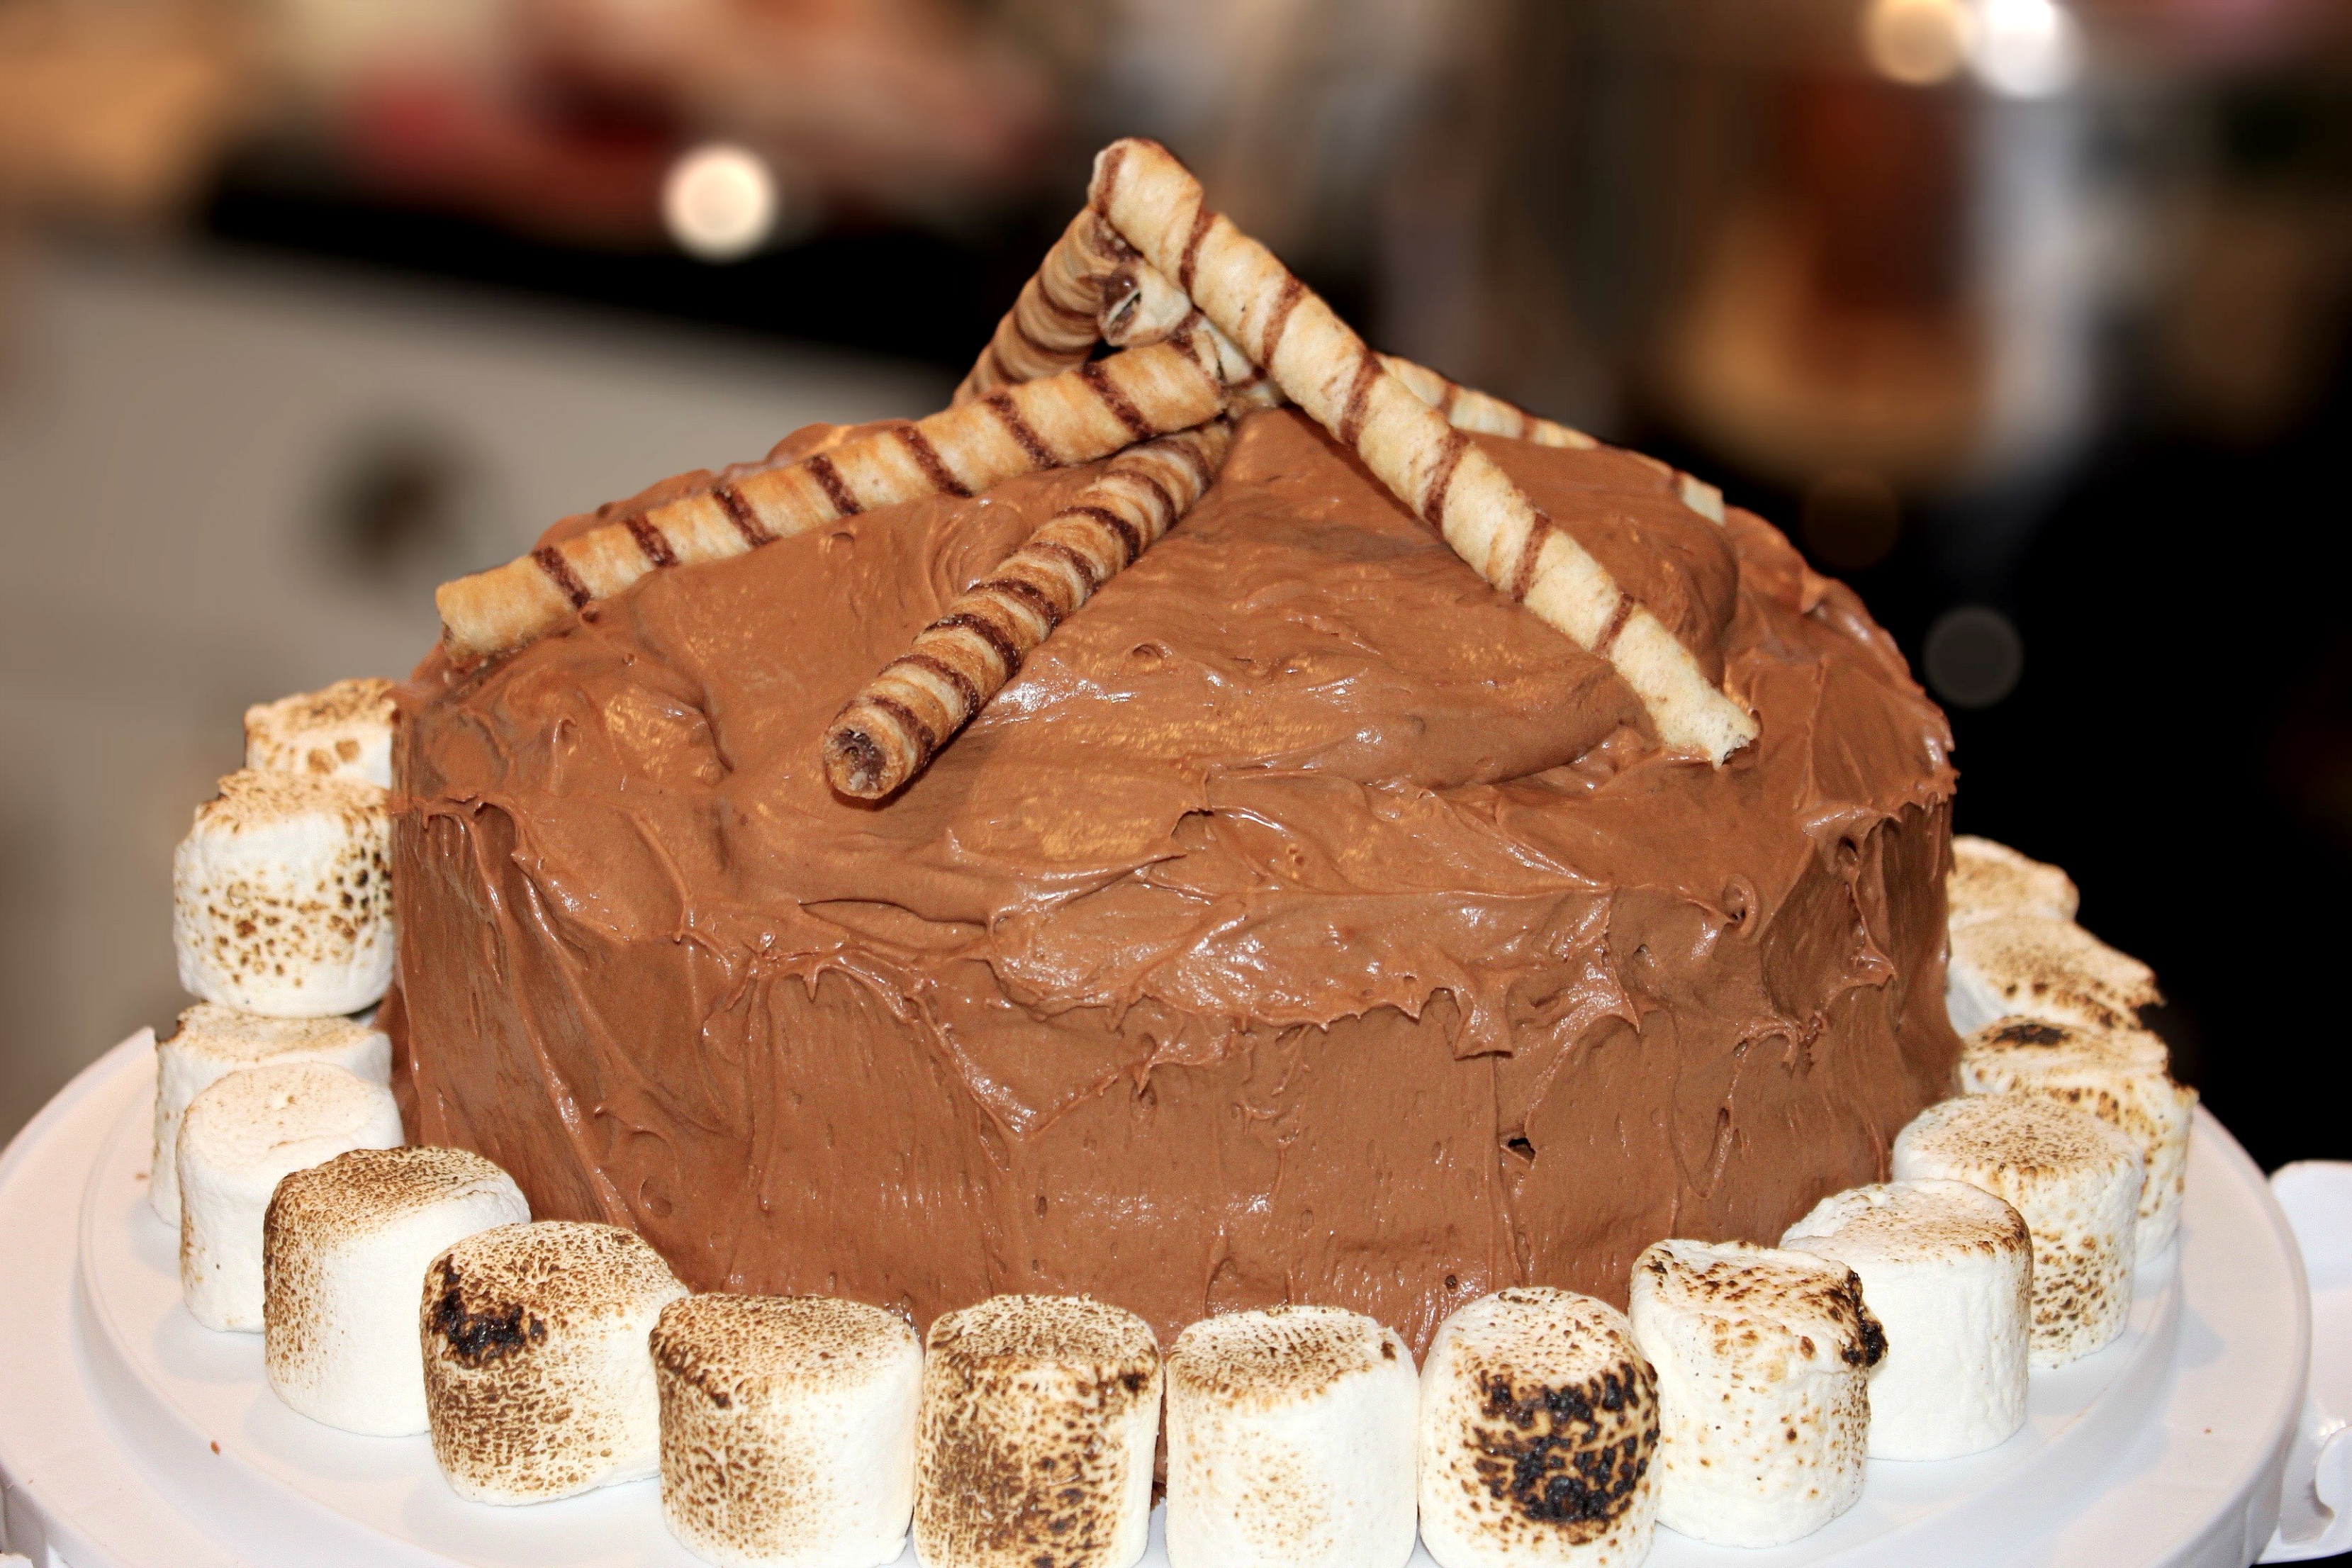
I used Crème Roulée Chocolate hazelnut European styled rolled wafers for my logs.
Step 36: Start placing broken candy flames where you feel fit to mimic the campfire flames.

I started with the largest pieces near the top and tapered down with the smaller pieces, for more convincing flames, near the bottom. I could not make the flames too tall, because it had to fit under a domed cake cover to travel. Larger, higher flames would be even more impressive!
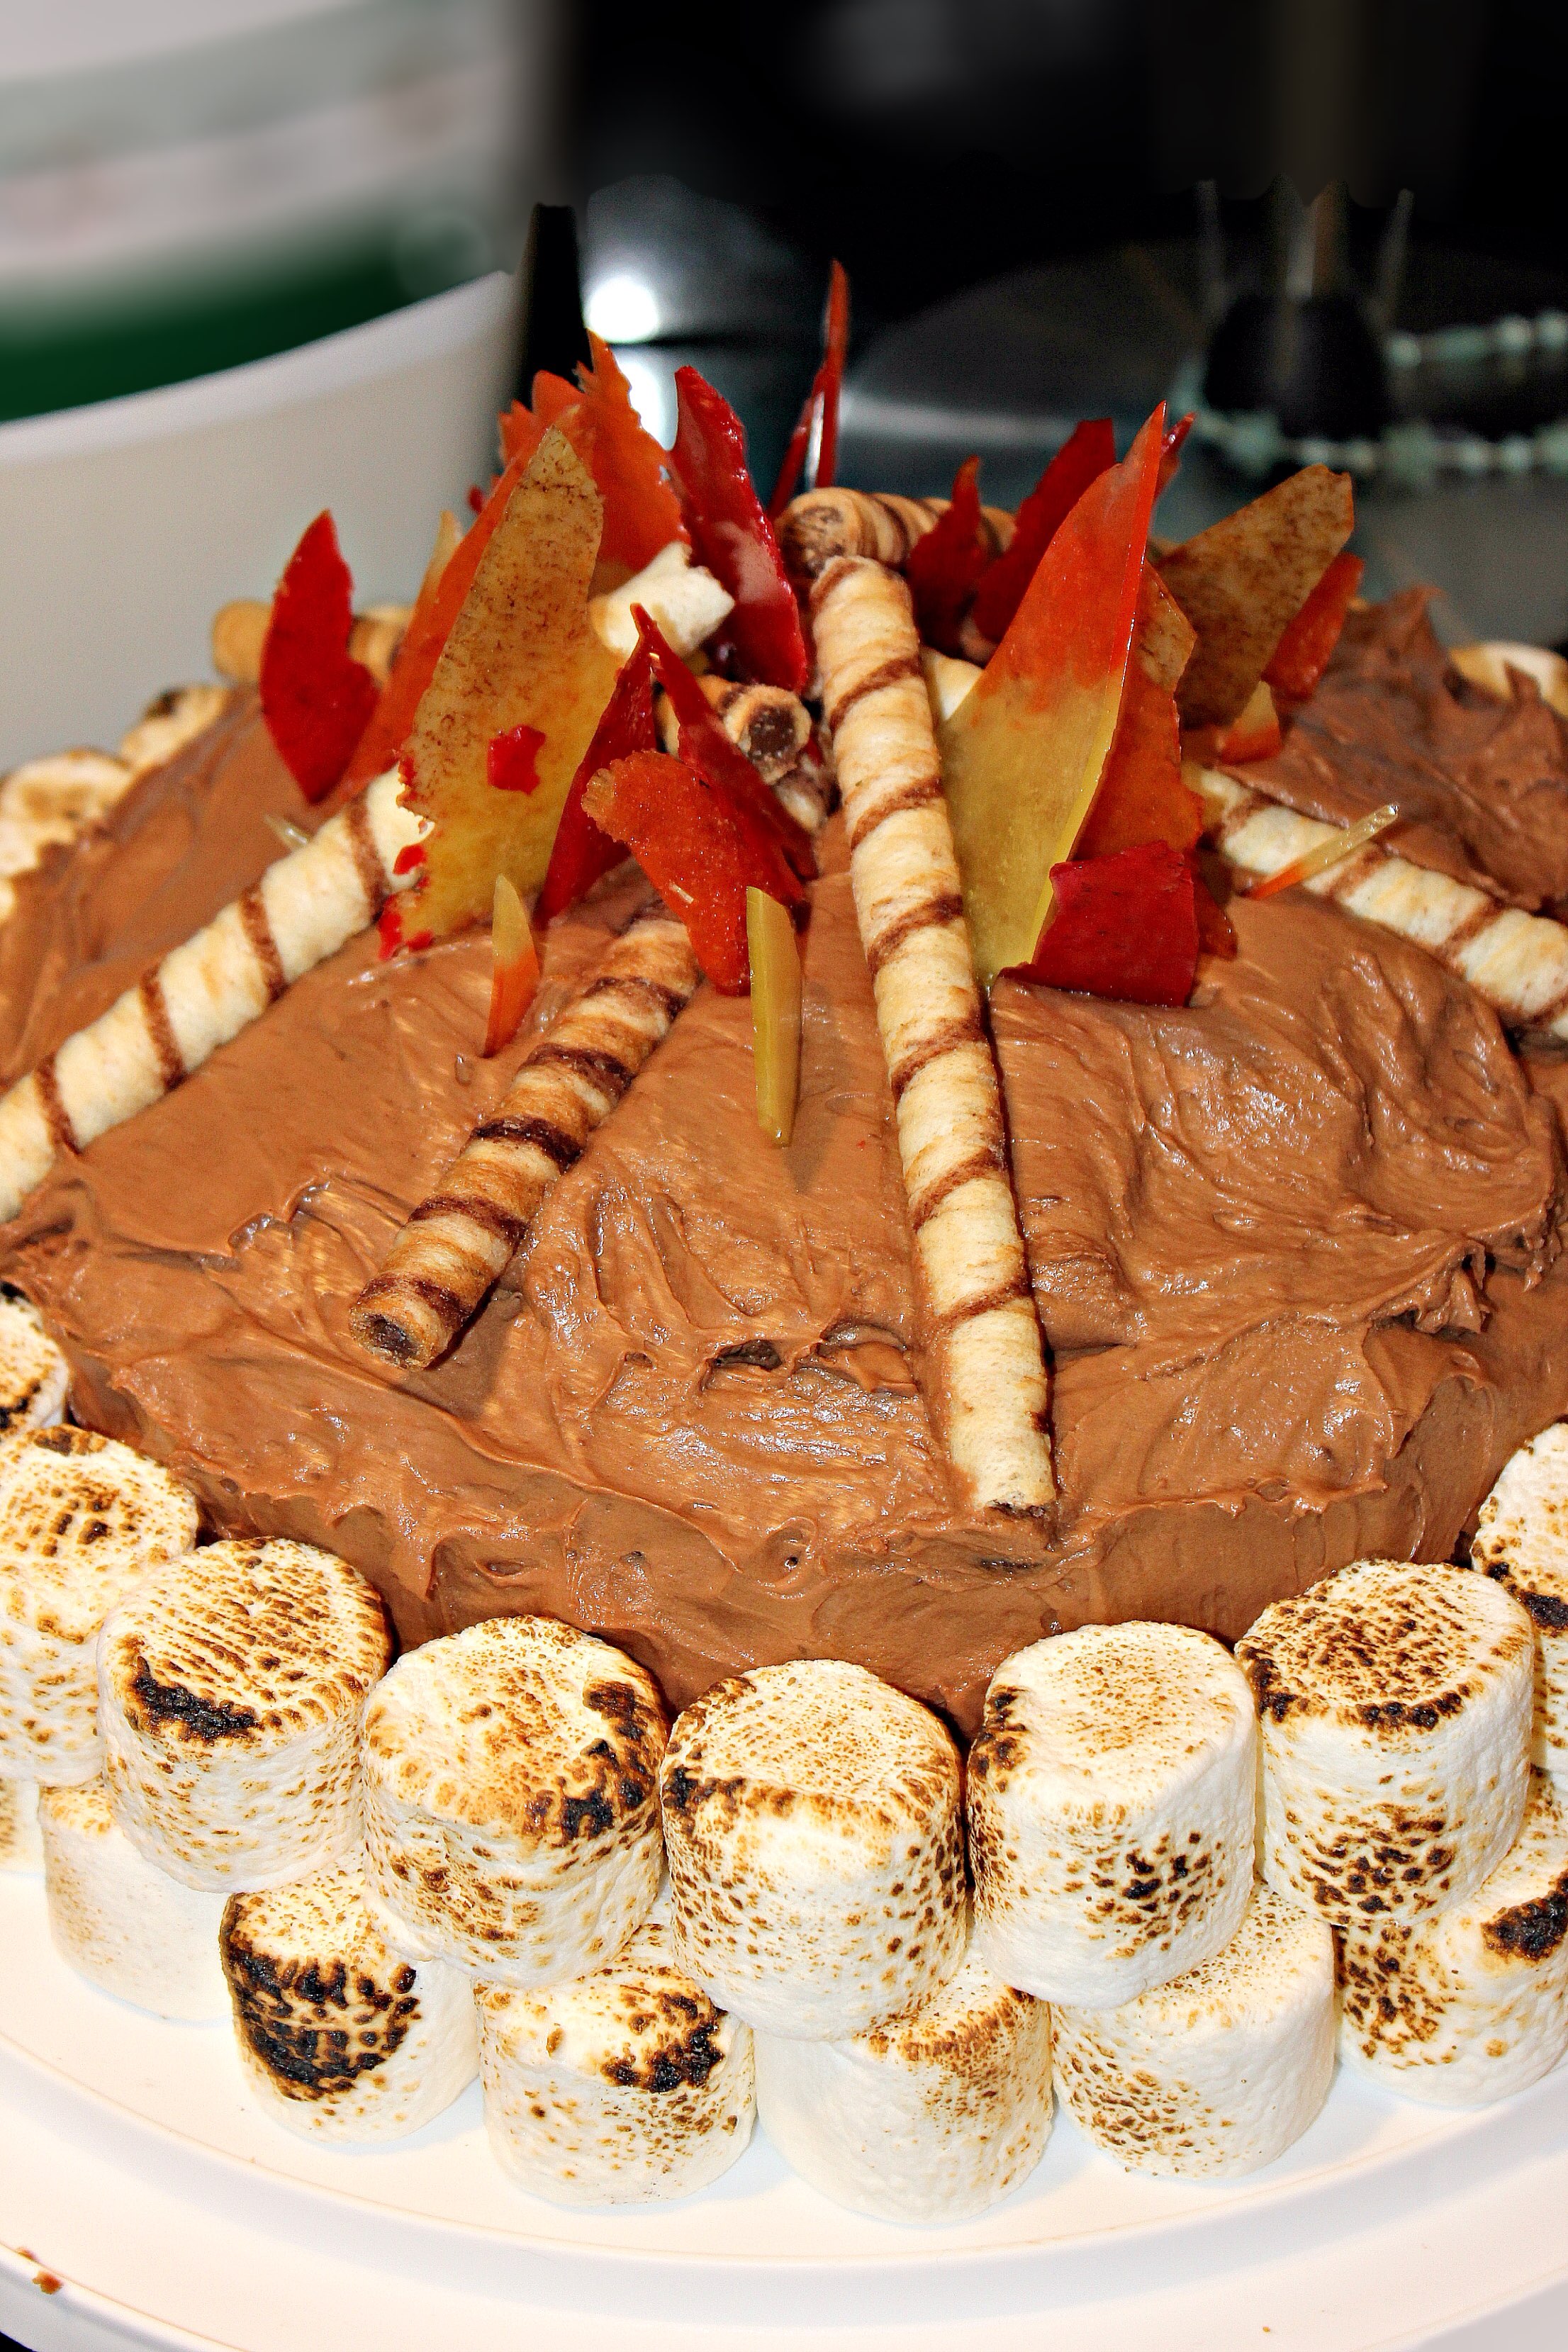
And there you have it – a campfire cake (fit to make the rellies fall in love with you and all your city loving ways)!!!

- 18 large graham crackers
- 1/2 cup granulated sugar
- 1/2 tsp Kosher salt
- 3/4 cup (12 Tbsp) unsalted butter
- 2 cups boiling water
- 1 cup Rodelle Gourmet Baking Cocoa (Dutch process cocoa powder)
- 1 cup soft unsalted butter
- 2 1/4 cups sugar
- 4 large eggs
- 1 tbsp vanilla
- 2 3/4 cups All Purpose Flour
- 2 tsp baking soda
- 1/2 tsp baking powder
- 1/2 tsp Windsor Kosher Salt
- 2/3 cup Hershey’s milk chocolate chips
- 1/2 cup whipping cream
- 1 cup Hershey’s milk chocolate chips
- 1 cup Hershey’s semi-sweet chocolate chips
- 1/2 cup unsalted butter
- 1 cup Arvand double creme yogourt
- 4 1/2 cups icing sugar
- 1 tsp vanilla extract
- 18 Lifesavers hard candies in red, yellow and orange
- 400g bag of large Marshmallows (about 50 individual marshmallows)
- Crème Roulée European style rolled wafers
- Preheat oven to 350 degrees and line the bottom of two 9in cake pans with parchment paper, then spray sides and bottom generously with non-stick spray.
- Break up 18 graham crackers into a food processor.
- Add 1/2 cup of sugar and 1/2 teaspoon salt.
- Pulse the food processor until very finely ground, uniform crumbs form.
- Brown butter by melting 3/4 of cup (12 tbsp) butter in a medium, heavy bottomed pot over medium heat. Swirl the butter around, moving the pot every few seconds, until butter is a golden brown colour.
- Place graham cracker crumbs in a bowl and pour browned butter over top, making sure to scrape out all the brown bits in the bottom of the pan. Stir together.
- Evenly press the graham cracker mixture into each of the greased pans.
- Place 1 cup of Baking Cocoa in a bowl.
- Pour 2 cups boiling water over cocoa powder and whisk together. Set aside.
- Put 1 cup room temperature butter and 2 1/4 cups granulated sugar into a stand mixer (or into a bowl and mix with hand mixer) and beat until light and fluffy.
- Add the vanilla and the eggs one at a time mixing until completely combined after each.
- Whisk the flour, baking soda, baking powder and salt together in a separate bowl.
- Gently add half the dry ingredients to the mixer and mix on low until combined.
- Slowly pour in half of the chocolate mixture to the batter with the mixer running on low.
- Repeat with the remaining dry ingredients and chocolate. Mix into a smooth batter.
- Pour carefully into pans overtop of the graham crumb mixture and bake at 350 degrees for 30 minutes or until a toothpick comes out clean when inserted in the middle.
- Allow cakes to cool on cooling racks in the pans for twenty minutes. Then gently run a knife around the sides to loosen and carefully turn out onto cooling racks, graham crumb side up. Leave to cool completely.
- To prepare the melted candy ‘flames’ line a cookie sheet with tinfoil and preheat oven to 270 degrees.
- Crush Lifesaver candies in their wrappers with a rolling pin or meat tenderizer.
- Empty crushed Lifesaver packets into stripes or touching rows on the tinfoil lined sheet.
- Bake in a 270 degree oven for 5 - 10 minutes until liquid. Then remove and set aside to cool and harden.
- Once the candy has cooled and hardened, peel it off the tinfoil and break apart to resemble flame-like pieces. Set aside.
- Place a large cookie sheet on a heat resistant surface or hot plate divot (the pan will get quite hot).
- Set out a row of marshmallows and using a kitchen torch char the top and front sides of each marshmallow. This cake took the entire bag of marshmallows, 50 in total (25 per row).
- Do not hold the flame too close to the marshmallow you are charing or it will light on fire.
- Combine 1 cup milk chocolate and 1 cup semi-sweet chocolate chips in a small bowl.
- Microwave 1/2 a cup of butter for 1 minute or until completely melted. Pour over chocolate chips and let sit for about 5 minutes.
- Whisk until chocolate chips are completely melted and smooth.
- Put 1 cup of Double Creme yogurt in a mixer, fitted with a paddle attachment, or a bowl with a hand mixer. With the mixer on low slowly pour in the melted chocolate. Mix until combined.
- Add the powdered icing sugar a cup at a time (4 1/2 cups in total) and the vanilla extract, mixing well between each addition. Continue to beat until a creamy frosting consistency is reached.
- Remove toothpicks from the cake, if used and begin frosting.
- Continue frosting until the whole cake is evenly covered, piling any extra any up on top.
- Remove the parchment paper lining the cake plate.
- Start placing the toasted marshmallows side by side along the base of the cake, all the way around (approximately 25 marshmallows).
- Continue with second layer, on top of, but between the original row for an even look and better balance. Pushing the back side of the marshmallows into the frosting holds them in place.
- Using chocolate rolled wafer cookies, place them on top of the cake in a campfire log formation.
- Start placing broken candy flames where you feel fit to mimic the campfire flames. I started with the largest pieces near the top and tapered down with the smaller pieces, for more convincing flames, near the bottom.
- If hoping for a more pronounced marshmallow taste in each bite, a jar of marshmallow fluff or mini marshmallows themselves could be added between the layers as well
- This is a very large cake. If you desire a smaller cake, cut both the graham cracker and chocolate cake recipes in half and bake in two 8in pans for 20 - 25 minutes.
Campfire cake idea adapted from here at Surviving a Teacher’s Salary.
S’mores Cake recipe adapted from here at Heather Christo.
Chocolate frosting recipe adapted from here at Something Swanky.
The post S’mores Campfire Cake appeared first on Creative Sides.
]]>The post Pink Flamingo Sugar Cookies appeared first on Creative Sides.
]]>
Hello summer. Hello kid’s parties. My poor children suffer so….I mean they have been to five kid’s parties since the beginning of June. Five. I haven’t been to five parties this entire past year and I highly doubt I will be to five in the next year either. Oh well, I can definitely think of worse things than lively, cute parties with a plethora of children running around having lots and lots of fun!
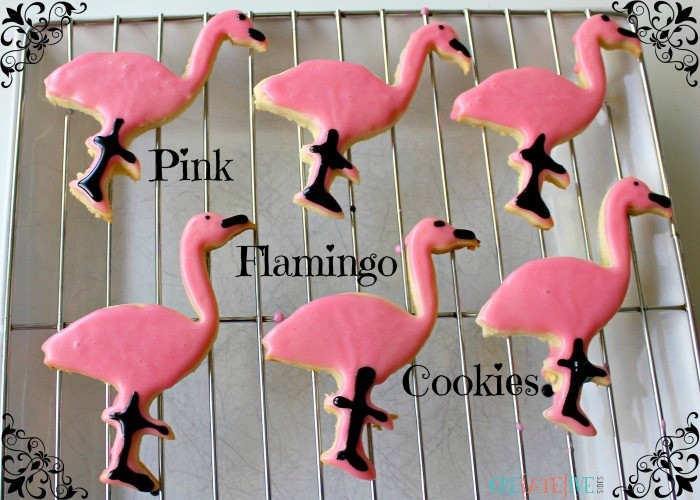
The latest party was one we have all been looking forward to (it had it’s inaugural run last year and was a definite highlight of the summer). It’s none other than an epic slip and slide party, with a huge, homemade slide on a rather perfect slope of a yard. And it is big, I mean really big, think four, even five kids at a time big! Hello fun! The only thing that could make this party better would be the Pink Flamingo Party theme. My girls and I have been waiting for this moment with our not one, but two separate flamingo shaped cookie cutters stored away. Plus, let’s face it, at the best of times we turn out pink icing like its going out of style!
Over the years I have made many, many sugar cookies and especially now with young kids in tow, there are even more occasions to break out the cookie cutters. So naturally I have tried plenty of different recipes with varying results. Once I found this recipe, there was no going back. This is the only one I use. I feel it is the easiest to make and work with and it ALWAYS turns out. Plus I love, love, love that it does not have to be chilled (who loves rolling out chilled dough – not me!!).
My Favourite Sugar Cookie Recipe – Just Roll Out And Use!
1 cup softened unsalted butter
1 cup granulated sugar
1 teaspoon vanilla extract
1/2 teaspoon Wilton Butter Flavour Extract (I found mine at Michaels)
1 egg
2 teaspoons baking powder
3 cups all-purpose flour
Step 1: Start with yummy ingredients, these are some of my favourites. Gather what you need.

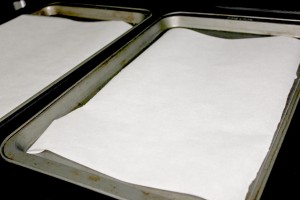
Step 2: Heat oven to 350 degrees and line two cookie sheets with parchment paper.
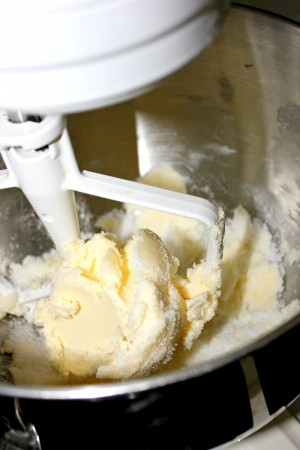
Step 3: Cream butter and sugar together with the help of a KitchenAid stand mixer until creamy.
Step 4: Beat in the extracts and egg.
Step 5: In a separate bowl, mix together the flour and baking powder, then add 1 cup at a time to the mixer.
The dough will become very stiff!
Step 6: Flour a work surface.
Step 7: Turn the dough out onto floured surface.
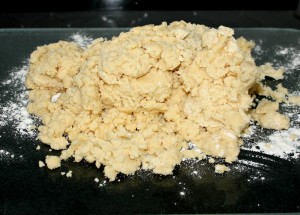
Step 8: Shape/knead the dough by hand, until it comes together, wetting hands if need be.
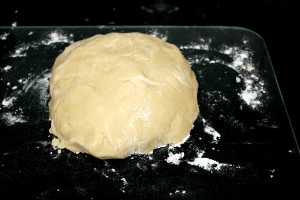
Step 9: Cut dough in half, to a more manageable size for rolling.
Step 10: Using only half the dough at a time, roll out evenly, on a generously floured surface until about 1/4-inch in thickness. Do not roll the dough too thin.
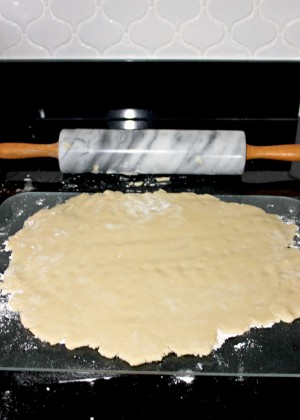
Step 11: Cut out desired shapes with cookie cutters. Dip the cutters in flour every couple cookies if they start sticking.
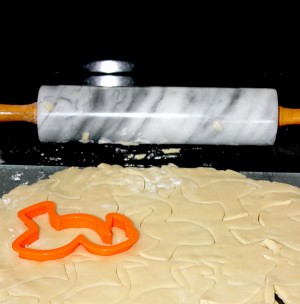
Step 12: Carefully lift (especially the skinny necked variety of flamingo in my case) the cookies and place on the baking sheets lined with parchment. After a few decapitated flamingos and some muttering, I started using my little tapered metal Pampered Chef Mini Spatula. All hail the mini spatula!! It works wonders in all situations, even those that need a little extra something (like say, really thin necked flamingos on a hot day……wait does that sound like country western song to anyone else?!).

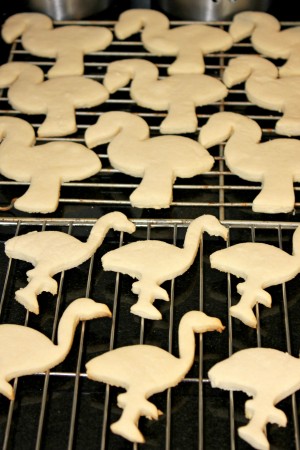
Step 13: Bake at 350 degrees for 6 – 8 minutes. Ovens tend to vary, but remove when lightly puffed and barely brown around the edges. Let cool on the cookie sheets until firm enough to transfer to a cooling rack.
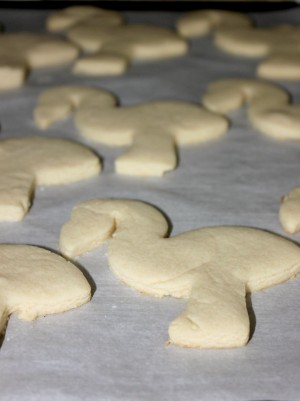
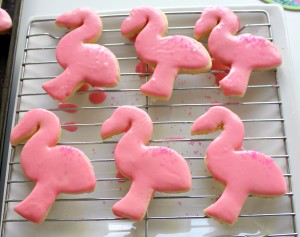
Step 14: Allow to cool completely. They look so naked waiting for their pink frosting.
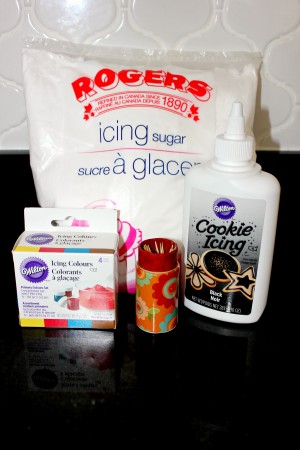
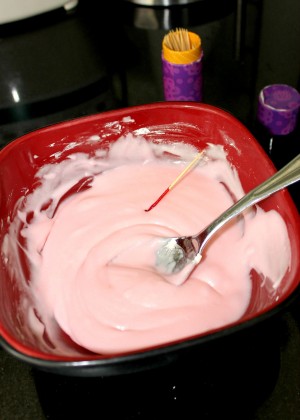
Pink Flamingo Icing

Basic Pink Icing
2 cups powdered icing sugar
1/4 cup 1% milk (more or less depending on consistency)
Wilton Concentrated Gel Icing Colours in red
Wilton Cookie Icing in Black (black flamingo accents) – I found mine at Michaels
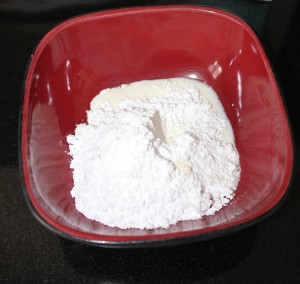
Step 1: Mix icing sugar and 1/8 cup (to start) of milk together in a bowl that is large enough to “dip” the cookies into. Keep adding milk until consistency is thin enough to coat a cookie, but not runny.
Step 2: Using a toothpick, add the Wilton Gel Red Icing Colours a little at a time, until reaching the desired hue of pink. A little really does go a long way. If you are like me and had never tried gel food colouring, listen to your sister-in-law and try some! It is a far cry from the messy liquid food colouring I have been using for years and the colours are far more intense with far less product. And as an added bonus, none on my fingers!!!
Step 3: Gently dip and coat each cookie in icing. I find this results in a much more even and smooth finish to the cookies, than trying to spread the icing onto the cookie itself. If the icing is too thick, this will not work and the cookies will break. It needs to be thin enough to smooth itself out and over the edges after (this is achieved best with a thinner milk like 1% rather than whole milk or cream). I do not actually let go of the cookie and allow it to sink into the icing like the picture indicates, but one must improvise for fear of getting frosting on their beloved SLR!
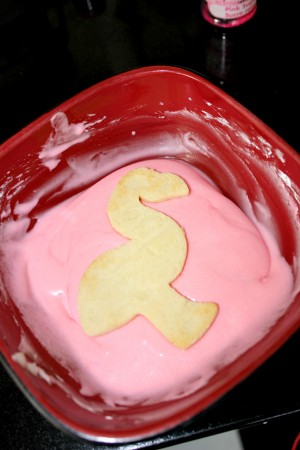
Step 4: Place on a cooling rack, overtop a cookie sheet or plate, to catch the drips.

Step 5: In the case of the less graceful of the two flamingo styles and in an attempt to quench my children’s insatiable need for sprinkles, I gave a light dusting of pink sparkling sugar to mimic feathers on the birds upper back, while the icing was still wet.
Step 6: Once the more detailed of the flamingo cookies had set, I very carefully used the Wilton Black Cookie Icing (I tried it out on a paper towel first, so as to get the feel of it and only twisted it open the smallest amount I could, so as to have more control) and drew an outline of legs, feet, beaks and eyes onto the flamingos. Once completed, allow them to dry for several hours, even overnight. Which isn’t hard, if say you did the black details after everyone was in bed….
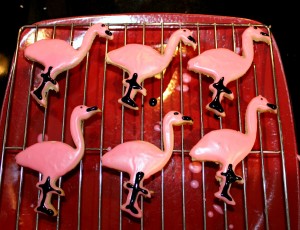
Voila! There you have it, the svelte flamingo cuties co-mingling with their adorable curvy counterparts and all ready to slip and slide!

- 1 cup softened unsalted butter
- 1 cup granulated sugar
- 1 tsp vanilla extract
- 1/2 tsp Wilton Butter Flavour Extract
- 1 egg
- 2 tsp baking powder
- 3 cups all-purpose flour
- 2 cups powdered icing sugar
- 1/4 cup 1% milk (more or less depending on consistency)
- Wilton Concentrated Gel Icing Colours in red
- Wilton Cookie Icing in Black
- Heat oven to 350 degrees and line two cookie sheets with parchment paper.
- Cream butter and sugar together with the help of a KitchenAid stand mixer until creamy.
- Beat in the extracts and egg.
- In a separate bowl, mix together the flour and baking powder, then add 1 cup at a time to the mixer. The dough will become very stiff!
- Flour a work surface.
- Turn the dough out onto floured surface.
- Shape/knead the dough by hand, until it comes together, wetting hands if need be.
- Cut dough in half, to a more manageable size for rolling.
- Using only half the dough at a time, roll out evenly, on a generously floured surface until about 1/4-inch in thickness. Do not roll the dough too thin.
- Cut out desired shapes with cookie cutters. Dip the cutters in flour every couple cookies if they start sticking.
- Carefully lift the cookies and place on the baking sheets lined with parchment.
- Allow to cool completely.
- Mix icing sugar and 1/8 cup (to start) of milk together in a bowl that is large enough to “dip” the cookies into. Keep adding milk until consistency is thin enough to coat a cookie, but not runny.
- Using a toothpick, add the Wilton Gel Red Icing Colours a little at a time, until reaching the desired hue of pink.
- Gently dip and coat each cookie in icing. If the icing is too thick, this will not work and the cookies will break. It needs to be thin enough to smooth itself out and over the edges after (this is achieved best with a thinner milk like 1% rather than whole milk or cream).
- Place on a cooling rack, overtop a cookie sheet or plate, to catch the drips.
- Once the icing has set use the Wilton Black Cookie Icing to add detail to your cookie (outline of legs, feet, beaks and eyes onto the flamingos)
- Once completed, allow them to dry for several hours, even overnight.
I found this glorious sugar cookie recipe entitled Best Sugar Cookie Recipe from In Katrinas Kitchen
The post Pink Flamingo Sugar Cookies appeared first on Creative Sides.
]]>The post Flamingo Kiddie Chocolates appeared first on Creative Sides.
]]>It probably has something to do with my love of all baked goods, or perhaps my constantly attempting to create yumminess, but my girls always want to make their own creations. The single most sought after and yet dreaded words, “Can I help?” or “What can I do?”
So today’s creation is a project just perfect for littles. These ‘chocolates’ are not perfect (nor should they be) but they were the first things to disappear at the party, the girls proudly took them to….though I did overhear “Try these, I made them!” proudly spoken more than a few times!
These are very simple and other than working the microwave, taking the pictures and waiting in the wings with a damp cloth, the girls did do it all themselves!
For this project you will need:
- 1 package Wilton Candy Melts (we used bright Pink) and we found ours at Michaels.
- Cake Mate Sprinkles (we used both rainbow round and party mix)
- Silicone mould (in our case a flamingo silicone ice cube tray from Superstore). The mould must be flexible in order to get the chocolates out after.
Step 1: Choose your sprinkles. The world and all projects will come to a screeching halt until this task is completed. This is serious business when you are three and seven. Each must slowly peruse the options of this weighty decision and then finally snatch and clutch one’s own chosen sprinkles to their chest, as if everyone else is out to steal them! It’s just the way it is done. We can’t help it, there is just mad respect for sprinkles in our house.
Step 2: Measure out Wilton Candy Melts. I find it best to work in 1/2 cup increments at a time. Melt in the microwave for 30 seconds and stir. Continue to microwave for 10 seconds at a time, stirring after each until melted.
Step 3: Place sprinkles in a smaller, more manageable container (unless you want to be cleaning up sprinkles for the rest of your life).
It’s a little known fact outside of our family, that one can concentrate much better if they stick their tongue out just a little.
Step 4: Spoon the melted candy into a flamingo shaped cavity and generously cover with sprinkles. Continue spooning in the melted candy into each flamingo and topping with sprinkles. Melt more Wilton Candy melts in the microwave as needed.
Step 5: Try to push any extra sprinkles on the edges in, because any on the outside will be lost. Don’t worry if it’s messy (it will be), once the candy melts harden, the thin edges on the outside of the shapes will just crack off when you remove the finished candies from their moulds.
Step 6: Put the finished ‘chocolates’ in the fridge to harden. This can take 30 – 60 minutes.
It’s fair to point out, that at this point if there is in fact any left over melted Wilton candy, it will be devoured!
….and there may be immense pride at their beautiful creations!
Step 7: Remove hardened candies from the fridge and carefully stretch and loosen silicone around each flamingo and then push or pop out of the moulds. Put onto a plate or serving dish. Store in an air tight container in the fridge until ready to serve.
Step 8: Enjoy!
The post Flamingo Kiddie Chocolates appeared first on Creative Sides.
]]>