Mains – Creative Sides https://creativesides.ca Beginner or expert we have something to unleash your creative side Fri, 03 Nov 2017 19:02:42 +0000 en-US hourly 1 https://wordpress.org/?v=4.4.16 Black Bean Sweet Potato Soup https://creativesides.ca/black-bean-sweet-potato-soup/ https://creativesides.ca/black-bean-sweet-potato-soup/#respond Sat, 01 Oct 2016 23:21:30 +0000 https://creativesides.ca/?p=1971 The leaves are turning, the temperature is dropping and rain is coming more frequently. We’re all getting ready to hibernate – pulling on warm layers, and making big batches of our favourite comfort foods to sustain us through the cold, dreary months ahead. Soup is one of my favourite comfort foods – it warms you...

Read More »

The post Black Bean Sweet Potato Soup appeared first on Creative Sides.

]]>
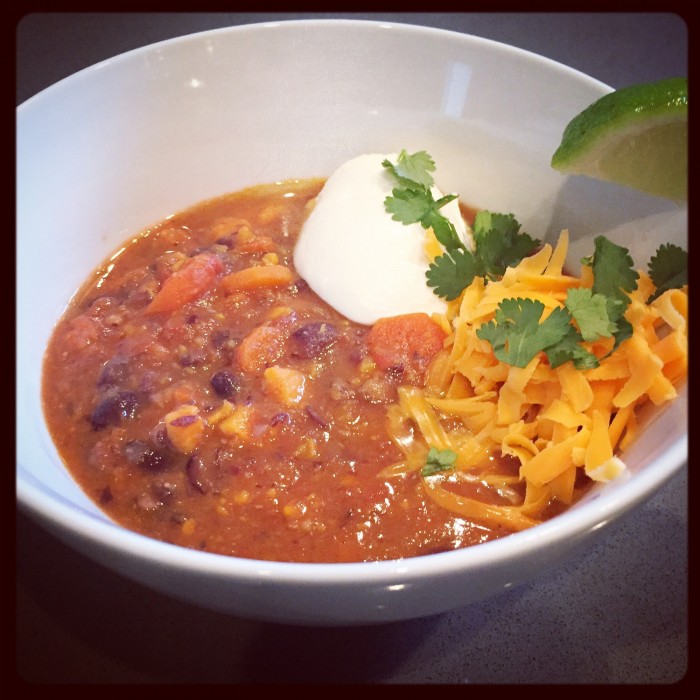
The leaves are turning, the temperature is dropping and rain is coming more frequently. We’re all getting ready to hibernate – pulling on warm layers, and making big batches of our favourite comfort foods to sustain us through the cold, dreary months ahead. Soup is one of my favourite comfort foods – it warms you up quickly, you can make it once in a big batch to last you through a week or two, and there are endless variations so it’s never boring! 

This Black Bean Sweet Potato soup is quick and easy to throw together, full of vitamins and minerals, and is comprised wholly of ingredients I always have in my pantry (a major win in my books). It can be jazzed up with shredded cheese and sour cream or left plain and simple. The recipe makes a lot but it freezes well.

Black Bean Sweet Potato Soup
Serves 8
A hearty and healthy soup, perfect for brisk fall days
Write a review
Print
Prep Time
10 min
Cook Time
30 min
Total Time
40 min
Prep Time
10 min
Cook Time
30 min
Total Time
40 min
Ingredients
  1. 2 tablespoons olive oil
  2. 1 onion, finely diced
  3. 4 carrots, sliced (approximately 1 cup)
  4. 1 sweet potato, finely diced (approximately 3 cups)
  5. 3 cloves garlic, minced
  6. 1/2 teaspoon cumin
  7. 1 x 796mL can diced tomatoes, with juice
  8. 2 x 540mL can black beans, drained and rinsed well
  9. 4 cups vegetable or chicken broth
  10. salt and pepper to taste
Instructions
  1. Heat olive oil in large soup pot over medium high heat. Add onions, carrots, and sweet potatoes and cook until softened, 7 - 10 minutes.
  2. Add garlic and cumin and cook, stirring constantly, for another minute or two.
  3. Add tomatoes with their juice, beans, and broth. Bring to a boil and cook until vegetables are completely tender, anywhere from 5 - 15 minutes depending on how big you sliced your veg.
  4. You can leave this soup as-is or you can blend all (or part) of it for a smoother consistency. I like to use my immersion blender and blend in quick bursts to end up with a sort of half-smooth-half-chunky consistency.
  5. Serve with sour cream, shredded cheese, sliced green onions, fresh cilantro, lime wedges, hot sauce, etc. The sky's the limit.
Adapted from Hillary With 2 L's
Creative Sides https://creativesides.ca/

Black Bean Sweet Potato Soup

A version of this post originally appeared on Hillary with 2 Ls

The post Black Bean Sweet Potato Soup appeared first on Creative Sides.

]]>
https://creativesides.ca/black-bean-sweet-potato-soup/feed/ 0
Salmon with Avocado Dill Yogurt Sauce https://creativesides.ca/salmon-avocado-dill-yogurt-sauce/ https://creativesides.ca/salmon-avocado-dill-yogurt-sauce/#respond Tue, 06 Sep 2016 17:04:43 +0000 https://creativesides.ca/?p=2174 Here on the West Coast of Canada, there are a few things we know to be true: We live in the tropics of Canada – yes it rains, but not nearly as much as we say it does because then everyone would want to move here. We can BBQ all year round without having to...

Read More »

The post Salmon with Avocado Dill Yogurt Sauce appeared first on Creative Sides.

]]>
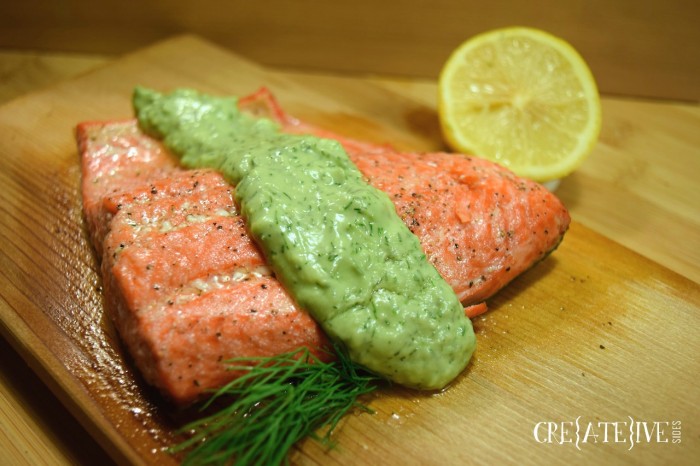
Salmon with Avocado Yogurt Sauce

Here on the West Coast of Canada, there are a few things we know to be true:

  1. We live in the tropics of Canada – yes it rains, but not nearly as much as we say it does because then everyone would want to move here.
  2. We can BBQ all year round without having to shovel snow to reach our BBQ – you don’t have to shovel rain… see #1.
  3. We are lucky to have an abundance of fresh local ingredients available within 100 miles.
  4. West Coast Spirit… easily observed in a gathering of great people, relaxed, welcoming, and – more often than not – planned on the spur of the moment.

Some of our best and most memorable gatherings are planned at the last minute. Friends coming over? Put some ice in a bucket with your beverage of choice, throw a salmon on the BBQ and whip up this tasty sauce. This sauce is quicker to prepare than the salmon and is a crowd pleaser. It adds a lot of flavour and interest to a simple meal and it lets you spend more time with your friends than in the kitchen.

What’s the secret to this easy sauce? Olympic Natural Yogurt. I’ve raved about it before in my Coconut Lime Banana Bread recipe. I love it because it’s so versatile and can be used at breakfast, lunch and dinner. Does this make me a Yogurt Aficionado?
 

Cedar Planked Salmon with Avocado Dill Yogurt Sauce

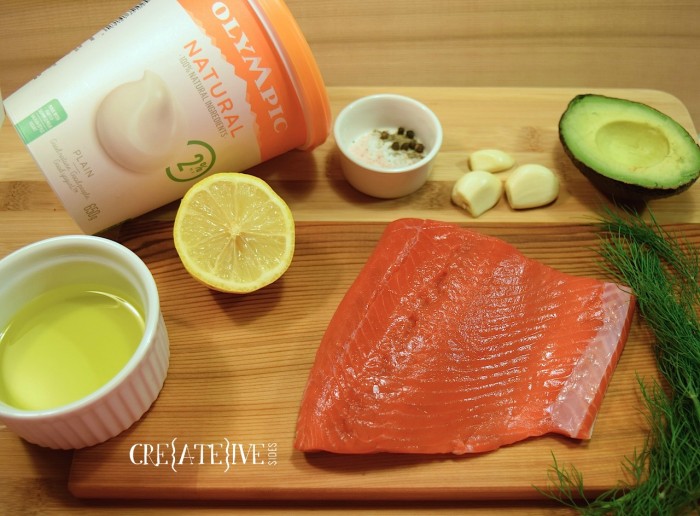
 Cedar Plank Salmon Ingredients

Ingredients

1 avocado
½ cup Olympic Natural Plain yogurt
3 tbsp dill (chopped)
1 clove garlic (pressed)
2 tbsp lemon juice
Salt
Pepper
4 salmon fillets
1 tbsp olive oil
Cedar Plank or parchment lined baking tray

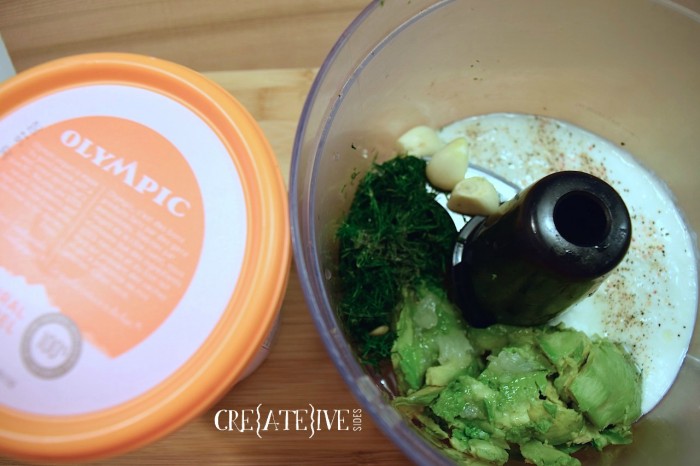
Yogurt Sauce

Instructions

Avocado Dill Yogurt Sauce

  1. In a food processor, combine avocado, Olympic Natural yogurt, dill, pressed garlic, lemon juice, salt and pepper until smooth and creamy.
  2. For garlic lovers you can blend the cloves of garlic whole but you may end up with small chunks in the sauce. If you prefer a smoother sauce, press the garlic first.

Cedar Plank Salmon (Baked)

  1. Submerge your cedar plank in water for 2-6 hours prior to cooking. Weigh down the plank with a heavy object.
  2. Preheat oven to 400 degrees
  3. Place salmon skin side down on cedar plank.
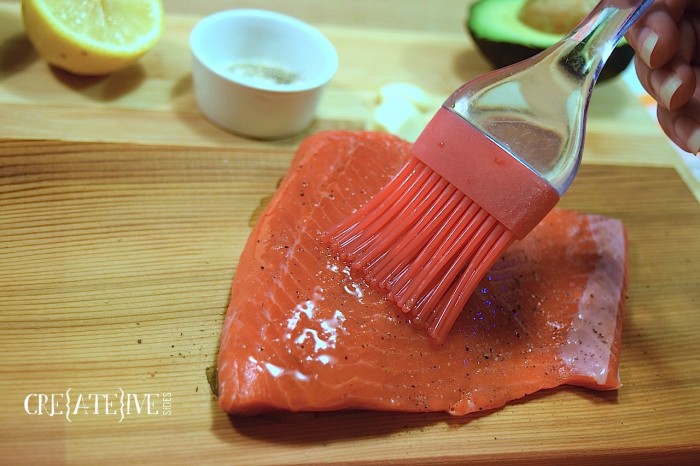
  4. Brush olive oil on salmon then season with salt and pepper.
  5. Bake for approximately 10-15 minutes depending on thickness of your fillets. A good rule of thumb is 10 minutes of baking time for each 1” of thickness.
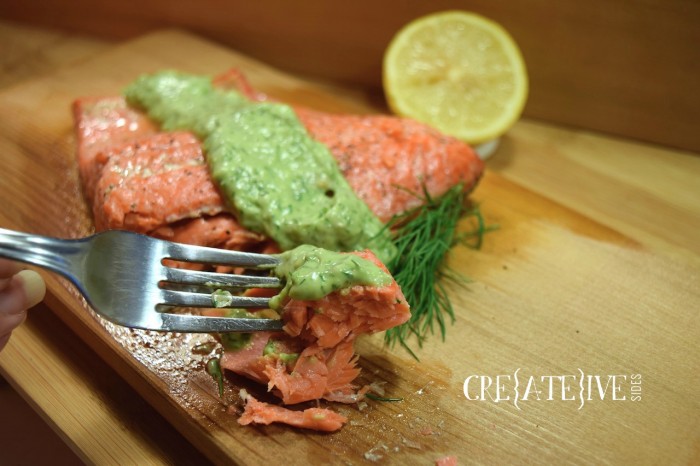
  6. Serve topped with Avocado Dill Yogurt Sauce

Oiling Salmon
Cedar Plank Salmon (BBQ)

  1. Complete Steps 1-4 as above
  2. Place the plank on a preheated hot grill. Turn down to low and close the lid.
  3. Keep the lid closed as much as possible. Plank should smoulder not flame. If the plank starts to flame, spritz the plank with a spray bottle of water.
  4. Serve topped with Avocado Dill Yogurt Sauce

Salmon with yogurt sauce

 
As mentioned in my previous post, Olympic products are made right here on the west coast in Delta, B.C. with 100% natural ingredients and fresh milk from cows who live close to their dairies. The milk has a shorter commute than my husband does to go to work. It’s that fresh!

Olympic’s packaging has a great new look and easily spotted in the grocery isle (as well as my fridge – my husband and I both went to the store and picked up yogurt last Tuesday without telling the other. I’ll be referencing these recipes over the next few weeks as I have approximately 3kg of yogurt in my fridge. Thank goodness it’s Back to School time!) 

Disclaimer: Although this post has been generously sponsored by Olympic, the opinions and language are my own. If I would not serve it to my family, I would never suggest you serve it to yours.


The post Salmon with Avocado Dill Yogurt Sauce appeared first on Creative Sides.

]]>
https://creativesides.ca/salmon-avocado-dill-yogurt-sauce/feed/ 0
Apricot Glazed Pork Kebabs https://creativesides.ca/apricot-glazed-pork-kebabs/ https://creativesides.ca/apricot-glazed-pork-kebabs/#respond Tue, 21 Jun 2016 04:53:26 +0000 https://creativesides.ca/?p=2101 Kebabs just scream summer don’t they? They’re a big family pleaser around our house too. I love that all the cooking heat stays outside, and my kids love anything served on a stick. Win-Win! This Apricot Glazed Pork Kebab recipe is a mainstay in our kebab rotation. It’s a little sweet with a little kick,...

Read More »

The post Apricot Glazed Pork Kebabs appeared first on Creative Sides.

]]>
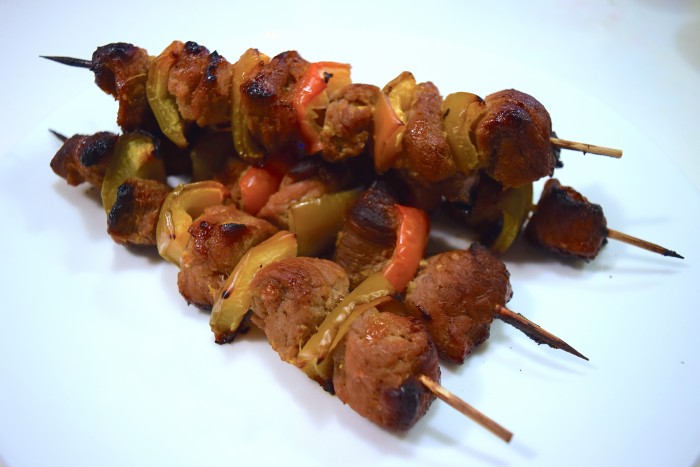
Kebabs just scream summer don’t they? They’re a big family pleaser around our house too. I love that all the cooking heat stays outside, and my kids love anything served on a stick. Win-Win! This Apricot Glazed Pork Kebab recipe is a mainstay in our kebab rotation. It’s a little sweet with a little kick, and best of all, it can be prepped ahead and frozen for a quick and tasty meal!

Glad Freezer Meal

Freeze-Ahead Apricot Glazed Pork Kebabs

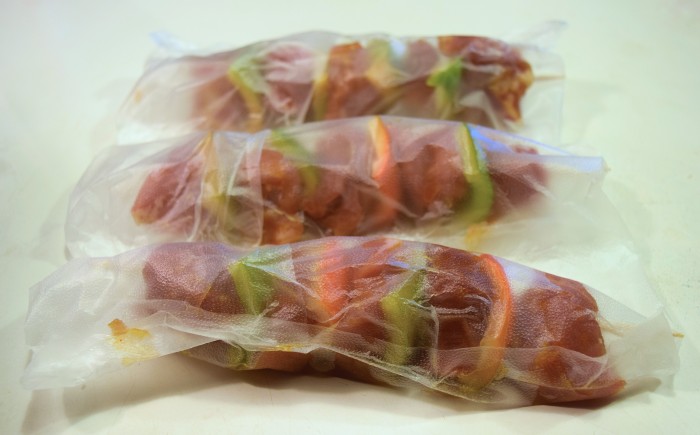
If you are planning to make this meal to freeze, follow the recipe below but mix the pork AND the peppers in with the marinade. Then, once you have threaded the skewers, my secret tip is to seal them individually with GLAD® Press’n Seal. I lay out a sheet (textured side up) that is twice as long as the skewers plus an extra inch. Then I lay 3-4 skewers side by side, leaving an inch between each skewer, plus an inch on either end. I fold the sheet length wise overtop of the pork kebabs and run my finger along each edge to seal. Then I run a finger in between each kebab to seal them off individually and voilà! No more fighting with kebabs that are stuck together! You can place each packet into a GLAD® Freezer Bag and you’re good to go.

Apricot glazed pork kebabs

One thing to note: some people prefer their kebabs with extra crisp vegetables. If this is you, I would recommend freezing meat-only kebabs, and making separate vegetable kebabs the same day you’ll be eating them. If you’re not so picky about the texture of the vegetables, or like them a bit softer, you’re good to freeze.

To cook, thaw the pork kebabs overnight in the refrigerator, or for a few hours on the counter. Then grill away!

Apricot Glazed Pork Kebabs
Serves 6
A sweet and spicy BBQ
Write a review
Print
Prep Time
20 min
Cook Time
7 min
Total Time
57 min
Prep Time
20 min
Cook Time
7 min
Total Time
57 min
Ingredients
  1. 8 oz jar of apricot jam
  2. 2 tbsp soy sauce
  3. 1 tbsp lemon juice
  4. 4 garlic cloves, minced
  5. 1 tbsp chipotle child powder
  6. salt & pepper
  7. 2 lbs pork tenderloin, cubed
  8. 1 green pepper
  9. 1 sweet pepper
Instructions
  1. Warm apricot jam in the microwave for 1 minute
  2. In a mixing bowl, combine jam, soy sauce, lemon juice, garlic and chill powder, stirring well
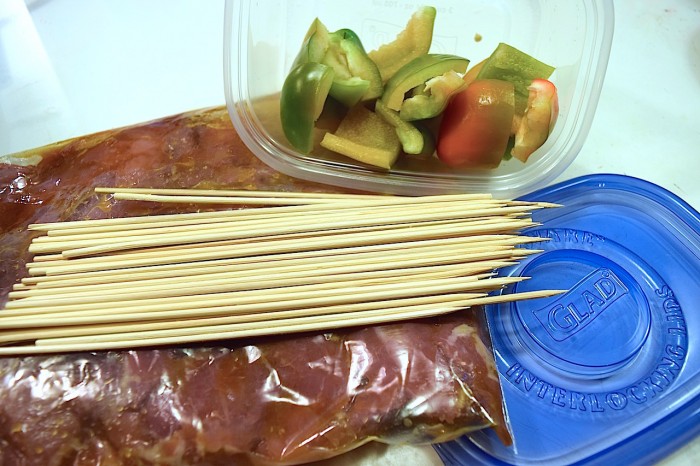
  3. Cube pork tenderloin and place into a large zipper plastic bag
  4. Pour 3/4 of the mixture into the bag with the pork and let it marinade for at least 30 minutes
  5. Chop green and sweet peppers
  6. Preheat BBQ to medium heat
  7. Alternate threading pork and pepper cubes onto bamboo or metal skewers
  8. Dust with salt and pepper, and additional chili powder to taste
  9. Place skewers on the BBQ and baste with remaining apricot mixture
  10. Cook for 3 minutes and turn
  11. Baste other half and cook for an additional 4 minutes or until done.
Notes
  1. If you don't have a BBQ, the kebabs can be cooked in the oven at 375°F for 25-30 minutes
Adapted from MyRecipes.com
Creative Sides https://creativesides.ca/
 
I’m a big fan of weekly meal planning and prepping. You can find more prepare-ahead recipe ideas here, plus be sure to check out my meal planning tips too! Happy cooking!

All on the table disclaimer: Although this post has been generously sponsored by GLAD®, the opinions and language are my own. If I would not use it with my family, I would never suggest you use it with yours. Read our full disclosure statement here.

The post Apricot Glazed Pork Kebabs appeared first on Creative Sides.

]]>
https://creativesides.ca/apricot-glazed-pork-kebabs/feed/ 0
Kale Citrus Salad https://creativesides.ca/kale-citrus-salad/ https://creativesides.ca/kale-citrus-salad/#respond Mon, 22 Feb 2016 20:42:50 +0000 https://creativesides.ca/?p=1761 Overrun with limp lettuce, the produce section is not a happy place in the winter. This kale citrus salad doesn’t pretend to be something it’s not. It’s not a place-of-honour-at-the-summer-picnic salad. It doesn’t feature jewel-toned berries or fresh-from-the-garden tomatoes. It’s winter salad. It’s a make-the-most-of-what-we’ve-got salad. It’s not pathetic or lackluster, though. This salad is robust...

Read More »

The post Kale Citrus Salad appeared first on Creative Sides.

]]>
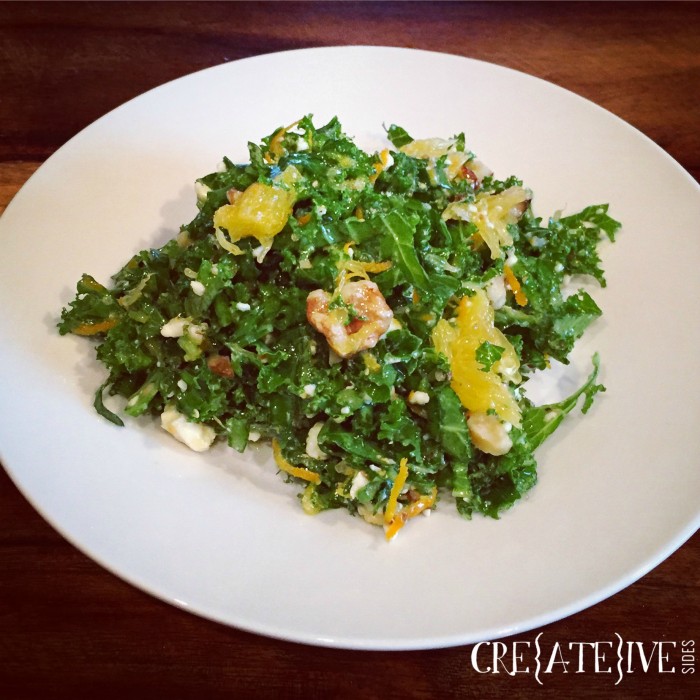
Overrun with limp lettuce, the produce section is not a happy place in the winter. This kale citrus salad doesn’t pretend to be something it’s not. It’s not a place-of-honour-at-the-summer-picnic salad. It doesn’t feature jewel-toned berries or fresh-from-the-garden tomatoes. It’s winter salad. It’s a make-the-most-of-what-we’ve-got salad. It’s not pathetic or lackluster, though. This salad is robust and flavourful and defiant. This salad doesn’t care that it’s winter.

Kale Citrus Salad


Kale Citrus Salad
Serves 4
Write a review
Print
Ingredients
  1. 1 navel orange, zest and flesh
  2. 2 tbsp olive oil
  3. 2 tbsp apple cider vinegar
  4. juice of 1/2 a lemon
  5. 1 tsp Dijon mustard
  6. 1 tsp honey
  7. 3 green onions, finely sliced
  8. 1 small bunch fresh mint, finely sliced (chiffonade) - approximately 1 heaping tbsp
  9. 1/2 cup crumbled feta cheese
  10. 4 - 6 kale leaves, finely sliced (chiffonade) - approximately 4 cups
  11. 1/4 cup chopped walnuts
  12. salt and pepper to taste
Instructions
  1. Zest orange into large mixing bowl.
  2. Supreme the orange, chop, and add to mixing bowl with olive oil, apple cider vinegar, lemon juice, mustard, honey, green onions, mint, and feta cheese. Mix well.
  3. Add kale and walnuts and toss until lightly coated with dressing. Season with salt and pepper.
Creative Sides https://creativesides.ca/

The post Kale Citrus Salad appeared first on Creative Sides.

]]>
https://creativesides.ca/kale-citrus-salad/feed/ 0
Creamy Tomato Spinach Soup with Quinoa and Chickpeas https://creativesides.ca/creamy-tomato-spinach-soup-with-quinoa-and-chickpeas/ https://creativesides.ca/creamy-tomato-spinach-soup-with-quinoa-and-chickpeas/#comments Sun, 24 Jan 2016 01:30:05 +0000 https://creativesides.ca/?p=1557 This tomato soup is satisfyingly rich and creamy but the protein and leafy greens have it firmly planted on my healthy list. I used coconut milk with trepidation (I usually use it in curries and soups full of ginger and chilis) but it works here to add a nice creaminess to the soup without using...

Read More »

The post Creamy Tomato Spinach Soup with Quinoa and Chickpeas appeared first on Creative Sides.

]]>
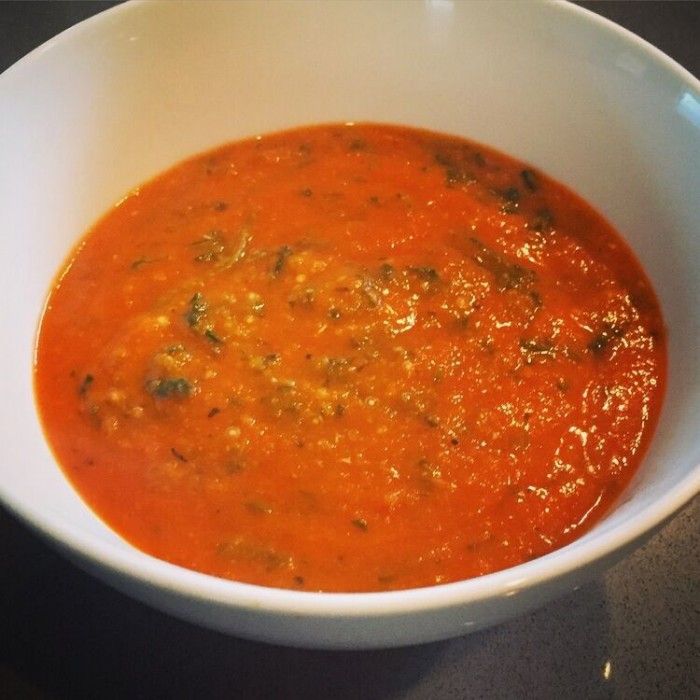
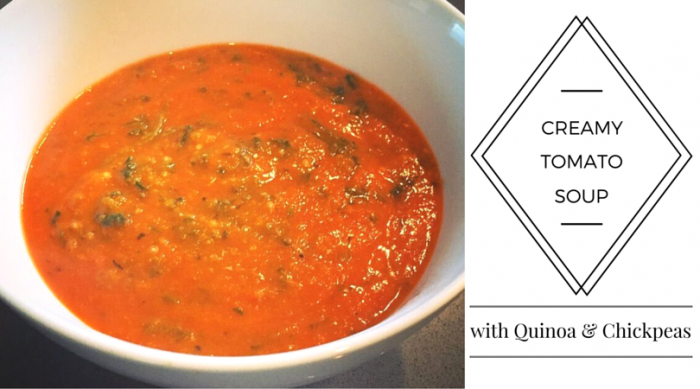
This tomato soup is satisfyingly rich and creamy but the protein and leafy greens have it firmly planted on my healthy list. I used coconut milk with trepidation (I usually use it in curries and soups full of ginger and chilis) but it works here to add a nice creaminess to the soup without using actual cream.

Tomato Soup with Quinoa and Chickpeas

Creamy Tomato Soup with Quinoa & Chickpeas
Serves 8
Write a review
Print
Prep Time
10 min
Cook Time
45 min
Total Time
55 min
Prep Time
10 min
Cook Time
45 min
Total Time
55 min
Ingredients
  1. 2 tablespoons olive oil
  2. 1 onion, roughly chopped
  3. 2 carrots, roughly chopped
  4. 4 cloves garlic, peeled and roughly chopped
  5. 1 cup dry white wine*
  6. 2 tablespoons tomato paste
  7. 1 (796mL) can diced tomatoes, with juice
  8. 1 (400mL) can coconut milk
  9. 2 cups broth
  10. 1 (540mL) can chickpeas, drained and rinsed well
  11. 1 (300g) block frozen chopped spinach, not thawed**
  12. 1/4 cup dry quinoa, rinsed well
  13. 1 tablespoon dried basil
  14. 1 tablespoon dried oregano
  15. salt and pepper to taste
Optional toppings
  1. grated parmesan or asiago cheese
  2. finely chopped fresh parsley
Instructions
  1. Heat olive oil in large soup pot over medium-high heat.
  2. Add onion, carrots, and garlic and cook, stirring often, for 7 - 10 minutes until onions are translucent. Don't let your pot get too hot or you'll scorch your garlic.
  3. Add white wine and cook, scraping up tasty bits from the bottom of your pot, until liquid is reduced by approximately 2/3.
  4. Add tomato paste, diced tomatoes, coconut milk, broth, and chickpeas and bring to a boil. Turn heat down and simmer until carrots are very tender. Buzz with immersion blender until smooth.
  5. Add spinach and turn heat up until soup boils. Add quinoa, reduce heat to low, and cook, uncovered, stirring occasionally, until quinoa is tender (approximately 15 minutes). Add basil and oregano. Taste and season with salt and pepper.
  6. Top with grated parmesan or asiago cheese and finely chopped fresh parsley. Serve with crusty bread for dipping.
Notes
  1. * If you don't have wine, skip this step and increase your broth by 1/2 cup.
  2. ** If you just have fresh spinach, use about three cups, chop finely, and increase your broth by about 1/4 - 1/3 cup.
Creative Sides https://creativesides.ca/
Creamy Tomato Soup with Quinoa & Chickpeas

This post originally appeared on Hillary with 2Ls

The post Creamy Tomato Spinach Soup with Quinoa and Chickpeas appeared first on Creative Sides.

]]>
https://creativesides.ca/creamy-tomato-spinach-soup-with-quinoa-and-chickpeas/feed/ 2
Mom’s Macaroni and Cheese https://creativesides.ca/moms-macaroni-and-cheese/ https://creativesides.ca/moms-macaroni-and-cheese/#comments Tue, 17 Nov 2015 19:58:17 +0000 https://creativesides.ca/?p=1065 My mom has made the same macaroni and cheese since my siblings and I were little kids. Macaroni and cheese night was the best night. Looking back on it now, macaroni and cheese night was probably a “stretch the pay cheque until grocery day” meal or a “I cannot give a single more eff” meal...

Read More »

The post Mom’s Macaroni and Cheese appeared first on Creative Sides.

]]>
My mom has made the same macaroni and cheese since my siblings and I were little kids. Macaroni and cheese night was the best night. Looking back on it now, macaroni and cheese night was probably a “stretch the pay cheque until grocery day” meal or a “I cannot give a single more eff” meal for my mom but to us kids it was a special treat. I will never forget the day my dad tried to make mom’s macaroni and cheese. My mom was in the hospital giving birth to either my little sister or brother so my dad was taking care of me and my older sister. He made my mom’s macaroni and cheese but decided to give it a little flair in the form of onions, green peppers, black pepper, and olives. Have mercy. I’m still not over it.

Ingredients

3 cups dry elbow macaroni pasta
2 tablespoons butter
2 heaped tablespoons all-purpose flour
4 cups milk (I use whole milk because I am sinful but you can use 2% if you want a lighter sauce. If you use skim milk I will give you side eye so hard.)
1 teaspoon mustard (pro tip: don’t use grainy mustard if you plan to serve this to a picky child or they will ask you why you put “nuts” in the cheesy pasta and you will die a little inside.)
1 tablespoon Worcestershire sauce (optional but it really enhances the cheesiness so I don’t recommend skipping it unless you’ve got vegetarian concerns.)
2 cups grated cheddar cheese (I use old cheddar and it is decadent but regular cheddar is fine too.)
salt and pepper to taste

Directions

Step 1: Preheat oven to 350F.

Step 2: Prepare macaroni per “al dente” instructions on the bag. Drain and set aside.

Step 3: Melt butter over medium-high heat in medium-sized saucepan. Add flour and cook, stirring constantly, until butter and flour are combined well and the mixture has begun to smell a bit nutty, about 90 seconds – two minutes. If the roux starts to darken, turn down the heat.

Step 4: Add the milk slowly, whisking vigorously. I usually add the milk cup by cup, taking time to whisk and thicken the sauce between cups. Cook until sauce is thickened to the consistency of runny yogurt. Remove from heat and whisk in mustard and Worcestershire sauce.

Step 5: Now! This is important. If your sauce came anywhere close to a boil, it is too hot to stir in your cheese right now. Your cheese sauce will curdle. You will cry. Your macaroni and cheese will not be as good as my mom’s macaroni and cheese. It is worth your time to sit and wait and be patient for five minutes. Go make a cup of tea. Take a few deep breaths. Come back in five minutes.

Step 6: Right! We’re back. Stir grated cheese into your sauce, reserving about 1/2 cup to sprinkle on top. Taste and season with salt and (white) pepper. Mix sauce into pasta, spread into a casserole dish, top with grated cheese, and bake for 15 – 25 minutes until bubbly. Enjoy!

Step 7: If you’re not serving a toddler and want to fancy things up a bit, skip the melted cheese on top and make a nice crunchy topping from a couple of tablespoons of melted butter and about 1/4 – 1/2 cup of panko bread crumbs. If you want to get really decadent, you could also mix some crispy fried bacon bits and green onions into the panko mixture. Just don’t bring that nonsense around me or my older sister.

Serves six.

Pro-tip: Instead of reheating the leftovers in the oven, I like to scoop the mac and cheese into a saucepan and reheat on the stove with a bit of extra milk to prevent the pasta from drying out.

This post originally appeared at Hillary with 2 L’s
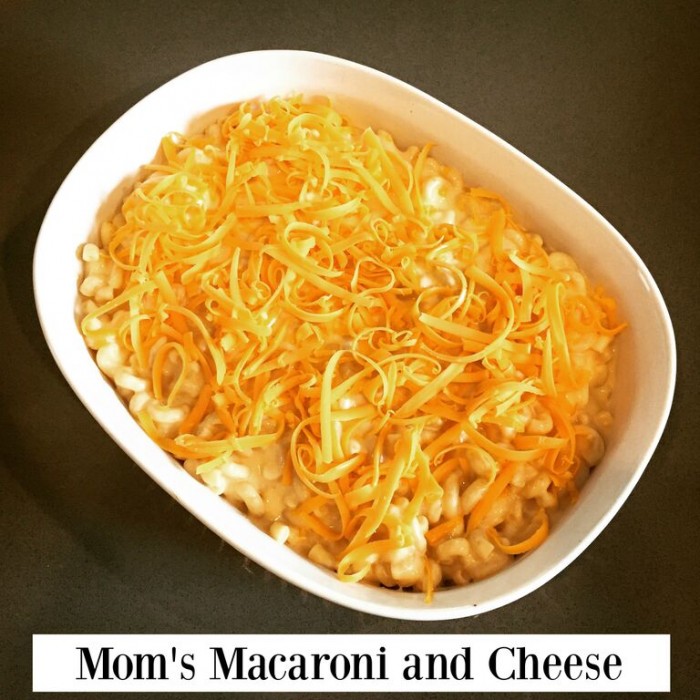
Mom’s Macaroni & Cheese
Serves 6
Write a review
Print
Prep Time
10 hr
Cook Time
20 hr
Total Time
30 hr
Prep Time
10 hr
Cook Time
20 hr
Total Time
30 hr
Ingredients
  1. 3 cups dry elbow macaroni pasta
  2. 2 tablespoons butter
  3. 2 heaped tablespoons all-purpose flour
  4. 4 cups milk (whole or 2%)
  5. 1 teaspoon mustard (pro tip: don't use grainy mustard if you plan to serve this to a picky child)
  6. 1 tablespoon Worcestershire sauce
  7. 2 cups grated cheddar cheese
  8. salt and pepper to taste
Instructions
  1. Preheat oven to 350F.
  2. Prepare macaroni per "al dente" instructions on the bag. Drain and set aside.
  3. Melt butter over medium-high heat in medium-sized saucepan. Add flour and cook, stirring constantly, until butter and flour are combined well and the mixture has begun to smell a bit nutty, about 90 seconds - two minutes. If the roux starts to darken, turn down the heat.
  4. Add the milk slowly, whisking vigorously. I usually add the milk cup by cup, taking time to whisk and thicken the sauce between cups. Cook until sauce is thickened to the consistency of runny yogurt. Remove from heat and whisk in mustard and Worcestershire sauce.
  5. Now! This is important. If your sauce came anywhere close to a boil, it is too hot to stir in your cheese right now. Your cheese sauce will curdle. It is worth your time to sit and wait and be patient for five minutes.
  6. Stir grated cheese into your sauce, reserving about 1/2 cup to sprinkle on top. Taste and season with salt and (white) pepper. Mix sauce into pasta, spread into a casserole dish, top with grated cheese, and bake for 15 - 25 minutes until bubbly.
Notes
  1. Optional: Skip the melted cheese on top and make a nice crunchy topping from a couple tablespoons of melted butter and about 1/4 - 1/2 cup of panko bread crumbs. If you want to get really decadent, you could also mix some crispy fried bacon bits and green onions into the panko mixture.
Creative Sides https://creativesides.ca/

Mom’s Macaroni and Cheese Recipe from Hillary with 2 L's

The post Mom’s Macaroni and Cheese appeared first on Creative Sides.

]]>
https://creativesides.ca/moms-macaroni-and-cheese/feed/ 1
Favourite Fall Soups https://creativesides.ca/favourite-fall-soups/ https://creativesides.ca/favourite-fall-soups/#respond Mon, 21 Sep 2015 02:42:57 +0000 https://creativesides.ca/?p=363 One of my favourite things about Fall is soup. Yes I love to see the leaves turn, and bring out the cozy sweaters but honestly, the soup! The tempurature drops ever so slightly and I just want All.The.Soup. I love that you can put just about any ingredients into a soup, it means you never...

Read More »

The post Favourite Fall Soups appeared first on Creative Sides.

]]>
Favourite Fall Soups

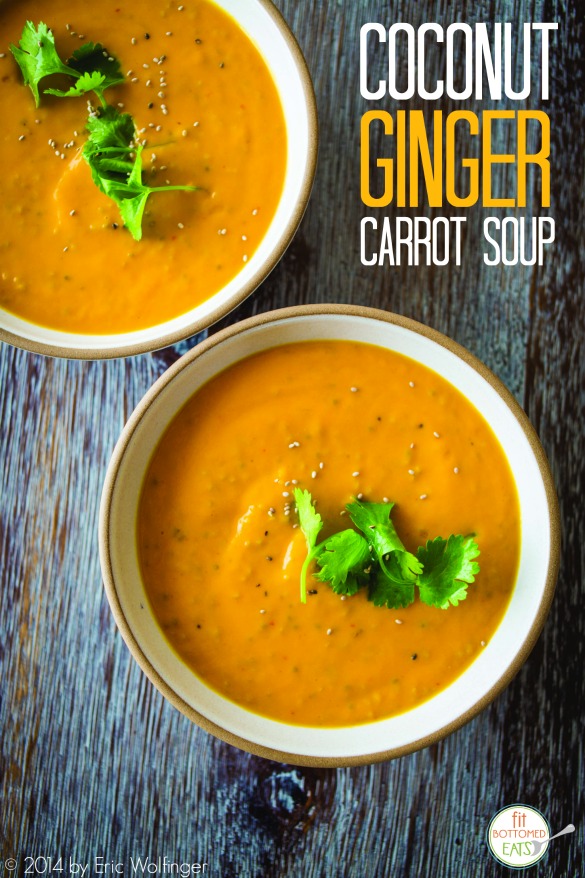
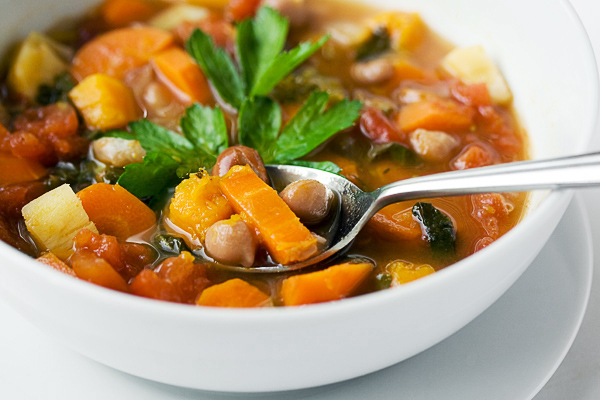
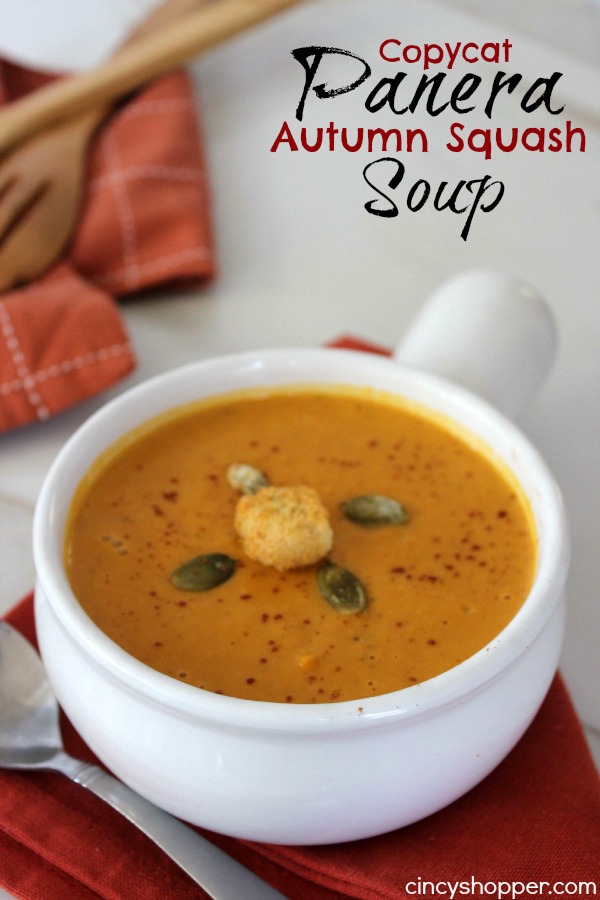
One of my favourite things about Fall is soup. Yes I love to see the leaves turn, and bring out the cozy sweaters but honestly, the soup! The tempurature drops ever so slightly and I just want All.The.Soup. I love that you can put just about any ingredients into a soup, it means you never get bored! I’ve rounded up some of my favourites to share with you.

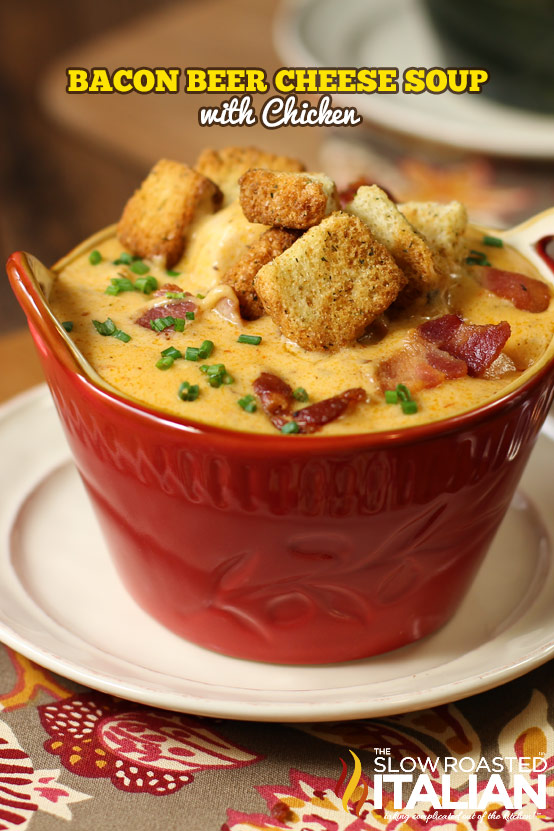
bacon-beer-cheese-soup-with-chicken

1. Bacon, Beer & Cheese Soup: Bacon – need I say more? 


ginger-carrot-soup

2. Coconut Ginger Carrot Soup: A gorgeous and healthy combination of flavours


Fall Vegetable Soup

3. Fall Vegetable Soup: Hearty is the only word for this soup.


Copycat-Panera-Autumn-Squash-Soup-Recipe

4. Autumn Squash Soup: It isn’t Fall without squash!

You can find these and more (like this delicious black bean & pumpkin soup, a roasted mushroom & brie soup and even a spicy vegan lentil soup) on our Creative Eats – Favourite Fall Soups Pinterest Board.

The post Favourite Fall Soups appeared first on Creative Sides.

]]>
https://creativesides.ca/favourite-fall-soups/feed/ 0
8 Gluten Free Pizza Crust Alternatives https://creativesides.ca/8-gluten-free-pizza-crust-alternatives/ https://creativesides.ca/8-gluten-free-pizza-crust-alternatives/#respond Sun, 20 Sep 2015 20:58:47 +0000 https://creativesides.ca/?p=371 In my never-ending quest to find healthy alternatives for much-loved foods, pizza is one I keep coming back to over and over. It’s a difficult thing to mimic – especially the crust, so I set out on a search to find tasty and healthy gluten free pizza crust recipes. I was delighted to turn up the...

Read More »

The post 8 Gluten Free Pizza Crust Alternatives appeared first on Creative Sides.

]]>
Gluten Free Pizza Crust Alternatives

In my never-ending quest to find healthy alternatives for much-loved foods, pizza is one I keep coming back to over and over. It’s a difficult thing to mimic – especially the crust, so I set out on a search to find tasty and healthy gluten free pizza crust recipes. I was delighted to turn up the following 8 mouth watering and UNIQUE recipes from some fantastic, creative bloggers. All are gluten free, some are paleo and one is even Whole30 compliant! Take a peek and add them to your weekly menu. 

Gluten Free Paleo Carrot Pizza Crust

1. Carrot Based Pizza Crust

2. Eggplant Based Pizza Crust (Whole30 Compliant)

Gluten Free Cauliflower Pizza Crust

3. Cauliflower Based Pizza Crust 

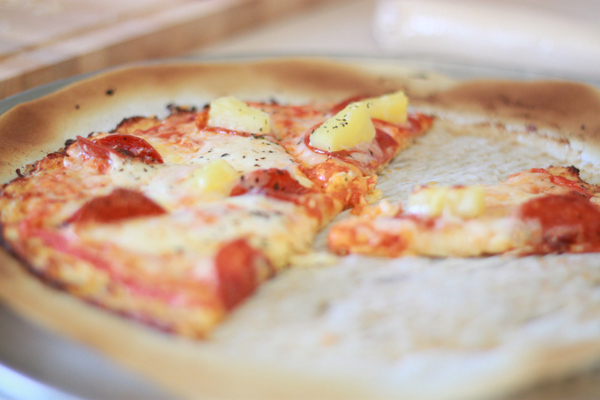
4.Coconut & Almond Flour Based Crust

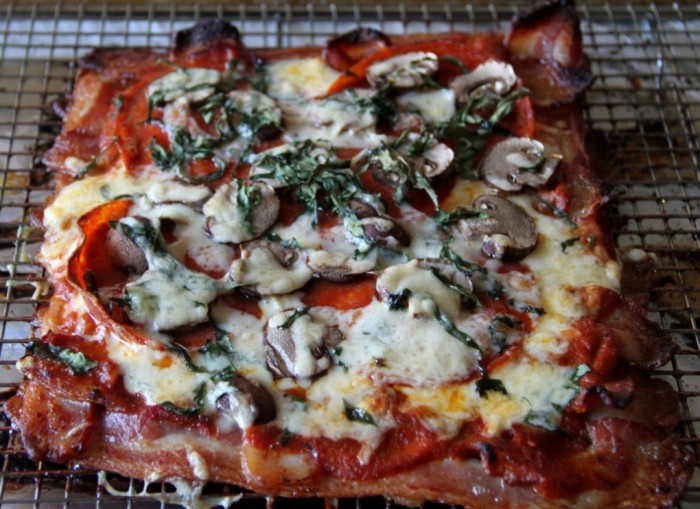
Ketogenic Gluten Free Pizza

5. Bacon Based Pizza Crust

6. Beet Based Pizza Crust

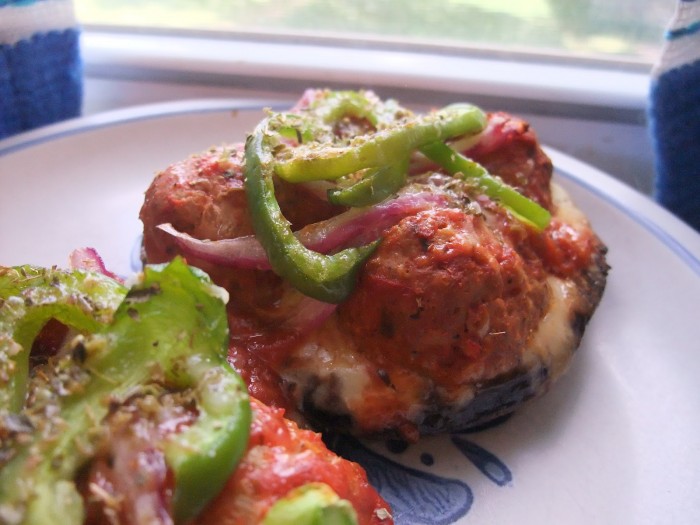
Mushroom Cap Pizza Crust

7. Mushroom Cap Pizza Crust

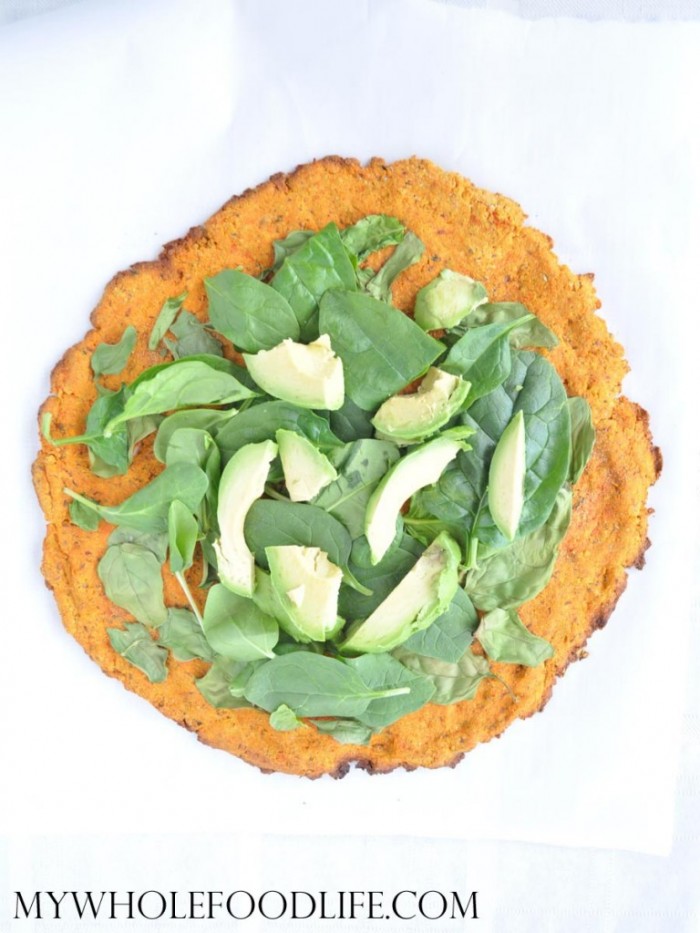
8.  Sweet Potato Based Pizza Crust

Sweet-Potato-Pizza-Crust-My-Whole-Food-Life-768x1024

Tell me, which one will you try first?  Do you have a favourite go to pizza crust recipe? Share in the comments below! 

*Disclaimer* I am not, nor have ever claimed to be a nutritional or dietary expert. If you are celiac or have a gluten intolerance, please read all ingredient labels to ensure they contain no gluten products.

The post 8 Gluten Free Pizza Crust Alternatives appeared first on Creative Sides.

]]>
https://creativesides.ca/8-gluten-free-pizza-crust-alternatives/feed/ 0
Quick and Flavourful Oven-Baked Chicken Thighs https://creativesides.ca/quick-and-flavourful-oven-baked-chicken-thighs/ https://creativesides.ca/quick-and-flavourful-oven-baked-chicken-thighs/#respond Sun, 20 Sep 2015 02:48:48 +0000 https://creativesides.ca/?p=494 Chicken thighs are the unsung hero of quick and easy dinners in my opinion. They cook quickly and can be used in a variety of ways. These chicken thighs take 25 minutes to cook – just enough time to throw together some quinoa and a green salad. Ingredients 2 tablespoons olive oil 2 tablespoons balsamic...

Read More »

The post Quick and Flavourful Oven-Baked Chicken Thighs appeared first on Creative Sides.

]]>
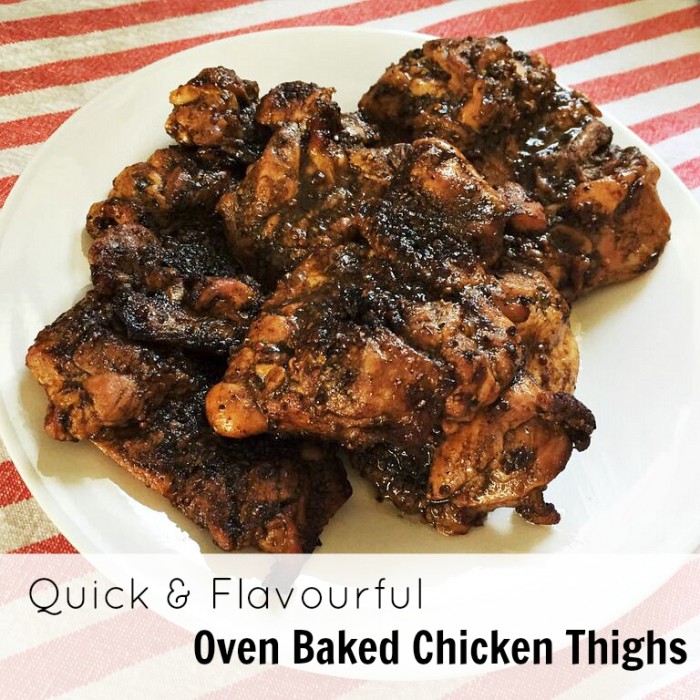
Chicken thighs are the unsung hero of quick and easy dinners in my opinion. They cook quickly and can be used in a variety of ways. These chicken thighs take 25 minutes to cook – just enough time to throw together some quinoa and a green salad.

Quick & Flavourful Oven Baked Chicken Thighs

Ingredients

2 tablespoons olive oil
2 tablespoons balsamic vinegar
1 heaped teaspoon grainy mustard
1 teaspoon salt
1 teaspoon black pepper
1 package boneless, skinless, chicken thighs (approximately 6 thighs)

Directions

Step 1: Preheat oven to 425F. Line baking sheet with aluminum foil.
Step 2: Whisk olive oil, vinegar, mustard, salt, and pepper together in large bowl. Add chicken thighs and stir to fully coat.
Step 3: Place chicken thighs in single layer on baking sheet. Pour over any extra sauce left in the bowl.
Step 4: Bake for 20 – 25 minutes until fully cooked.

Oven Baked Chicken Thighs
Write a review
Print
Prep Time
5 min
Cook Time
25 min
Total Time
30 min
Prep Time
5 min
Cook Time
25 min
Total Time
30 min
Ingredients
  1. 2 tablespoons olive oil
  2. 2 tablespoons balsamic vinegar
  3. 1 heaped teaspoon grainy mustard
  4. 1 teaspoon salt
  5. 1 teaspoon black pepper
  6. 1 package boneless, skinless, chicken thighs (approximately 6 thighs)
Instructions
  1. Preheat oven to 425F. Line baking sheet with aluminum foil.
  2. Whisk olive oil, vinegar, mustard, salt, and pepper together in large bowl. Add chicken thighs and stir to fully coat.
  3. Place chicken thighs in single layer on baking sheet. Pour over any extra sauce left in the bowl.
  4. Bake for 20 - 25 minutes until fully cooked.
Creative Sides https://creativesides.ca/
Enjoy!

This post originally appeared on Hillary with two Ls (please).

The post Quick and Flavourful Oven-Baked Chicken Thighs appeared first on Creative Sides.

]]>
https://creativesides.ca/quick-and-flavourful-oven-baked-chicken-thighs/feed/ 0