The post Keep Children Safe by Making the Right Choice of Window Blinds appeared first on Creative Sides.
]]>
Parenting can be an overwhelming task, especially since there is simply no easy way to keep track of all the things that need to be done in a day when you’ve got so many things going on at once. From being employed to running errands, and dropping the kids to and from school, things like home maintenance can often be the last thing on a busy parent’s mind. As a result, it’s easy to forget to completely child-proof your home, especially if you make design changes like choosing new window treatments over a long period of time. Unfortunately, such memory lapses can be very dangerous. Dubbed the “silent killer”, window blind cords are one of those seemingly innocuous things that adults don’t realize can pose a threat to children; hundreds of children have passed away from strangulation upon getting caught in these cords.
Because of this potential danger, Health Canada has decreed that all Canadian-made window treatments, as well as those products sold in the country must be child-proofed with cord/chain tension devices. That being said, the rise of e-commerce businesses has resulted in many customers purchasing window treatments that do not necessarily conform to regulations.
As such, it bears to keep in mind that legacy or unregulated products, or even products that are improperly installed can pose a serious risk to children. Here are a few tips for those of you who would like to re-think your window treatment options for your family’s home:
Go Cordless
These days, it seems like just about everything is going wireless. And why not? If it’s within your budget, automated window coverings are a great cordless option for a child-proof home. They come in a range of different prices, and so you don’t need to shell out an arm and a leg for them. Cellular shades make for great alternatives to corded blinds at a relatively affordable price.
Take Your Time
If you’re in need of a more wallet-friendly solution, and cannot commit to changing all your blinds at once, you could also opt for changing your window treatments over an extended period of time as well. Simply start by the rooms most used by the kids – their bedrooms, the family room, etc. In the meantime, you can follow a few other solutions to keep those pesky cords from causing trouble.
Move the Furniture Around
If going cordless isn’t an option for you, one of the first steps to take in childproofing your window treatments is to move some furniture around. Kids are adept climbers, and if the bed, a desk, a chair – anything really – is close enough to a window, they’ll climb it at one point or another. If a child gets his or head caught within the cords of the window blinds, they’ll be at risk of strangling themselves.
Double Check the Installation
We all know how exasperating home renovations can be. It’s easy to make small, unnoticeable mistakes or to do a sloppy job at the end of a long day. Make sure that the window blinds are actually properly installed, cords are not super slack, and that cord-restraining devices are secure. On that note, if you’ve just purchased a new product, read the safety label to find out if it falls under new safety regulations. While all corded window treatments manufactured are supplied with a warning label and are within regulation, not every company will be as scrupulous.
The Tuck Doesn’t Cut It
We’ve all heard of the old saying, “out of sight, out of mind”. Many people seem to think that simply tucking the cords of their blinds out of sight will keep their kids from harm, but this isn’t necessarily the case. Any child with a love of climbing will find that cord faster than they can say “uncle”, and a gust of wind or the slam of a door could easily dislodge a cord that is tucked away on top of the blinds. Instead, you could opt for cutting the cord, in which case you’ll be limited to using the tilt wand to adjust the slats. You could also purchase cord cleats to deal with excess cords. This a very economical solution, but depends on adults to use them properly and consistently after handling the blinds.
Ultimately, going cordless is the only solution guaranteed to keeping your window blinds child-proof. While you can follow our helpful hints to deal with legacy or unregulated products, if you decide to upgrade your window treatments, do your due diligence by purchasing commercial window coverings supplied with a warning label, and that fall under Health Canada’s consumer regulations.
The post Keep Children Safe by Making the Right Choice of Window Blinds appeared first on Creative Sides.
]]>The post Small Spaces and How to Maximize Them appeared first on Creative Sides.
]]>
How to maximize space in a small apartment
If you happen to live in a booming urban environment, you may notice that the cost of living space is at somewhat of a premium. The solution to this is often to live in smaller spaces. Many of us have lived in small spaces at some time in our lives, and many of us still do – especially when you’ve found that perfect apartment close to work and right next to the grocery store. But how can you escape that feeling of living in a tiny box? There are a few small space solutions that can help you to really open up your space and make the most of it.
Think Vertically
It’s important to remember that every room has eight corners! One way to maximize your space is by thinking vertically rather than horizontally. Floor to ceiling bookshelves are a great way to make use of wall space. Cabinets too! You can also think about exploiting the spaces between the tops of furniture and the ceiling. Think of hanging or high-mounted elements, which will draw the eye upwards.
Storage Solutions
In the same way, consider storage nooks, bespoke built-ins and tailored furniture to make use of every available portion of space. For example, try retractable pantry drawers for small appliances. To reduce clutter, make sure that items can easily be shut away or grouped by category. Open storage can also draw the eye upward; balance this against the amount of clutter you have on your shelves.
Opening Up
Doors and walls are so last century! Consider using room dividers in place of walls to let your space breathe. If you want to go further, consider glass walls, which can separate spaces without visually dividing a room. Curtains are also useful where privacy is required, and can make one wide open room into two very easily. And try increasing your window to wall ratio; larger windows let in more light, which can really make your space seem more open and free.
Less is More
It’s a lot easier to minimize clutter if you don’t have any clutter. Embracing a minimalist lifestyle can not only make your space go further but also cuts down on the need for consistent consumption of consumer goods, saving money as well. A win-win. In terms of furnishings, maximize your square footage by using small, easily moveable pieces of furniture. As an alternative, use fewer, larger pieces of quality furniture – this may seem counter-intuitive, but this can make a room feel grander. But choose which technique you want to use – don’t mix and match!
Mirror, Mirror
The cunning placement of mirrors can do wonders for opening up a space. Using them can easily double the size of a room, for example by mimicking doorways and windows. An alternative is to use reflective metallic subway tiles; reflecting more light will also help the space feel larger. Other visual tricks include see-through furniture made of glass, Lucite or Plexiglas – either that or mounting the mirrors or tiles on the furniture themselves.
Zone Warfare
Think about all the things you do in your house or apartment –work, sleep, eat, relax – and consider separate zones for each activity. You can place different types of furniture and demarcate the zones by using multiple seating areas, a table and chair, or a tented bed. If you don’t want to go this route, go the other way: find elements that have multiple functions, like a table that can function as both dining table and desk, or deep sofa beds. Try ensuring that each furniture piece is dual-use at least. That way you will waste as little space as possible.
Conclusion
Maximizing your space doesn’t have to be a chore – it can be a fun interior design project. Reduce clutter by thinking like a minimalist, and making use of storage space in an optimal fashion. Use visual tricks like mirrors, windows and glass walls to open up the interior, and make use of as much of your vertical space as possible. And consider the type and size of furniture you are using, where it’s placed and what it’s used for. Taken together, these tips should help you to feel like you’re living in a much larger space!
The post Small Spaces and How to Maximize Them appeared first on Creative Sides.
]]>The post Bat Minion Halloween Door appeared first on Creative Sides.
]]>
It all started with a vampire cape from the dollar store. No one wanted to wear it, it didn’t even get much love sitting in the dress up box. I removed the collar of the cape and spread out the vinyl and started thinking about what I could use it for.
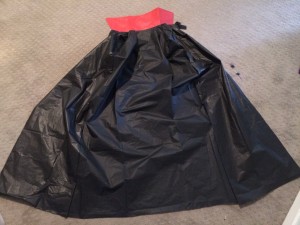
Ah ha! I had a yellow plastic table cloth left over from a recent birthday party. Given my kid’s love for all things superheroes and Minions, this lonely cape would get a new a new life and decorate our front door for Halloween. Behold: Bat Minion!
You will need:
White card stock or cardboard
Black plastic/vinyl cloth (I used a vampire cape)
Stencil or print out of Batman logo
Yellow plastic table cloth
Googly eye (optional)
Paint – gray, white, red, black, brown
Paint brushes
Tape
Scissors
Pencil

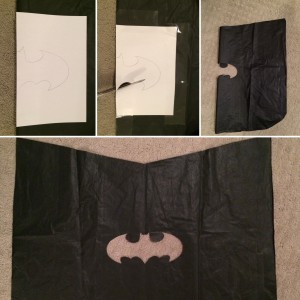
Step 1: If using the vampire cape, remove the collar. With your material folded in half, cut out the shape of the mask, body and feet. Take the folded body portion and tape the batman logo on the fold and cut out. Tape the feet to the body.
Step 2: For the eye, trace a large circle on card stock or cardboard with a bowl or other circular object. With a slightly smaller bowl, draw another circle. Use gray paint around the edges and brown and black paint for the iris. You can also use a googly eye from the dollar store for the iris.
Step 3: For the mouth, paint and cut out a mouth on cardstock. Make it as spooky or happy as you wish.
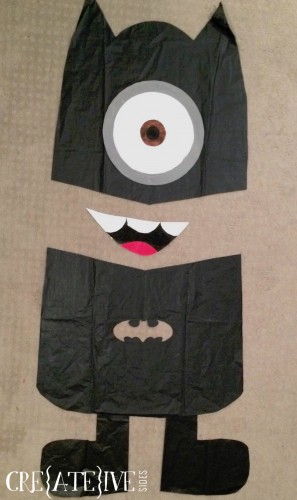
Step 4: Now you have all of your pieces, its time to set up! If your front door is painted, test in an inconspicuous spot to make sure your tape does not peel off the paint. Tape the yellow tablecloth to your front door. Make a very small cut and carefully push the tablecloth over the door handle. Repeat for the deadbolt. Tape the body and feet to the door. Repeat for the head, mouth and eye.
Happy Halloween!
The post Bat Minion Halloween Door appeared first on Creative Sides.
]]>The post Refurbished Vanity DIY appeared first on Creative Sides.
]]>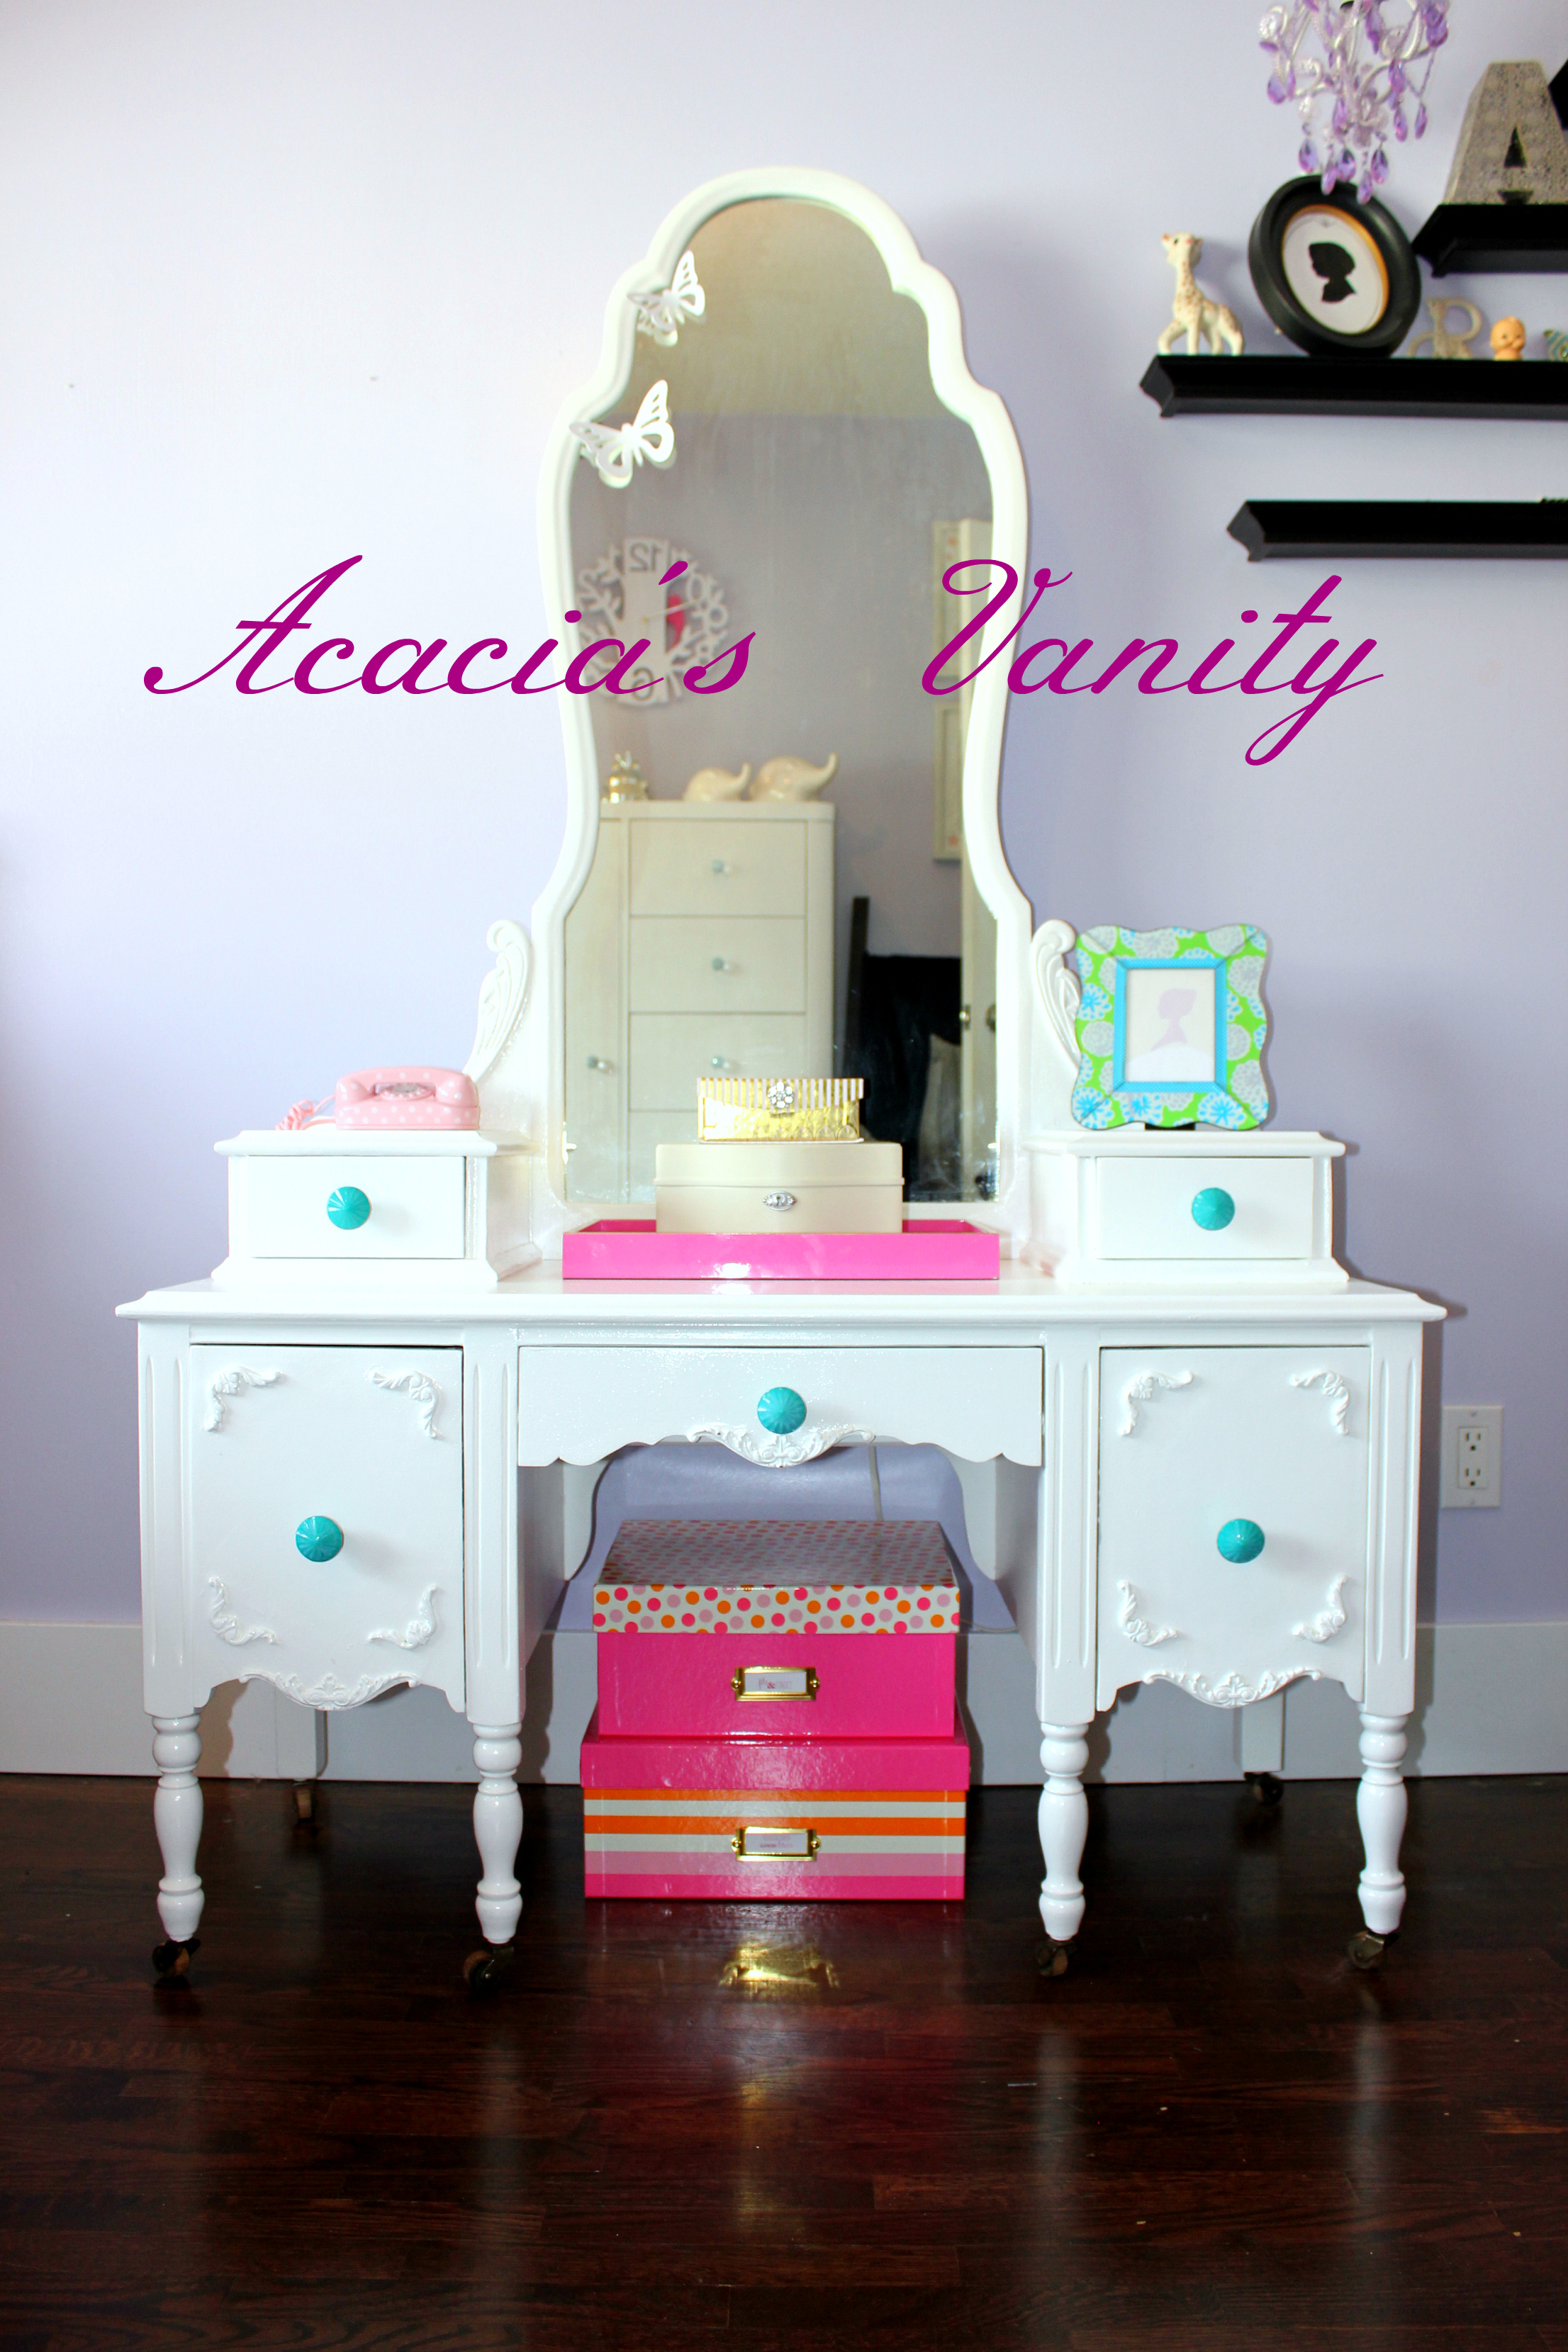
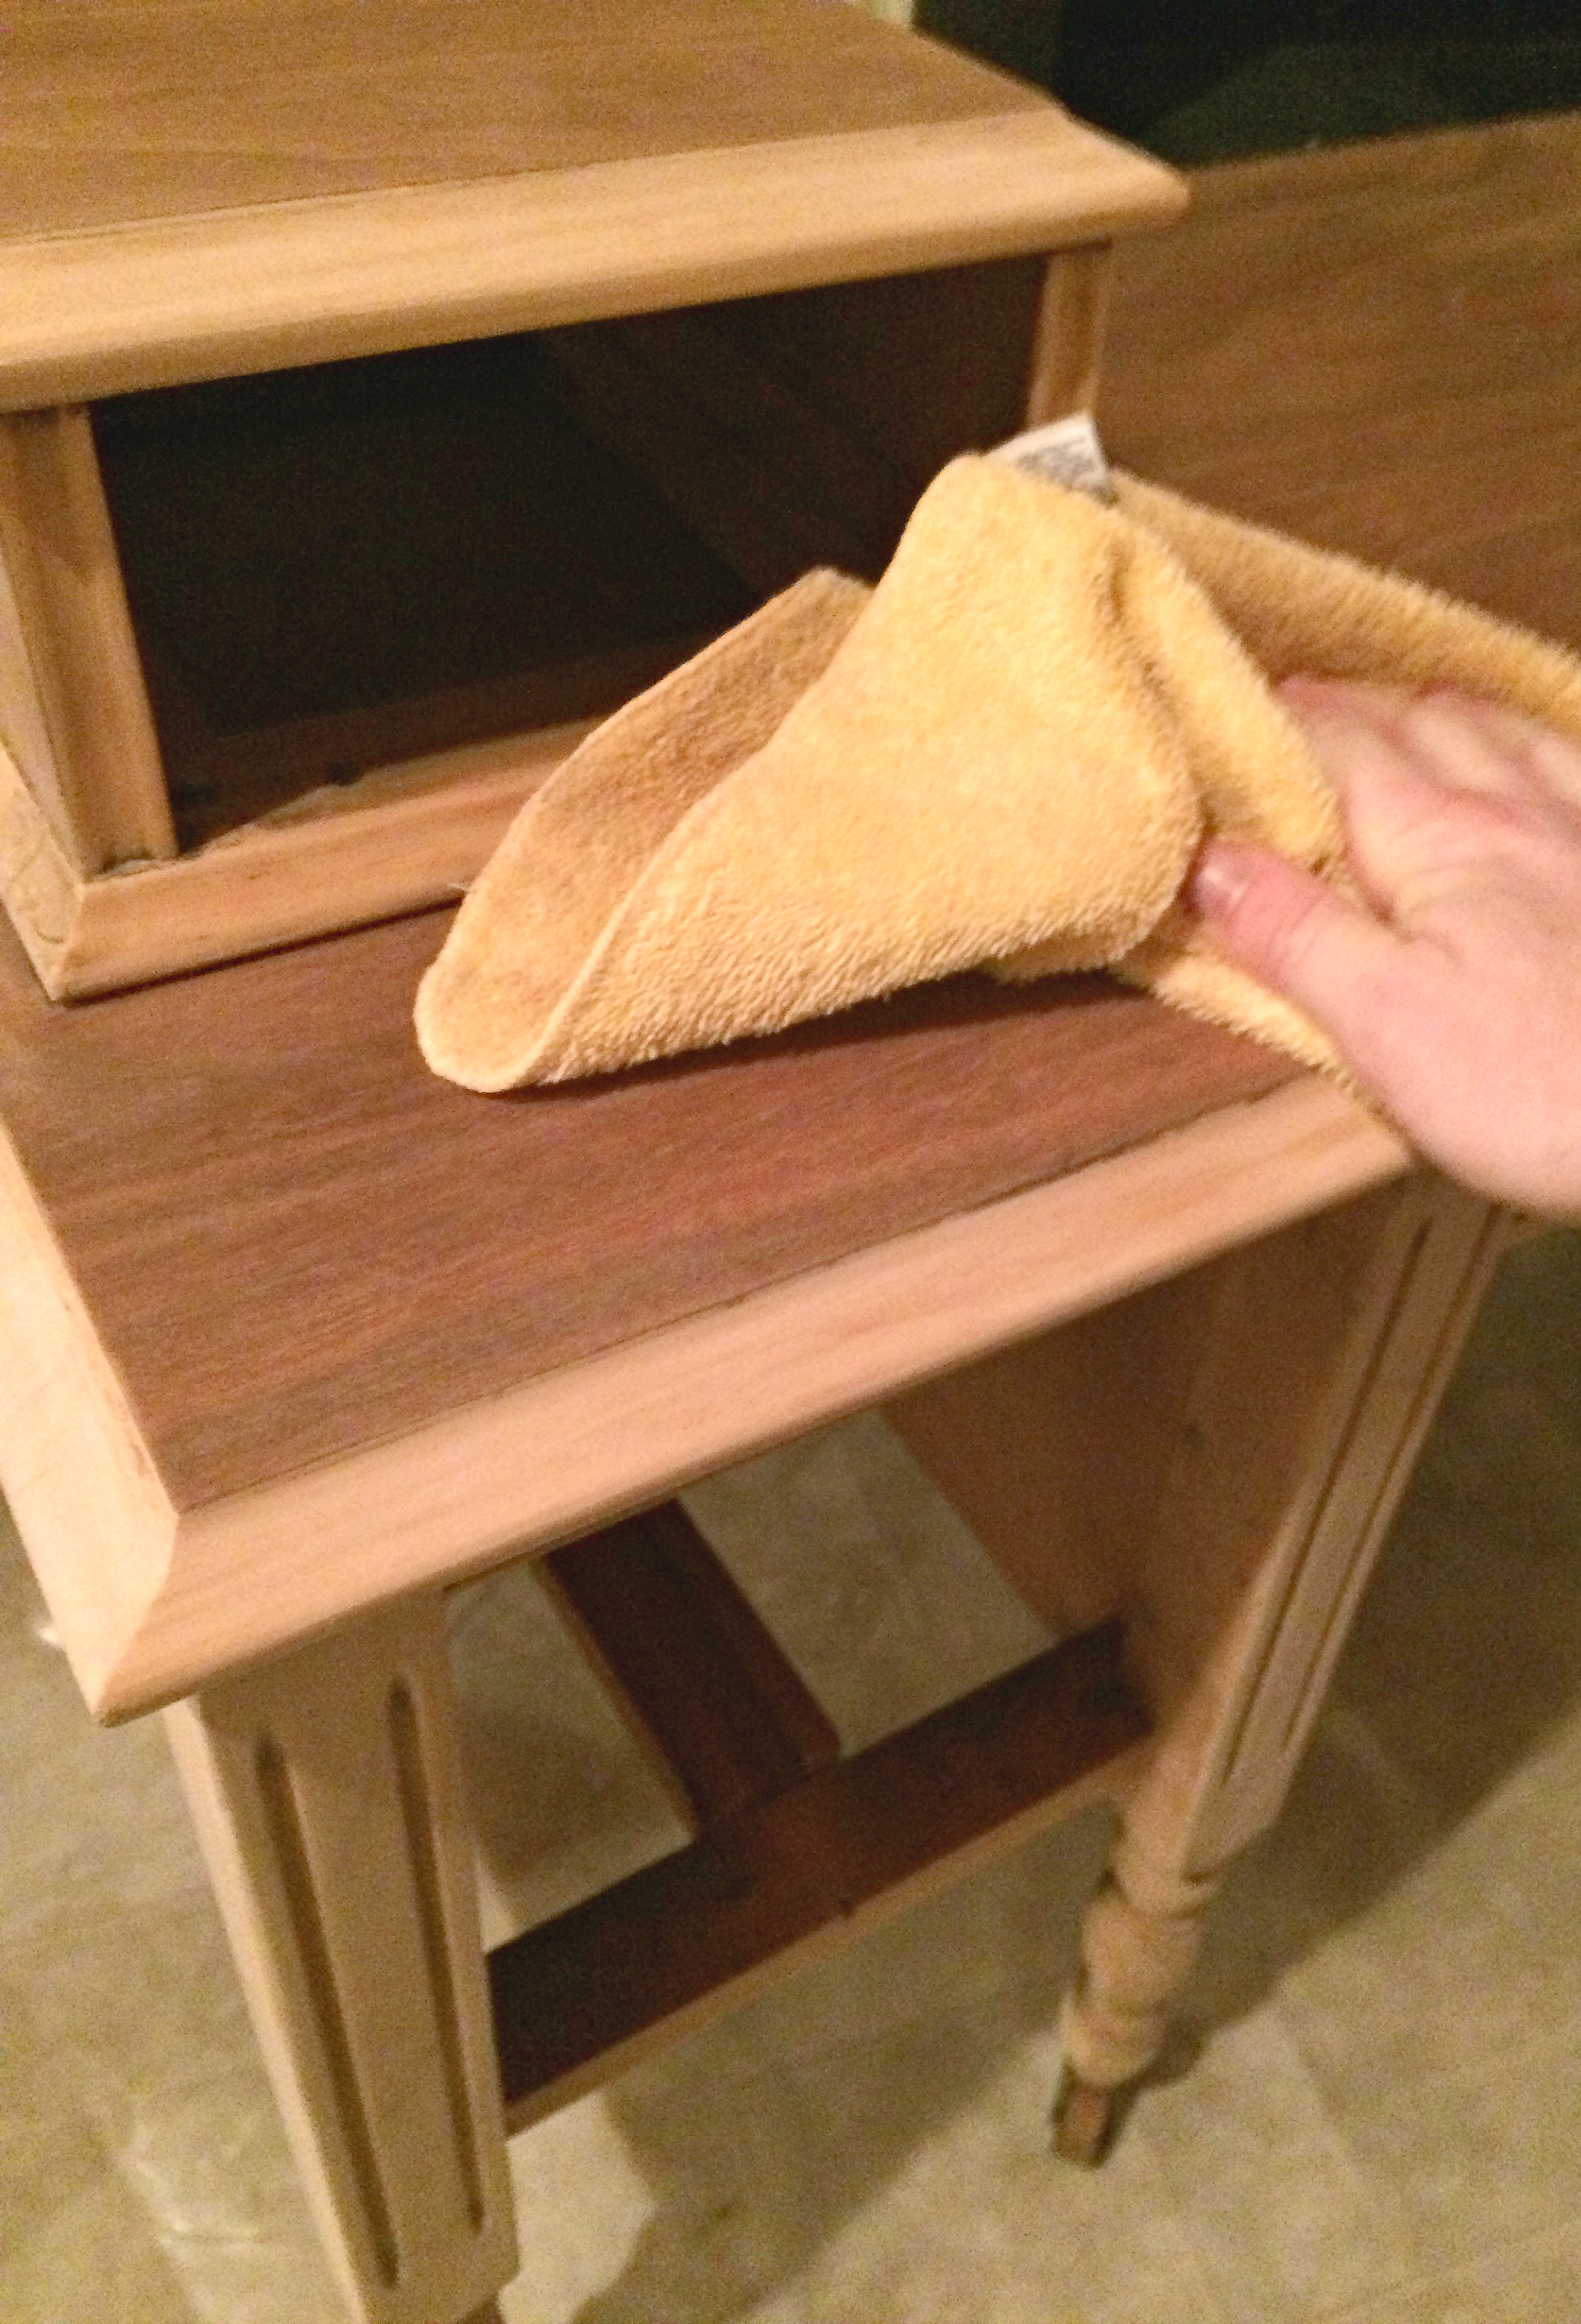
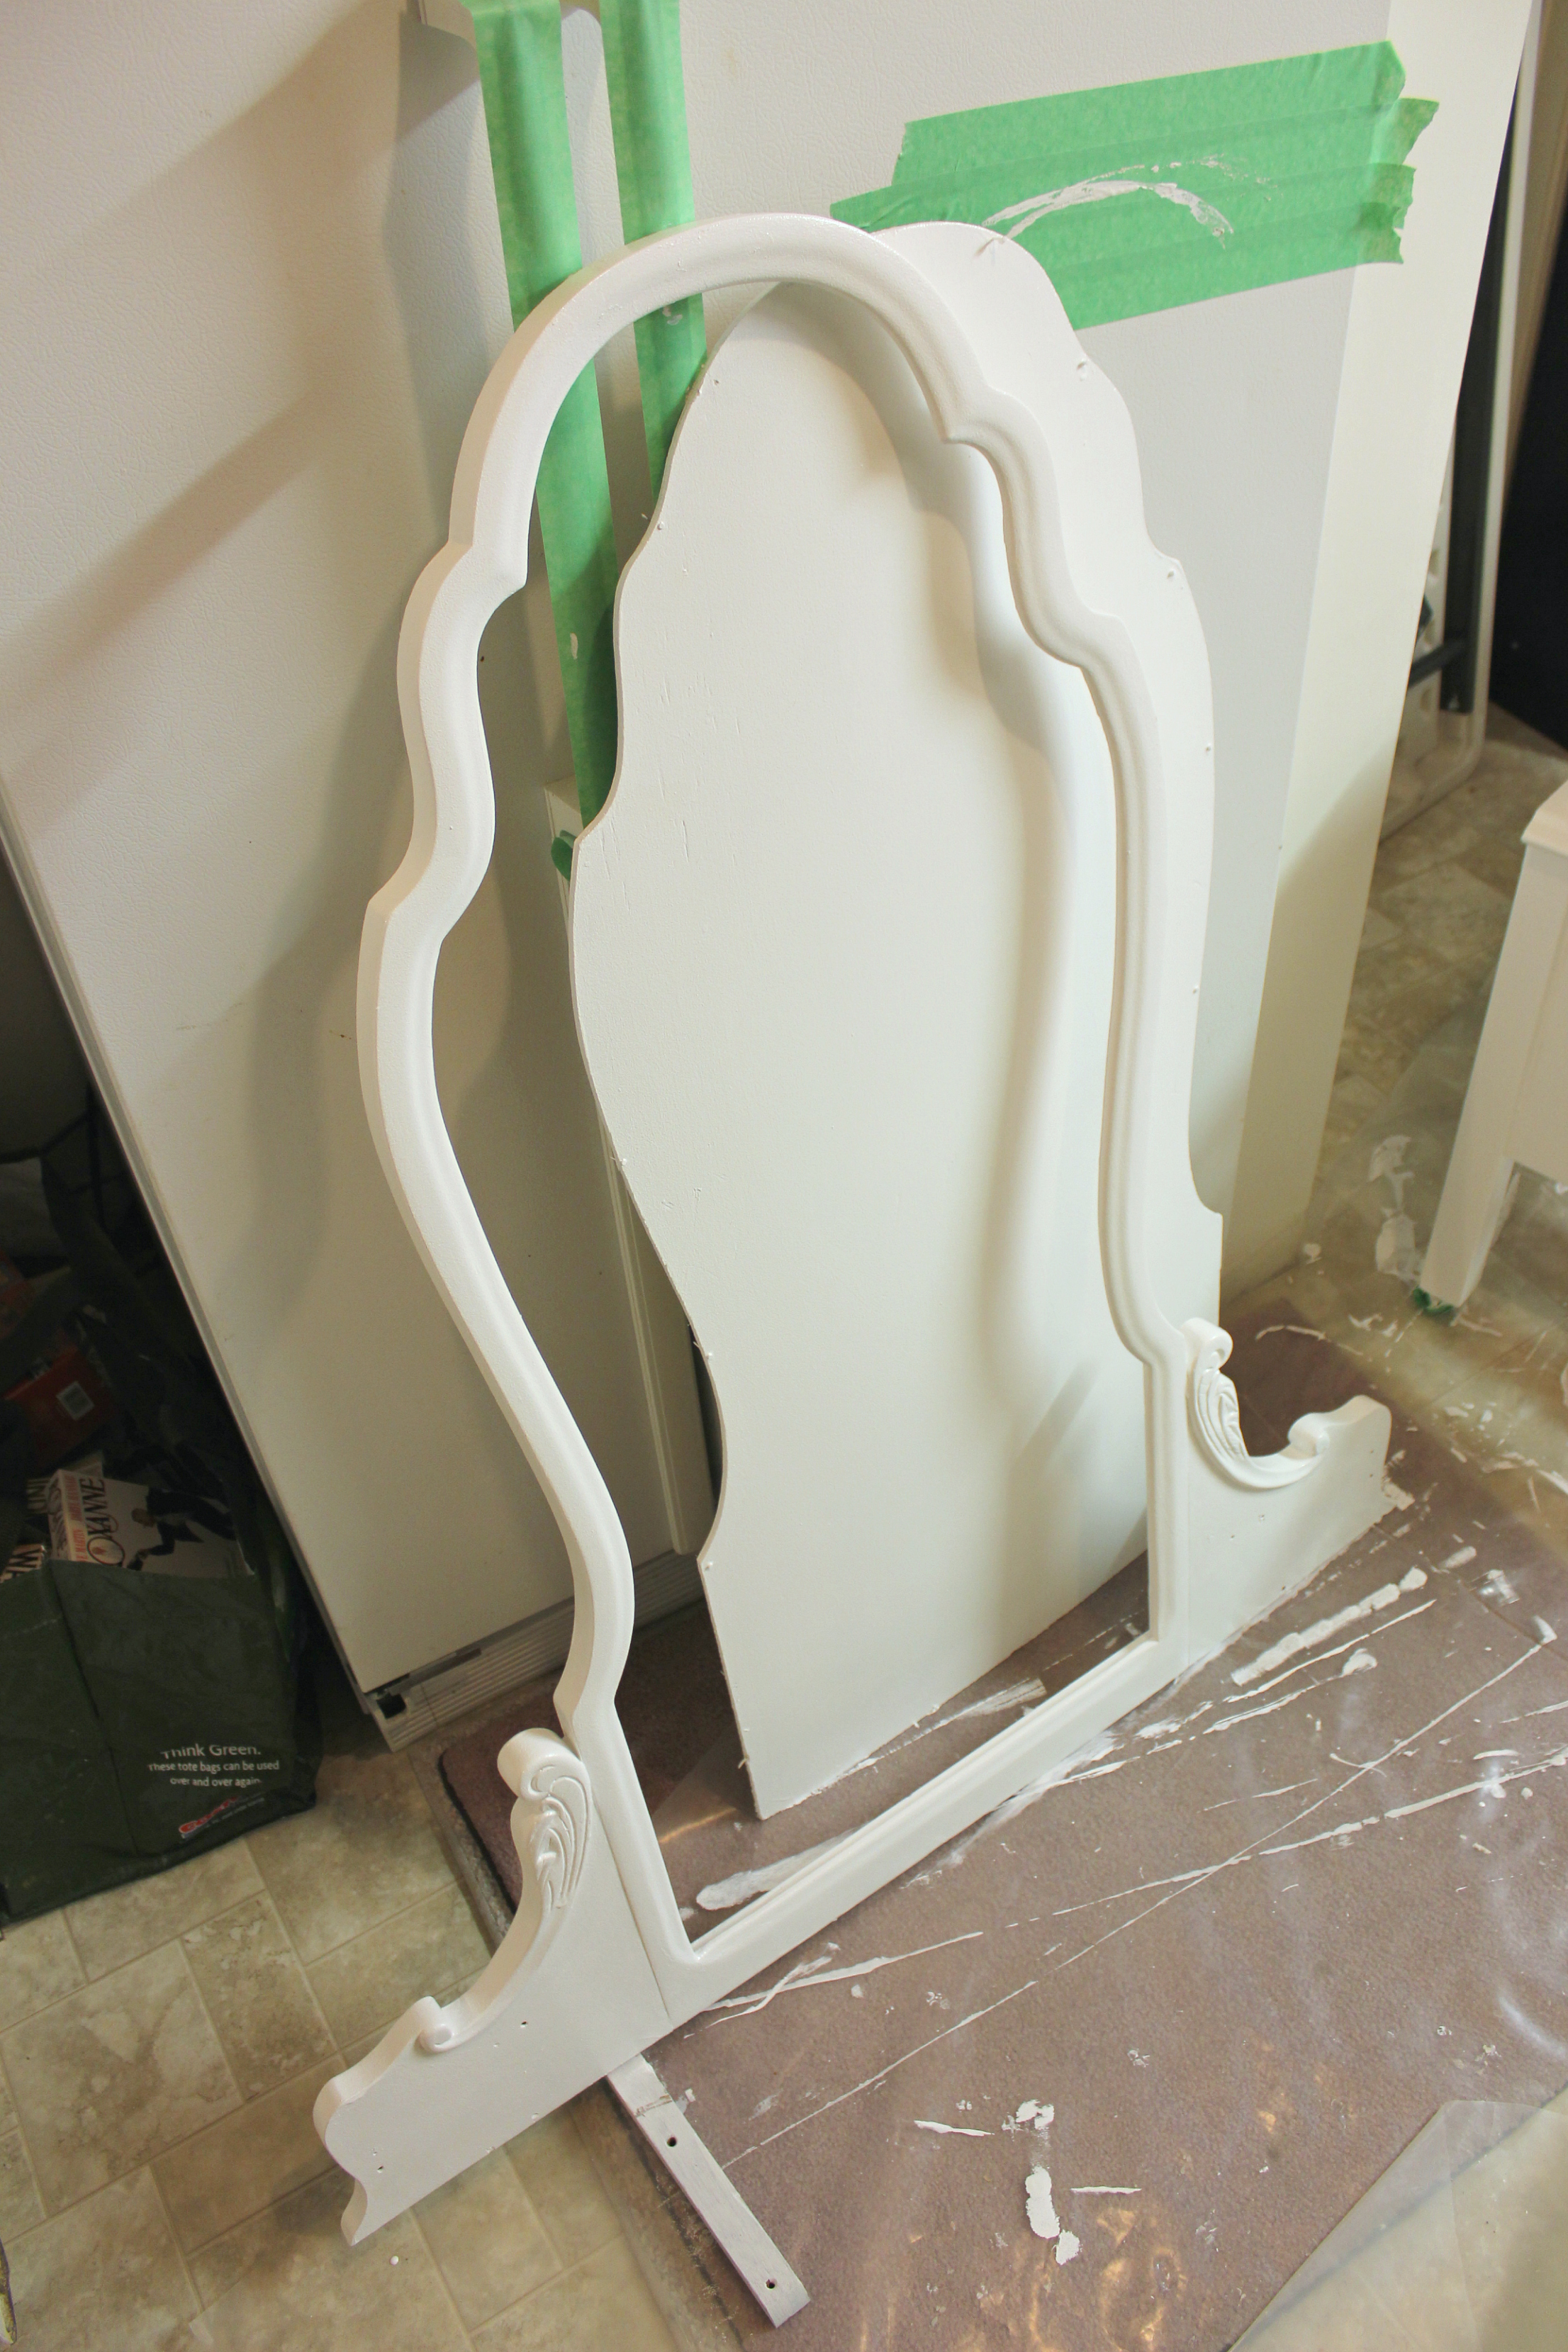
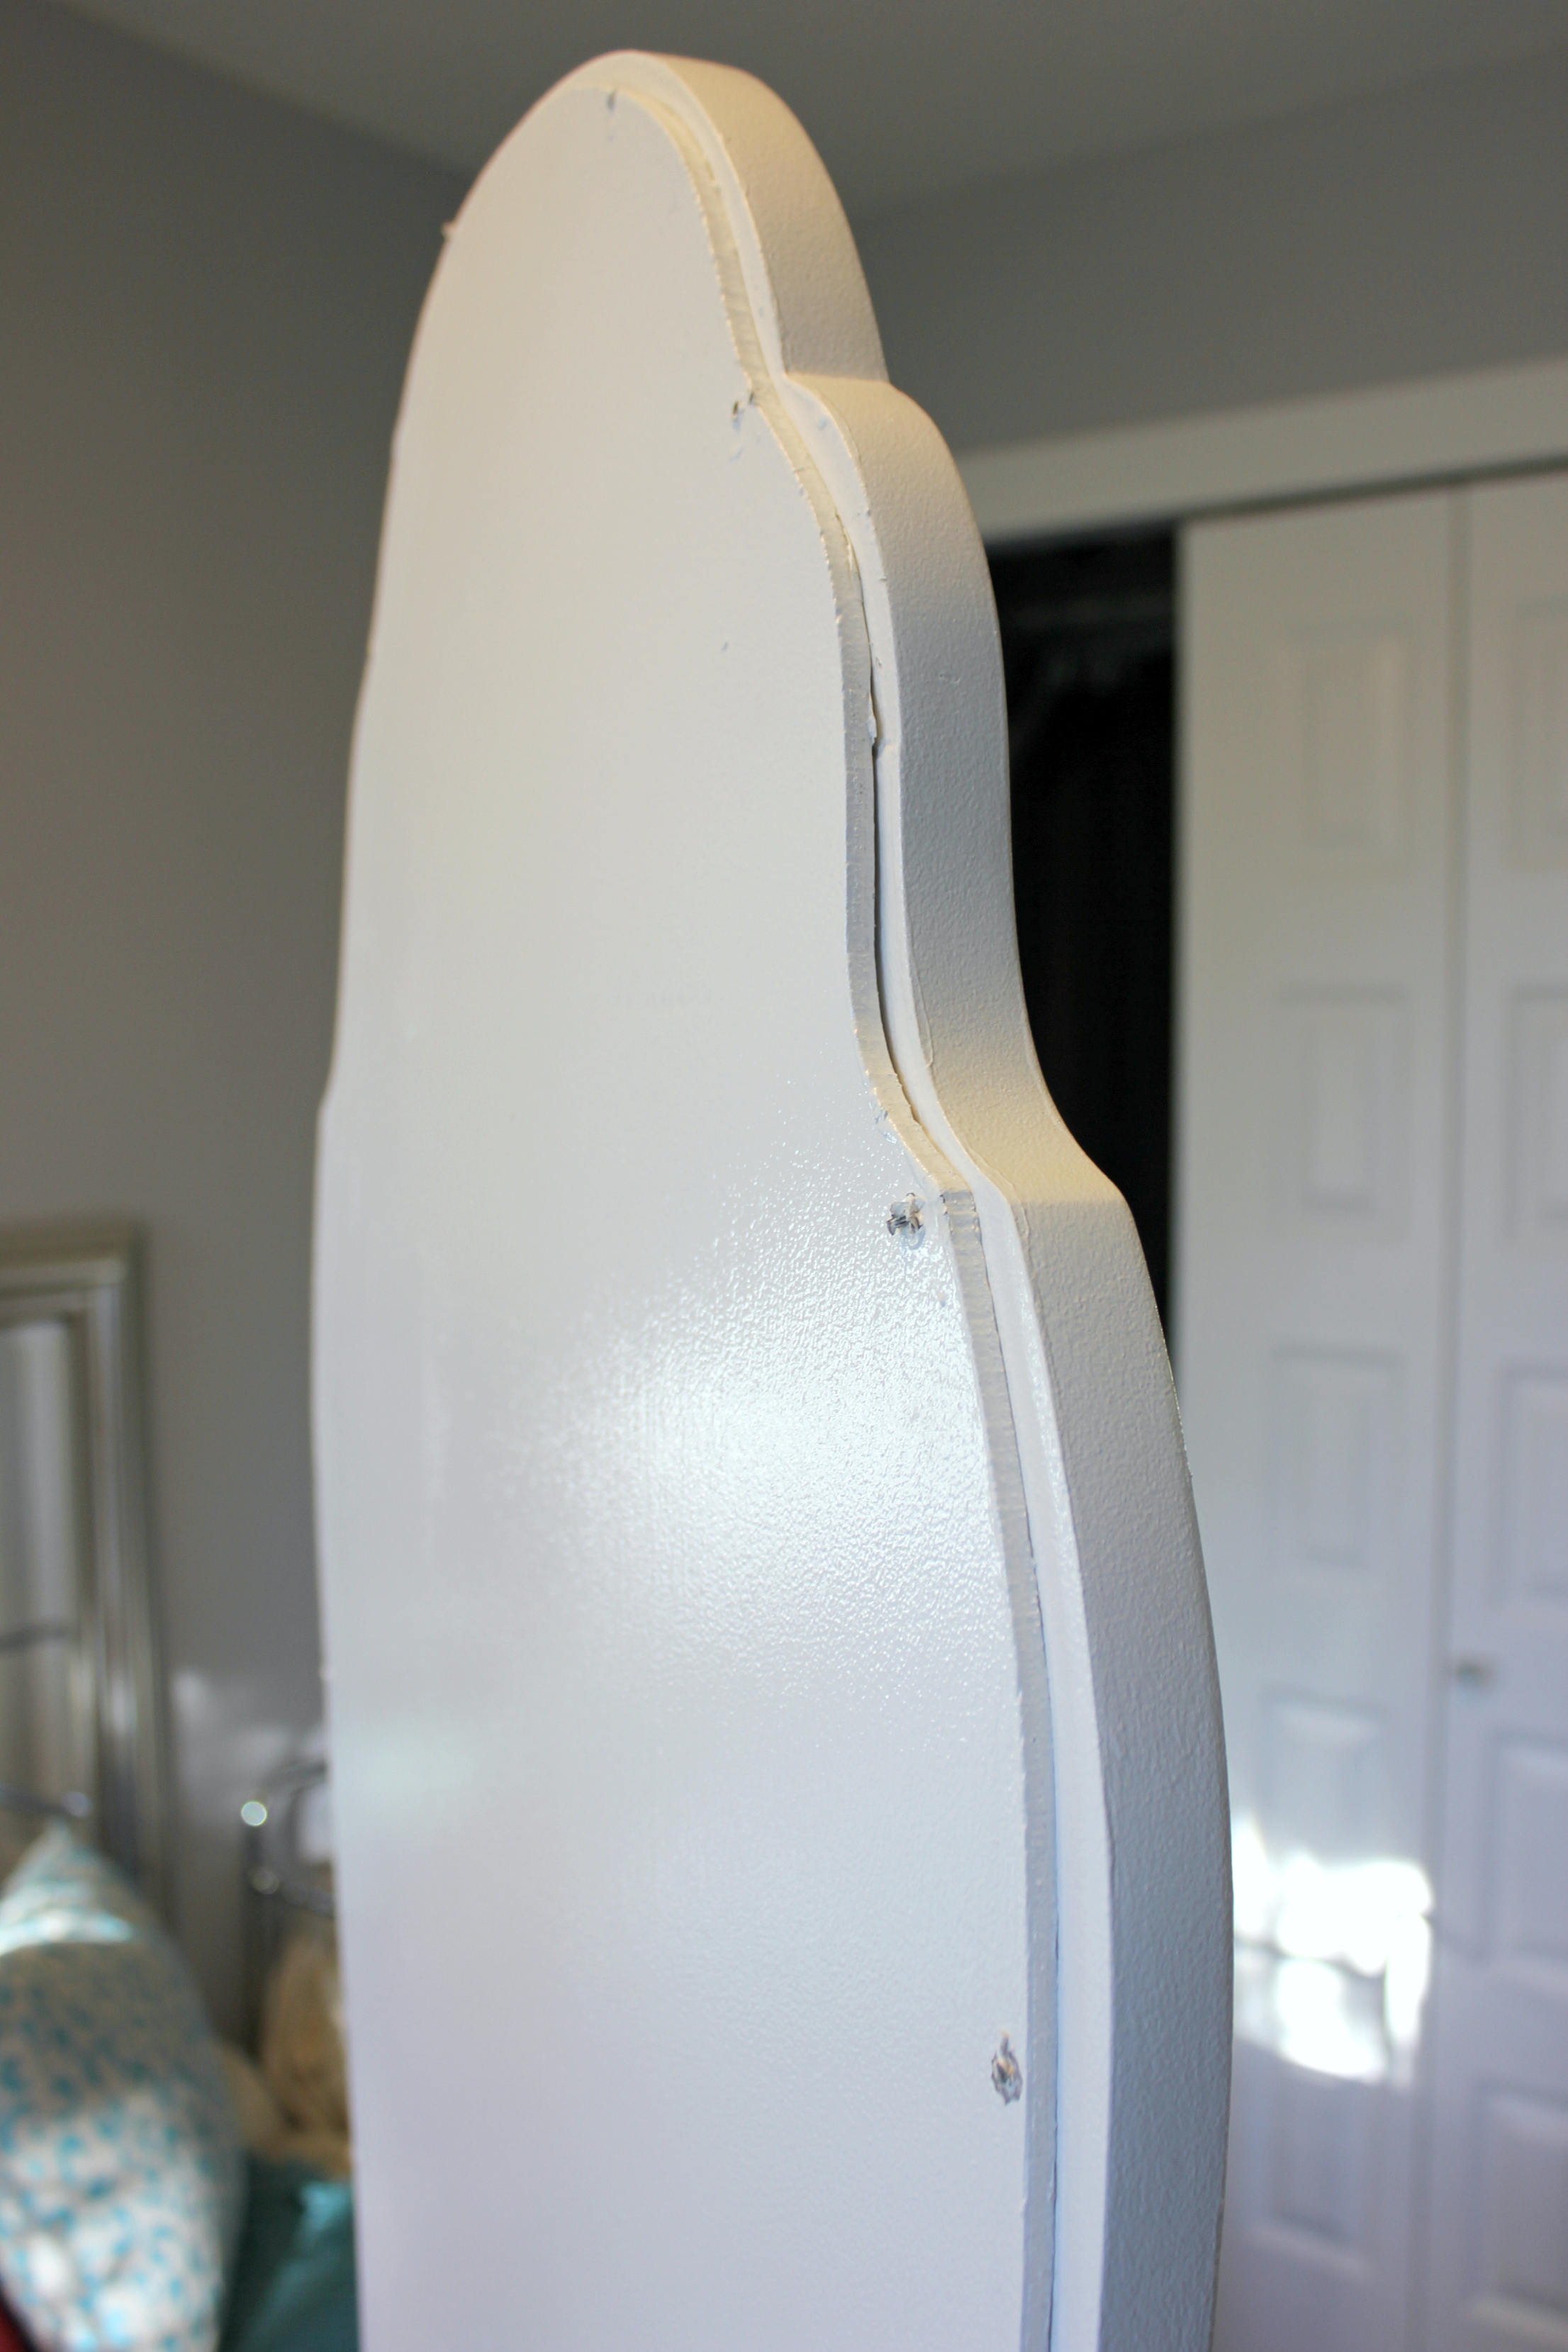
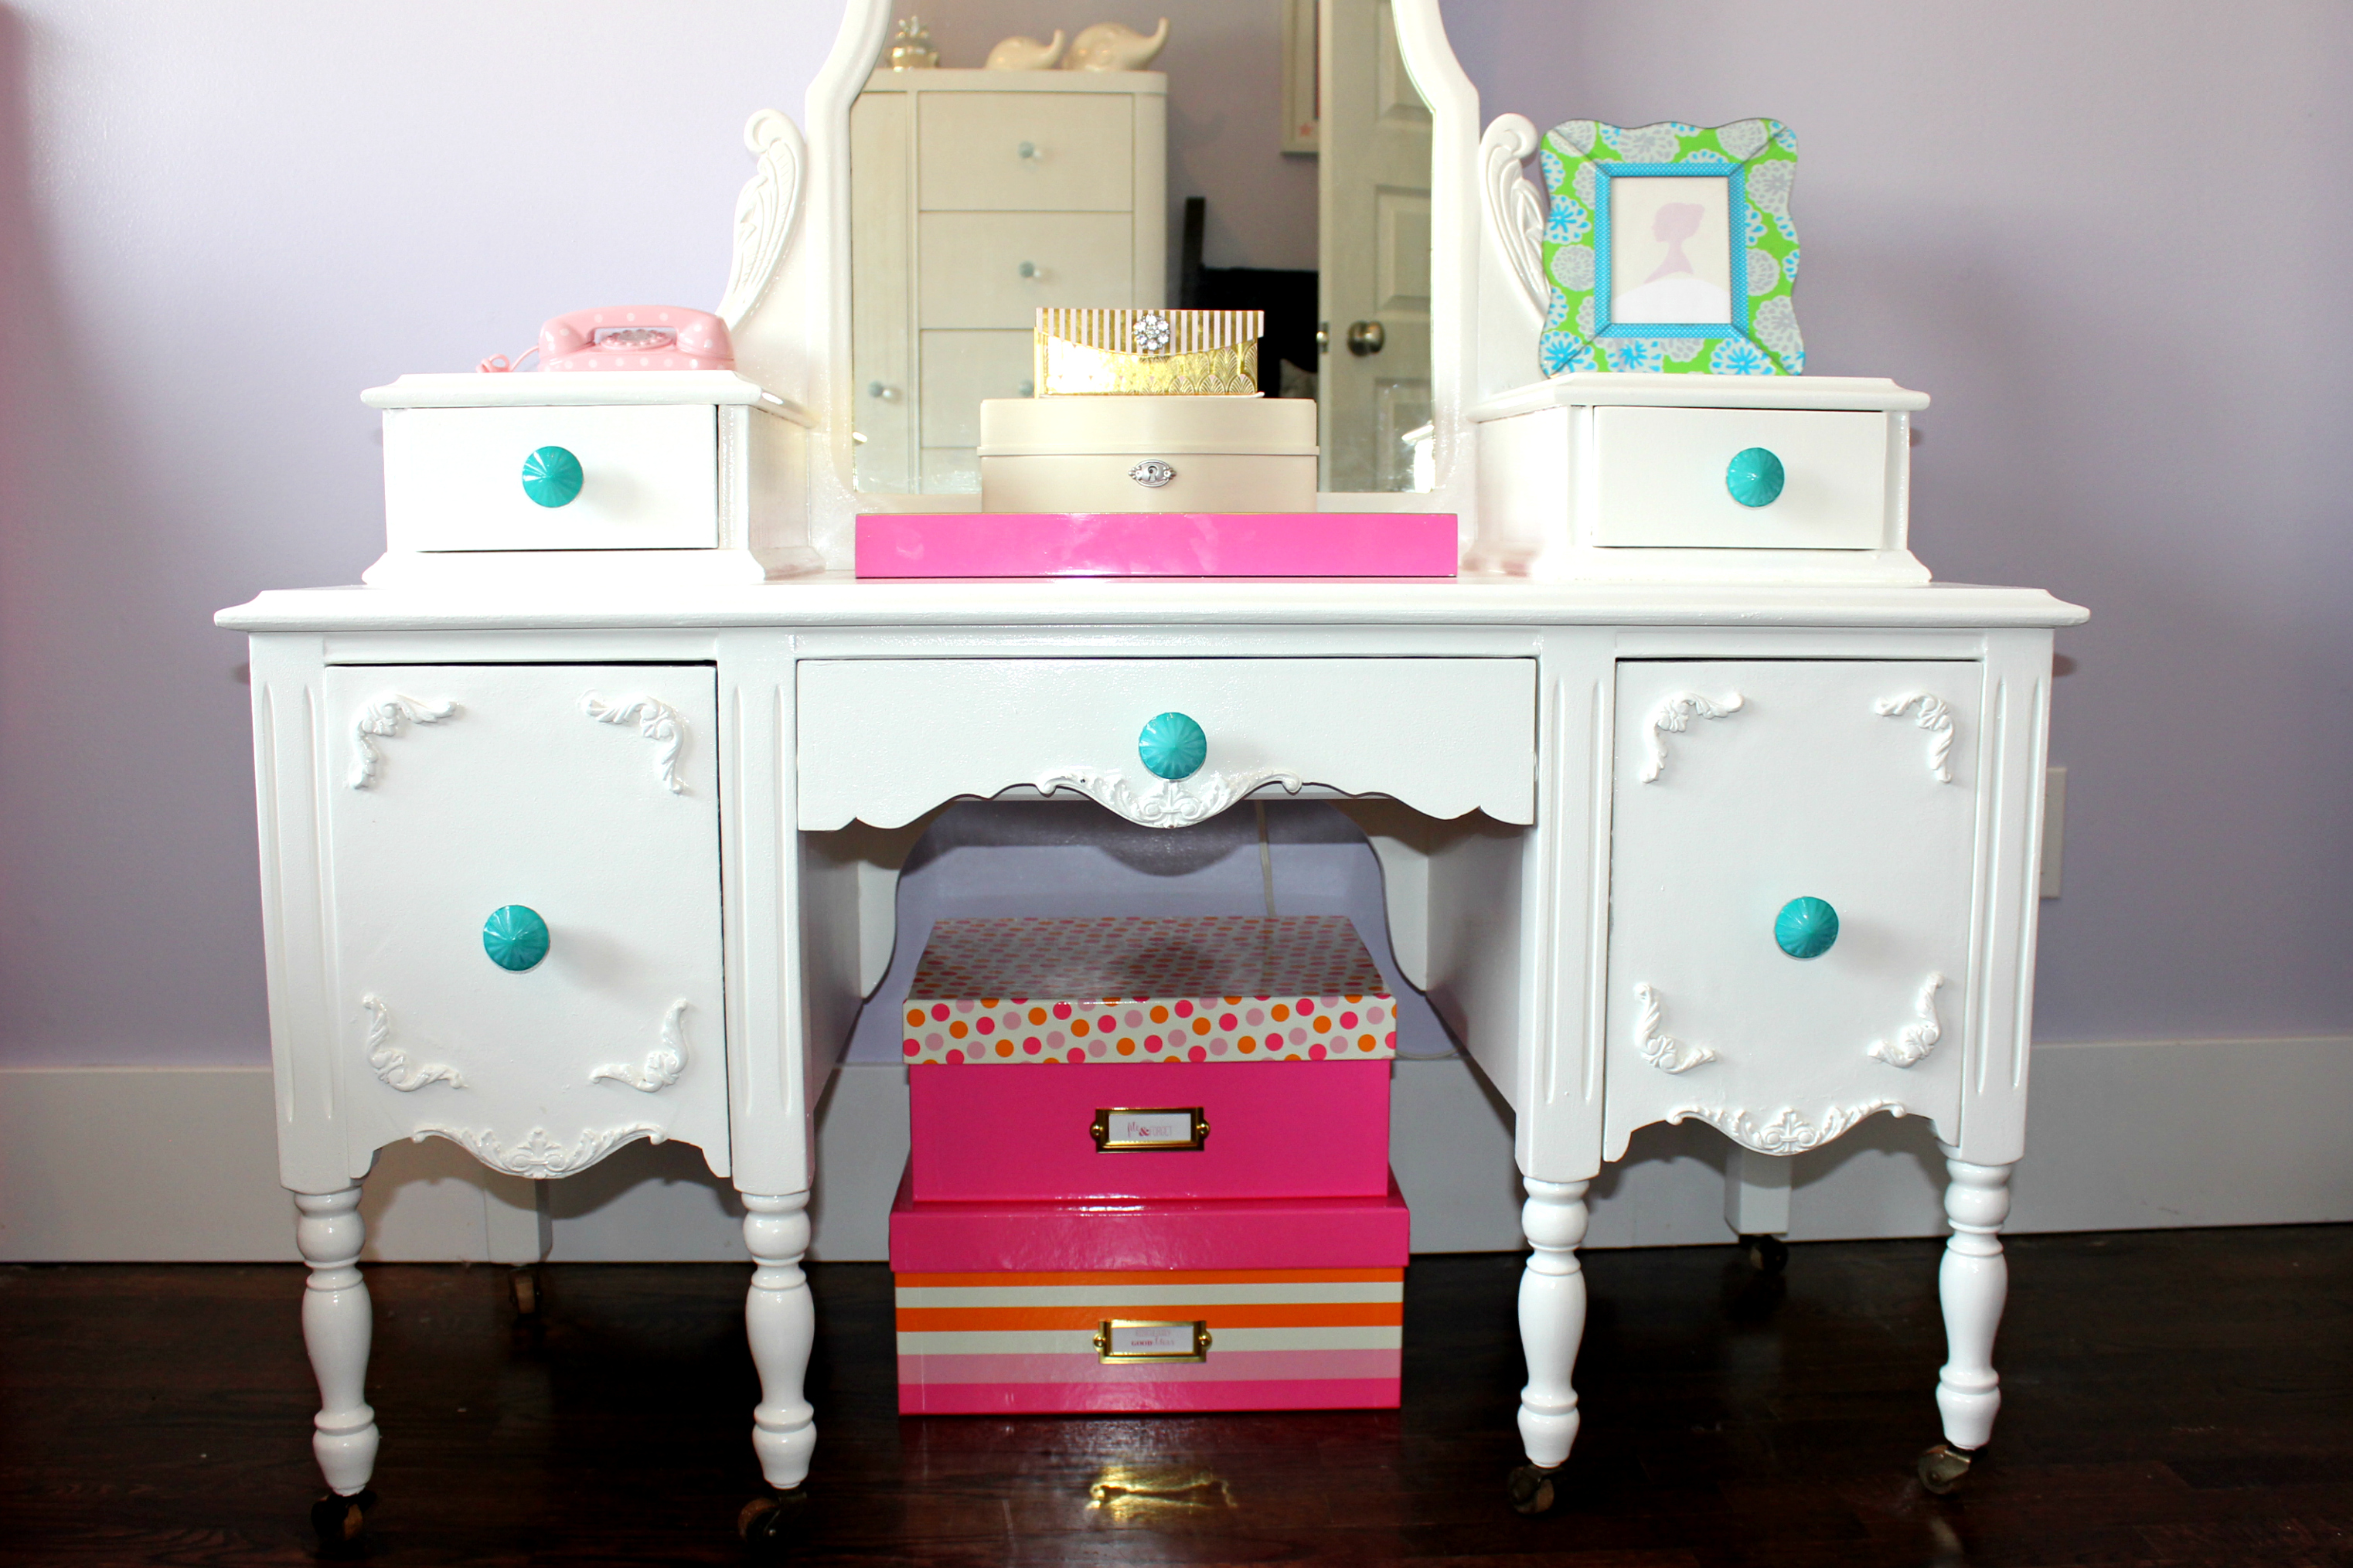
In an effort to transform our youngest daughter’s room from a nursery to a little girl’s domain, we had a couple projects up our sleeves. The first of these was refinishing this beautiful antique child’s vanity that my husband had acquired from a second hand store several years back. It was finally it’s moment to come up from the basement and shine!
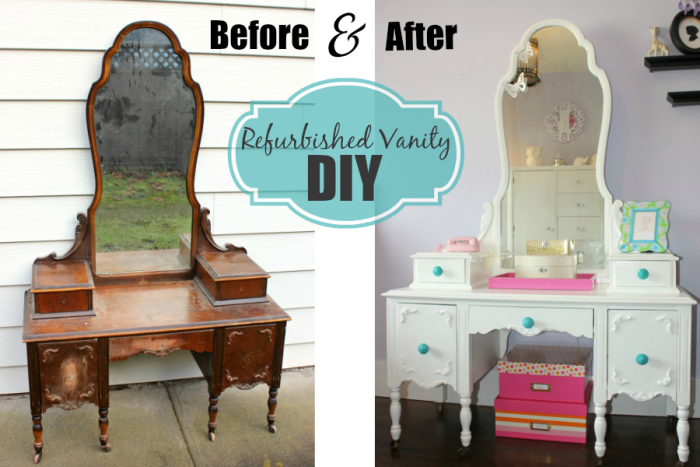
Before:
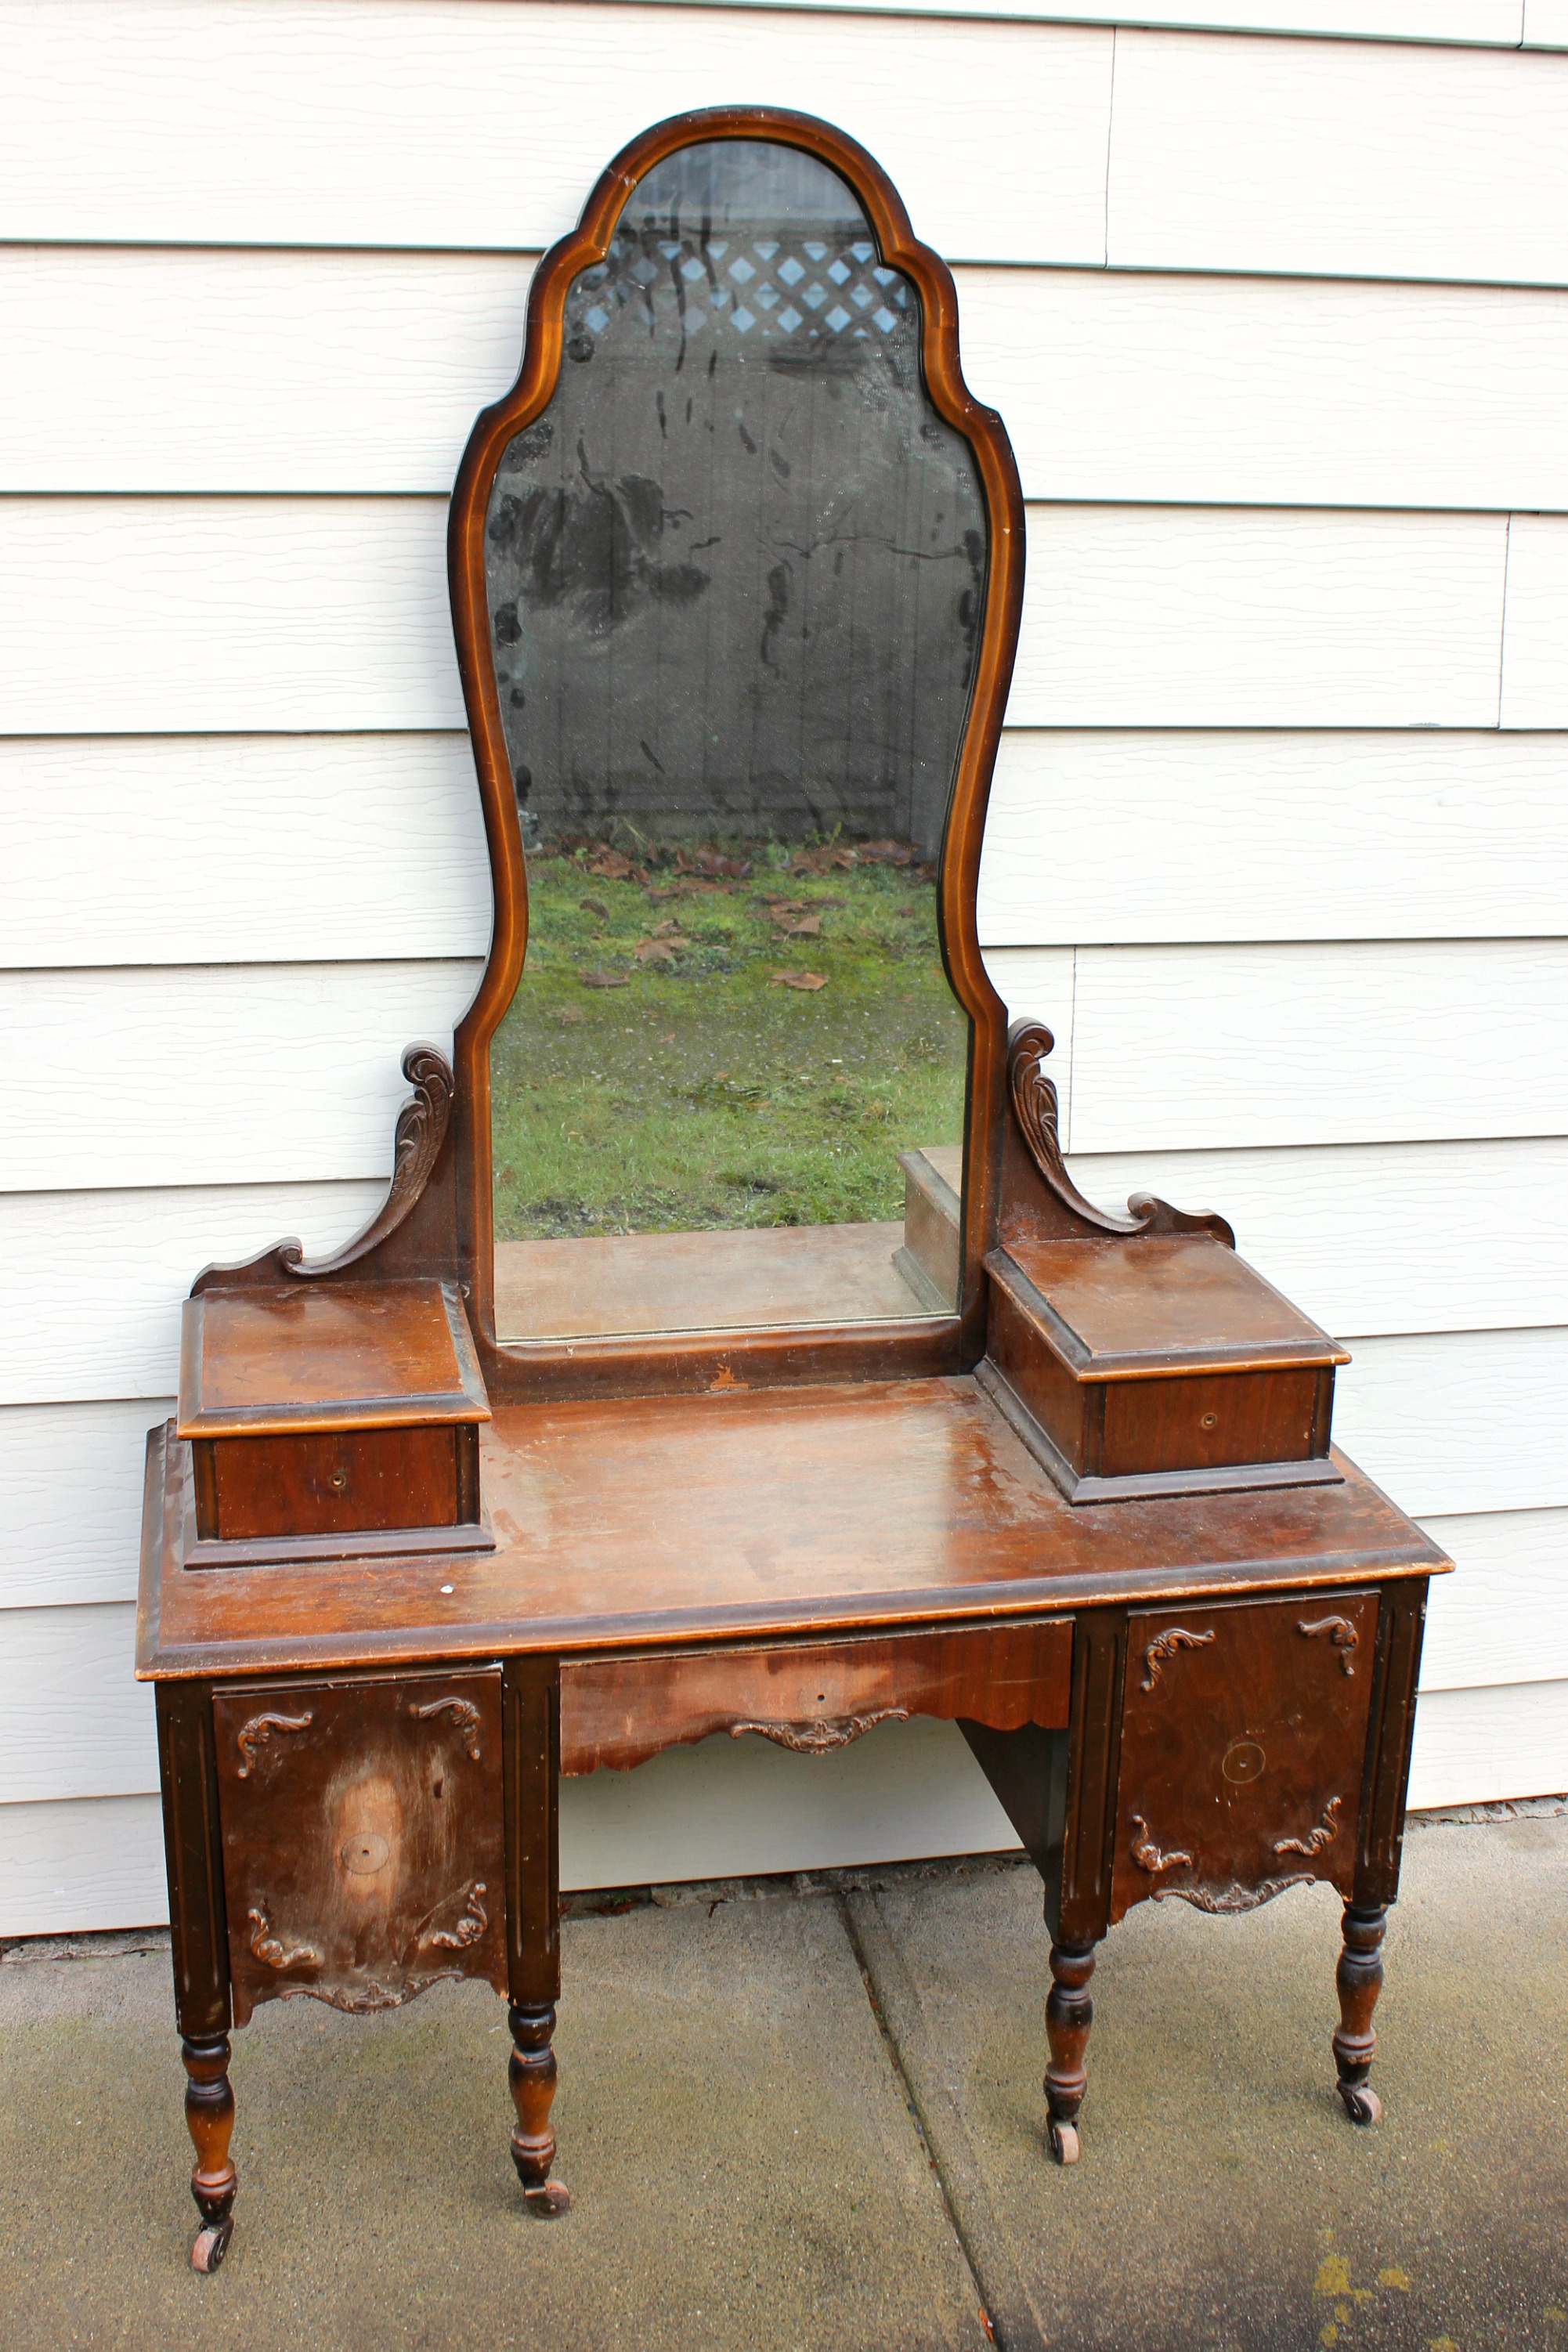
Just bursting with potential! You can see why the Hubster, with his woodwork loving ways, brought this gem home. I mean really, can’t you just see the potential bursting all over the place already?!
Refurbished Vanity DIY
Tools and Supplies:
Finishing nails (we saved the original)
Screws (we saved the original)
Sandpaper – 20, 120 and 200 grit
Orbital Sander (optional)
Lint free cloth
Drop Cloth or Plastic (optional – to protect your work area)
Painters Tape
Smooth 4″ Foam roller
2″ Paint Brush
Paint Tray
Zinsser Cover Stain Interior/Exterior Primer-Sealer Stain Killer
Benjamin Moore’s High-gloss Latex Paint in Chantilly lace (OC-65)
Hammer
Drill and corresponding bits
Hardware (handles/pulls)
Step 1:
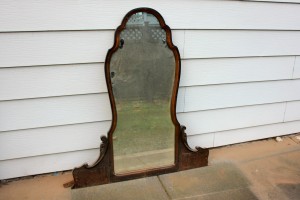
The first order of business was taking it apart. We removed the mirror by detaching it from the unit. Then we took off the wood backing and removed the mirror itself, putting it carefully aside. It is important to remove the mirror so that the inside edge of the vanity frame can be painted. This way you will not see a dark reflection of unpainted wood along the outer edge of the mirror when it is finished.
Step 2:
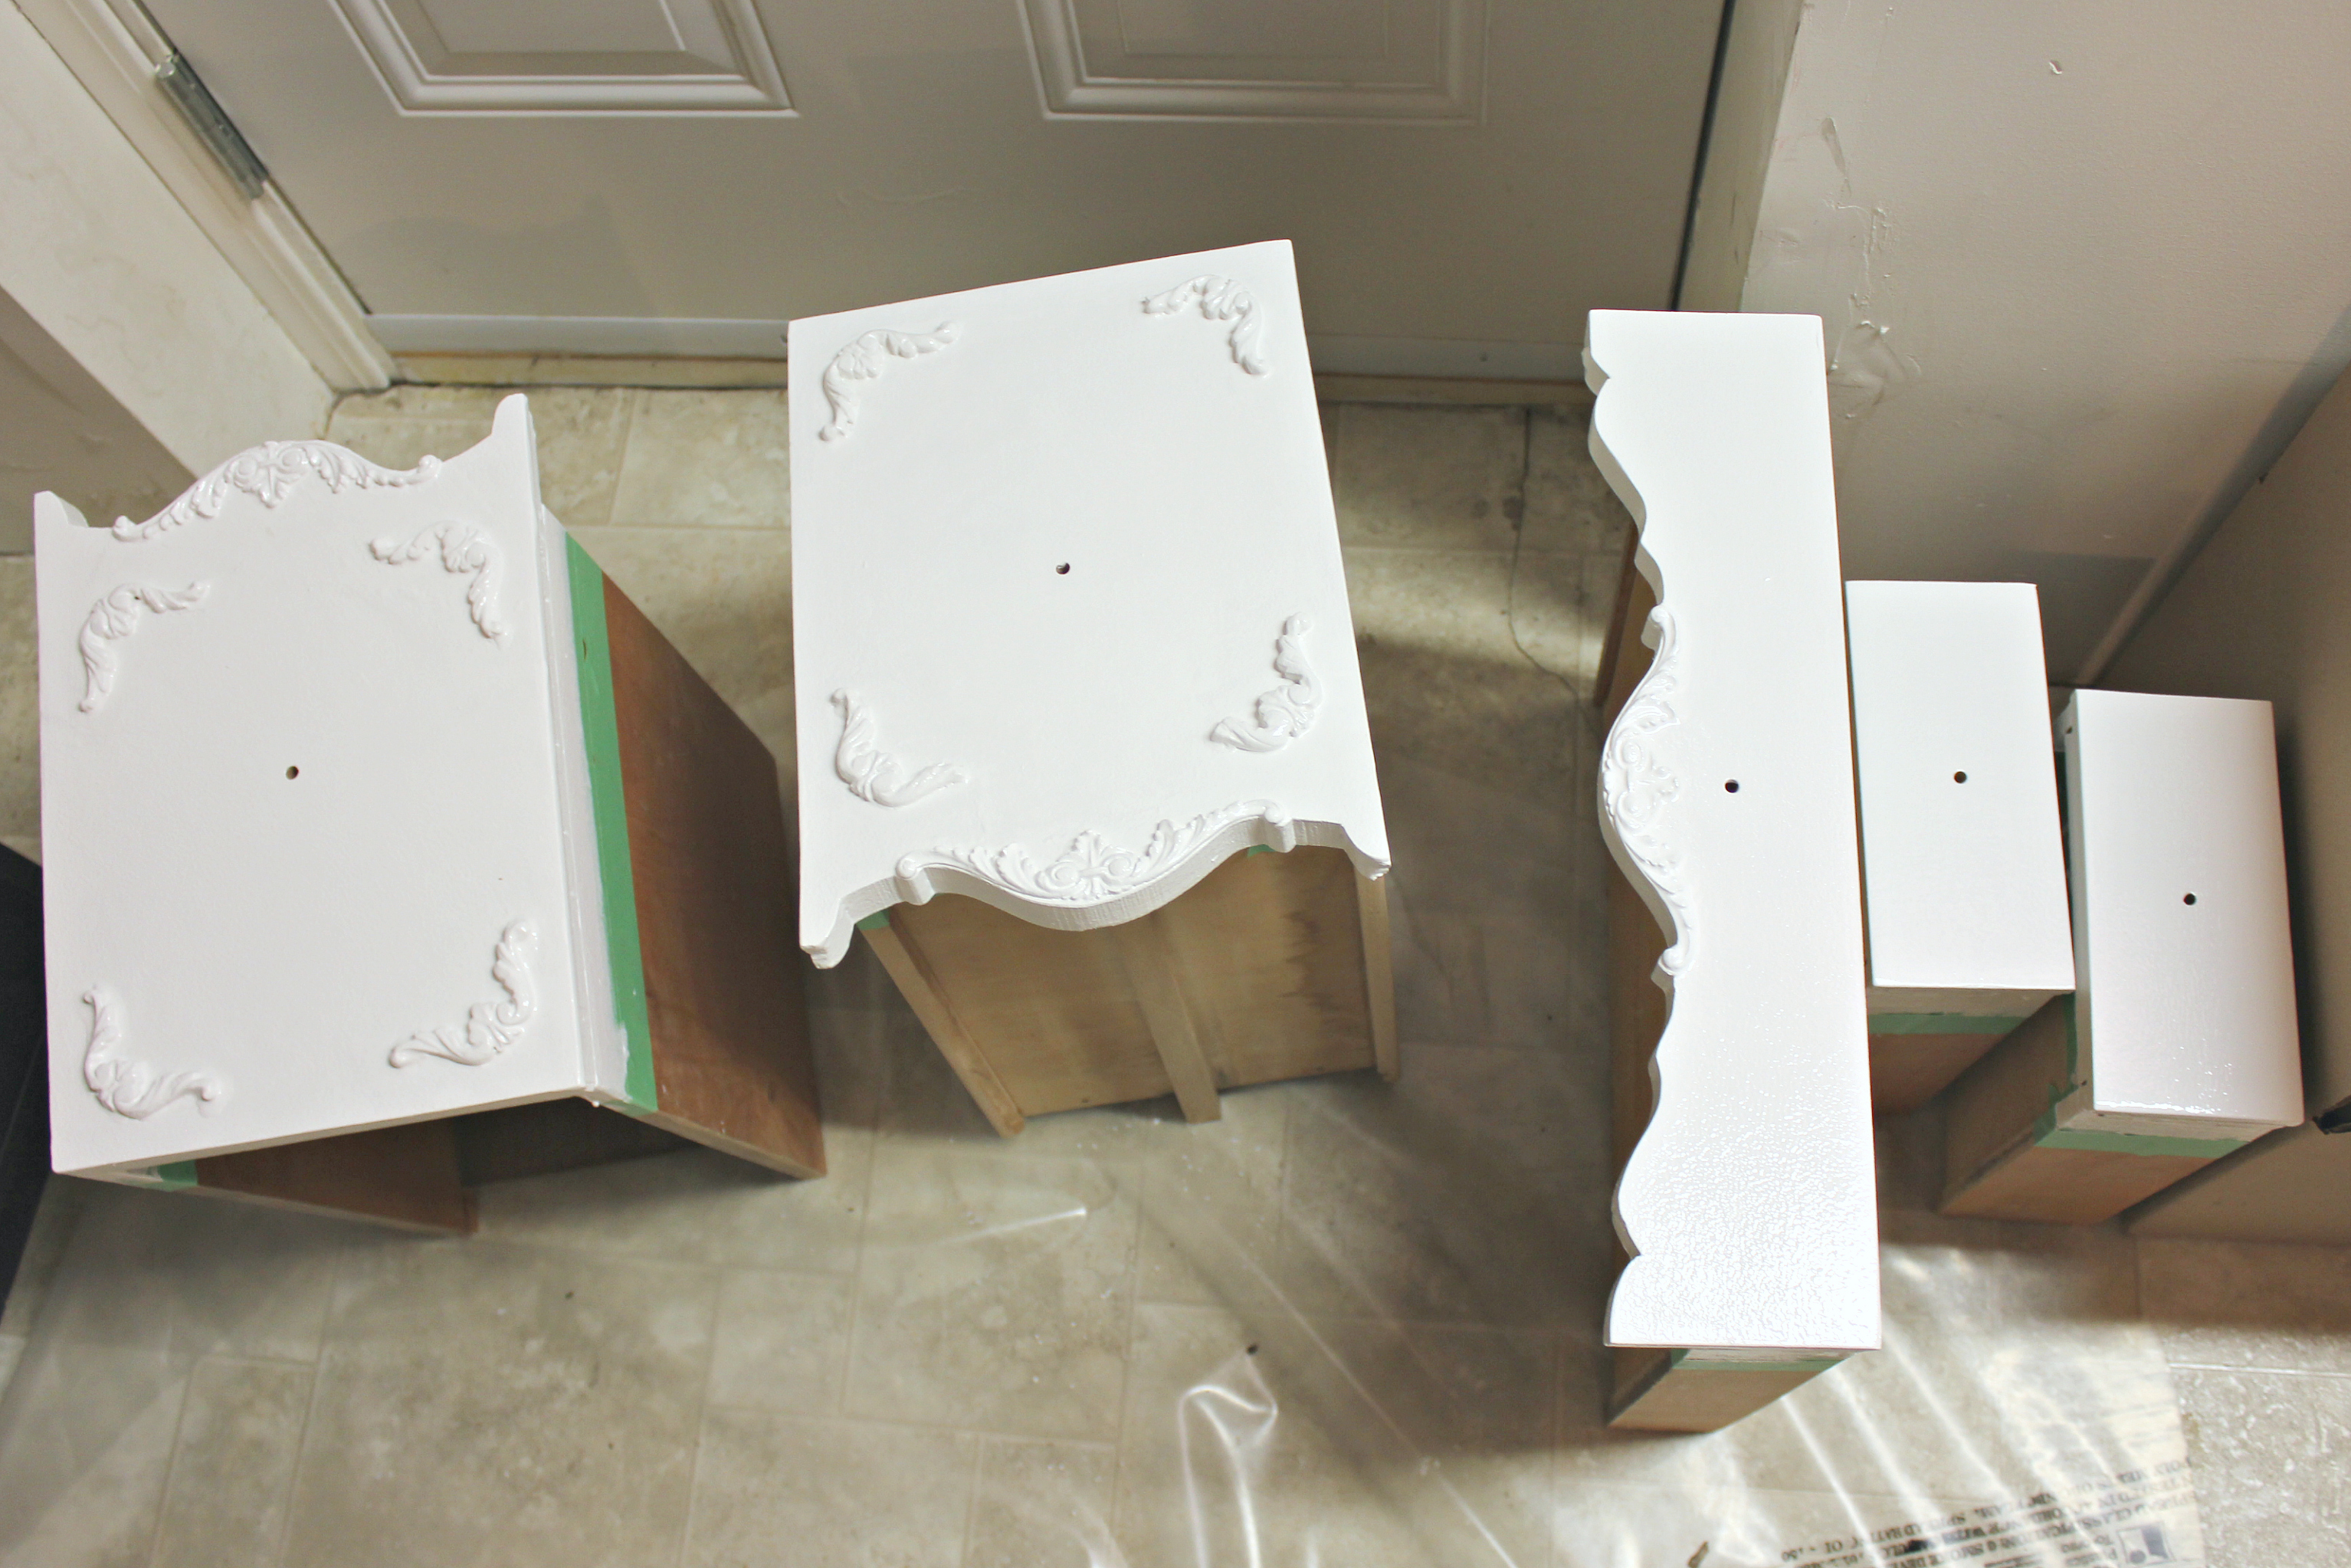
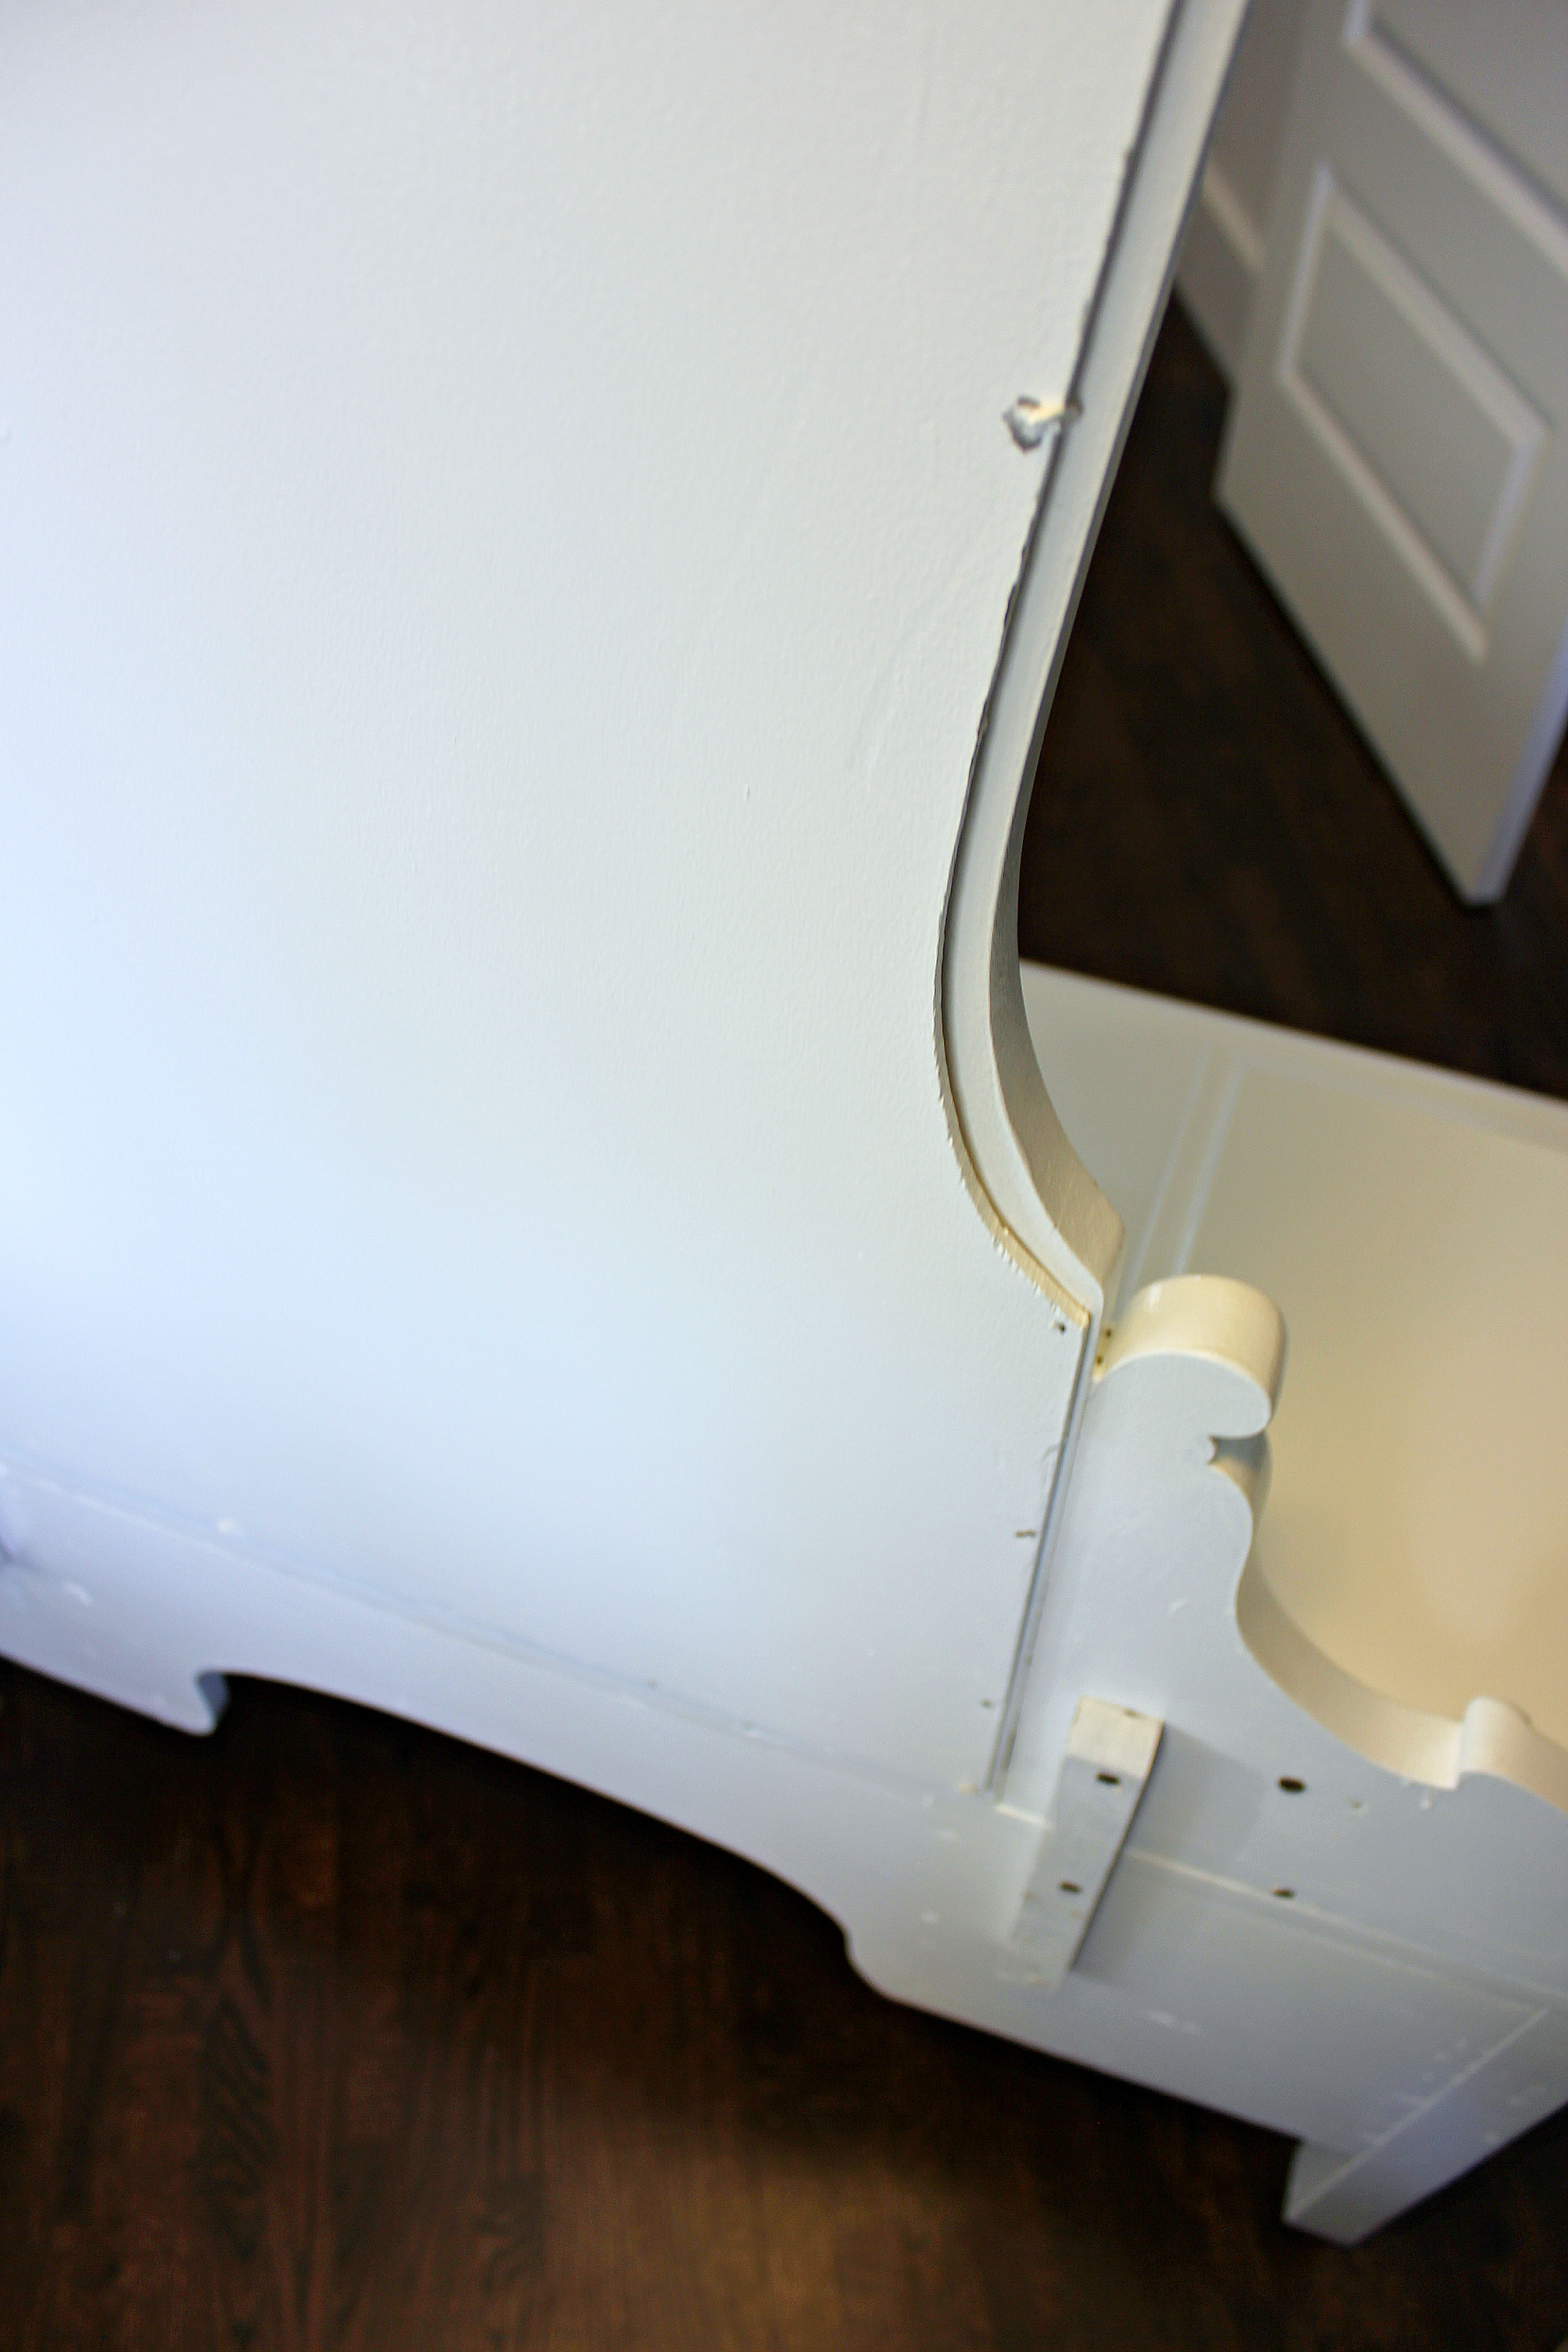
Next came the sanding. All the sanding! My husband’s perfectionist tendencies come in very handy for these sorts of things. We wanted to make sure any sort of finish or varnish had been removed before proceeding. This was achieved with an 80, 120 and then a 200 grit sand paper on an orbital sander.
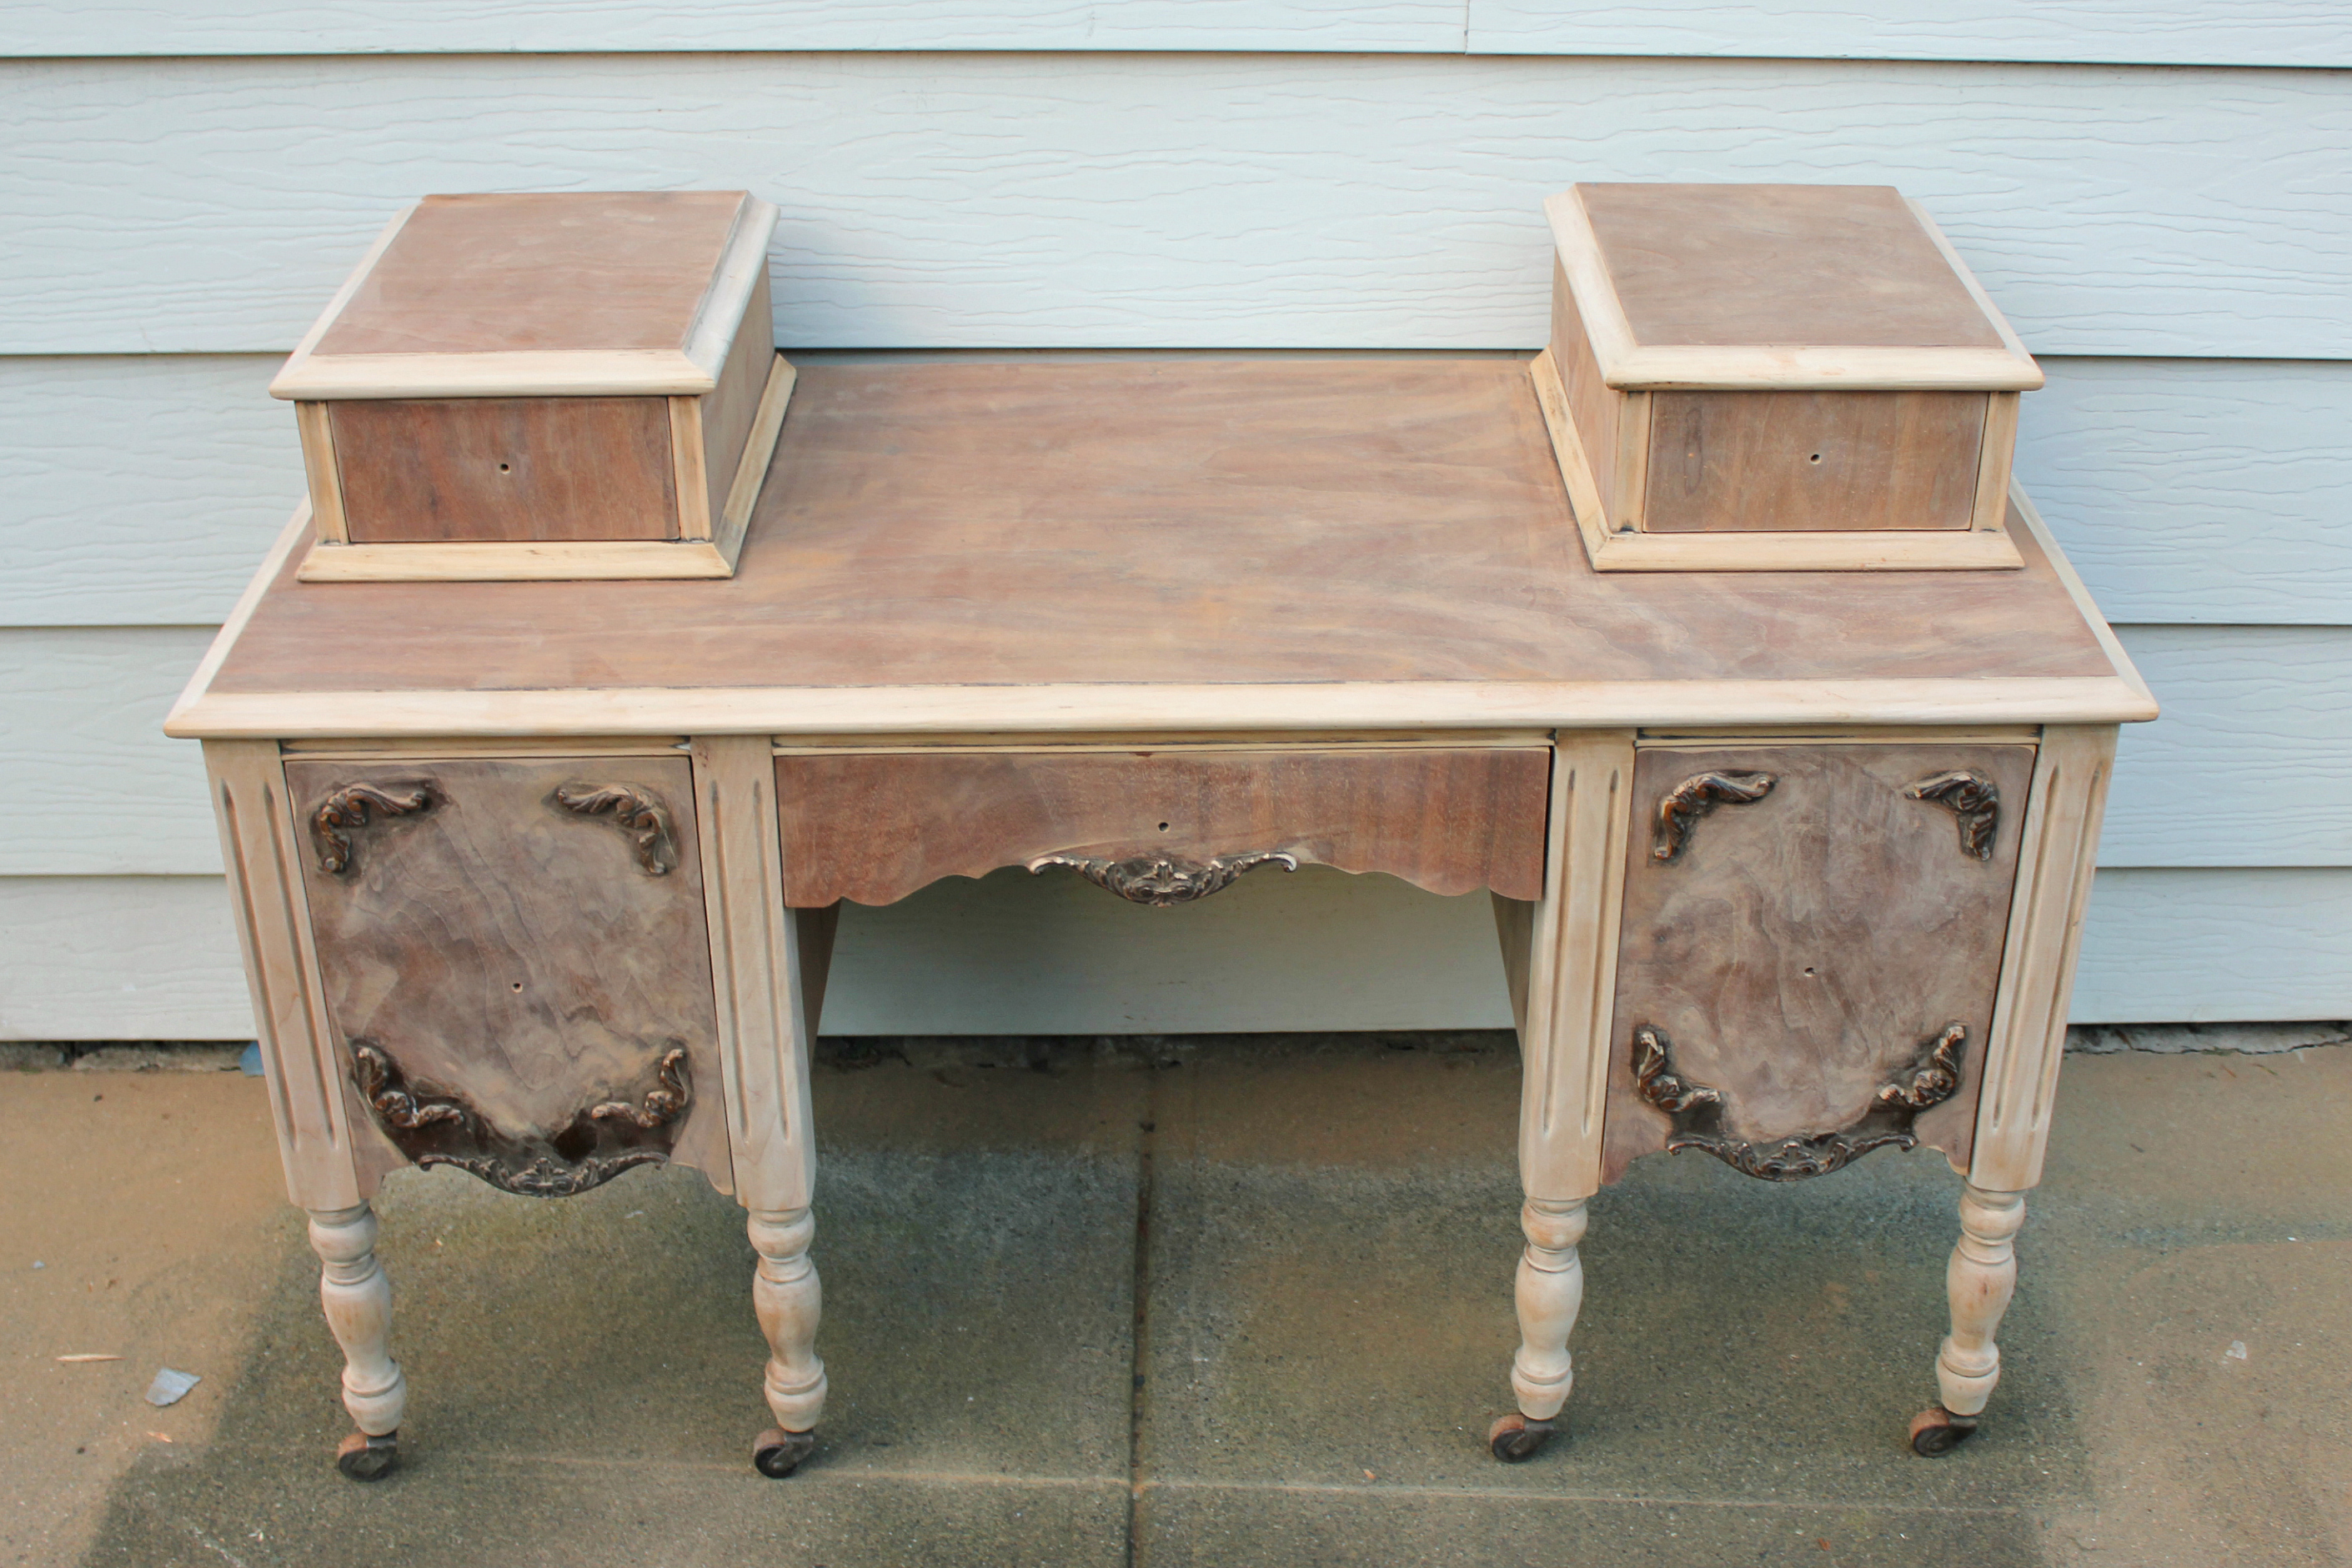
Step 3:
Carefully wipe down any and all dust with a damp cloth.
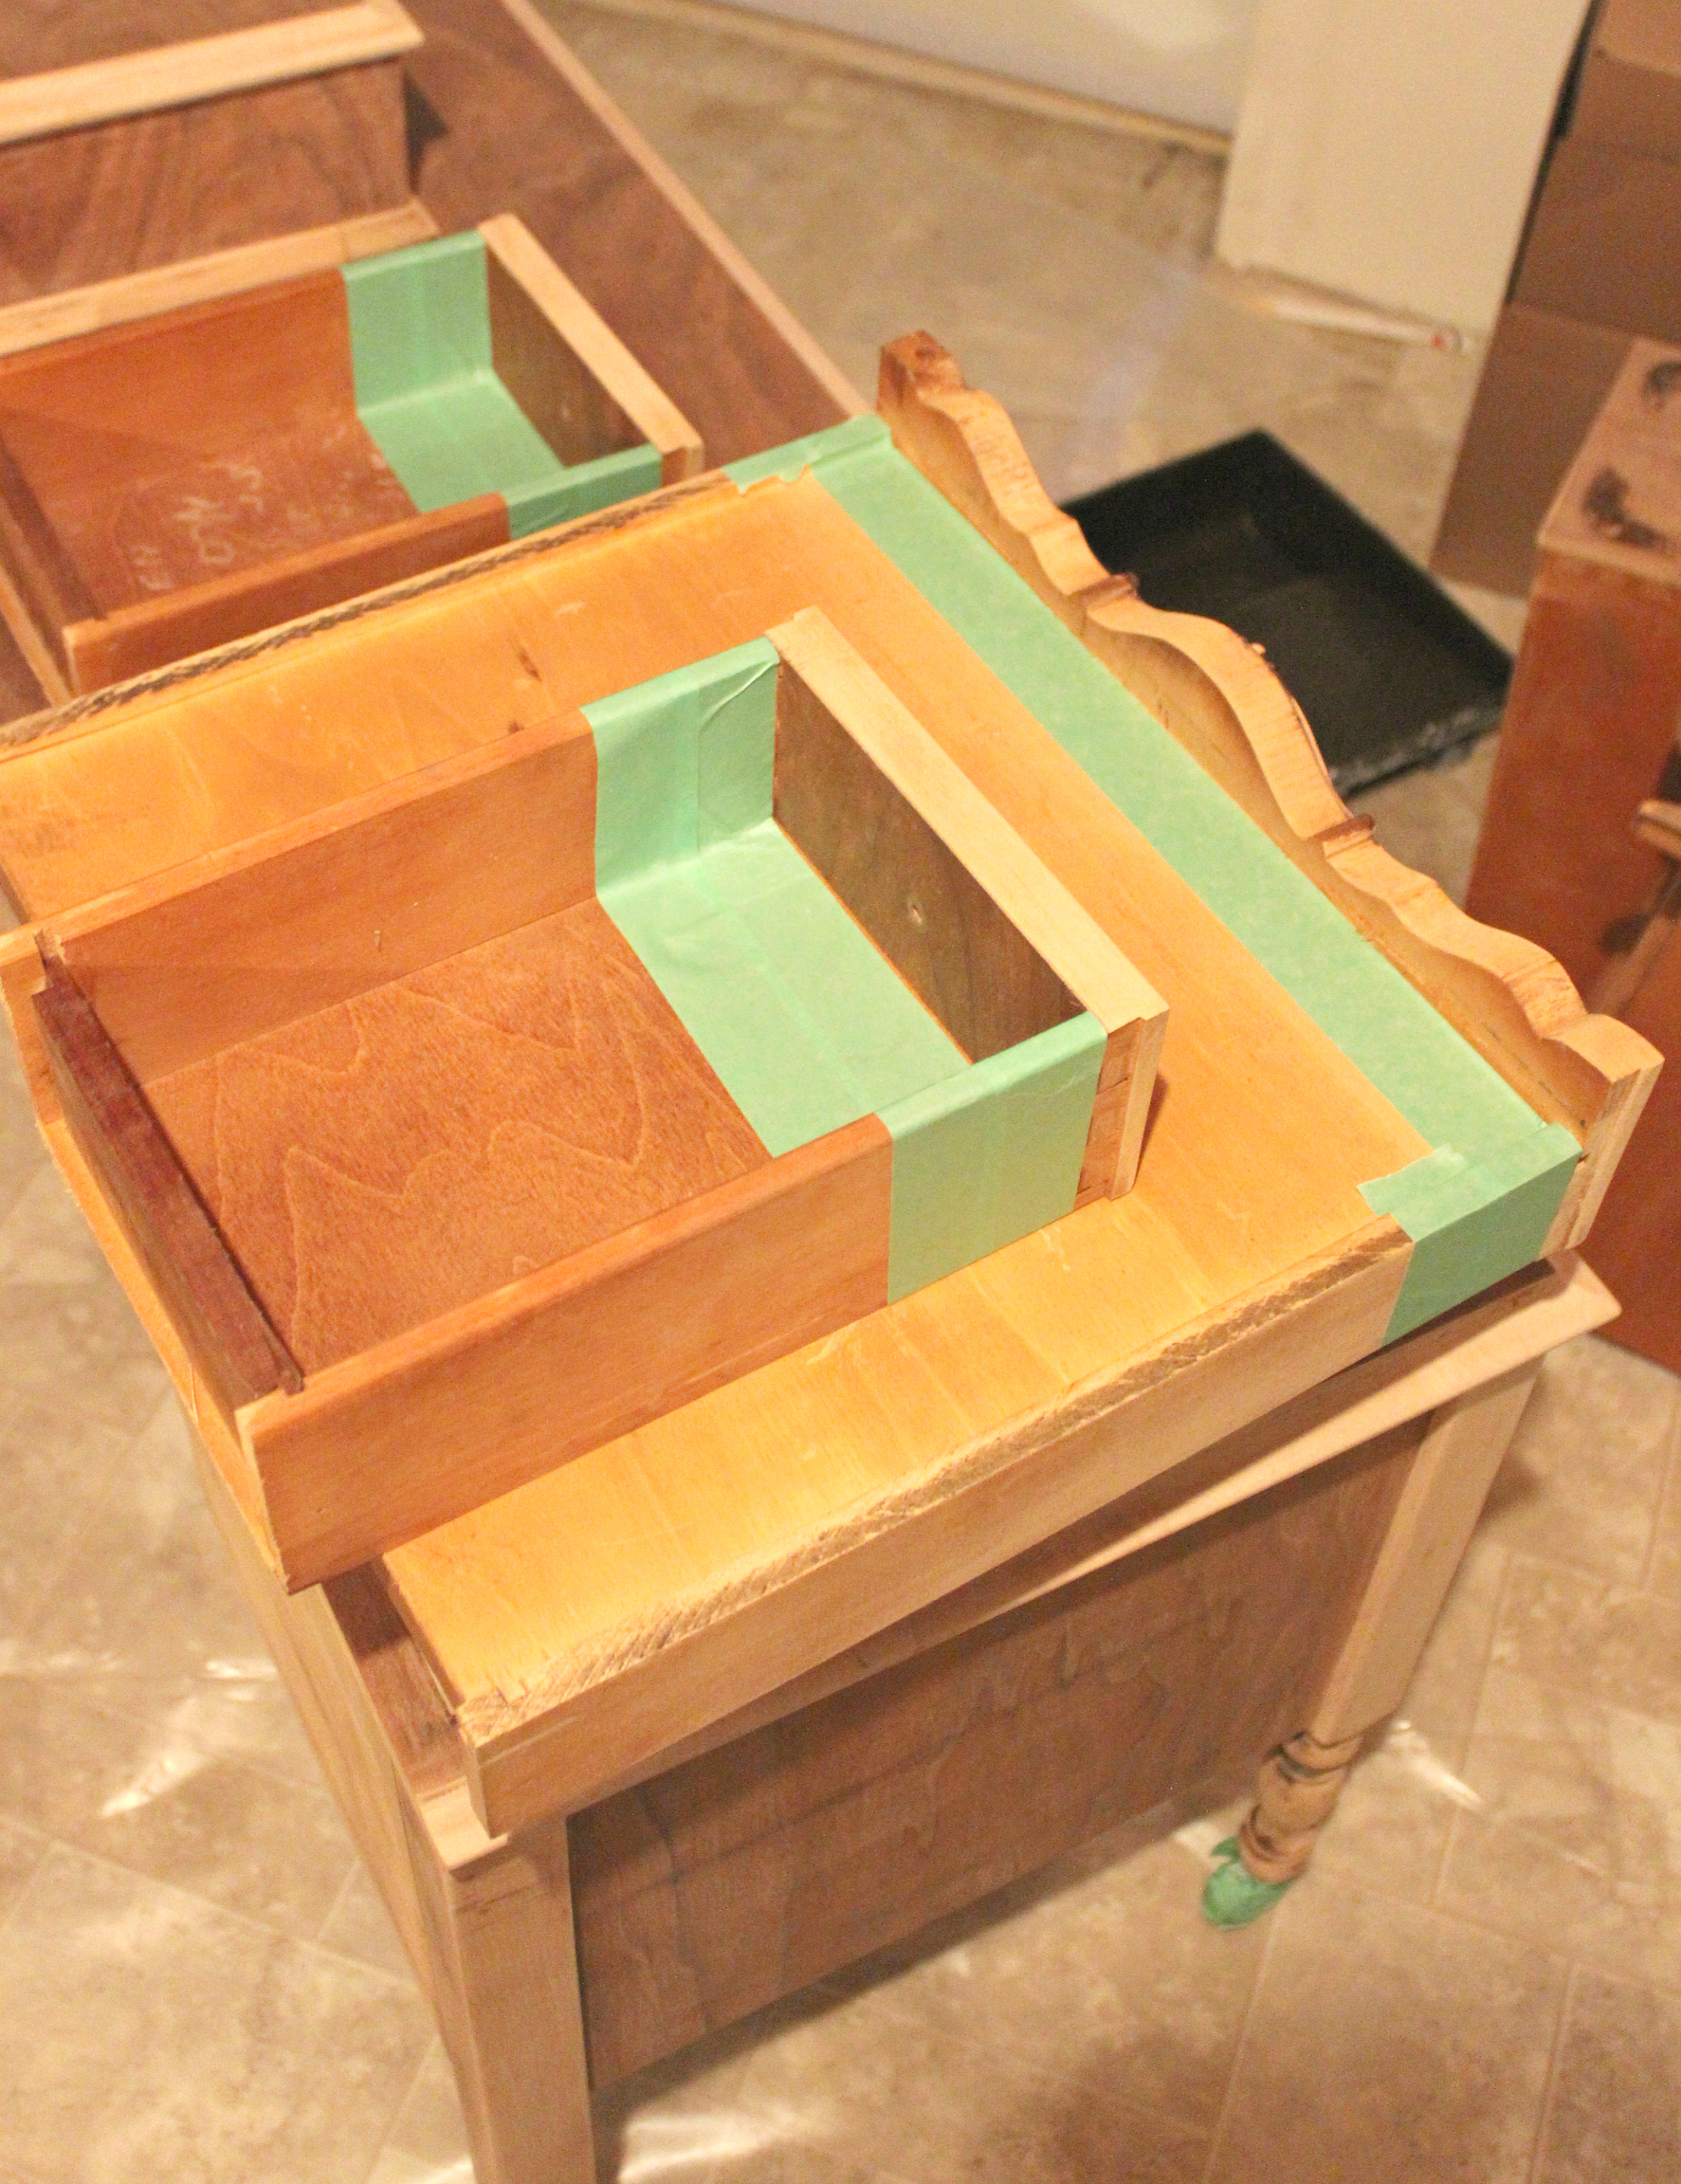
Step 4:
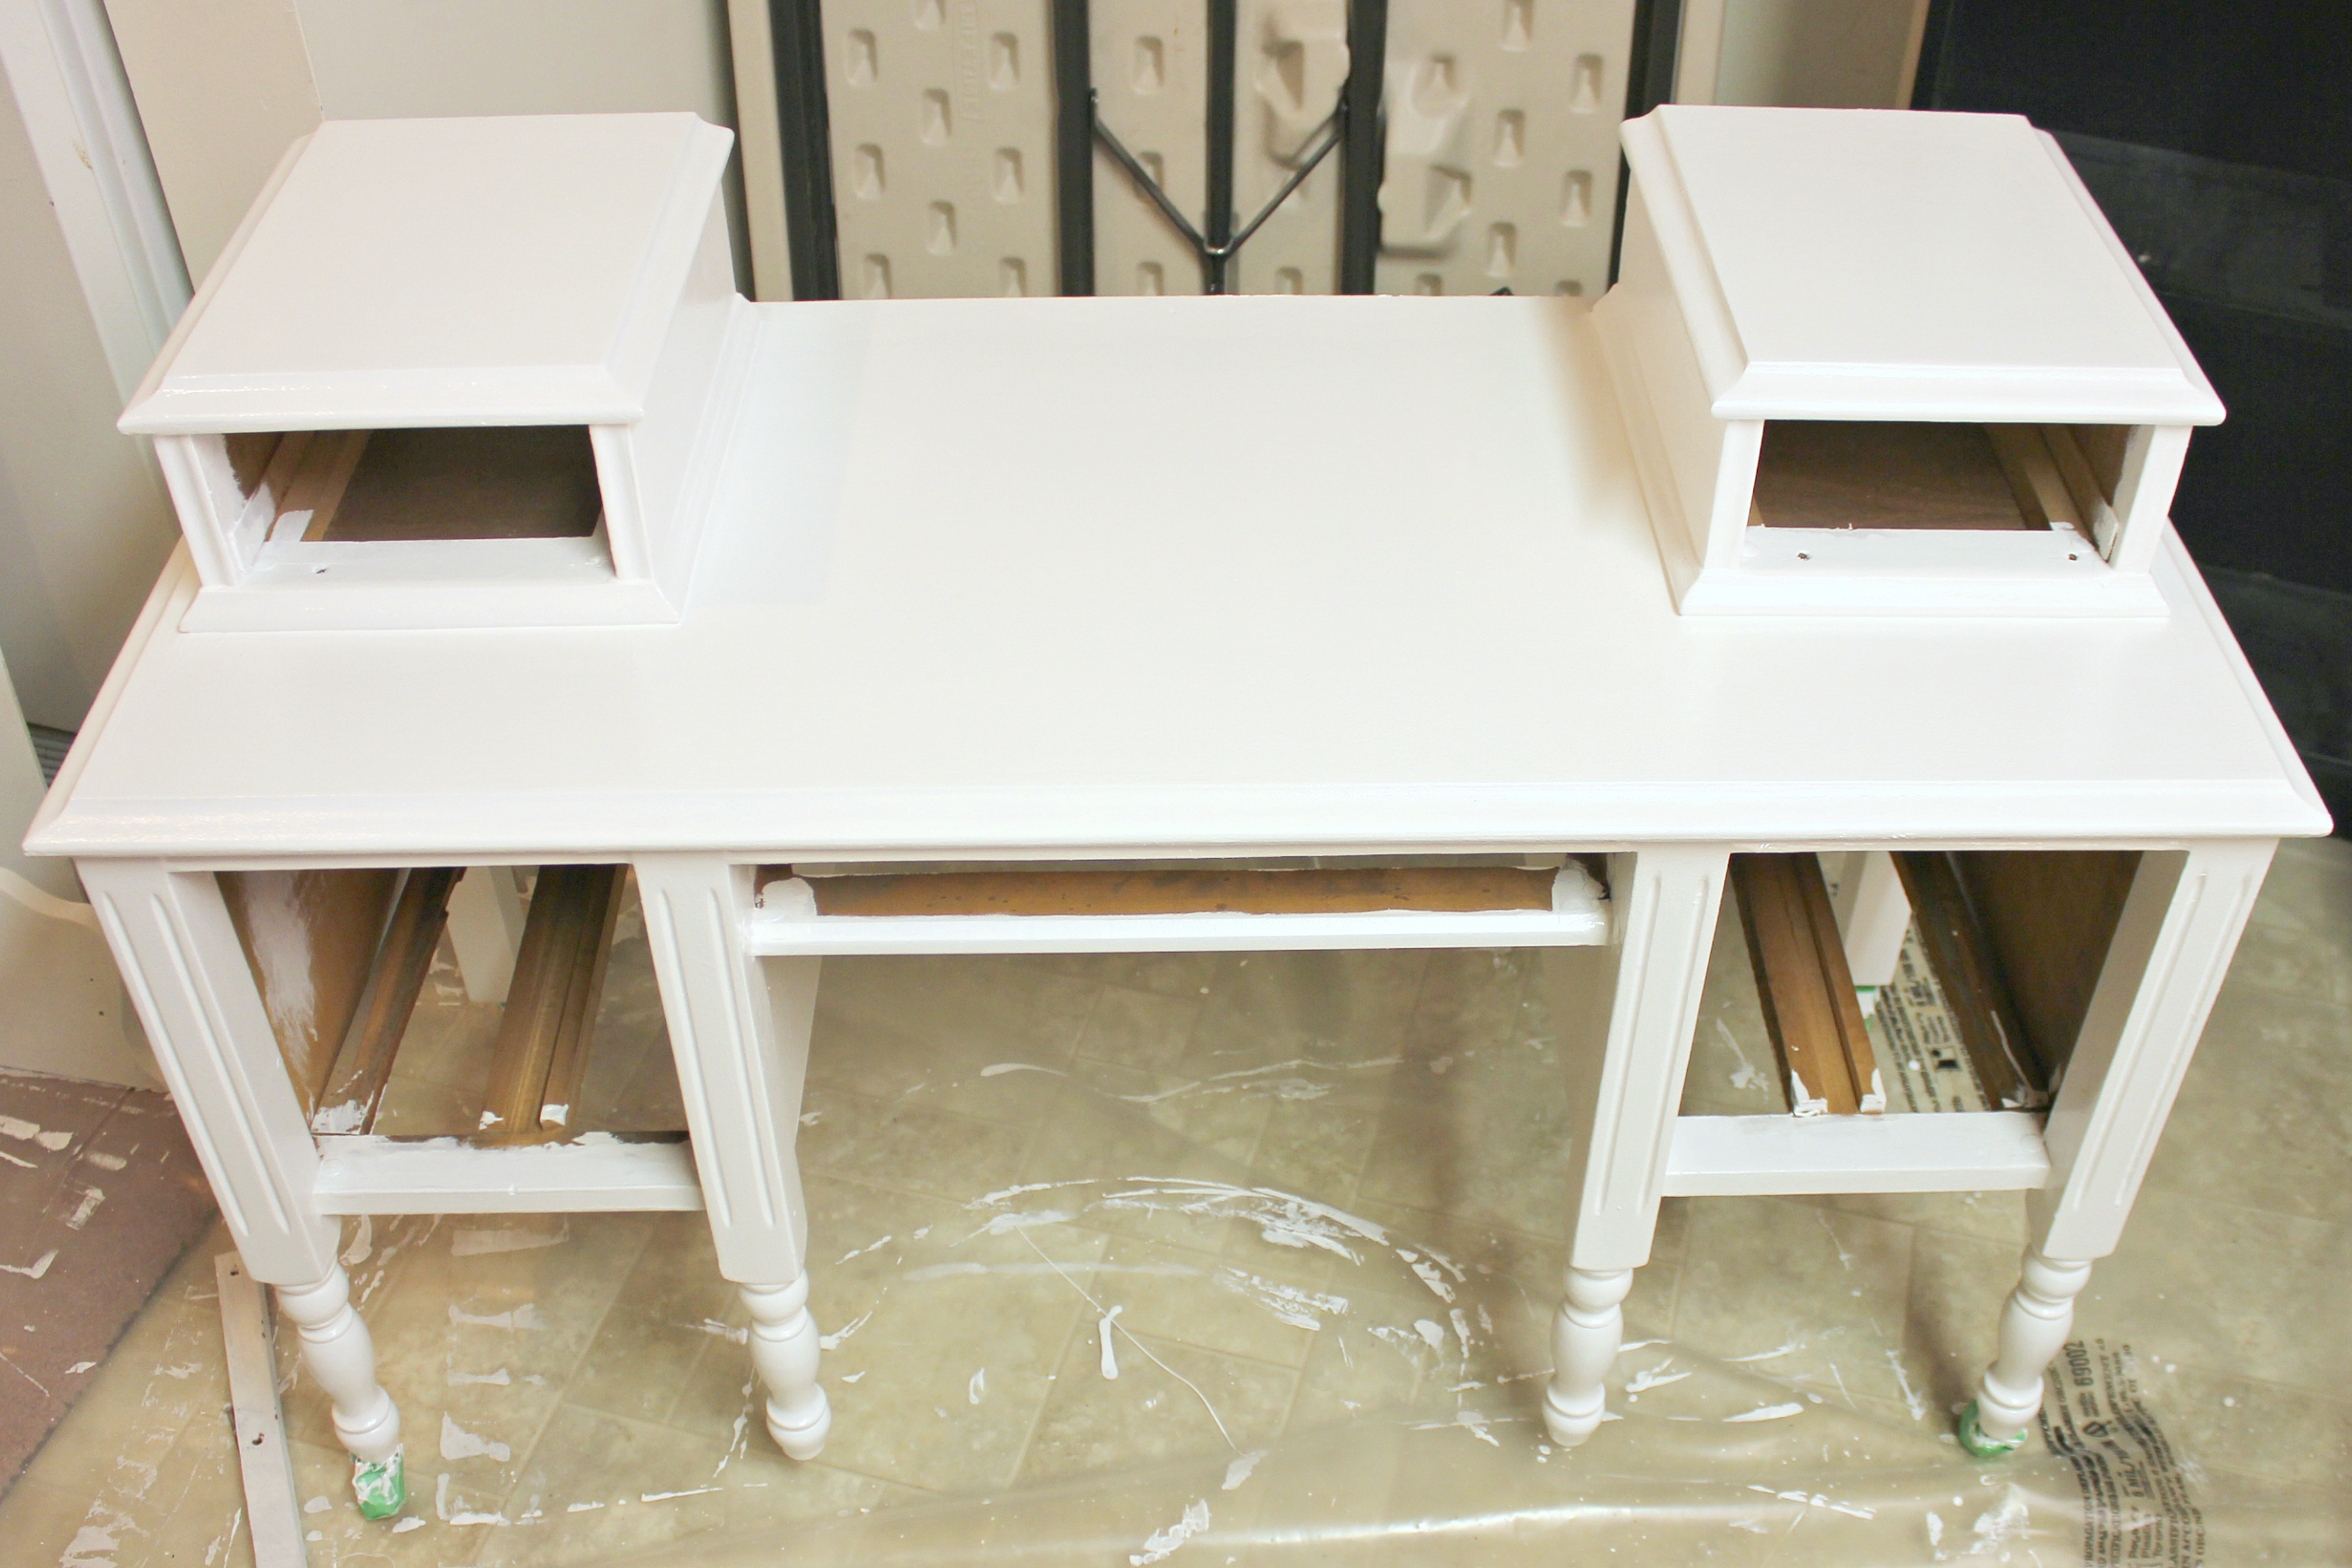
Next he taped off inside the drawers with painters tape so there would be straight lines where the paint stopped. This makes a much more finished look when the drawers are opened. He also taped off the casters on the bottom of the unit, alternatively you could just remove them.
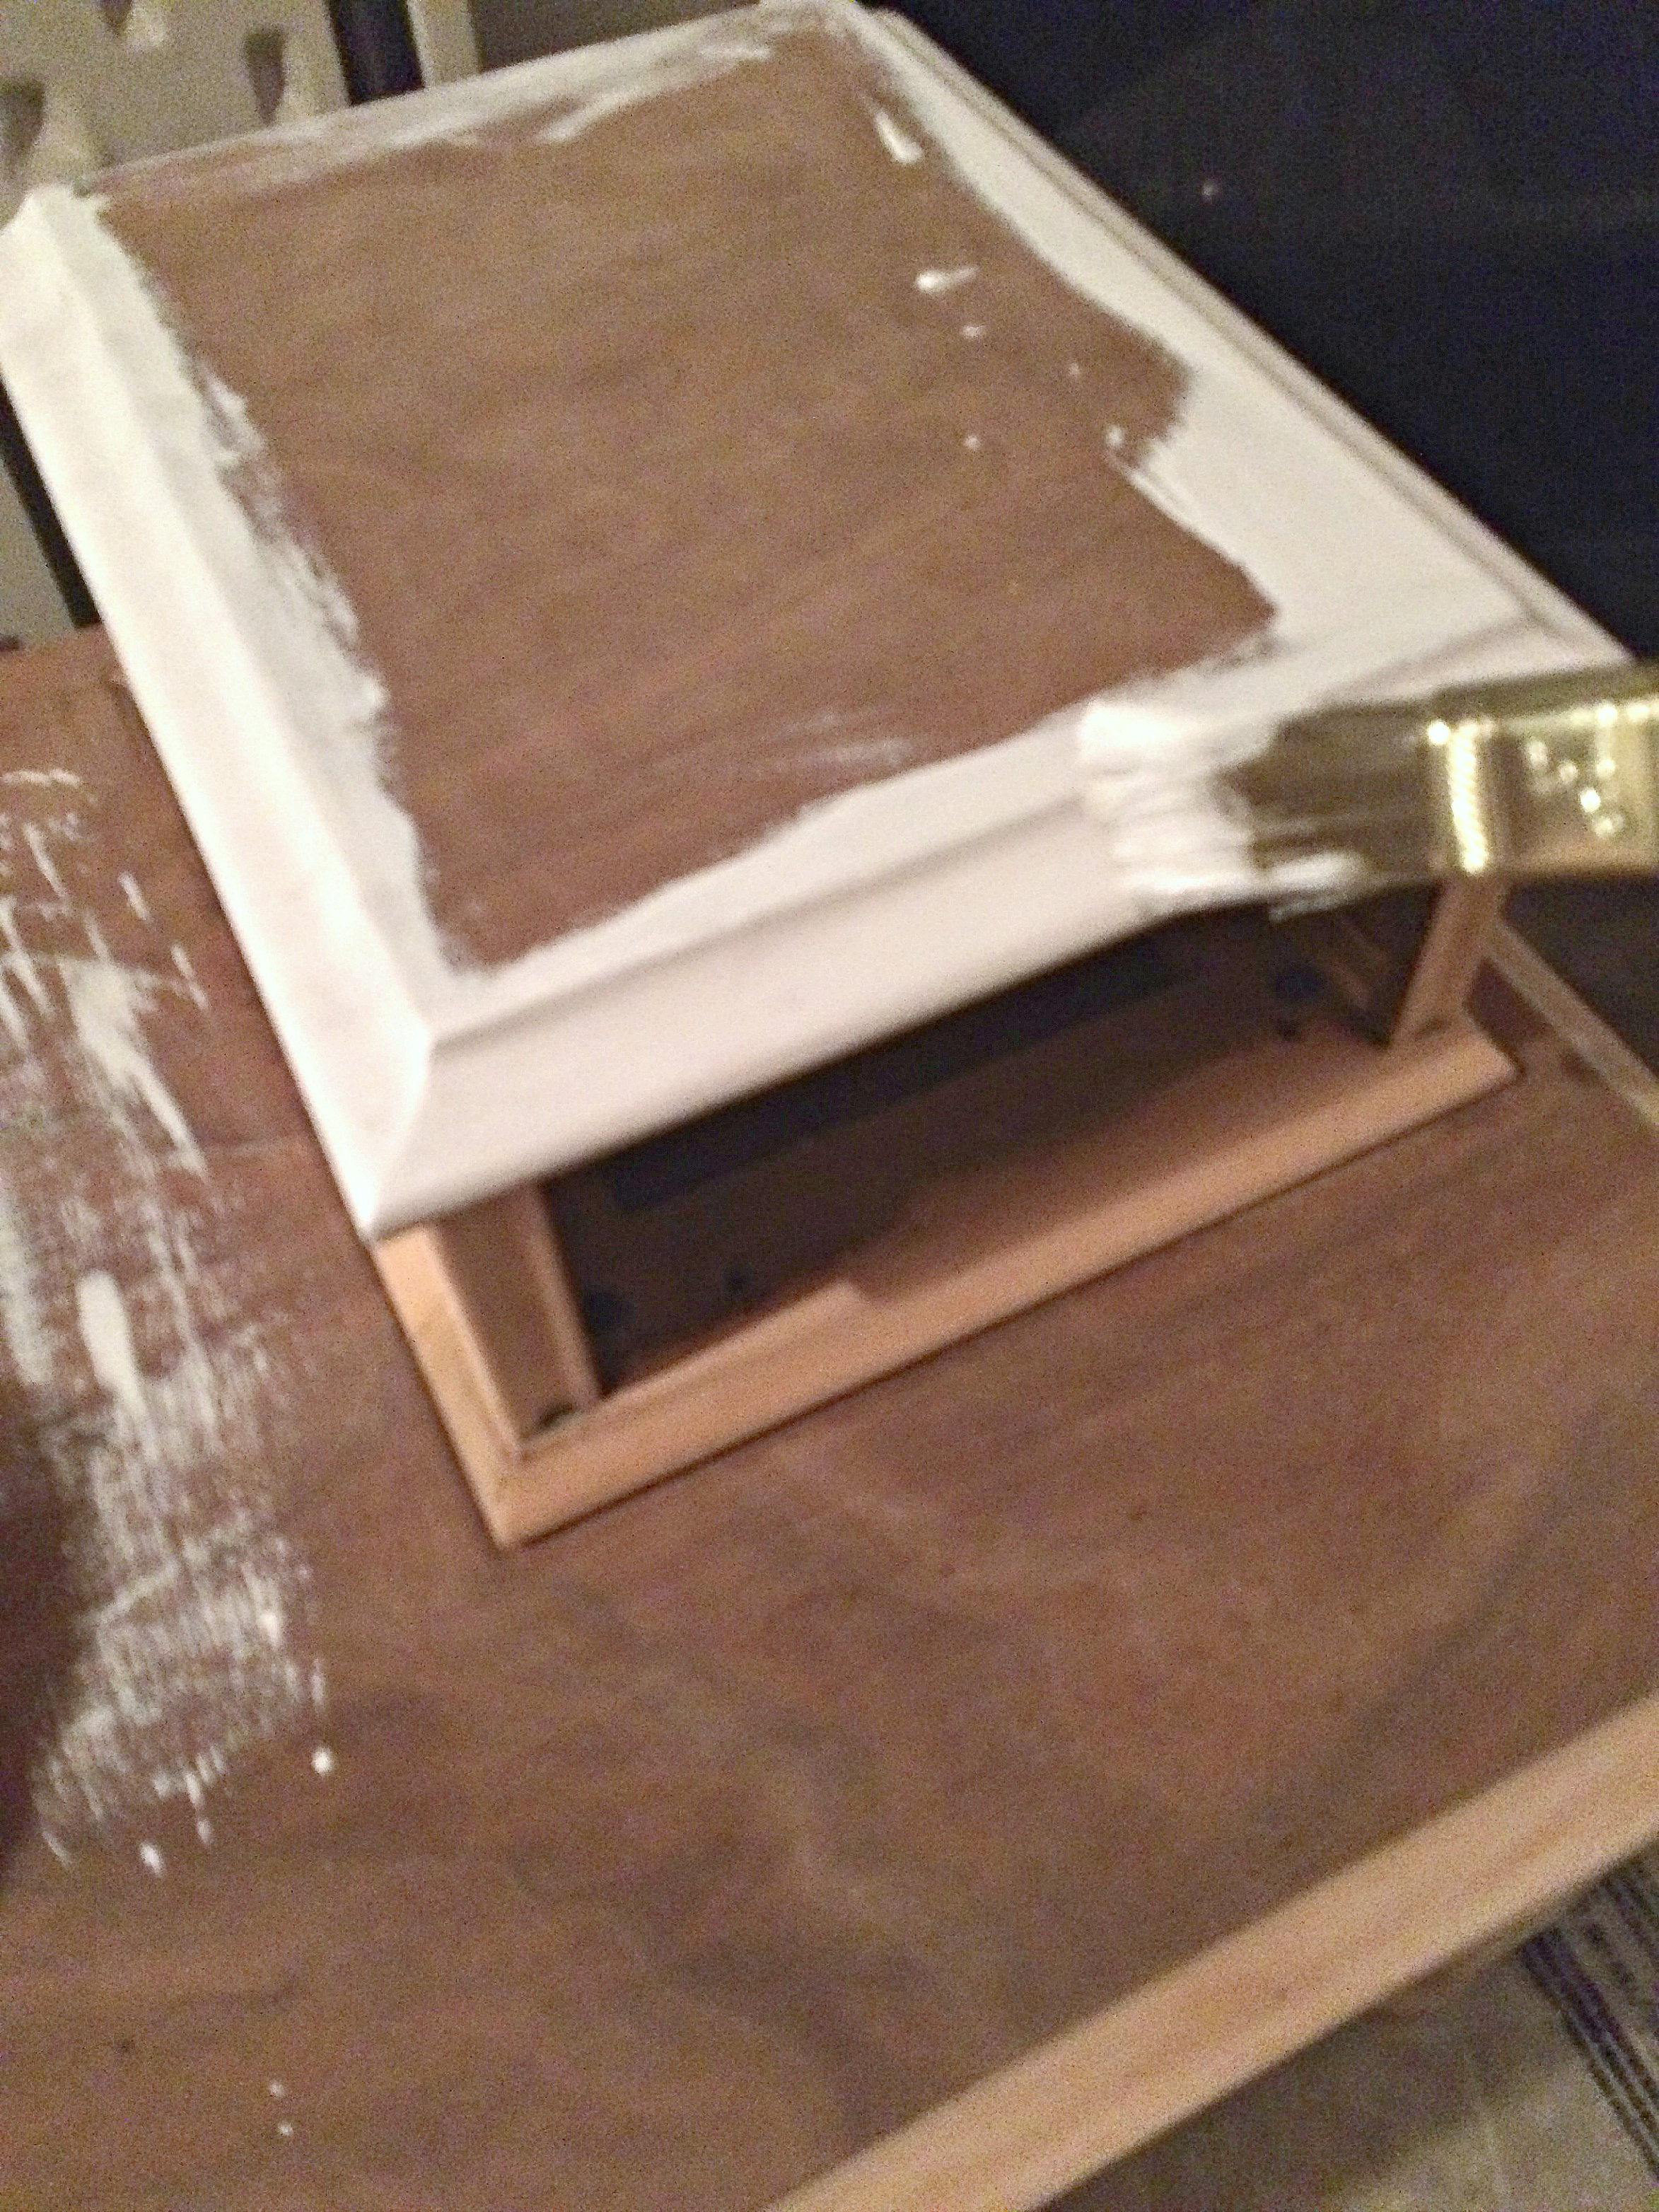
Step 5:
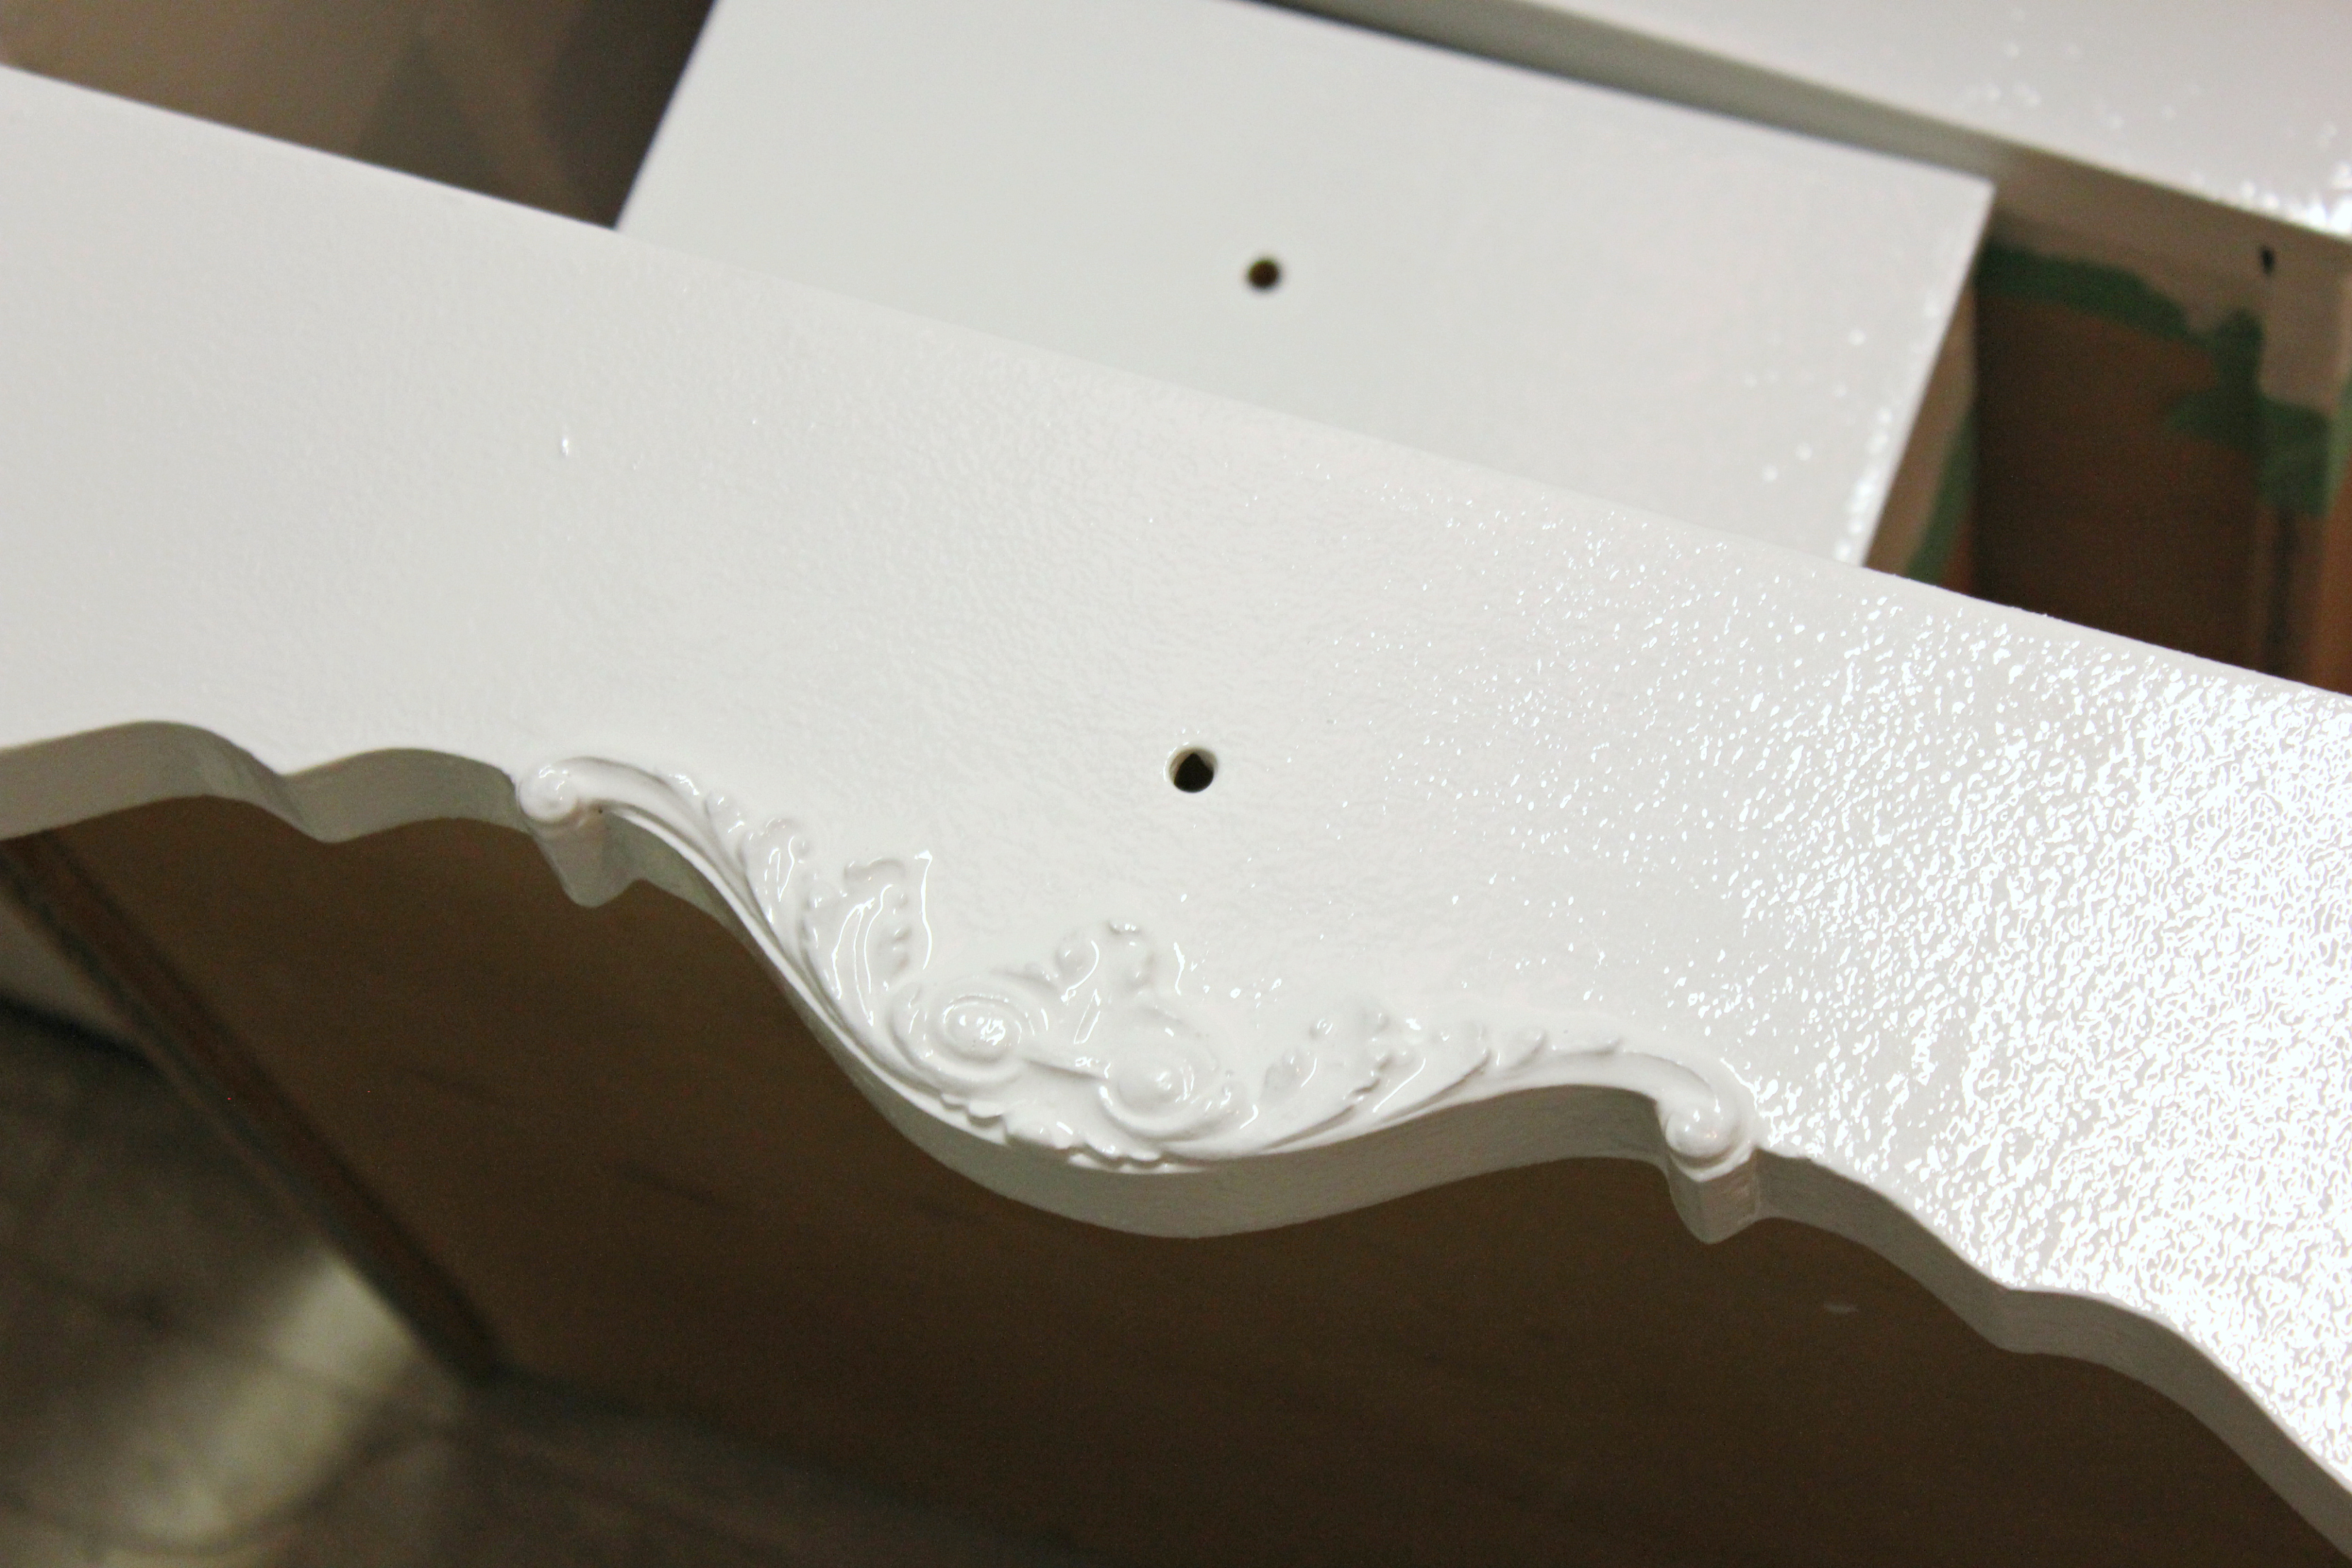
Then we meticulously applied a coat of primer, paying extra attention to any detail and being mindful for drips. We used a paint brush for all the detail work and then finished off with a smooth faced foam roller. We used Zinsser Cover Stain Primer-Sealer Stain Killer so as to give a good solid coat that wouldn’t allow any lingering stain that is embedded in the woodgrain to seep through later. We have used this product multiple times before on other projects with happy results. Allow to dry completely.
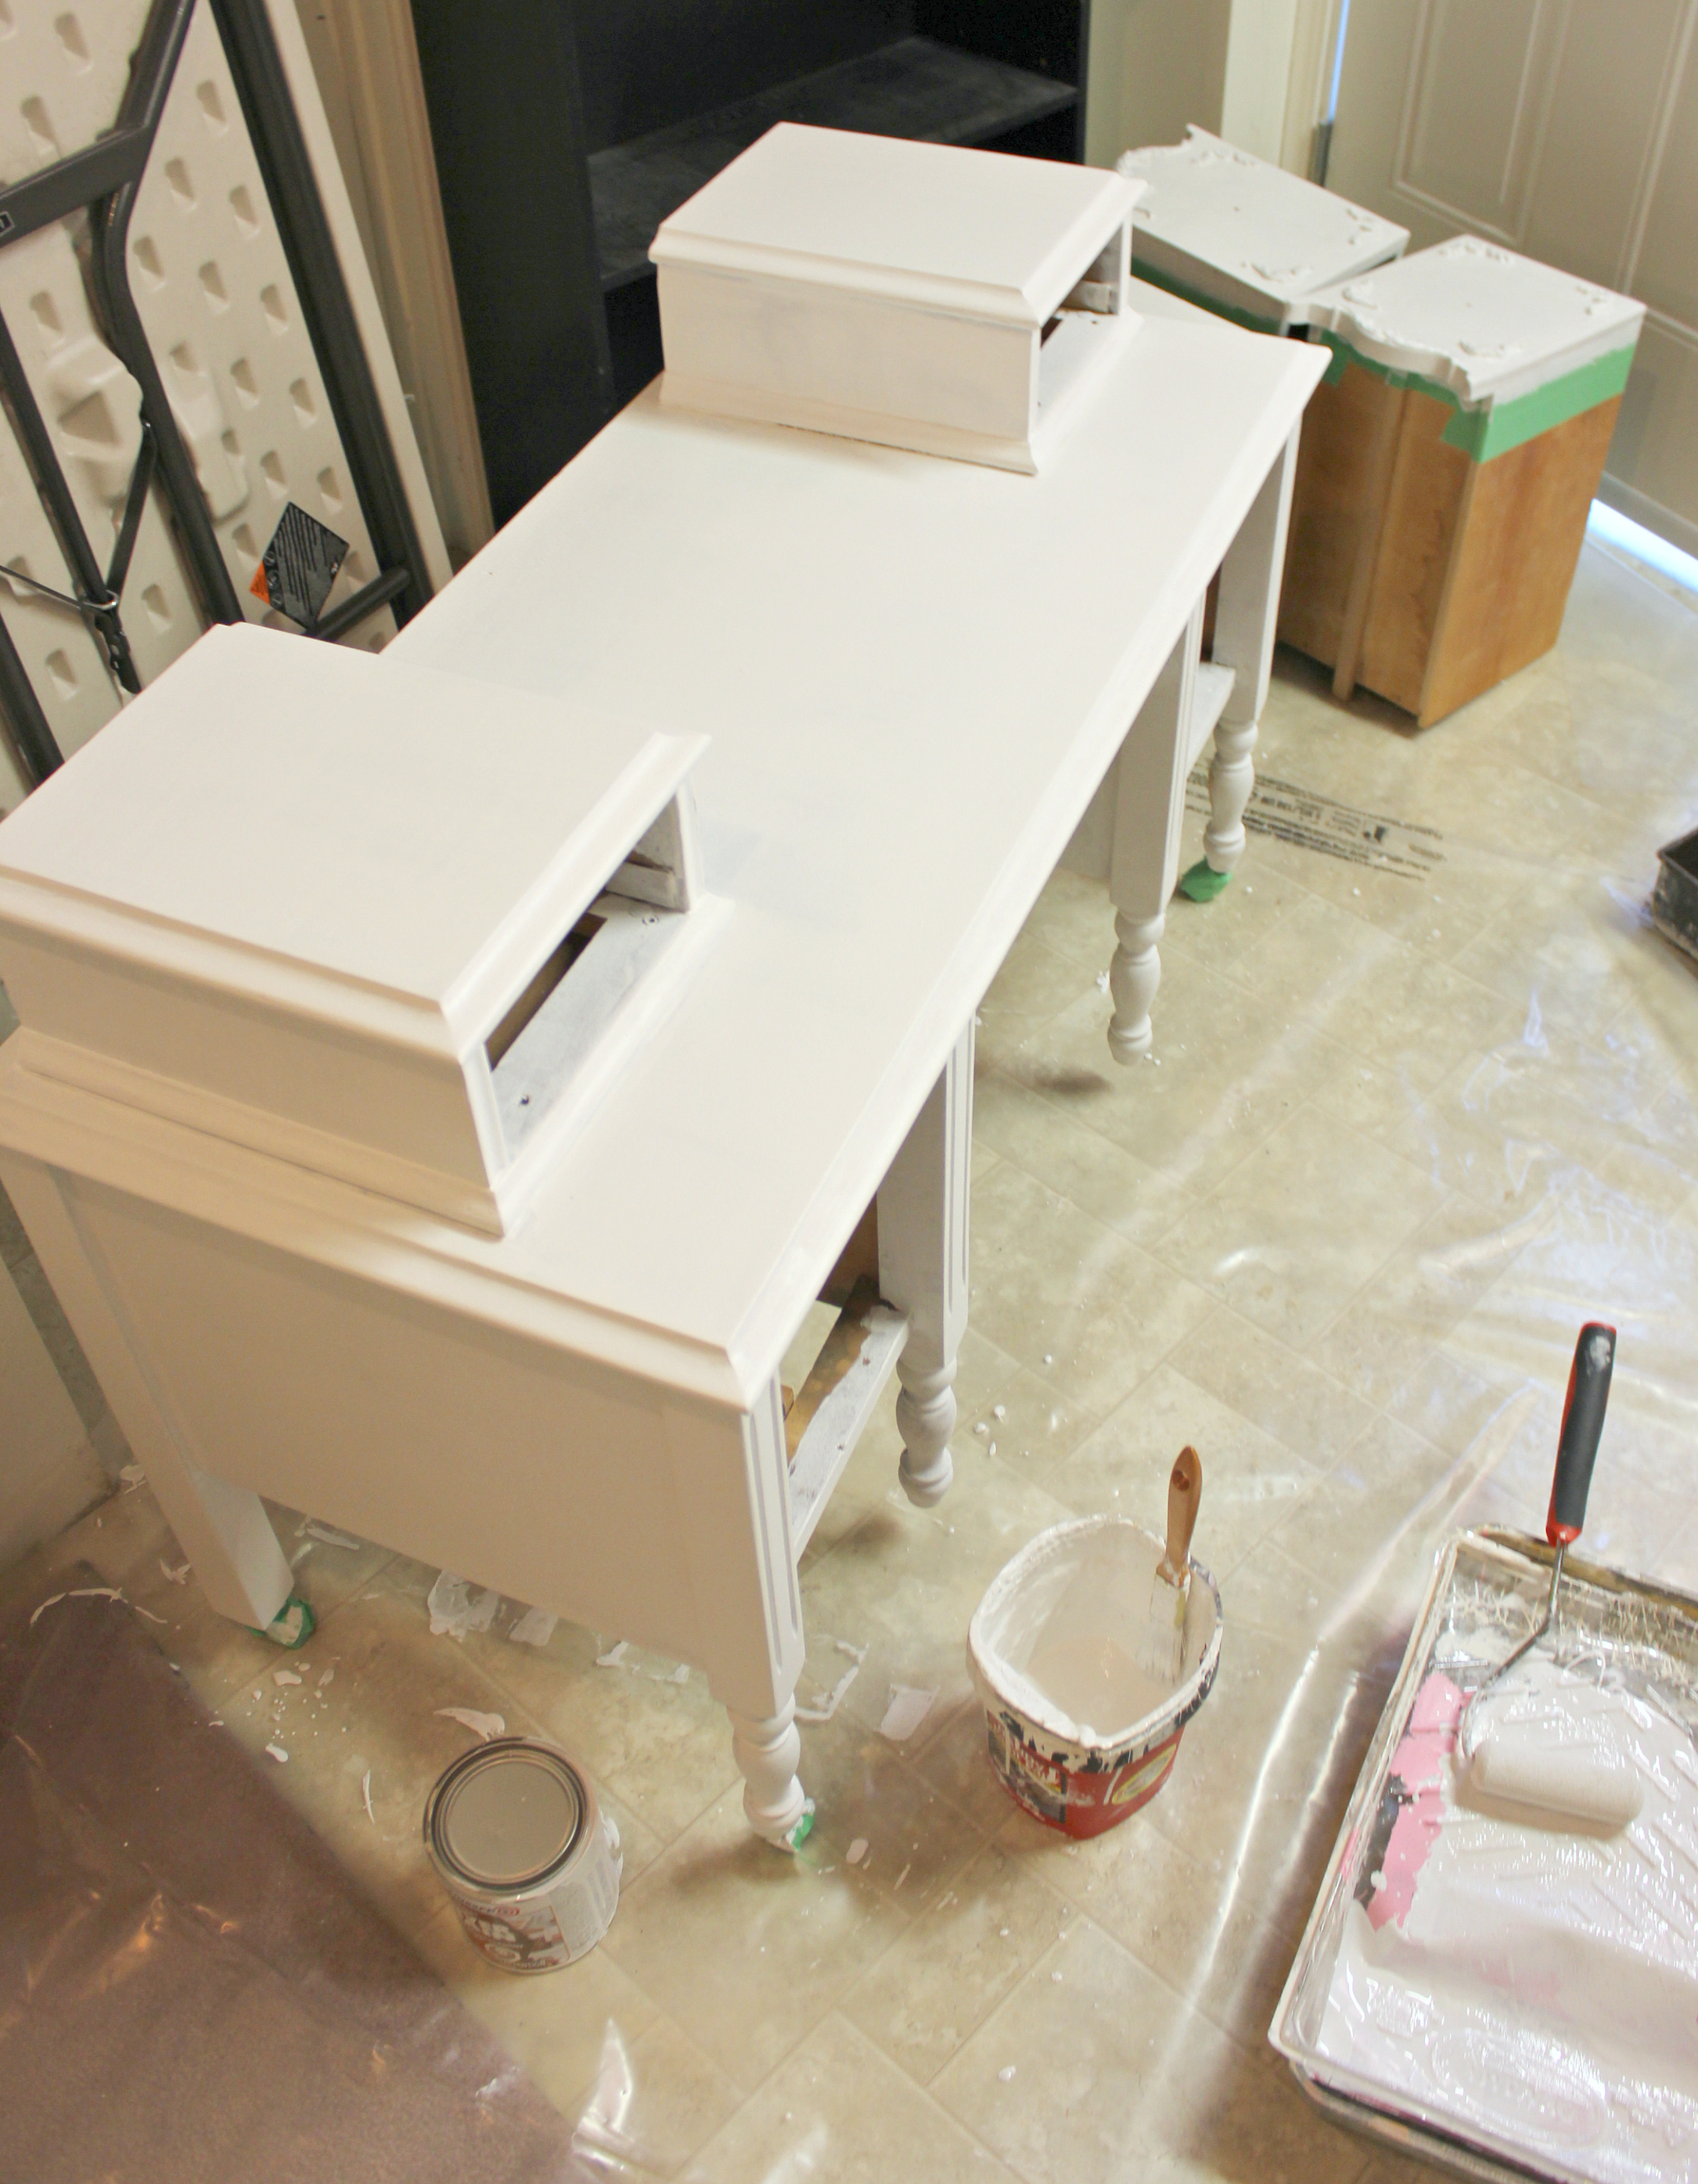
Step 6:
Once completely dry, we applied two coats of Benjamin Moore’s High-gloss latex paint in Chantilly Lace (OC-65). A few minutes after applying the first coat, check to ensure that paint runs have not formed. If they have, be sure to quickly smooth with the paint brush or roller before the paint dries. Then allow time for the first coat to dry completely before applying the second coat.
Step 7:
Allow the paint to dry and cure according to directions (we gave ours a week). Also make sure you allow this to take place without the drawers in place or they may get stuck.
Step 8:
Once the paint was no longer soft, we put the mirror back in place and the wood backing was secured with the original finishing nails. Then it was reattached to the unit with the original screws, saved from disassembly. It took both of us, one holding the mirror in place while the other attached it to the back of the vanity.
Step 9:
Next, if you are anything like me, dance your way to Anthropologie, overjoyed to finally have a reason to actually purchase some of their amazingly beautiful handles, rather than just oohing and ahhing at your every visit!
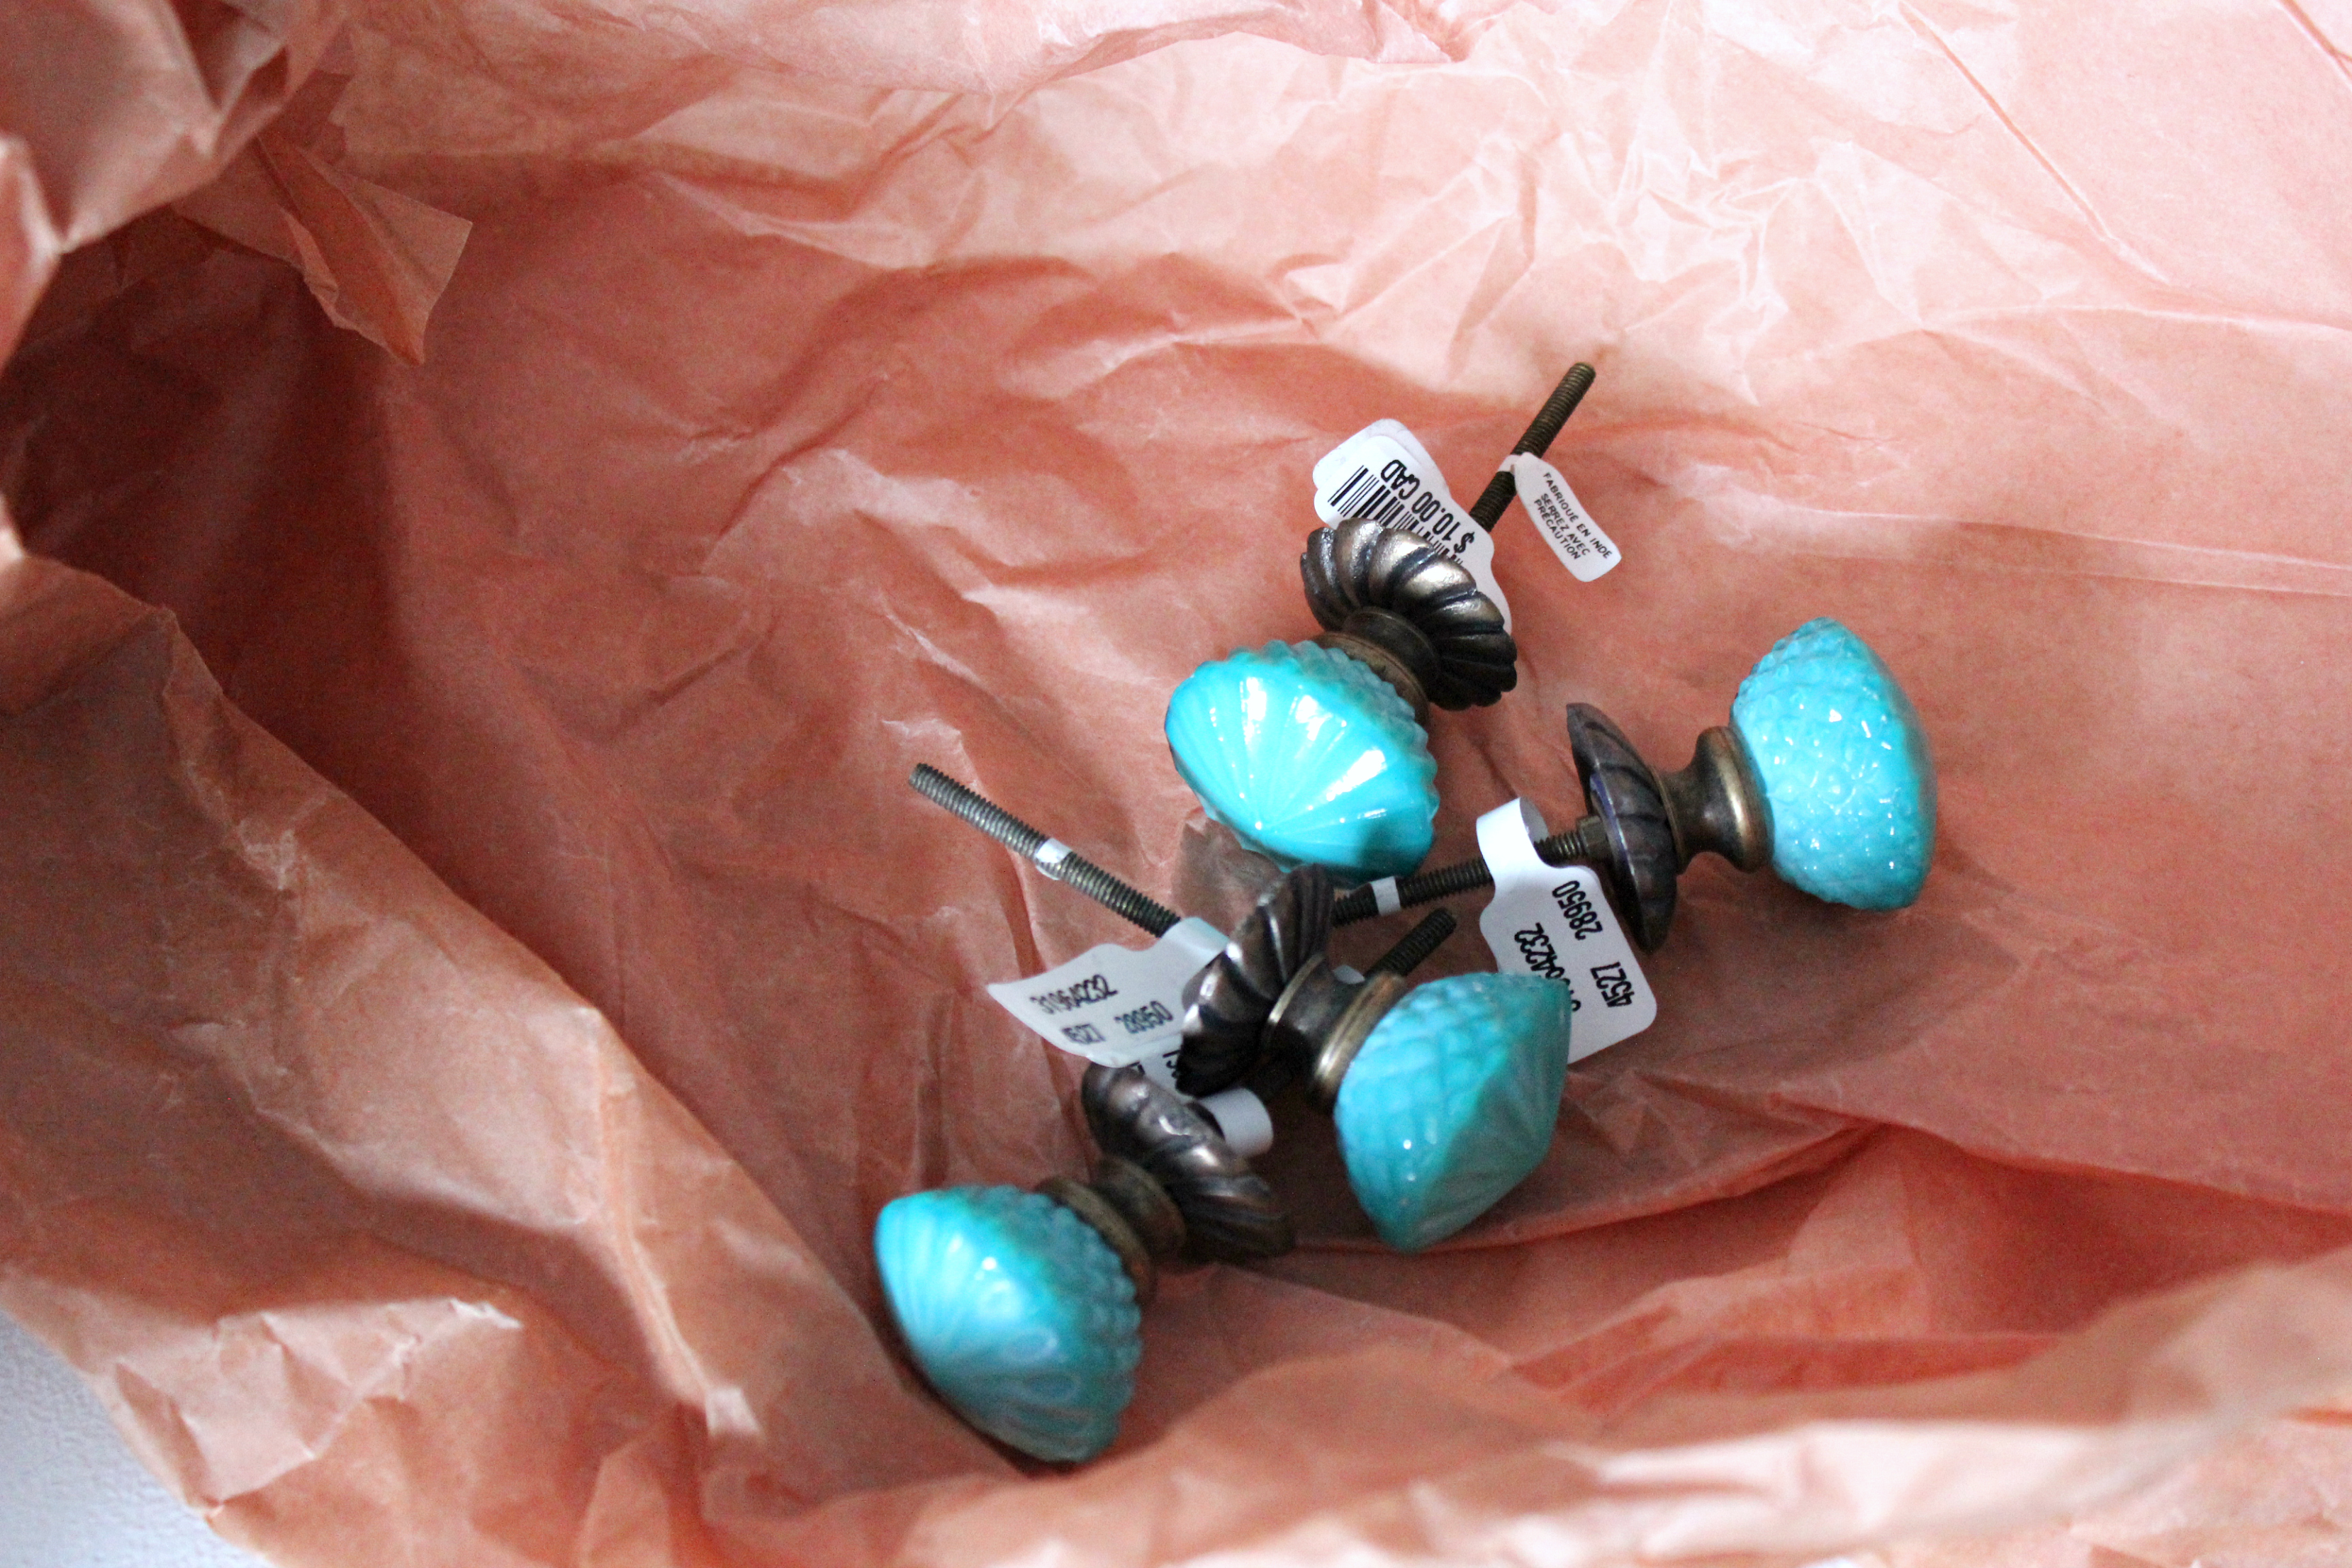
Step 10:
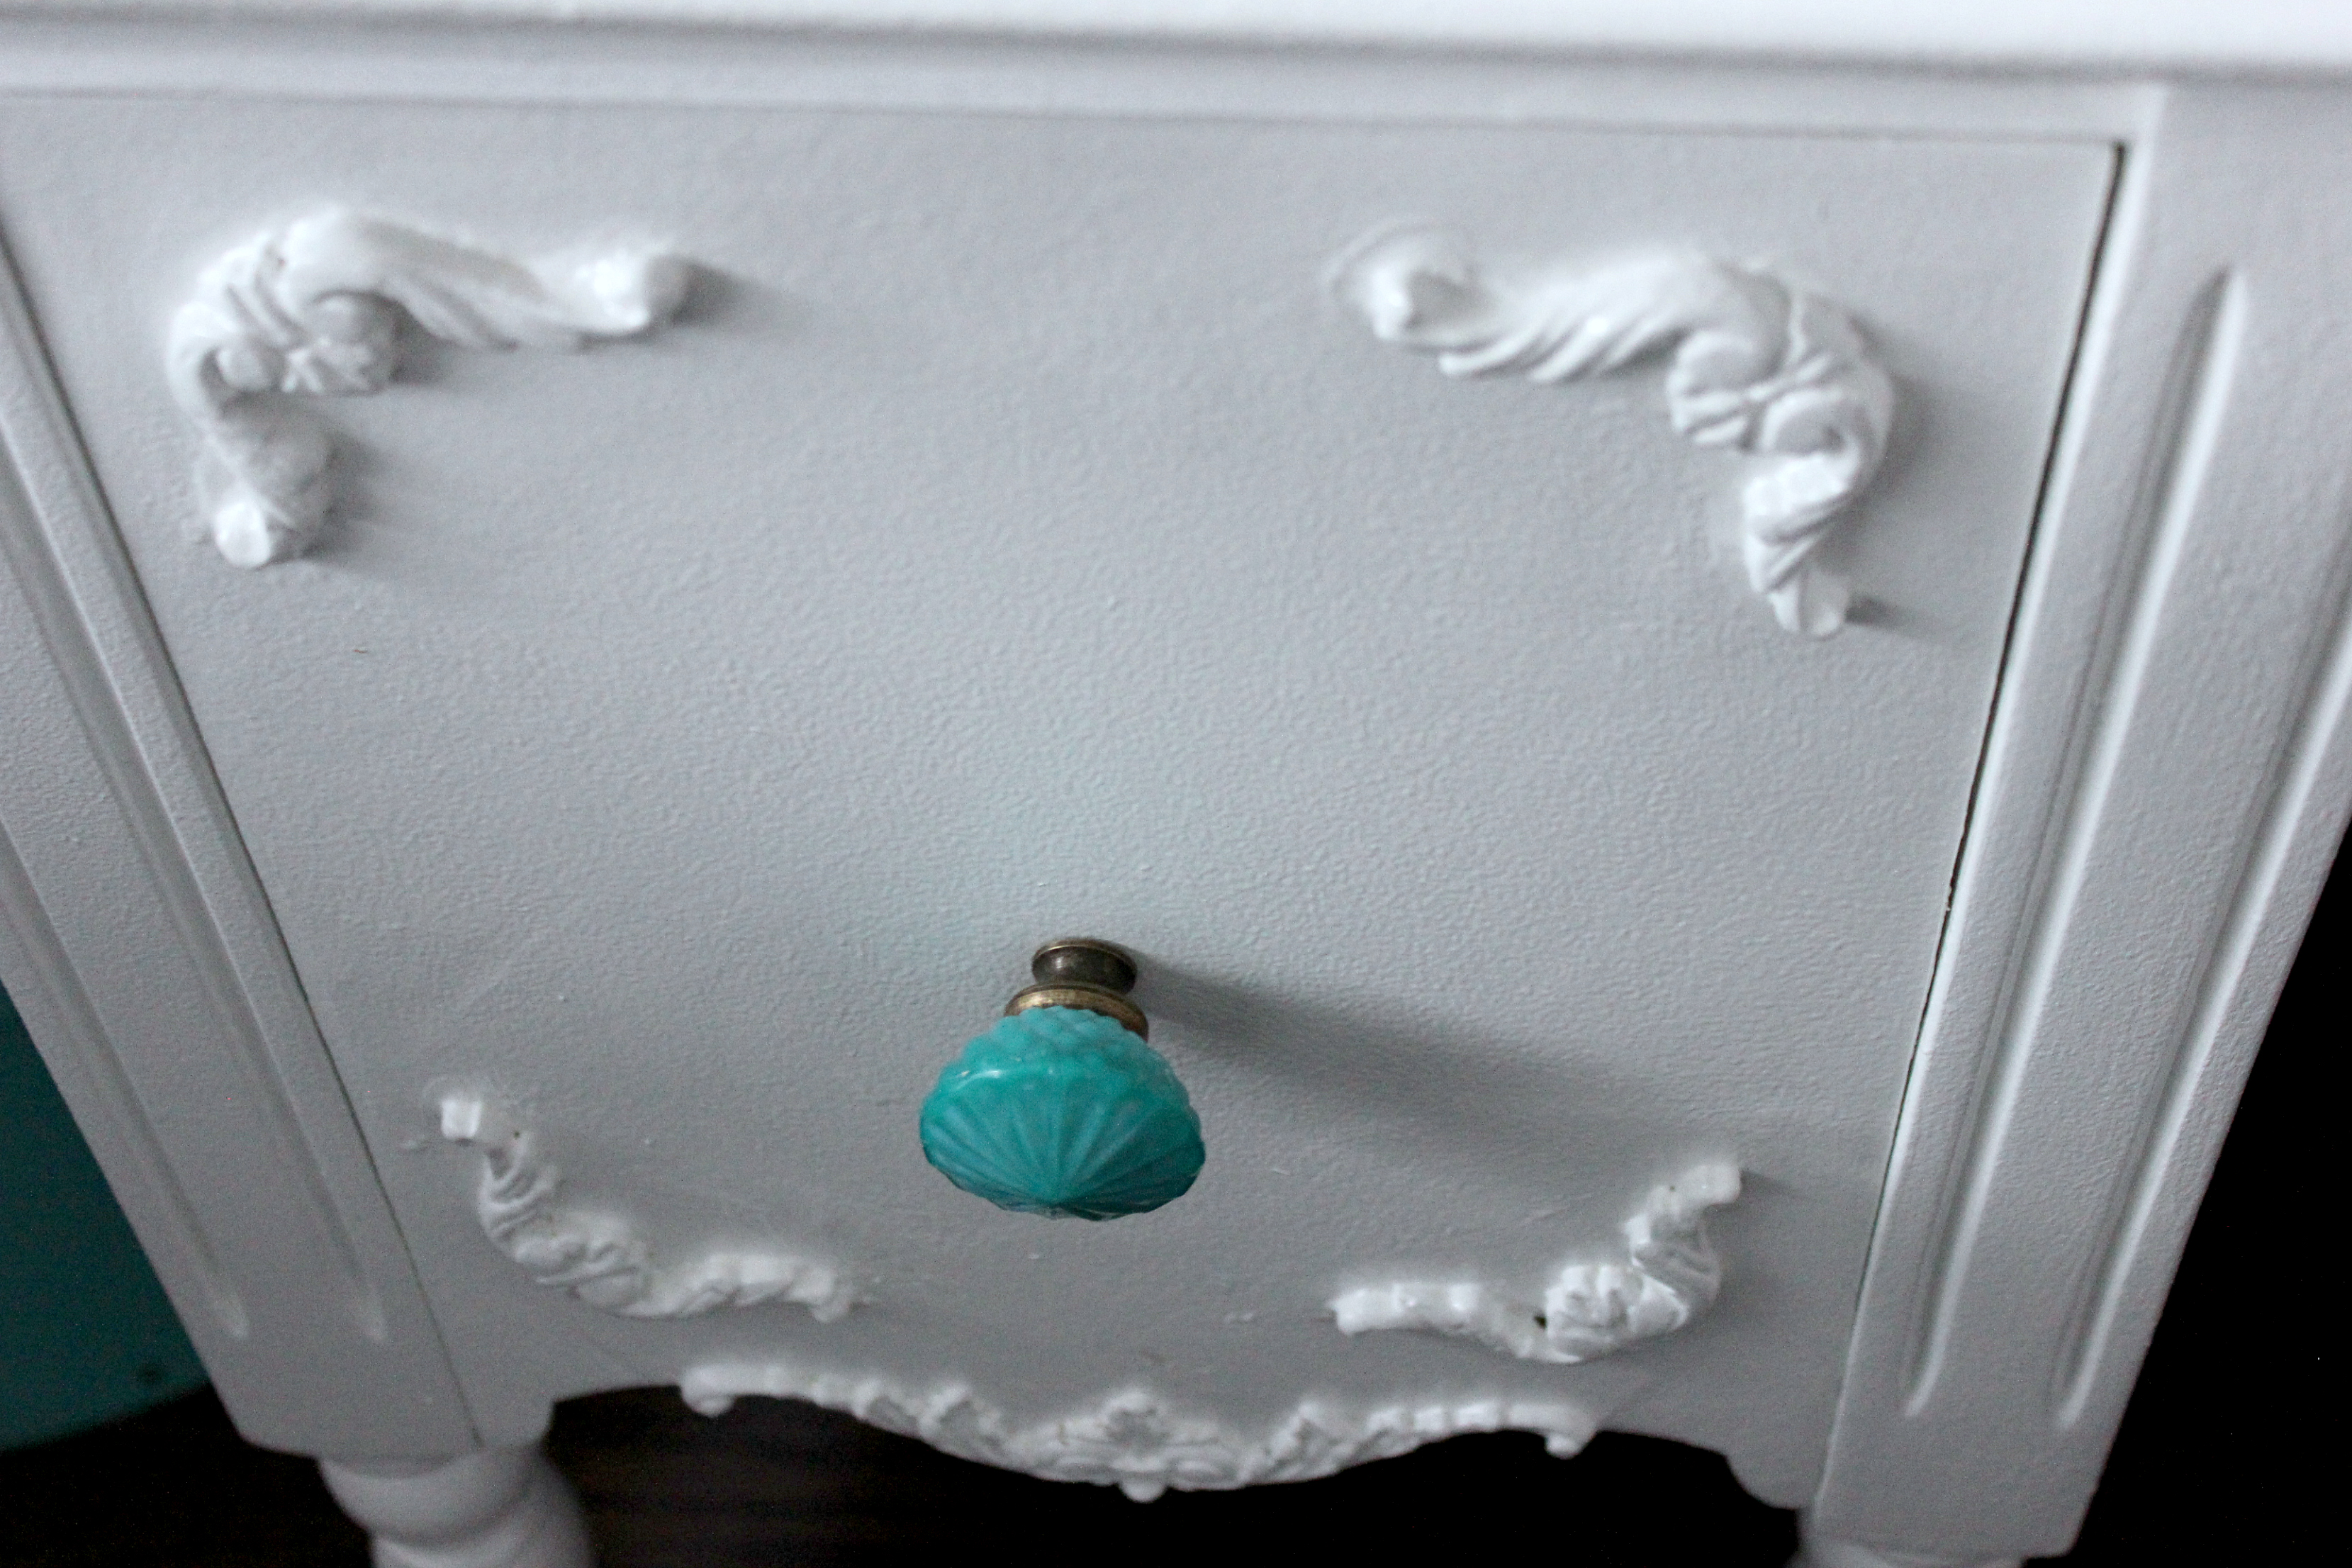
Install the new hardware. We went with a turquoise glass and oh man I am so in love. They look like jewelry!
And there it is. All done!
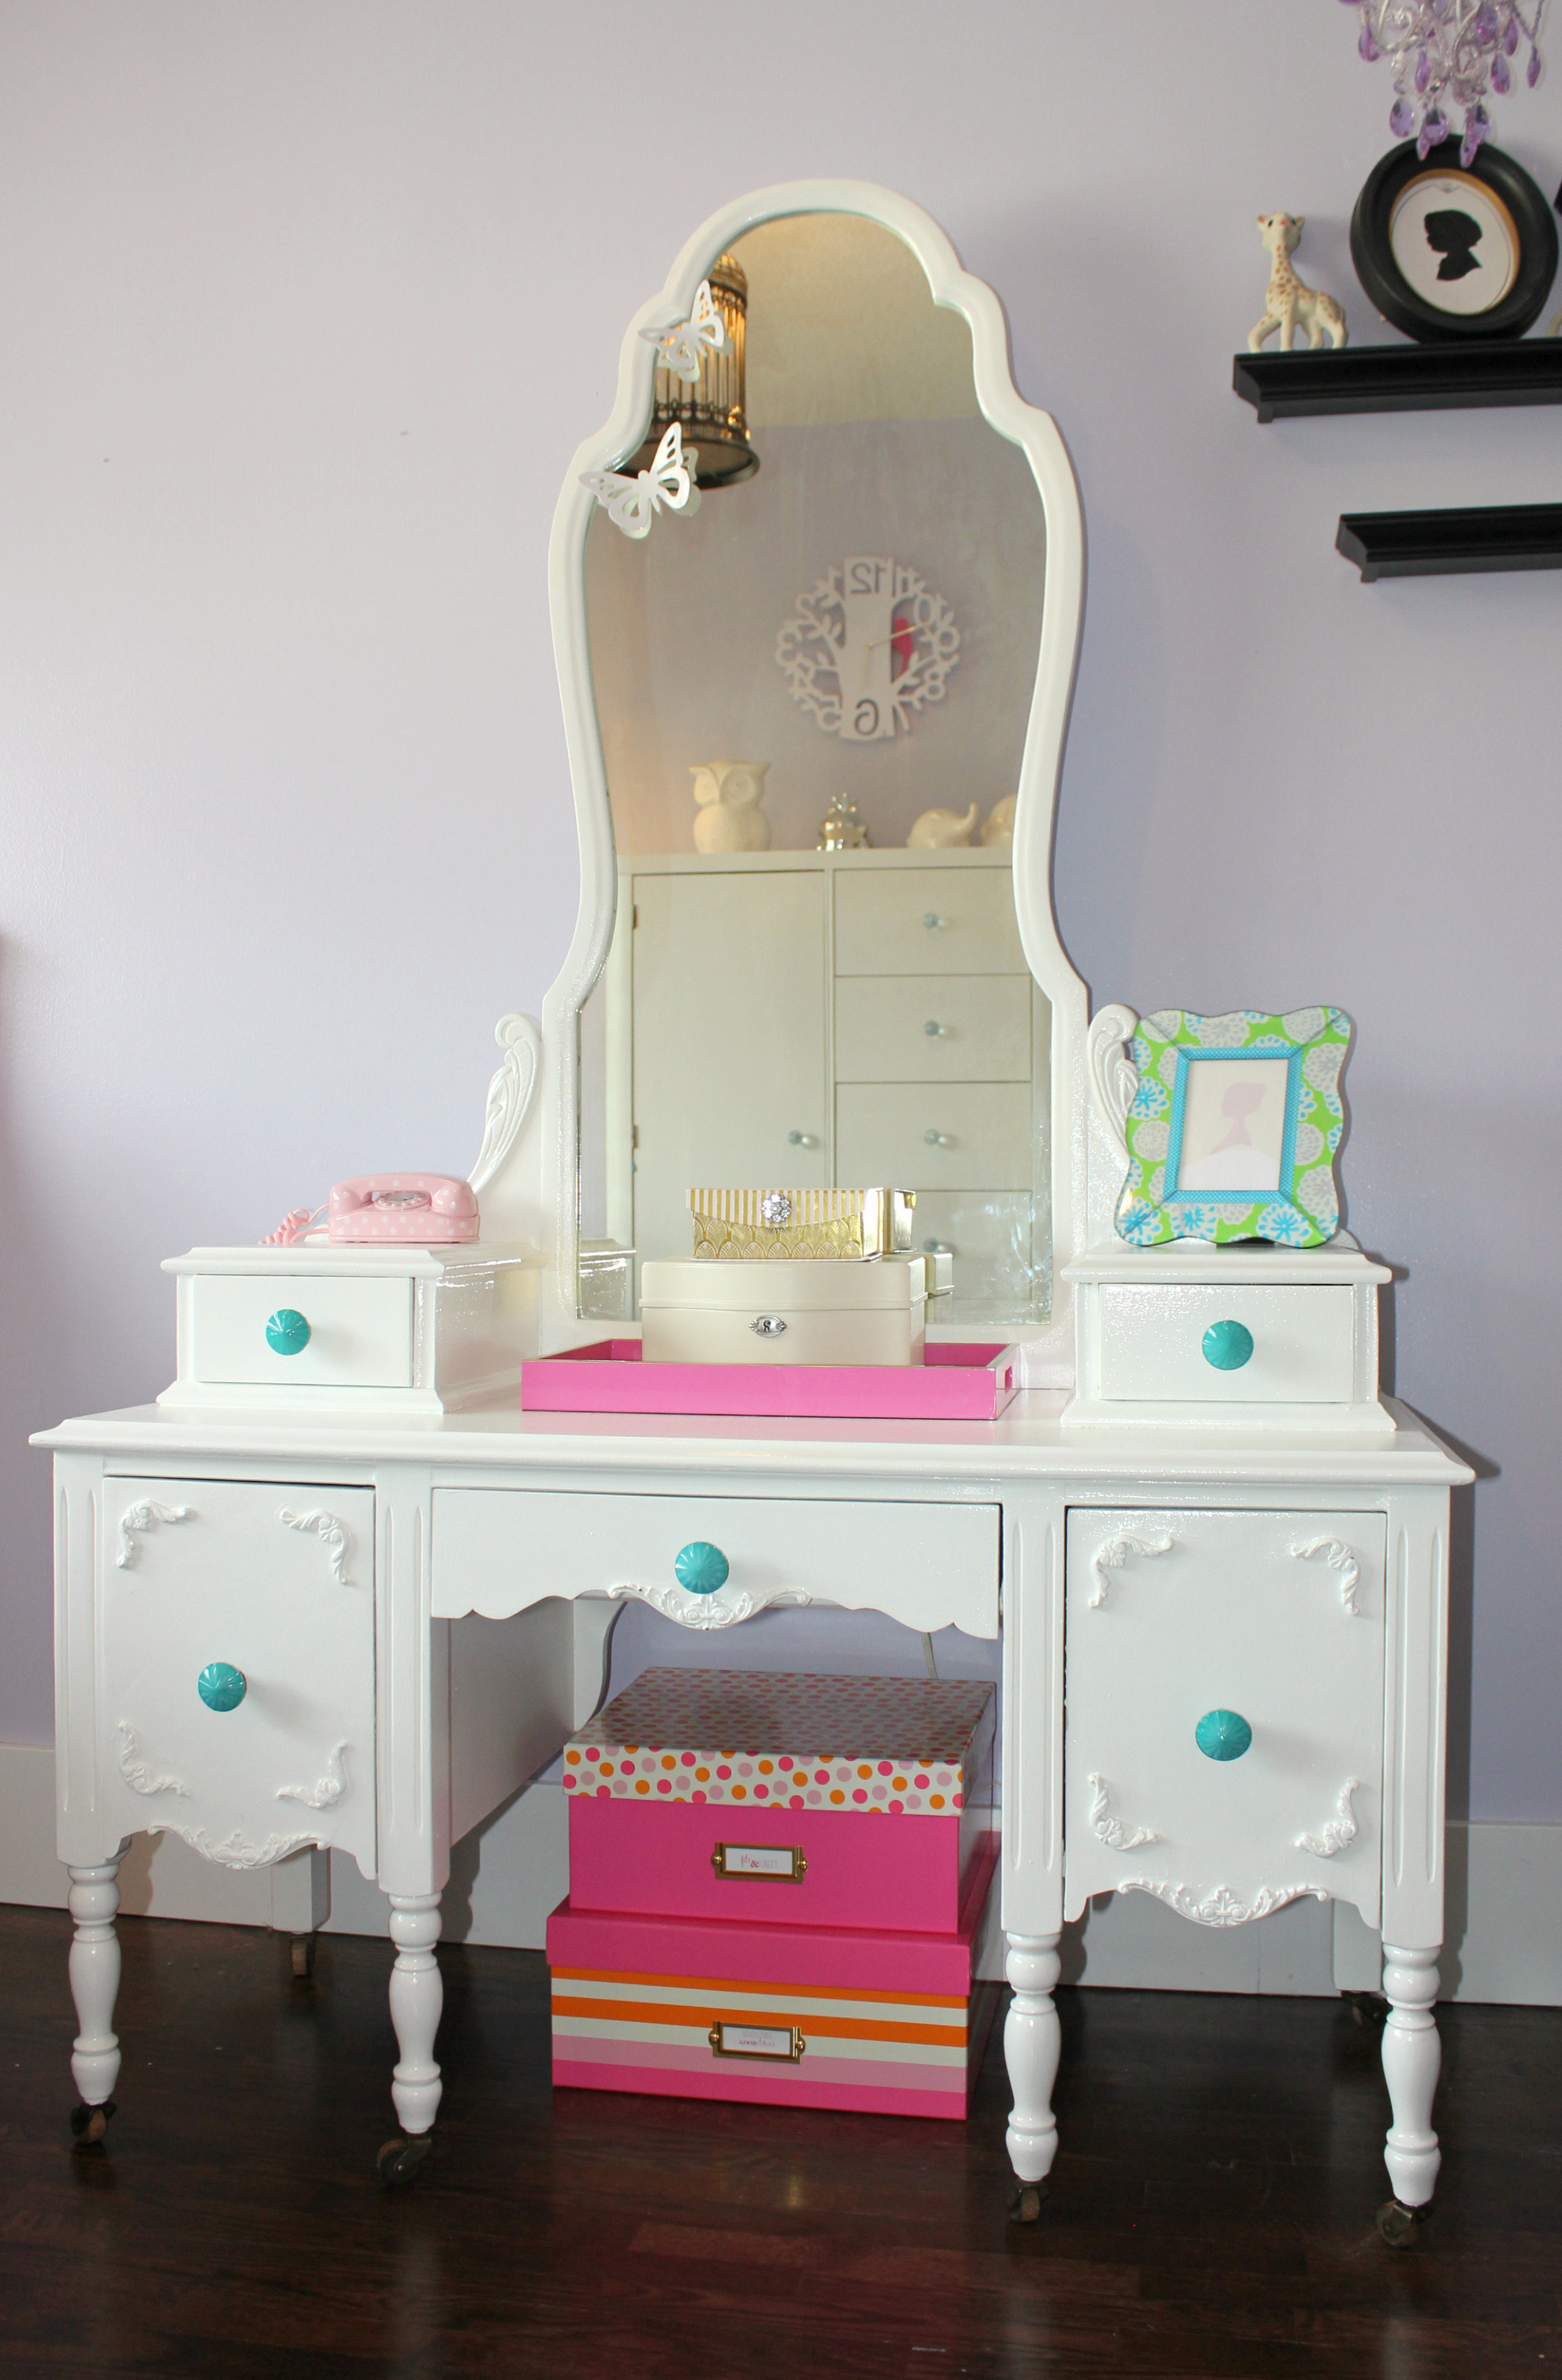
I was very pleased with this beautiful vanity, and not just because I didn’t have to do any of the sanding! Acacia especially loves that her father bought it for her. I think it also doesn’t hurt that her older sister doesn’t have one (she has her own desk instead – an antique roll top secretary, also refinished by her father). You can tell both father and daughter are proud of it and I like that! Even the following day when I walked into Acacia’s room, I found her sitting in front of her new vanity happily listening to her jewelry box play music and watching the little ballerina inside of it twirl. Appears I am not the only one pleased.
The post Refurbished Vanity DIY appeared first on Creative Sides.
]]>The post DIY Birdcage Chandelier appeared first on Creative Sides.
]]>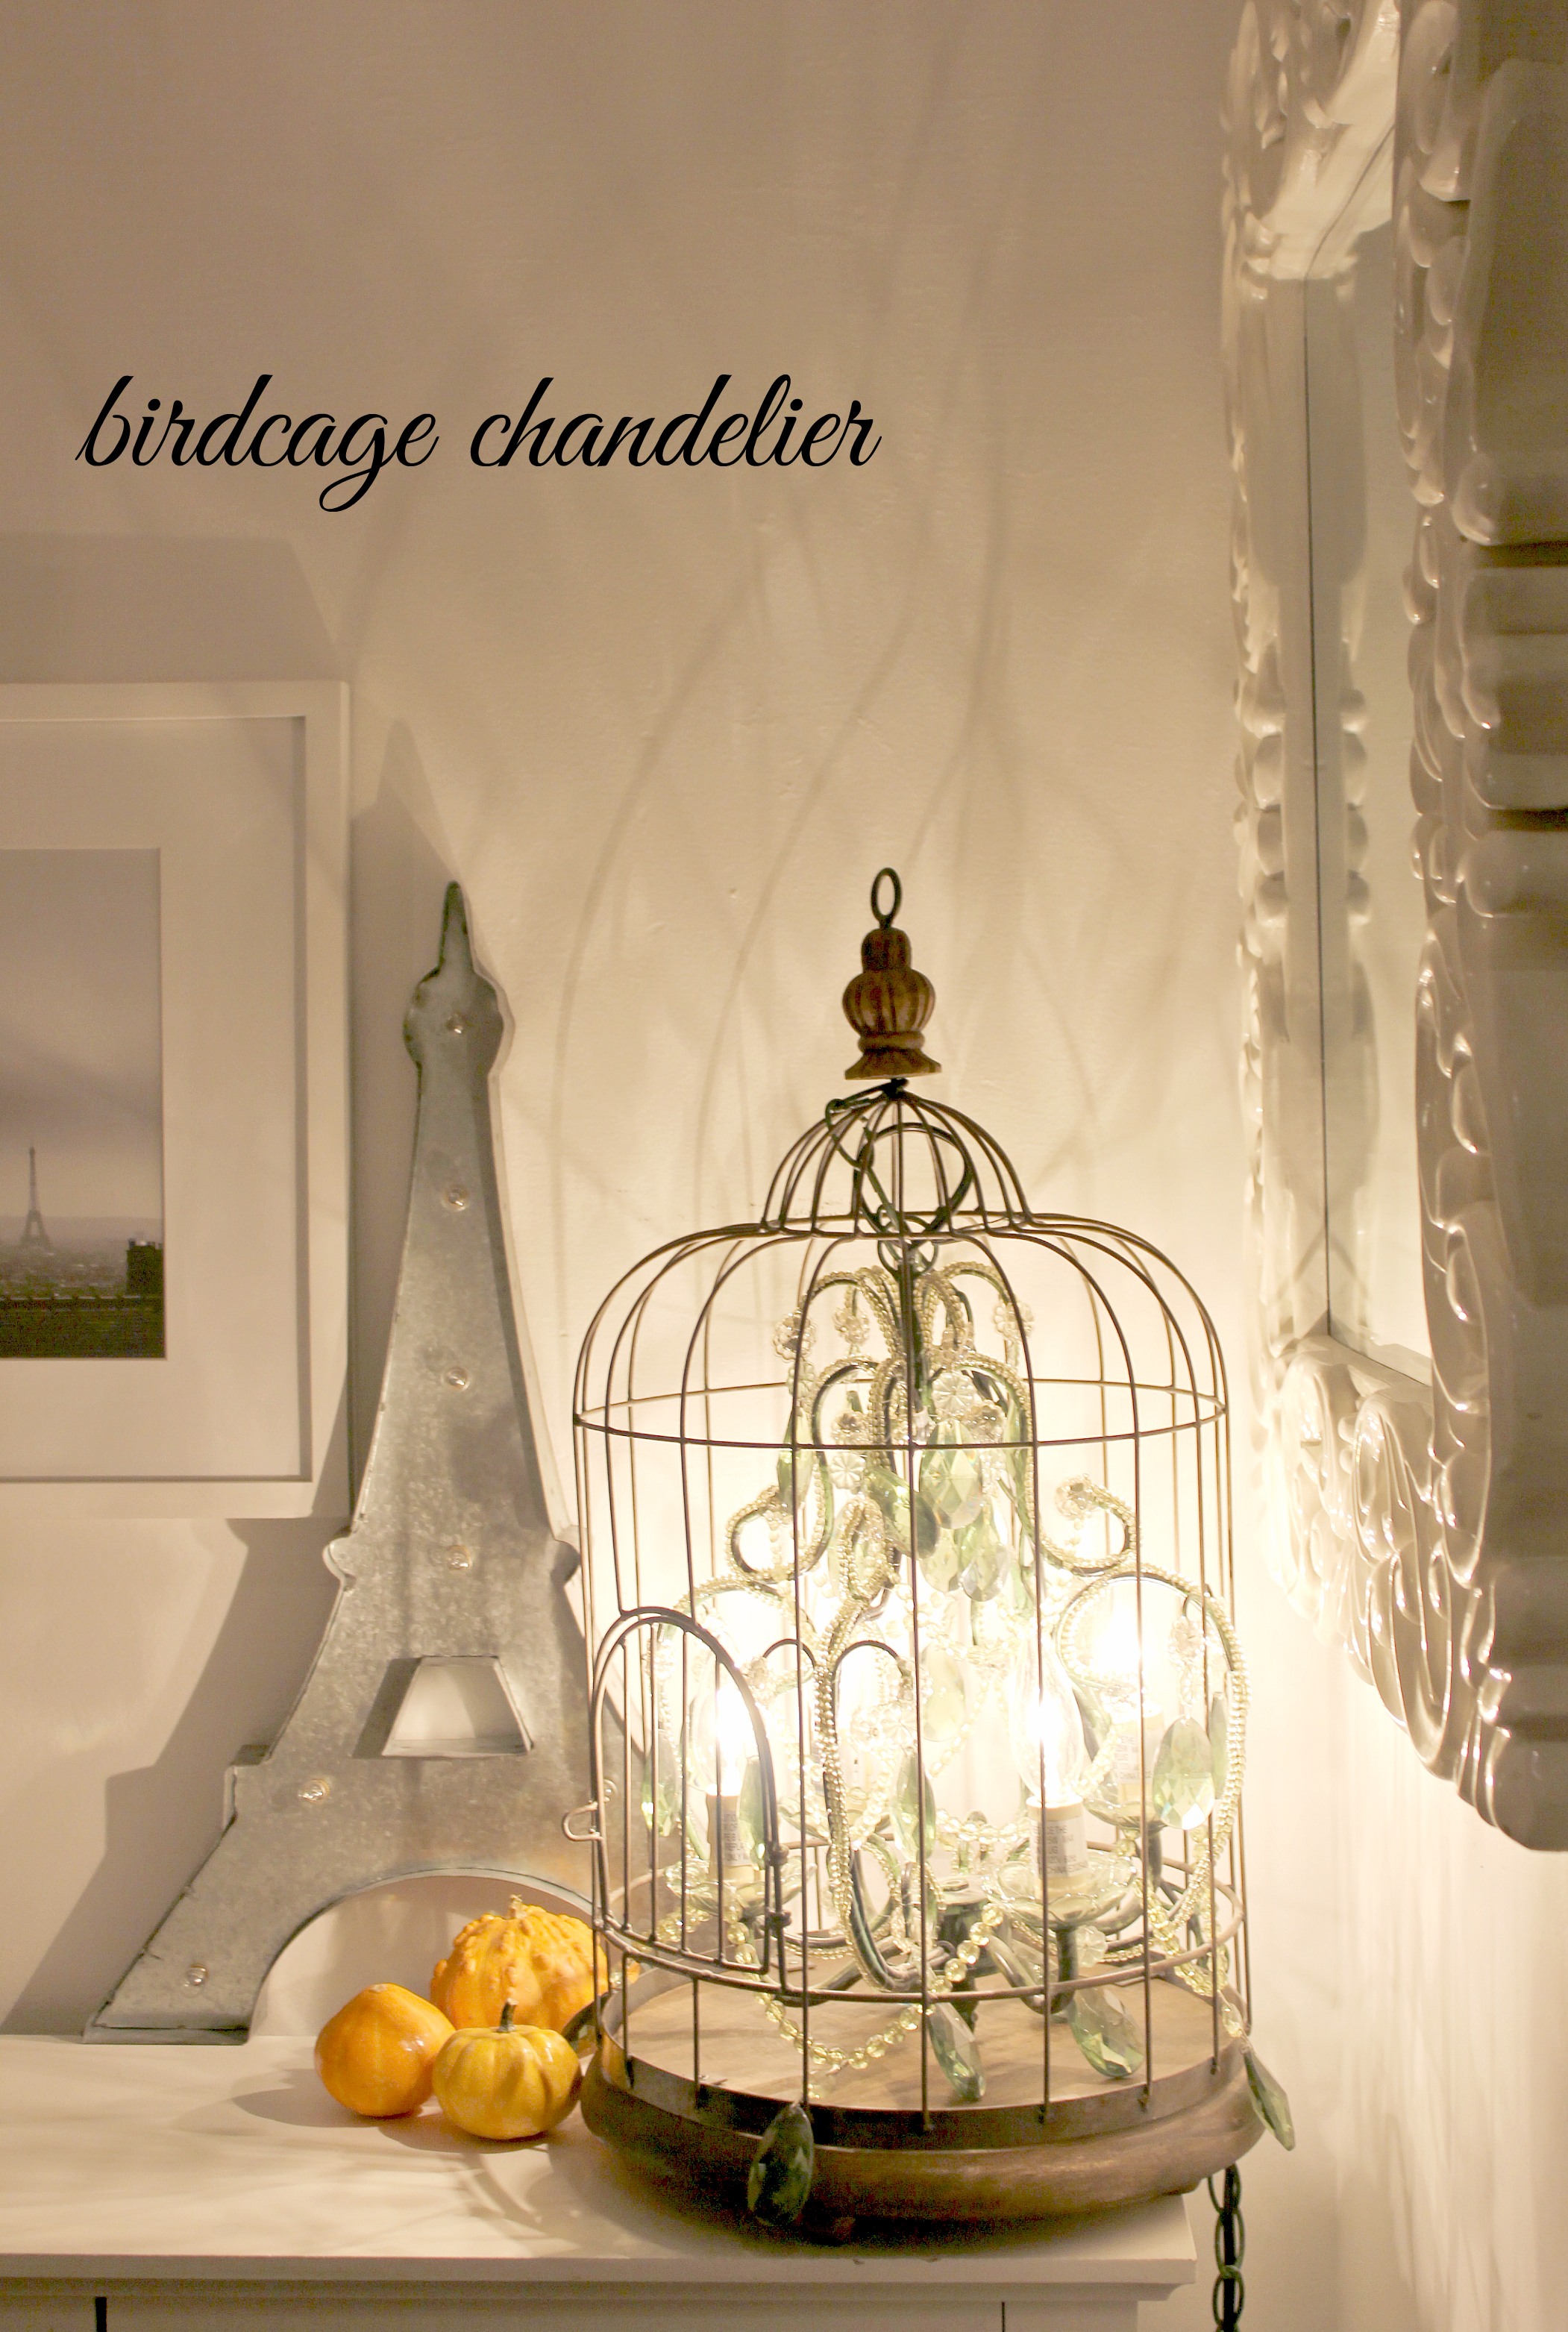
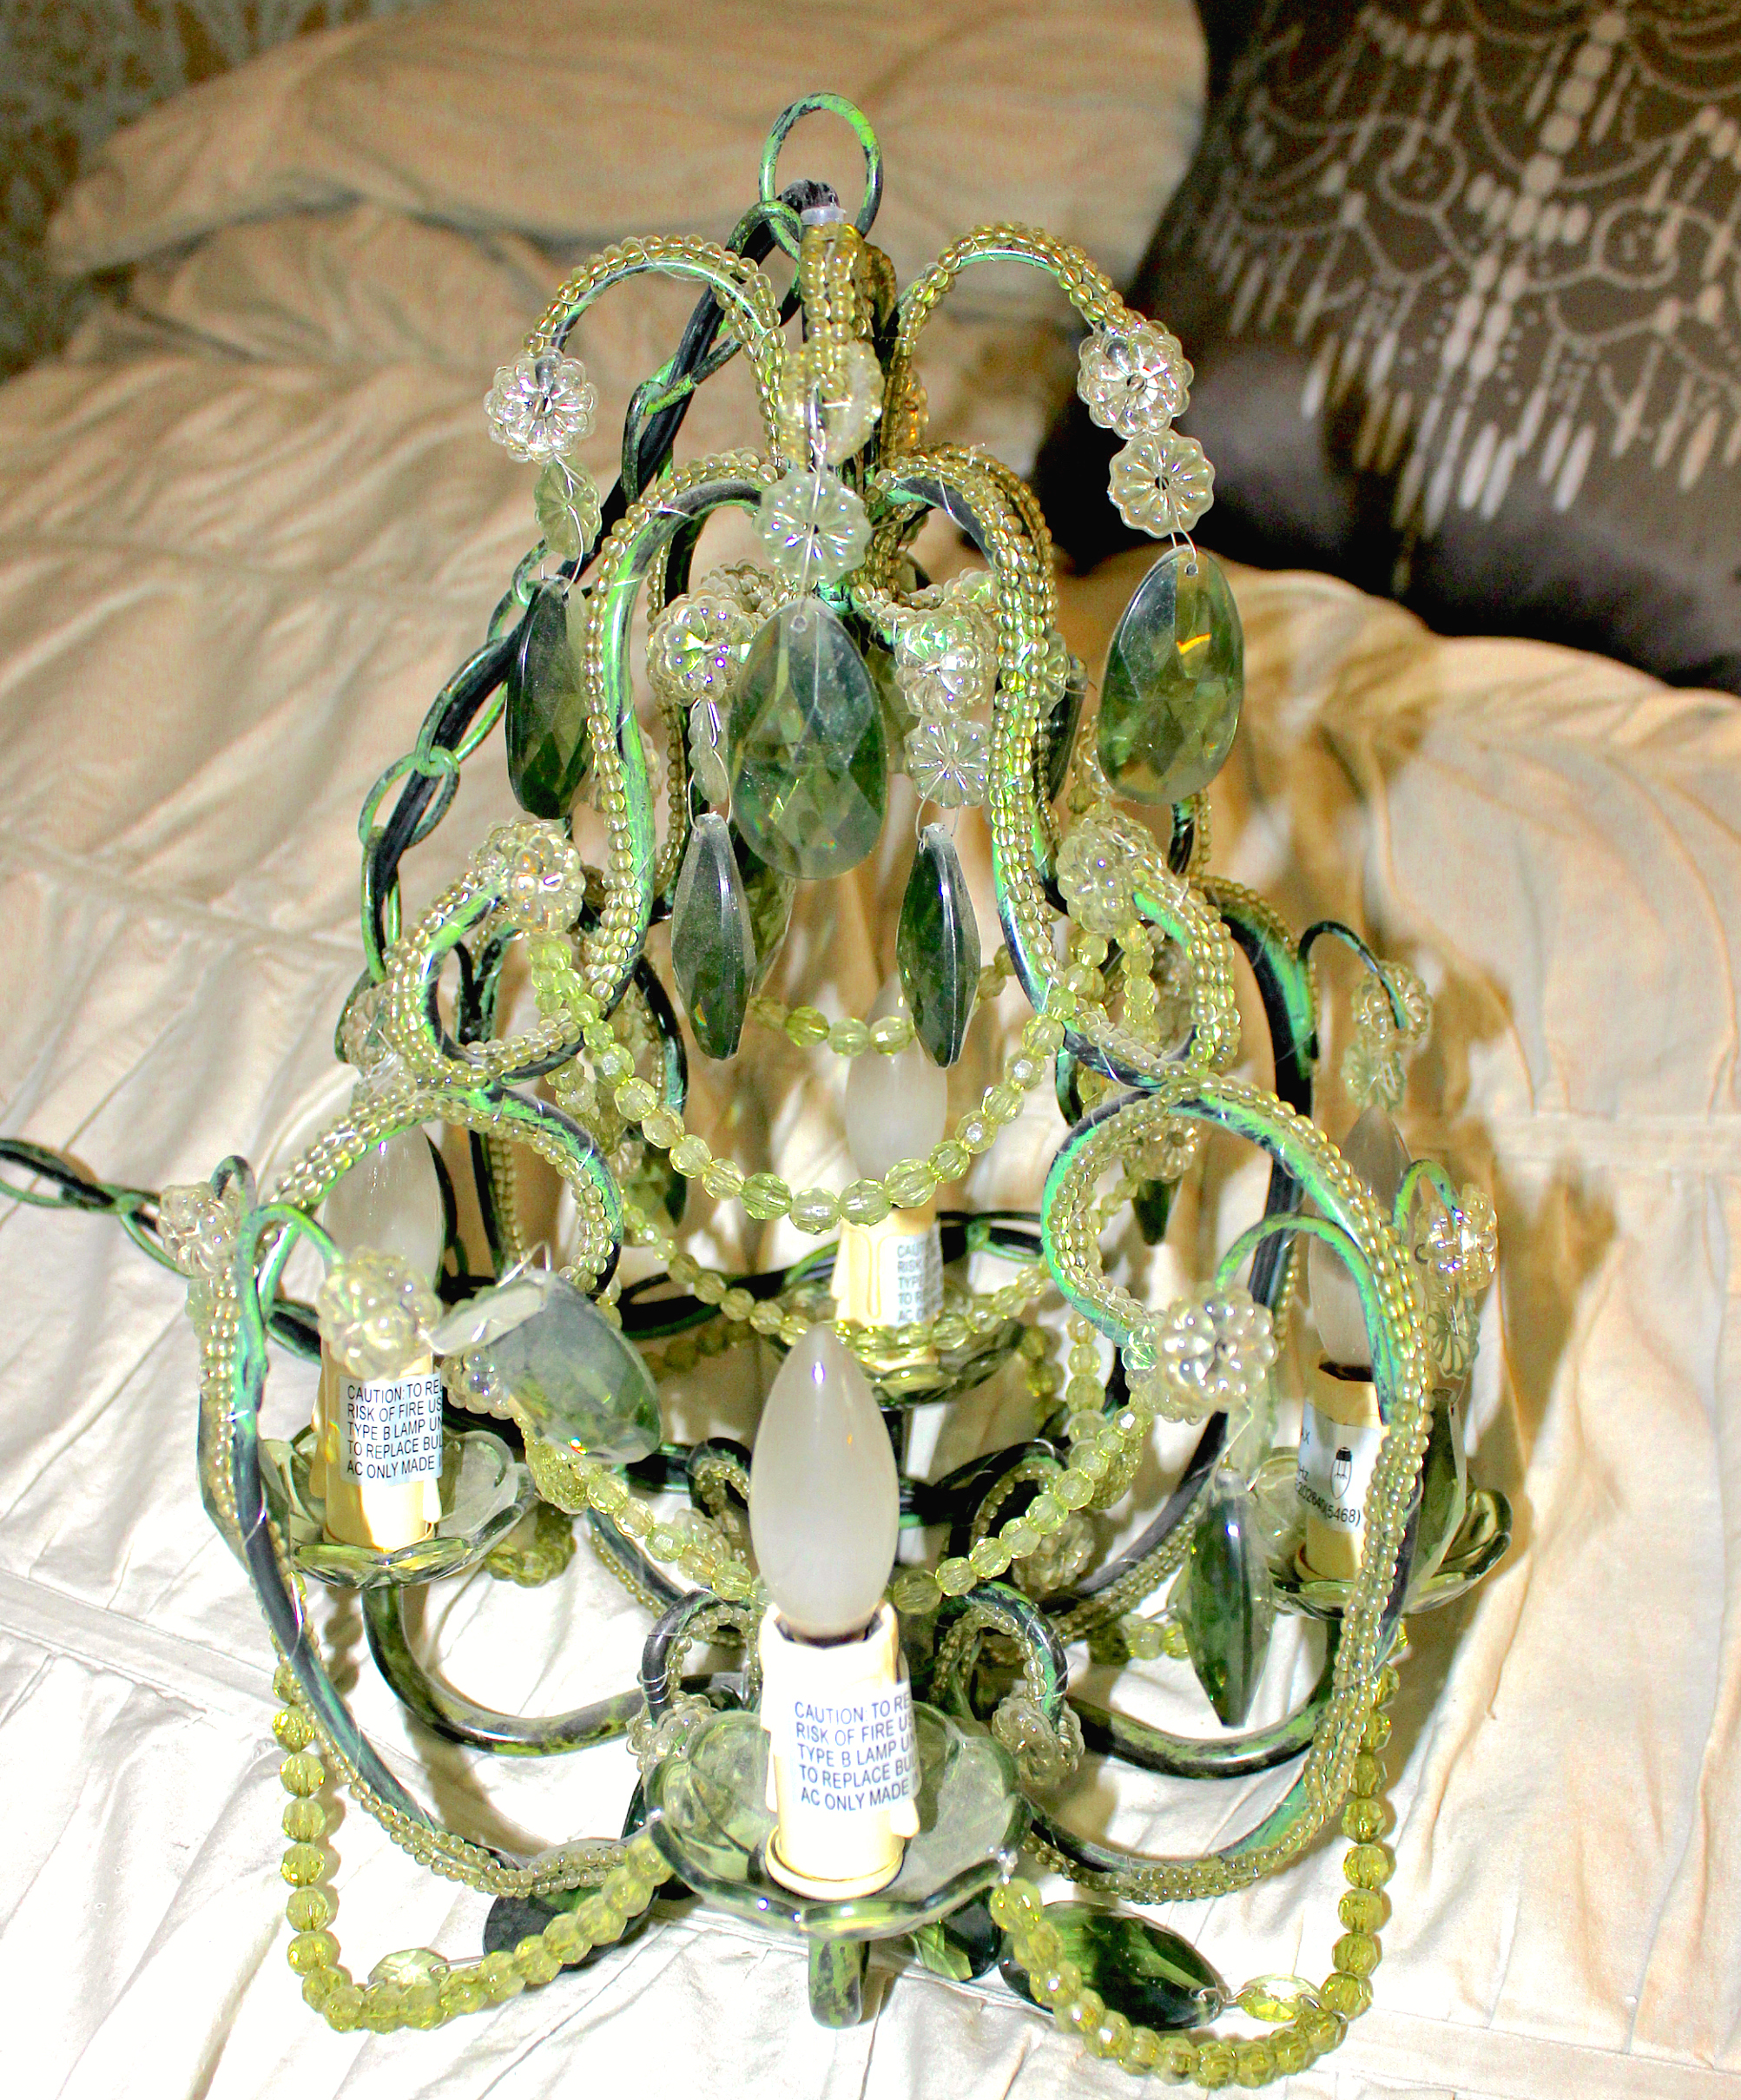
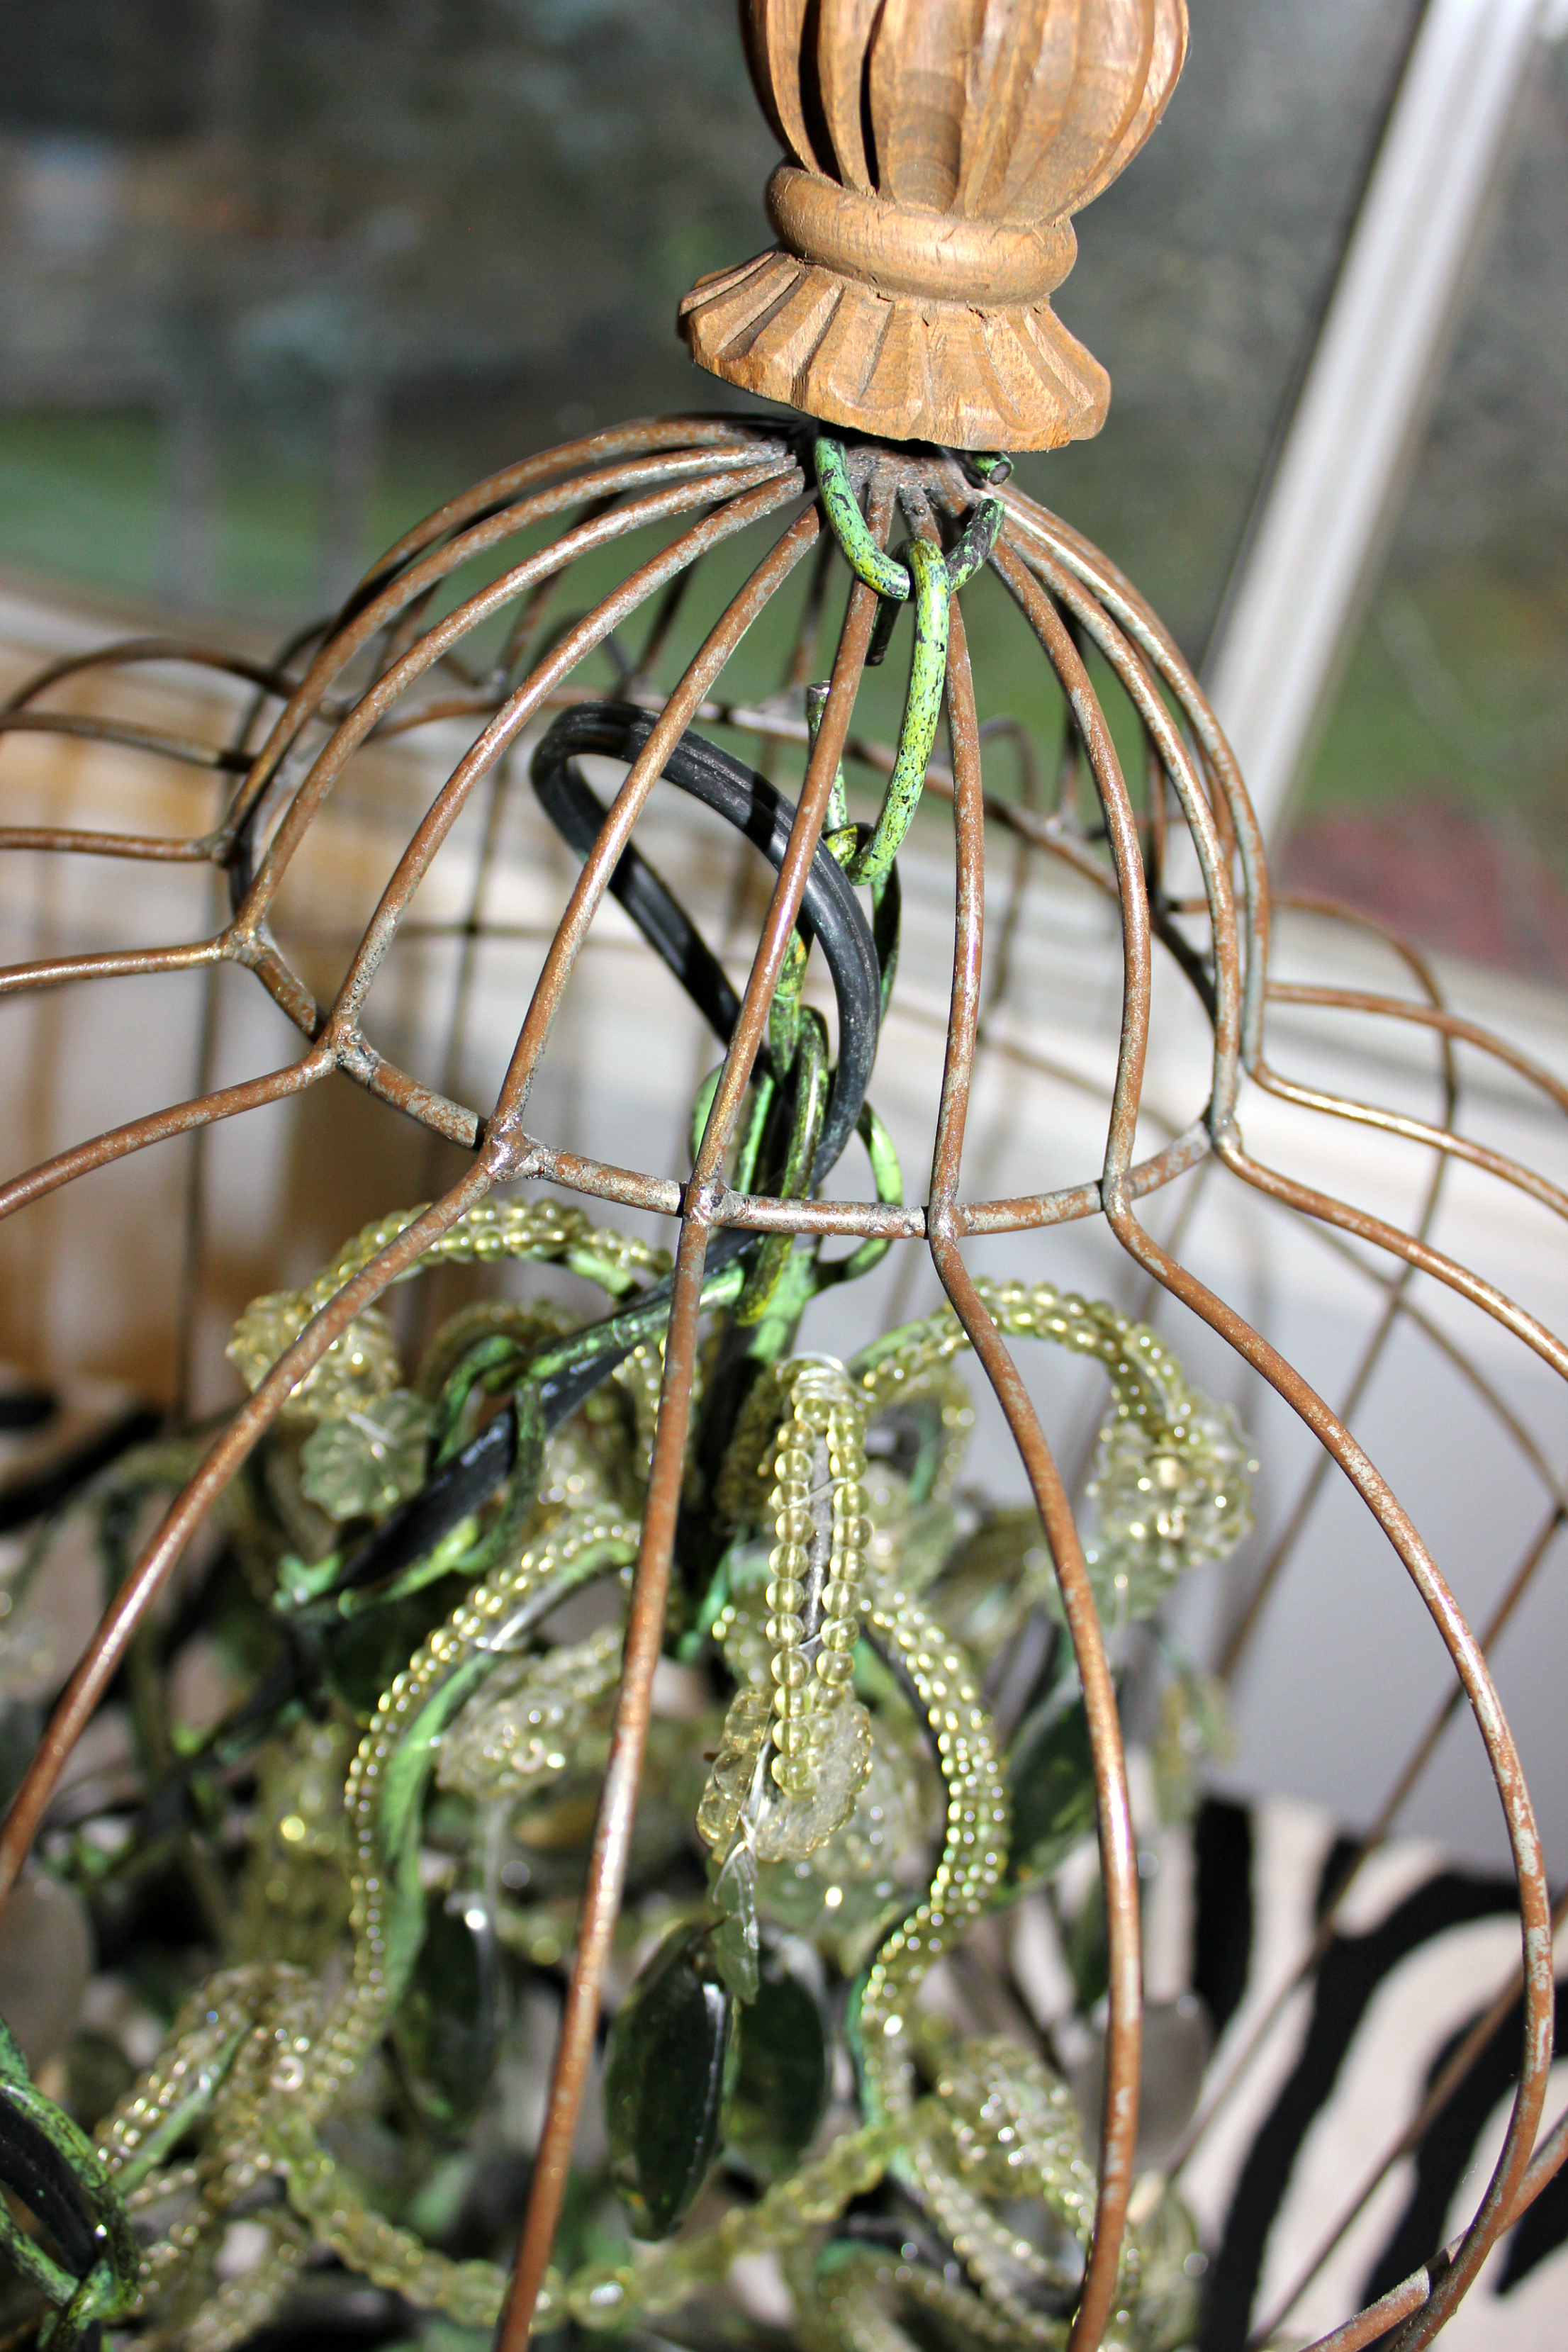
Sometimes the only thing I wish for more than extra wall space in our home (for more photos of course), is a larger need for chandeliers in my life. I have a rather insatiable love of chandeliers and photos and tufted furniture and monograms and and and….need I really go on? Basically, I just love decor and beautiful, unique things. My latest obsession interest has been in the form of birdcages, especially when paired with lighting. Ever since we fashioned the overhead light in our youngest’s room out of a birdcage, my interest has grown. You might think that I would have gotten it out of my system….but if one is good, might more be even better! Why not combine a forgotten chandelier and a new found birdcage? Why not indeed. I mean if the all knowing and ever impressive Restoration Hardware thought it a good idea and did it, why couldn’t I?! Since I had no convincible argument to not create a birdcage chandelier, here are the 12 steps I went through in order to do so.
What I used:
Chandelier – green acrylic 18″ x 12″ chandelier found years ago at HomeSense
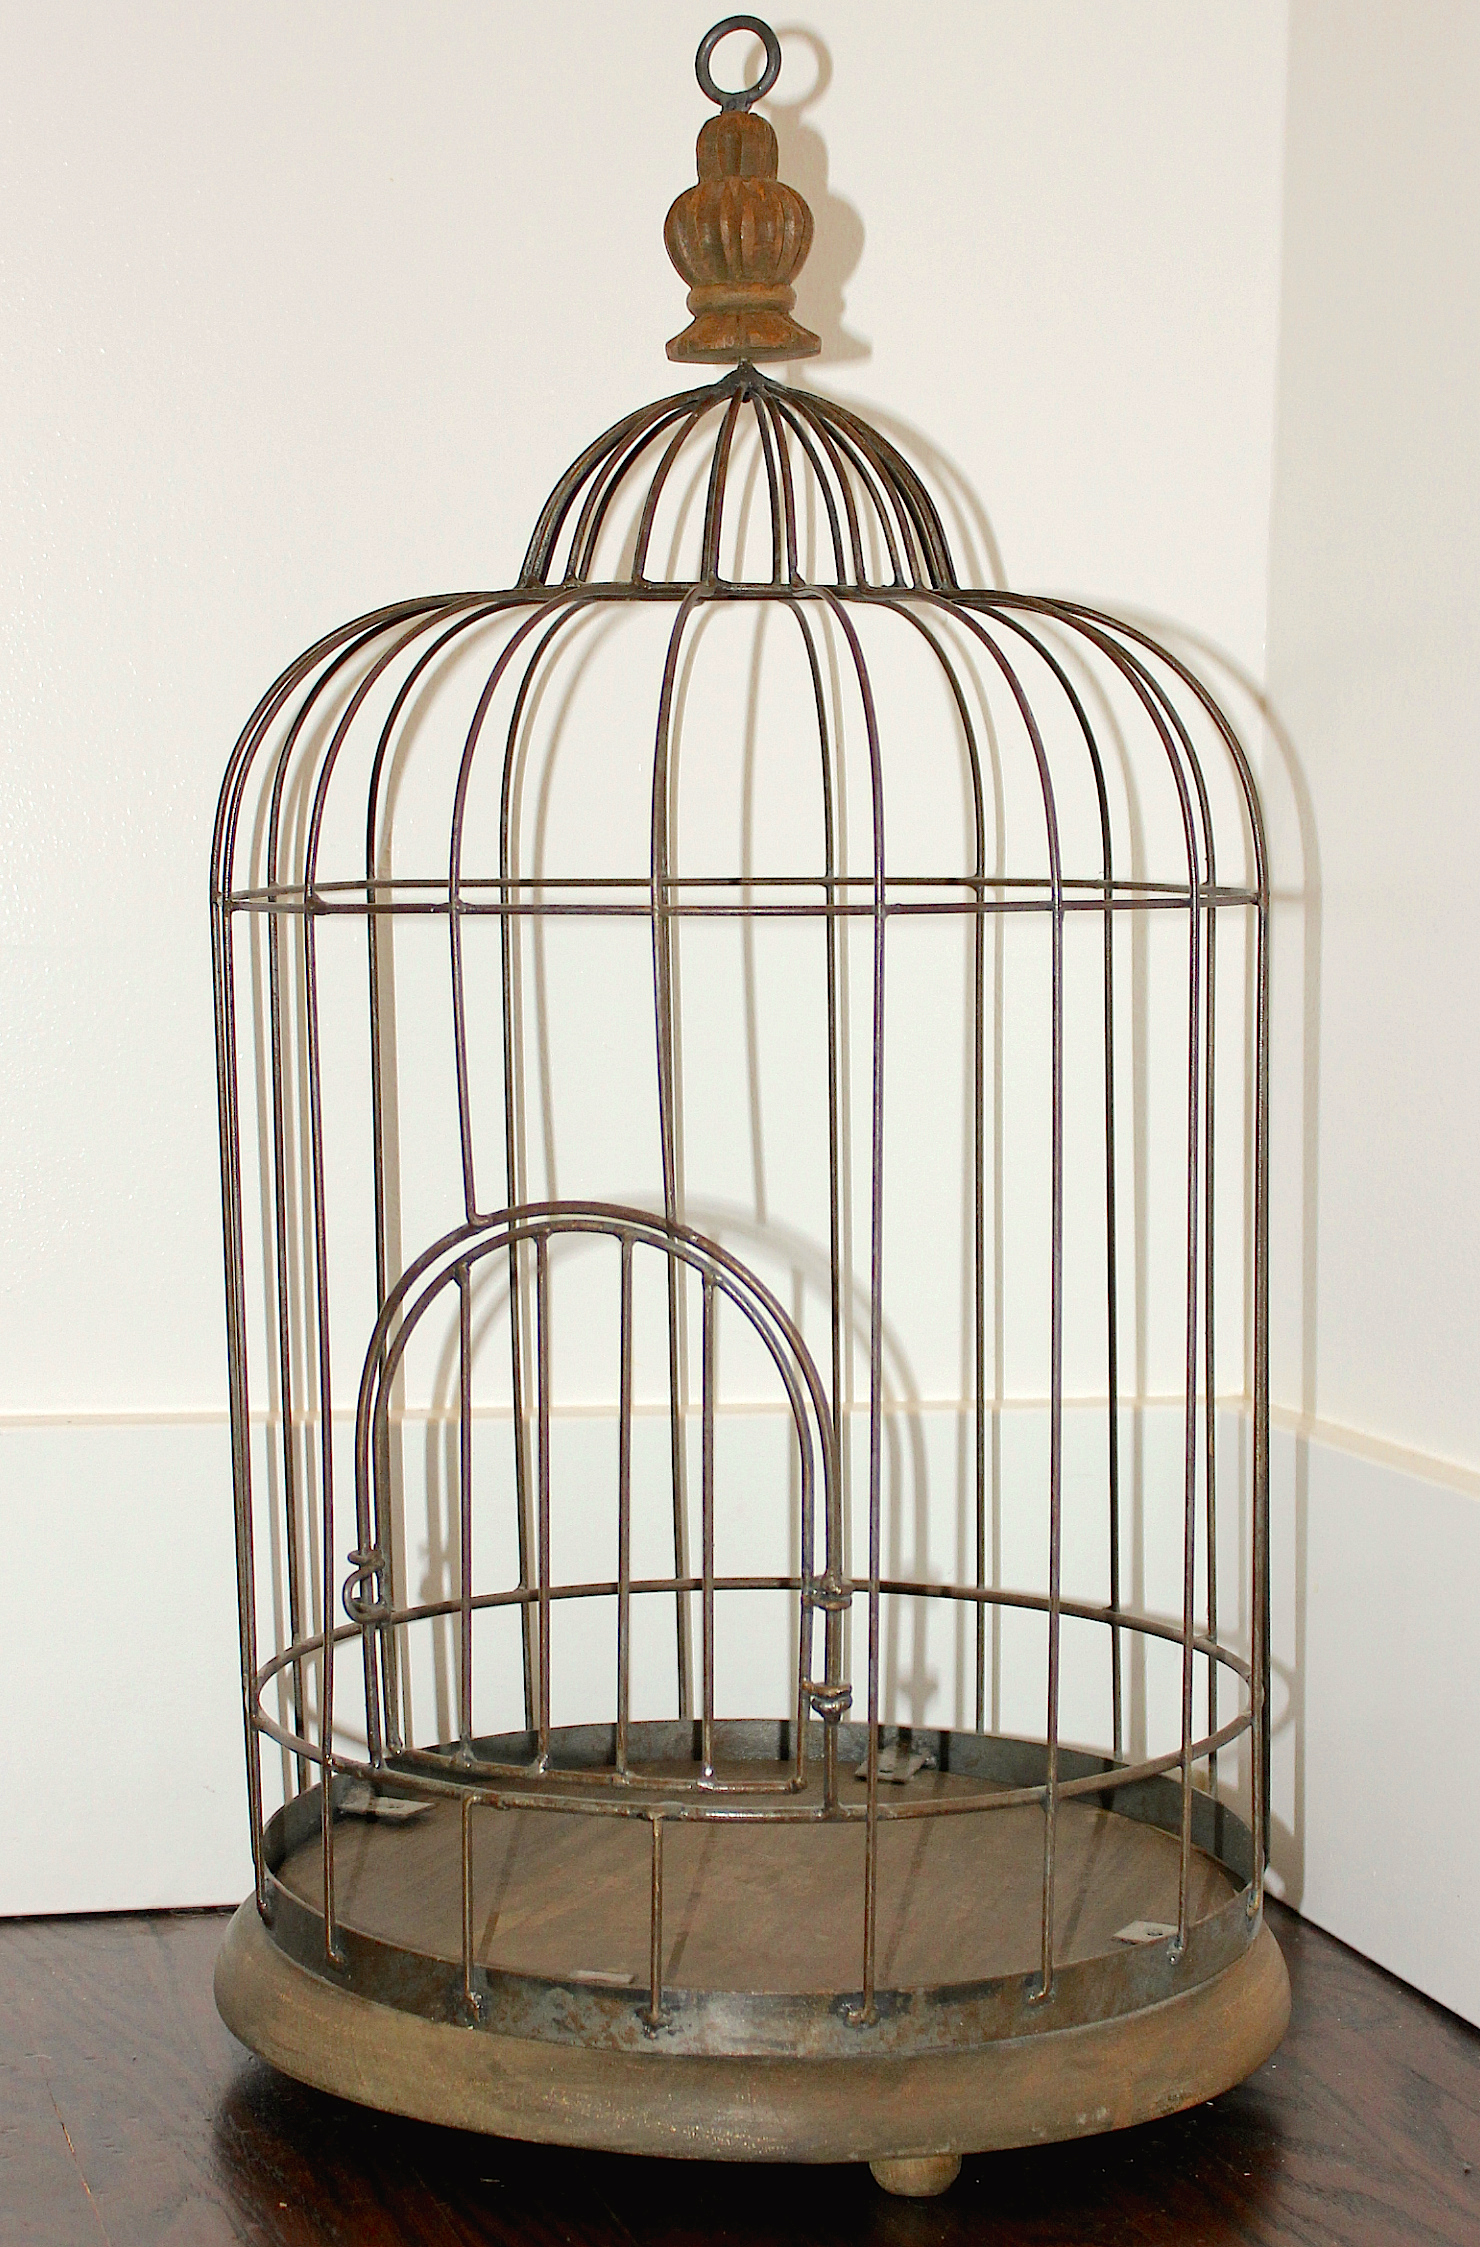
Birdcage (large enough to house chandelier) – found more recently at HomeSense
Screwdriver (to remove base)
Pliers (2 pairs work best)
Bendable Wire (if needed to centre chandelier in cage)
DIY Birdcage Chandelier Instructions
Step 1: Select a chandelier and remove the light bulbs if you don’t want to have to replace them all. Ours had originally been used in our old place, and had just stayed packed away in box since we moved. This particular style plugged into an electrical outlet and so I didn’t have any extra electrical components to consider.
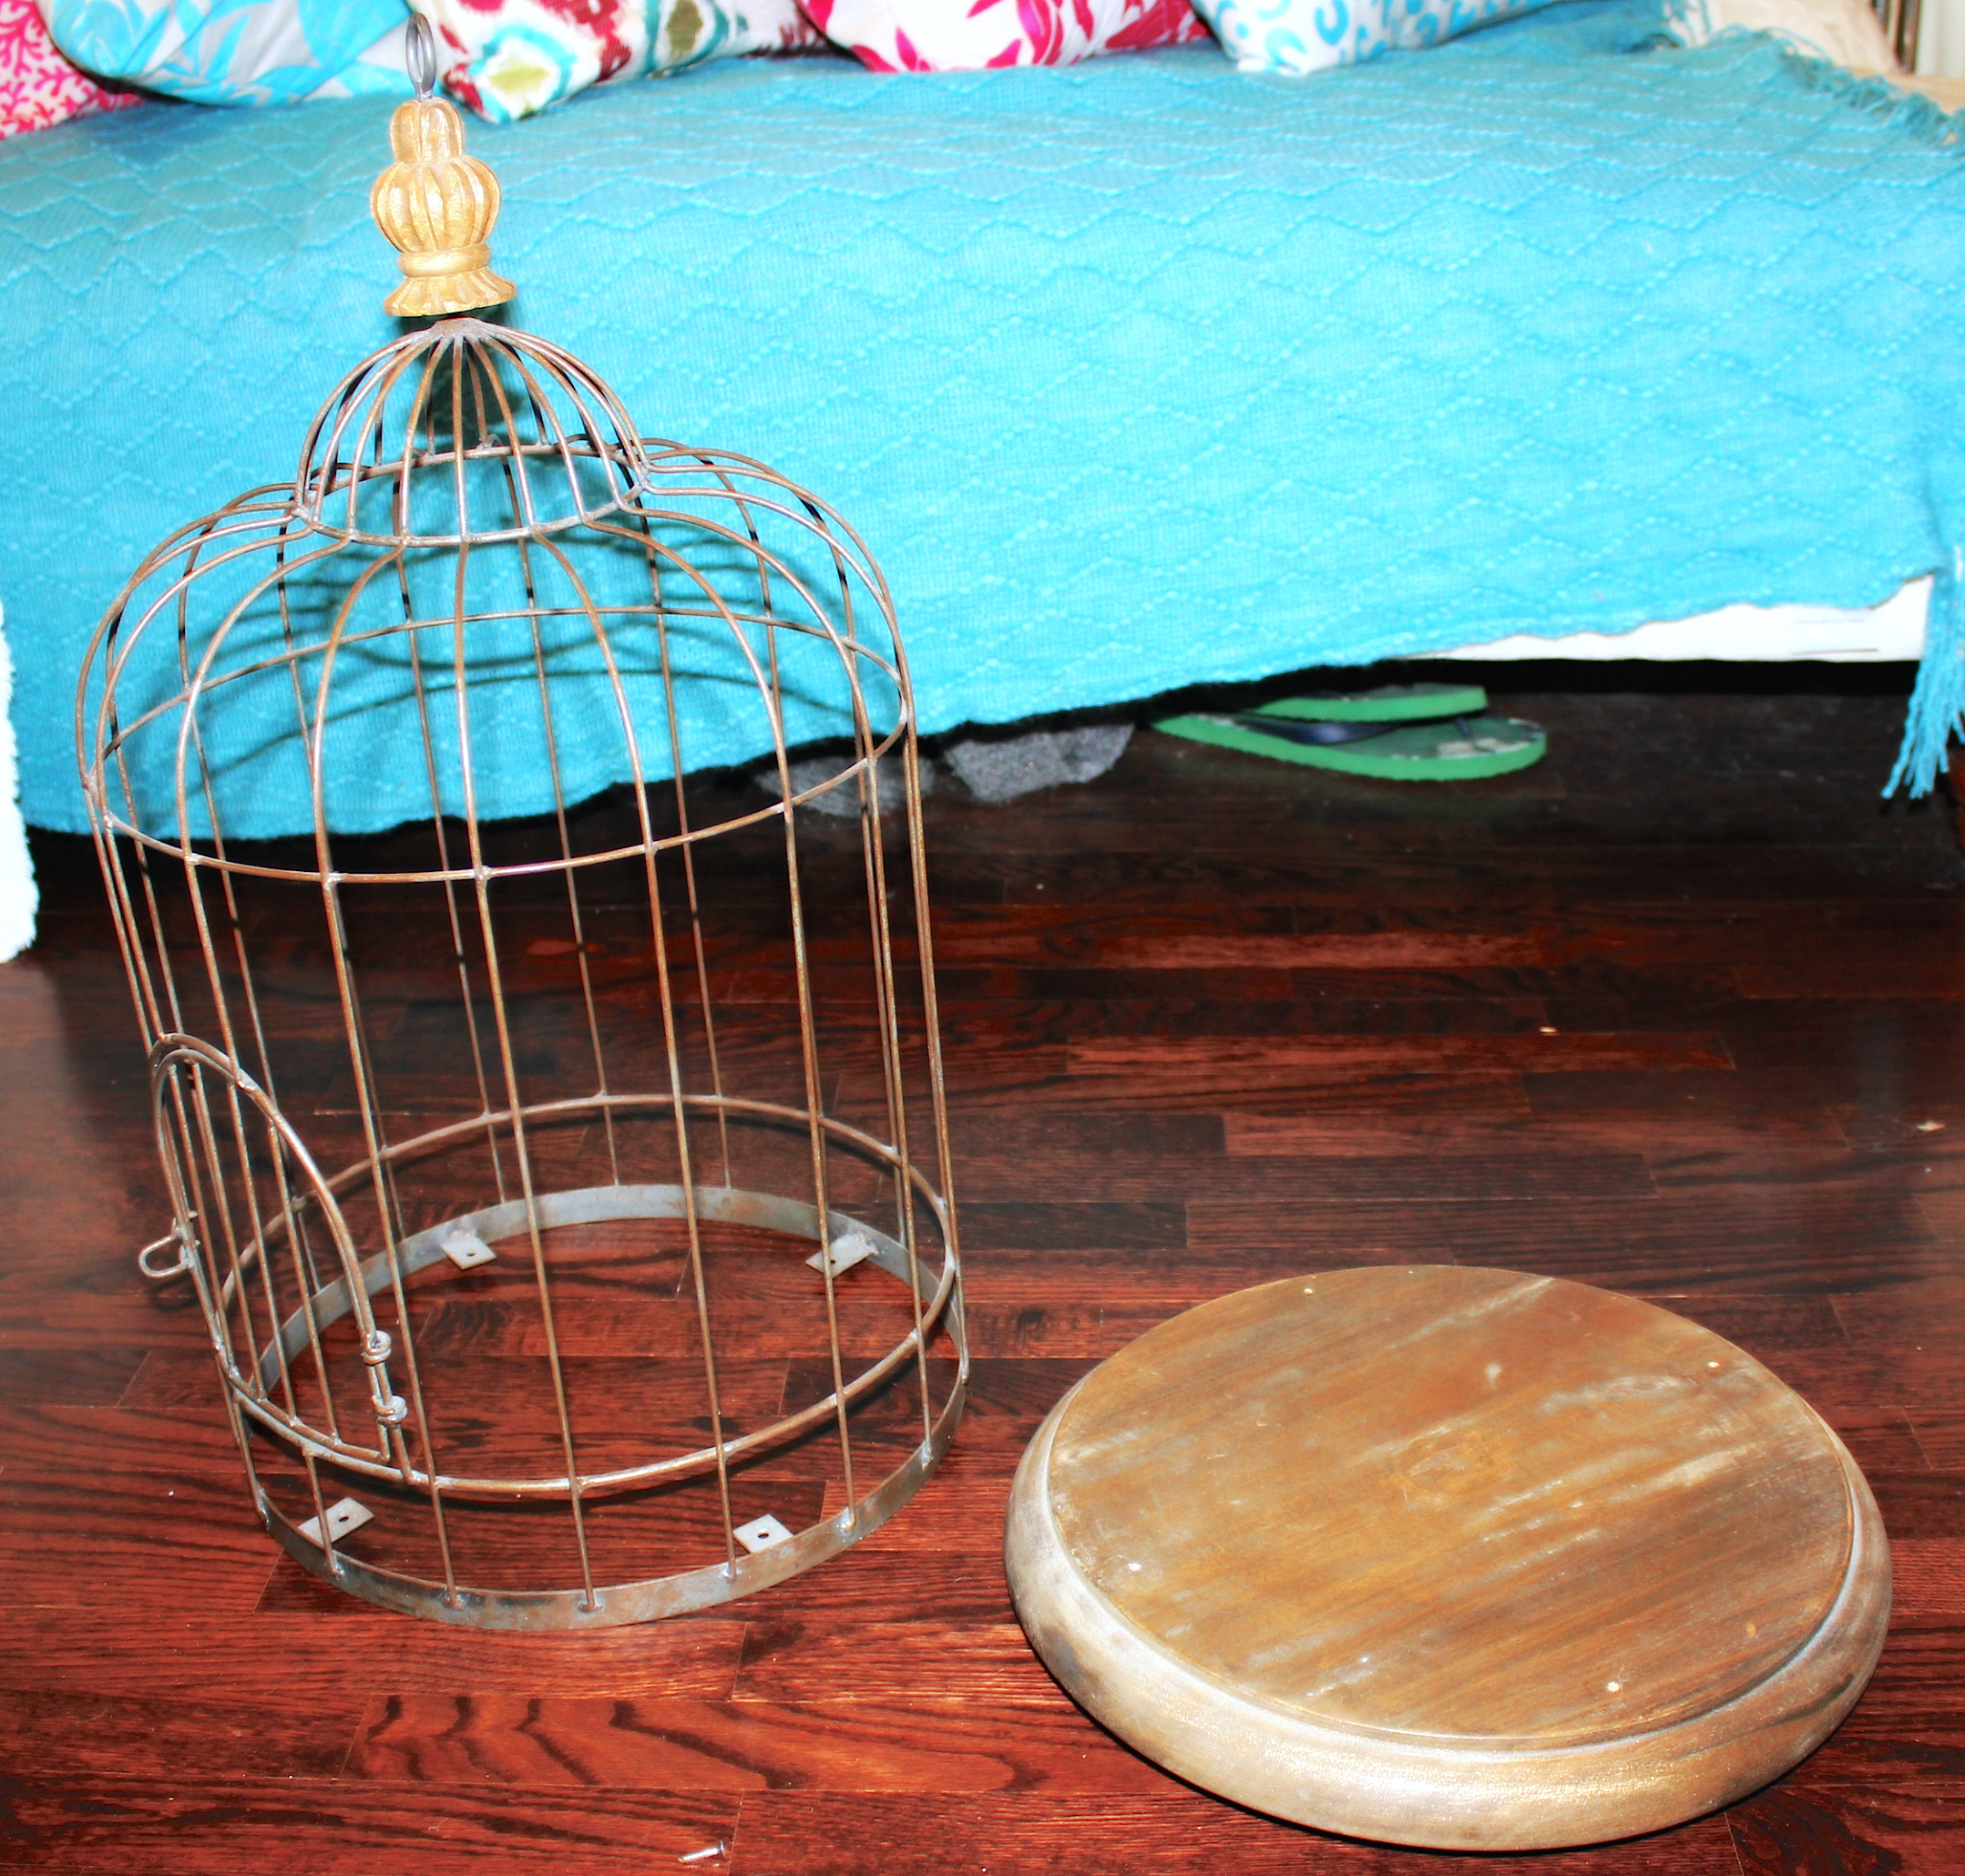
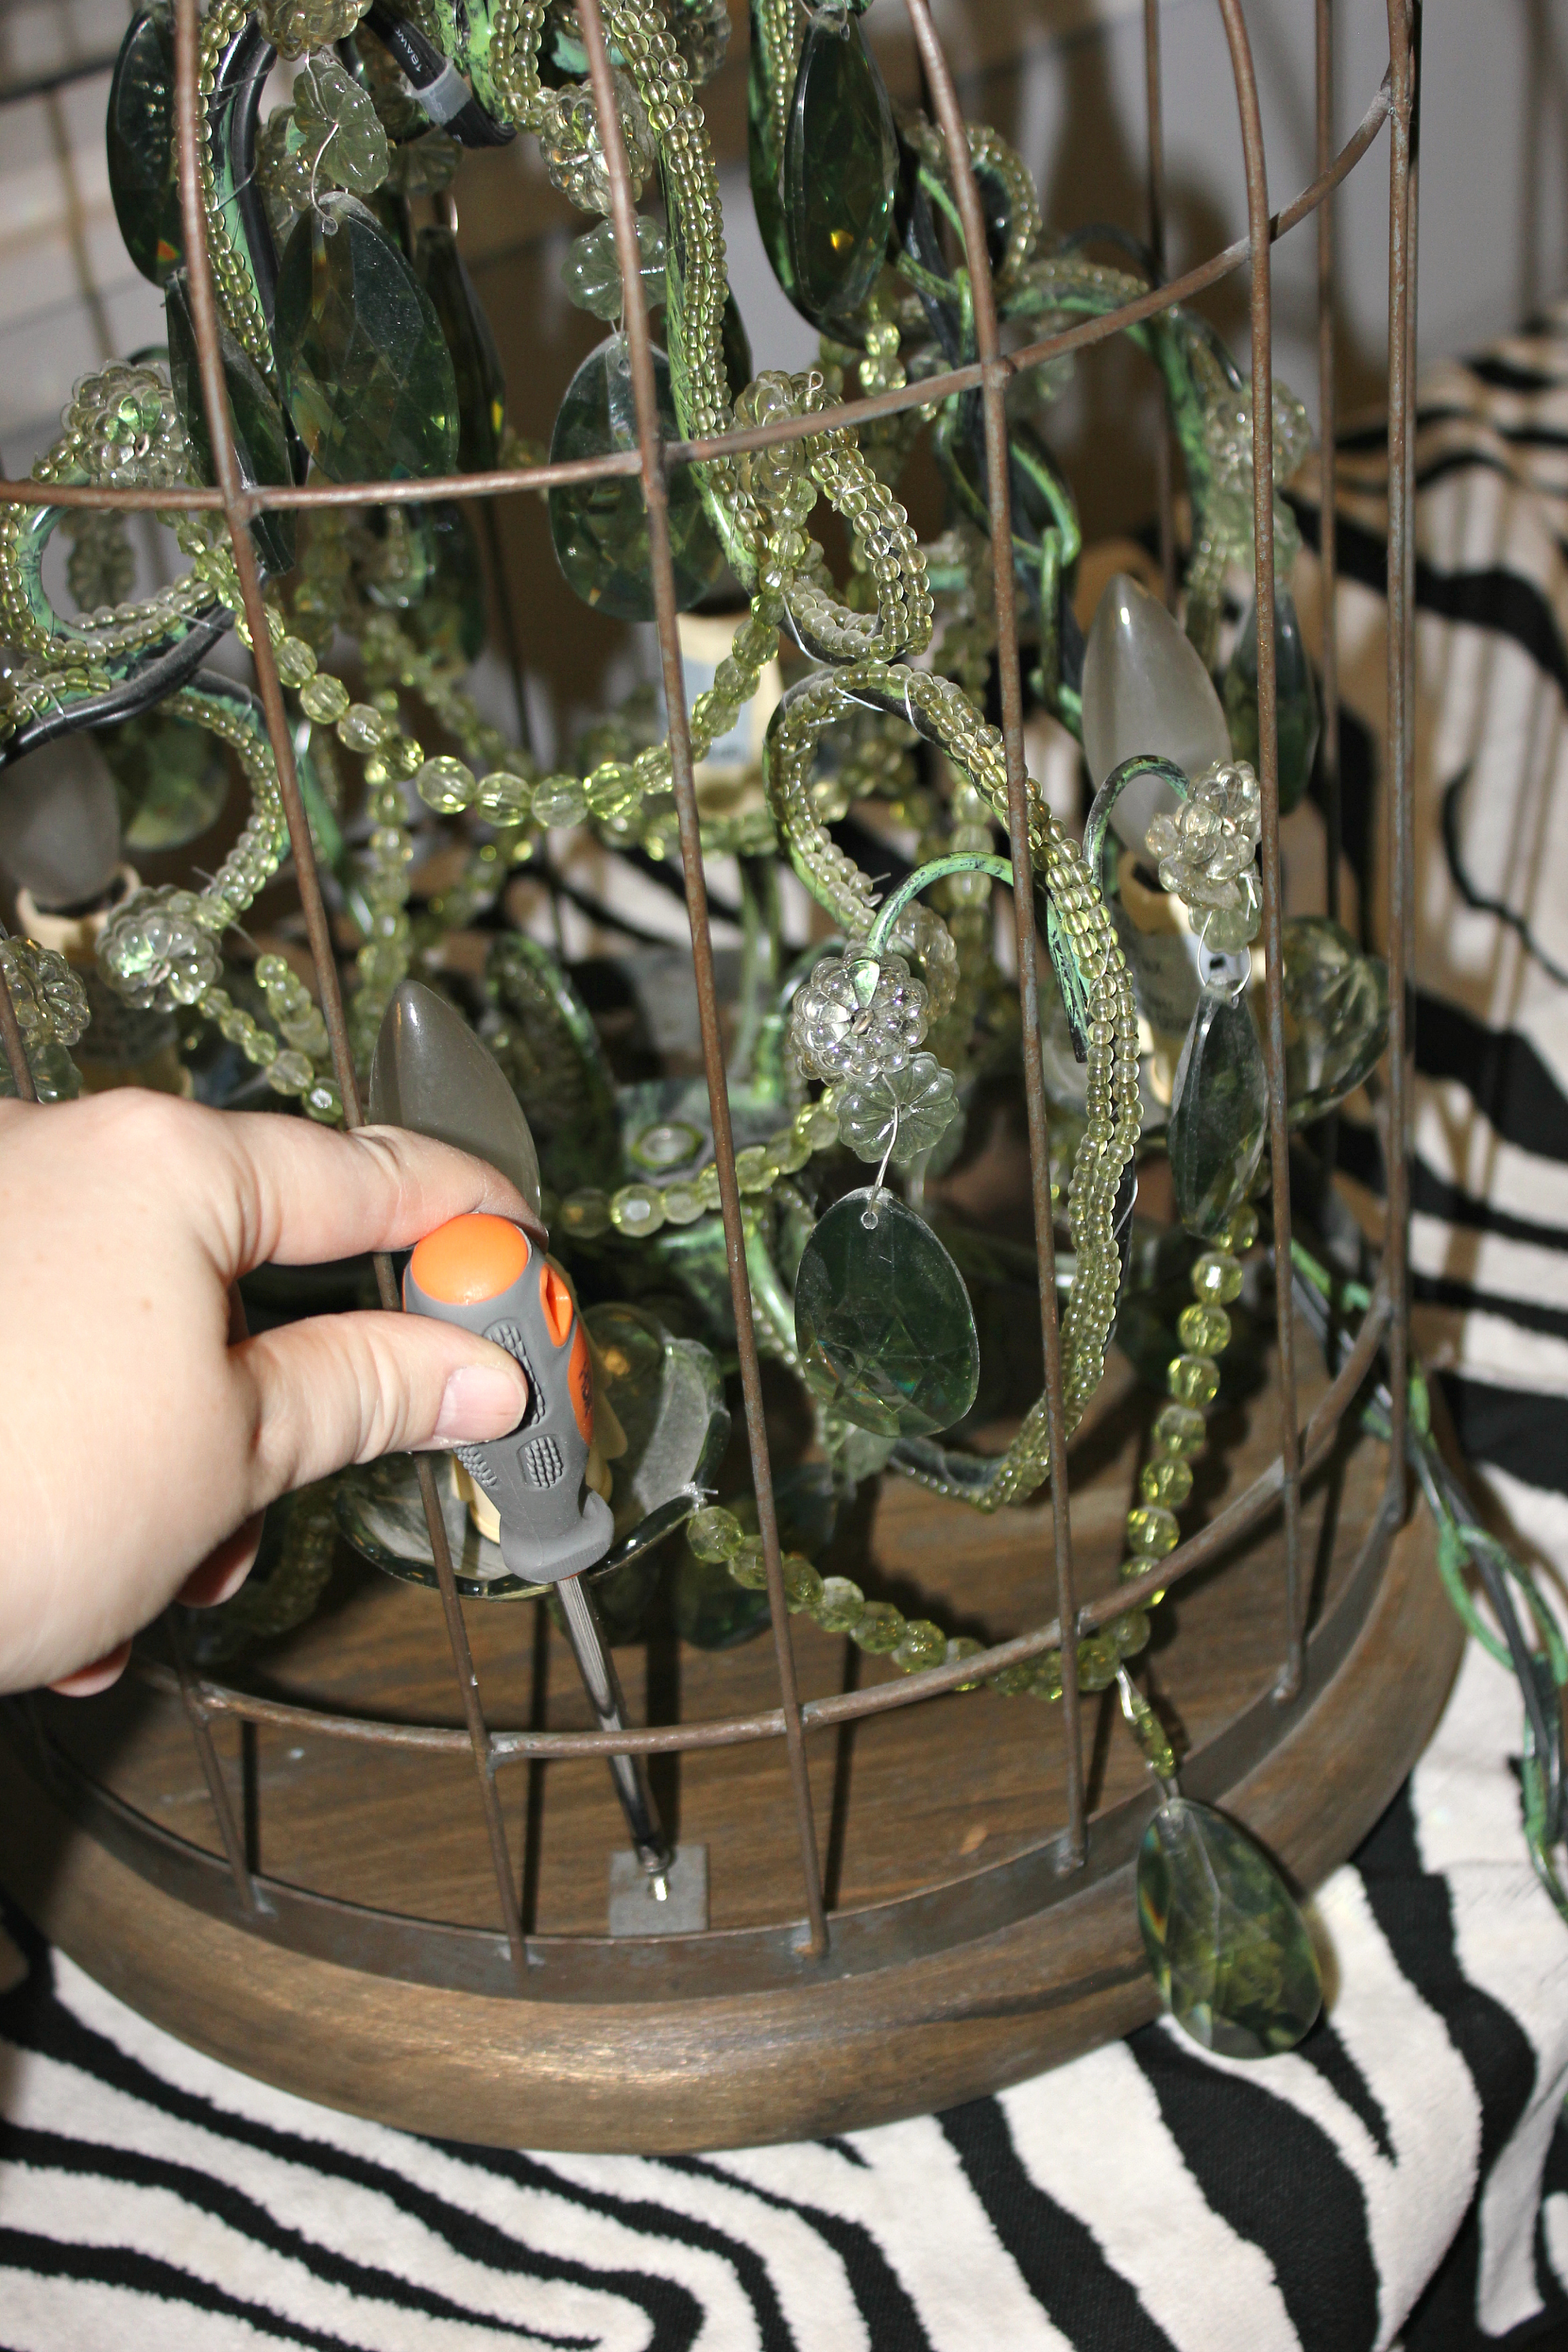
Step 2: Aquire a birdcage of suitable measurements. Not only will it need to be large enough to fit the chandelier, it will also need to have a removable base.
Step 3: Detach the base. This one had four small phillips screws attaching the wooden base to the cage.
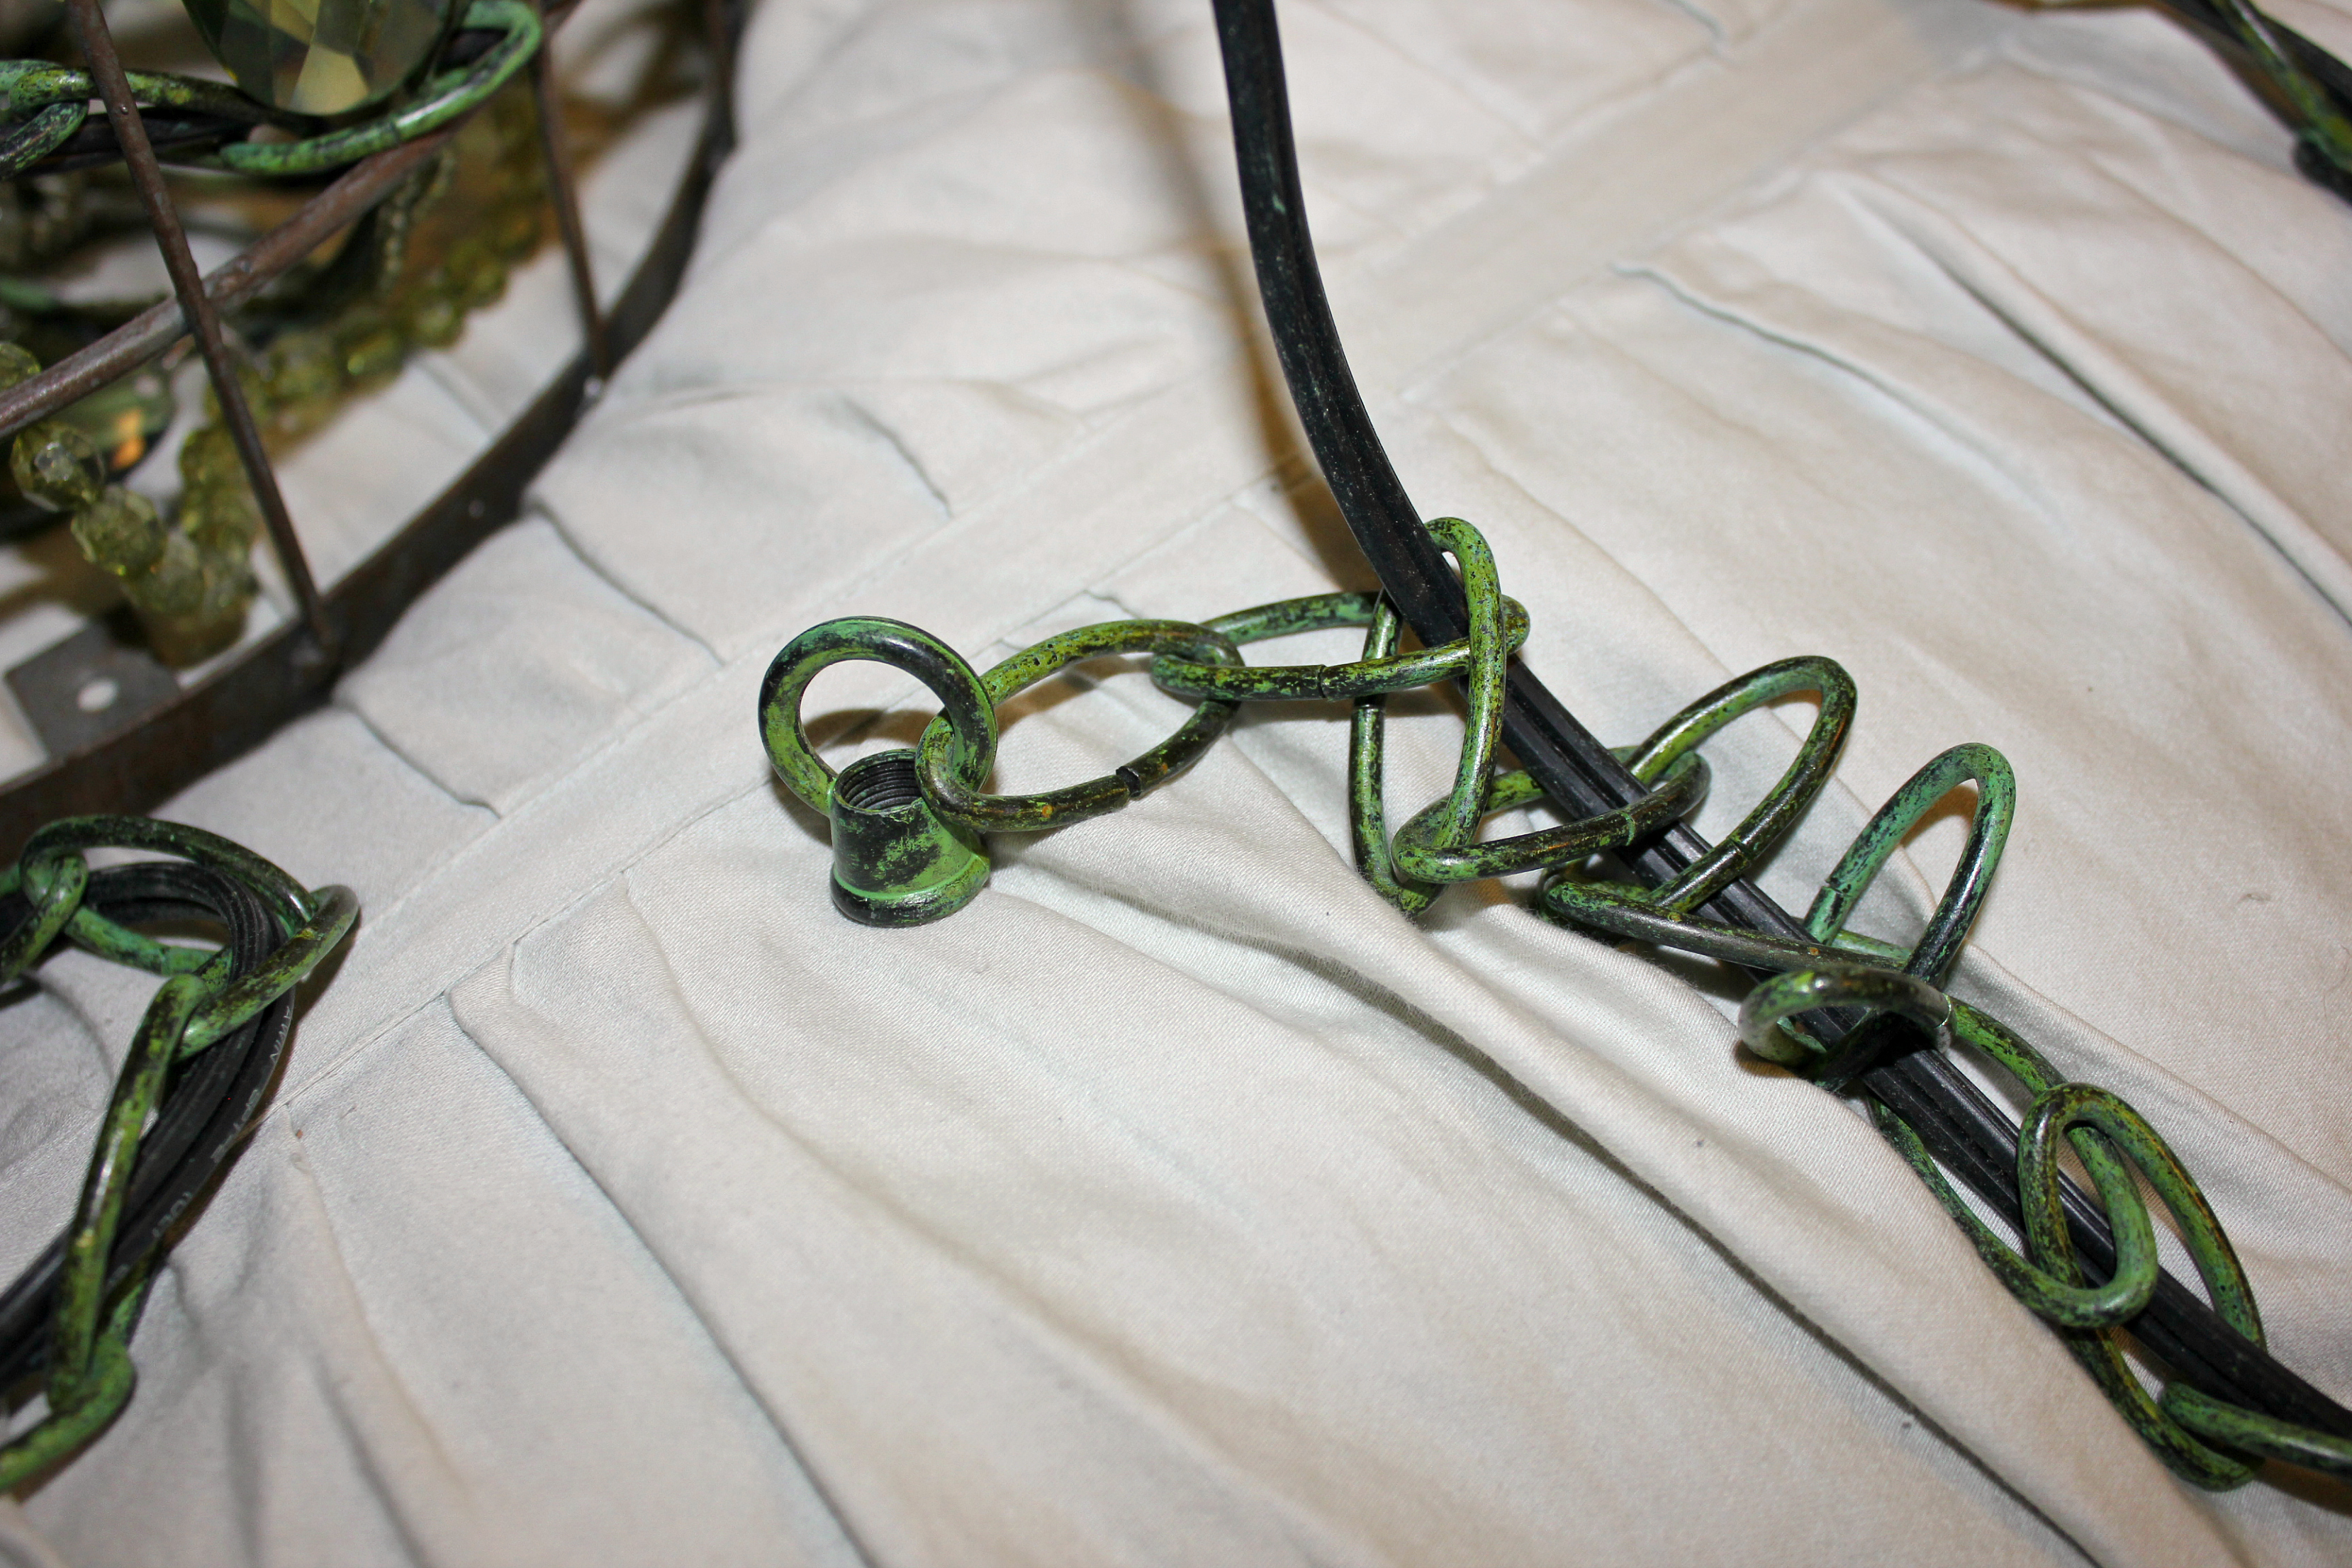
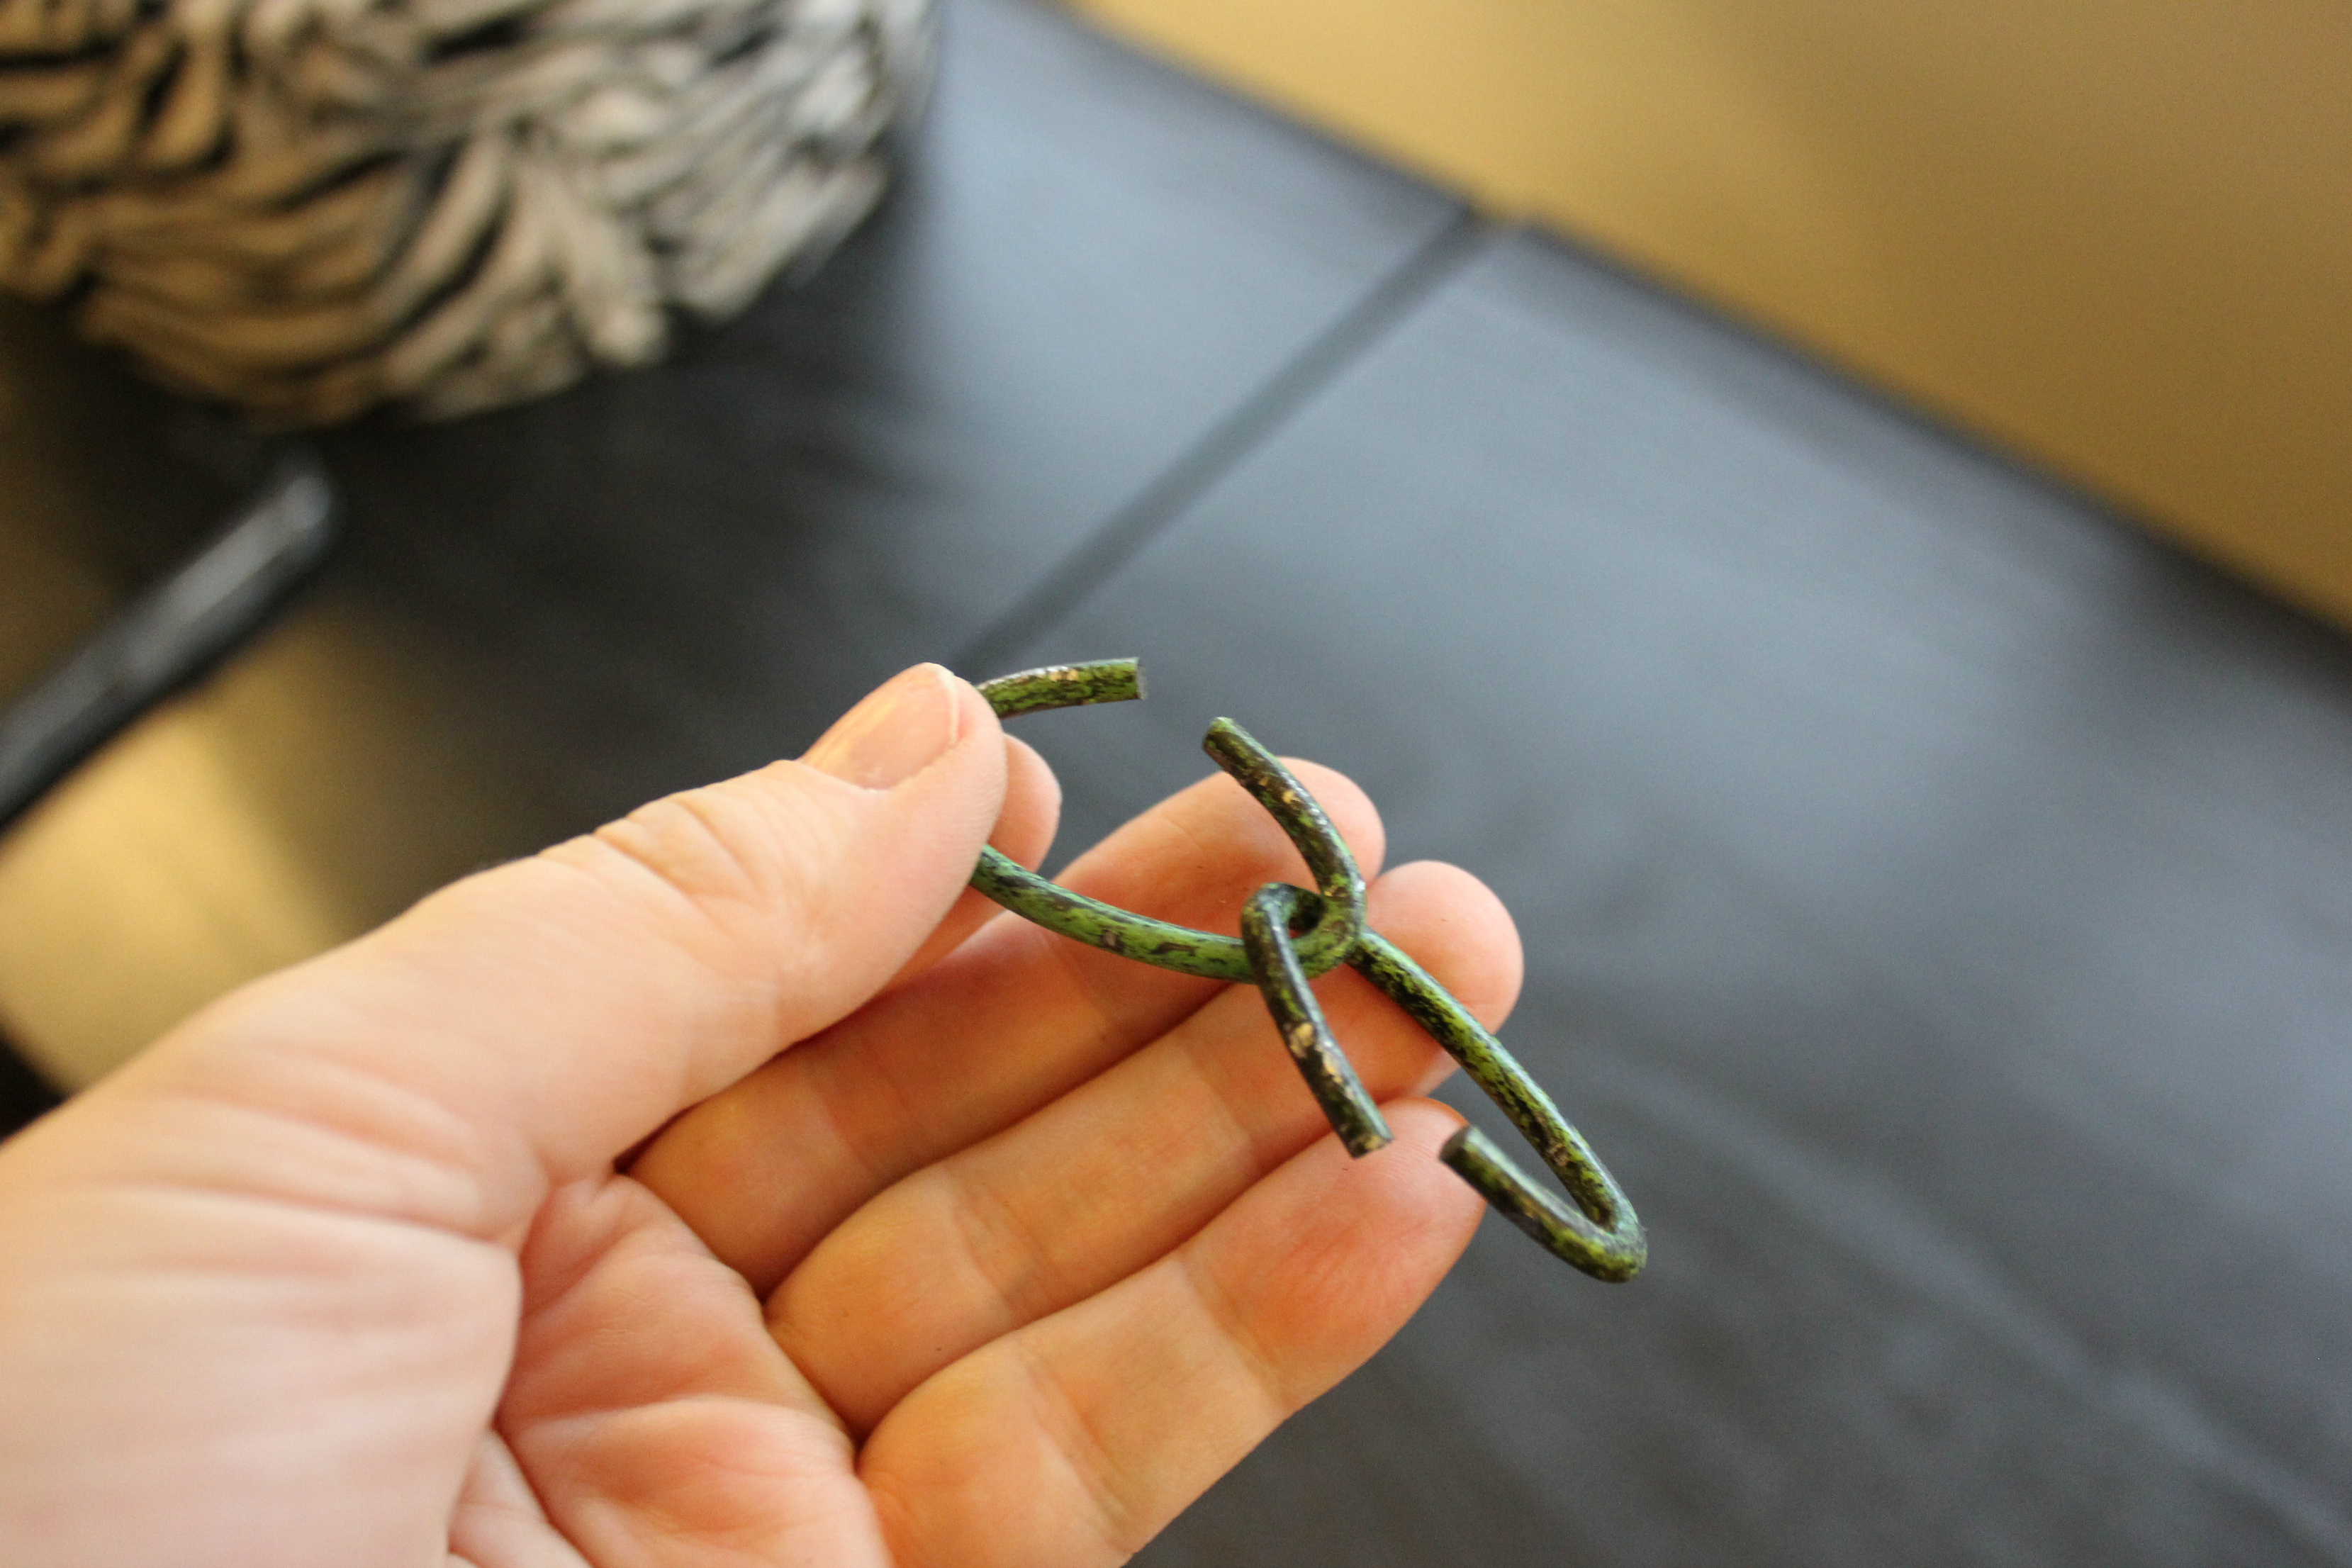
Step 4: Using 2 sets of pliers, detach the bottom 2 links of the chain on the chandelier. This chandelier’s chain had several extra links at the bottom, otherwise you could purchase links or other suitable hardware at any home improvement store.

Step 5: Next carefully slide the birdcage top down over the chandelier. I found this easiest accomplished on something soft, like a bed, or a couple towels because the chandelier is not flat and you will find it is one of those moments where you could use two more hands.
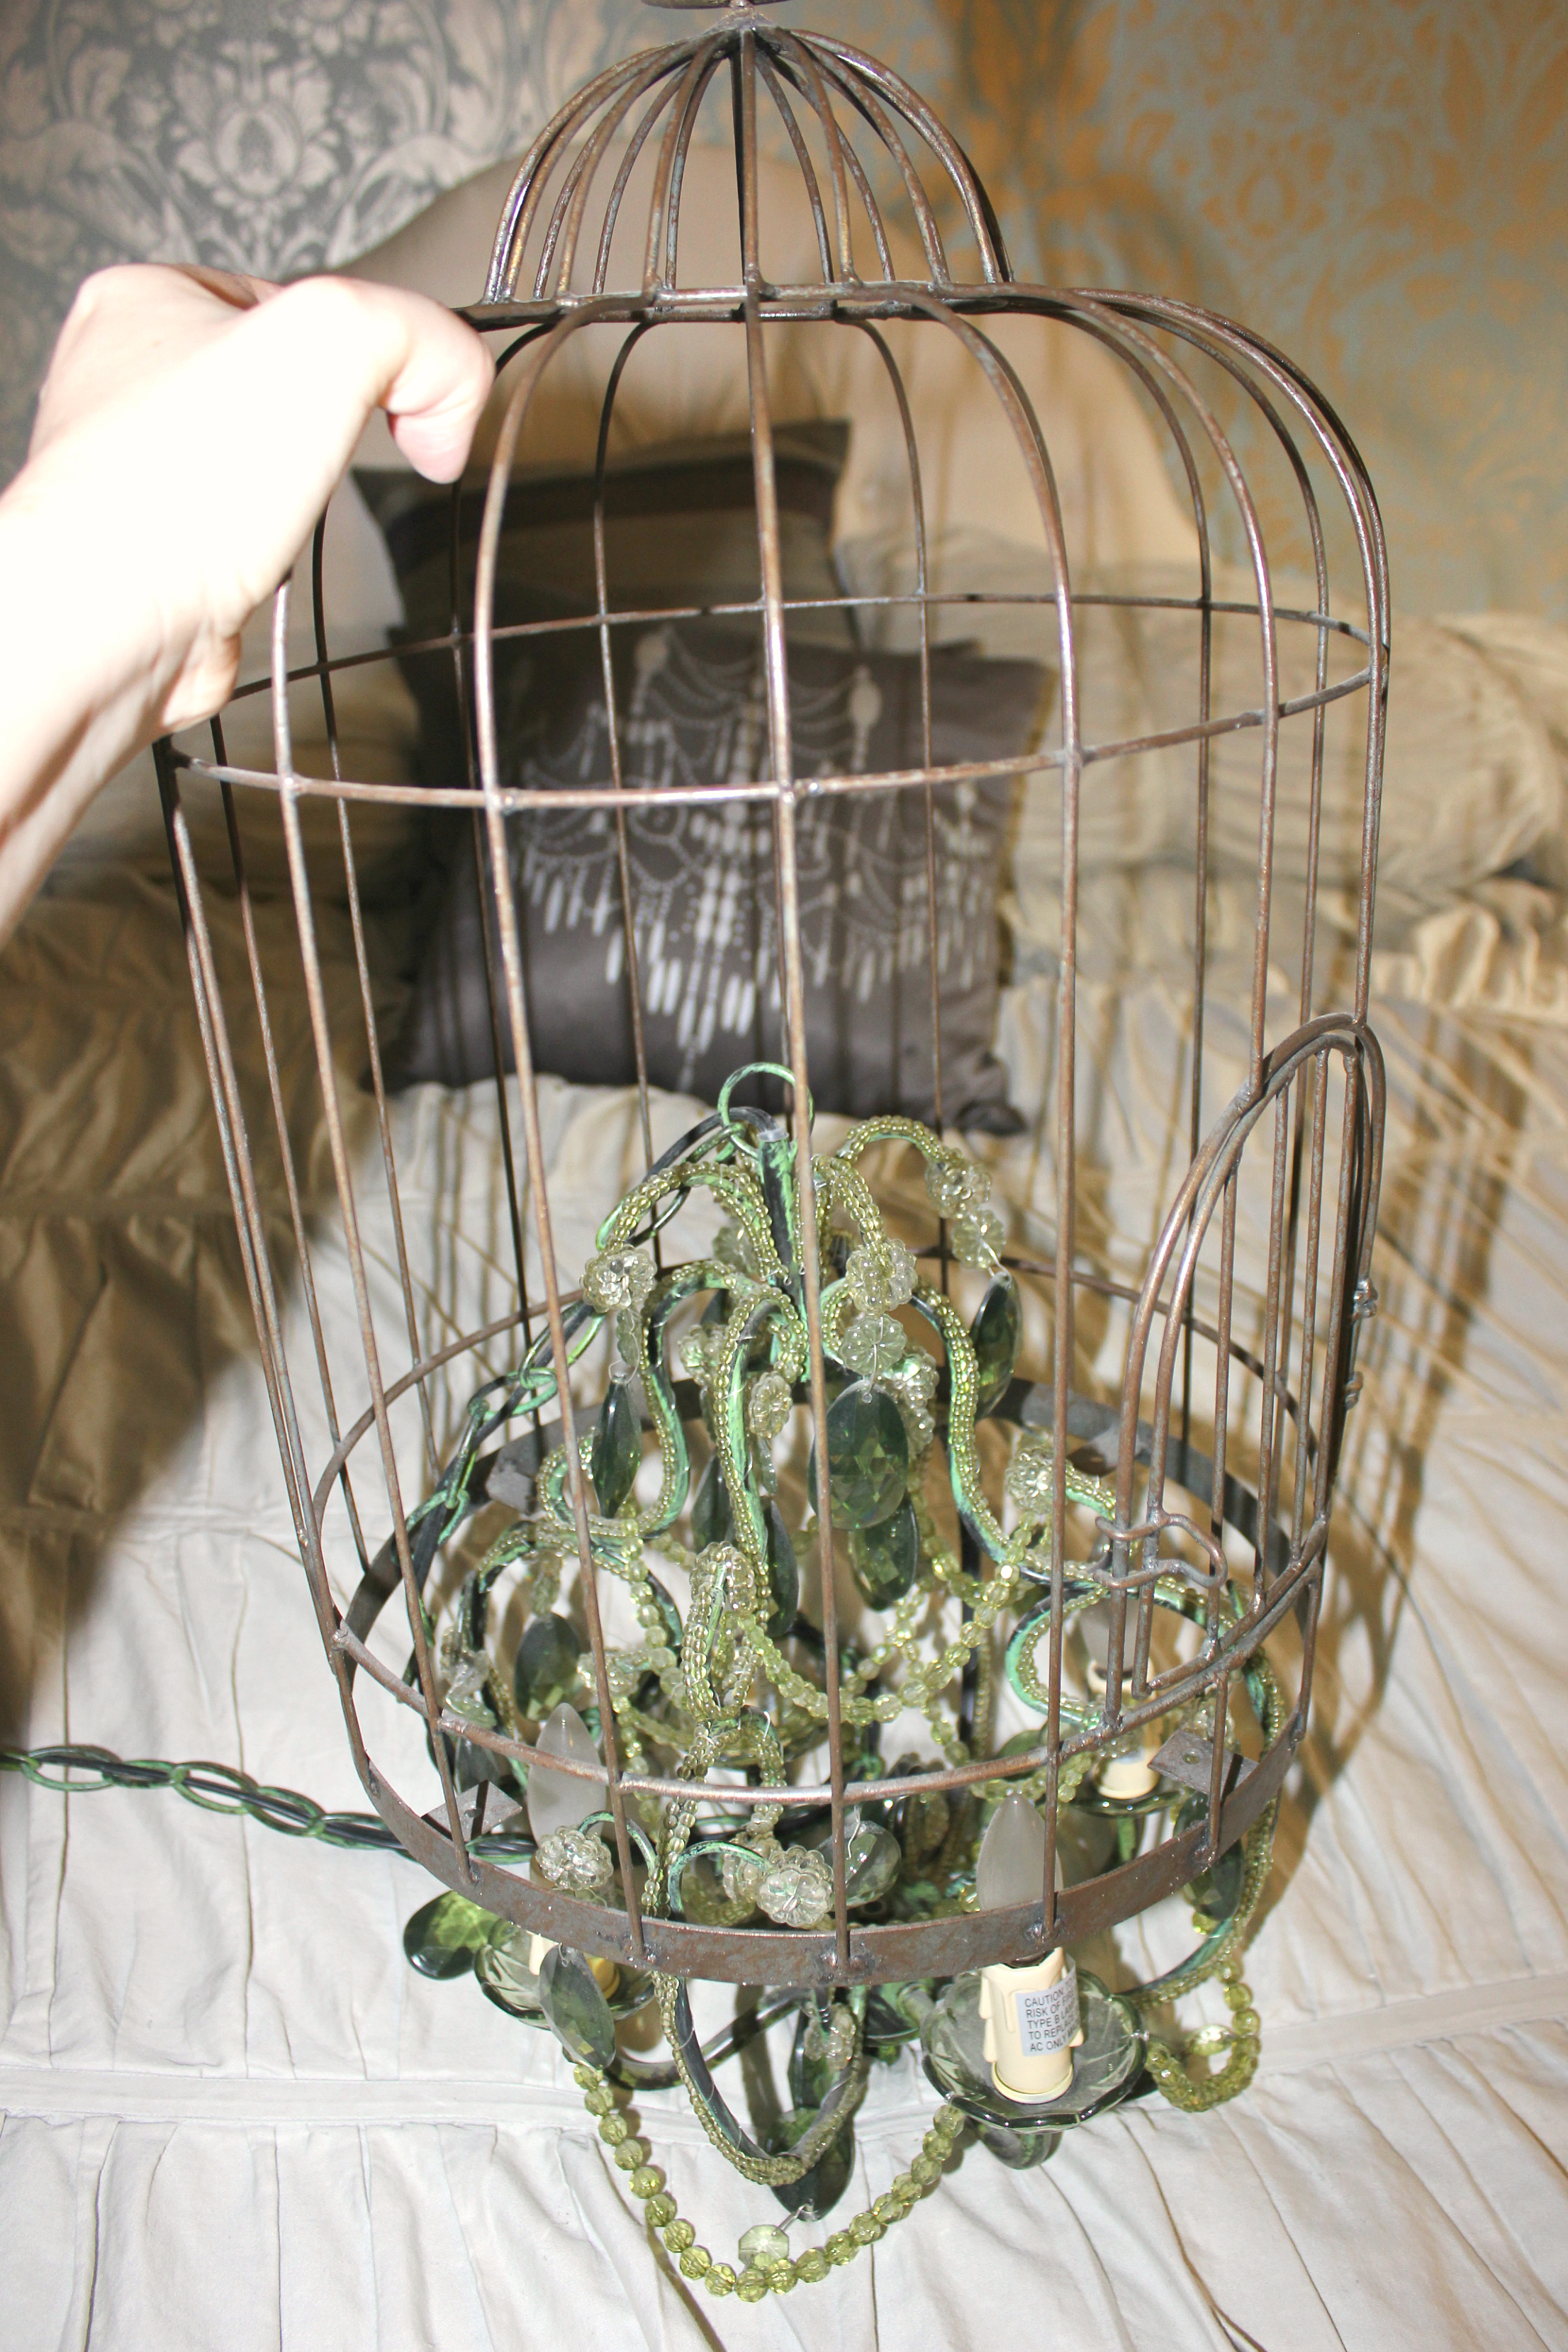
Step 6: Next take the 2 links of chain you removed and loop them together.
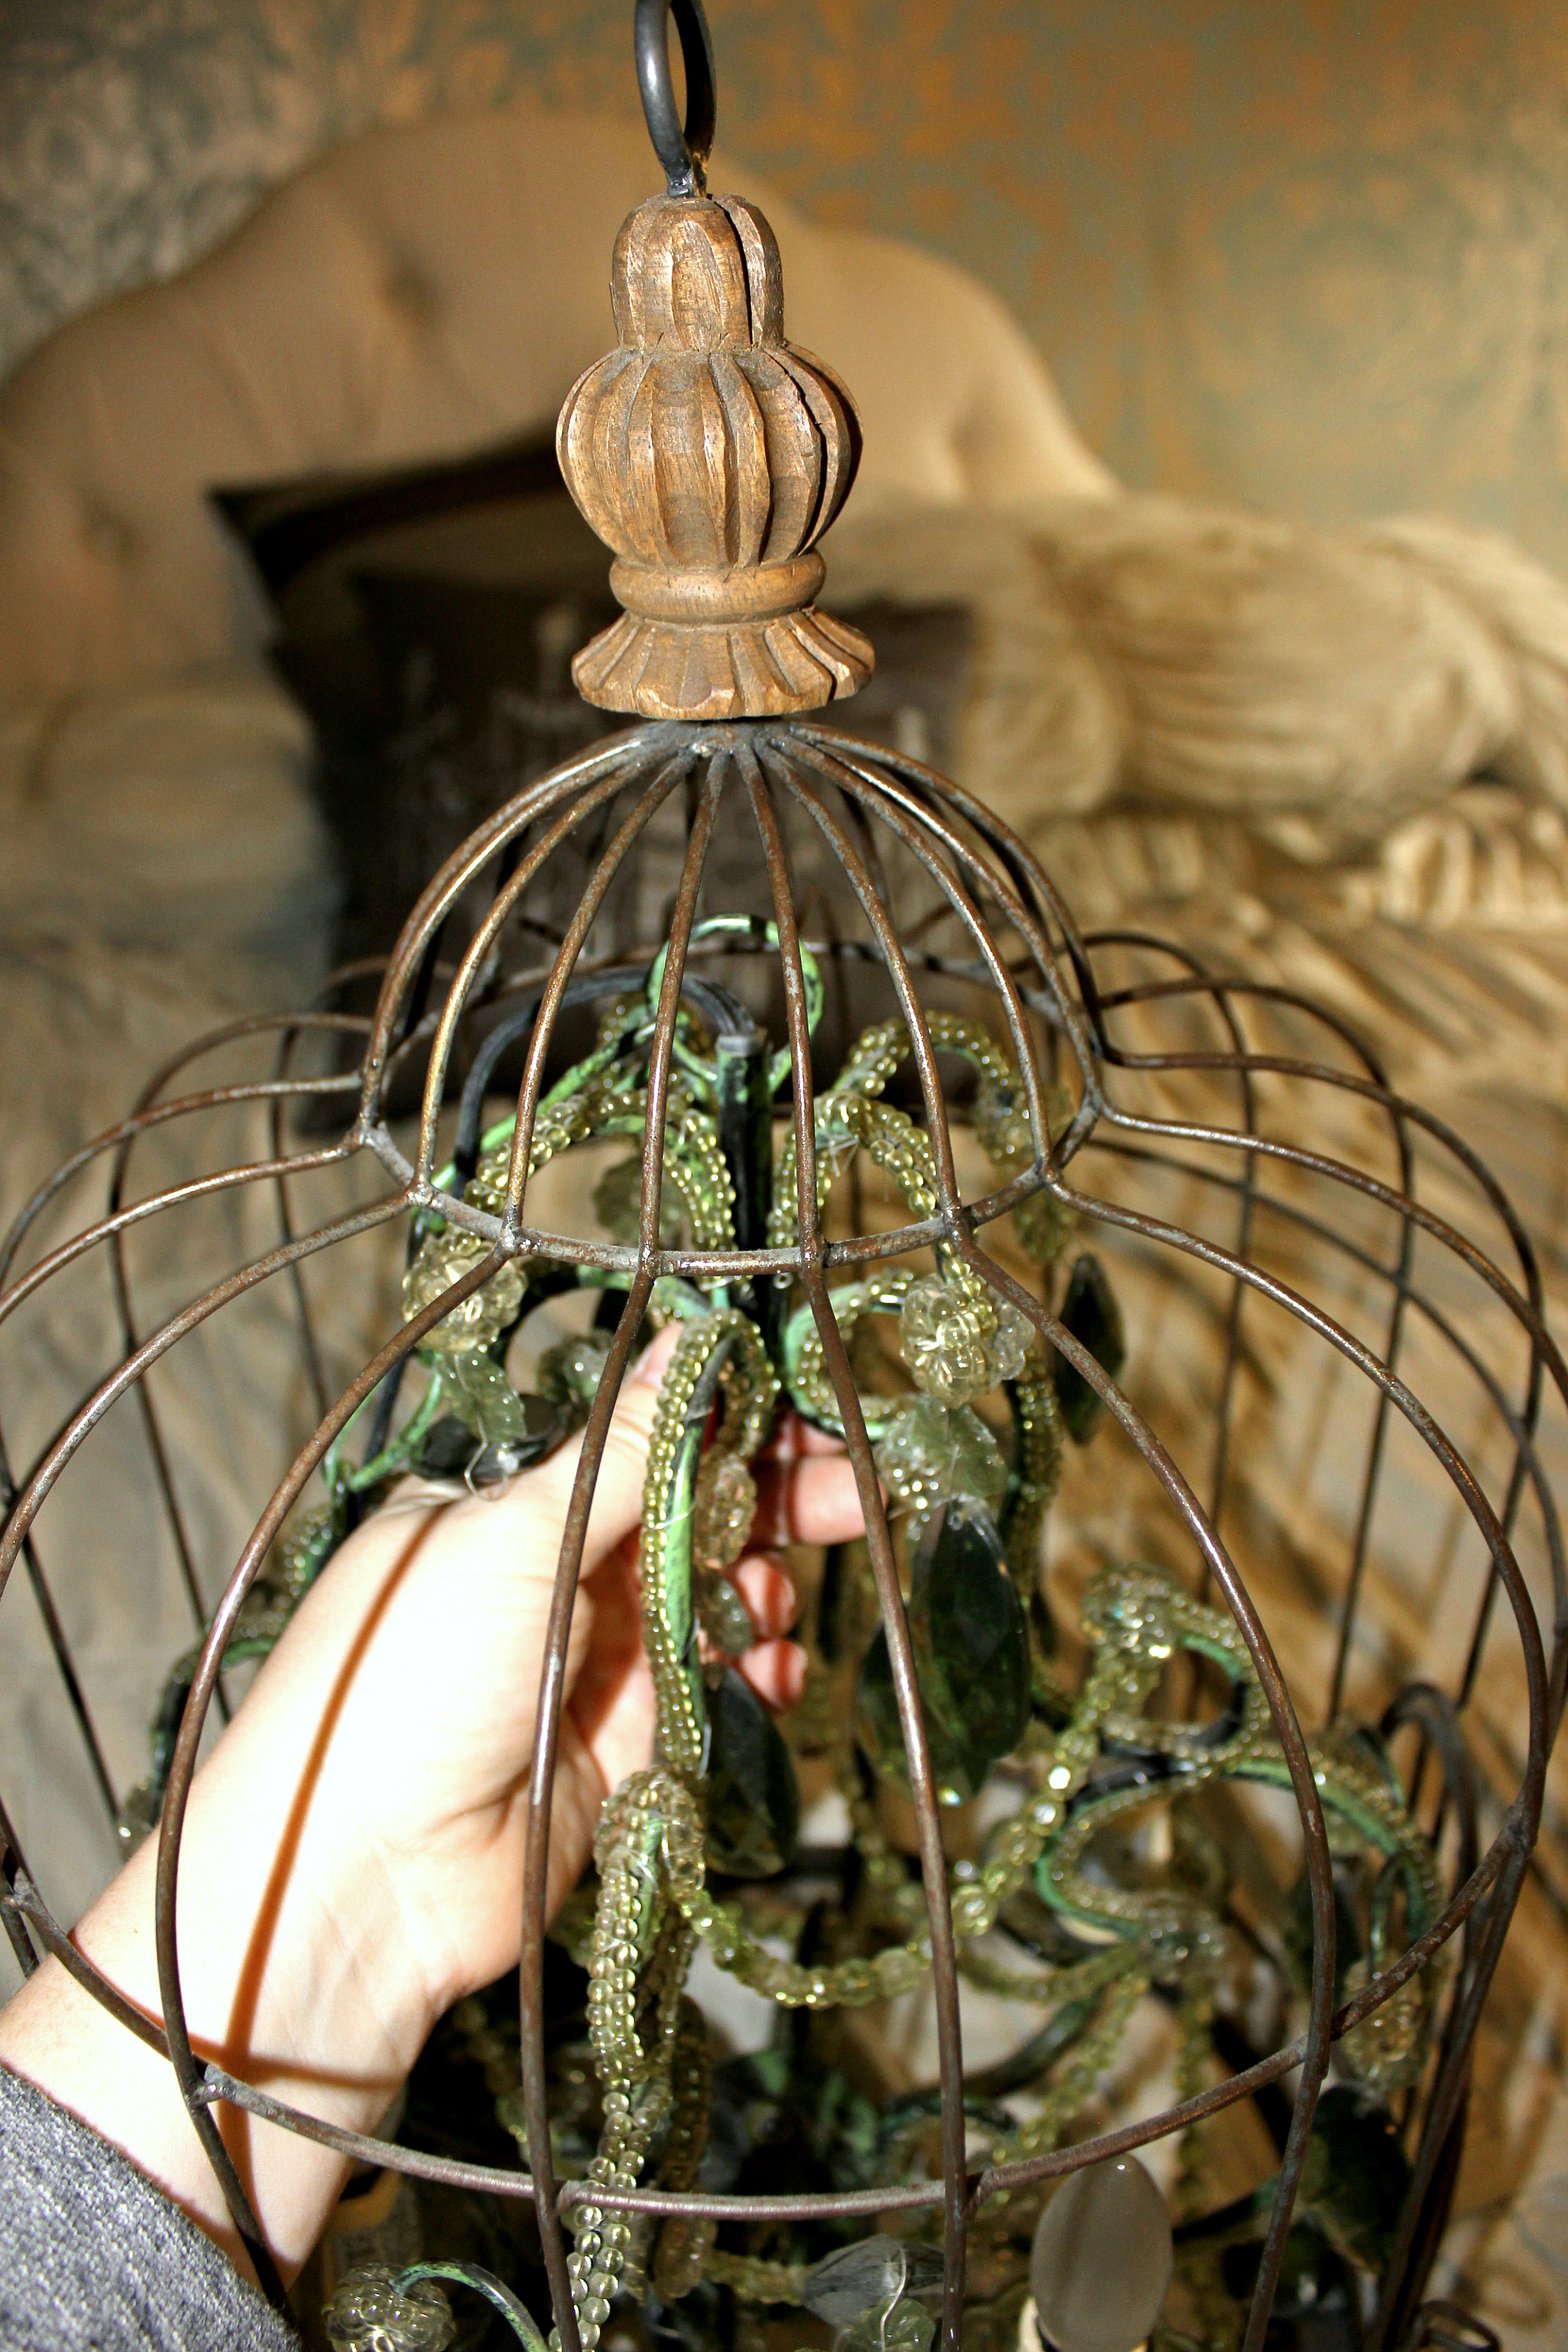
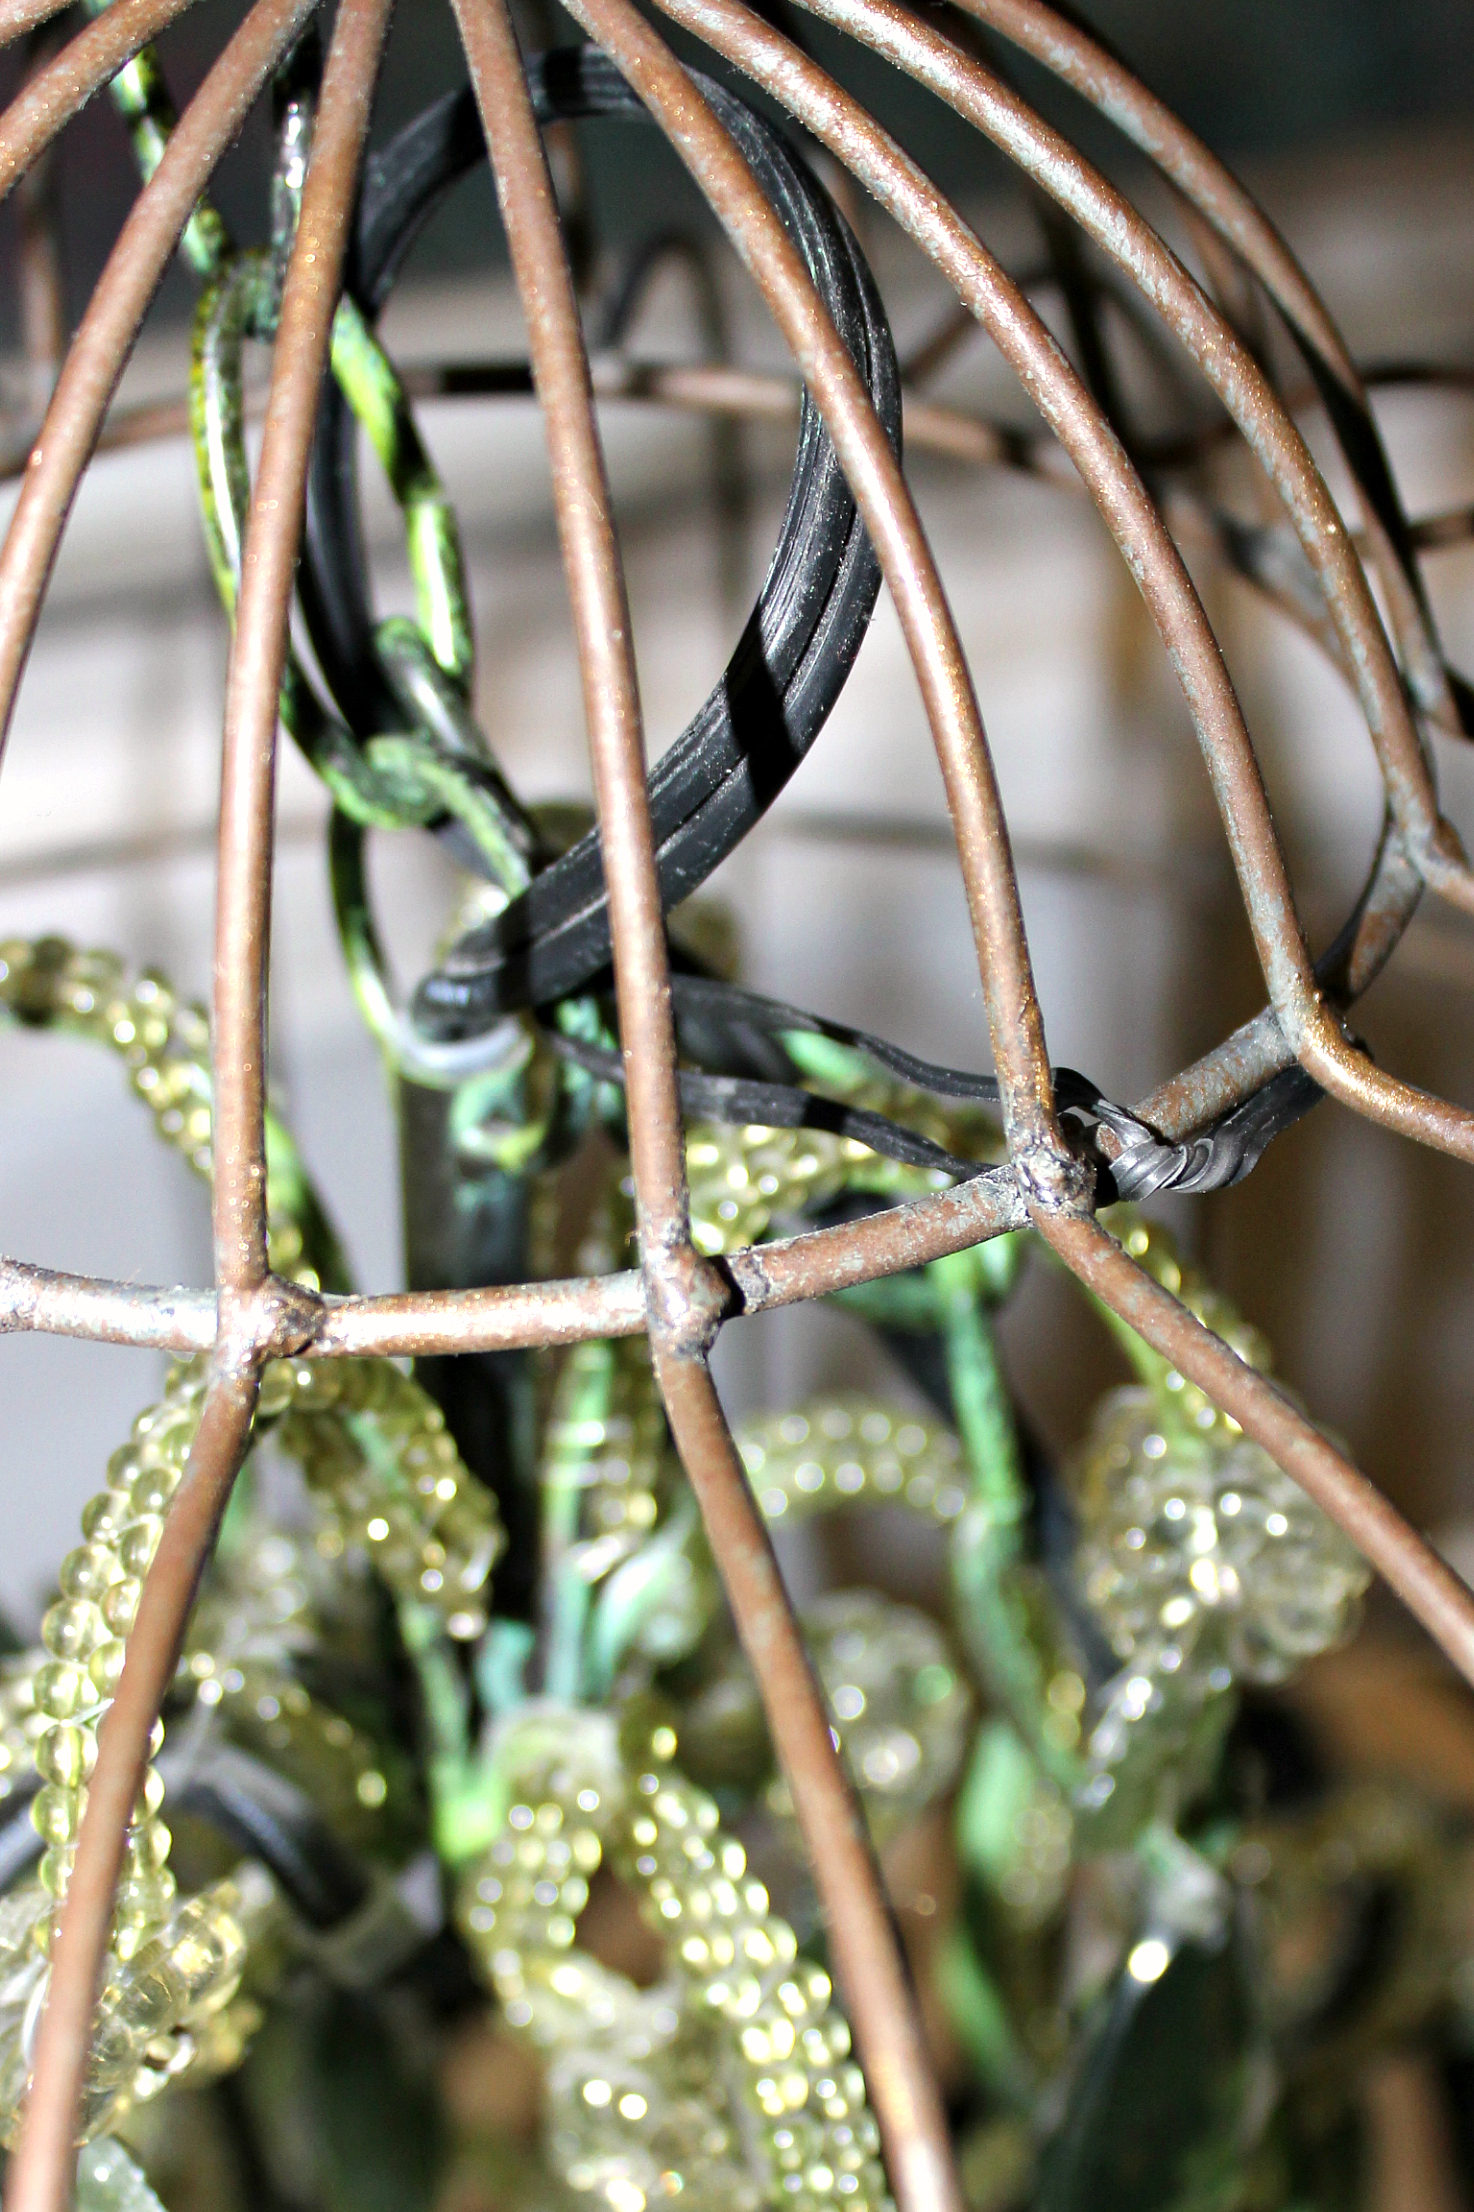
Step 7: Slip one of the links around the top of the bird cage, allowing the other to hang down inside.
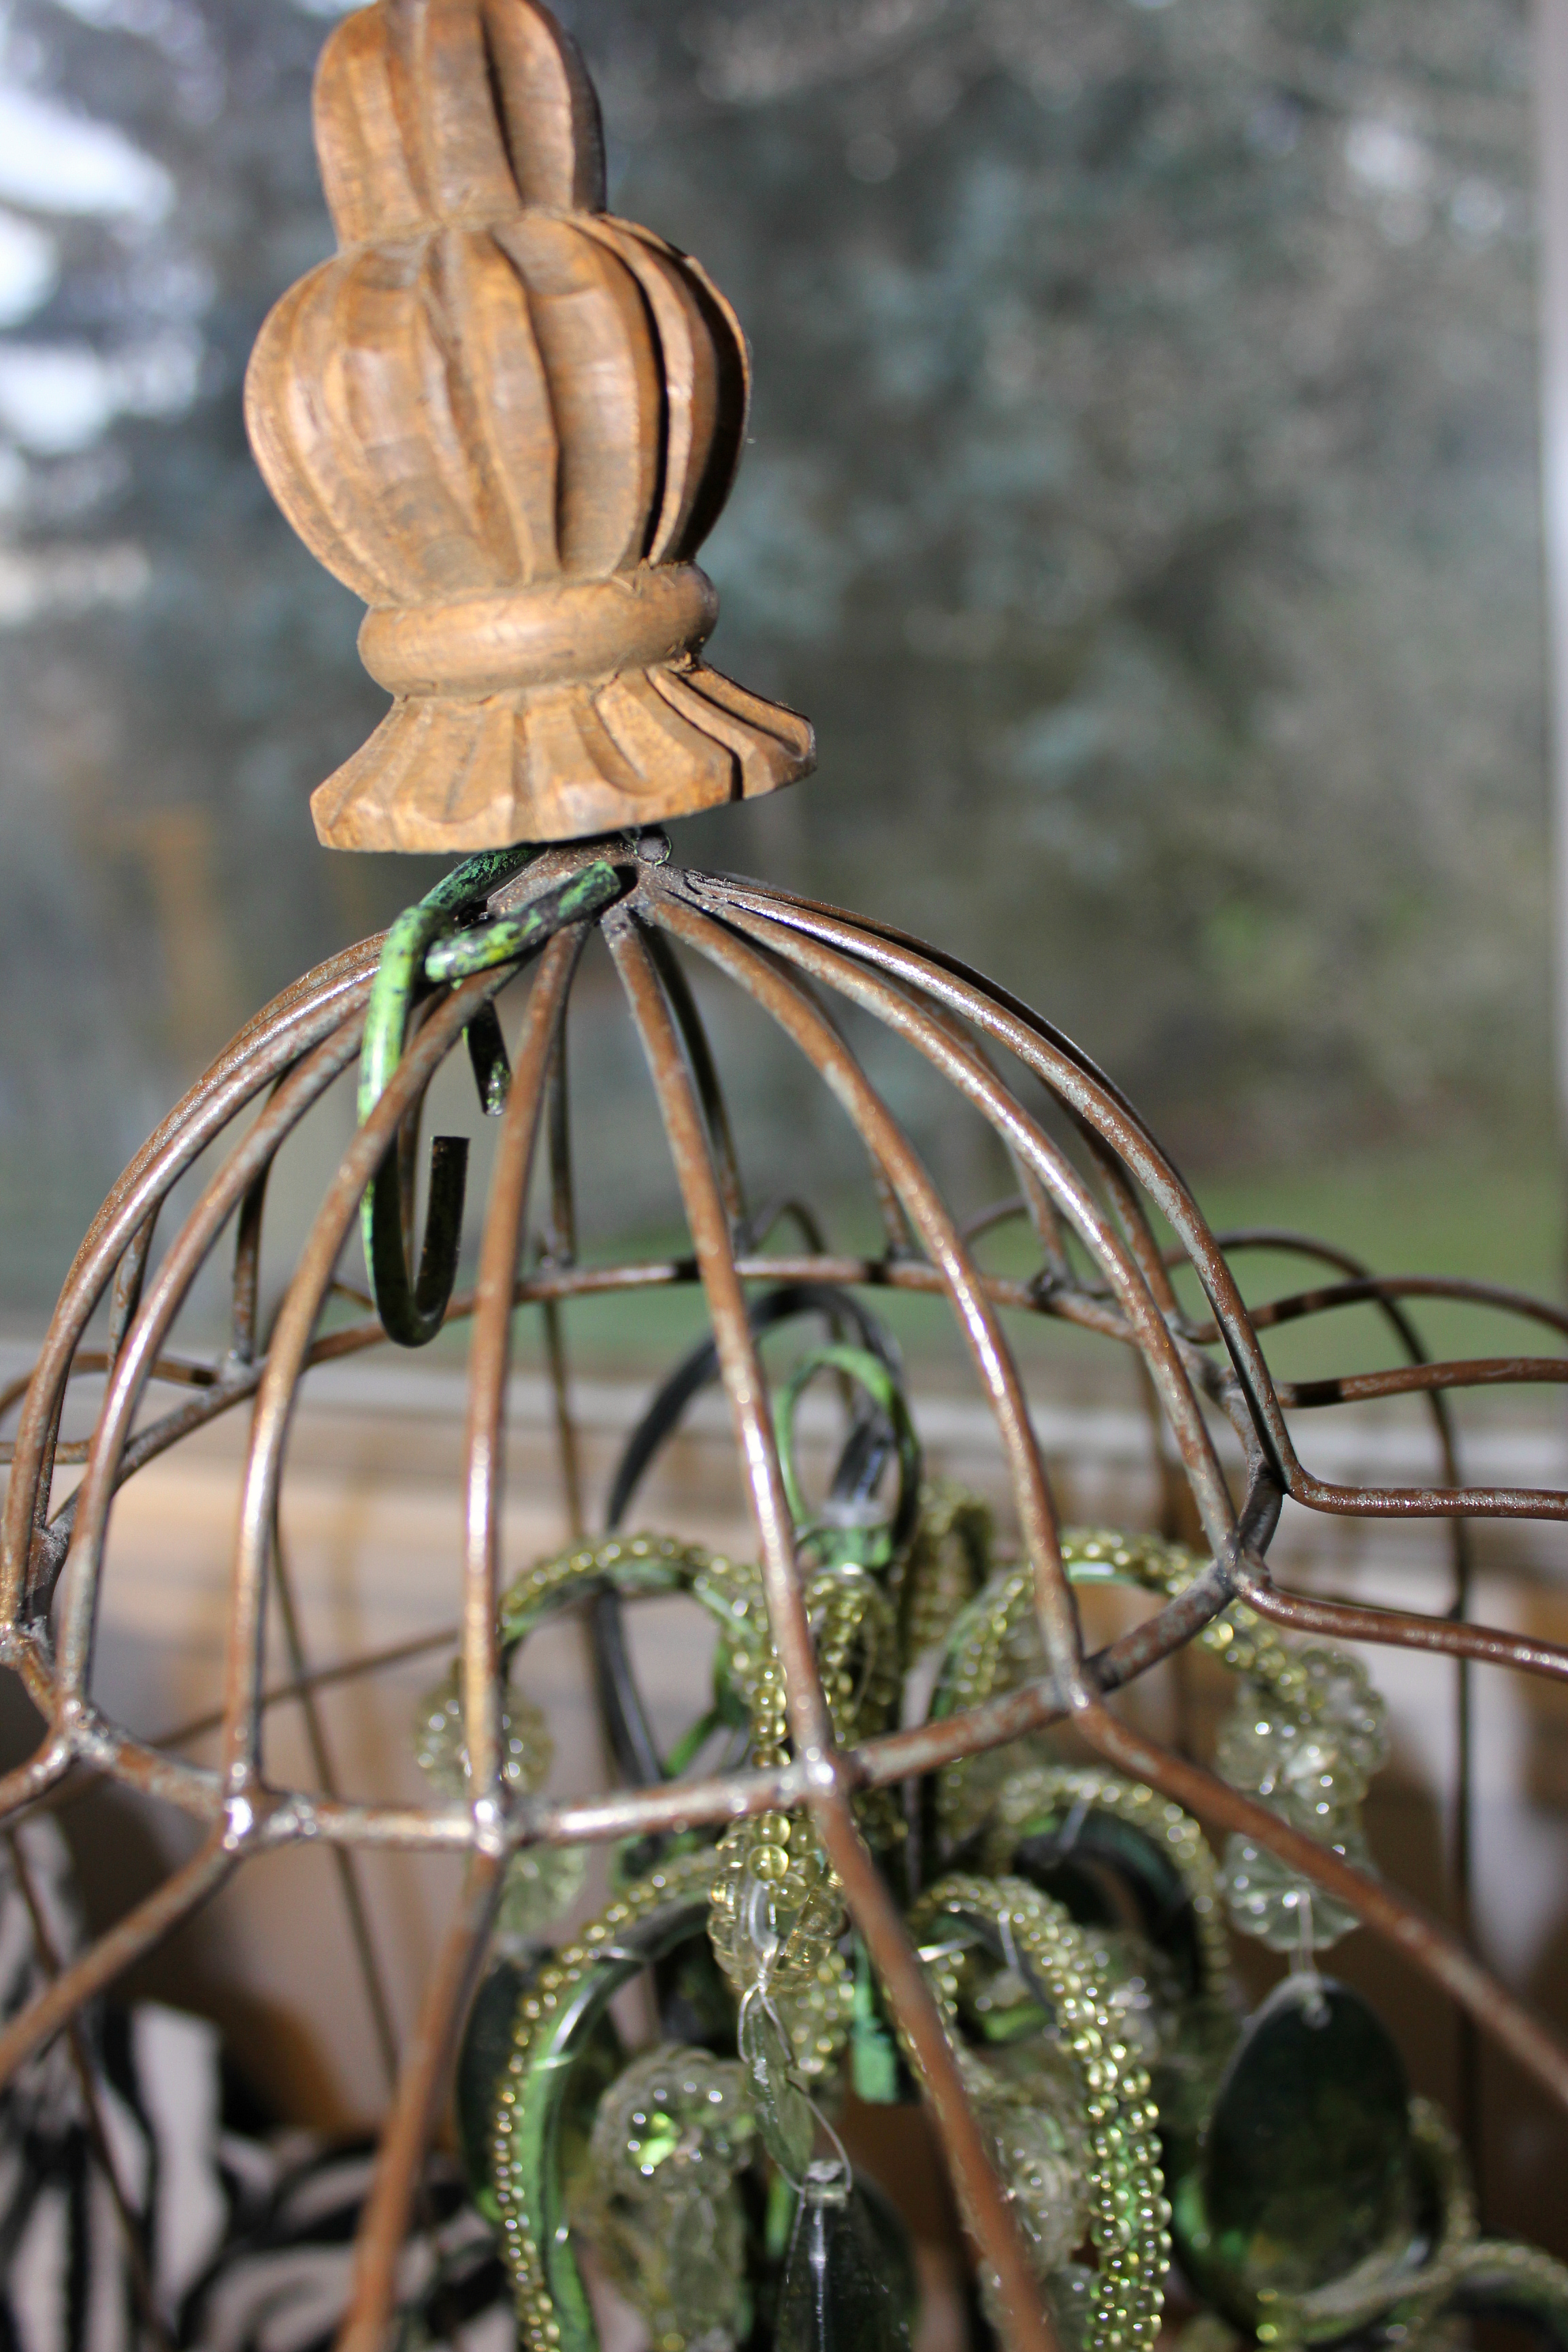
Step 8: Lift up the chandelier by the chain and attach to the hanging link (alternately it may be easier to remove the hanging link and loop it thru the chain and then reattach to the top). Never have my hands felt so large as trying maneuver them around the inside of this birdcage, but who’s not up to a good challenge!
Step 9: Close the 2 links back up again. This is best accomplished with needle nose pliers, and two hands with no pictures.
If the links are off centre and cause the chandelier to pull to one side, use bendable wire (that sometimes comes with the chandelier) to pull the light back centre and twist off around one of the cage bars to keep in place.
Step 10: If a hanging light fixture is what you are looking for (and unlike me you actually still have space for one) this would be a great place to stop.
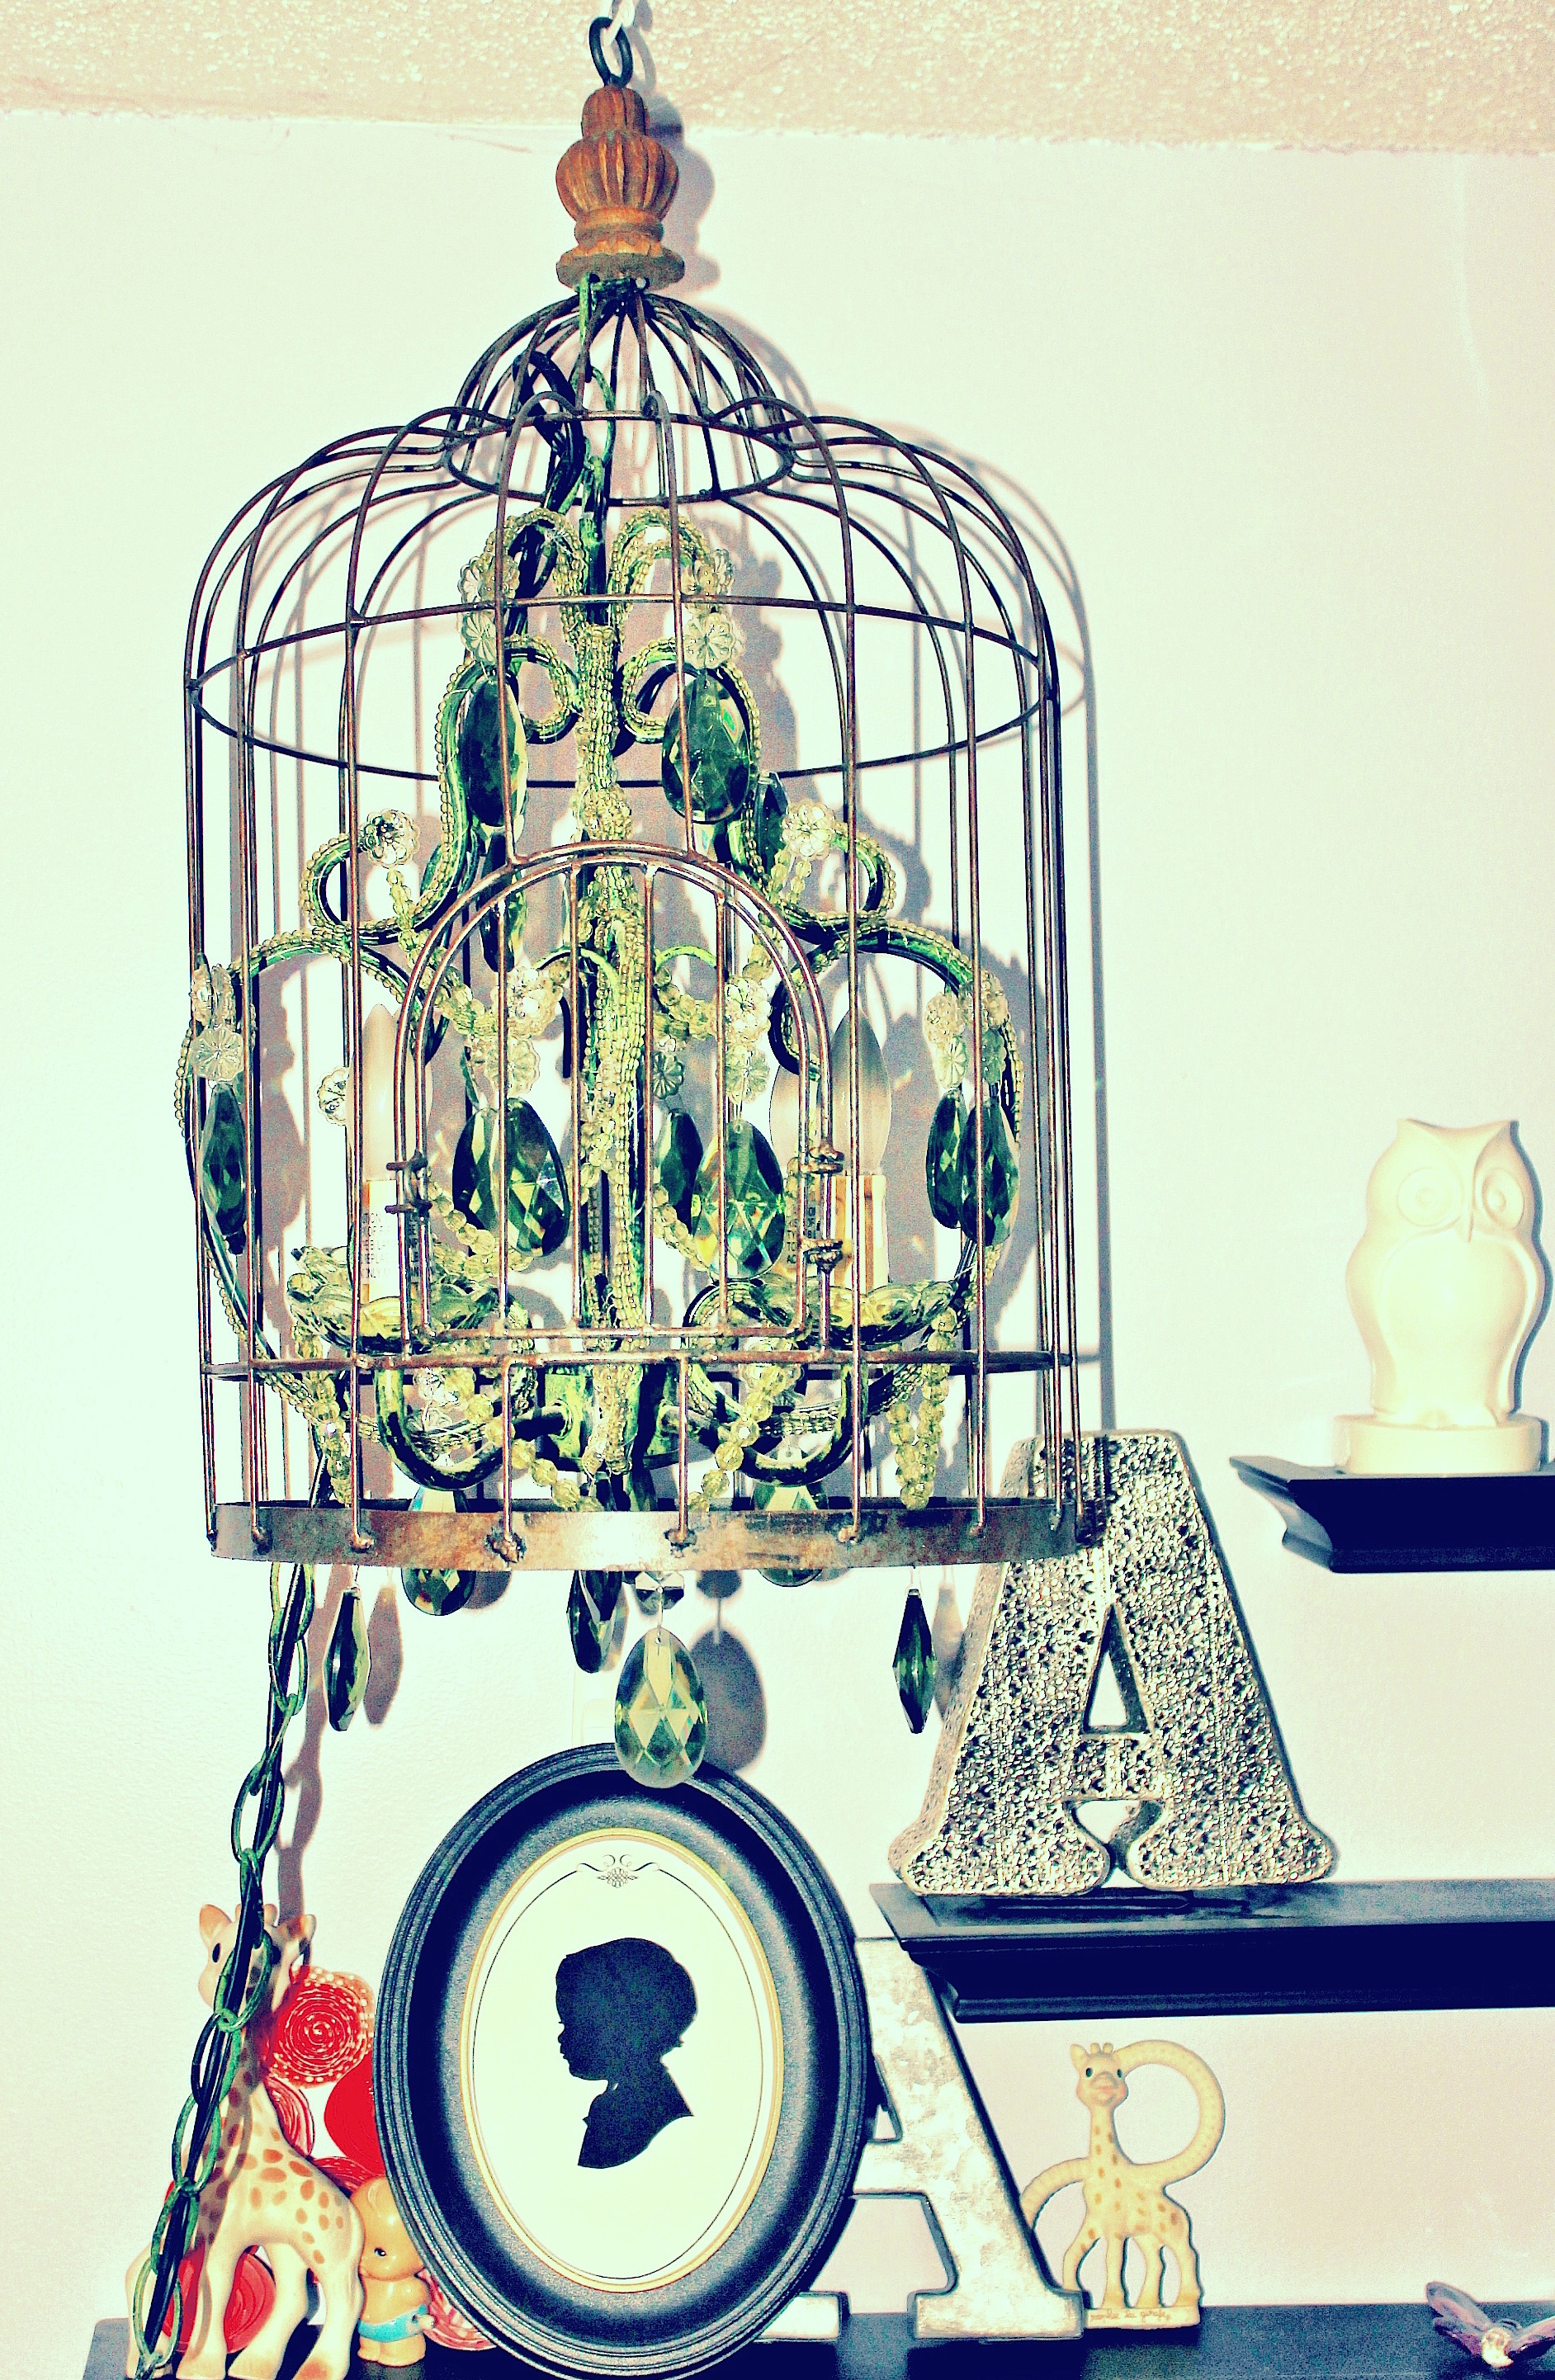
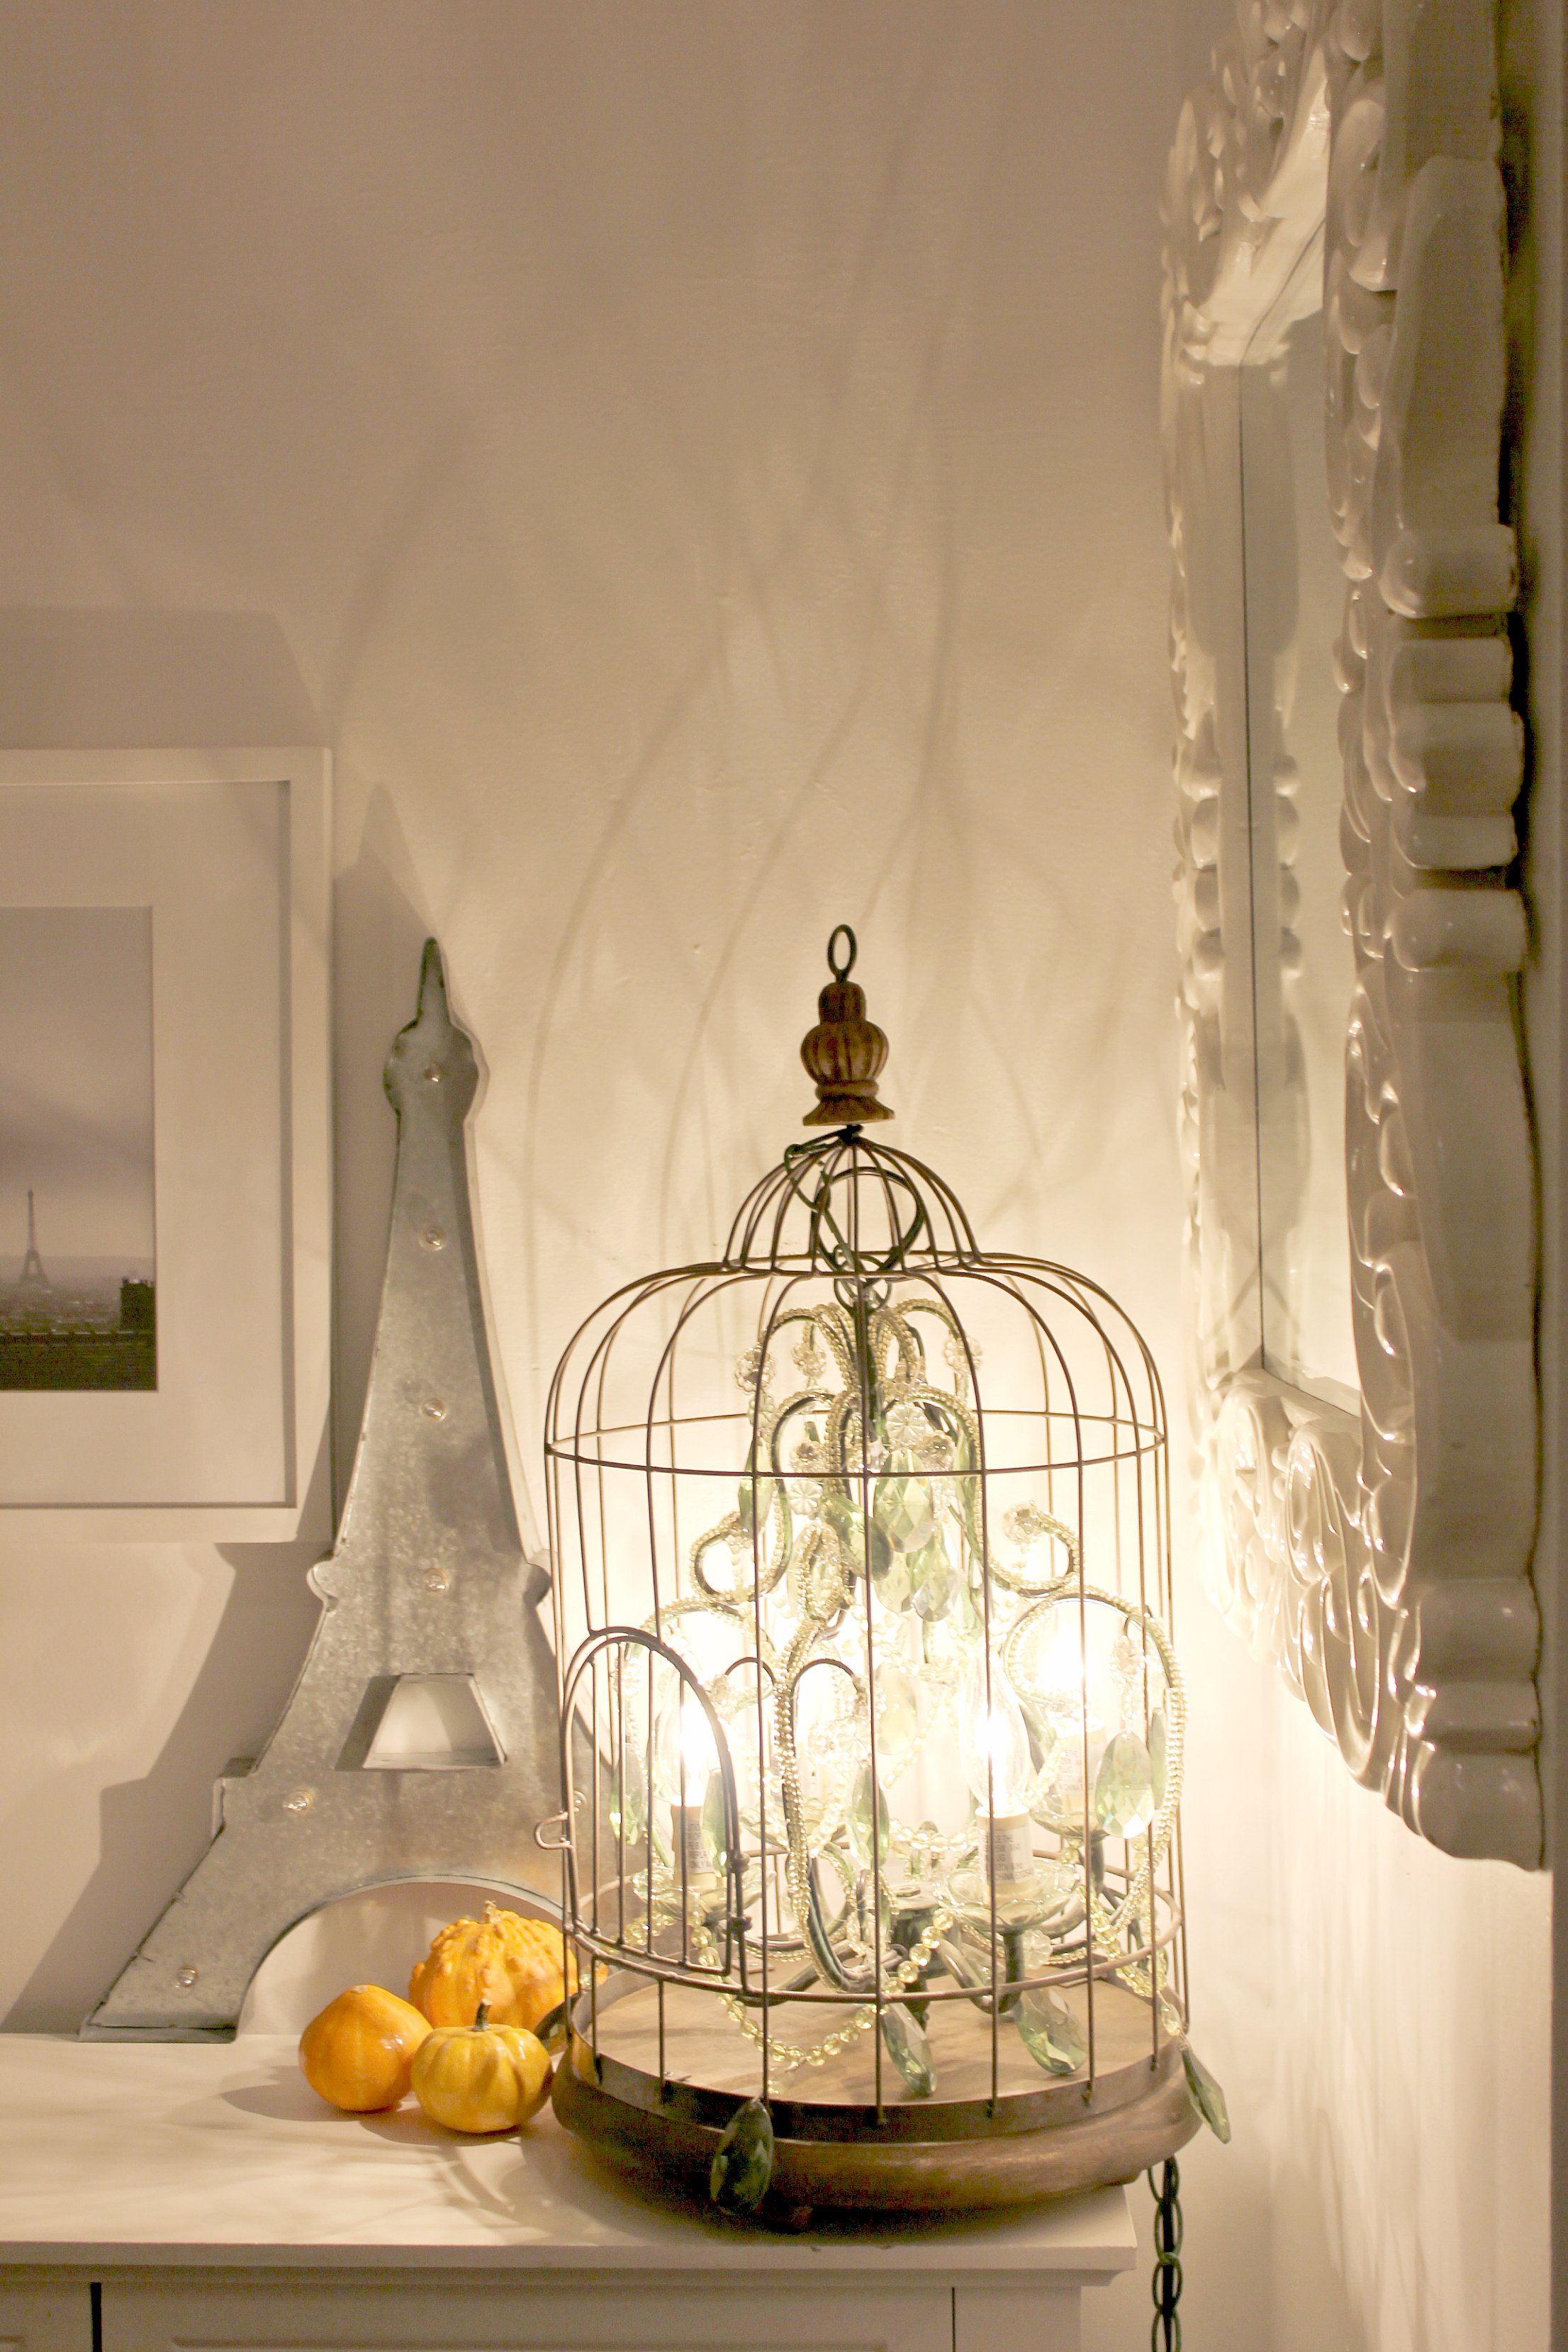
But in my case, this particular chandelier of a birdcage was destined to be a table lamp, so I continued on with step 11.
Step 11: Place the base of the birdcage on a hard surface and carefully align the chandelier and cage back in place on top.

Step 12: Using the same 4 screws removed earlier, reinstall the base back onto the cage and you are done!
Rejoice in the fact that you do not have to try to fit your hands in and around the bars of this particular birdcage anymore!
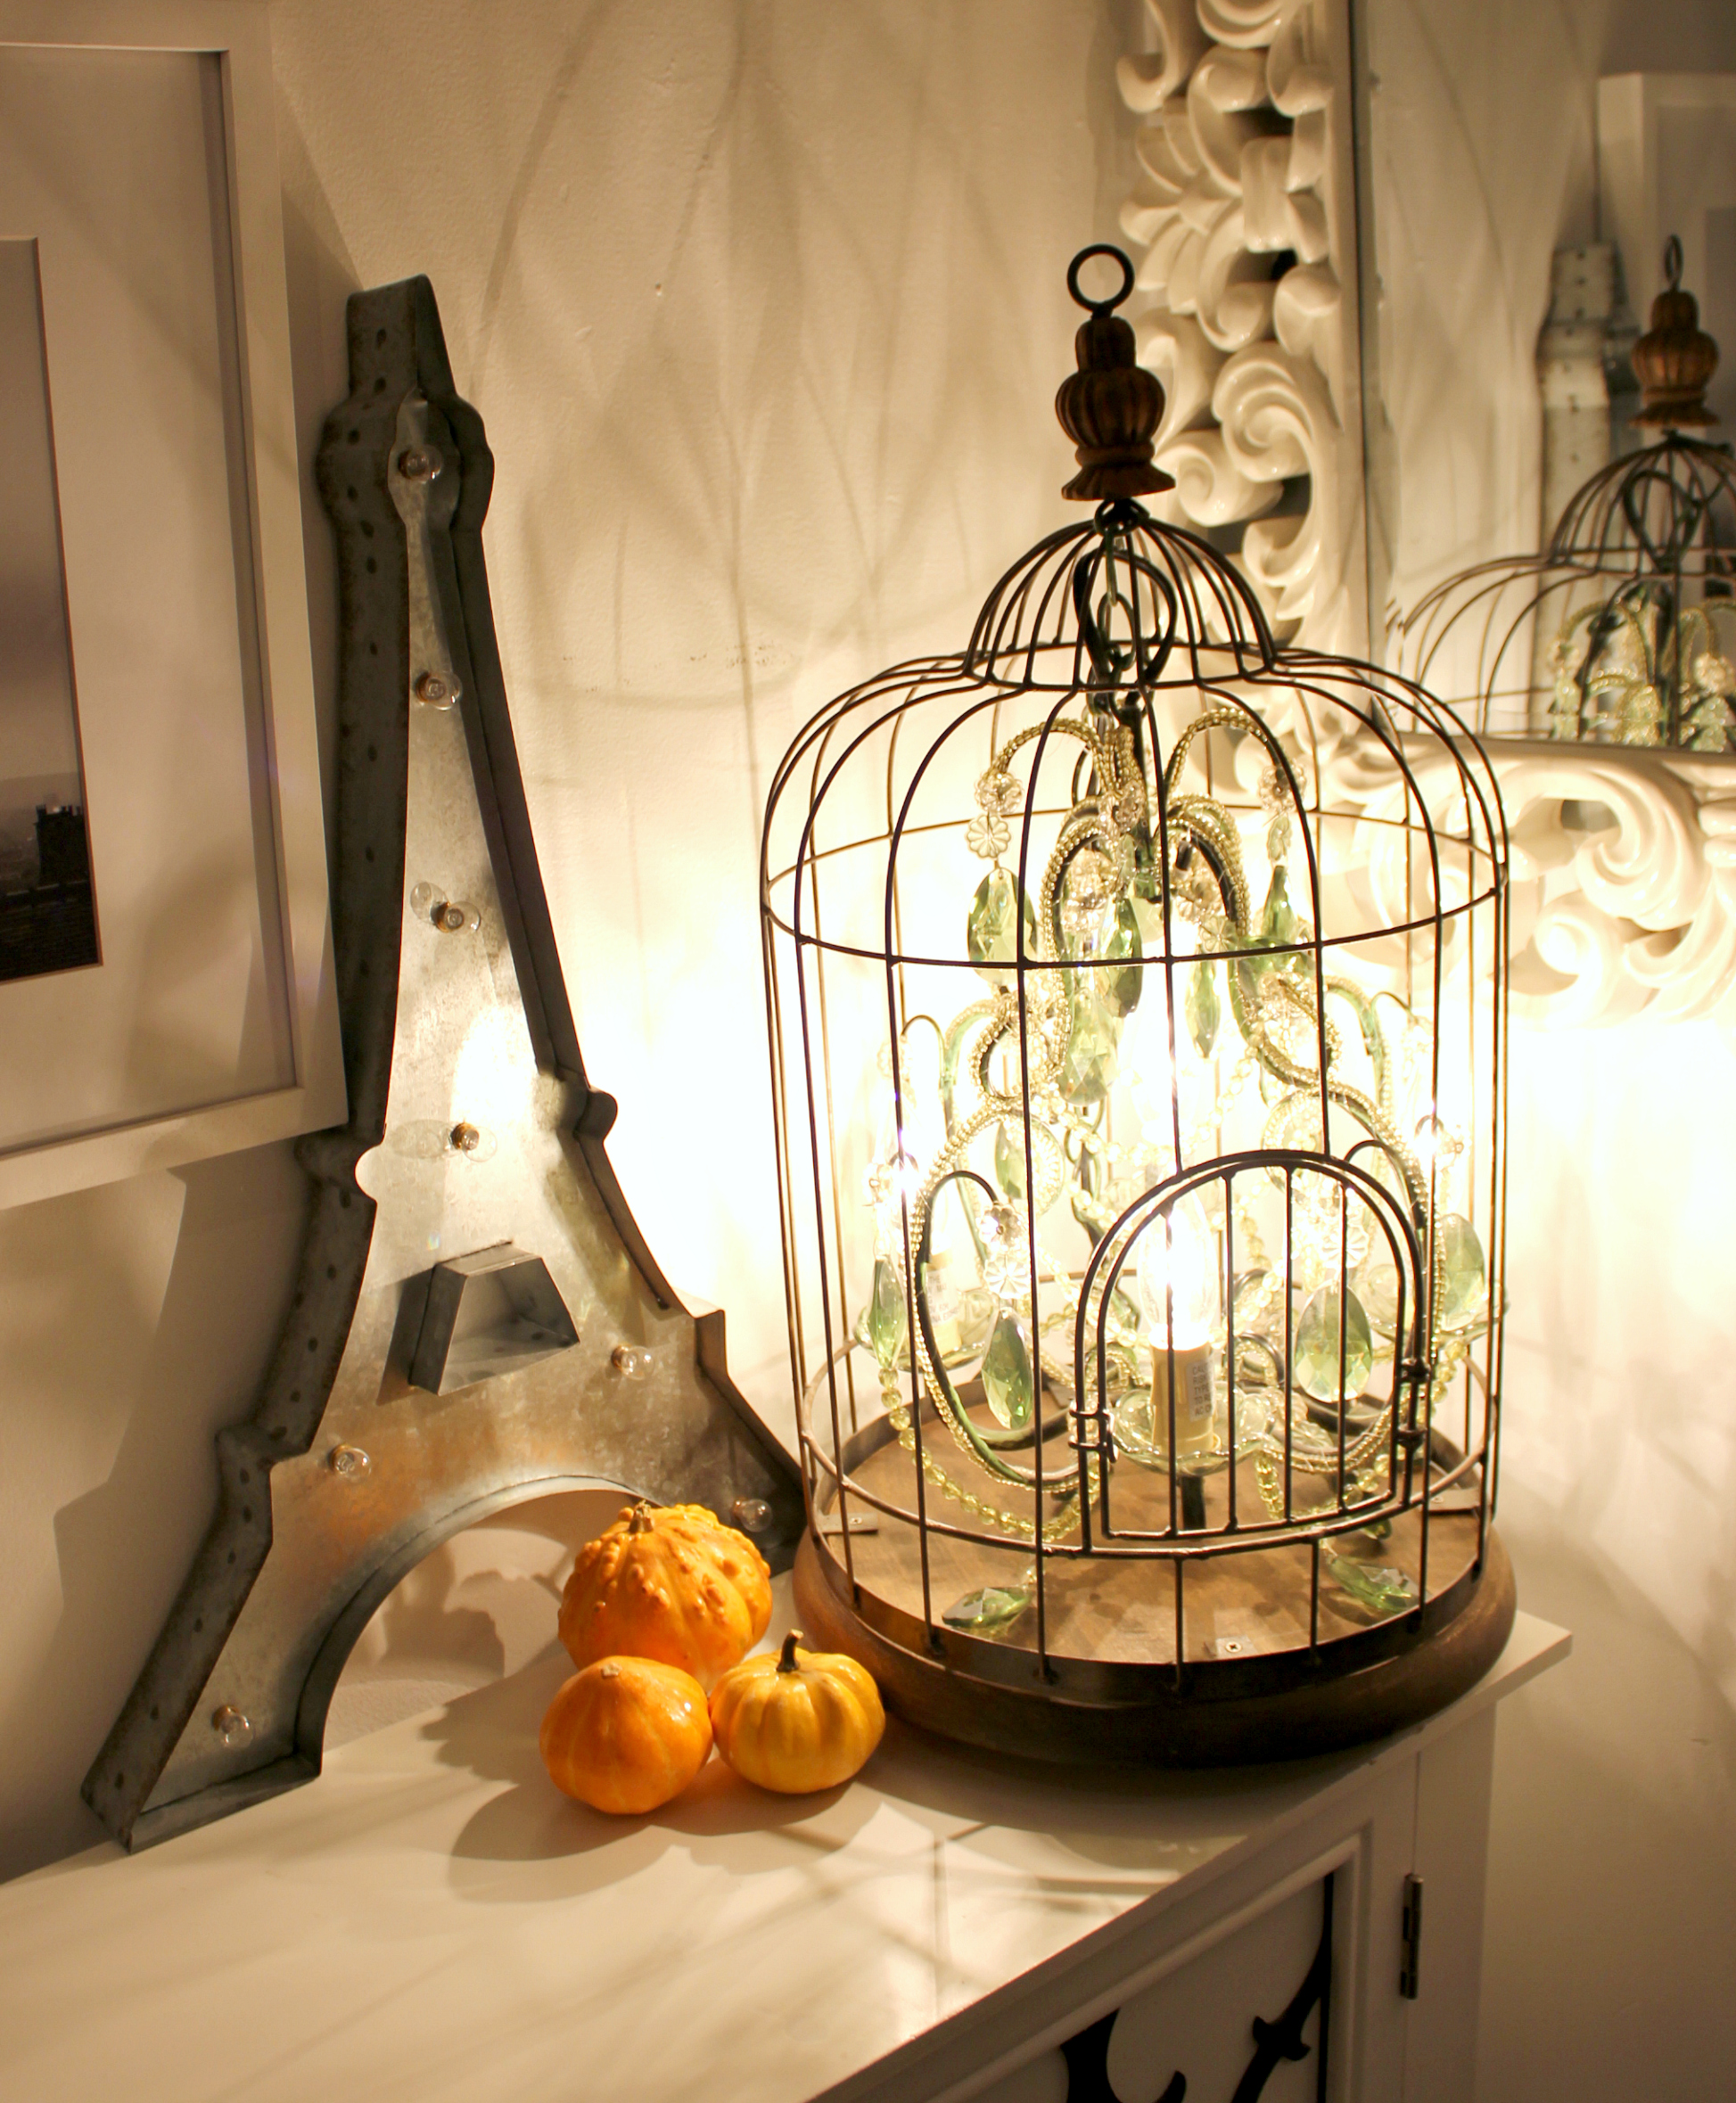
Wahoo! My very own birdcage chandelier shining in all it’s glory.
The post DIY Birdcage Chandelier appeared first on Creative Sides.
]]>The post DIY Wooden Letter Monogram appeared first on Creative Sides.
]]>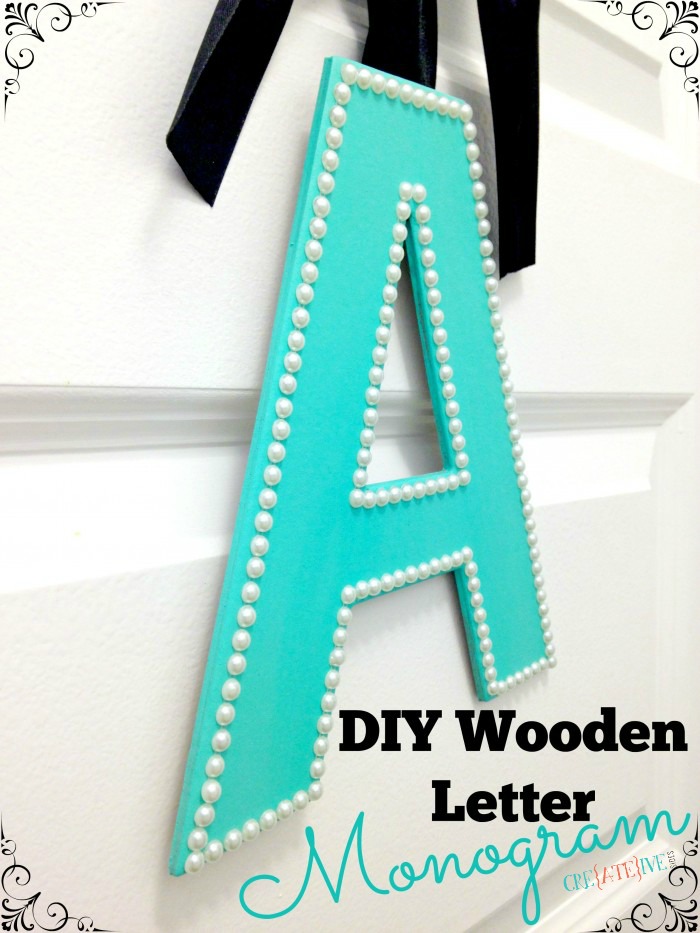
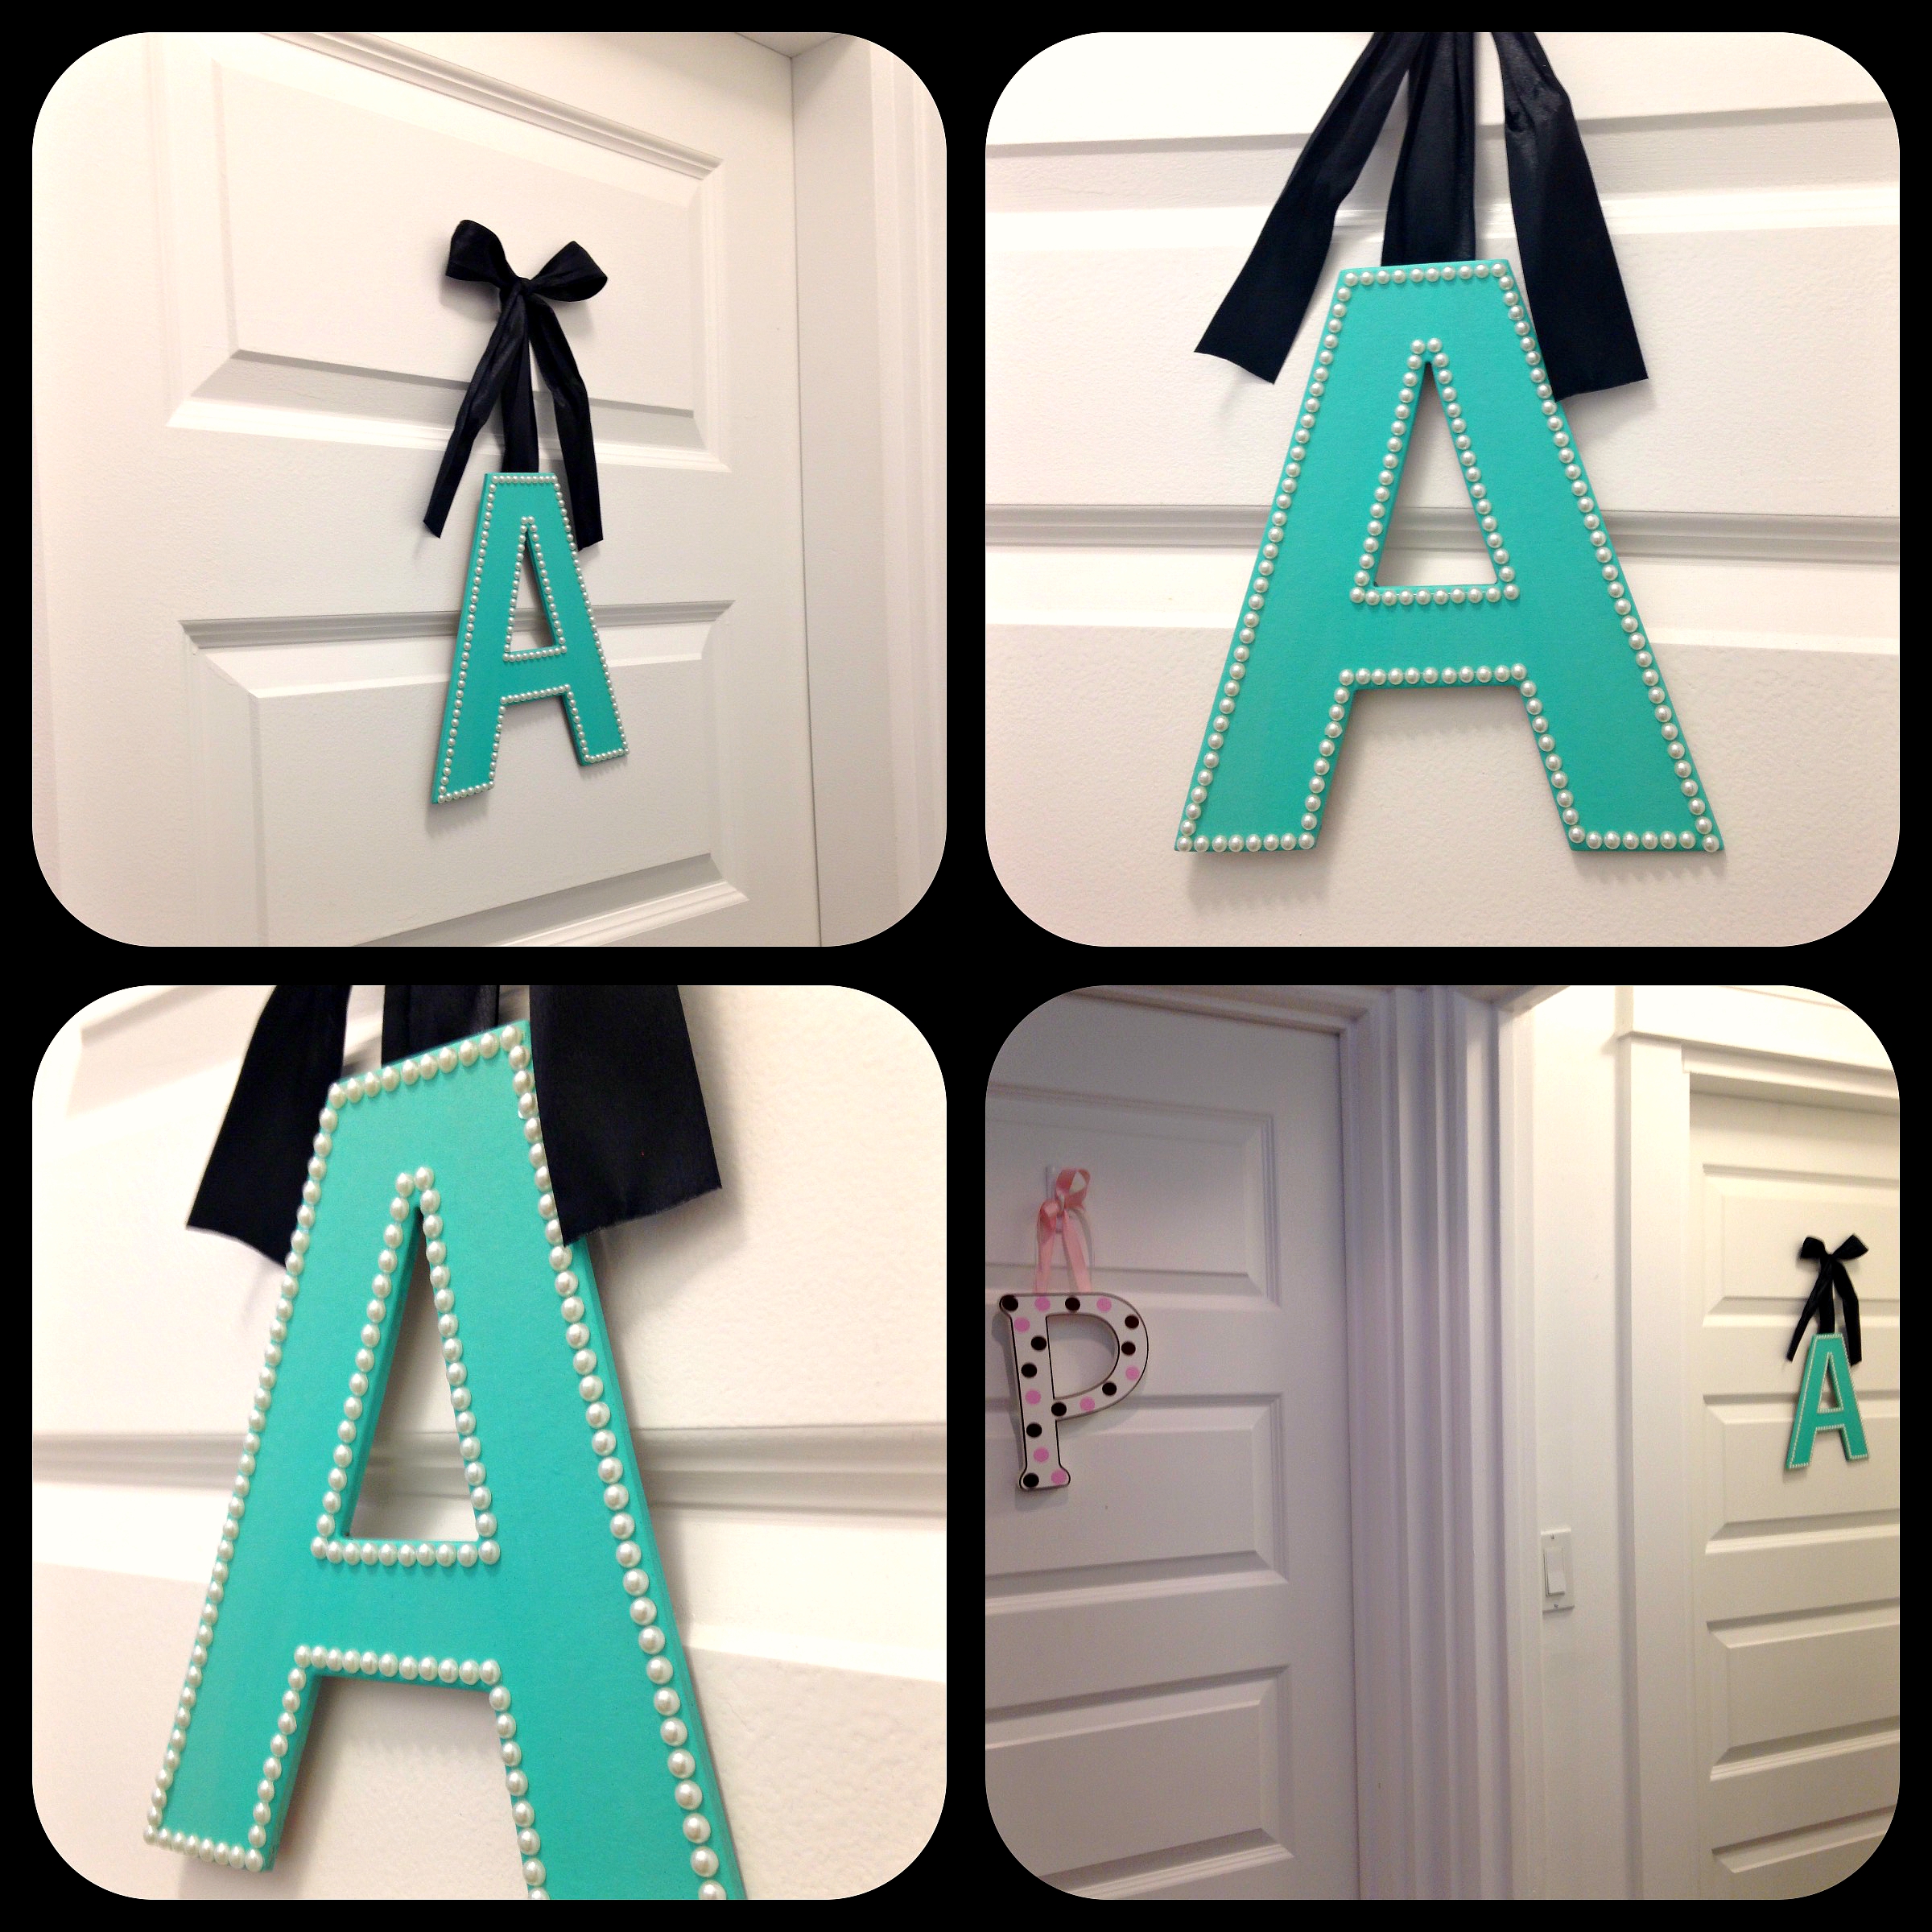
I am really rather taken with monograms and initials. I don’t really know why, it seems kind of silly really, but I have different letters and initials up all over our place. So even though it’s not a true ‘monogram’, both of my girls have the first letter of their names on their bedroom doors. Now after three years of searching for just the right ‘A’ for my younger daughter’s bedroom door, I decided to make one myself. Delightedly it only cost me about $3 in supplies. But to be perfectly honest, I could not endure the conversation regarding why the letter ‘P’ on her older sister’s bedroom door was larger than her letter ‘A’ again. Really, seriously not again. I don’t believe words could even do justice to conveying the grave importance Acacia felt this held. Of course her door had a letter ‘A’ on it (I am not a monster), but it was in fact smaller than her sister’s (and all the sparkles in the world couldn’t change that).
So a whole $3 dollars lighter and prompted with the motivation to never have to discuss this again (heaven forbid the older sister has something the little sister has not), I embarked on this incredibly simple project. I have to admit I am very pleased with the way it turned out. More importantly Acacia was over the moon happy and actually gasped out loud when I surprised her with it on her door! Thus freeing up more time for never ending conversations regarding more important things like why is the sky blue and how rainbows are made and why when we cut our own hair, it will not grow back the next day…. (and of course my personal favourite of why I won’t buy her a unicorn).

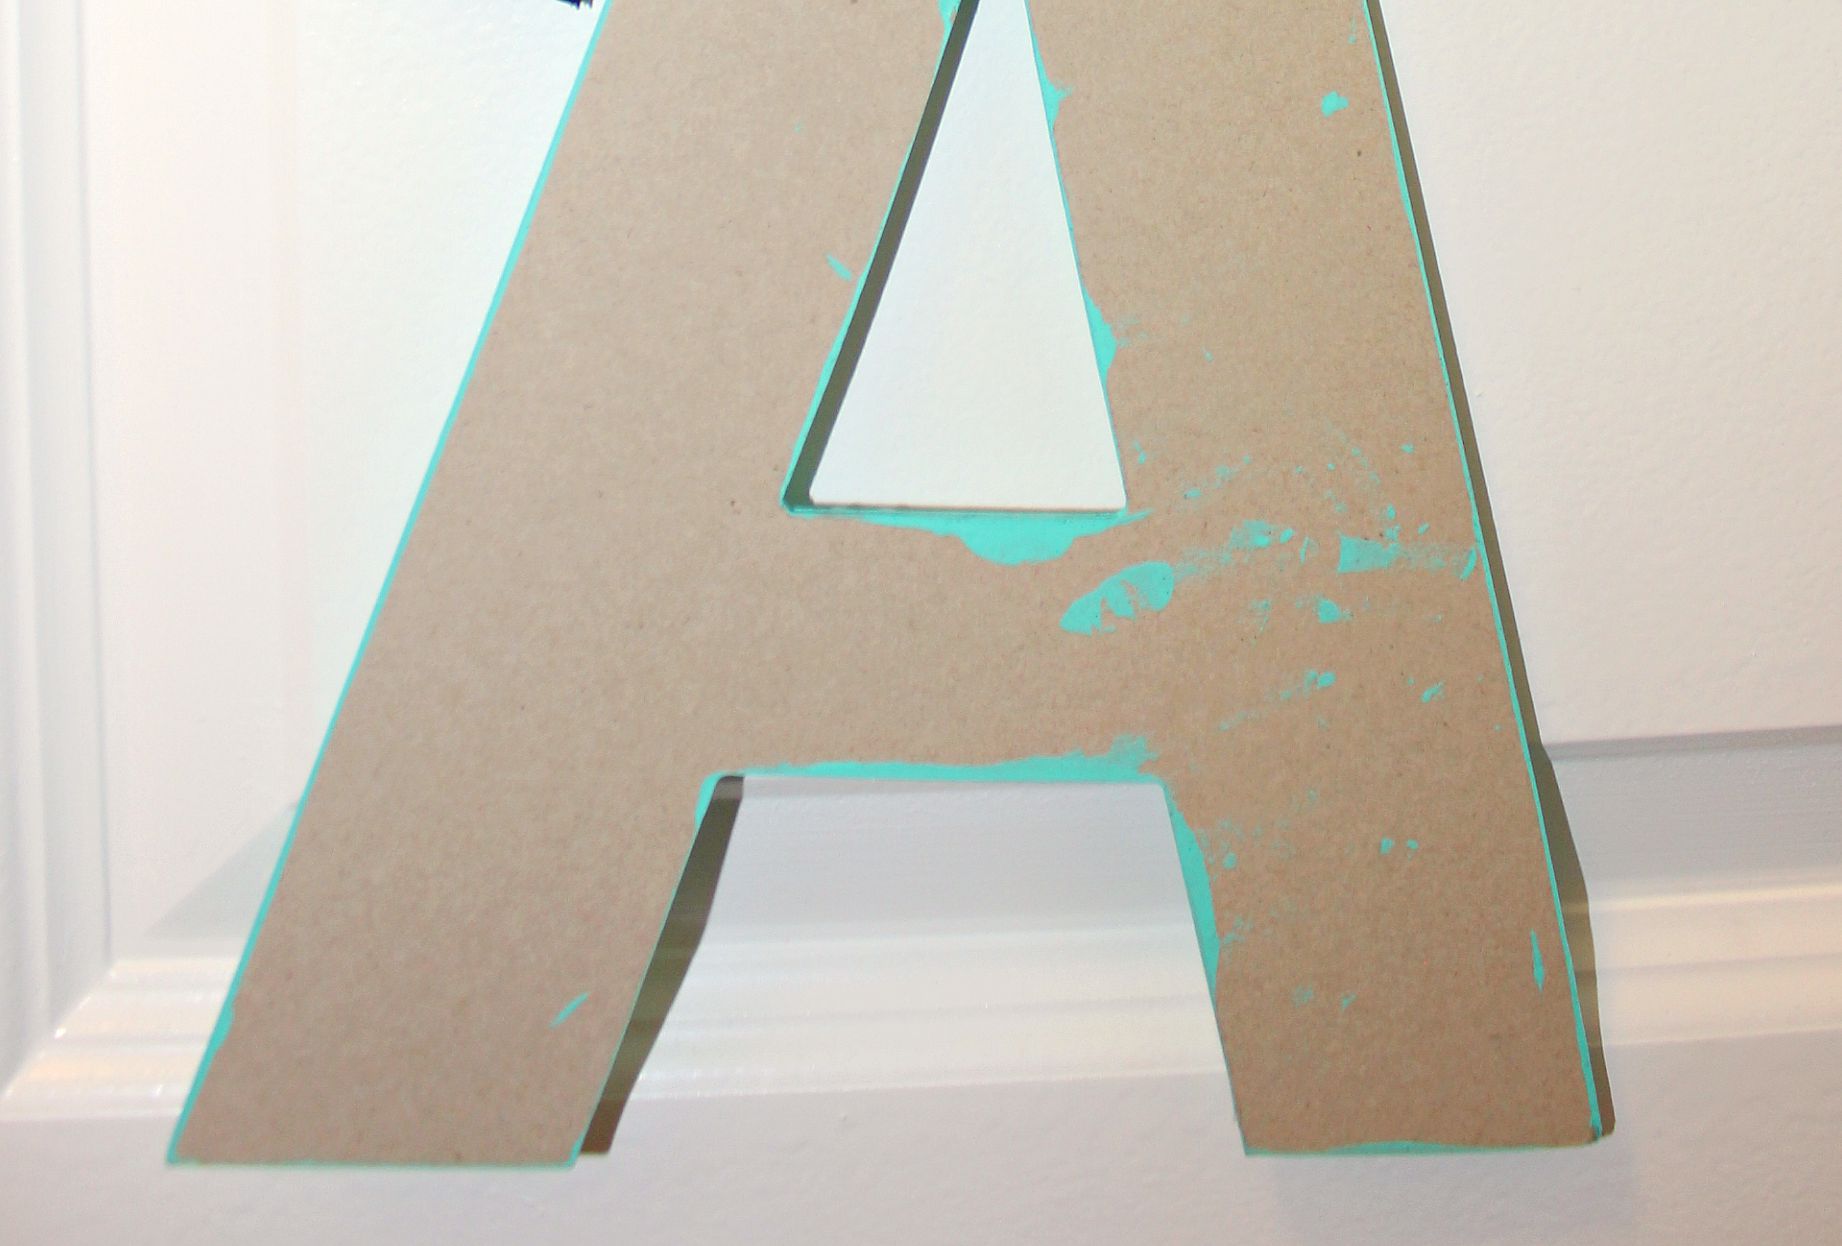
My love of all things Tiffany’s was the inspiration in both my colour and style choice. The actual ‘A’ and paint were found at Michaels (in the sale section at about .50 cents each if I remember correctly). The ribbon I already had, but can also be found at Michaels or Fabric Land. As for the pearls, they were stickers from Dollarama, making this project a breeze!
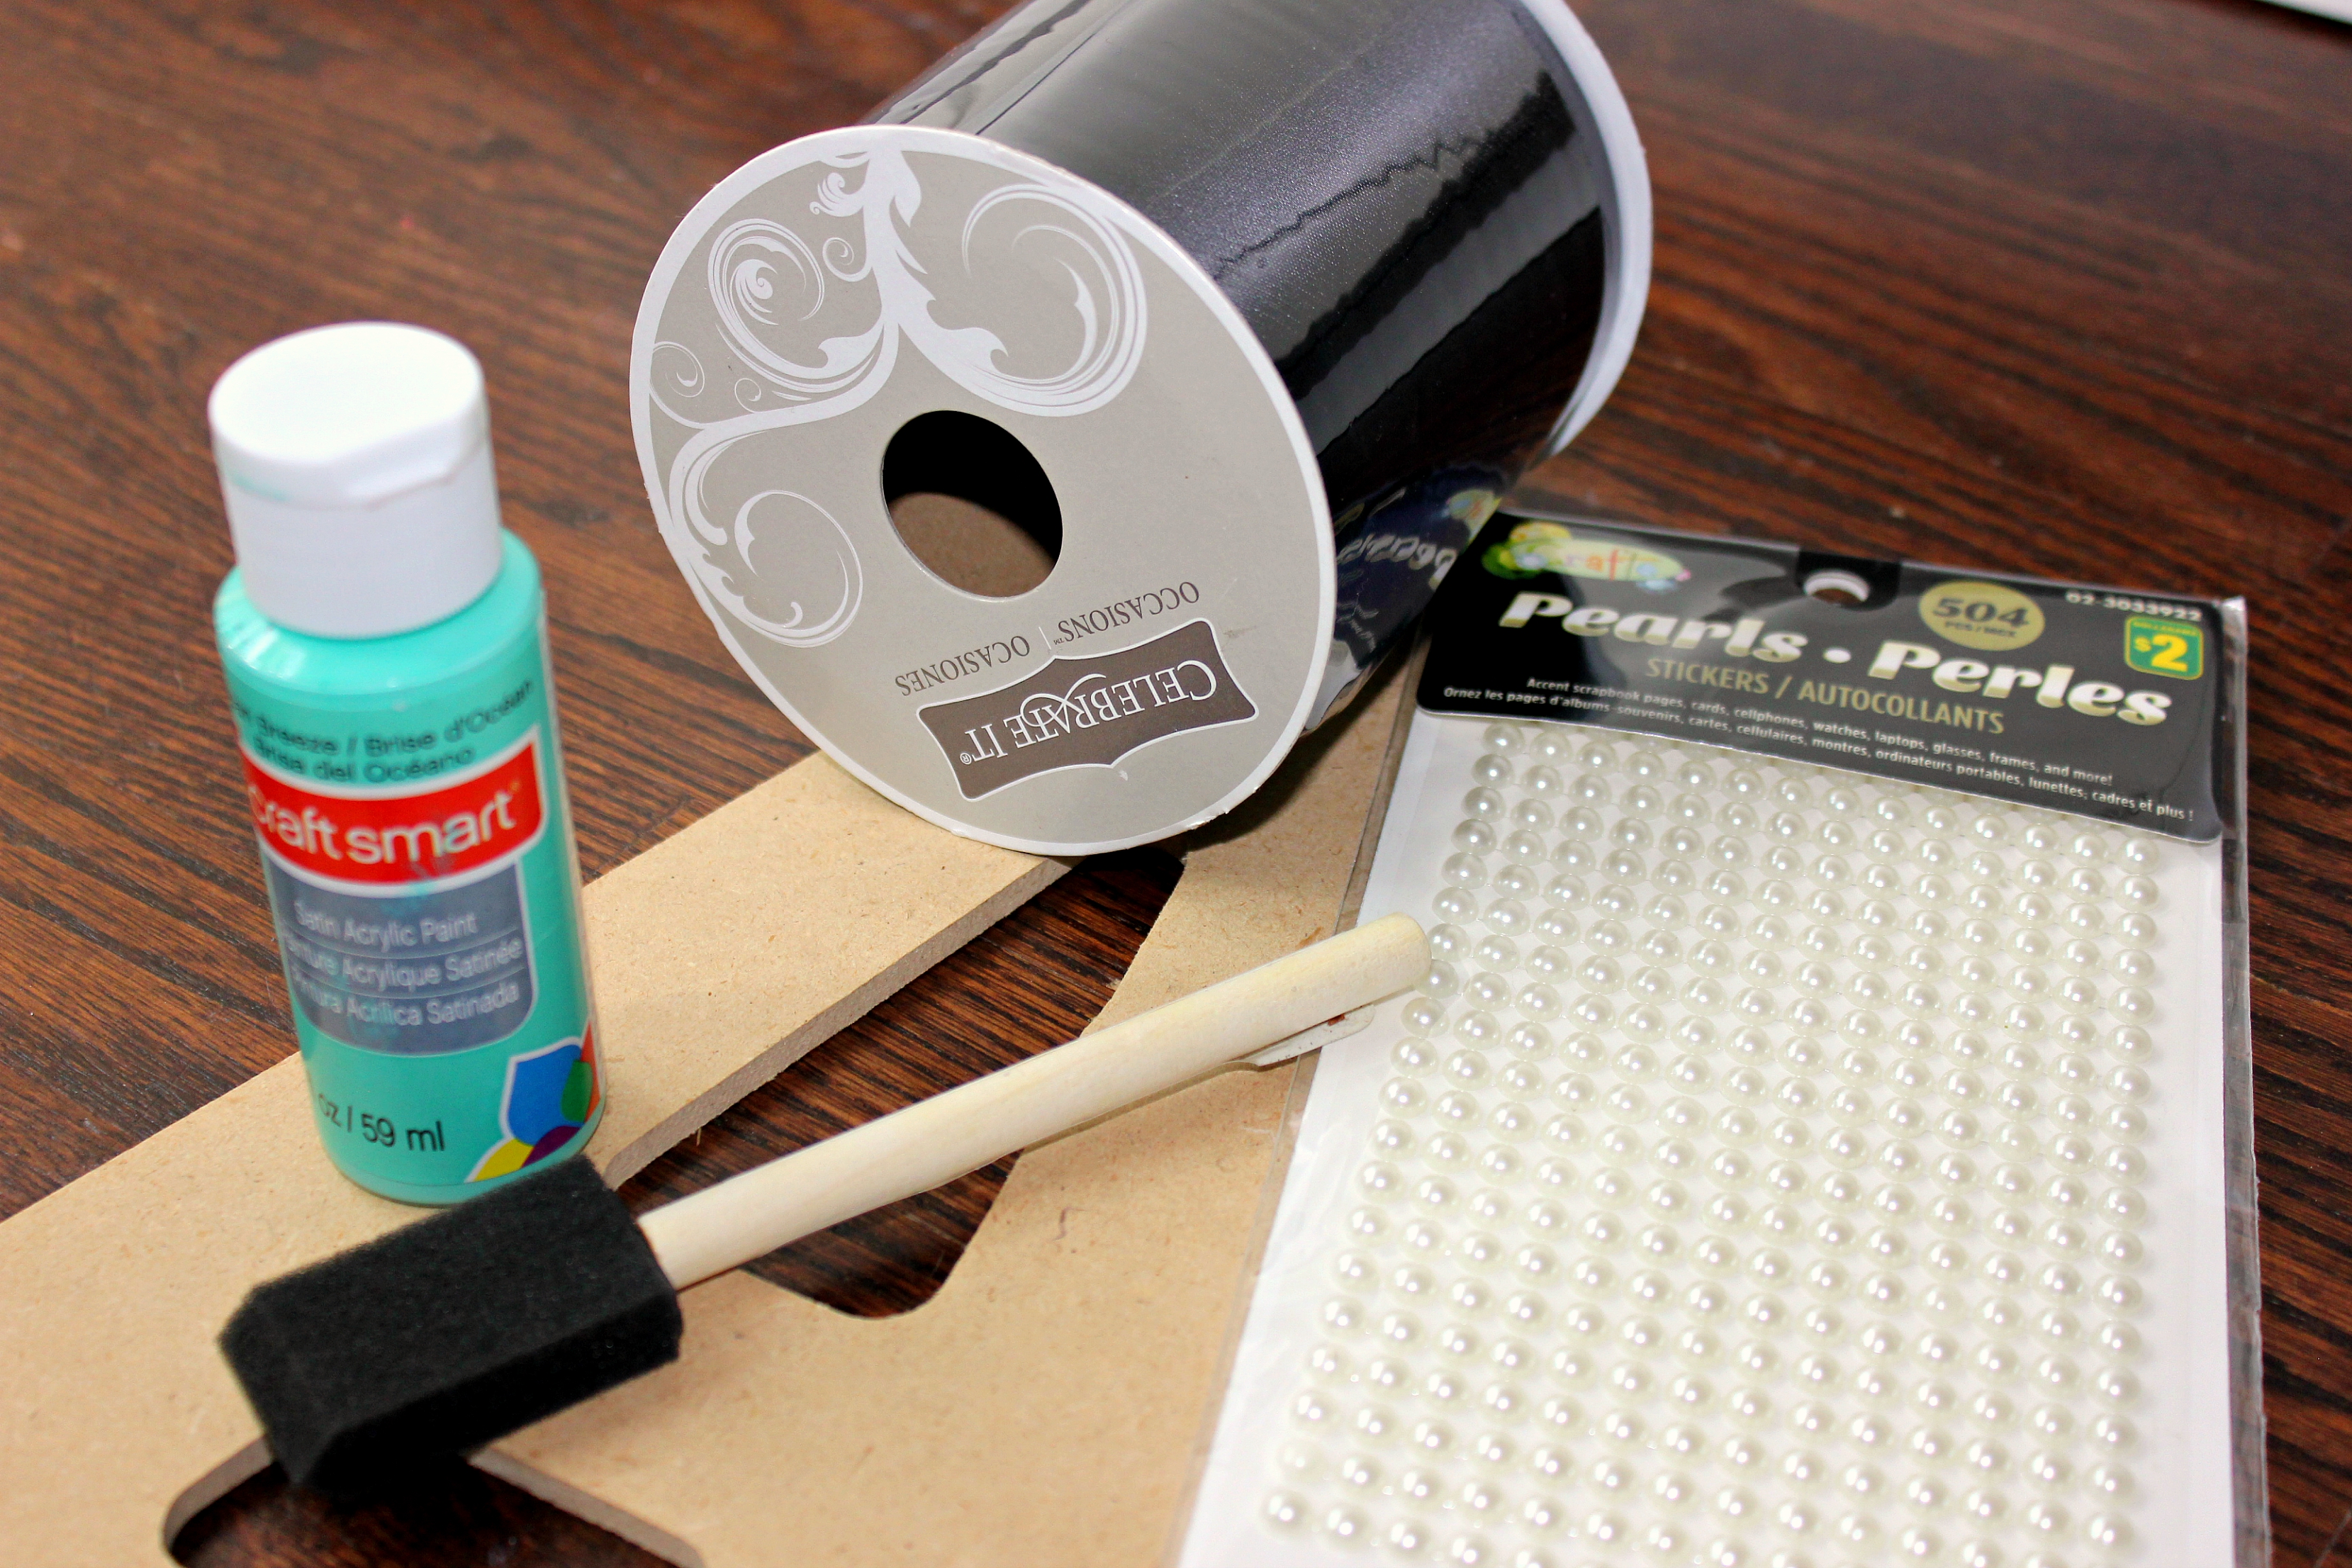
For a similar project you will need:
A wooden letter
Craft paint (I used craft smart satin acrylic paint in ocean breeze)
A foam paint brush
Embellishments (I chose pearl stickers)
Ribbon
Hot Glue Gun (or craft glue)
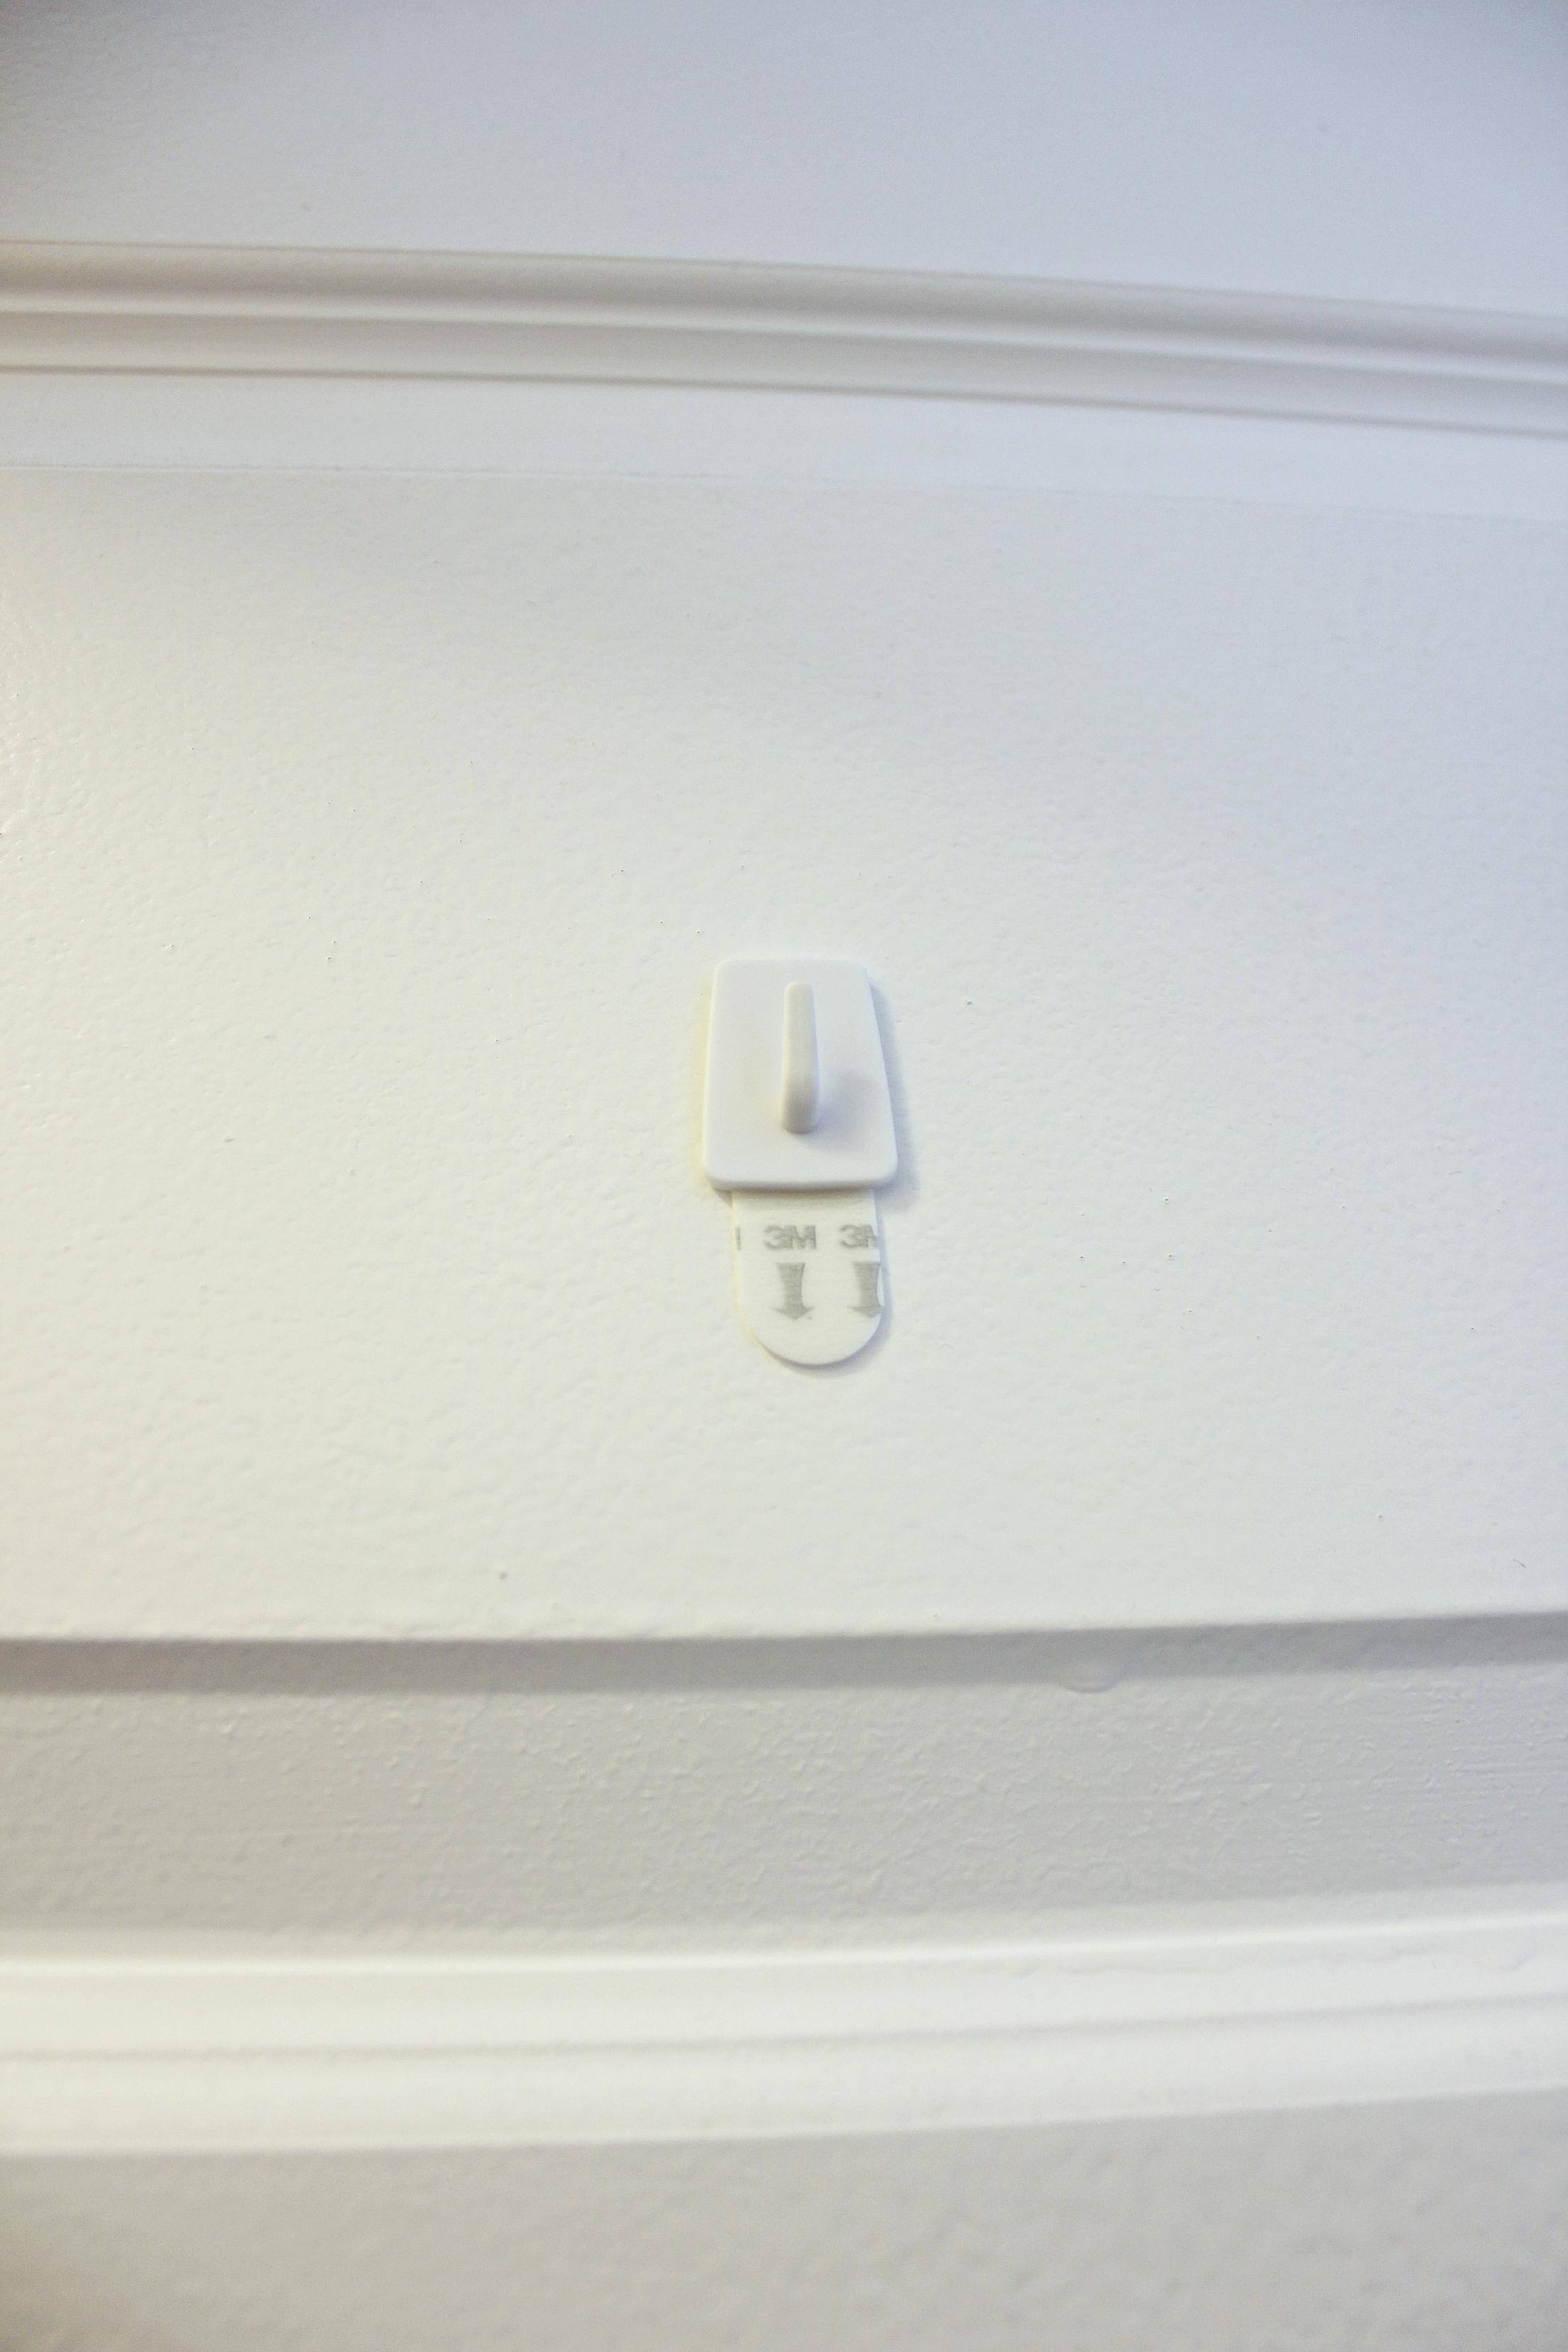
A hook (I went with a small Command Damage-Free hook so as to not leave a permanent mark on the door)
Scissors
Step 1: Paint the letter, starting with the sides. I used two coats of paint, allowing the letter to become ‘dry to the touch’ in-between coats (this really only took a few minutes). Then allow to dry completely (if it is not completely dry the stickers will not adhere properly in the next step).
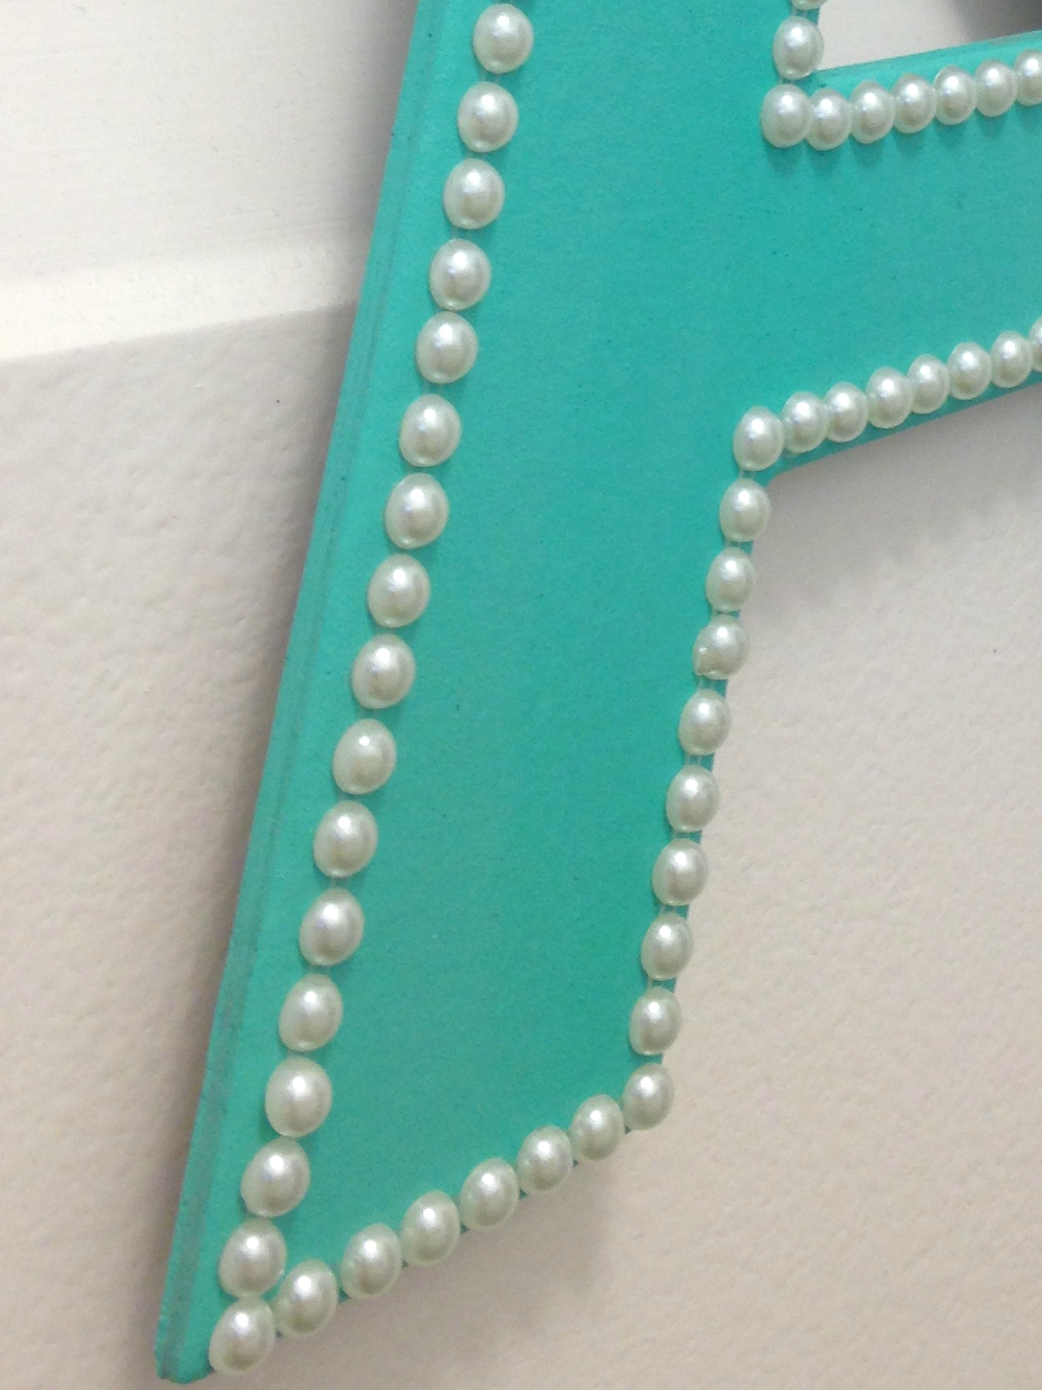
Step 2: Once completely dry, outline the letter in pearls. Following the shape of the letter, lay the pearls down just inside the edge. My ‘pearls’ came in sticker form, with 14 in a row on a clear sticker backing. I trimmed the stickers to fit with scissors (cutting the sticky plastic backing not the pearls themselves), especially on the corners, trying to get as uniform a look as possible.
Step 3: Cut a length of ribbon. I cut a length of about 36 inches. Fold in half at the centre point and glue to the back of the letter top and centre (so it will hang straight). I used my glue gun for this and it was quick and easy.
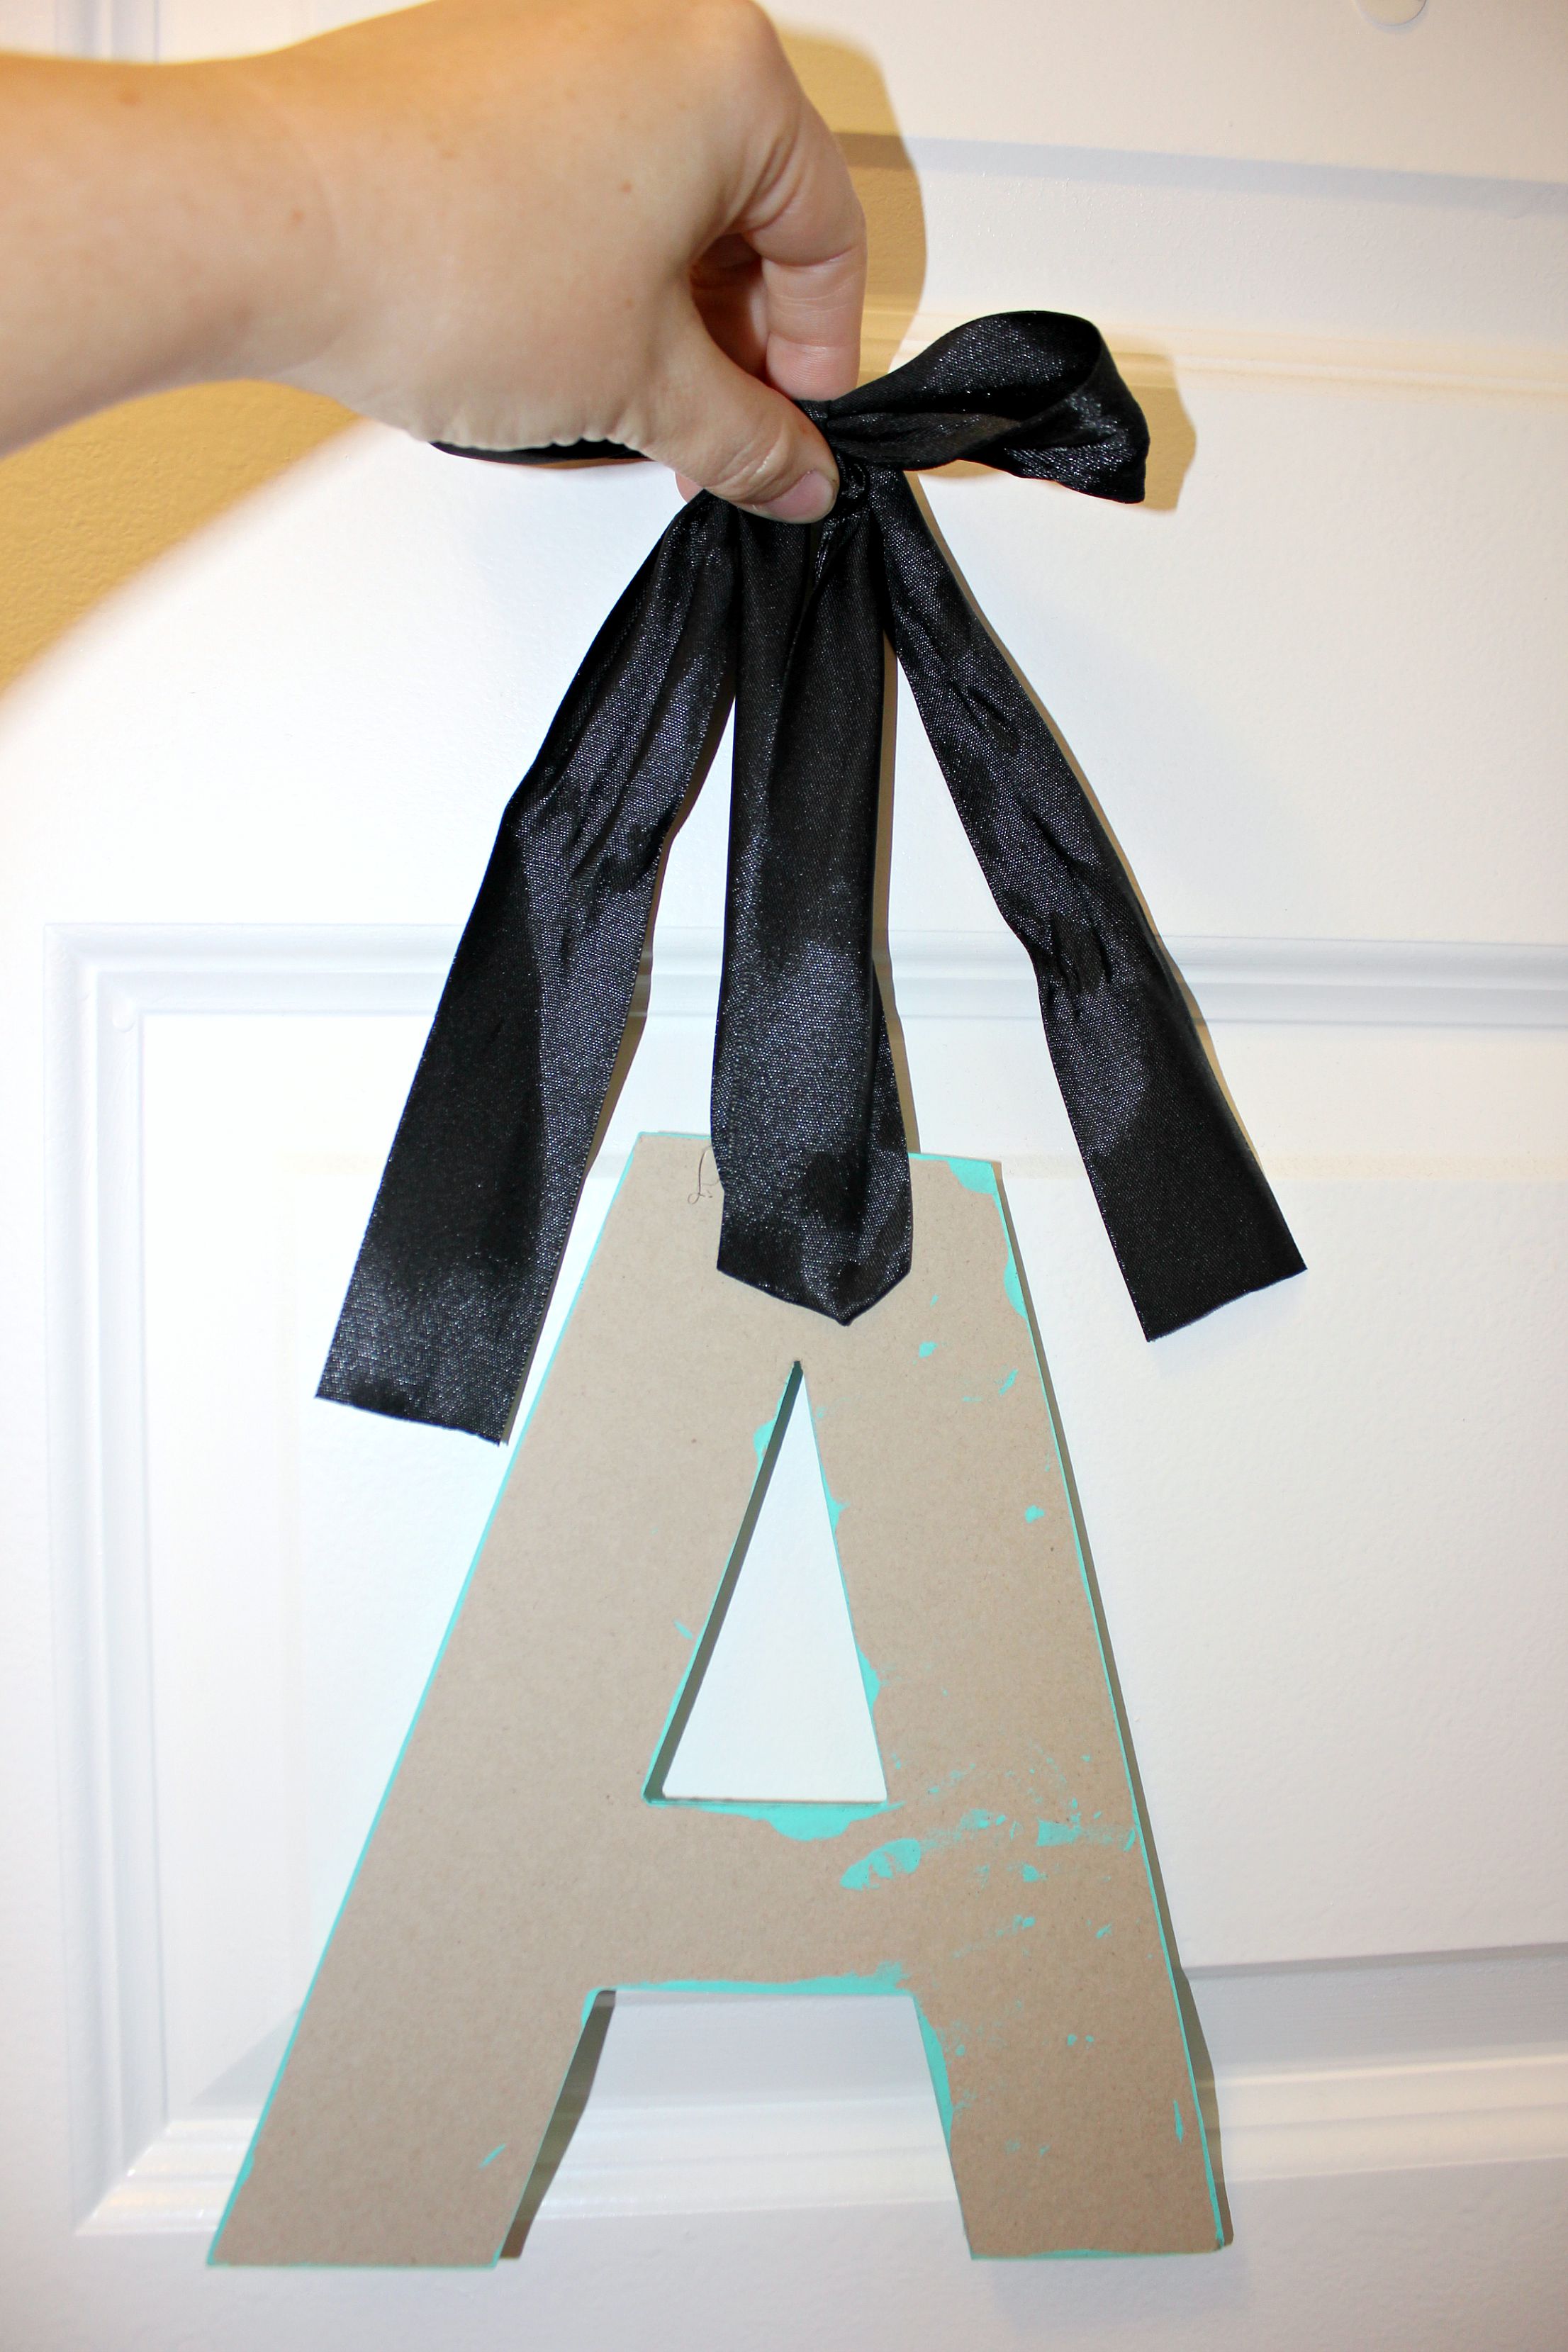
Step 4: Leaving the desired length of ribbon, tie into bow at the top. Trim the edges of the ribbon so they hang evenly and are not frayed.
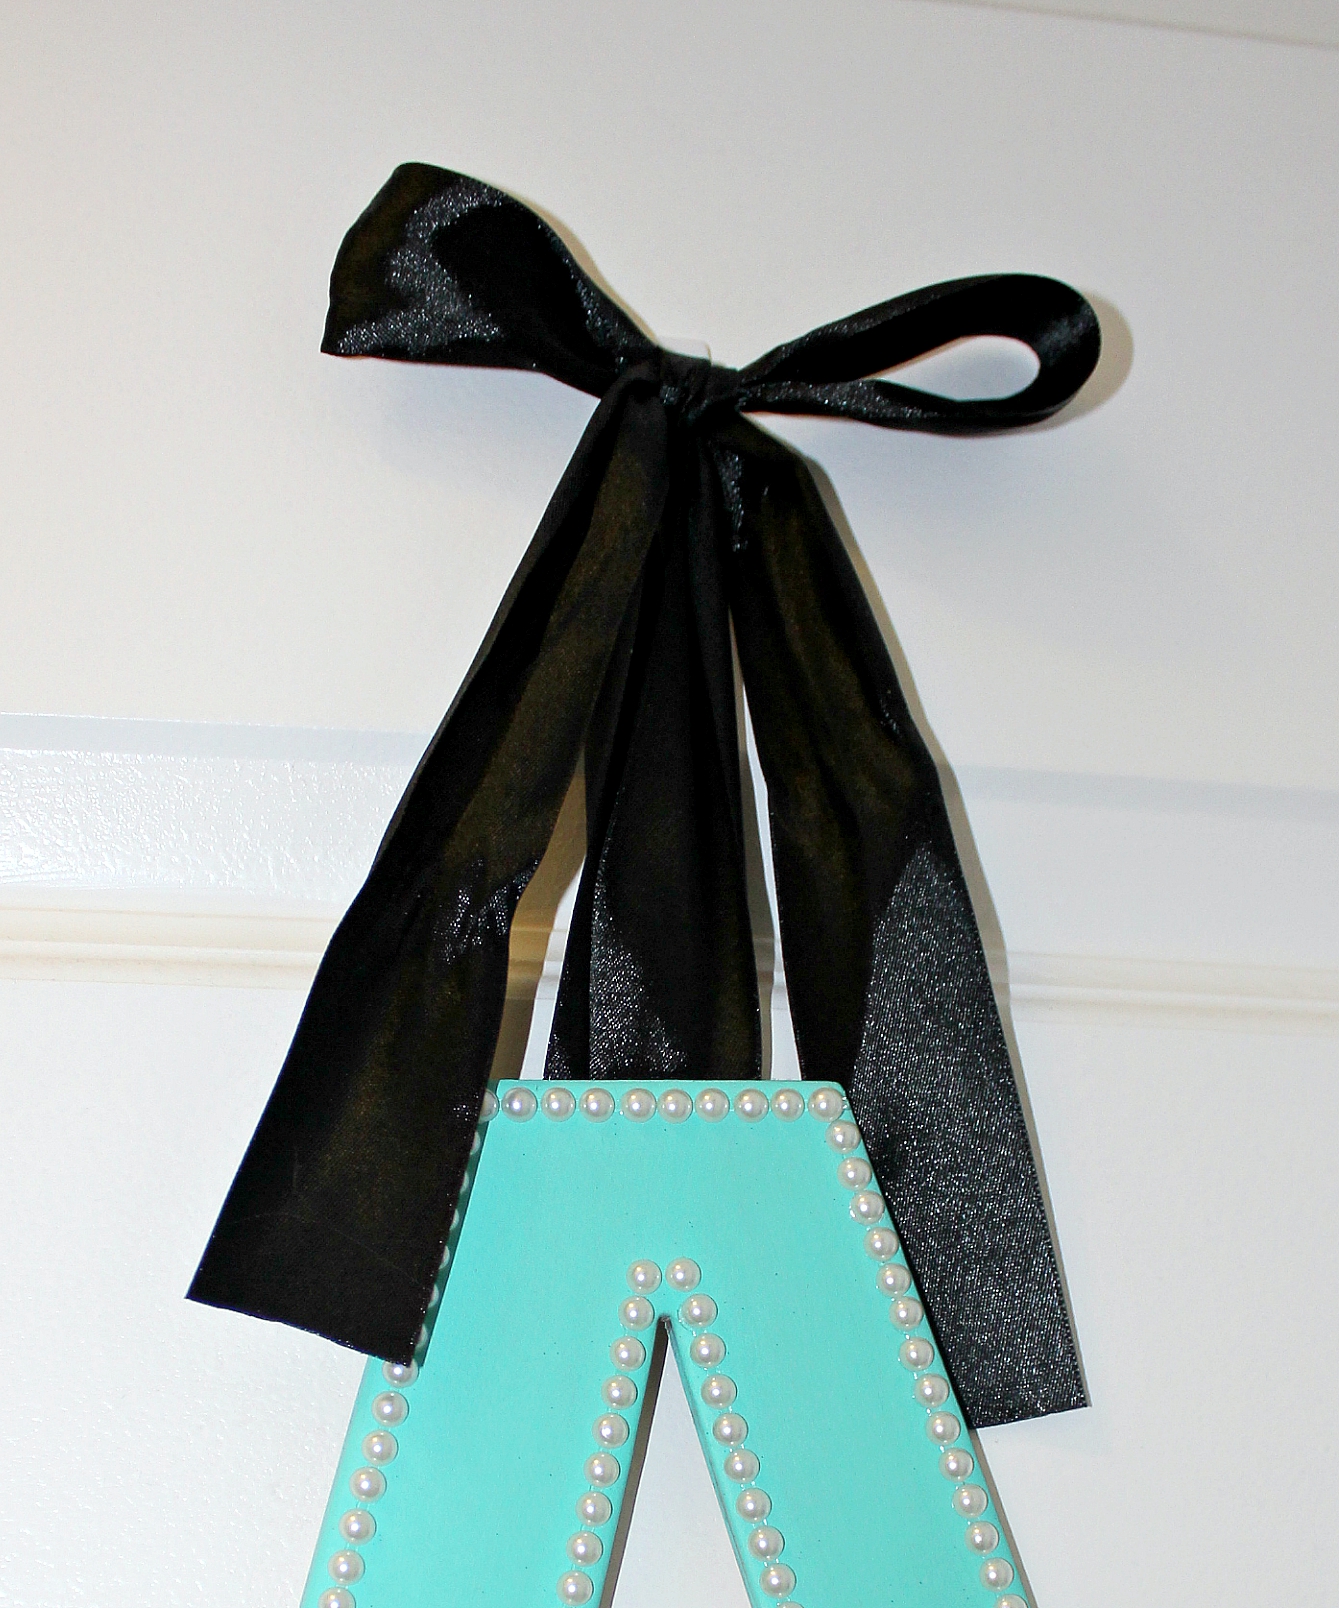
Step 5: Attach the hook to the door (following the directions that come with the command hooks, if using) and hang up the letter by the bow.
Step 6: Step back and admire your handy work and allow your child to gasp in glee!
This post may contain affiliate links. See our disclosure policy for more information.
The post DIY Wooden Letter Monogram appeared first on Creative Sides.
]]>The post Spice Up Photo Frames Using Scrapbook Paper appeared first on Creative Sides.
]]>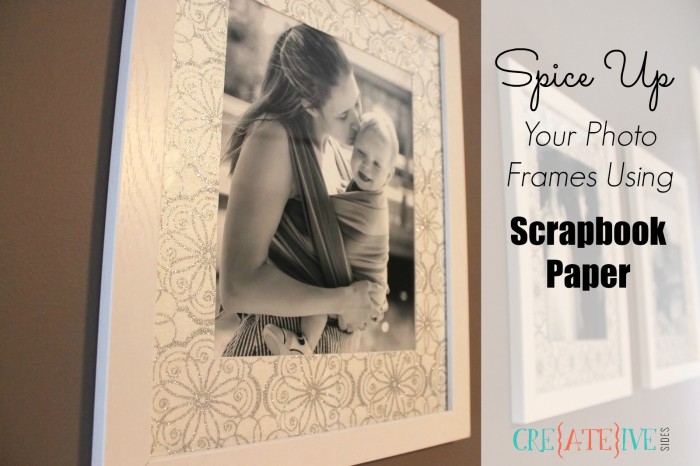
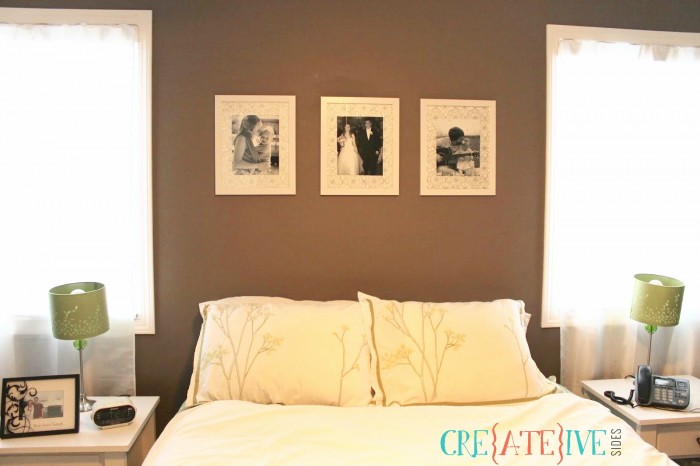
One day I was scrolling Pinterest – as I always do – when I came across a bedroom look that I absolutely loved. Above the bed, they had three photos framed and it looked really beautiful. I knew I wanted to do this in my bedroom!
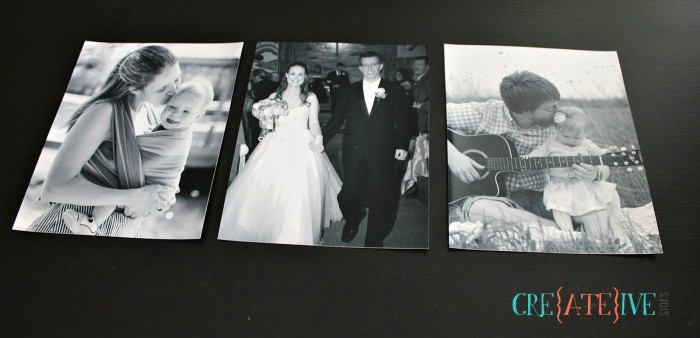
I found the perfect family photos; one of my husband and I on our wedding day, a photo of me wearing my son, and a photo of my daughter and husband with his guitar. I printed them in 8×10 size and purchased frames.
I chose white frames to match our white furniture, however when I set the photos on the frames to see how the display would look, I was a little underwhelmed. I love crisp and clean white, but the frames just didn’t blow me away.

They needed more. I then got a brilliant idea – I could add some fancy paper to the backing to spice them up! I wanted things to be kept simple; definitely not anything too busy, and I soon found some scrapbook paper that was just right. It was the perfect mix of elegance and sparkle.
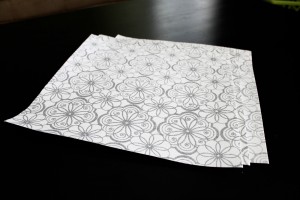
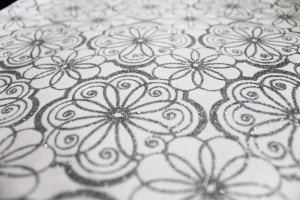
The white with the silver glitter is just gorgeous and catches the light wonderfully. Adding the paper to the frames was fairly straightforward, but here’s how I did it!
How To Spice Up Your Photo Frames Using Scrapbook Paper
Step 1: Take the cardboard backing out of each of the frames.

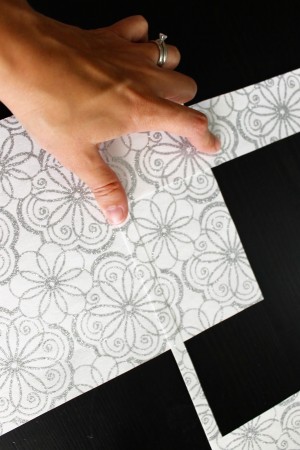
Step 2: Trace the backing shape onto the back of my paper.

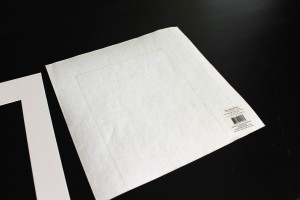
Note: If the scrapbook paper is the same size or smaller than your frame backing, you just cut it out and you’re done!
Mine was unfortunately a bit larger.I cut it out and it looked like this:
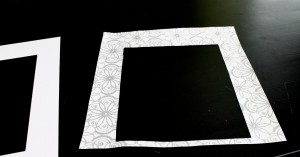
Step 3: Line up the pattern on my remaining paper with the cut out and taped them together. Then re-trace and cut again. I had to do this twice to get the pattern to line up properly and ended up with 3 pieces.
Step 4: After they’re all cut out, tape them together with a bit of scotch tape. I also snipped off the bottom of the original piece so there were less “seams.”
(If you’re doing this with the same dimensions as mine, I would recommend leaving this bit at the bottom until now, to help line up your pattern)
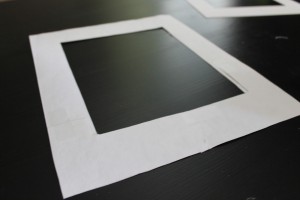
Step 5: Put the paper and backing back into the frames, and hang them up!
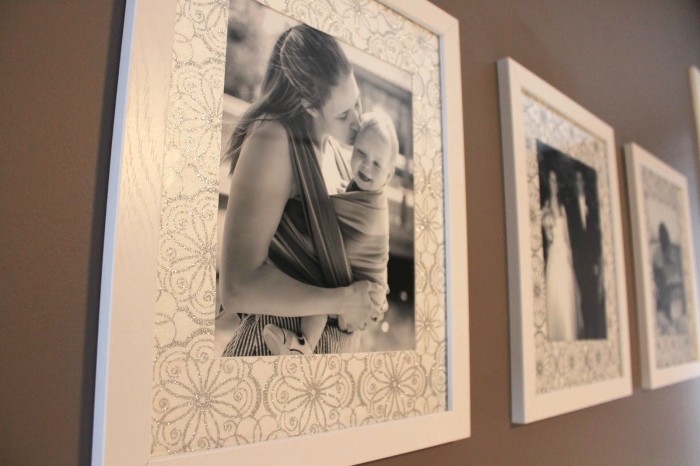
I really love the extra detail and shimmer the paper adds. This was such an easy project and is a great way to spice up your photo frames!
This would also be super fun in a child’s bedroom where you can use more bold patterns and go a bit funky!
The post Spice Up Photo Frames Using Scrapbook Paper appeared first on Creative Sides.
]]>The post How to Cover Letters with Fabric appeared first on Creative Sides.
]]>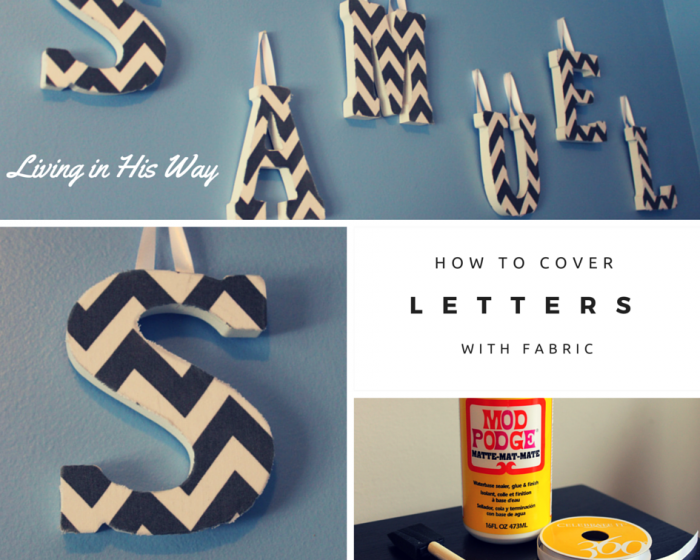
When I found grey chevron bedding for my son’s nursery and remembered I had grey chevron fabric, I knew a project was looming!
My older daughter has her name displayed in her room and I just left the letters plain white to match her furniture, but for Samuel’s room I decided to dress them up a bit to go with the rest of the decor.
I didn’t take photos as I was covering, but this really is a quick and easy craft.
How to Cover Letters with Fabric
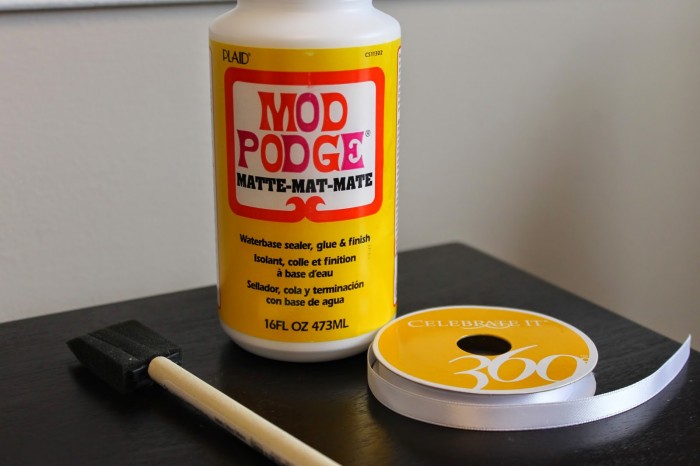
You will need:
-fabric
–wooden letters with a smooth surface
–mod podge
–a sponge brush
–ribbon
You don’t need much fabric for this, depending of course on how large your letters are and how many you’re looking to cover. I started with half of a yard and had plenty left over.
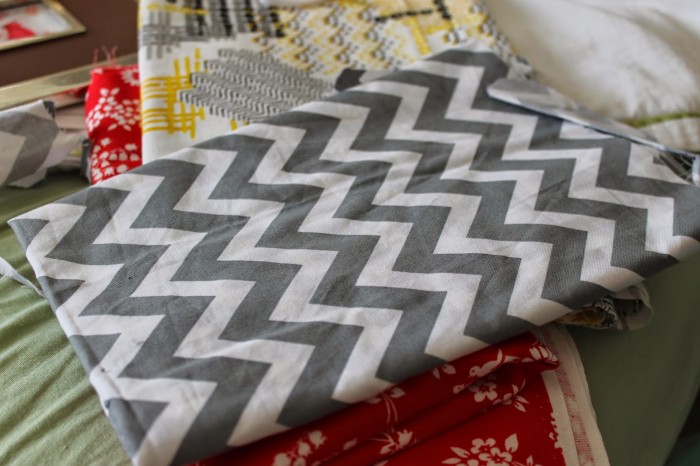
First, I traced my letters upside down onto the wrong side of my fabric. Next, I cut them out.
I covered the right side of the letters in mod podge, using the sponge brush and placed the fabric cut out on each letter, moving it to completely cover the white. Then I let it dry. Once it was dry, I added another layer of mod lodge to seal it.
The final step is to add the ribbon! This step is totally optional, but the letters I chose didn’t have a hole for hanging and I like the look of the ribbon as well.

I used mod podge to attach the ribbon too. I applied it to the top, stuck on the ribbon, and sealed it once it was dry. It worked like a charm and allows each letter to lay flat against the wall.
I measured the pieces of ribbon first to make sure they were all the same length. For letters that require two pieces of ribbon, this is especially important! Make sure they are attached the same way as well, or your letter won’t hang straight.
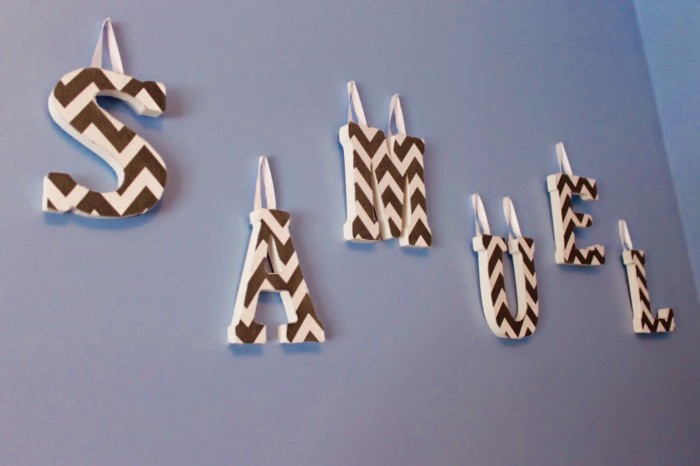
I love the final result and think it really adds to the nursery. There are so many possibilities here and letters can be decorated to match pretty much any decor!
This post originally appeared on livinginhisway.ca
This post may contain affiliate links. See our disclosure policy for more information.
The post How to Cover Letters with Fabric appeared first on Creative Sides.
]]>