The post Small Spaces and How to Maximize Them appeared first on Creative Sides.
]]>
How to maximize space in a small apartment
If you happen to live in a booming urban environment, you may notice that the cost of living space is at somewhat of a premium. The solution to this is often to live in smaller spaces. Many of us have lived in small spaces at some time in our lives, and many of us still do – especially when you’ve found that perfect apartment close to work and right next to the grocery store. But how can you escape that feeling of living in a tiny box? There are a few small space solutions that can help you to really open up your space and make the most of it.
Think Vertically
It’s important to remember that every room has eight corners! One way to maximize your space is by thinking vertically rather than horizontally. Floor to ceiling bookshelves are a great way to make use of wall space. Cabinets too! You can also think about exploiting the spaces between the tops of furniture and the ceiling. Think of hanging or high-mounted elements, which will draw the eye upwards.
Storage Solutions
In the same way, consider storage nooks, bespoke built-ins and tailored furniture to make use of every available portion of space. For example, try retractable pantry drawers for small appliances. To reduce clutter, make sure that items can easily be shut away or grouped by category. Open storage can also draw the eye upward; balance this against the amount of clutter you have on your shelves.
Opening Up
Doors and walls are so last century! Consider using room dividers in place of walls to let your space breathe. If you want to go further, consider glass walls, which can separate spaces without visually dividing a room. Curtains are also useful where privacy is required, and can make one wide open room into two very easily. And try increasing your window to wall ratio; larger windows let in more light, which can really make your space seem more open and free.

Less is More
It’s a lot easier to minimize clutter if you don’t have any clutter. Embracing a minimalist lifestyle can not only make your space go further but also cuts down on the need for consistent consumption of consumer goods, saving money as well. A win-win. In terms of furnishings, maximize your square footage by using small, easily moveable pieces of furniture. As an alternative, use fewer, larger pieces of quality furniture – this may seem counter-intuitive, but this can make a room feel grander. But choose which technique you want to use – don’t mix and match!
Mirror, Mirror
The cunning placement of mirrors can do wonders for opening up a space. Using them can easily double the size of a room, for example by mimicking doorways and windows. An alternative is to use reflective metallic subway tiles; reflecting more light will also help the space feel larger. Other visual tricks include see-through furniture made of glass, Lucite or Plexiglas – either that or mounting the mirrors or tiles on the furniture themselves.
Zone Warfare
Think about all the things you do in your house or apartment –work, sleep, eat, relax – and consider separate zones for each activity. You can place different types of furniture and demarcate the zones by using multiple seating areas, a table and chair, or a tented bed. If you don’t want to go this route, go the other way: find elements that have multiple functions, like a table that can function as both dining table and desk, or deep sofa beds. Try ensuring that each furniture piece is dual-use at least. That way you will waste as little space as possible.
Conclusion
Maximizing your space doesn’t have to be a chore – it can be a fun interior design project. Reduce clutter by thinking like a minimalist, and making use of storage space in an optimal fashion. Use visual tricks like mirrors, windows and glass walls to open up the interior, and make use of as much of your vertical space as possible. And consider the type and size of furniture you are using, where it’s placed and what it’s used for. Taken together, these tips should help you to feel like you’re living in a much larger space!
The post Small Spaces and How to Maximize Them appeared first on Creative Sides.
]]>The post What Everyone Needs To Know Before Remodelling appeared first on Creative Sides.
]]> 
Until the day when I can have the older home of my dreams and embark on that adventure, I will happily settle on being about halfway there with our current home that is approaching the 50 year mark. This place has garnered us with plenty of experience in fixing and repairing, but without the charm of a front porch. Any part of our place that looks nice to date is because we have made it that way. We bought this place because we could see the potential and liked the space it afforded us (not because we were won over by things like pink sinks and yellow bathtubs or a lack of doors on most of the rooms…including the bathrooms…). Of course it has meant replacing some plumbing and electrical along the way, as well as many ascetics (orange melamine countertops anyone?), and due to the age of the building, there is asbestos. We didn’t know it initially, but we learned that it was present in the drywall tape. This is hardly unusual. In fact, older homes are not the only ones with the problem (unless you are young enough to think that 1990 is old – in which case get out your smartphone and look up asbestos and shoulder pads – both are bad…. but in different ways…). Asbestos was used in construction up until 1990, believe it or not. Often times it seems to slip people’s minds, but asbestos is something that should be at front of mind when considering renos.
By living in a place that has been on this planet longer than I have, I have been afforded unique insights along the way, thanks to my DIY-happy husband. I’ve learned to say things aloud like, “When I come home today, please let there still be stairs.” After all, in his defense, he can’t read my mind. I learned this when I returned home from work one day, shortly after purchasing our current home, and was shocked to hear myself say, “Where are the stairs that were here this morning?!”
It has also taught me phrases like, “What is your asbestos abatement plan?”. No seriously, my husband’s career is related to safety and the words ‘abatement plan’ are in fact part of our regular vocabulary and riveting dinner conversation.
Asbestos is not uncommon, as most houses built between 1950 and 1990 in BC contain some form of asbestos. In our case, it’s in the drywall tape on the walls. Drywall, insulation and vinyl flooring are very common places to find asbestos. You can find a list of other common places asbestos is located here.
Turns out that buying a place built in the 70’s didn’t just leave us the building legacy of no overhead lighting, sunken living rooms and strangely hued decorative glass panels! The use of asbestos in residential finishes (between 1950-1990) became commonplace because of its incredibly hardy nature and resistance to heat. Now the presence of asbestos in itself is not harmful, but the act of removing it is. If you have ever lived through any type of renovation or demolition, you will know about the dust. The never ending, insidious, possibly make you lose your mind trying to clean it up, dust. There is no way around it. Unfortunately, this is where asbestos becomes incredibly dangerous. As soon as something containing asbestos is disturbed, it can become air born and harmful. You do not want breathe in asbestos particles and there is no renovation without dust (though how I wish there was) and so asbestos protection/removal plans need to be in place.

Before fixing up our homes, we all need to make sure our renovation plans include looking for and safely removing asbestos before any workers come into do the work.
WorkSafeBC is educating homeowners in BC about the danger of asbestos exposure and how we can work together to keep everyone healthy and safe on our projects. Because asbestos was so widely used in BC construction, it’s important that any asbestos is identified and properly removed to ensure the health and safety of everyone contributing to the project or living in the home. Take asbestos seriously. It can only be removed (or remediated) by qualified professionals.
Consider these sobering facts. Breathing in asbestos fibres can cause serious health problems, lung diseases and cancer. Asbestos-related disease is the leading cause of work place death in BC. In fact 584 workers died from asbestos-related diseases between 2006 and 2015, 30% of which were in the construction industry alone.
Clearly, we need a greater awareness of asbestos and how prevalent it can be in structures built before 1990. Educate yourself before taking on a home renovation. Click here to learn more about asbestos.
It’s important to take the necessary steps to ensure your home is asbestos-free before starting any demolition or renovation project.
Disclaimer: this post has been generously sponsored by WorkSafeBC, the opinions and language are my own.
The post What Everyone Needs To Know Before Remodelling appeared first on Creative Sides.
]]>The post Goodbye Perfectionism appeared first on Creative Sides.
]]>
I often struggle with having everything just so. Perfectionism is a slippery slope, especially when children are involved. Children are not perfect; they are glorious and wonderful. Learning how to do things comes with mess – lots and lots of mess. That mess and clutter makes me shy away from all day cleaning binges in order to make my house appear uninhabited for when company comes calling. I don’t want to teach my girls that their selves and their homes must be perfect to be hospitable. That’s just not true.
I decided to make ‘goodbye expectations’ my new motto. Embracing that spirit means it’s time to say:
“Goodbye, see you later, adios, so long expectations!
Here we are in all our imperfect glory!!!
Take us as we come, because we are great!
Welcome to ‘how we do things in our family.
Hello friends – my kids are learning and growing here.”
I want them to know it might be a bit of a circus, but it’s our circus. Life would be awfully dull without it. All this fun and life happens in our home. It happens in our sometimes cluttered, sometimes noisy, sometimes ‘where-is-the-dining-table-under-all-these-crafts-and-blanket-forts’ kind of home and more often than not, with a dirty kitchen floor.
After all, a lot happens in our kitchen. There are chairs dragged up to the counters (sometimes running over my toes), with flour flying everywhere. Sometimes we have more baking than we know what to do with, but the neighbours never complain about that. I hope that spirit of sharing teaches my girls to be generous and giving. The spirit of hospitality is about more than housekeeping.
Who’s idea is it anyway that a home must appear un-lived in and flawless to entertain guests? We have enough people expecting us to be perfect, do we really want that from our near and dear too? And when, oh when, did someone decide there should be no sign of children around the home (and especially not in living rooms)? It’s just plain weird that 50% of our household should leave no evidence of their existence.
Do we really only want friends who know this version of ourselves, the version that – if we succeed in portraying – will only make them feel ‘less than’ about themselves? Shouldn’t our friends and loved ones enjoy our company, comfy sofa and yummy kitchen creations?
Yummy kitchen creations make for messy floors. It’s science. You can’t argue with science. Aren’t the best meals the ones that happen naturally with many hands contributing a little of this and a little of that (in comfy pants, with lots of laughter for good measure)?!
This is why Ikea’s new campaign #letsrelax really spoke to me. Ikea’s new global campaign challenges the expectations and starts conversations about the things that make life unnecessarily demanding. It’s about time we all relax and start enjoying the perfectly imperfect life we have to share with family and friends.
Here are some of the great ways our family has found to do just that:
Location, location, location. For daily family meals we all sit around our kitchen table, it makes for much better conversation – plus you are closer to the food for seconds or, dare I even say, thirds.
Embracing the dining table. Our dining space (referring to it as an actual room might be a stretch) is rather tight. To seat everyone at the table comfortably we need to slide the living room sofa further into the living room. It’s painstaking, but we are not to be denied. We love sitting around the table, and not just because we are statistically more prone to spills!
Make room! When it comes to entertaining, cozy or not, we slide the sofa out, insert the dining table’s extra leaf, and add more chairs. We can (and do) seat up to ten. Once the food starts flying being eaten, no one really seems to notice the close quarters. Our most recent family gathering boasted out of town relatives, with our numbers rising to twelve. The kids pulled up their play table and chairs next to the adults table and away we went!! Make room in your heart and your house for family.
Delegate! Kids can help you embrace imperfection. No one will have to wonder if you did things to a grade or preschool level because the kids will be proud enough to take ownership when your guests cross the threshold. A collaborative approach teaches that entertaining is a family affair. It should not just fall on one person. This lesson is important for me and my kids.
Start Small. Setting the table for guests is a great start. Bonus: a table set with mismatched dishware is adorable because the kids did it. No one suspects you don’t have twelve matching place settings (which my cupboards don’t currently boast).
For Everything There is A Season. My beautiful place settings for twelve are carefully packed away in the basement with very fragile and non dishwasher friendly china. They patiently await another season in our lives. This is not the time for that; it is the time for occasionally broken dishes and everything dishwasher friendly.
Leave Room For Creativity. Once our eight year old set such a beautiful table, it would rival that of any adult! Our ‘Fancy Nancy’ made the everyday very beautiful and special, even the single flower she choose for a vase in the centre matched. As I cooked in the kitchen, she looked up on youtube how to turn napkins into roses! I didn’t even need to lift a finger. Truly, it meant more to our family that she’d taken such pride and pleasure in doing it than if I’d unearthed all the fine china.
There’s never too many cooks. My kids love to help in the kitchen, sometimes even a little too much. My youngest once ‘helped’ cover the cupboards and both of us in chocolate cake batter turning the mixer on high prematurely! While it means four times the mess, I am bound and determined my kids will learn to cook and clean. This is why I’ve said goodbye to keeping kids out of the kitchen for fear of a mess.
Nobody expects perfection. Years of entertaining taught me people do not in fact have more fun when everything is just perfect. They may ooh and ahh over it at first, but they have more fun when you are relaxed and enjoying their company, not striving for the impossible or worrying something may get ruined.
Add a little extra (to dinner). More times than I can count last minute dinner invitations have made for some of our most memorable times. Put a little extra on for unexpected guests (and memories!)
Many hands make light work. Let those who offer, bring something! I hate going places empty handed. I am relieved when someone tells me how I can contribute. Our last few dinners, I’ve happily made the main, the dessert (there is just no way I could ever outsource the dessert) and a side dish. My husband made the mashed potatoes (truly, no one makes them better than him anyways). Someone brought a salad and two others brought sides and another provided the wine. It turned out great – delicious food, great company and I wasn’t exhausted!
Strut the Stuff You Love When You Fancy. I really enjoy decorating cakes and of course, that has its place. Those old fashioned, hand written recipes that have been passed down through generations, those cakes covered in glorious swirls or mounds or nuts that you just can’t wait to dive into, those somehow have my heart. That being said, Ikea and I agree on their suggestion to ‘keep it simple (but delicious)!’
Simplify. Sometimes I struggle between what tastes amazing and what looks great when it comes to entertaining. I don’t think I need to say which one wins when it’s just me. The meals and recipes I get asked for the most by friends and family are the quickest and simplest to prepare. These are the ones that won’t win any competitions on looks but get asked for again and again because they are so comforting or downright delicious!
It’s all about the guest list. Yummy food just tastes better with the ones you care about (again I believe this is pure science – like dirty kitchen floors). Invite those you care about, that make you laugh over and embrace the way you do things. It doesn’t need to be the way the neighbours do it or the media says it needs to be done, but rather just the way that works for you and your family. It turns out that is more than enough.
So join the movement! #letsrelax
The post Goodbye Perfectionism appeared first on Creative Sides.
]]>The post DIY T-Shirt Upcycle appeared first on Creative Sides.
]]>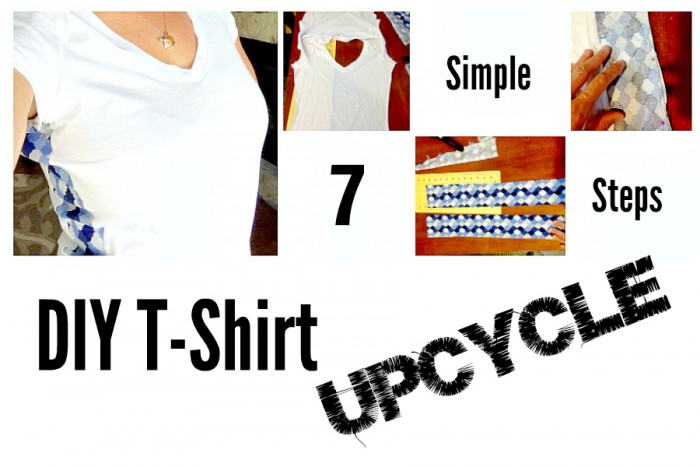
Spring has officially sprung, and whether you are experiencing warmer weather or still waiting for the thaw to come, it’s never to early to spruce up your wardrobe.
This t-shirt upcycle is a great project to do for 3 reasons:
- You have 6 t-shirts that are all the same and if you have to wear them one more time you are going to rip your arm off.
- You have a favourite t-shirt that you wear All. The. Time. And it may be looking a little tired under the arms (ahem… stains)
- You are bored to death with the t-shirt options and want to do something a bit funky
DIY T-Shirt Upcycle Instructions
What you need:
- 1 T-shirt (if you are buying a new one buy one or two sizes too small. I am a size medium and I would buy a small or extra small depending on the width of panel that I want to put in … wider the panel means smaller the shirt)
- 1 piece of materiel (cotton is easier than knit but both work) 2 inches longer than the measurement of armpit to bottom hem on the t-shirt.)
- Scissors or rotary cutter (I use a rotary cutter and cutting pad because I am the absolute worst at cutting a straight line)
- Pins
- Sewing machine
- Measuring tape
- Iron
How to do it:
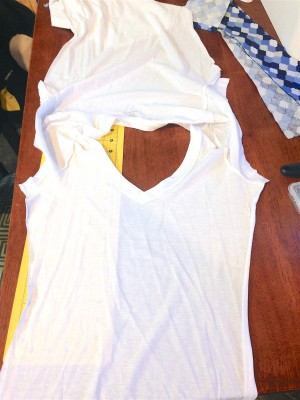
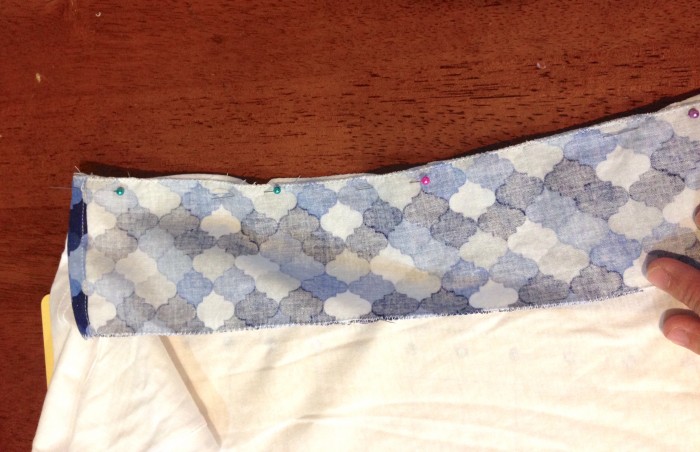
Step 1: Carefully cut right next to both sides of the side seams on the t-shirt. I carefully undid the seam the first time I did this project and that is 40 minutes I will never get back. Just trust yourself and cut those seams out. You will end up with an “opened up smock-like-thing”.
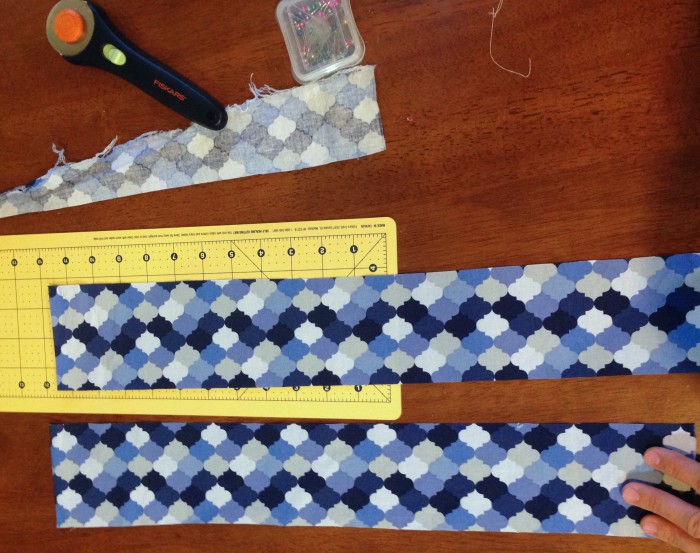
Step 2: Cut your piece of material into 2 strips/panels 2 inches longer than the measure of your t-shirt side seam. You will use the extra length for your seams. The width is totally up to you. You can also choose to cut them straight or flaring slightly at the bottom depending on the finished look that you want to achieve. Flared will create a more flowy top.
Step 3: If you are not using a knit fabric (they are a bit trickier so for a first go I suggest cotton) set your machine to a simple zig-zag stitch and whip around the edges to finish them.
Step 4: Then fold the top edge over about ½ inch & press with a hot iron (trust me this is an important step that makes it come together so much better! Oh and don’t forget to use an ironing board or at the very least put a folded towel down on whatever surface you use!!). Fold over again and repeat pressing. Repeat on both panels. Sew this hem with a straight stitch.
Step 5: Put the good side of the t-shirt face up and the good side of panel face down (right-side to right-side). Place the hem you just made even with the armpit seam on the t-shirt and pin together all the way down the shirt. Sew this seam with a straight stitch. Make sure that you do a few stitches forward, backwards then forwards again at the beginning and end to secure it.
You’re doing great!
Step 6: Now keeping right-side to right-side pin and sew the other side of the panel.
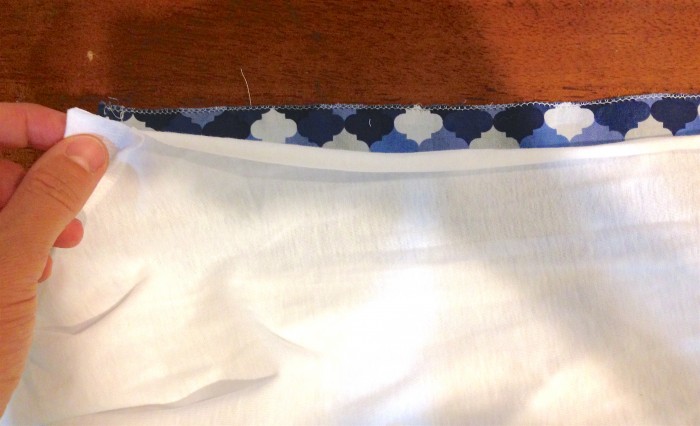
Don’t worry about the bottom yet. Take a break and shake out.
Repeat with the other side of the shirt.
Step 7: Now repeat the fold press fold sew that you did at the top of the shirt down at the bottom so that you line up the panel to the rest of the t-shirt. When you sew start on the t-shirt and secure it well. Try and line up the stitching for a better look.
Et Voila! You are a creative GENIUS!!!


The post DIY T-Shirt Upcycle appeared first on Creative Sides.
]]>The post Refurbished Vanity DIY appeared first on Creative Sides.
]]>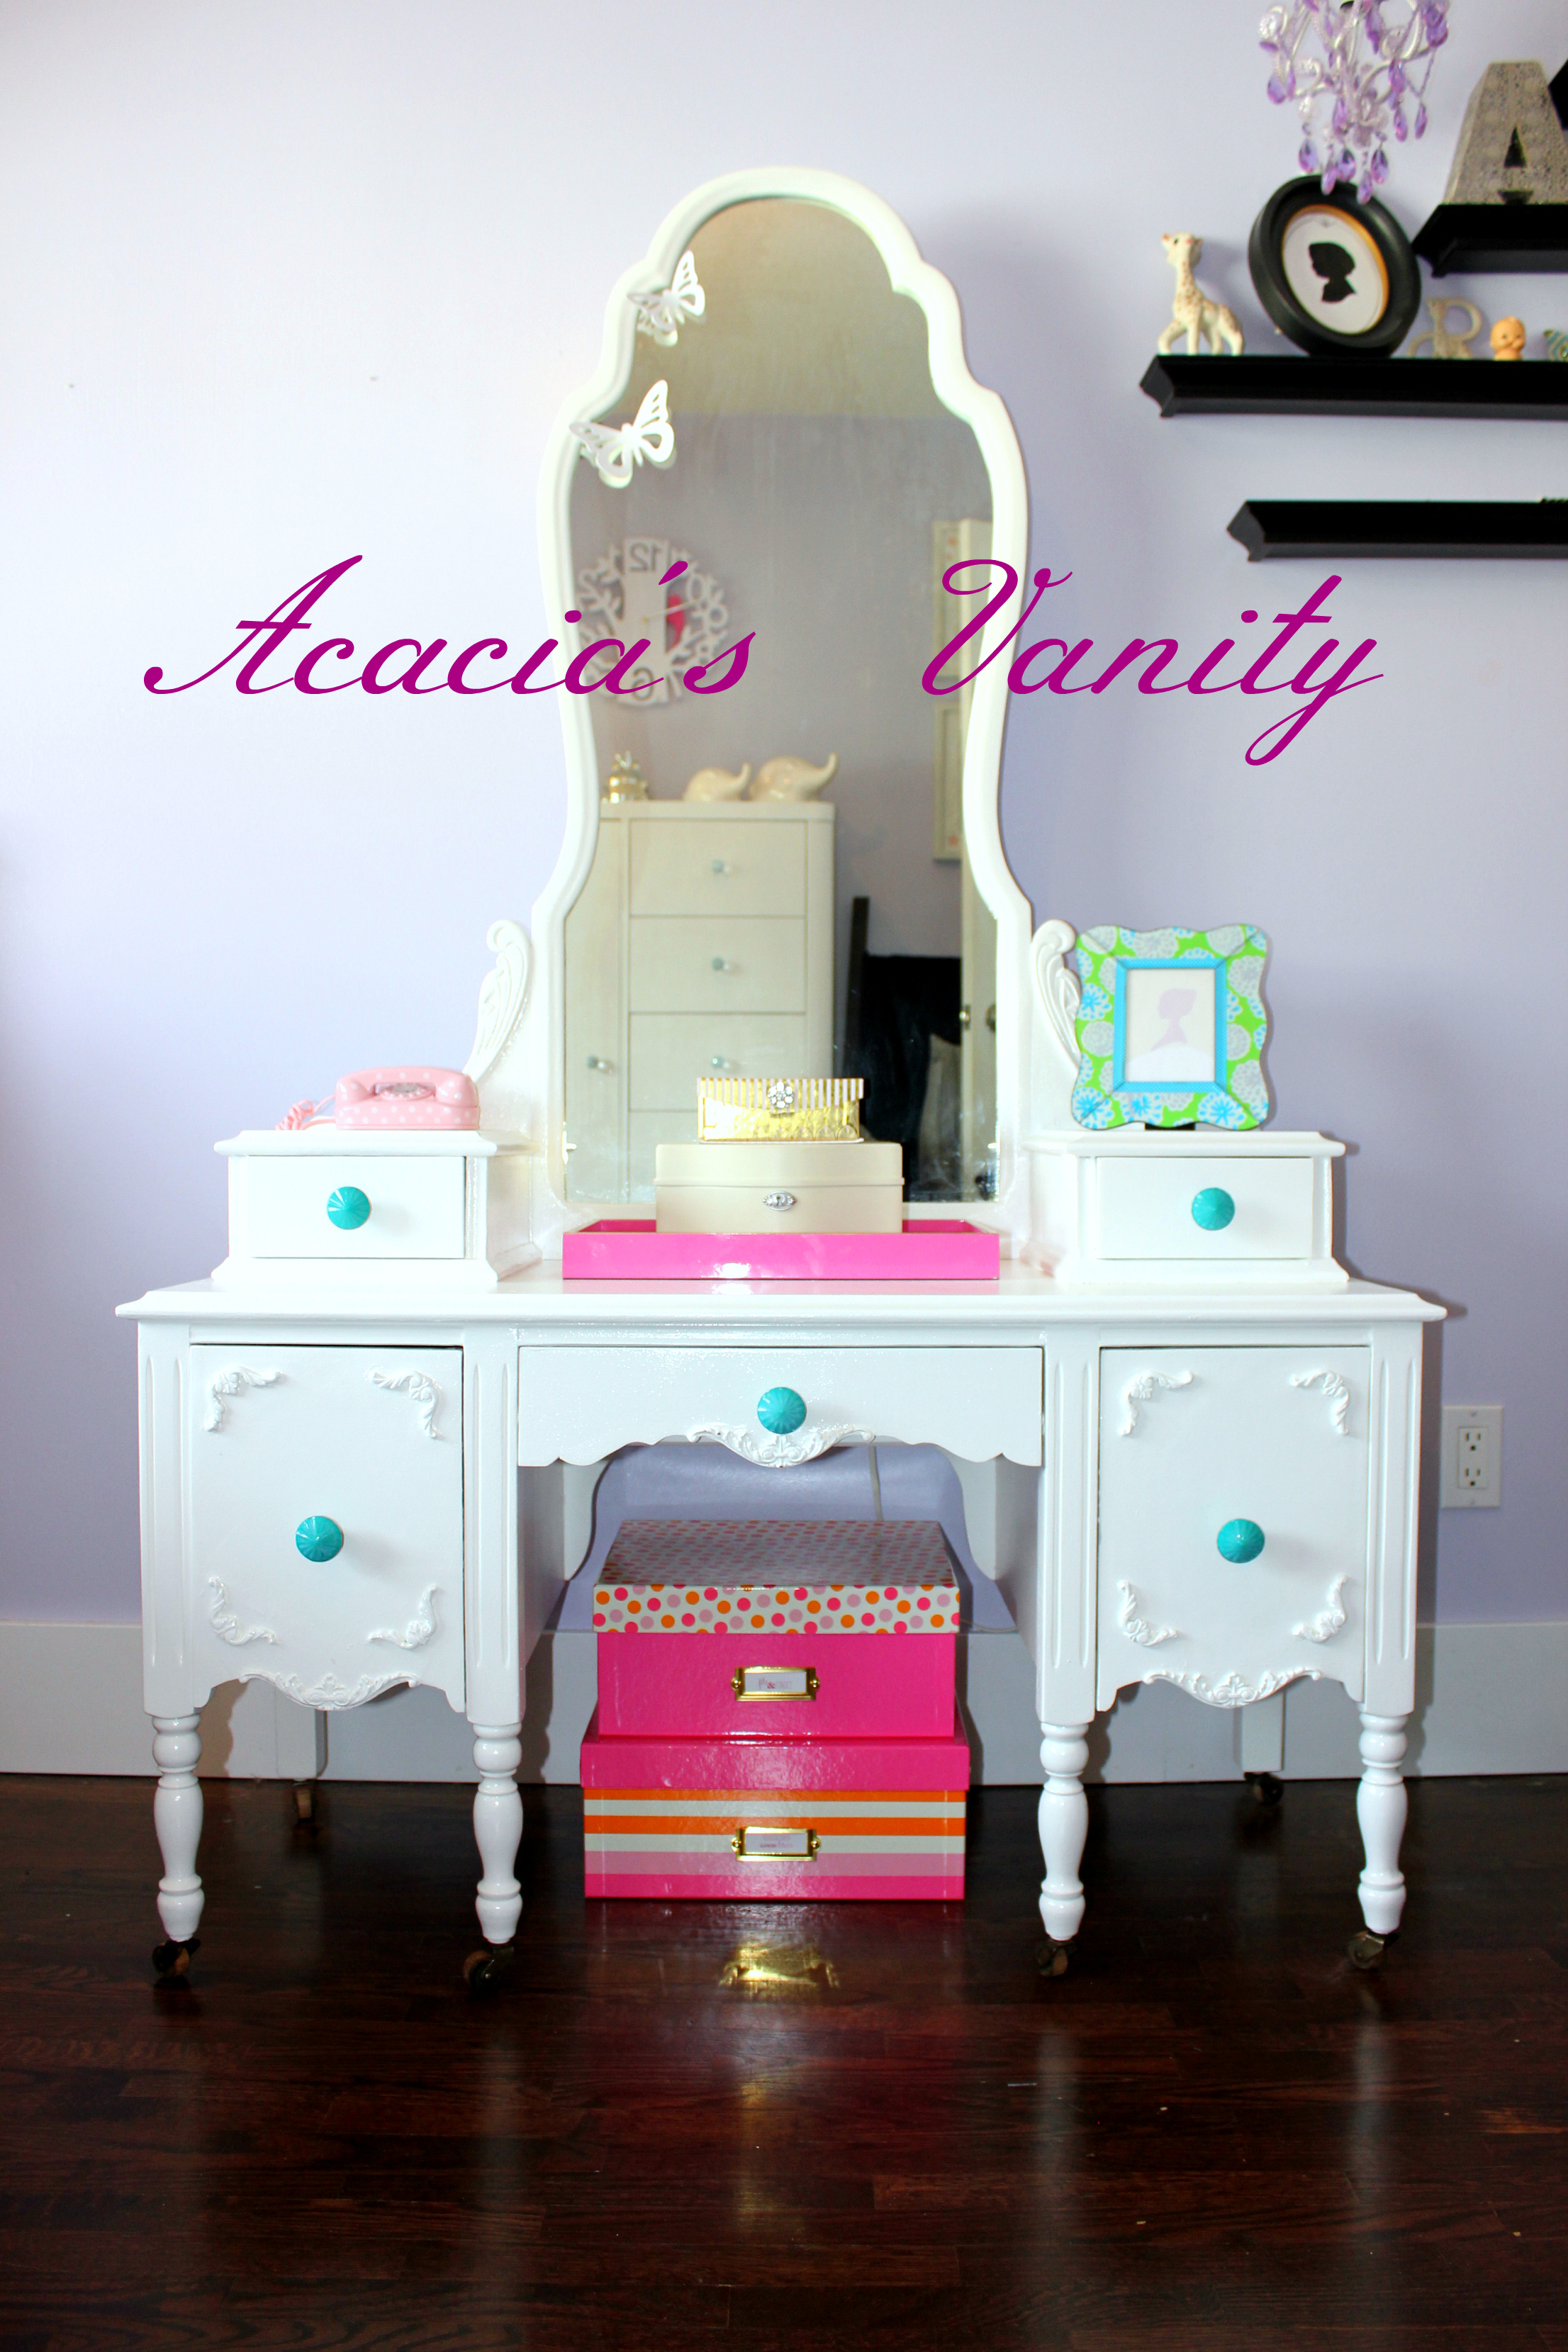
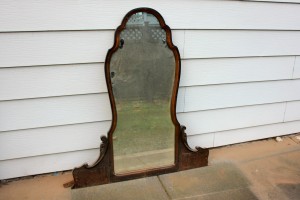
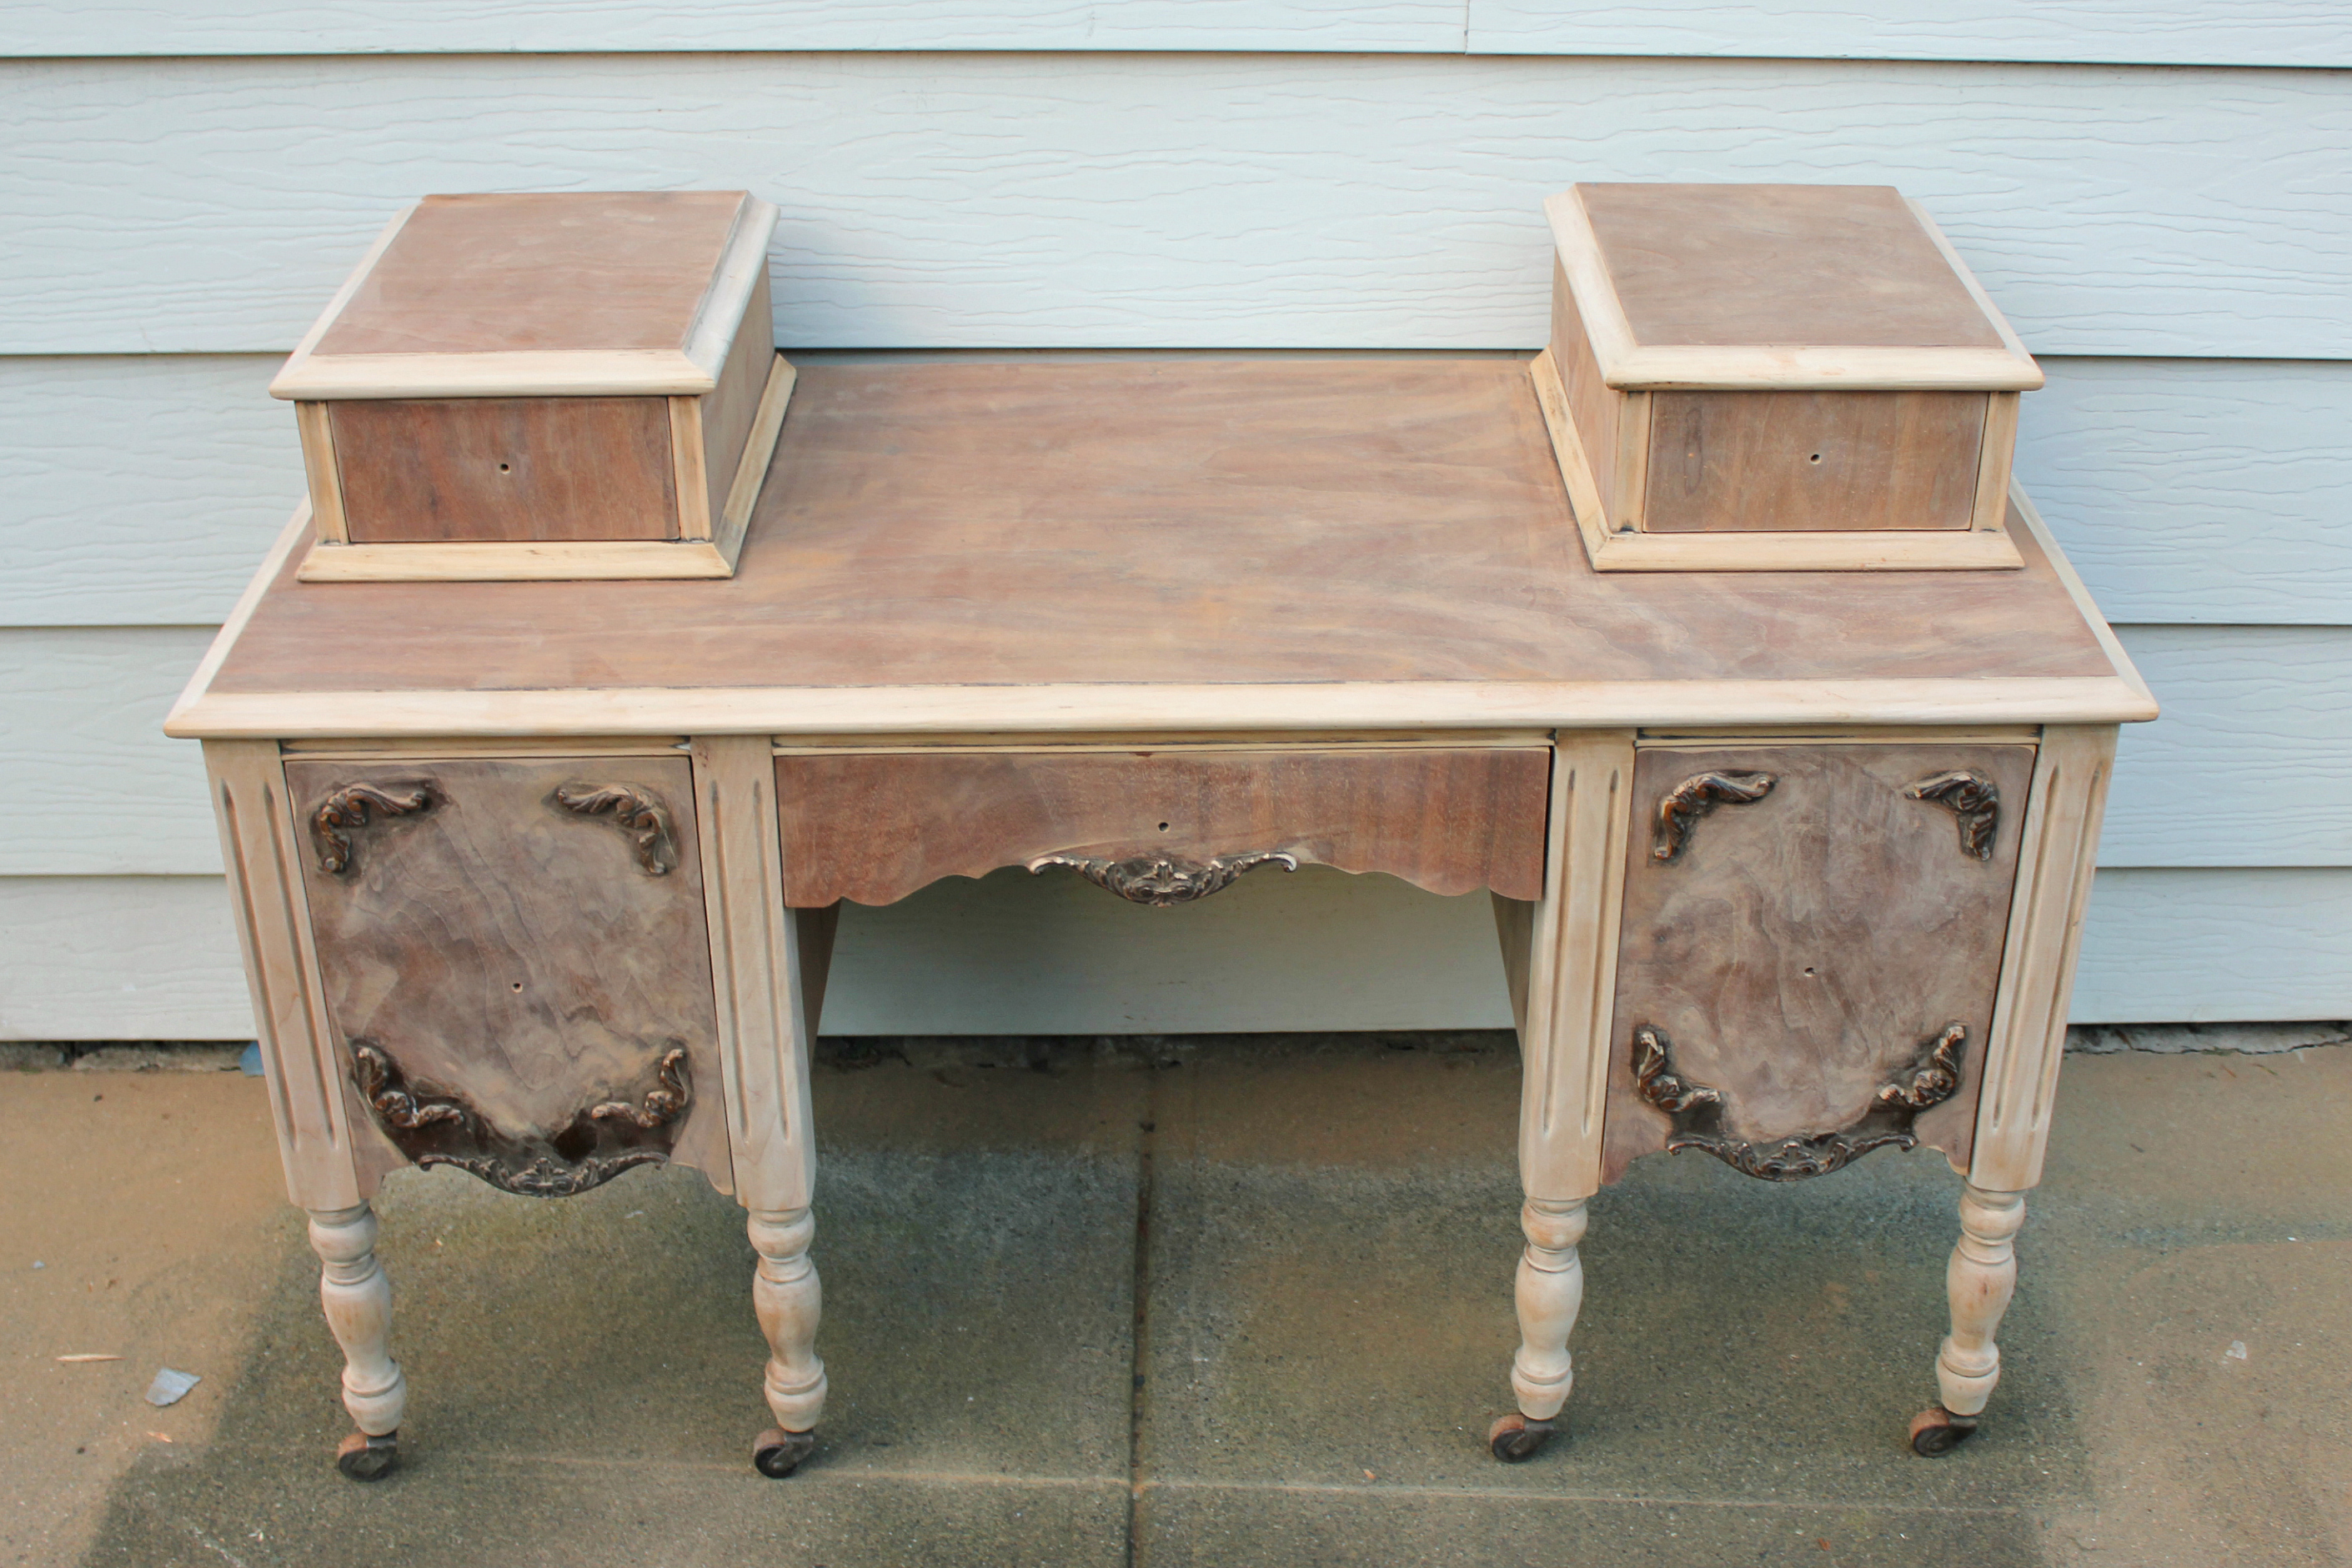
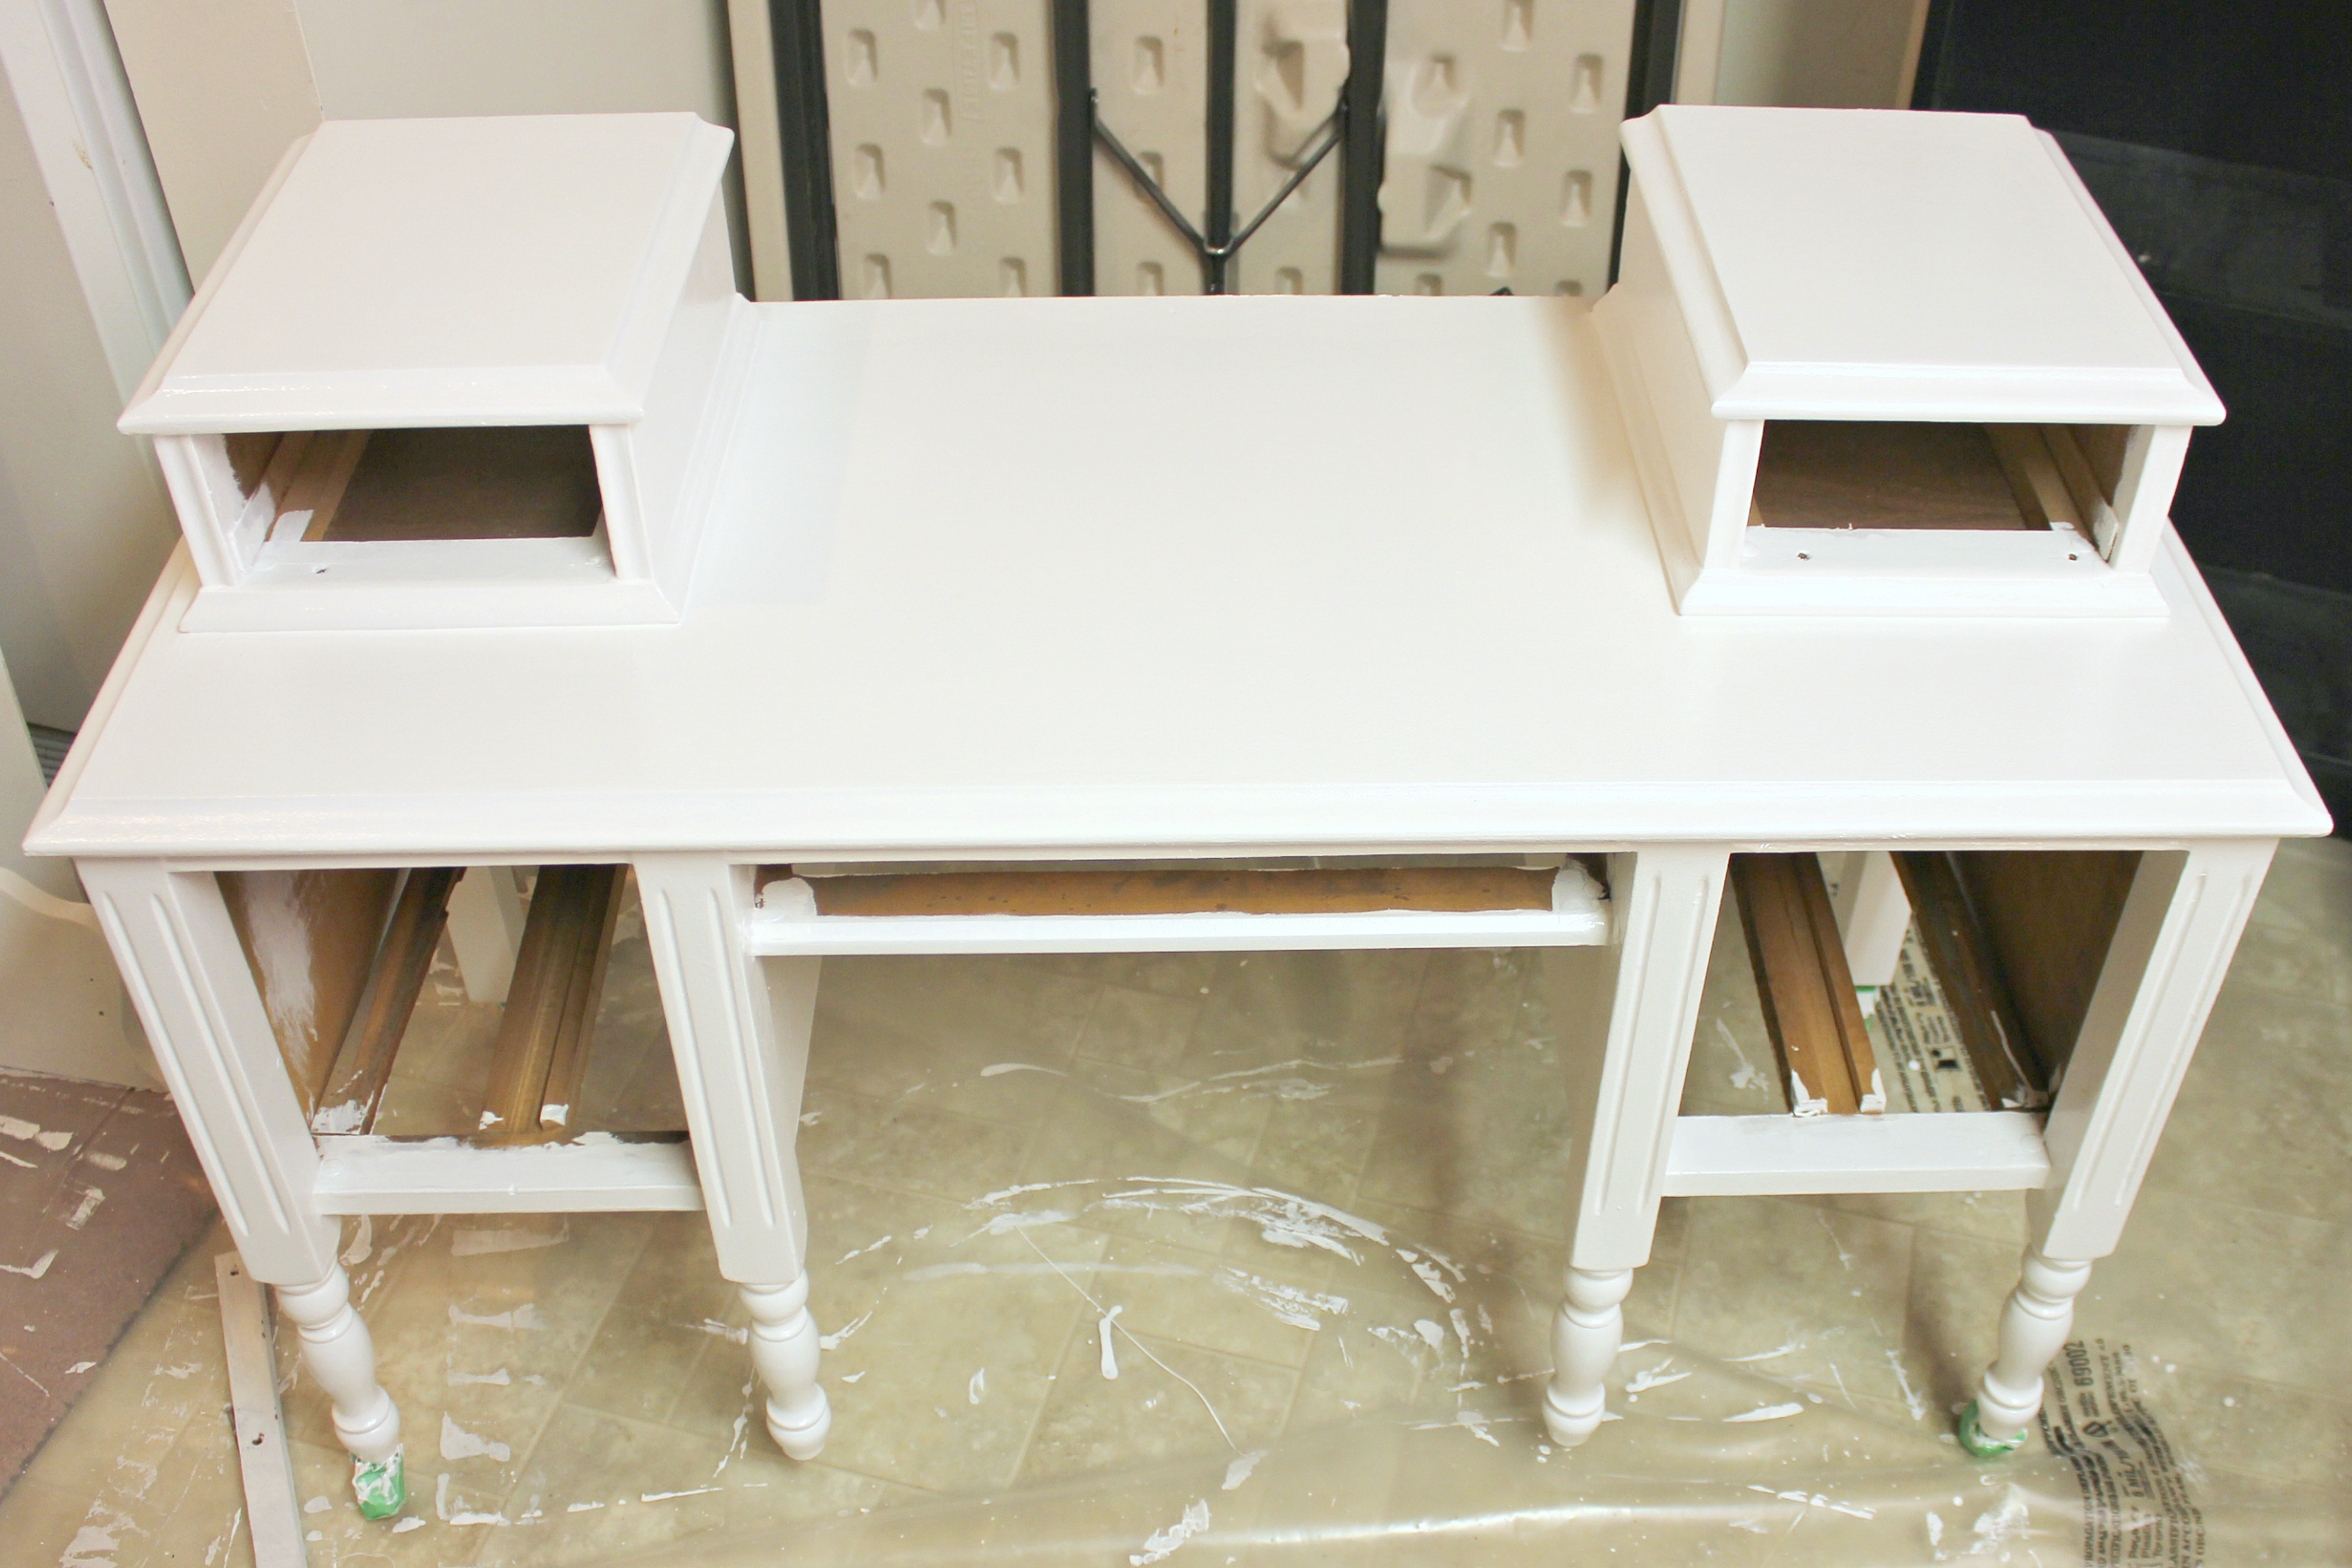
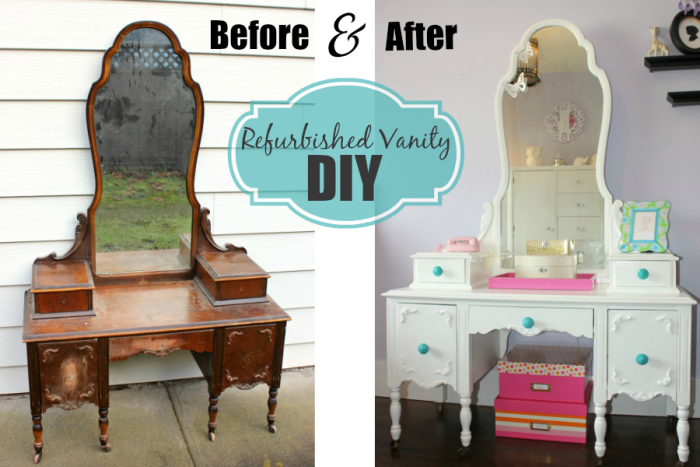
In an effort to transform our youngest daughter’s room from a nursery to a little girl’s domain, we had a couple projects up our sleeves. The first of these was refinishing this beautiful antique child’s vanity that my husband had acquired from a second hand store several years back. It was finally it’s moment to come up from the basement and shine!
Before:
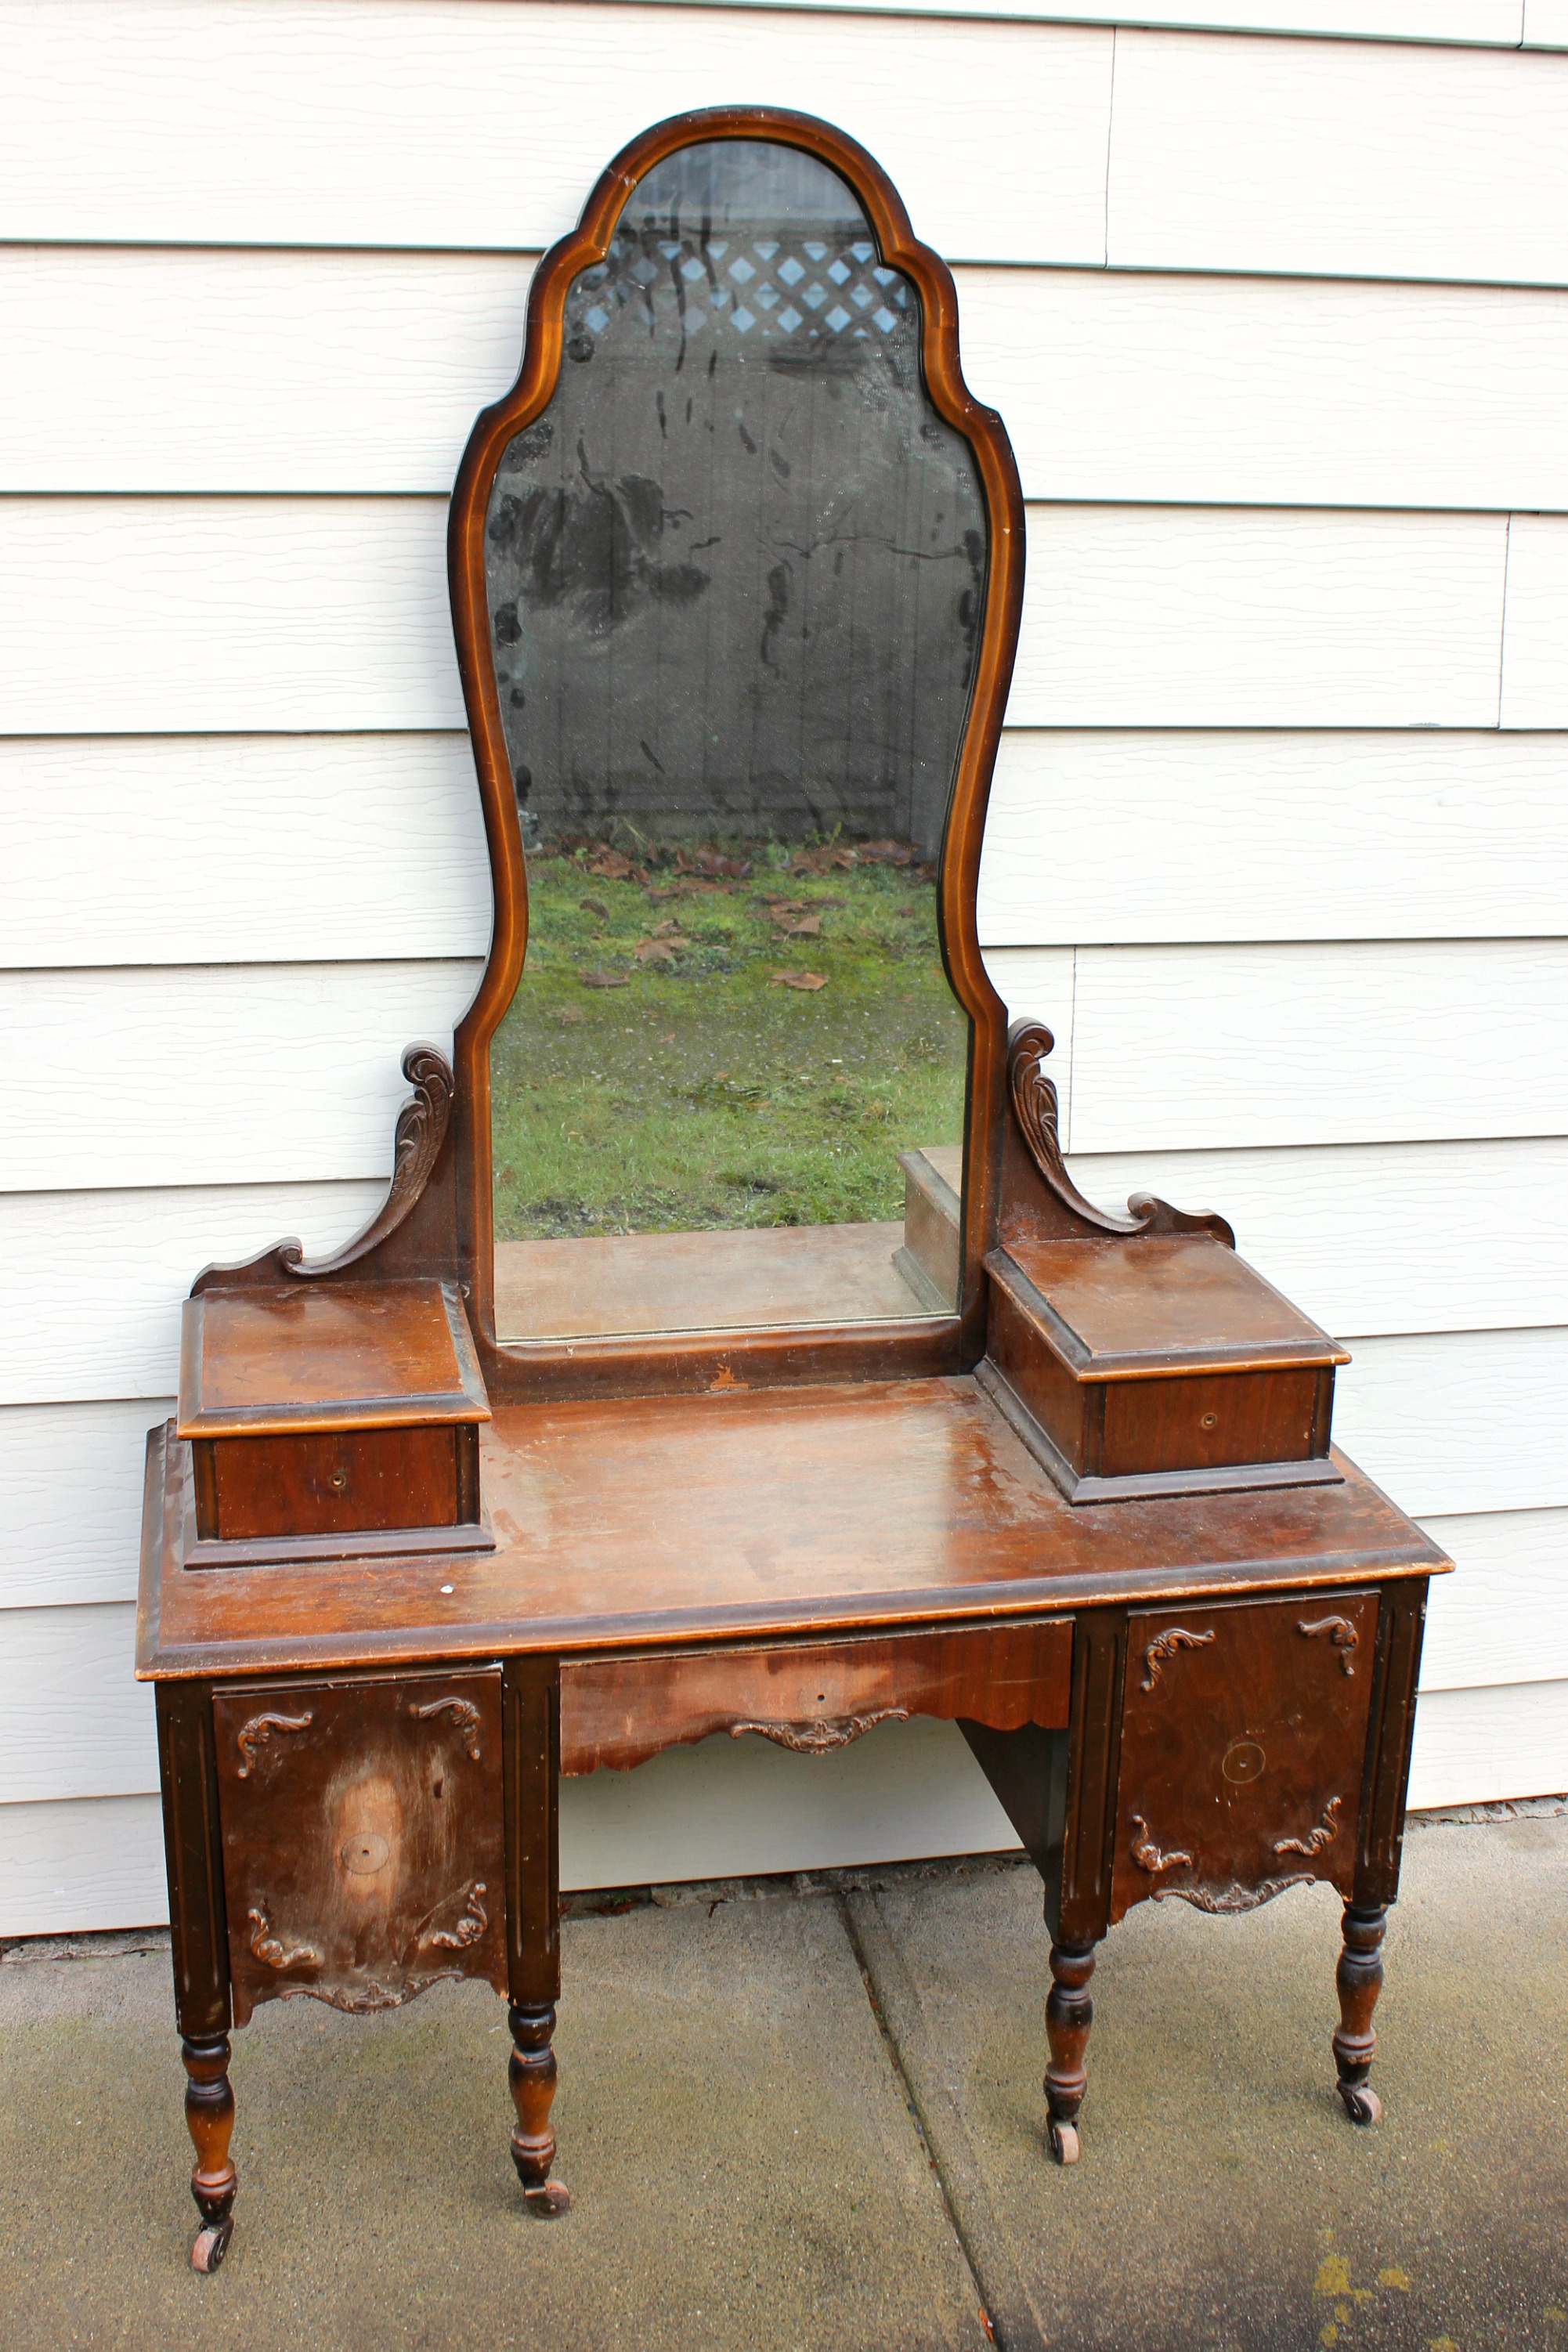
Just bursting with potential! You can see why the Hubster, with his woodwork loving ways, brought this gem home. I mean really, can’t you just see the potential bursting all over the place already?!
Refurbished Vanity DIY
Tools and Supplies:
Finishing nails (we saved the original)
Screws (we saved the original)
Sandpaper – 20, 120 and 200 grit
Orbital Sander (optional)
Lint free cloth
Drop Cloth or Plastic (optional – to protect your work area)
Painters Tape
Smooth 4″ Foam roller
2″ Paint Brush
Paint Tray
Zinsser Cover Stain Interior/Exterior Primer-Sealer Stain Killer
Benjamin Moore’s High-gloss Latex Paint in Chantilly lace (OC-65)
Hammer
Drill and corresponding bits
Hardware (handles/pulls)
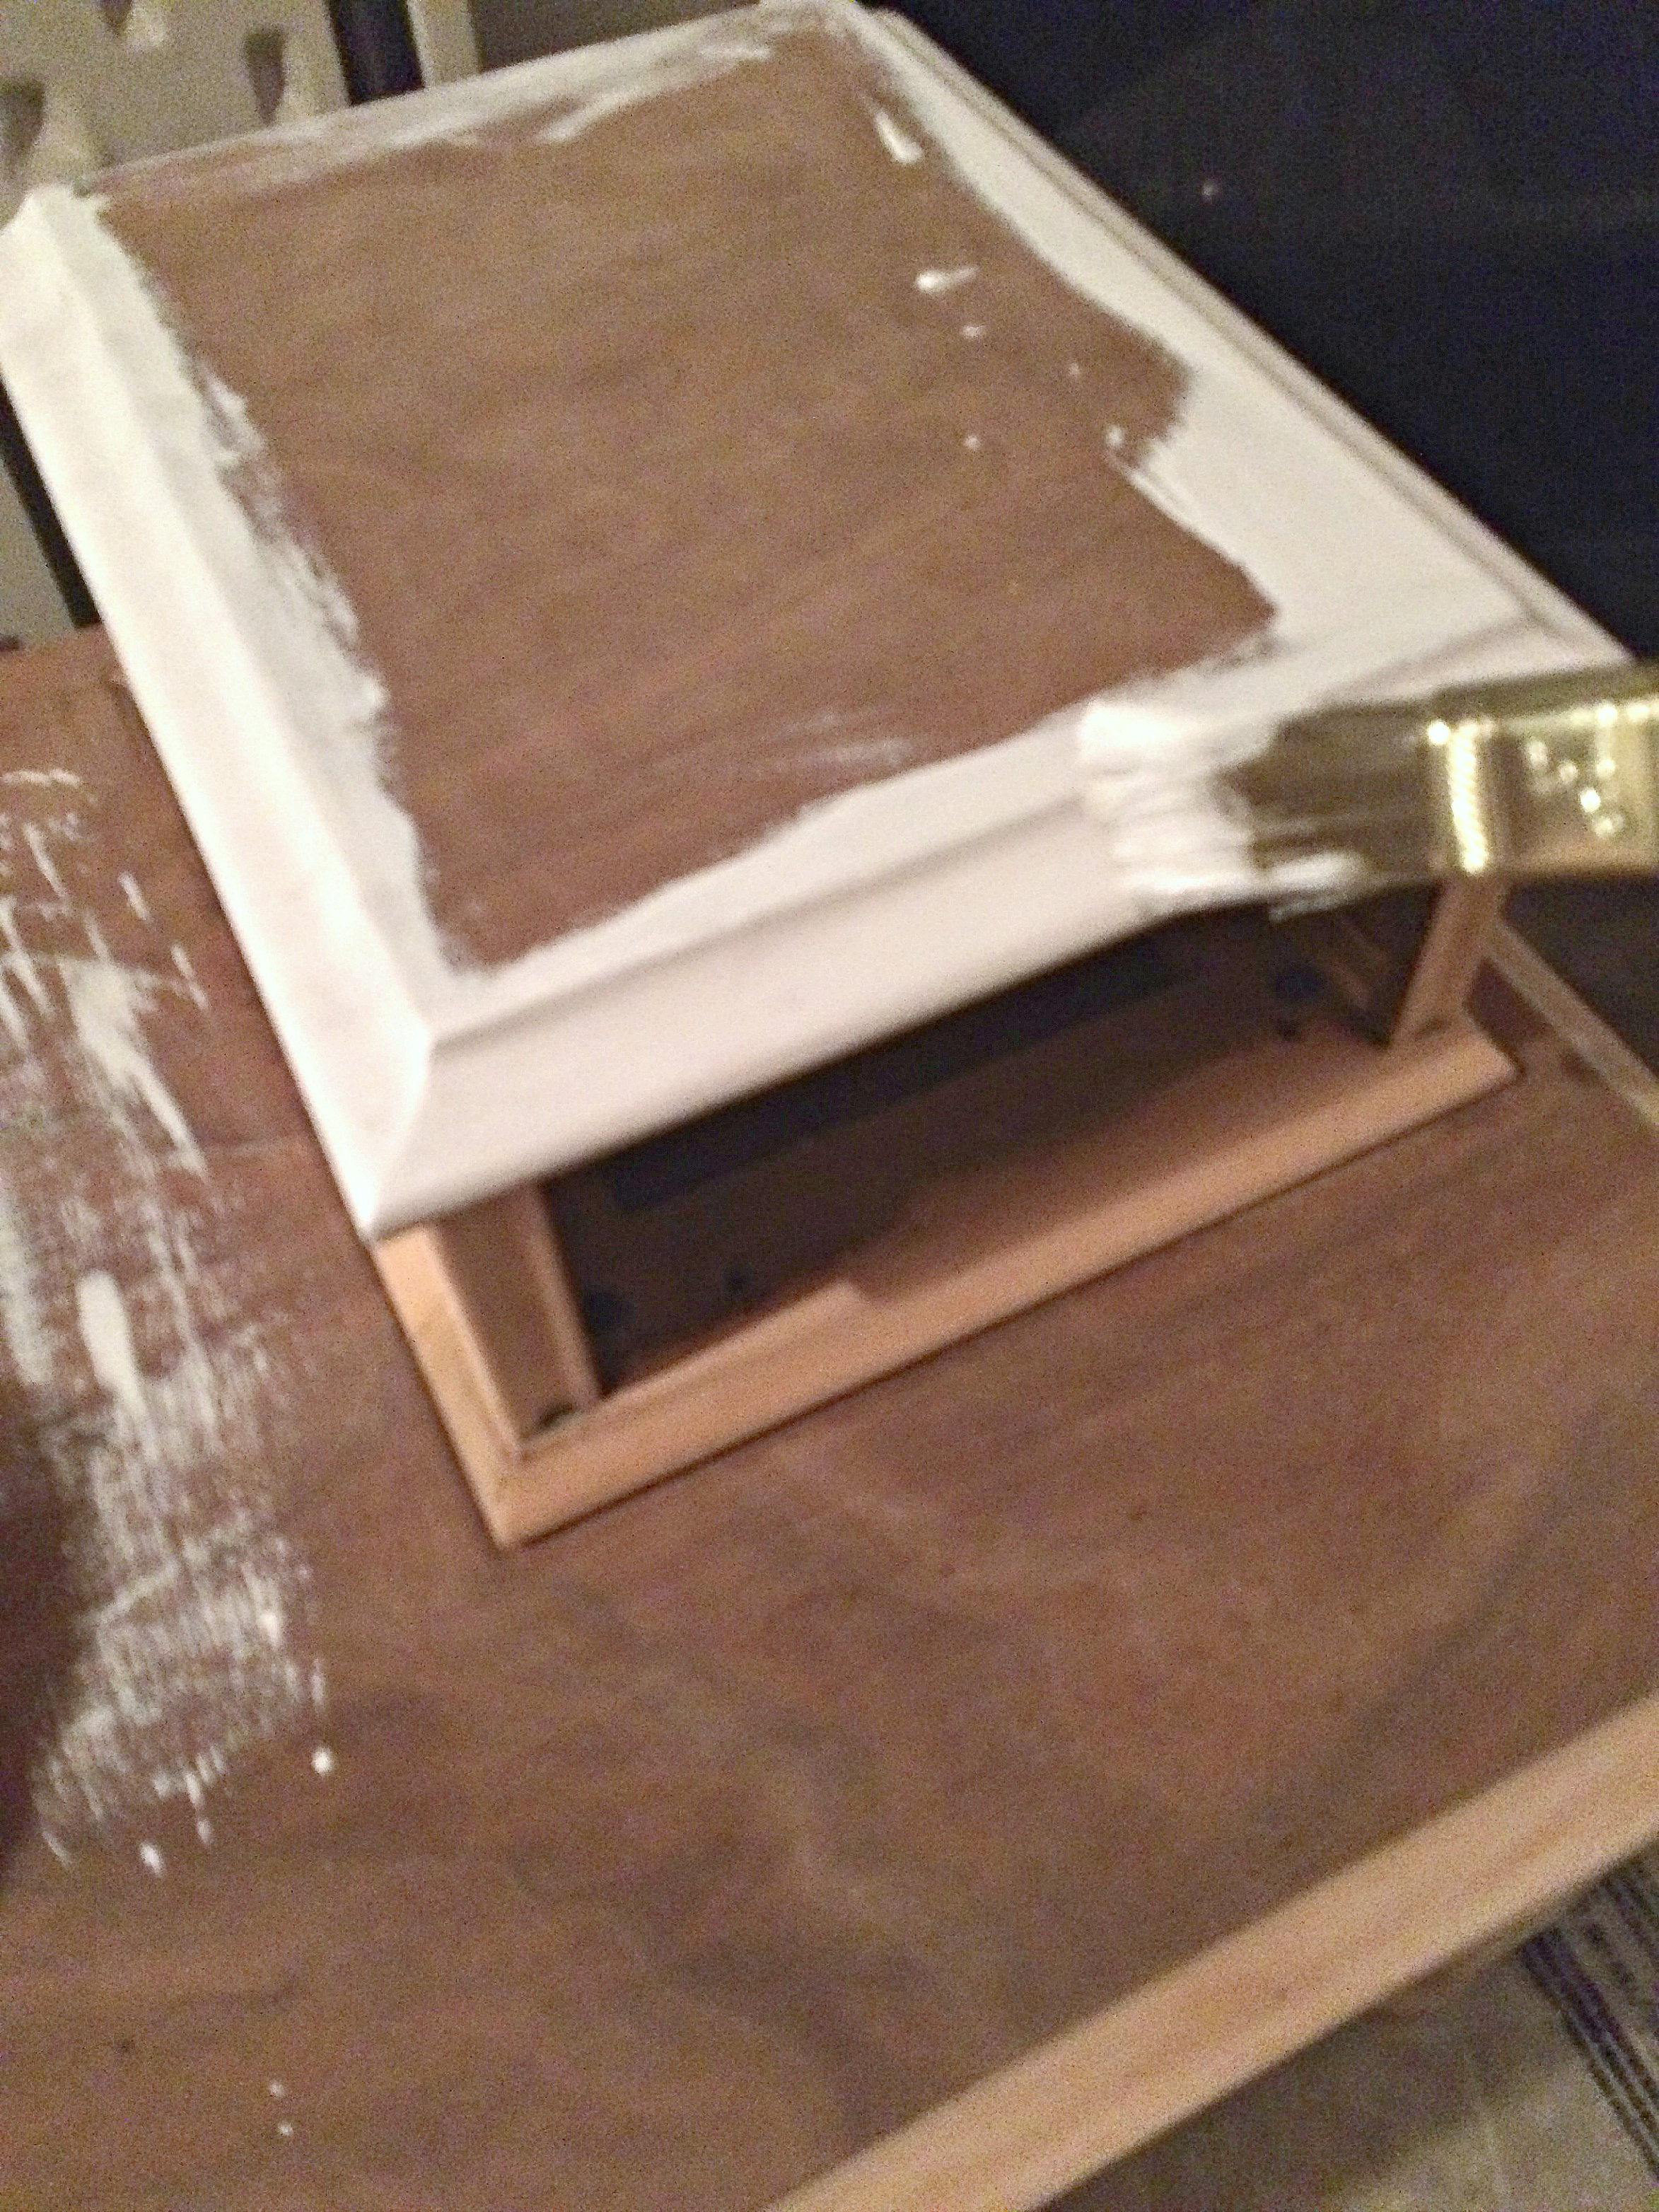
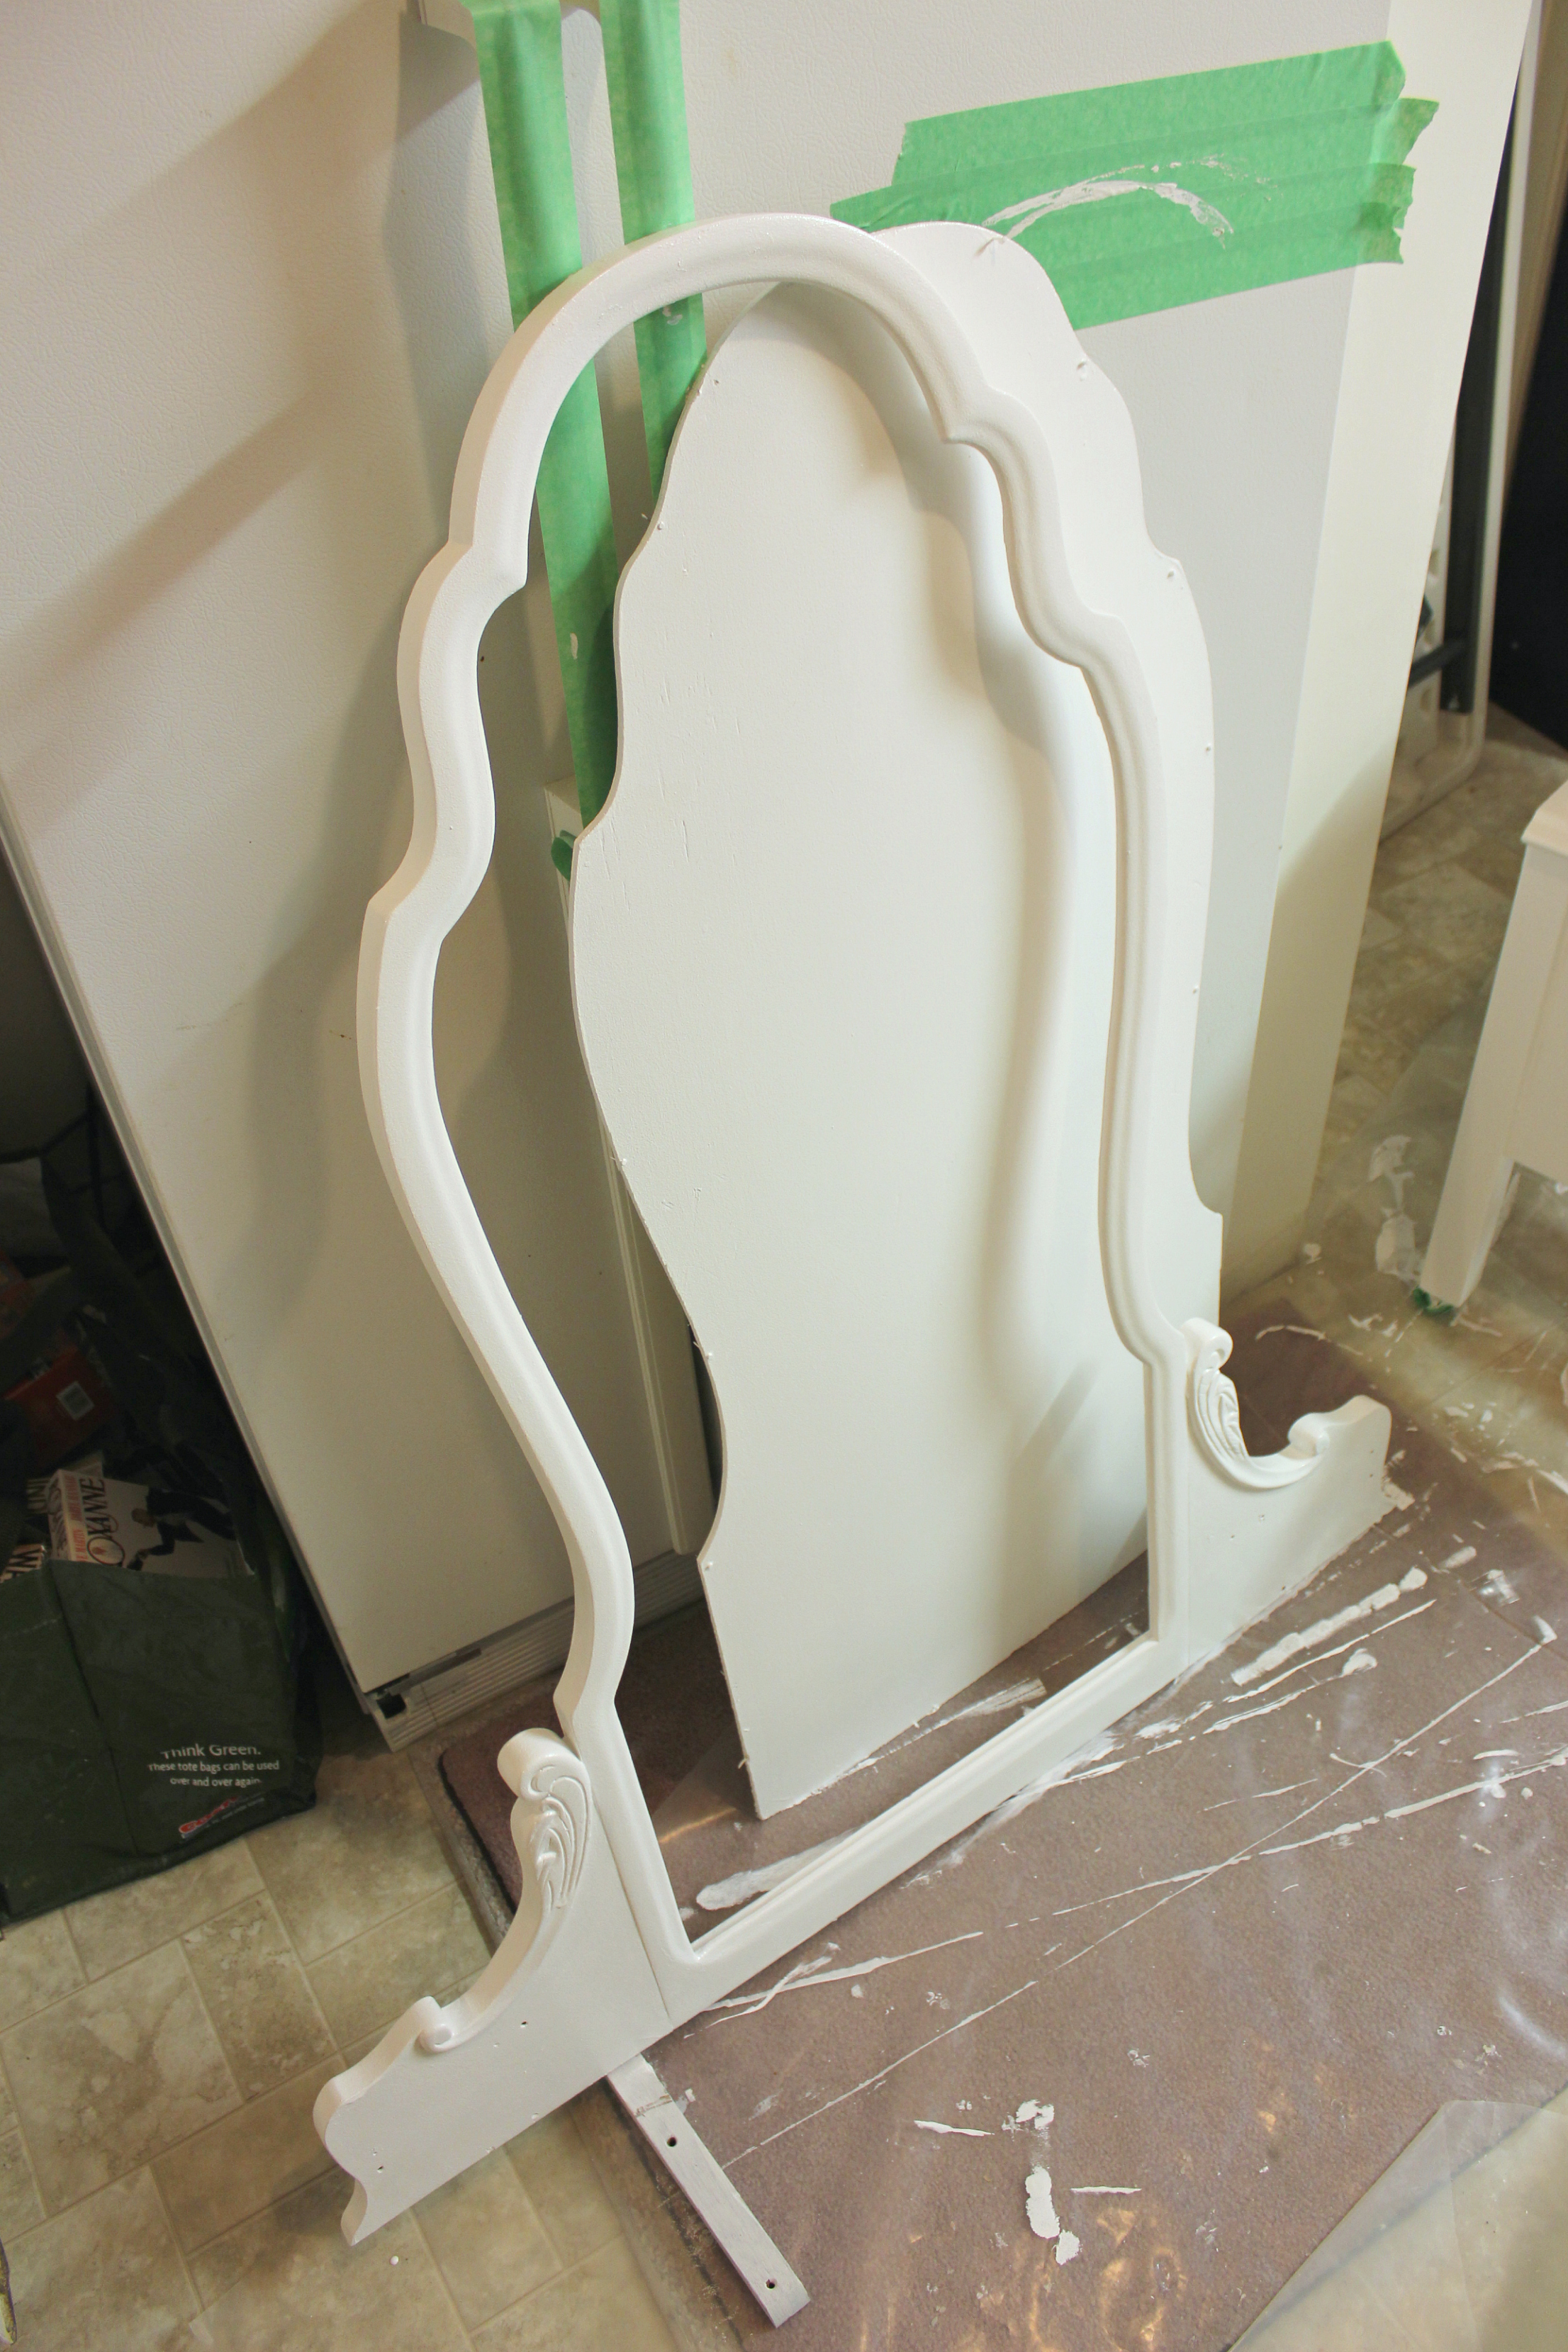
Step 1:
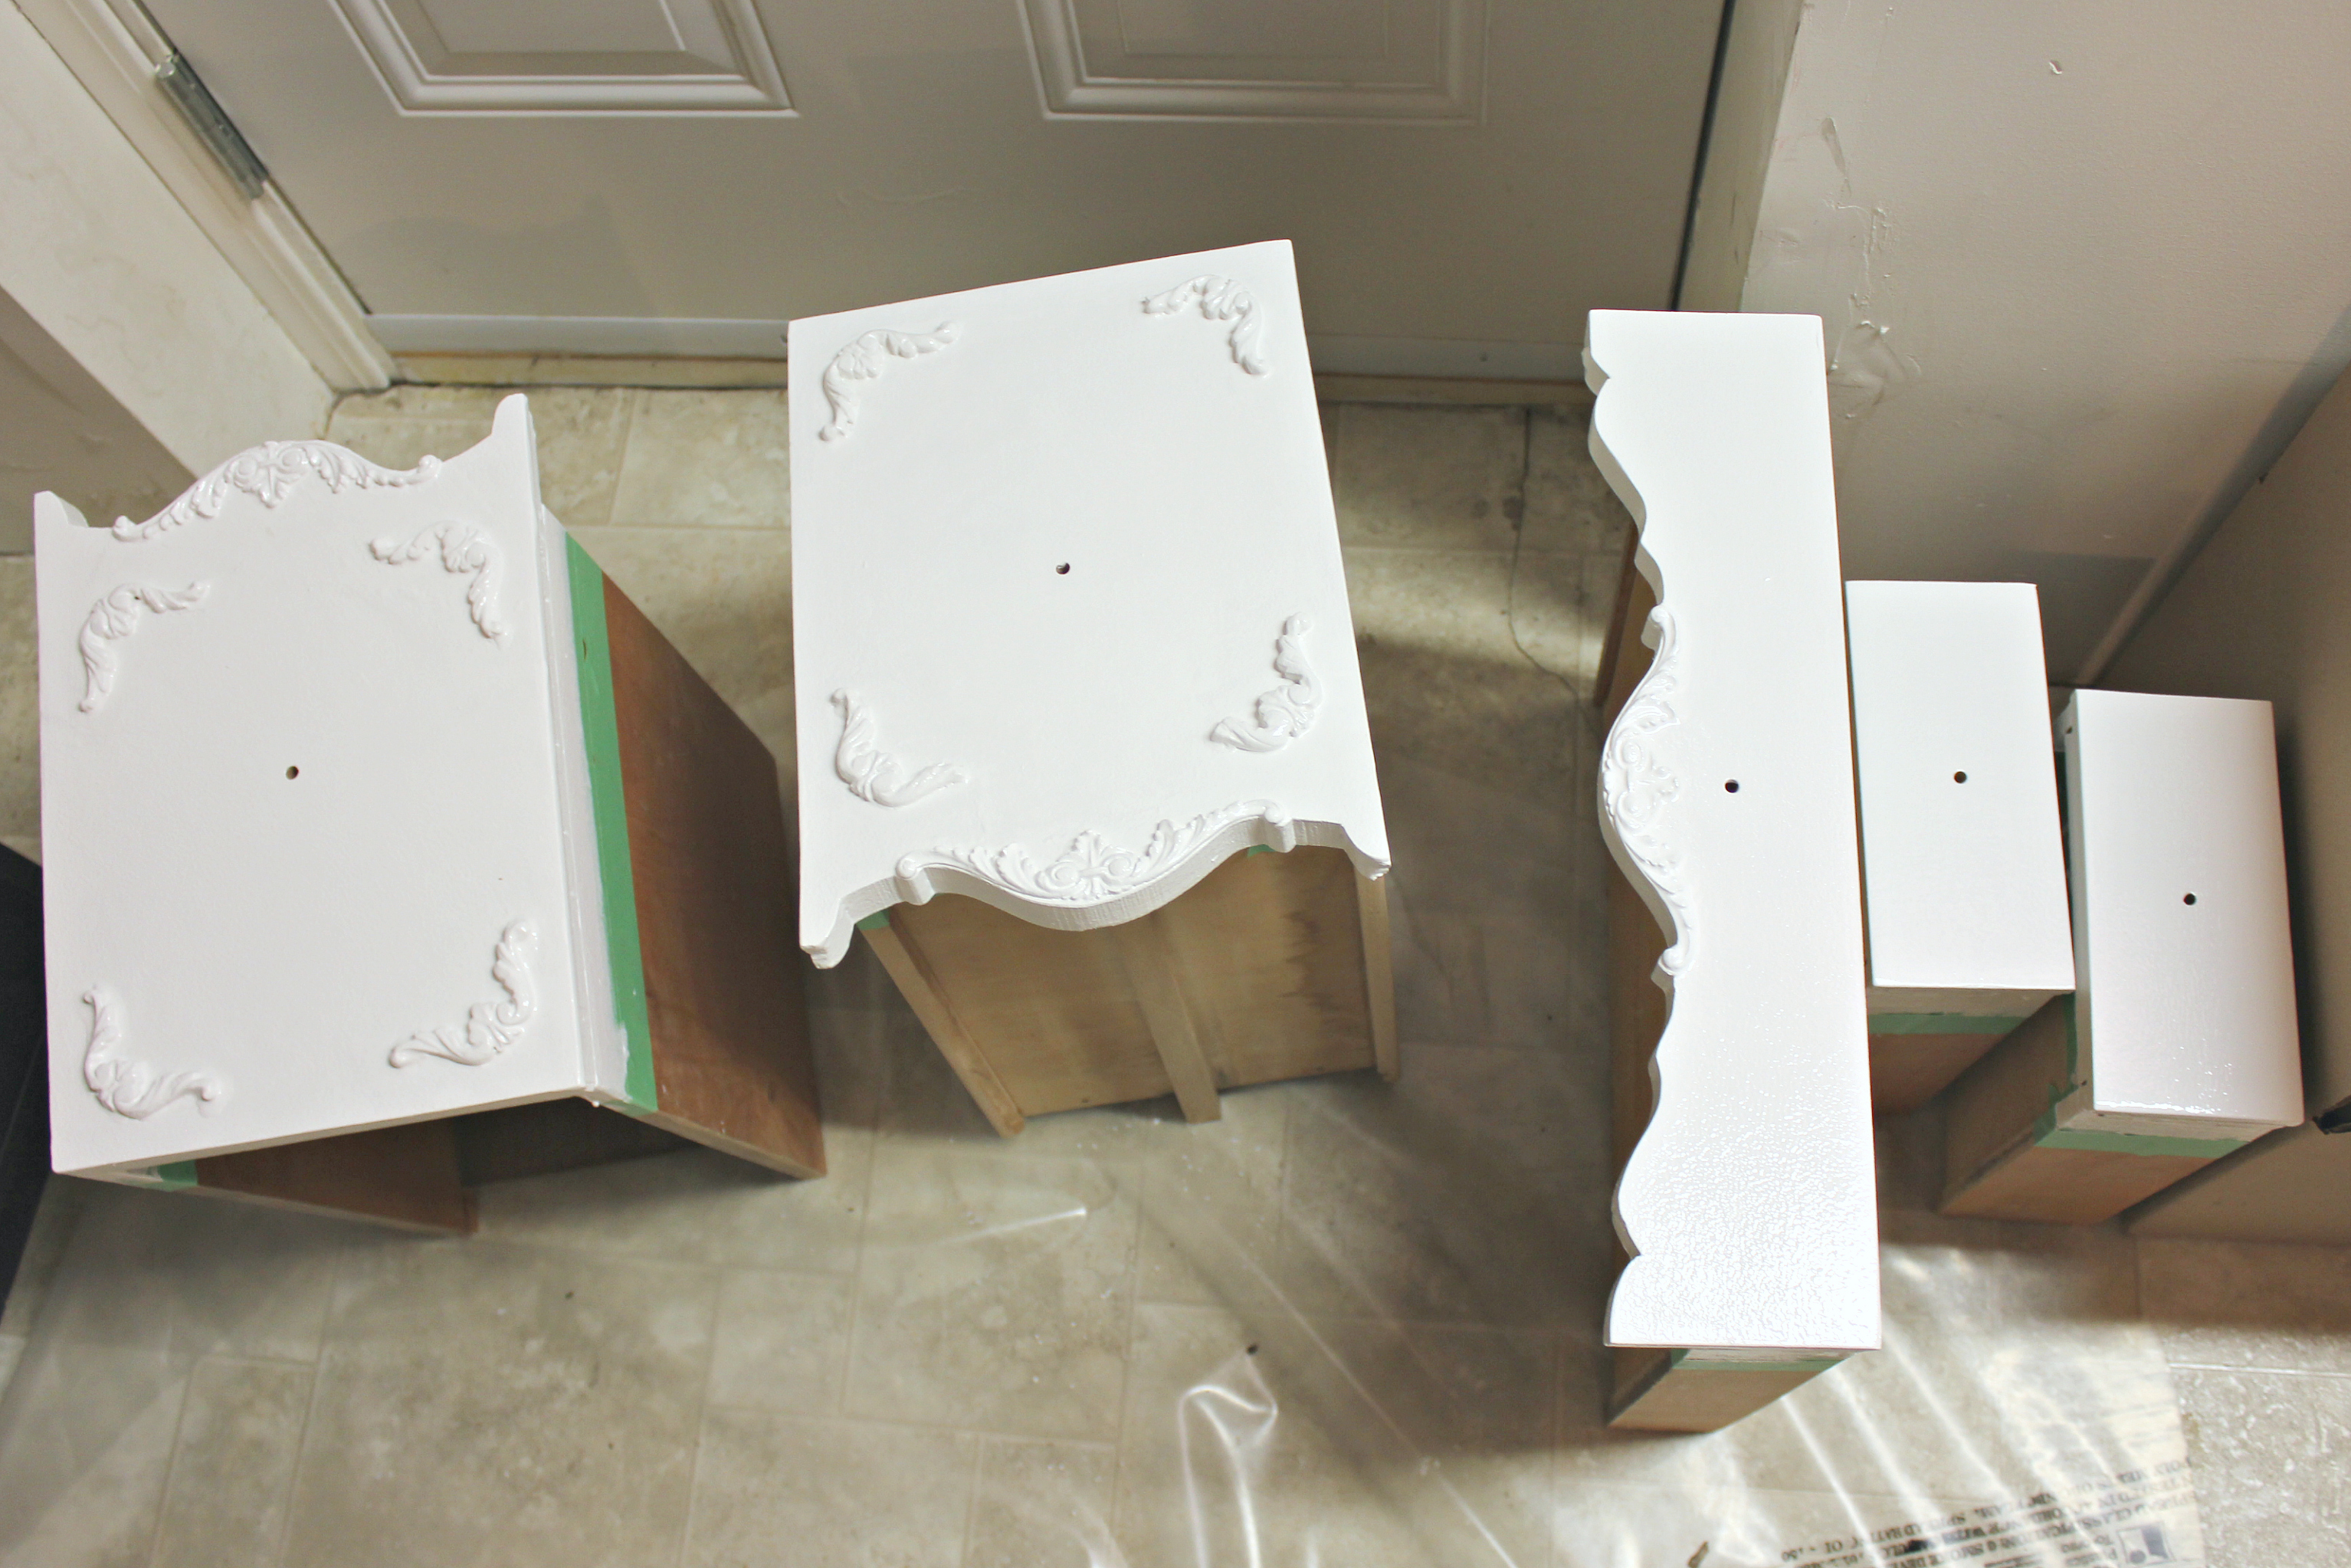
The first order of business was taking it apart. We removed the mirror by detaching it from the unit. Then we took off the wood backing and removed the mirror itself, putting it carefully aside. It is important to remove the mirror so that the inside edge of the vanity frame can be painted. This way you will not see a dark reflection of unpainted wood along the outer edge of the mirror when it is finished.
Step 2:
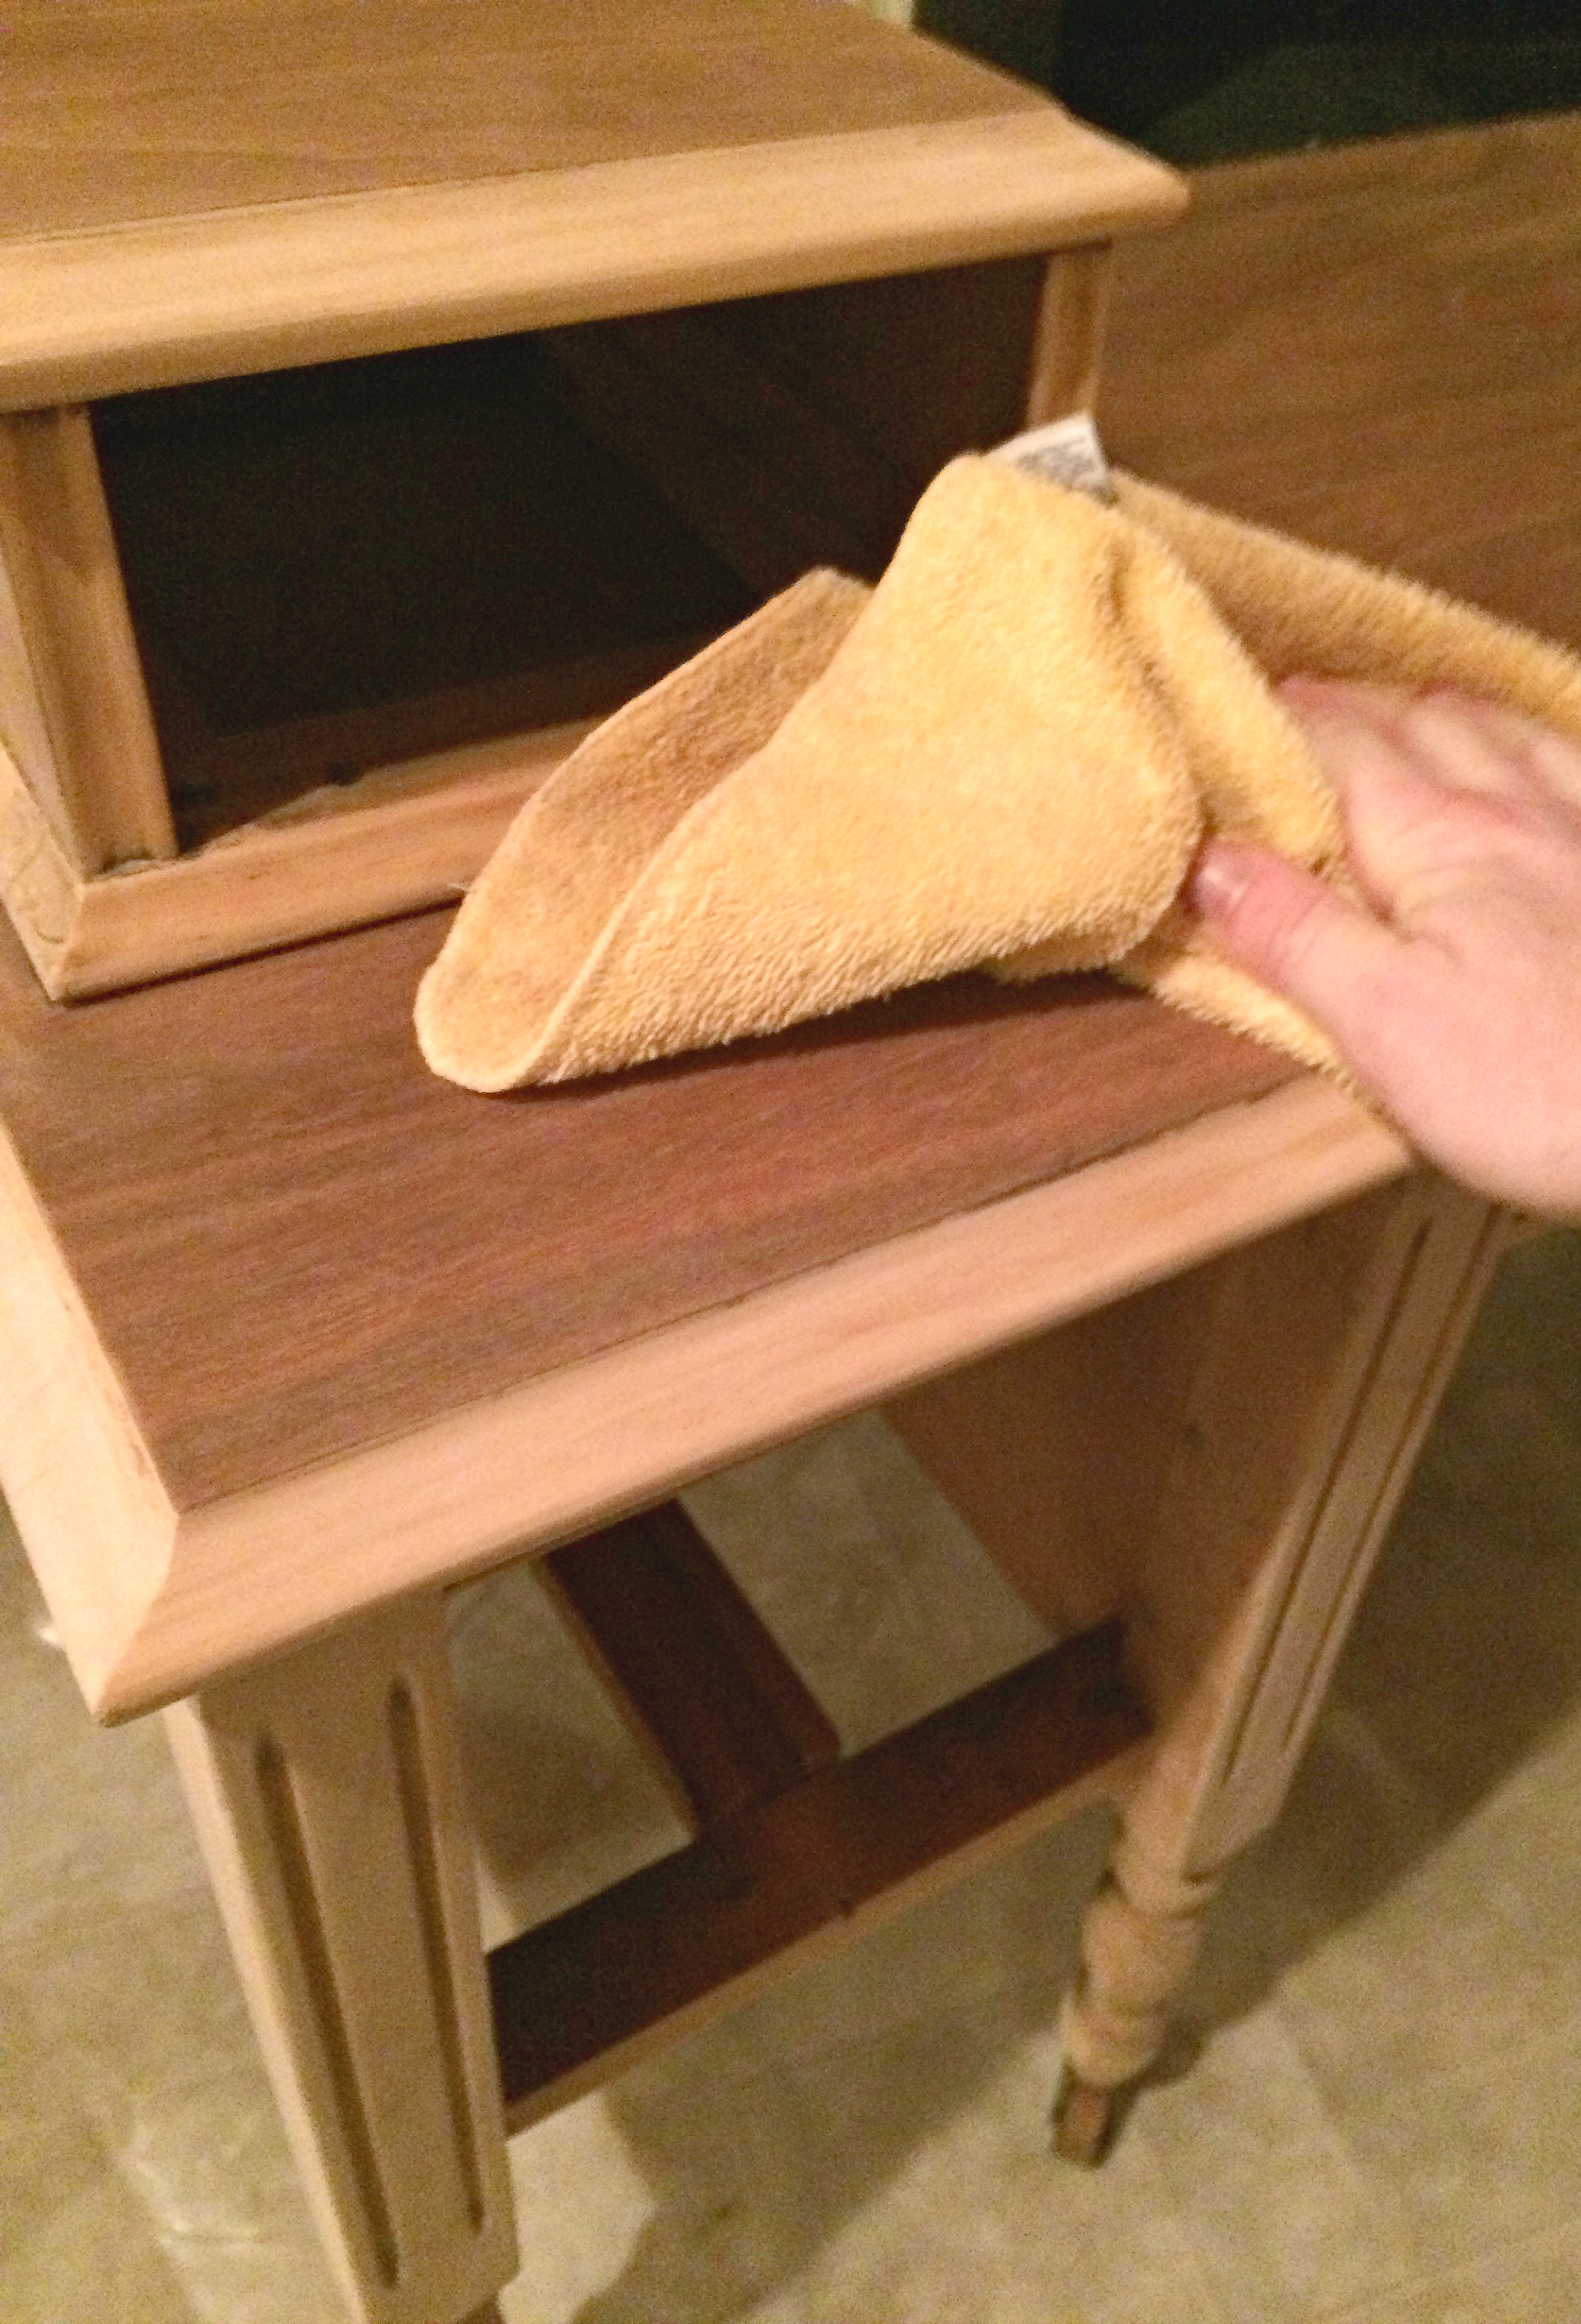
Next came the sanding. All the sanding! My husband’s perfectionist tendencies come in very handy for these sorts of things. We wanted to make sure any sort of finish or varnish had been removed before proceeding. This was achieved with an 80, 120 and then a 200 grit sand paper on an orbital sander.
Step 3:
Carefully wipe down any and all dust with a damp cloth.
Step 4:
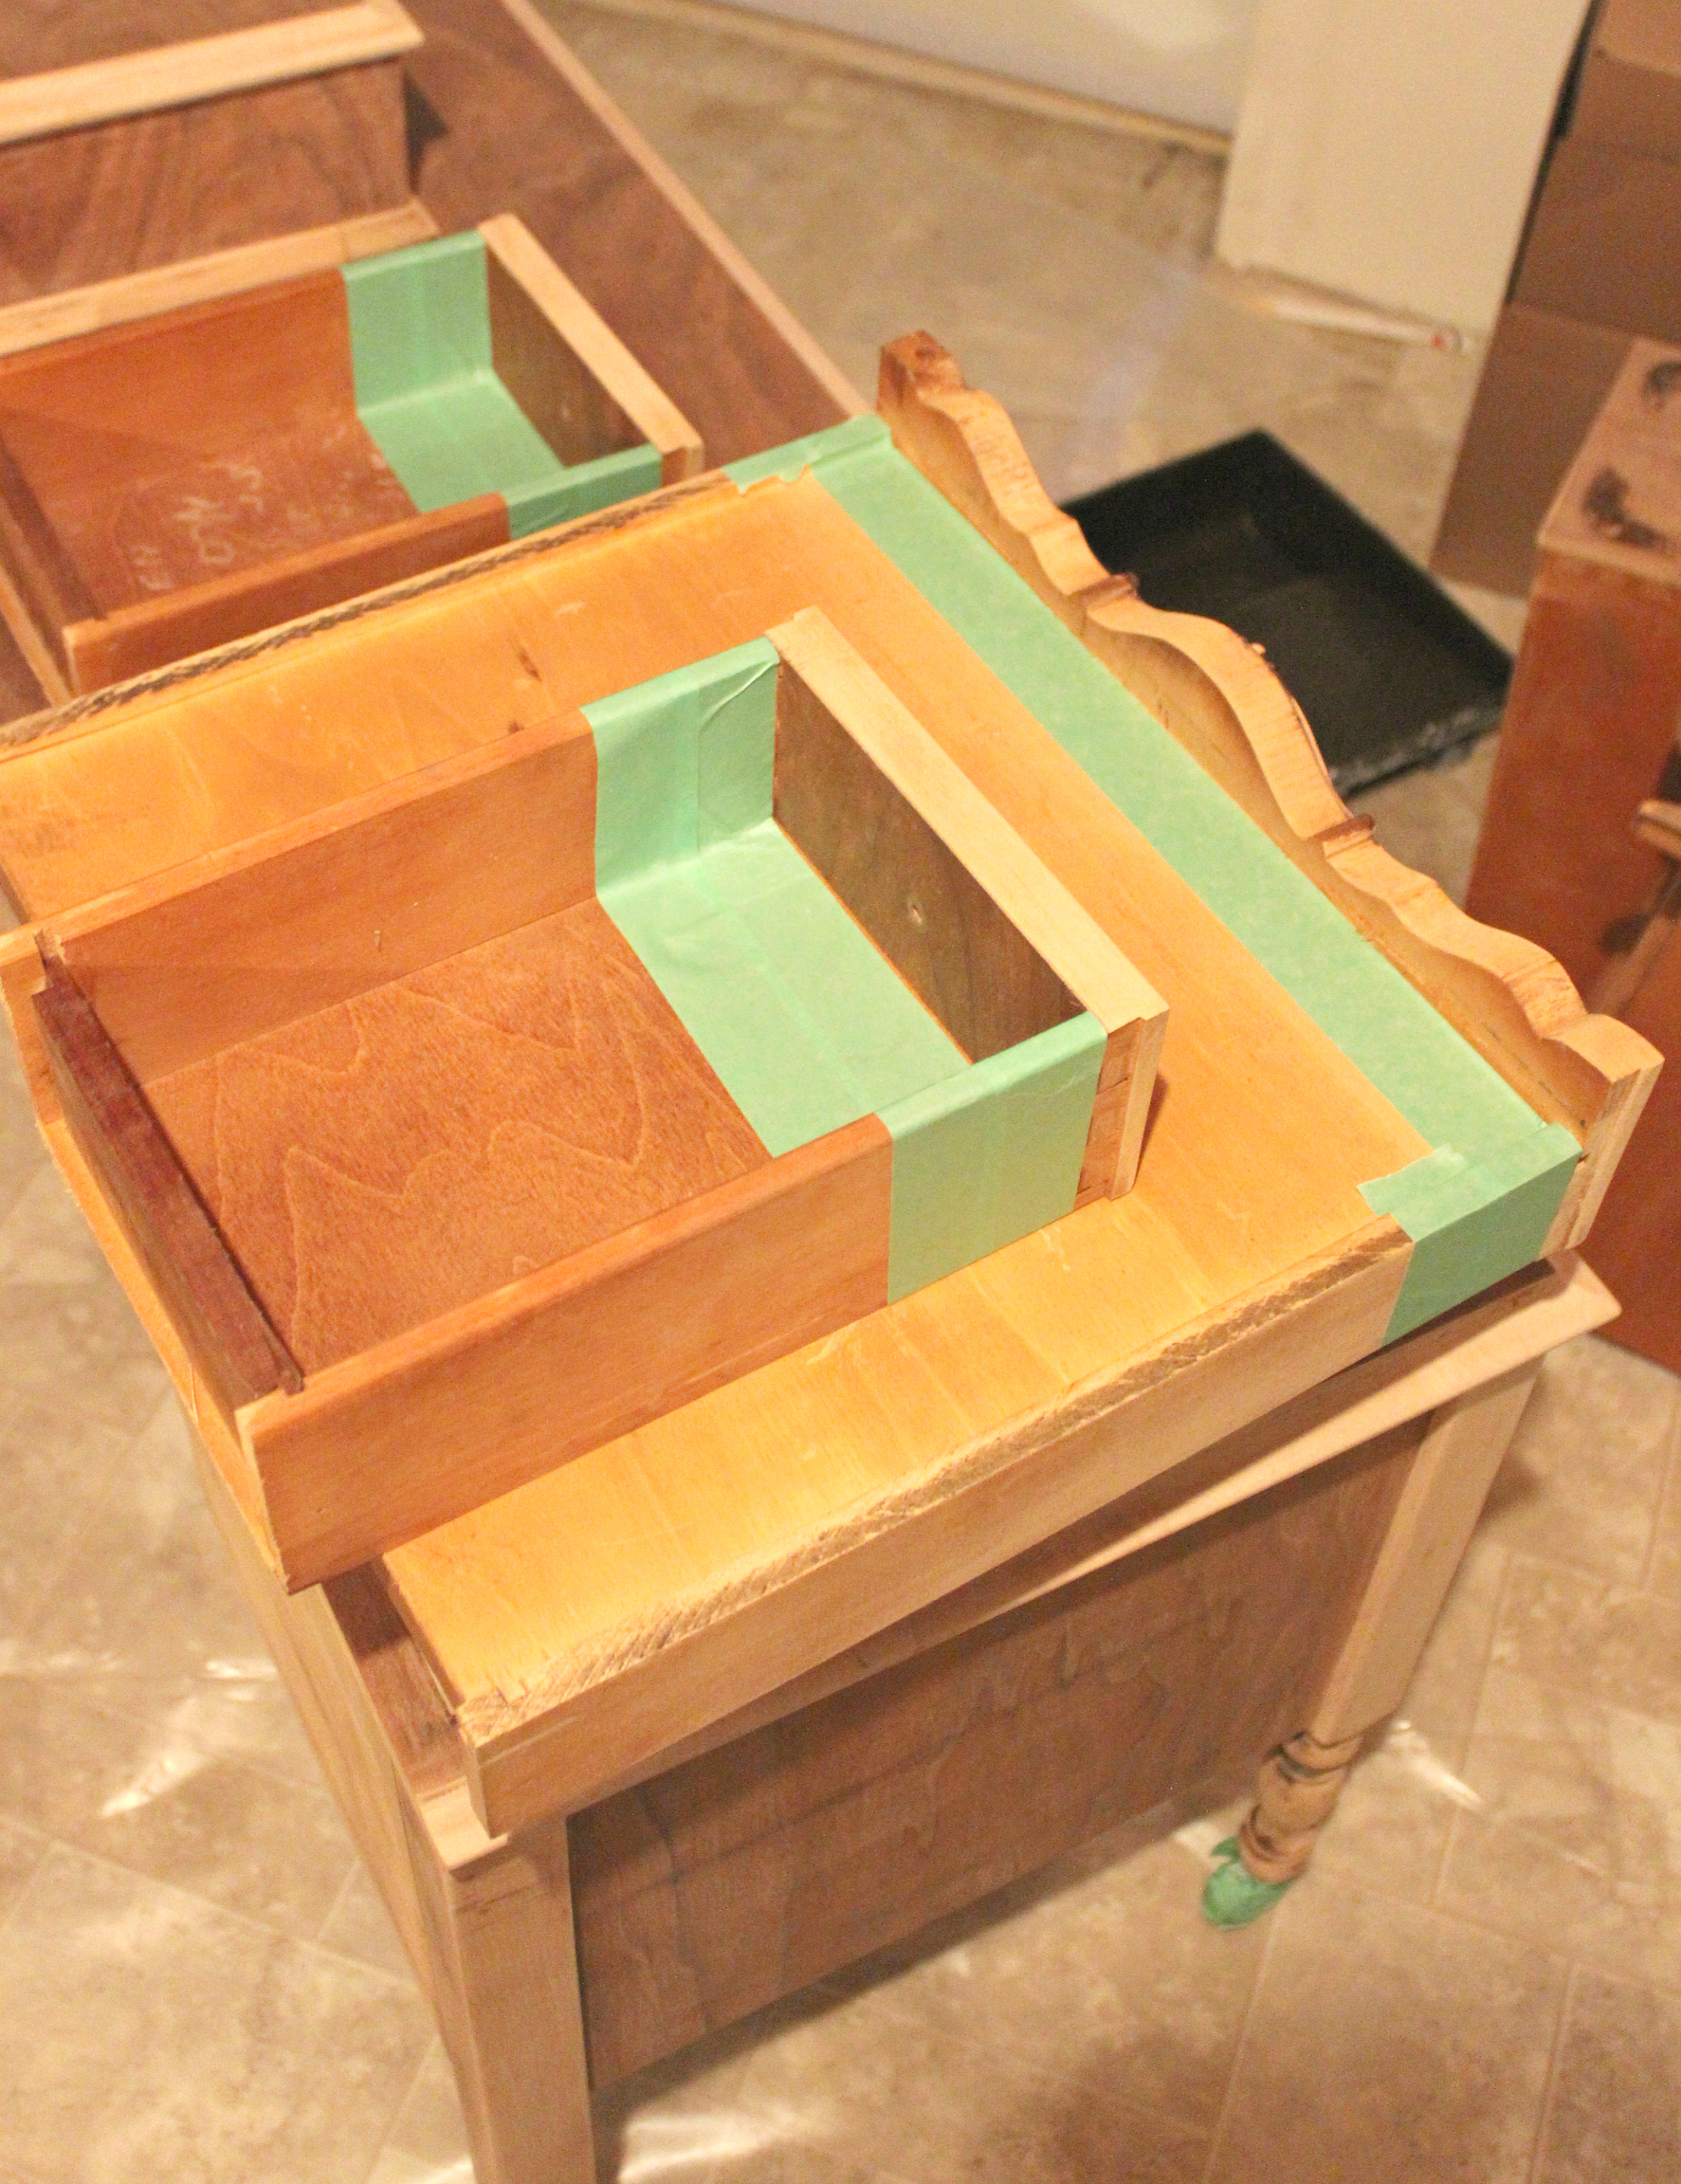
Next he taped off inside the drawers with painters tape so there would be straight lines where the paint stopped. This makes a much more finished look when the drawers are opened. He also taped off the casters on the bottom of the unit, alternatively you could just remove them.
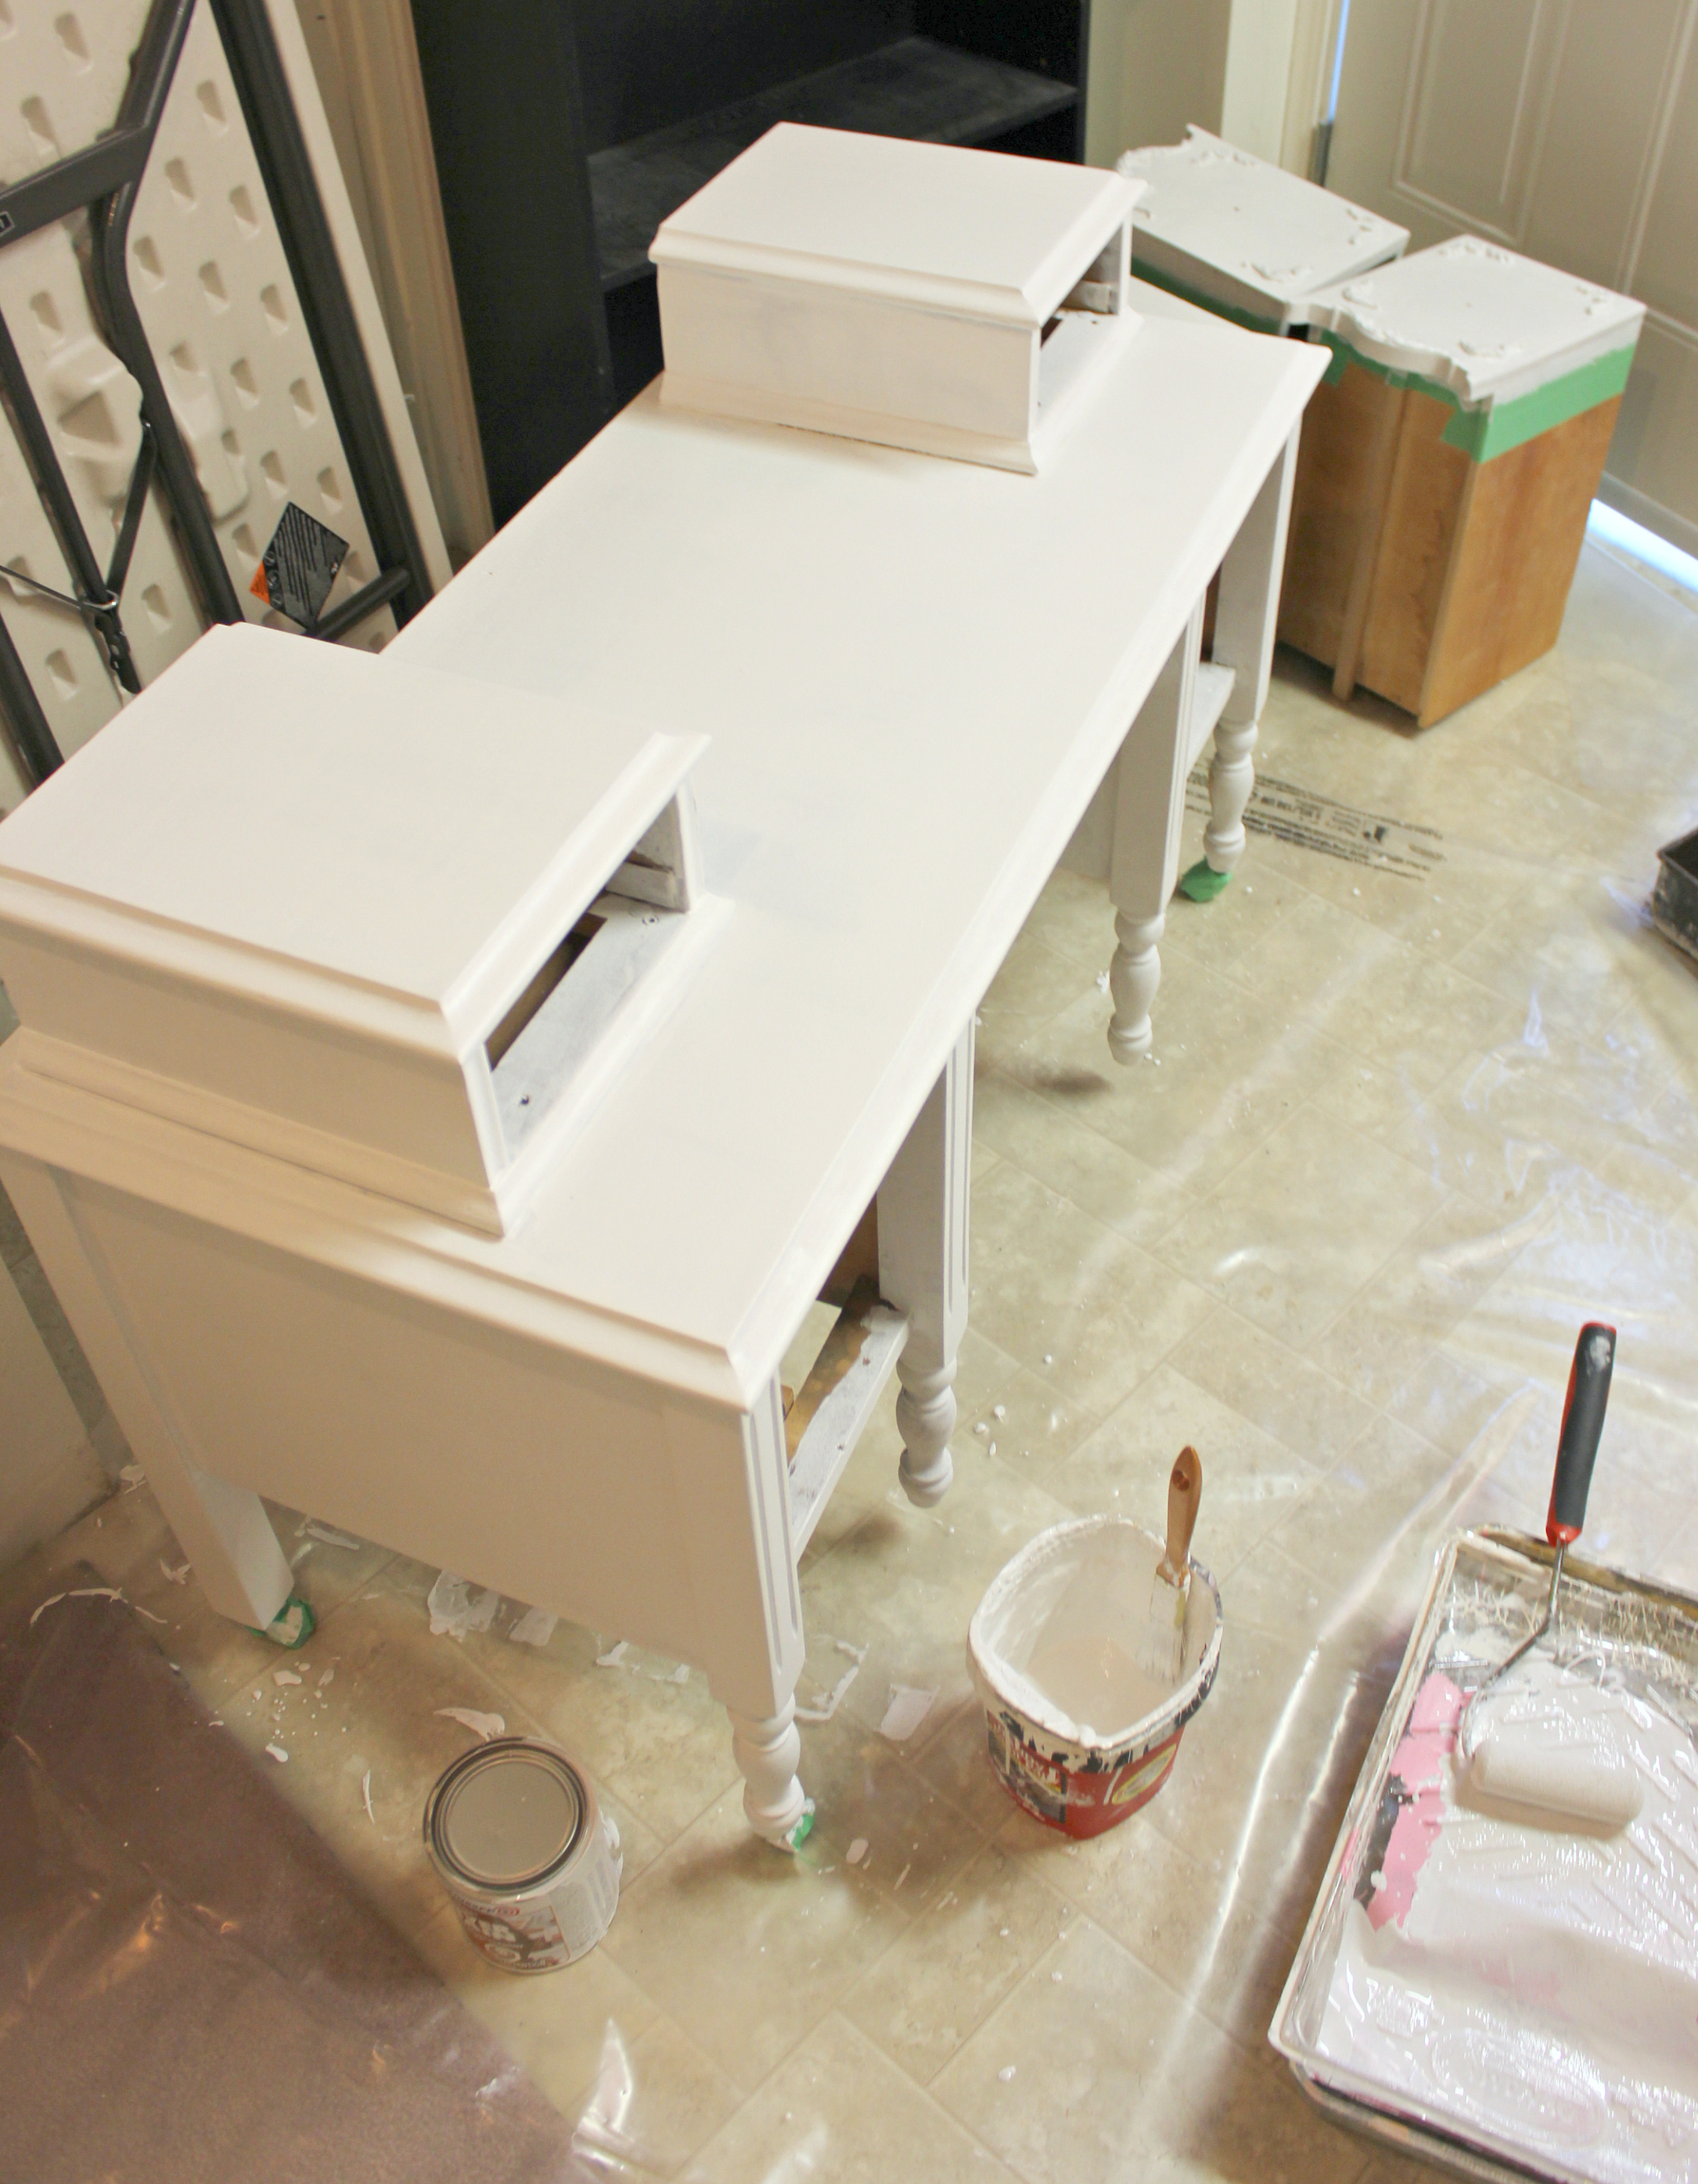
Step 5:
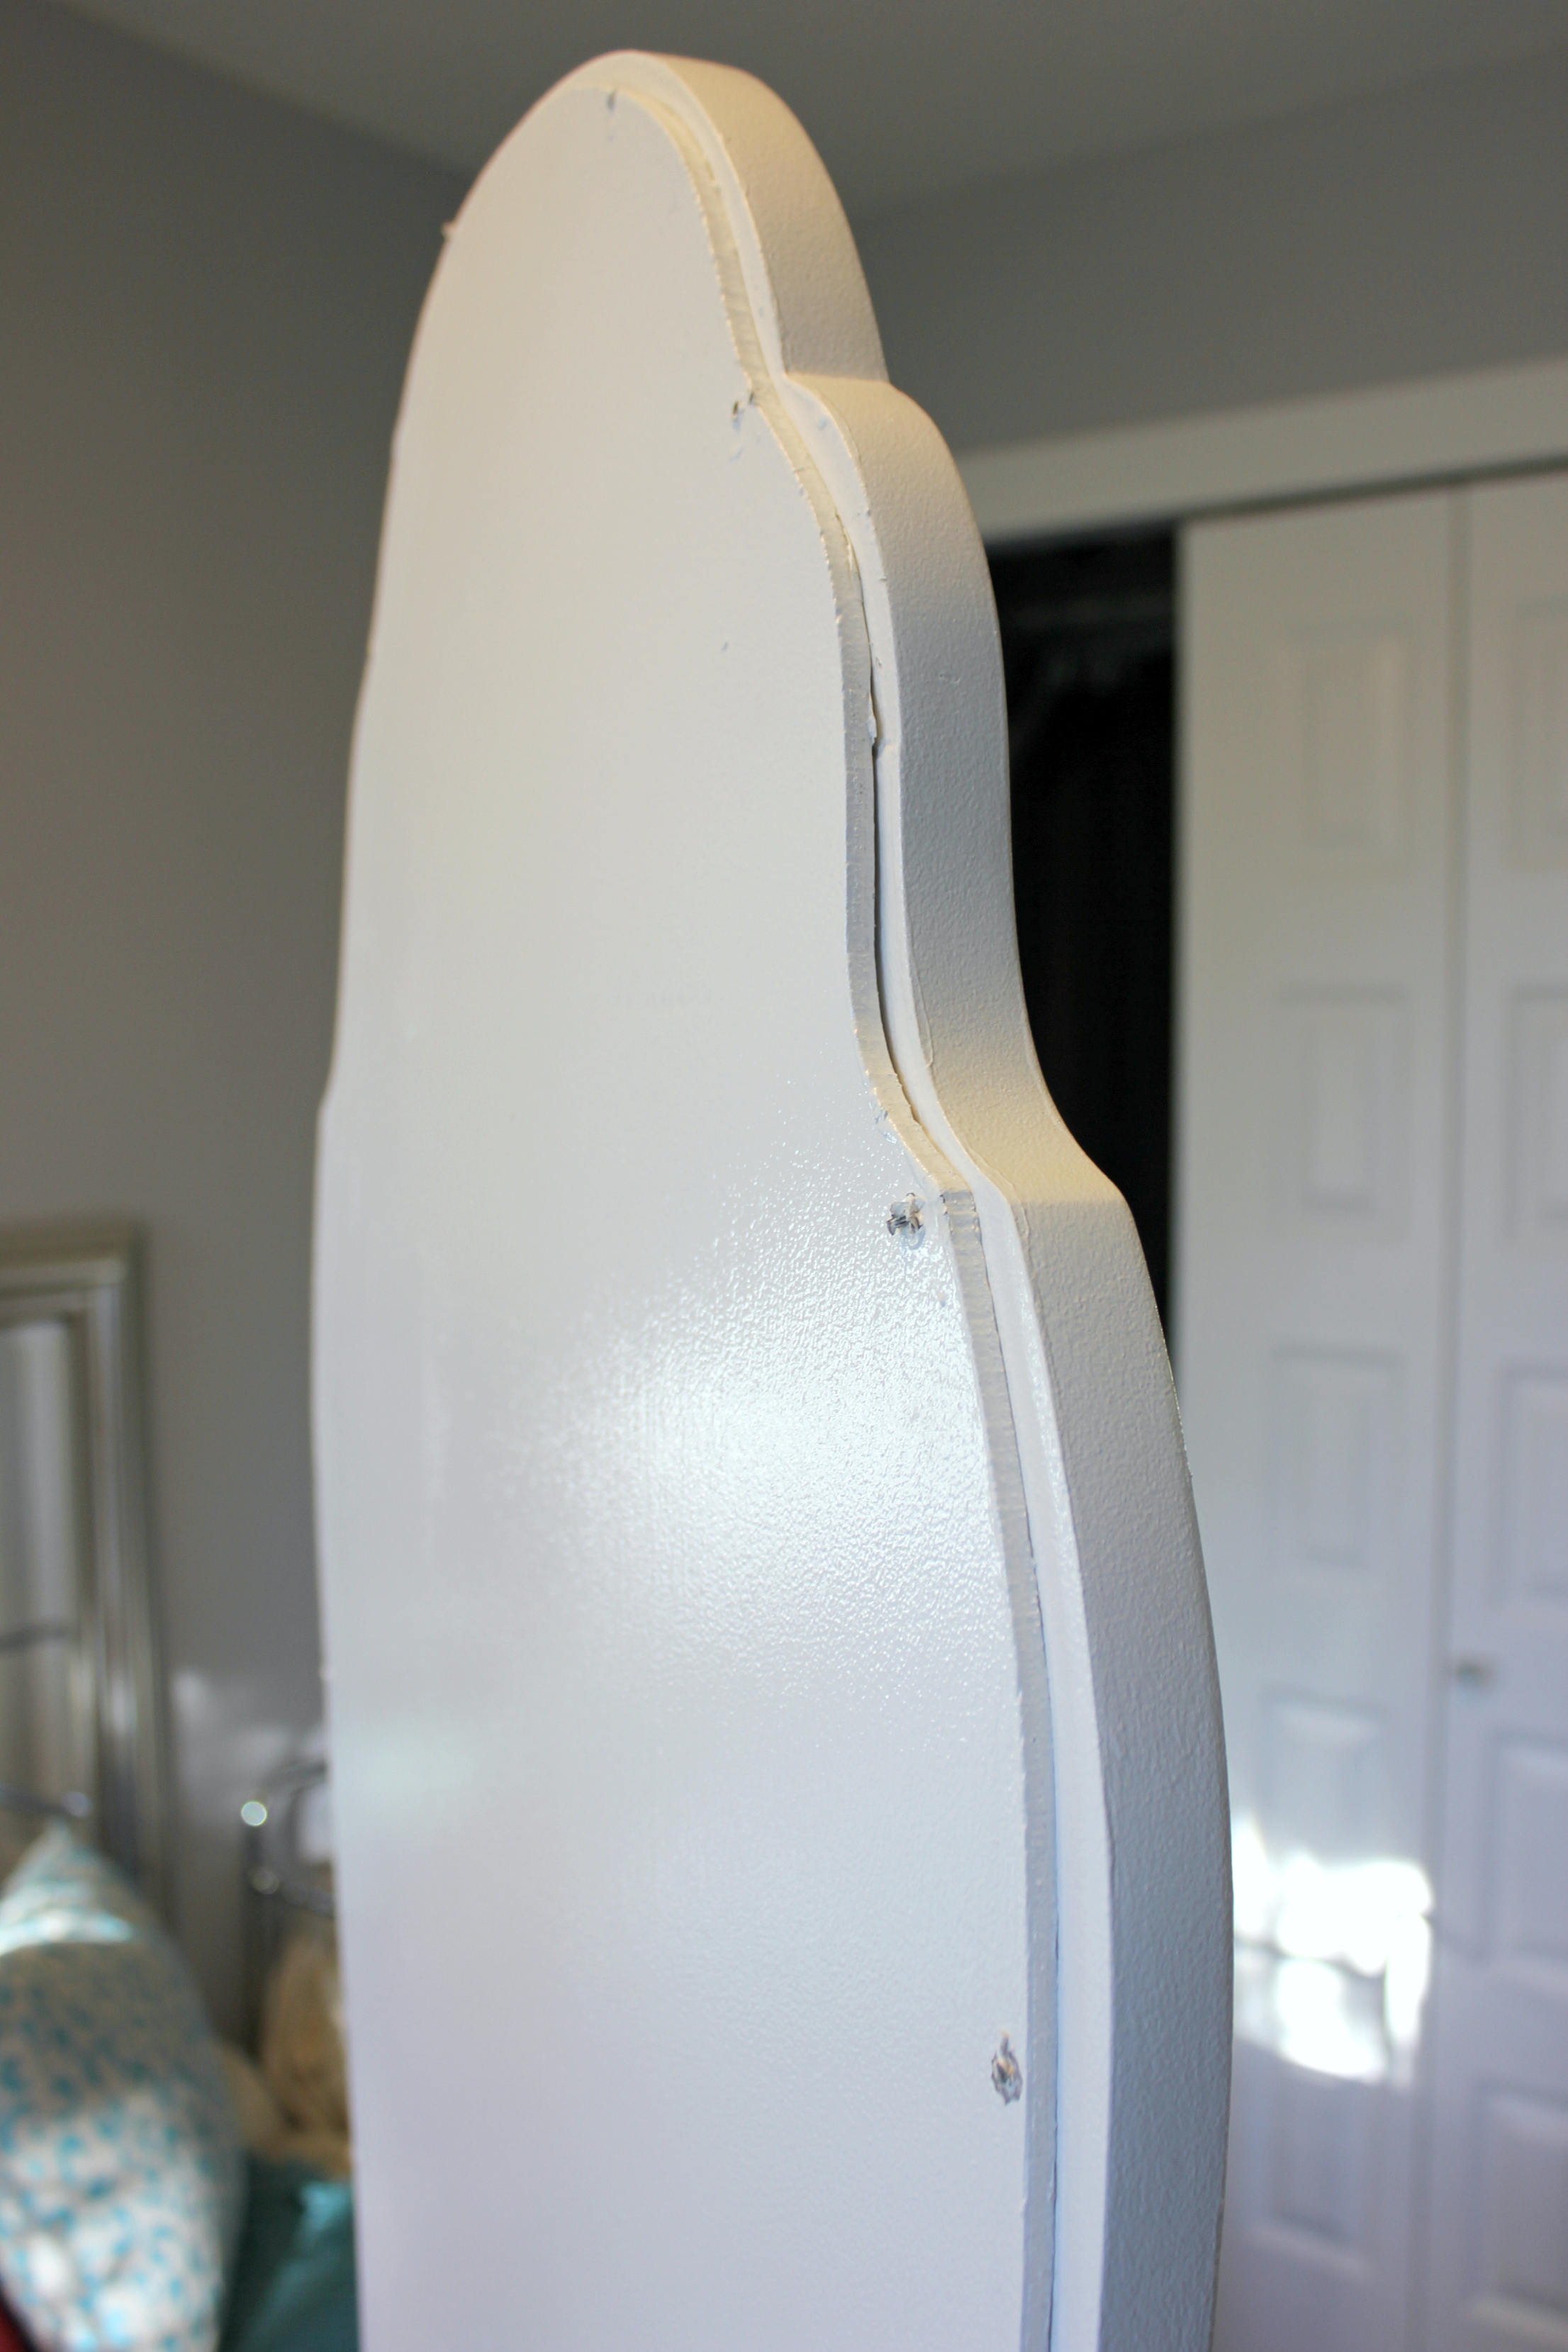
Then we meticulously applied a coat of primer, paying extra attention to any detail and being mindful for drips. We used a paint brush for all the detail work and then finished off with a smooth faced foam roller. We used Zinsser Cover Stain Primer-Sealer Stain Killer so as to give a good solid coat that wouldn’t allow any lingering stain that is embedded in the woodgrain to seep through later. We have used this product multiple times before on other projects with happy results. Allow to dry completely.
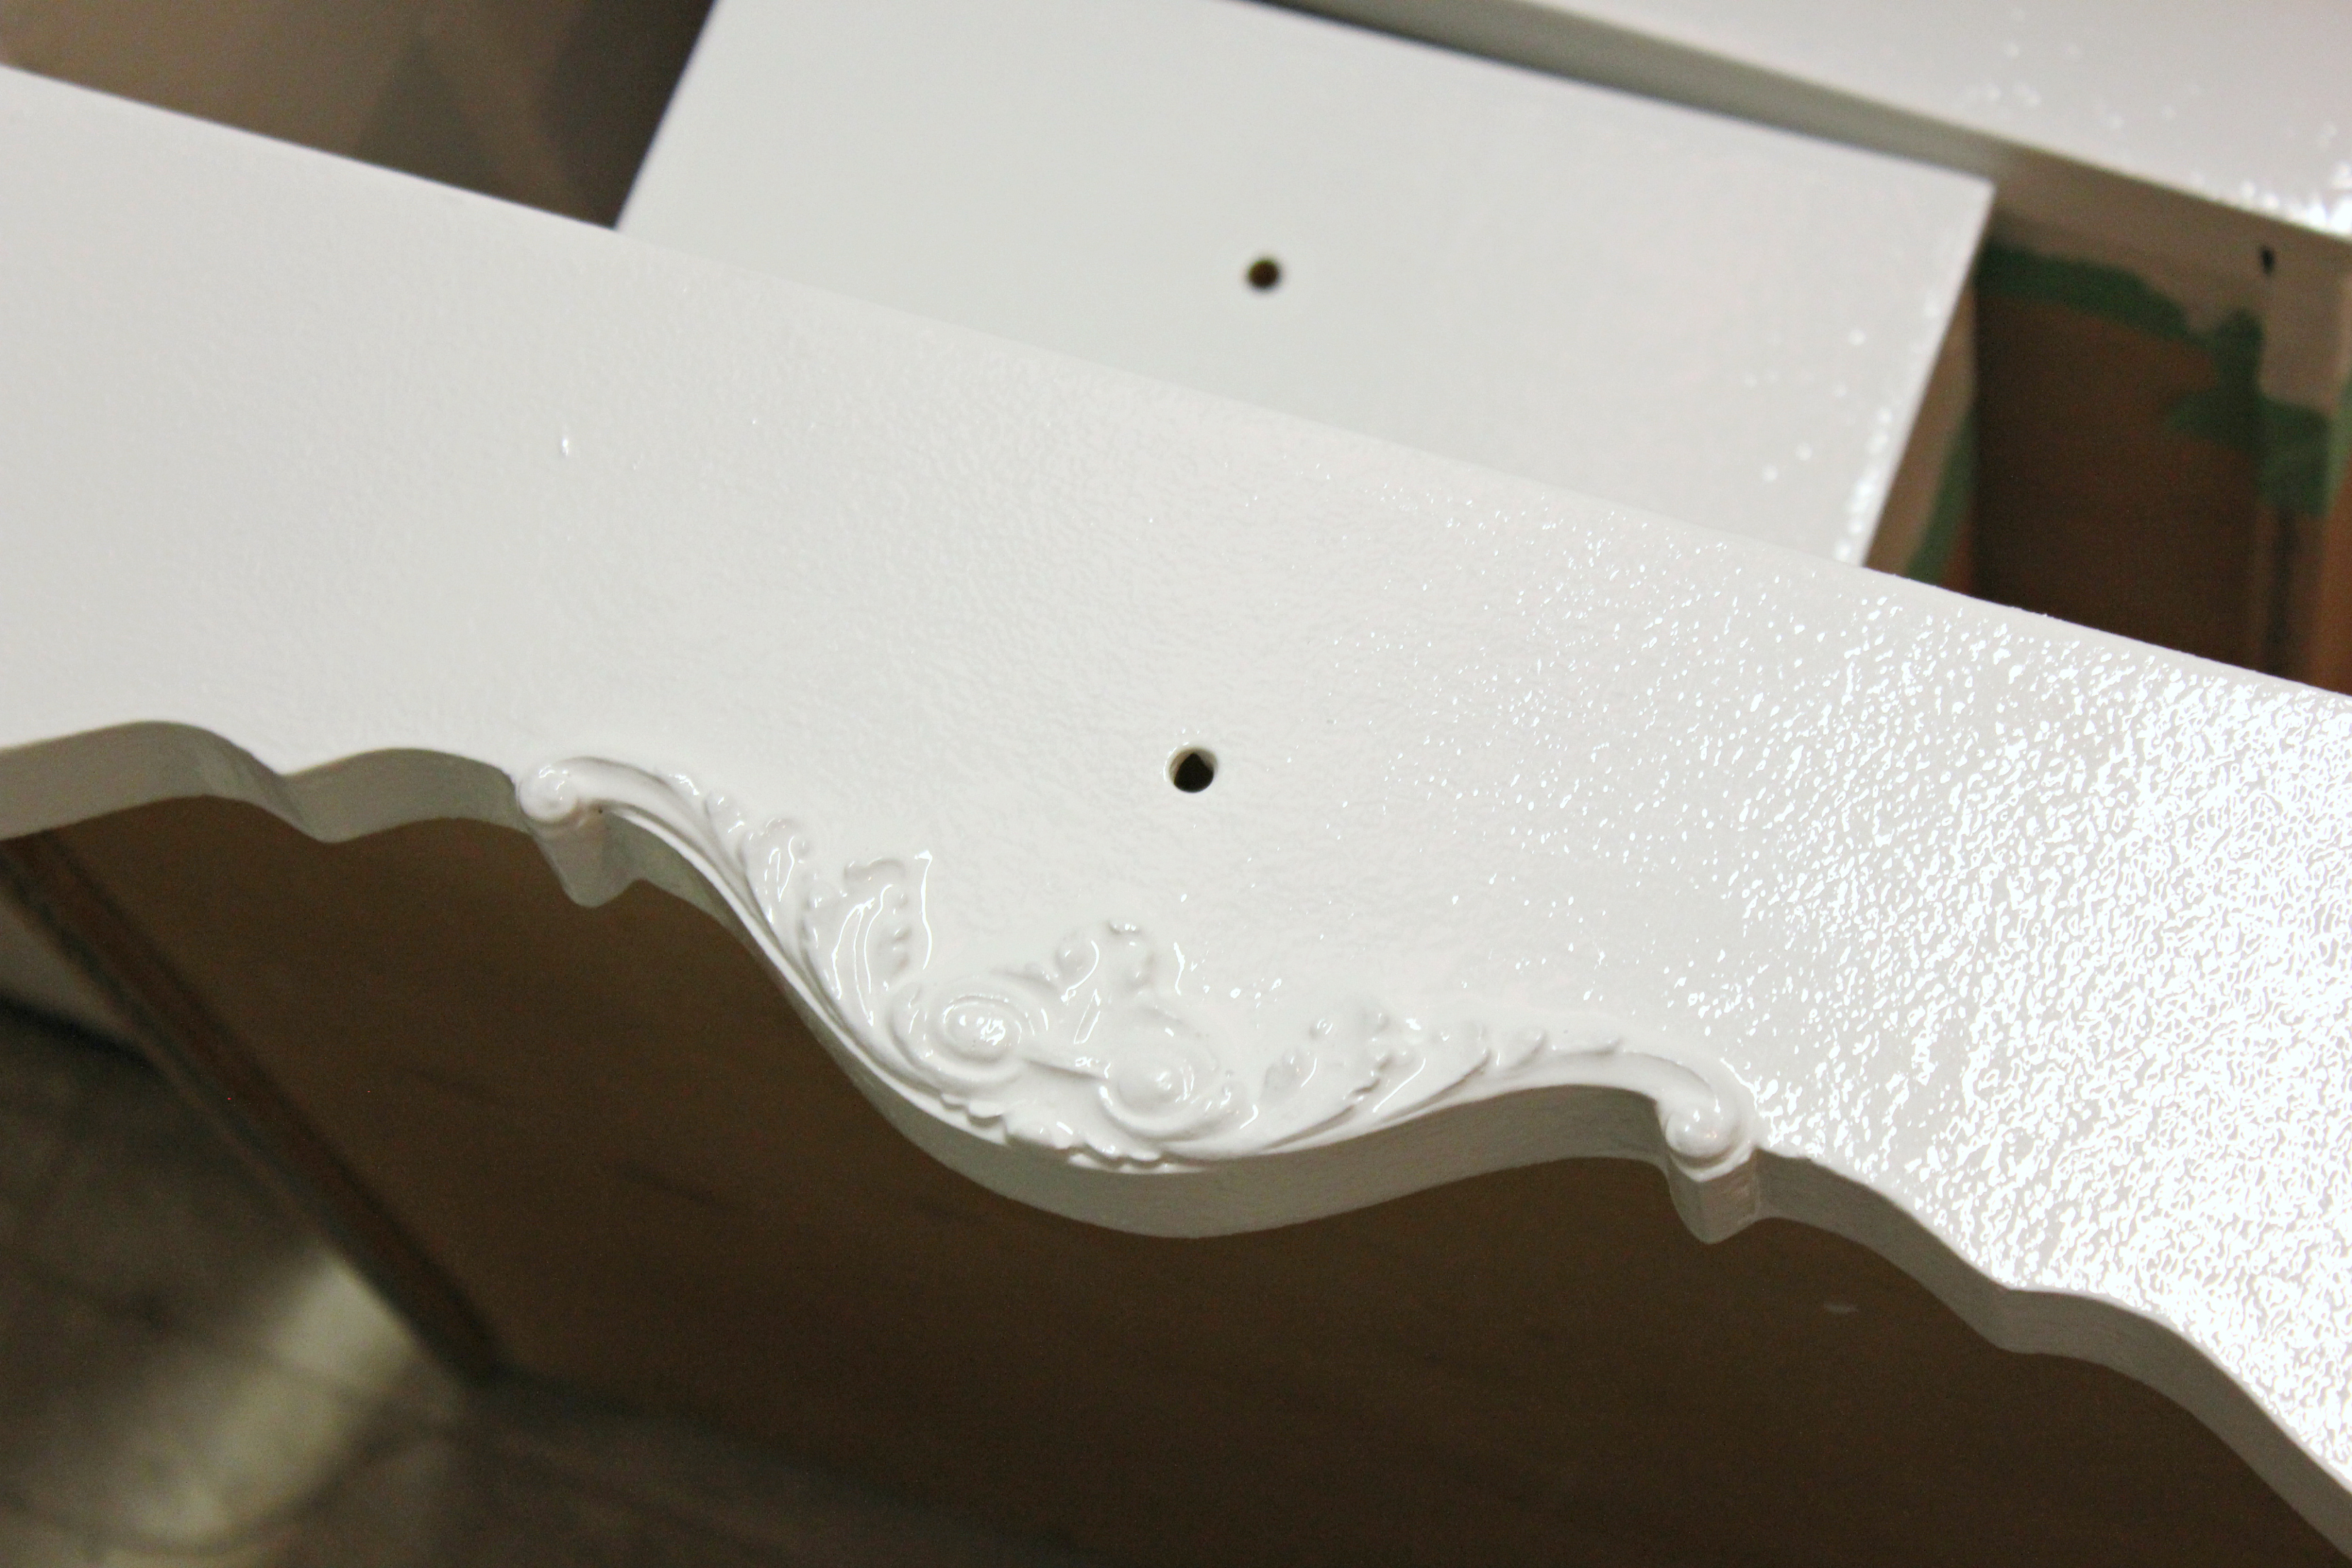
Step 6:
Once completely dry, we applied two coats of Benjamin Moore’s High-gloss latex paint in Chantilly Lace (OC-65). A few minutes after applying the first coat, check to ensure that paint runs have not formed. If they have, be sure to quickly smooth with the paint brush or roller before the paint dries. Then allow time for the first coat to dry completely before applying the second coat.
Step 7:
Allow the paint to dry and cure according to directions (we gave ours a week). Also make sure you allow this to take place without the drawers in place or they may get stuck.
Step 8:
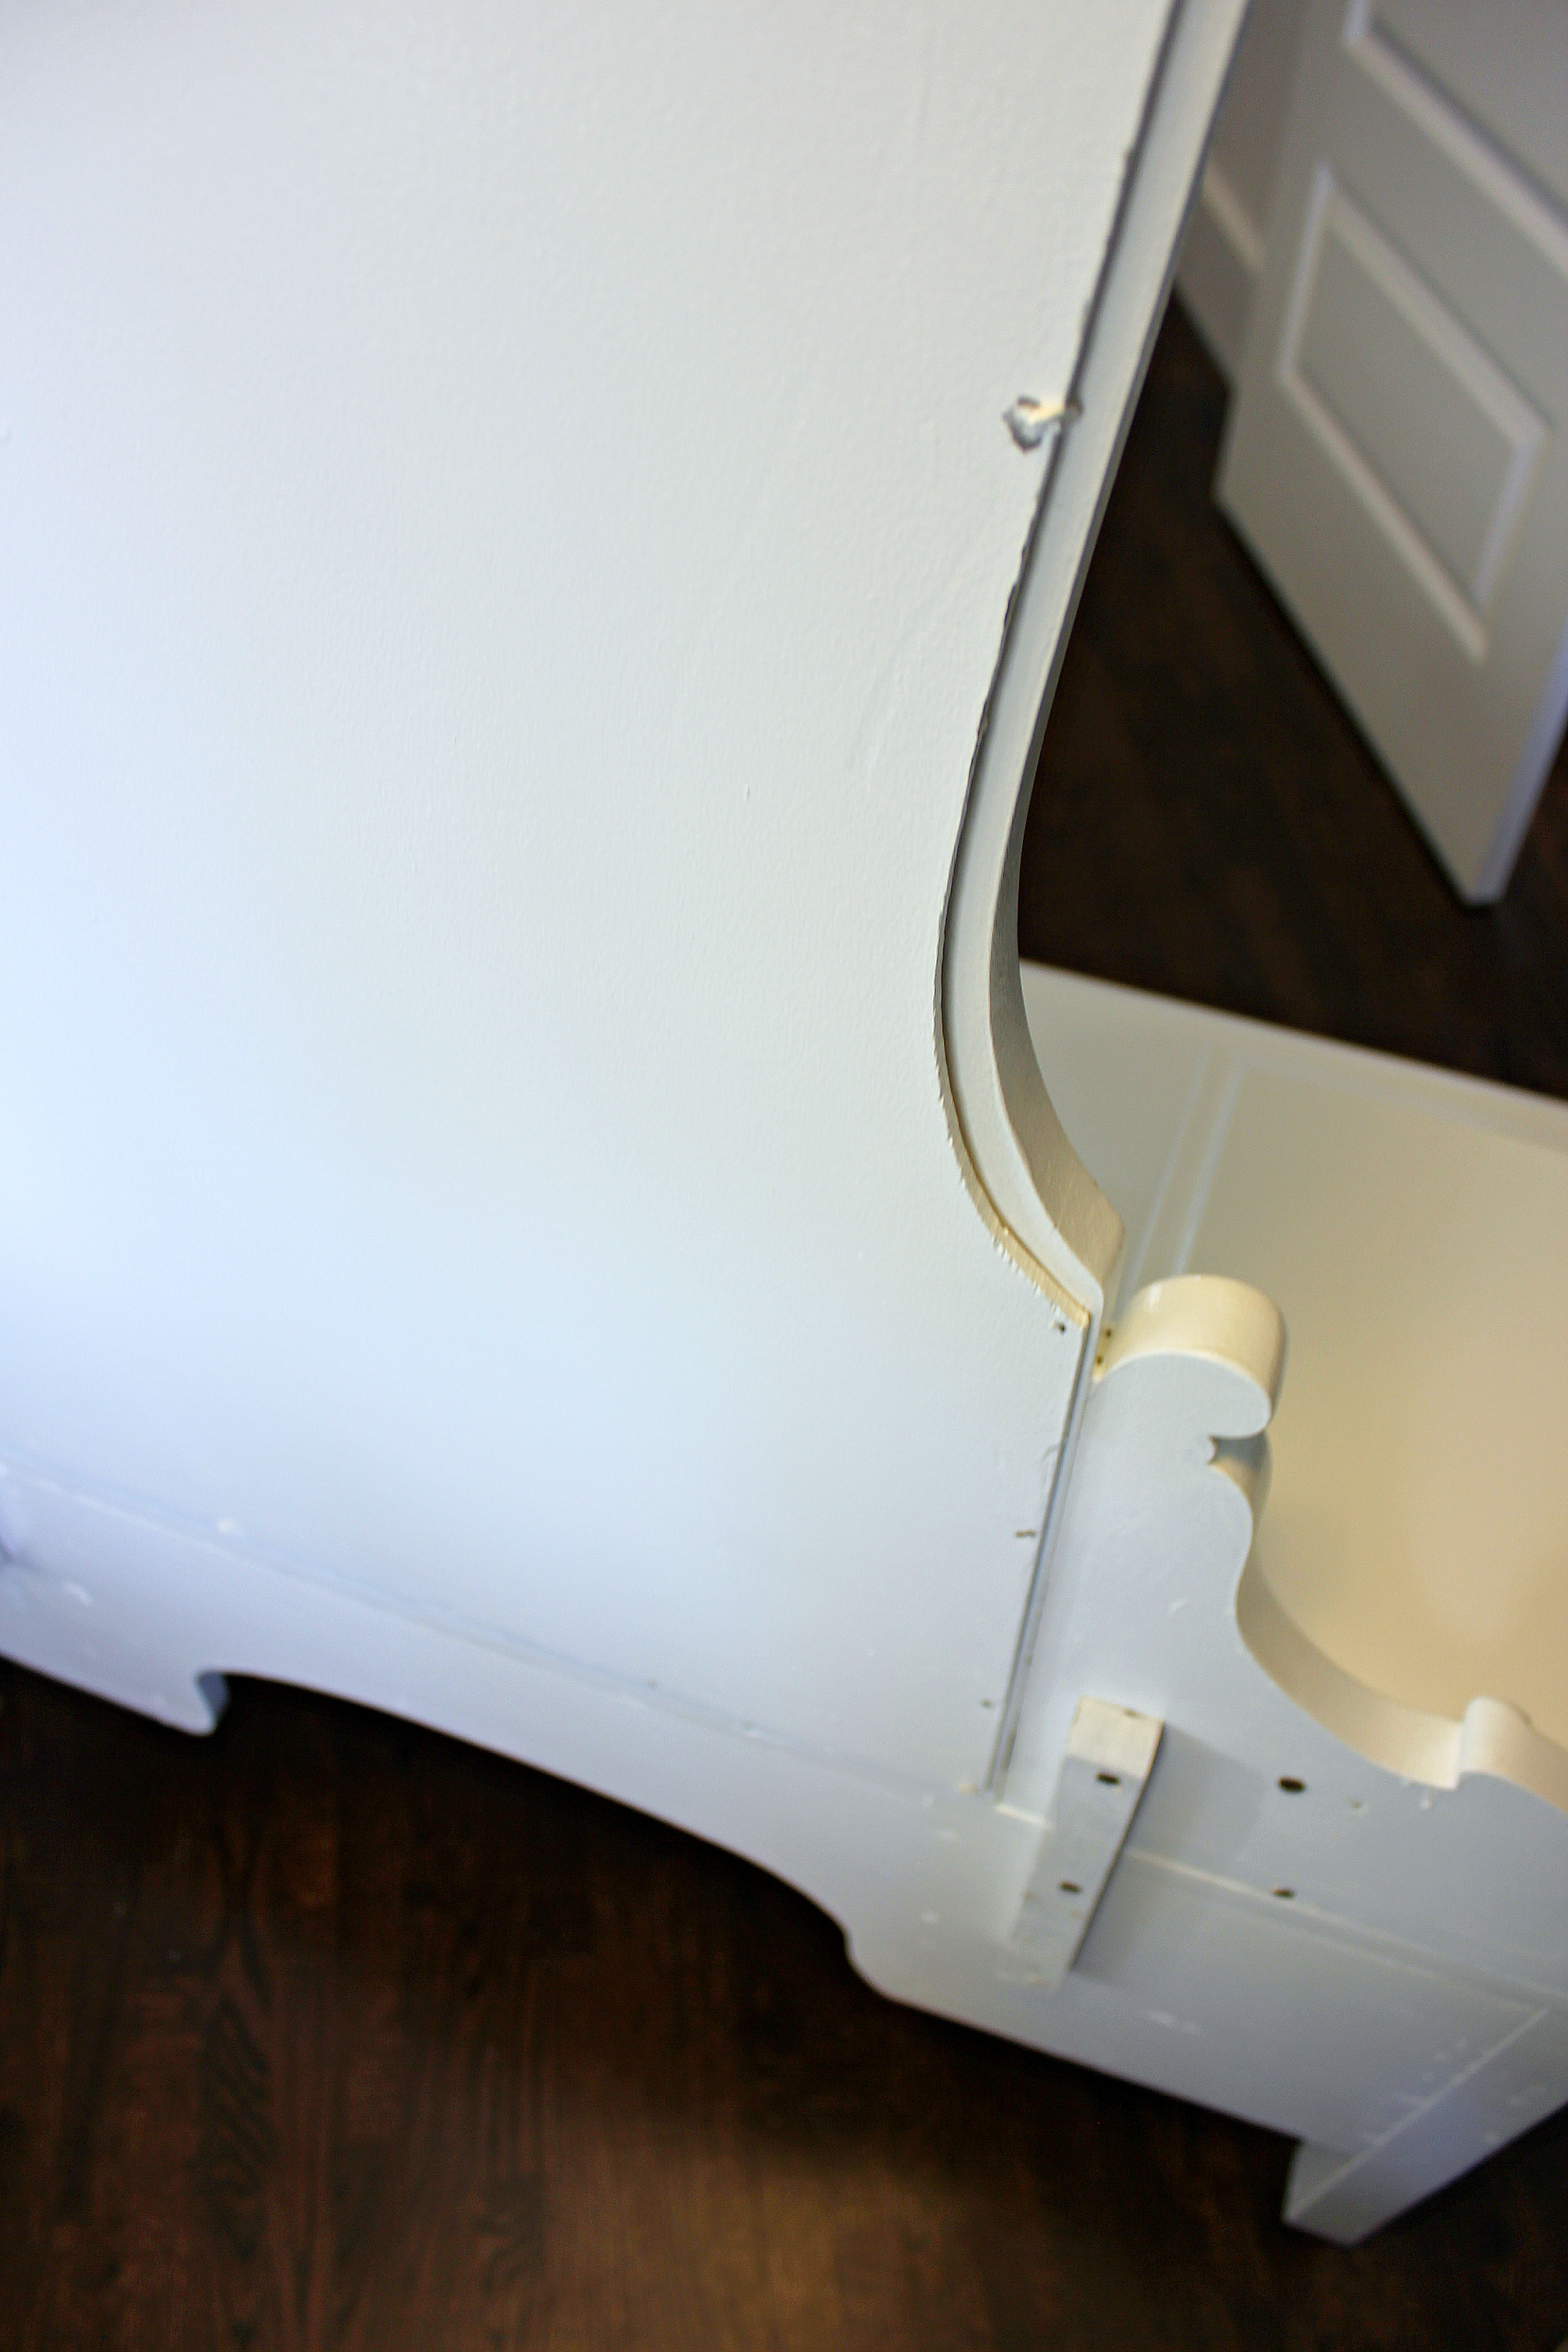
Once the paint was no longer soft, we put the mirror back in place and the wood backing was secured with the original finishing nails. Then it was reattached to the unit with the original screws, saved from disassembly. It took both of us, one holding the mirror in place while the other attached it to the back of the vanity.
Step 9:
Next, if you are anything like me, dance your way to Anthropologie, overjoyed to finally have a reason to actually purchase some of their amazingly beautiful handles, rather than just oohing and ahhing at your every visit!
Step 10:
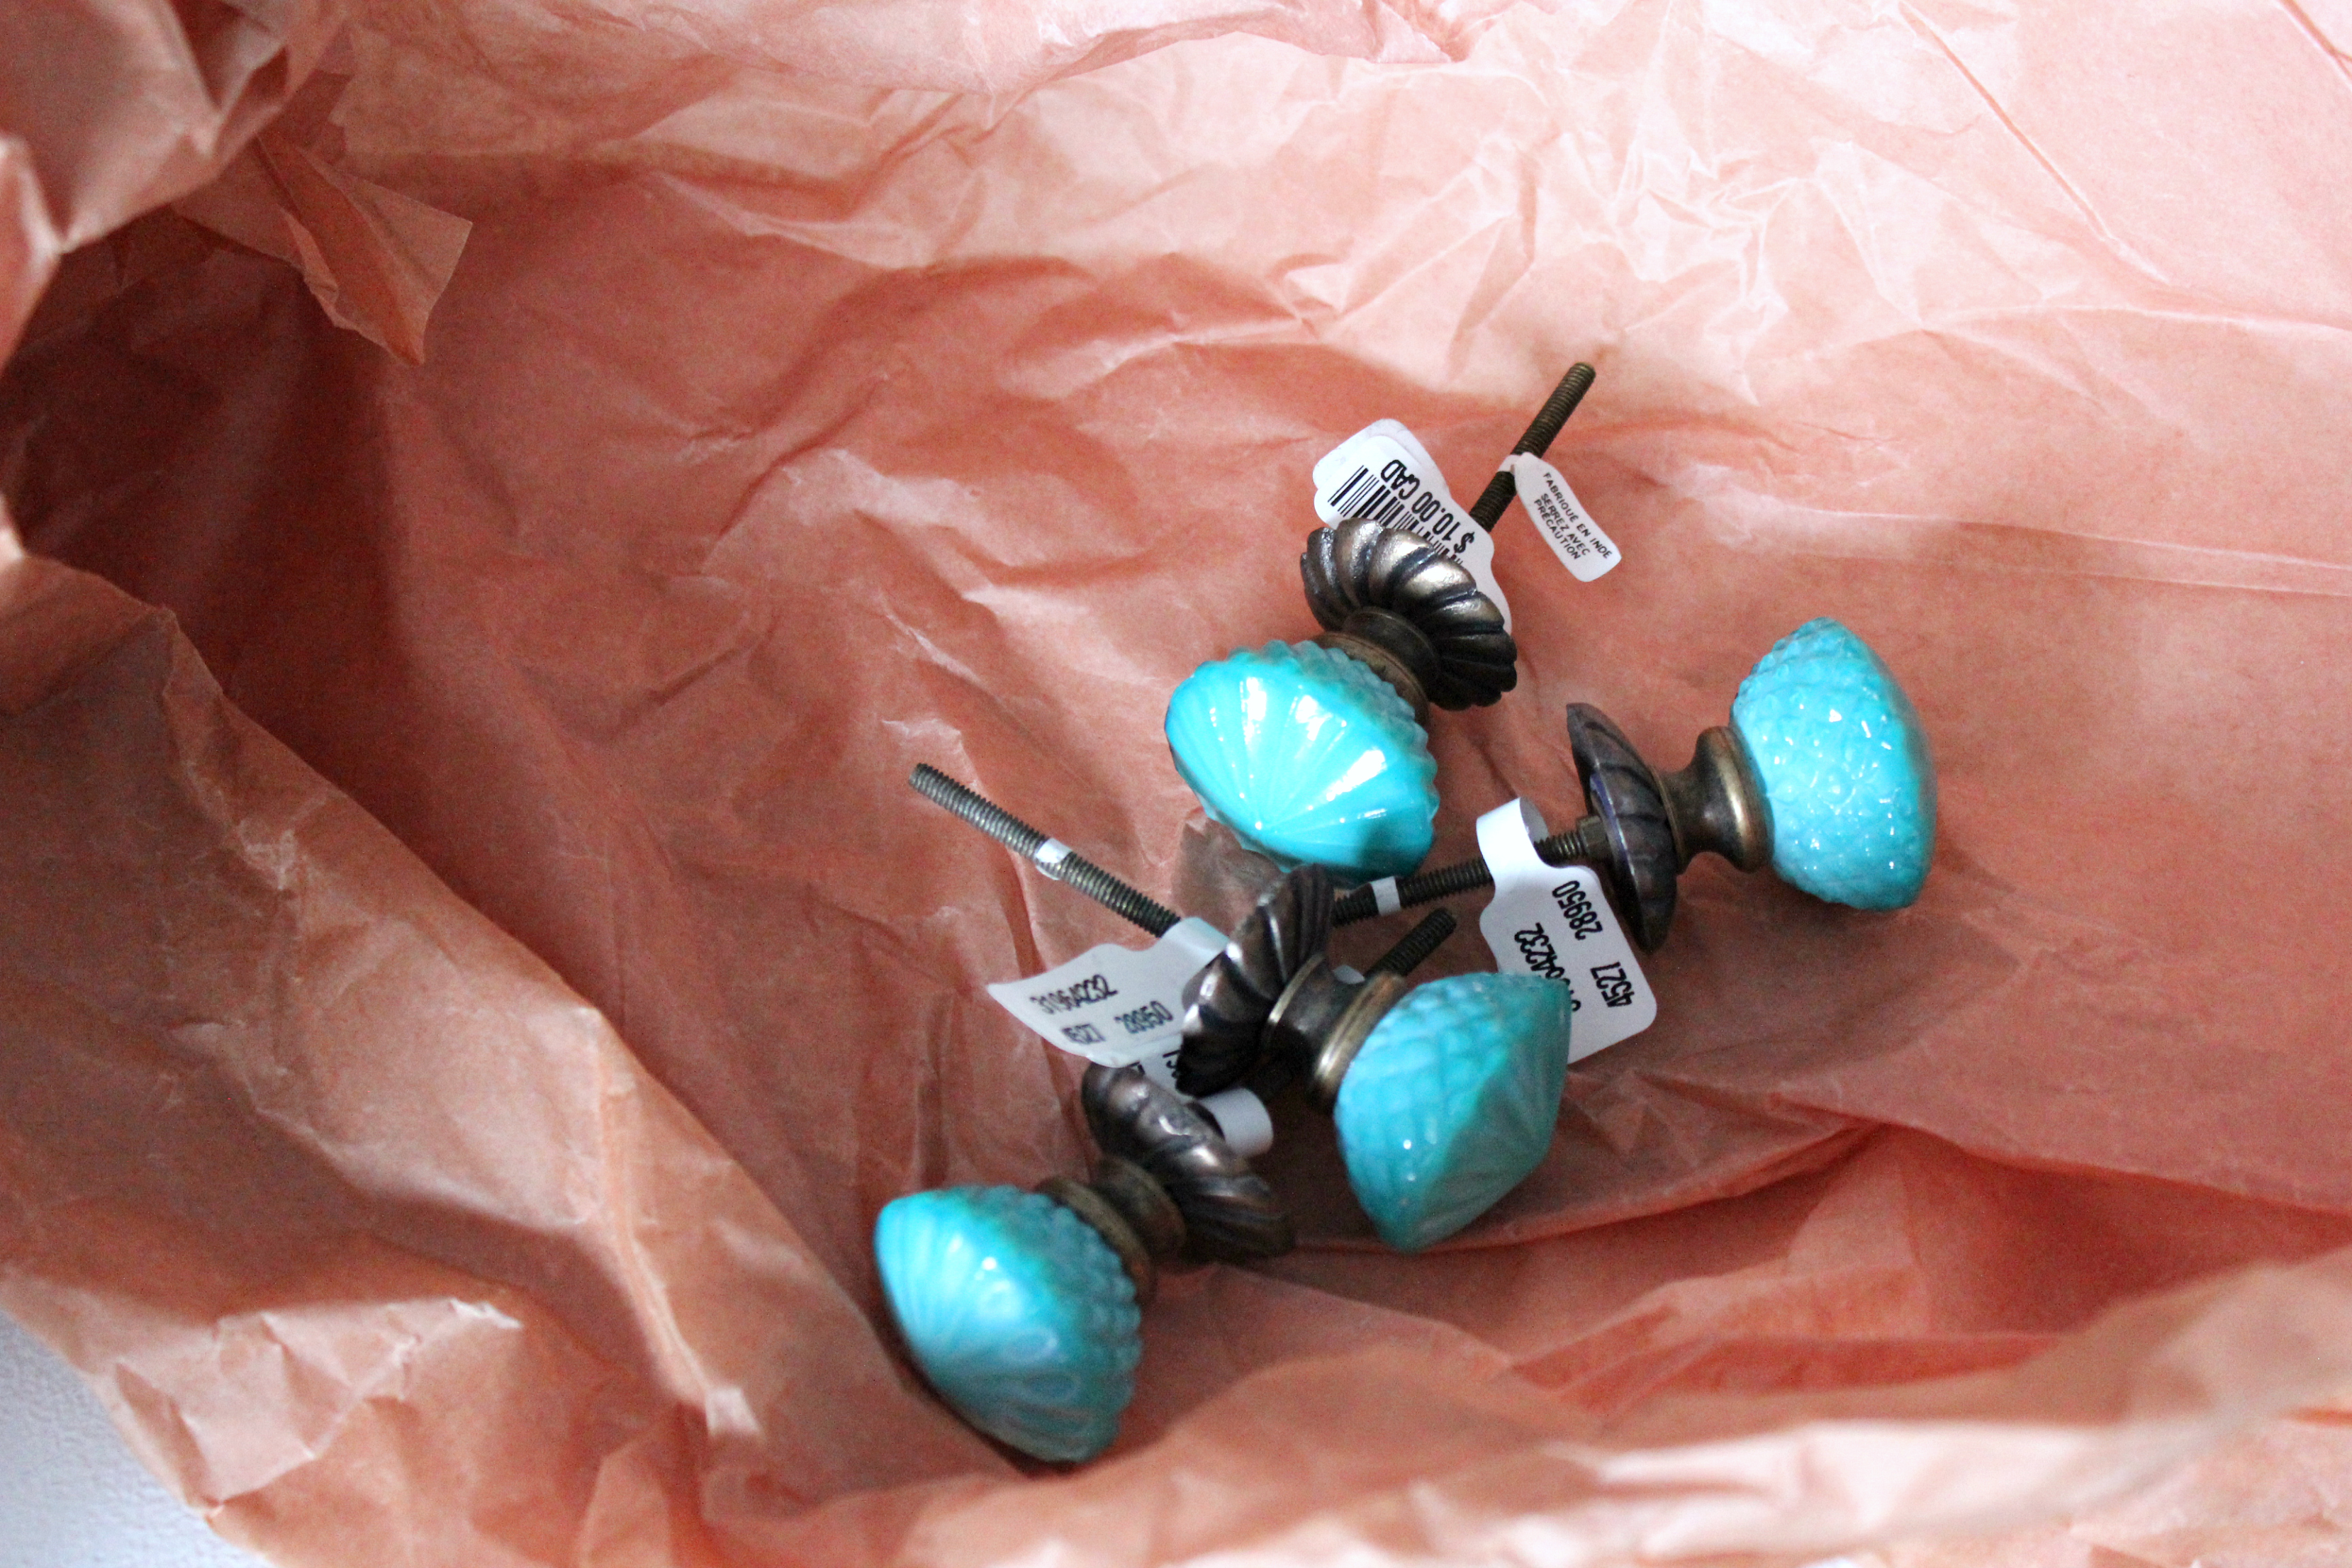
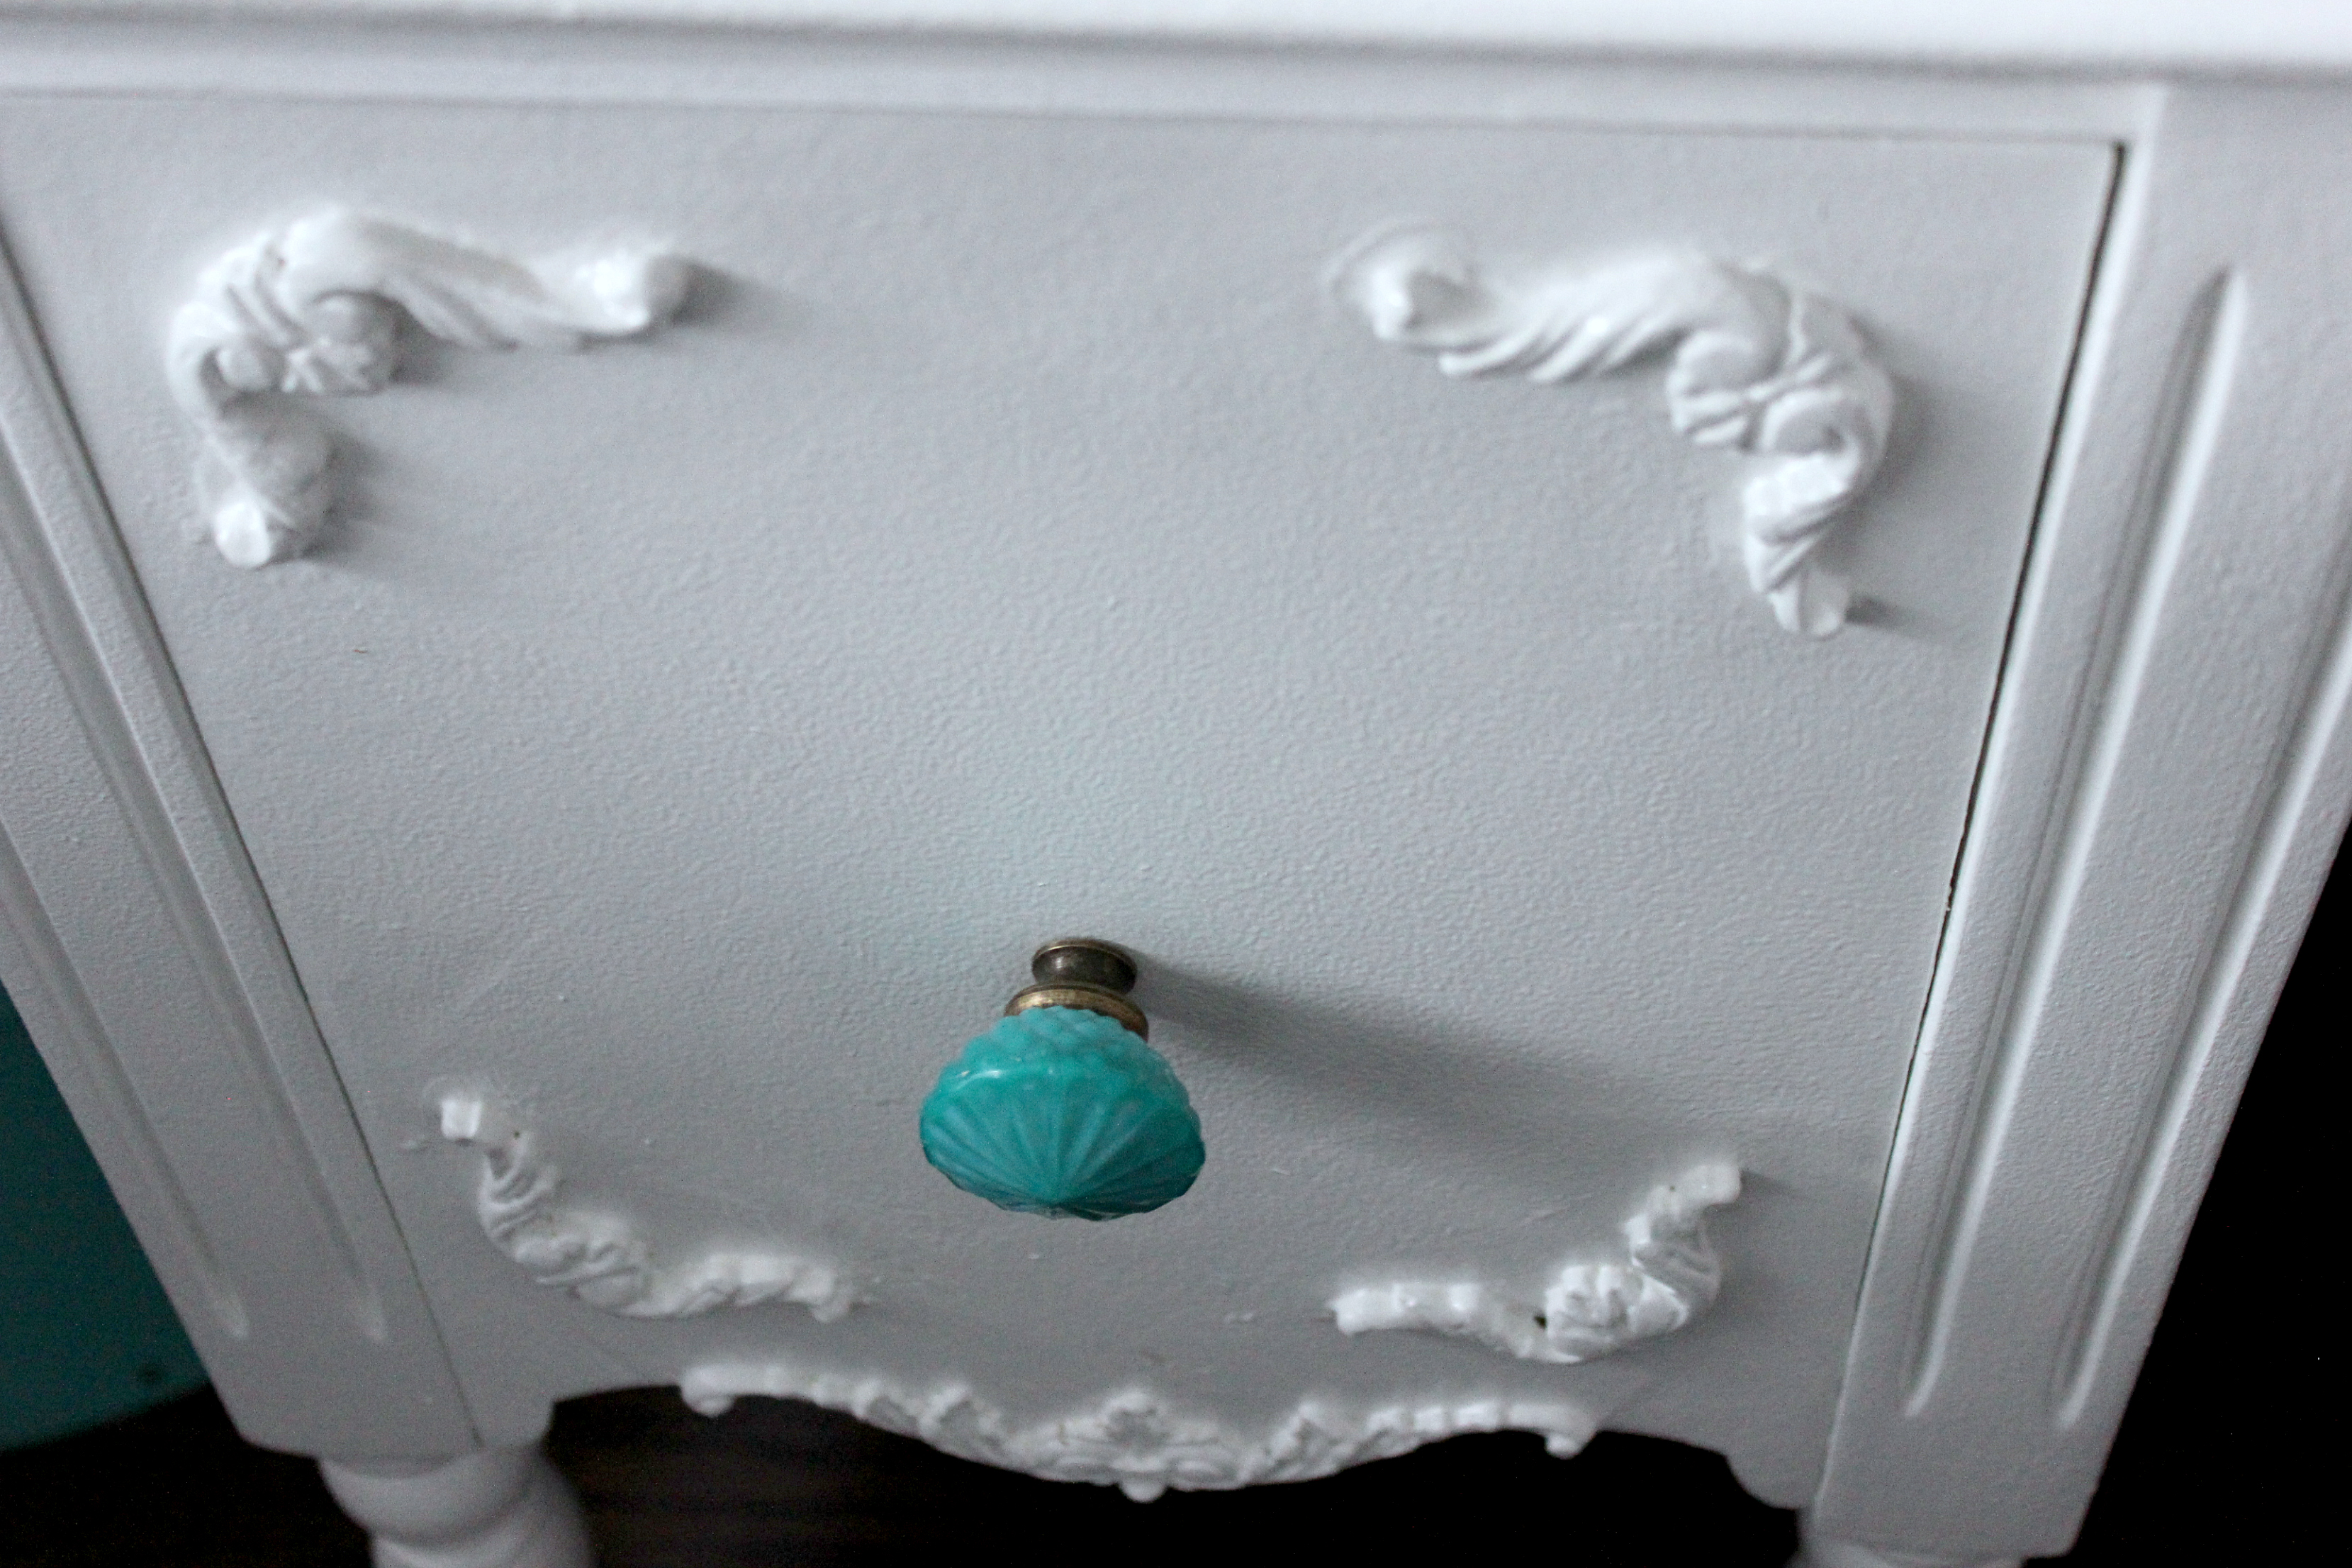
Install the new hardware. We went with a turquoise glass and oh man I am so in love. They look like jewelry!
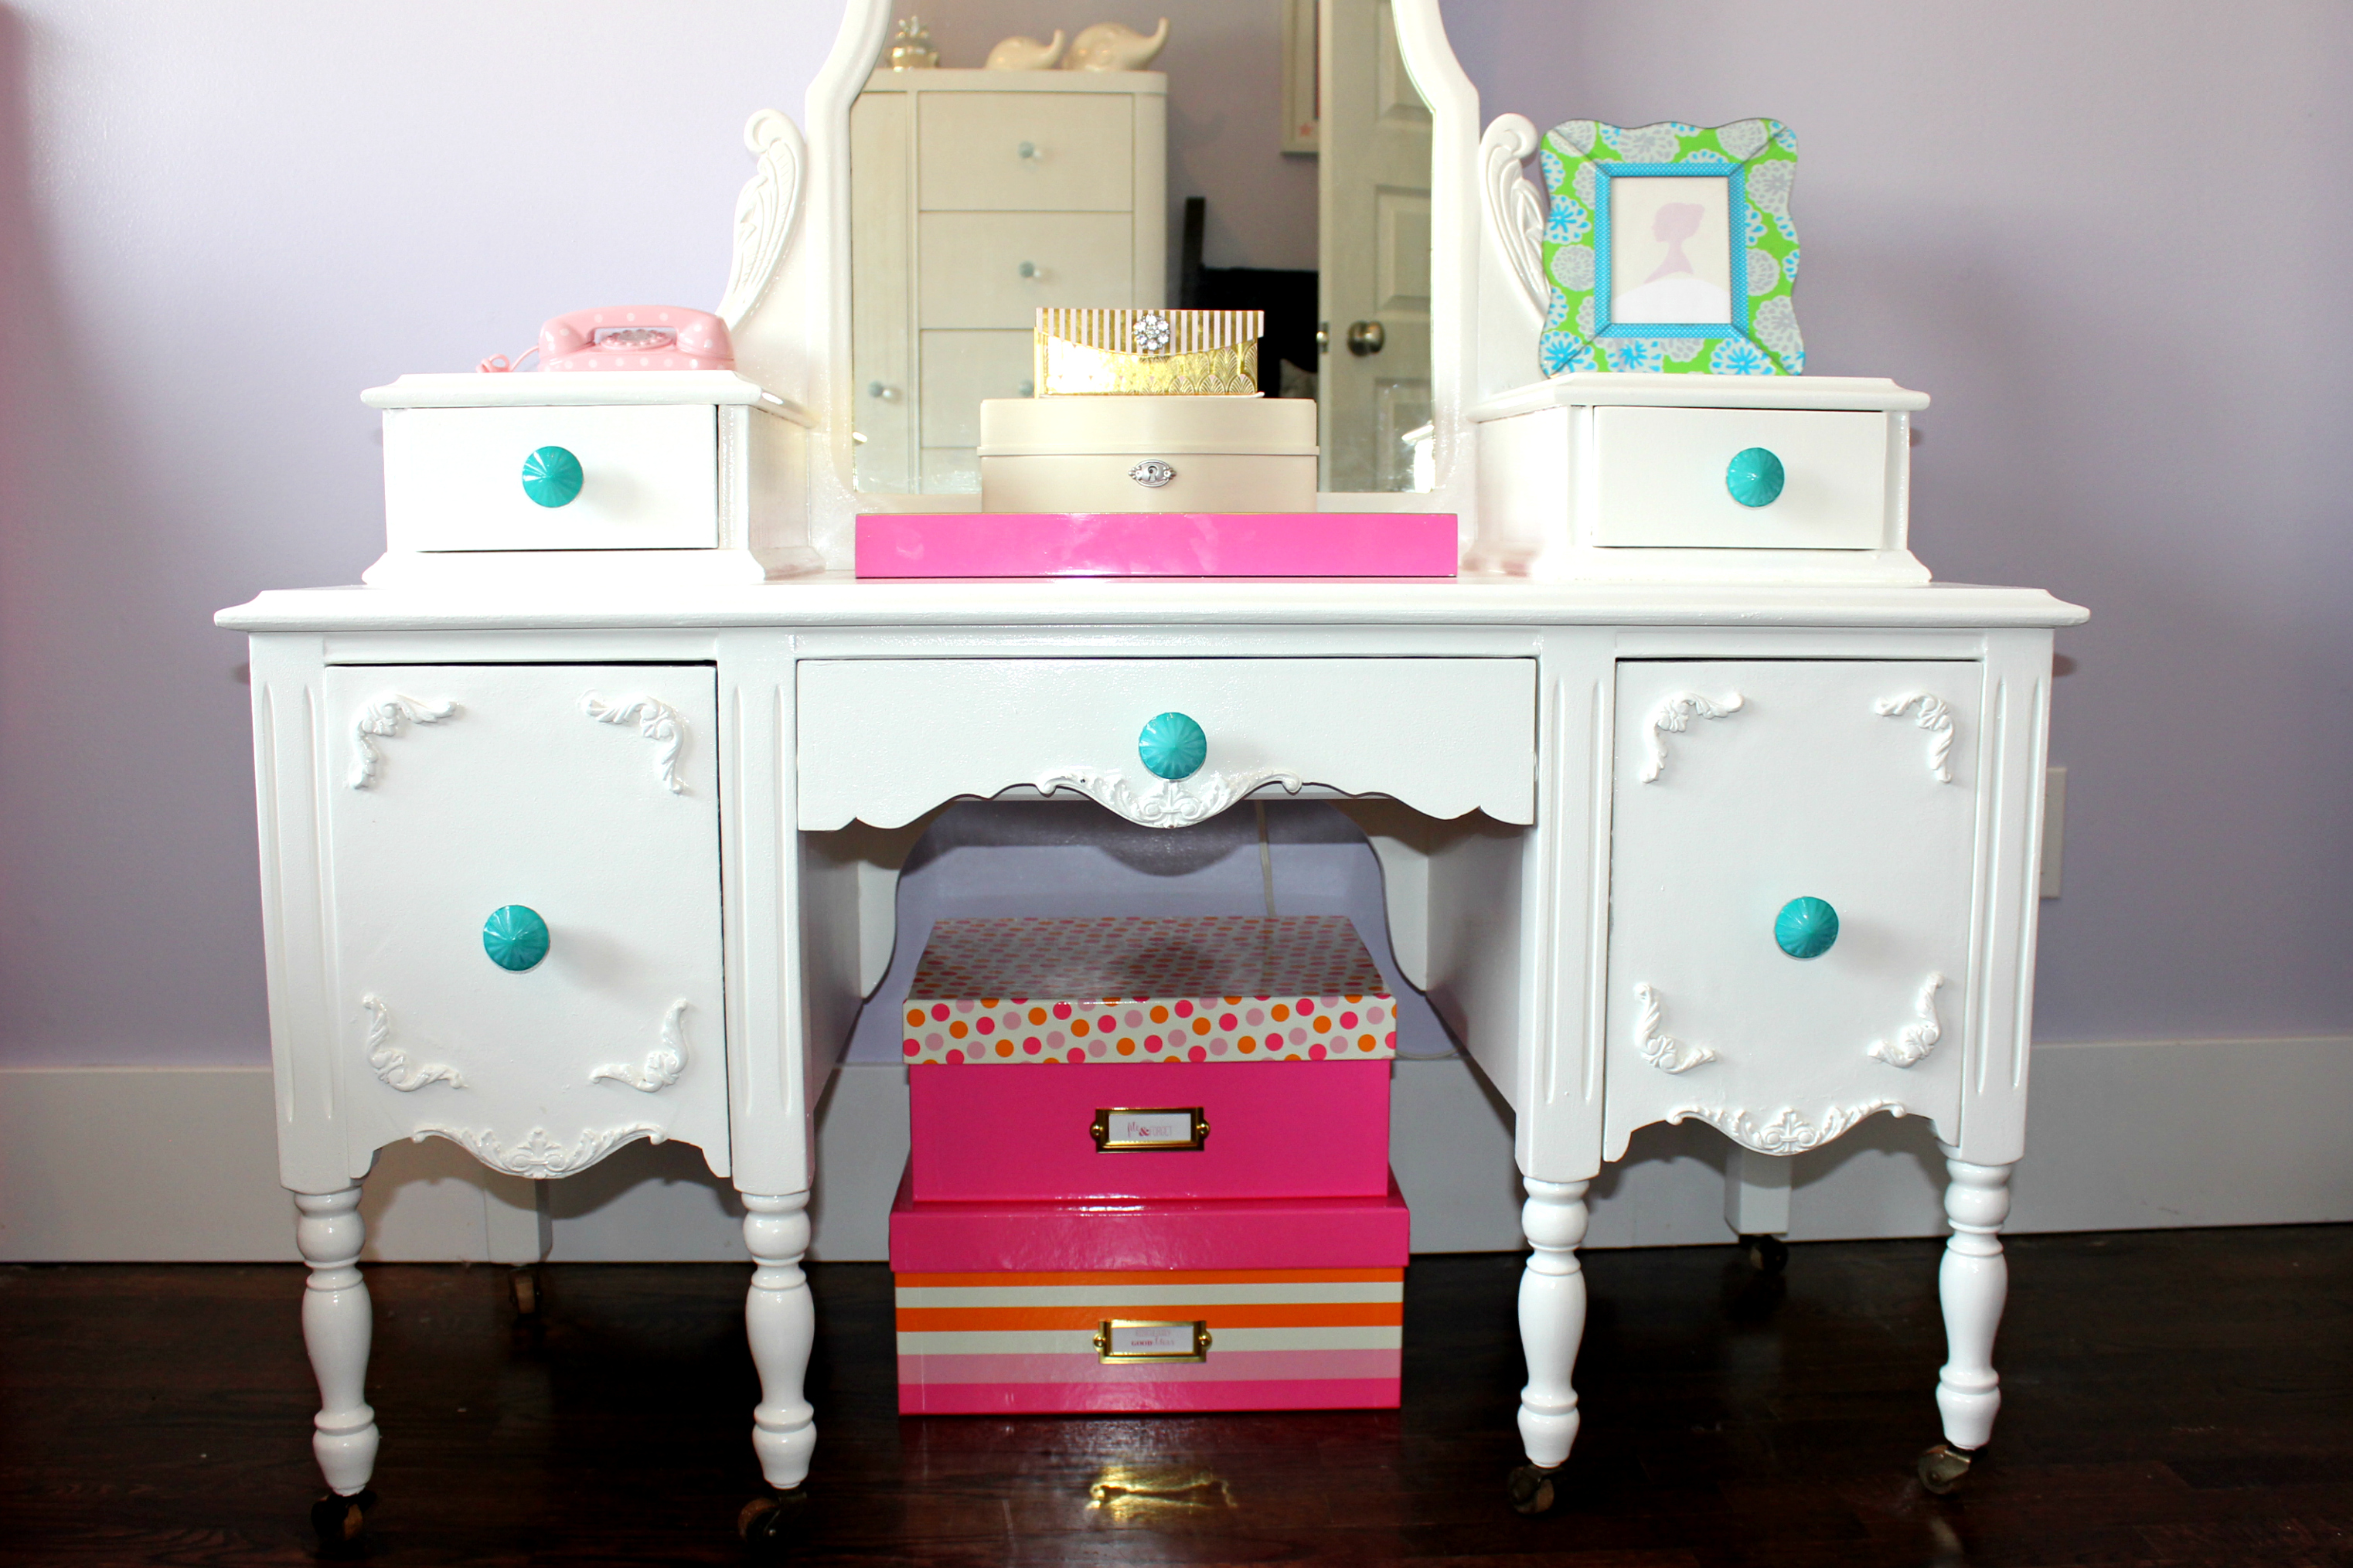
And there it is. All done!
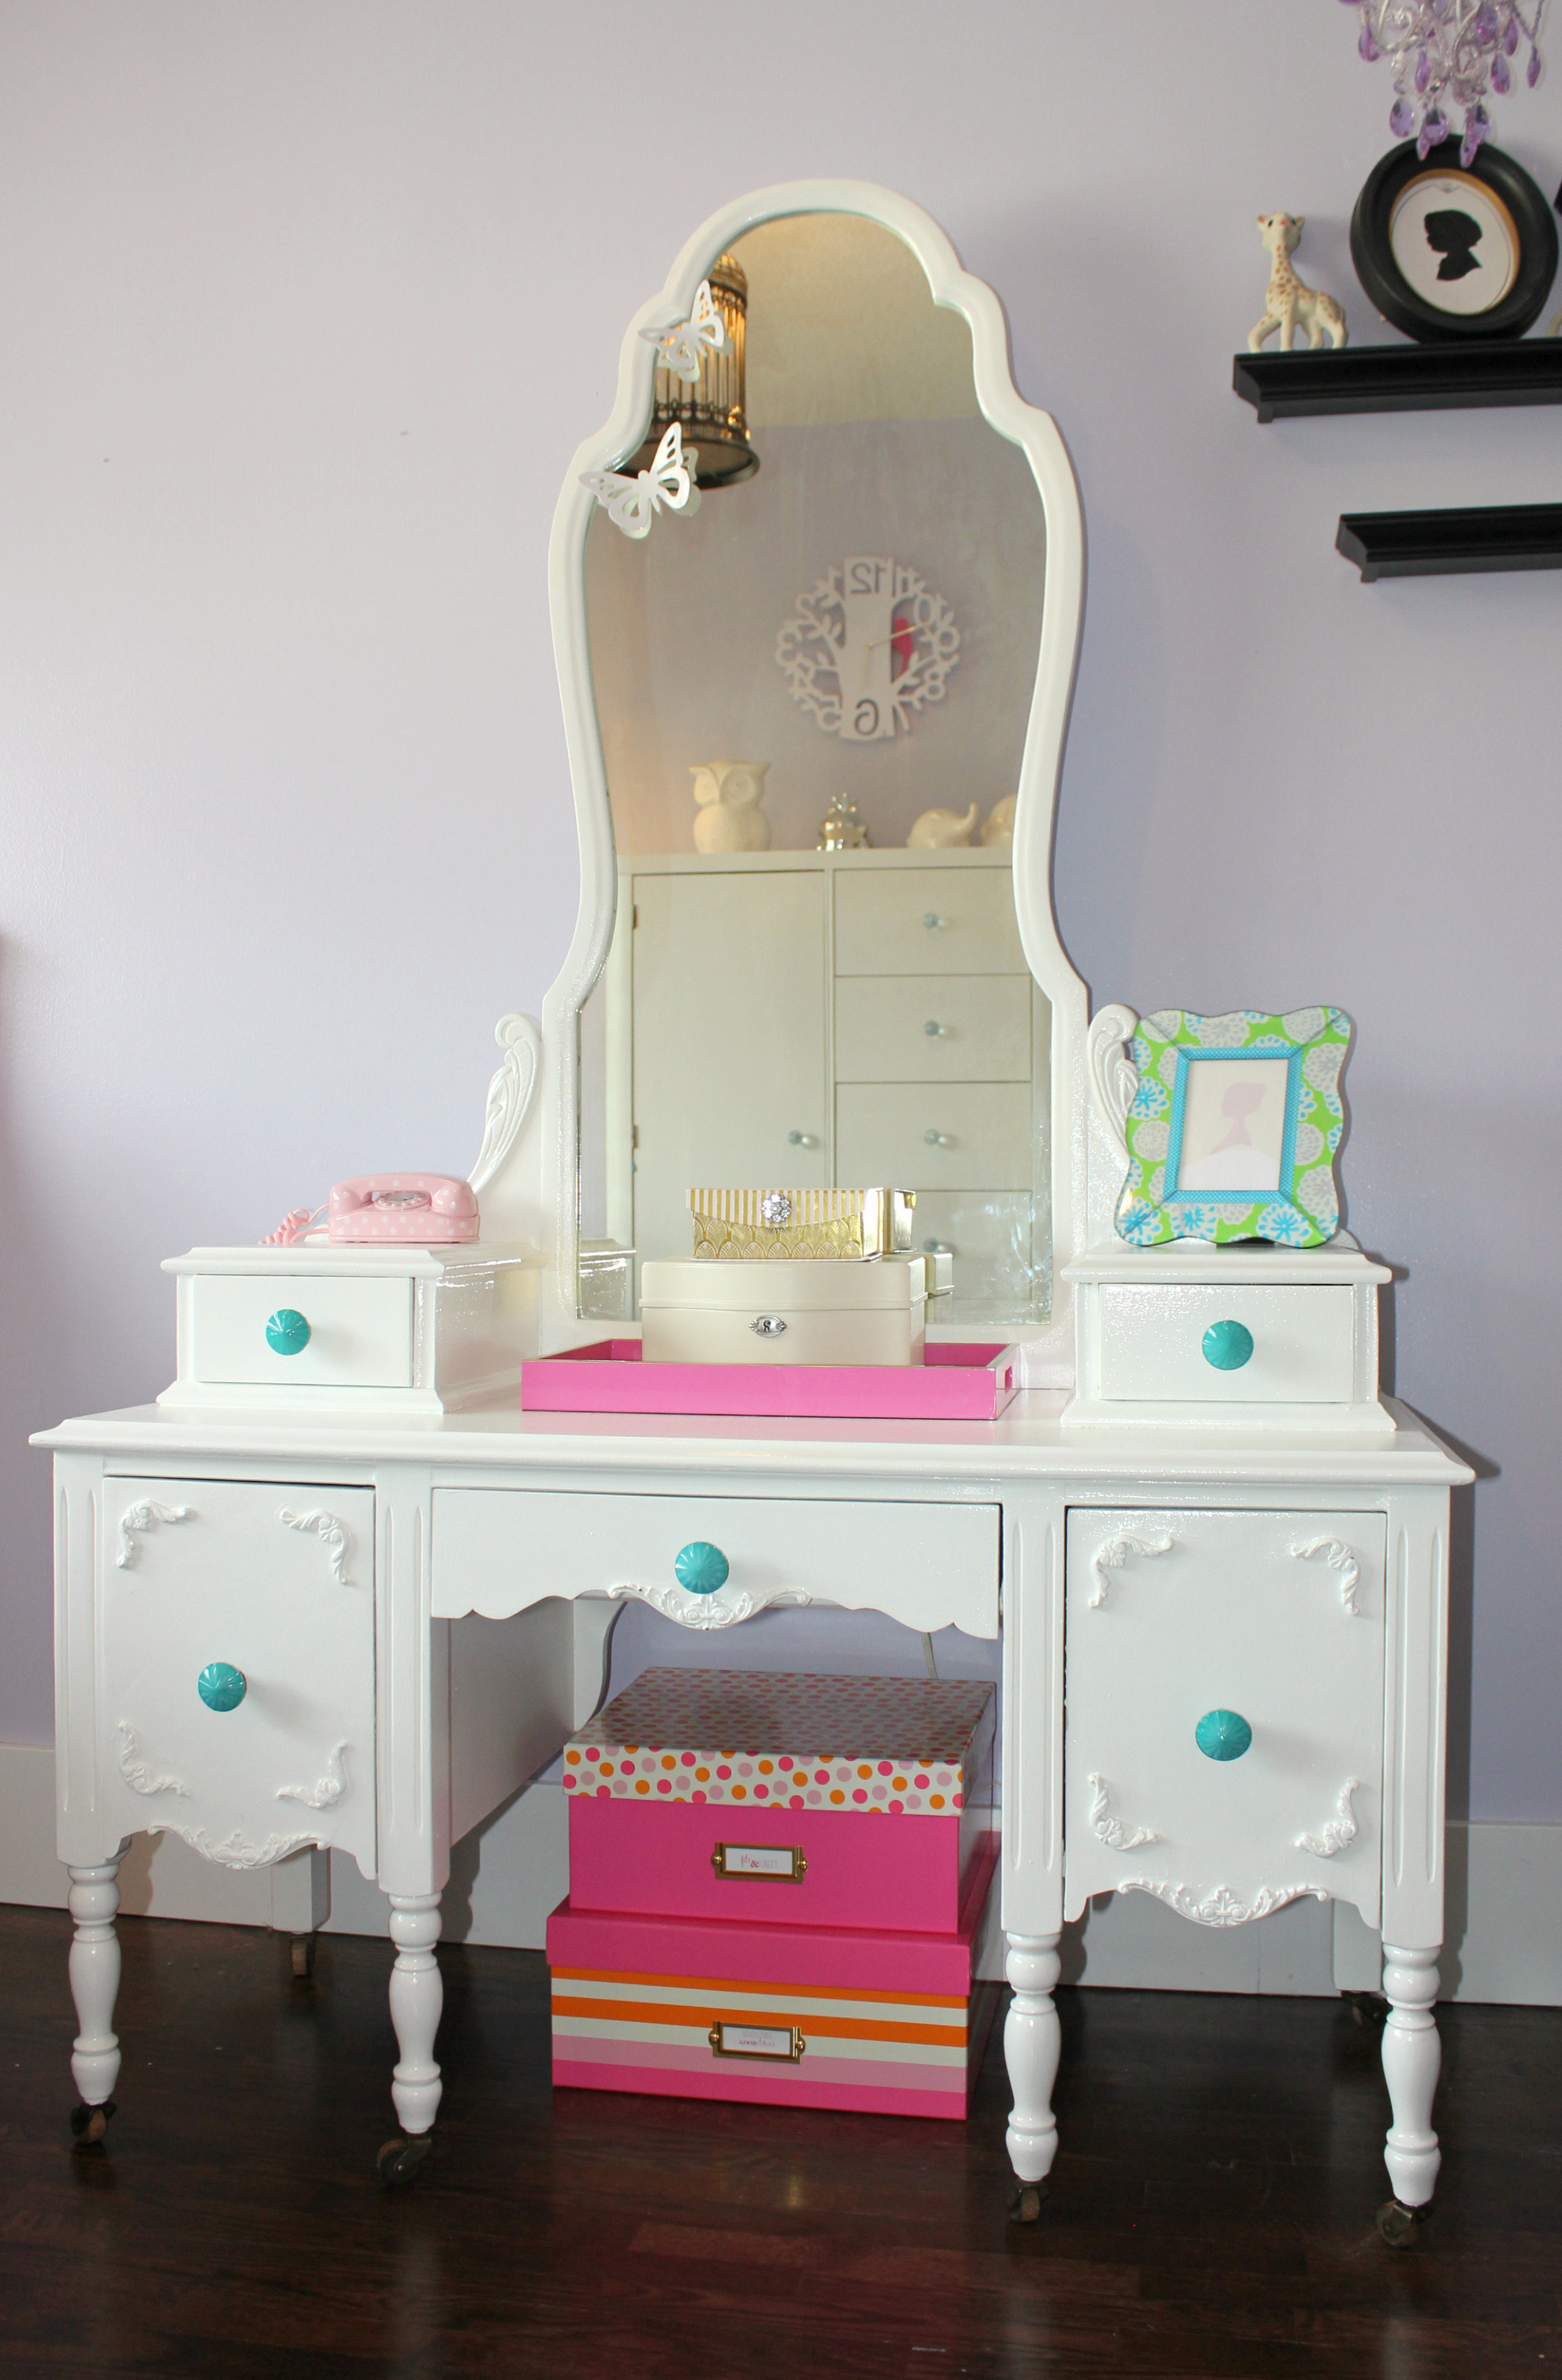
I was very pleased with this beautiful vanity, and not just because I didn’t have to do any of the sanding! Acacia especially loves that her father bought it for her. I think it also doesn’t hurt that her older sister doesn’t have one (she has her own desk instead – an antique roll top secretary, also refinished by her father). You can tell both father and daughter are proud of it and I like that! Even the following day when I walked into Acacia’s room, I found her sitting in front of her new vanity happily listening to her jewelry box play music and watching the little ballerina inside of it twirl. Appears I am not the only one pleased.
The post Refurbished Vanity DIY appeared first on Creative Sides.
]]>The post Fashion DIY: Knitted Graphic Tee appeared first on Creative Sides.
]]>
From home decor to fashion, word art is everywhere right now. This project puts a new twist on a plain t-shirt to create your own graphic tee.
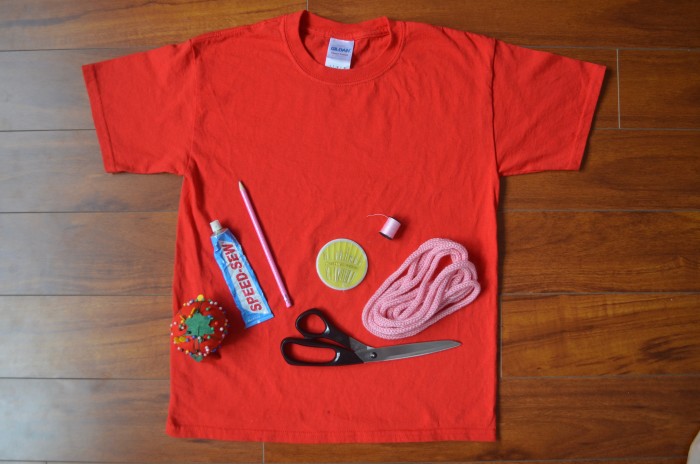
You will need:
- T-shirt
- Knitted or crocheted icord – 2 feet or more depending on the size of your design
- Scissors
- Pins
- Kwik Sew glue
- Toothpick
- Newspaper or cardboard
- Needle and thread
Knitted Graphic Tee Instructions
Step 1: Wash and dry t-shirt to prevent shrinking.
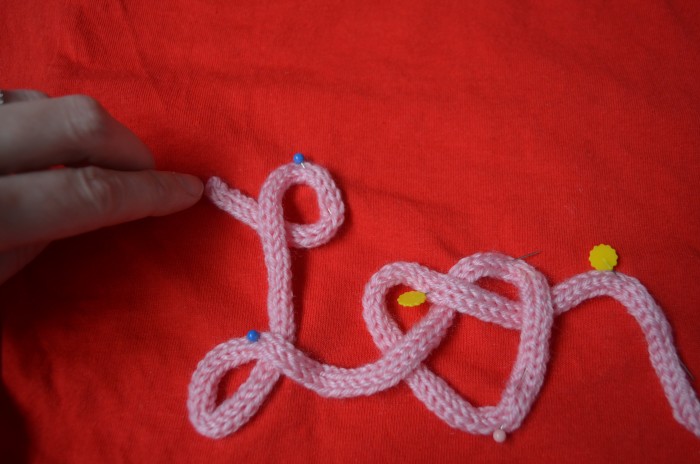
Step 2: Put a piece of cardboard or newspaper inside the t-shirt underneath the area you want your design to be. Place icord on your t-shirt in the shape you want and pin in place. Trim any excess cord.
Step 3: Take a small amount of Kwik Sew glue on a toothpick and tack pieces of the icord design in place and let dry. This step will make it much easier to hold your design while sewing.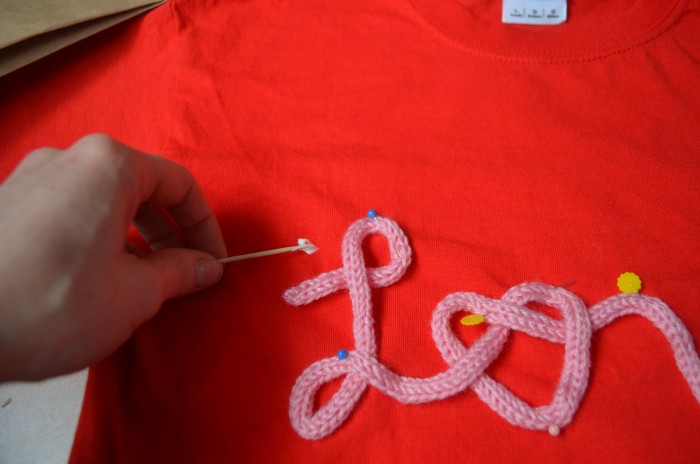
Step 4: With a needle and thread, sew your icord onto the t-shirt paying close attention to the spots that may snag with wearing or washing.
Step 5: Rock your new graphic tee!
Pro tip: Once your design is complete, wash t-shirt inside out!
Want to learn how to create your own icord for this project? Stay tuned for the full tutorial coming soon!
The post Fashion DIY: Knitted Graphic Tee appeared first on Creative Sides.
]]>The post 4 Reasons Why You Don’t Want to Miss the Healthy Family Expo *GIVEAWEAY* appeared first on Creative Sides.
]]>
We are so excited for the 3rd annual Healthy Family Expo coming back to the Vancouver Convention Centre on Sunday March 6th from 10 am – 5pm. There are so many reasons why you’ll want to join this fun-filled day for families with kids aged 0-12, but here are our top 5 reasons not to miss out:
- The Food: If you know us at all, you know we kinda have a thing for food. The Healthy Family Expo doesn’t disappoint on that front, with over 35 Food and Drink exhibitors you can sample and shop your way through including Seattle Chocolates, Nudge, Kids Can Cook Gourmet, Good Drink, Glutenull Bakery, Boathouse Farms, Life Choice Natural Foods and so many more!
- The Fun: The Healthy Family Expo boasts the biggest Active Kid Zone in the Lower Mainland, with climbing wall, giant hamster ball track, fire truck bouncer, run bike & sportball areas, animal safari, DANCEPL3Y classes & more! This means that the kids will not only be entertained, but also have a place to run and climb and play, getting all their energy out. Happy, engaged kids = more peaceful time for parents to take in everything the Expo has to offer.
- The Rides: One of the highlights of our experience last year was getting to test drive the latest cars from Toyota Canada. They are back again this year offering on-site hybrid vehicle test-driving, and we all know who is going to be at the front of that line!
- The Swag: The team at the Healthy Family Expo really knows how to treat their guests right! Not only do they have daily giveaways happening NOW on their Facebook Event page, plus the giveaway you’ll find at the end of this blog post, but one lucky advance ticket purchase will win a $200 Expo shopping spree! That’s not all! The first 200 attendees receive child day ticket to the Sea to Sky Gondola AND there is a whopping $15,000 Grand Prize Showcase, including a 1-year lease on a Toyota Prius c to be won.
Those aren’t the only reasons to join the Expo of course, there are:
- 100+ Exhibitors, Shopping & Food Sampling
- Bobs & LoLo concerts at 11 am and 12:30 pm
- Jessie Farrell concert at 3 pm presented by Bolthouse Farms
- On-site hybrid vehicle test-driving with Toyota Canada
- Seventh Generation Baby Feeding & Changing Lounge & Active Baby Stroller Parking
- $1 from each ticket sale supports the Canucks Autism Network.
And don’t forget to RSVP that you’re GOING in the Expo Facebook Event to win thousands in prizing before the big day!
So how do you get there? Tickets are $12 in advance (www.healthyfamilyexpo.com/tickets or at Whole Foods Market or London Drugs) or $15 cash at the door. Kids under 12 are FREE! Of course you can always click on the image below and use our exclusive 2-for-1 coupon code CC241 to enjoy all the fun for half the price!

To kick off pre-Expo celebrations, Healthy Family Expo partners have teamed up to give one lucky Lower Mainland winner a healthy family prize package valued at over $1000, including:
- Family Summer Season’s Pass to Sea to Sky Gondola ($274+ value)
- $50 gift card to Whole Foods Market from Toyota Canada
- $50 photo book gift card from London Drugs
- Family tubing or sliding pass for Cypress Mountain ($75 value)
- Grass fed goodness prize pack from Rolling Meadow Dairy, Life Choices & Nudge ($150 value)
- $50 gift card from Active Baby
- Climbing date-night for two at Climb Base5 ($50 value)
- All Natural Whole House Cleaning Kit from AspenClean ($70 value)
- Gift basket of yummy cereals & rice bars from Envirokidz ($50 value)
- Child Sonicare electric toothbrush from PDG Pediatric Dental Group ($69)
- Foster Naturals shampoo & conditioner set from Modern Mama ($52 value)
- WaterBox prize pack from Happy Water ($50 value)
- Gift box full of healthy, delicious products from Love Child Organics ($50 value)
- REAL meat pet food gift basket from Holistic Choice ($50 value)
Enter through Rafflecopter below! Open to Vancouver Lower Mainland and Sea to Sky Corridor residents.
Winner will be announced at the Healthy Family Expo Facebook Party on March 3rd, 2016, and must collect prizes at the Expo at the Vancouver Convention Centre on March 6th, 2016.
The post 4 Reasons Why You Don’t Want to Miss the Healthy Family Expo *GIVEAWEAY* appeared first on Creative Sides.
]]>The post DIY Birdcage Chandelier appeared first on Creative Sides.
]]>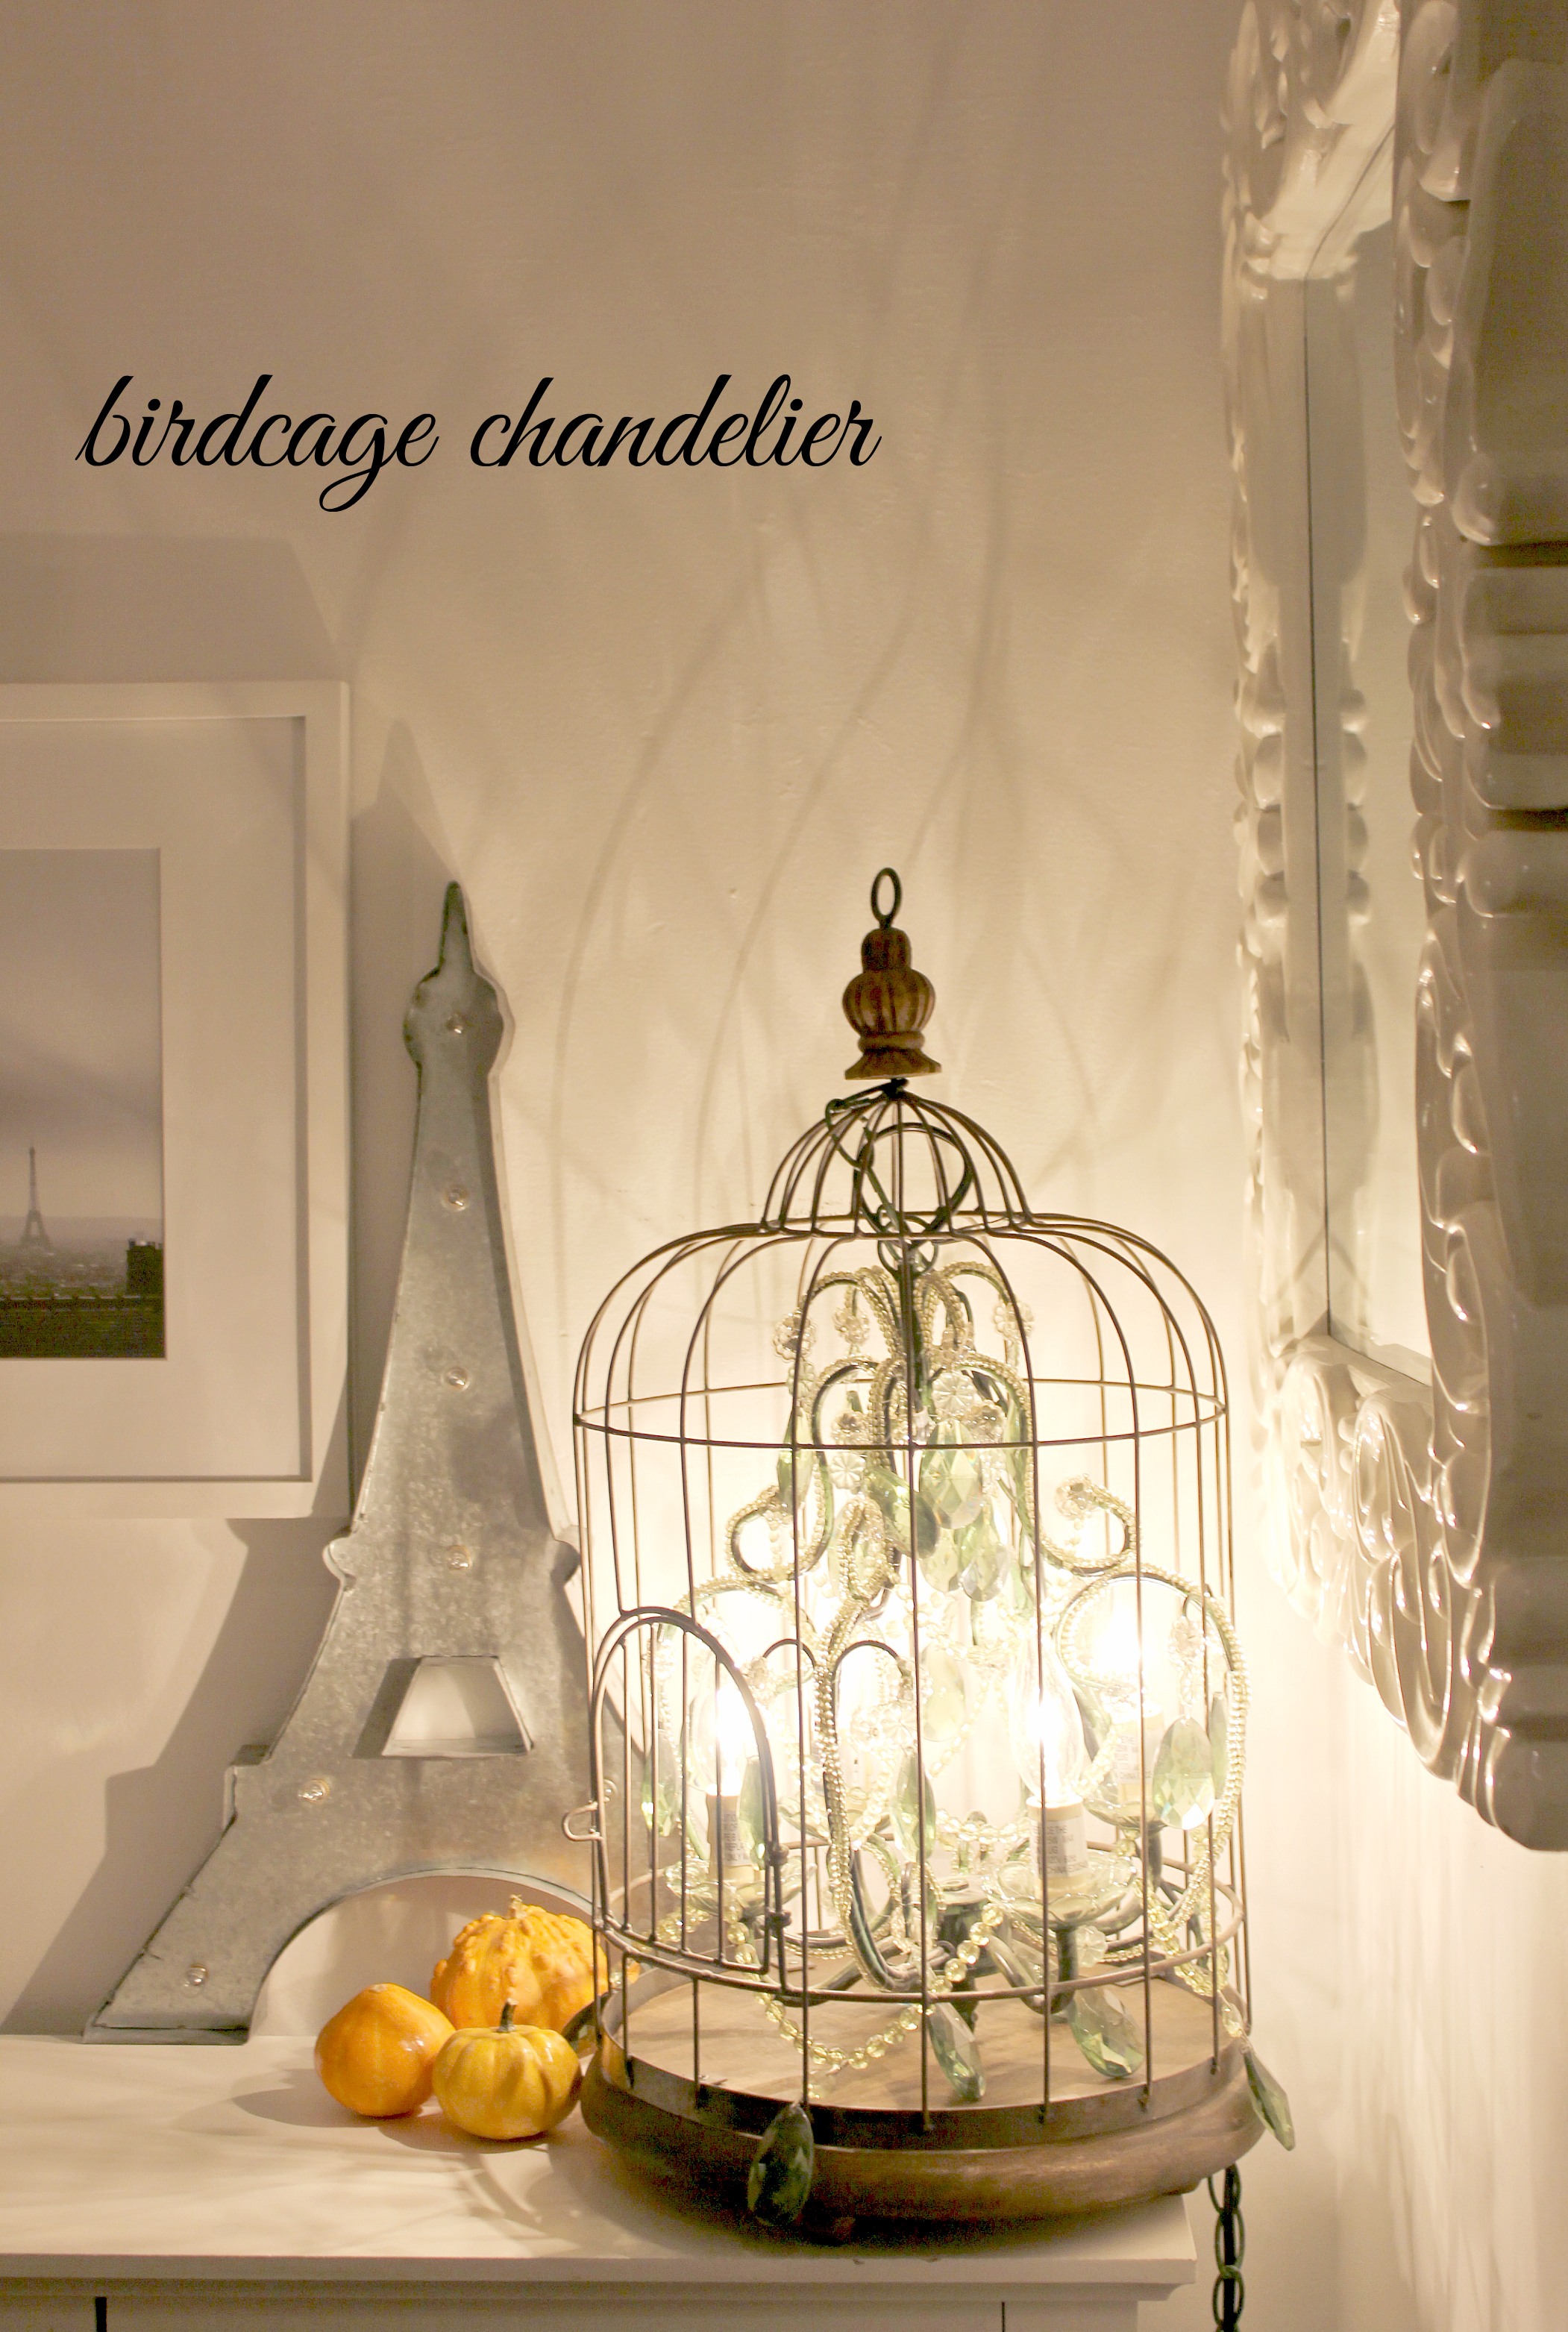
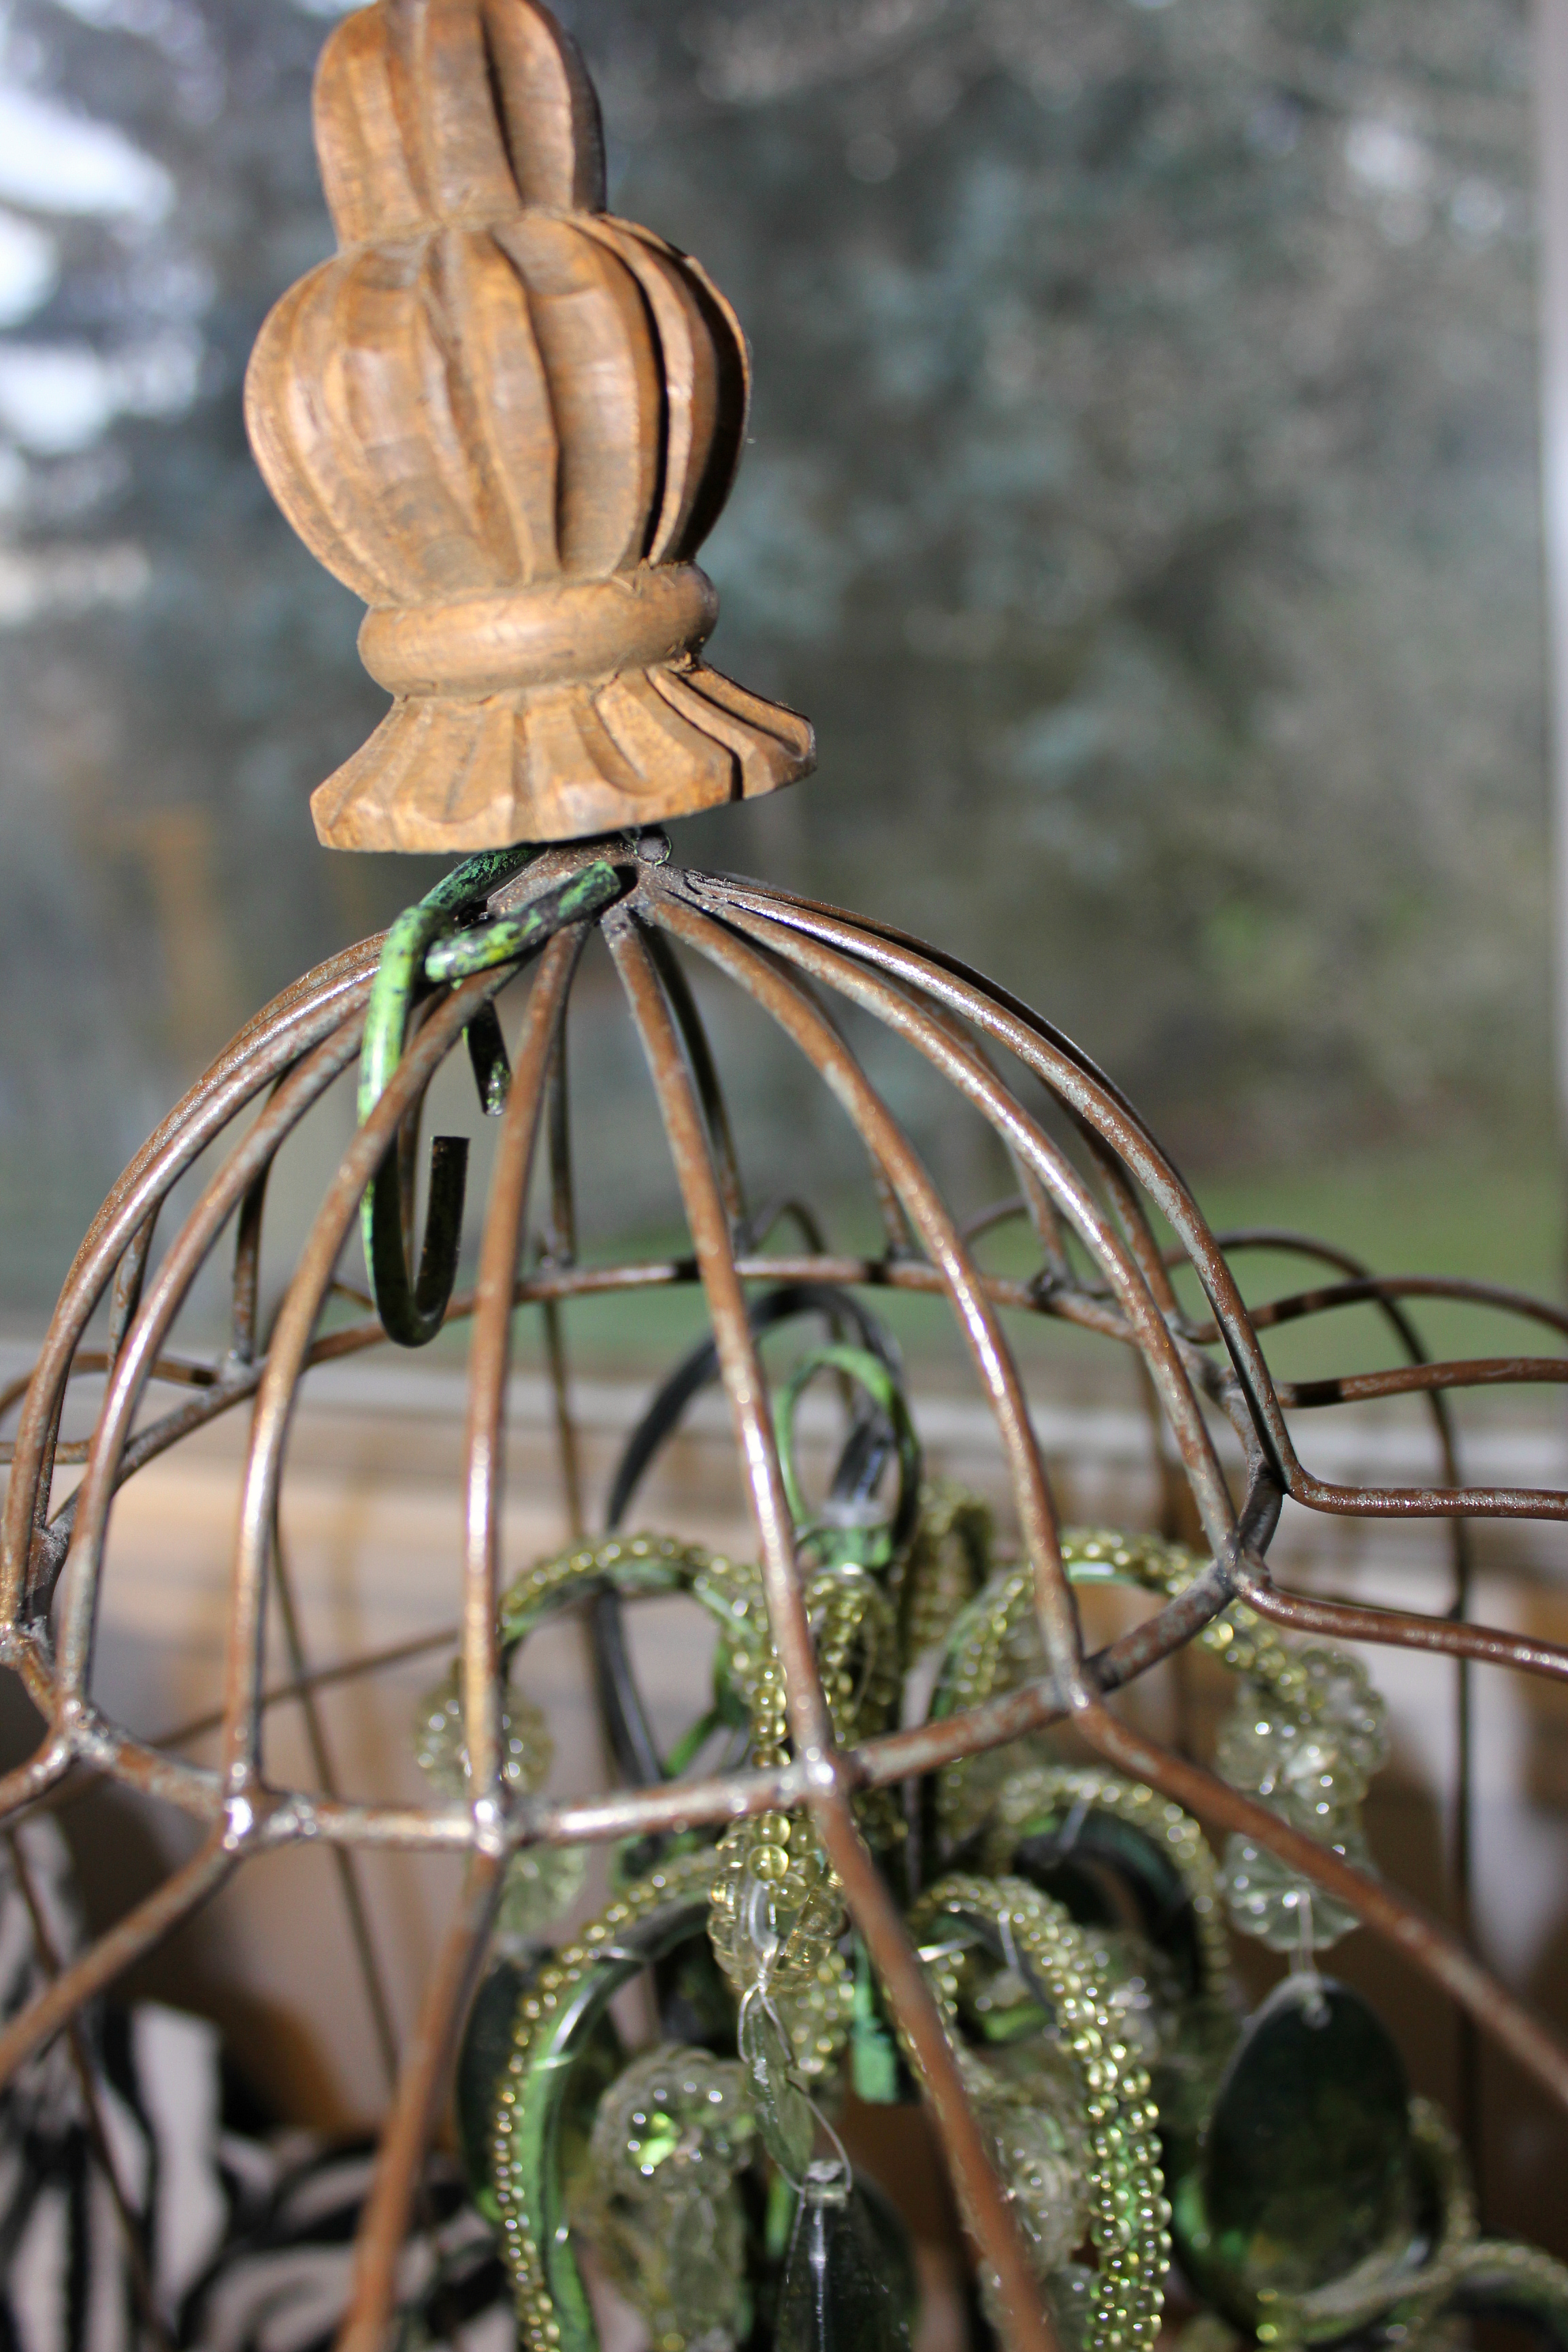
Sometimes the only thing I wish for more than extra wall space in our home (for more photos of course), is a larger need for chandeliers in my life. I have a rather insatiable love of chandeliers and photos and tufted furniture and monograms and and and….need I really go on? Basically, I just love decor and beautiful, unique things. My latest obsession interest has been in the form of birdcages, especially when paired with lighting. Ever since we fashioned the overhead light in our youngest’s room out of a birdcage, my interest has grown. You might think that I would have gotten it out of my system….but if one is good, might more be even better! Why not combine a forgotten chandelier and a new found birdcage? Why not indeed. I mean if the all knowing and ever impressive Restoration Hardware thought it a good idea and did it, why couldn’t I?! Since I had no convincible argument to not create a birdcage chandelier, here are the 12 steps I went through in order to do so.
What I used:
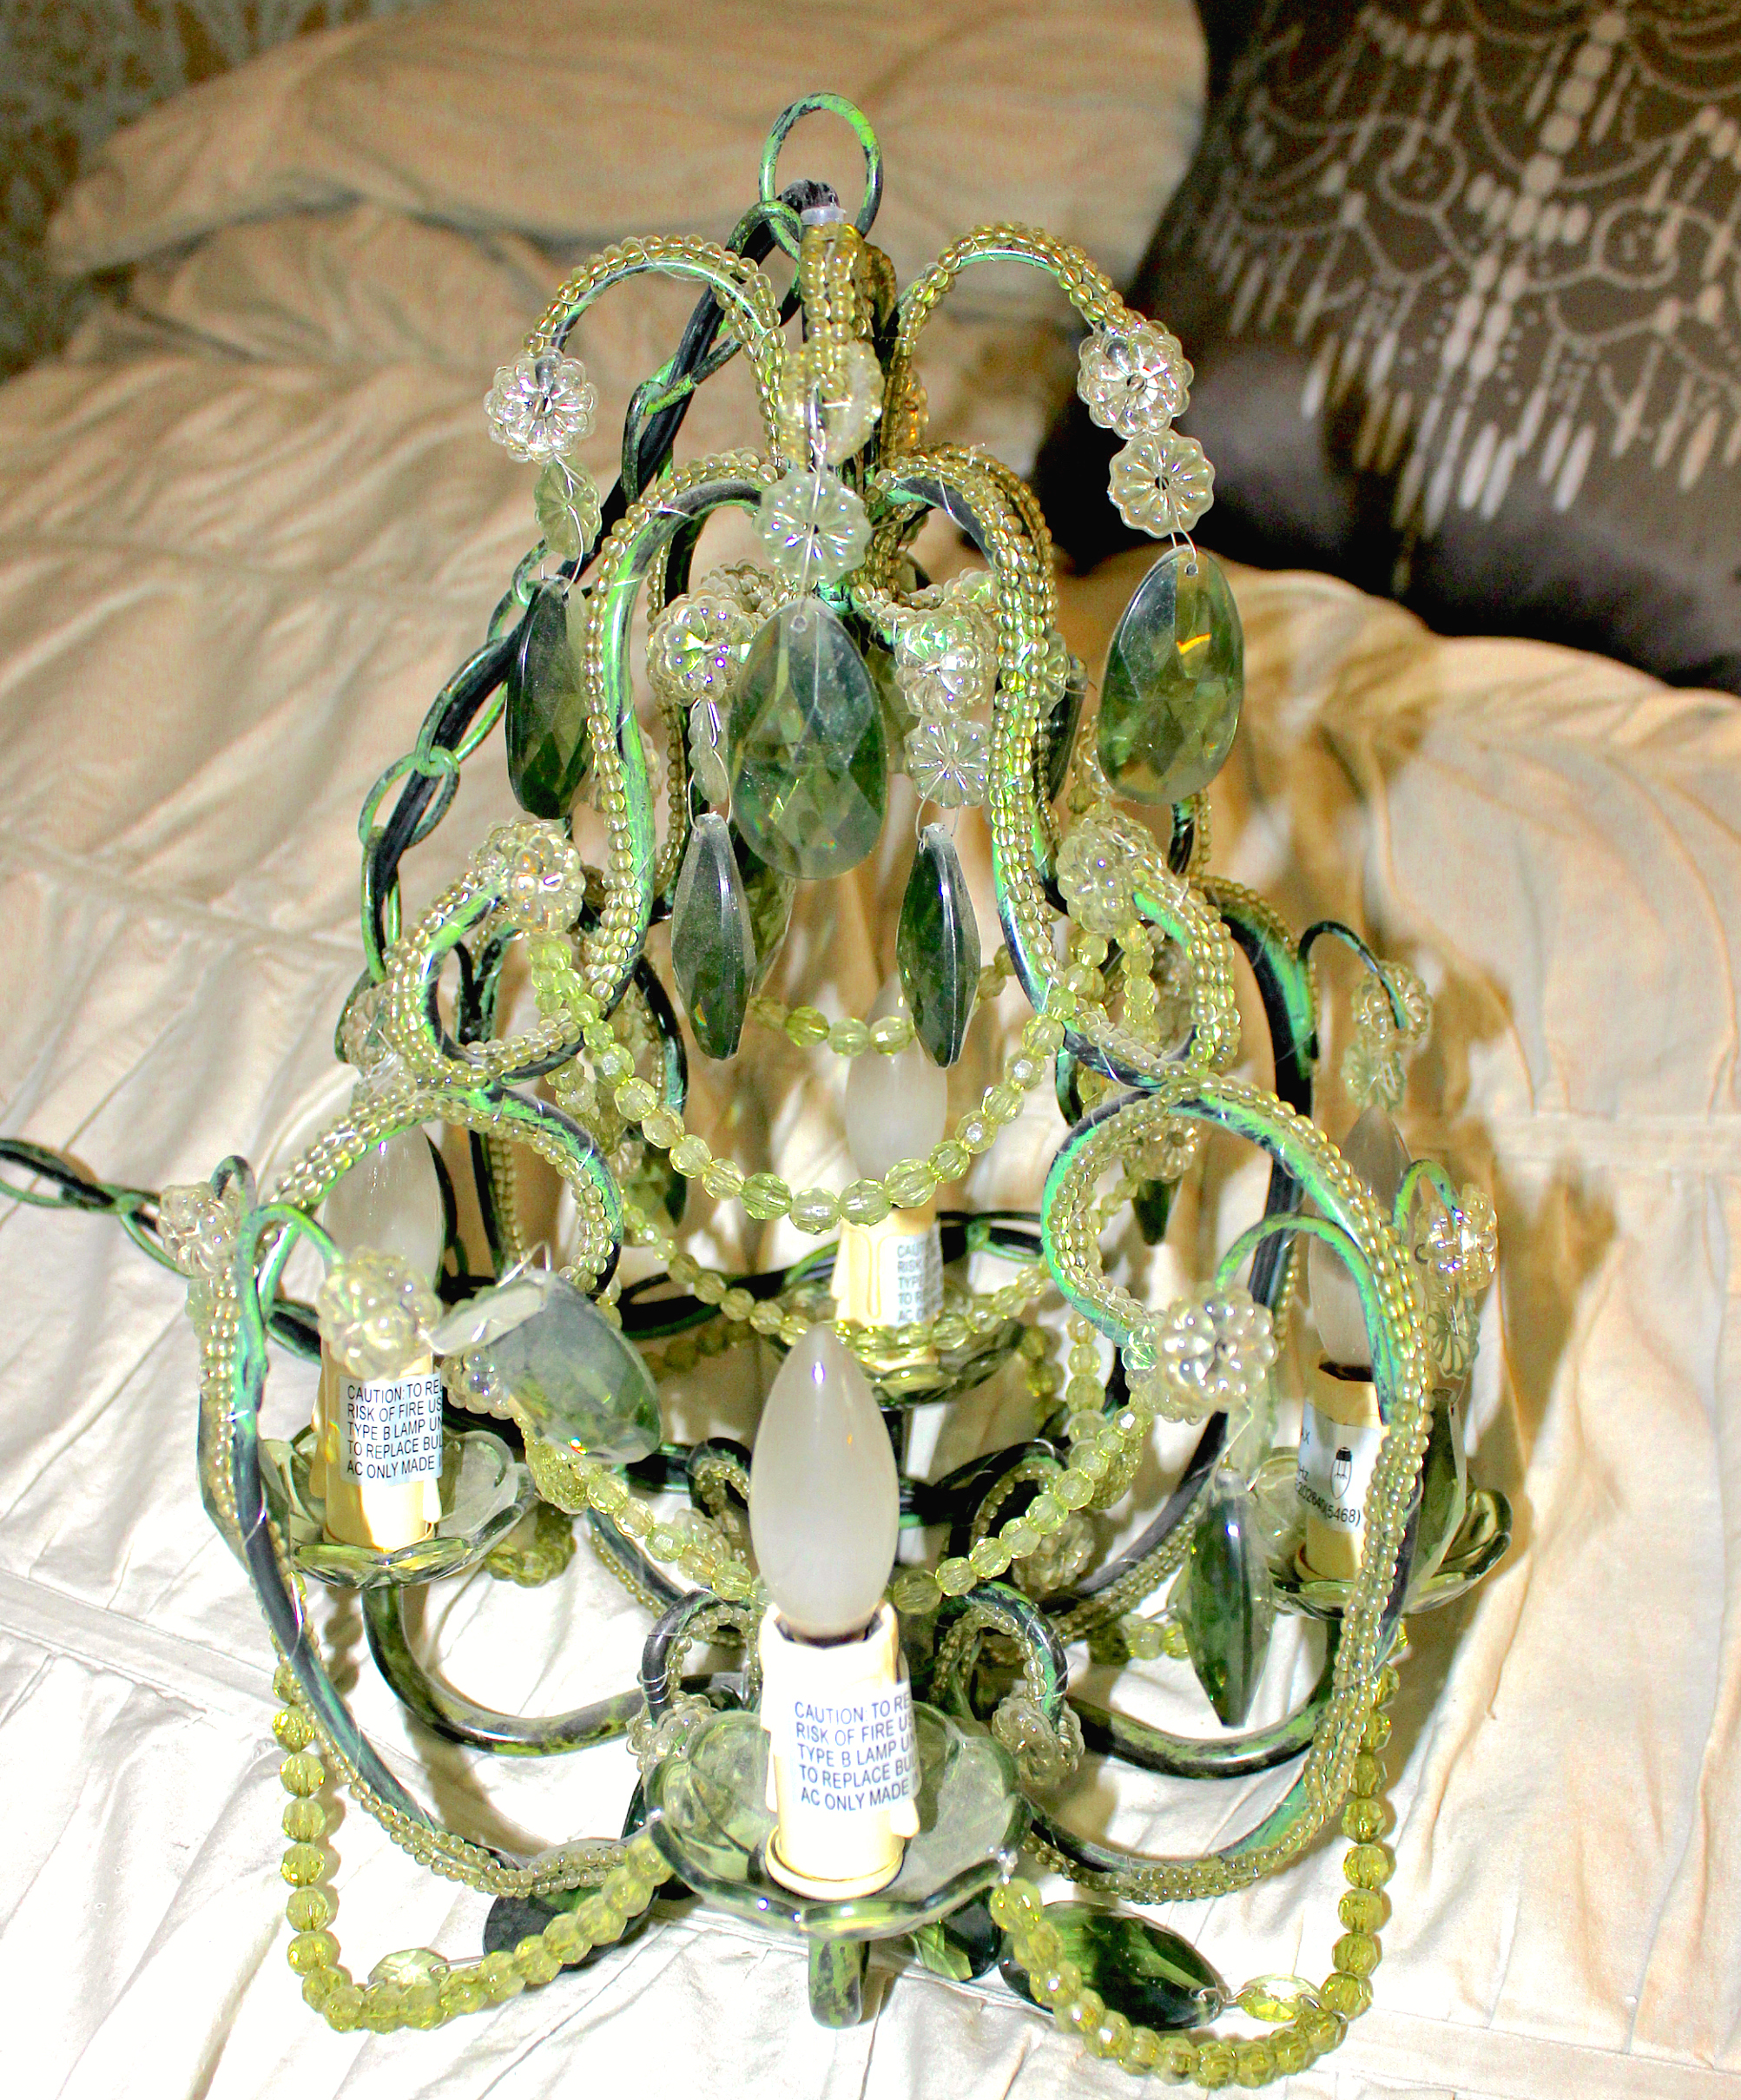
Chandelier – green acrylic 18″ x 12″ chandelier found years ago at HomeSense
Birdcage (large enough to house chandelier) – found more recently at HomeSense
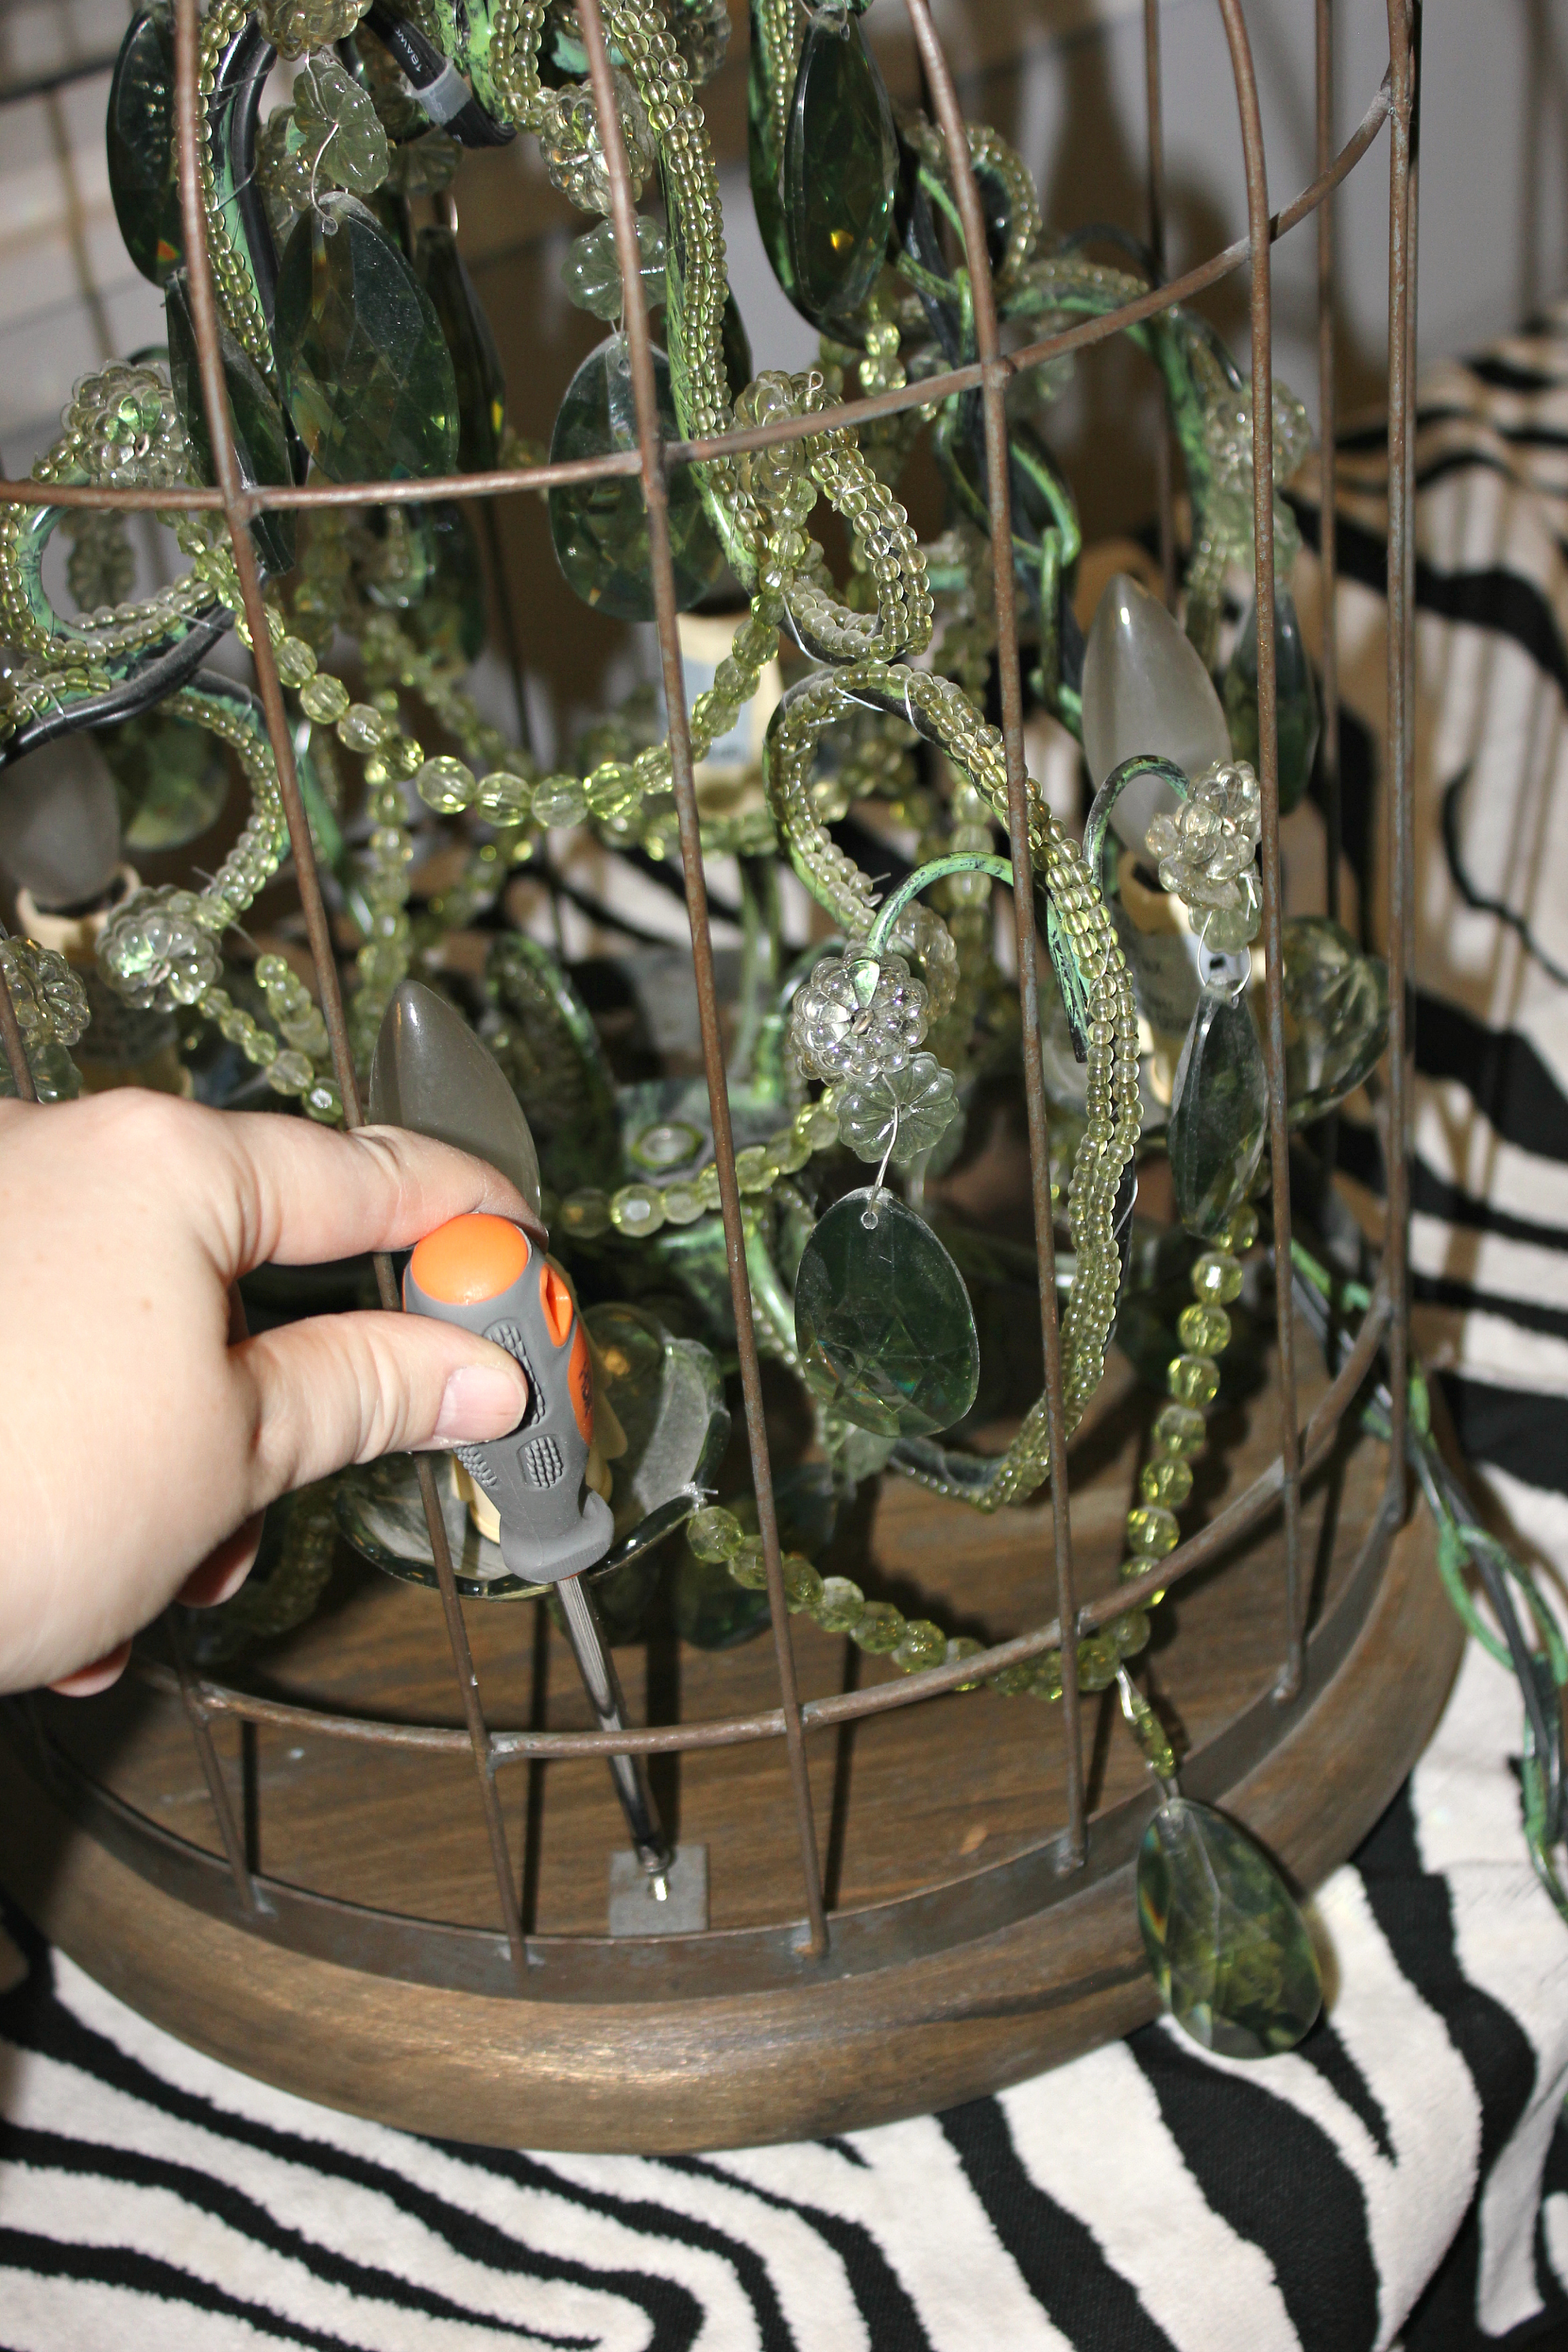
Screwdriver (to remove base)
Pliers (2 pairs work best)
Bendable Wire (if needed to centre chandelier in cage)
DIY Birdcage Chandelier Instructions
Step 1: Select a chandelier and remove the light bulbs if you don’t want to have to replace them all. Ours had originally been used in our old place, and had just stayed packed away in box since we moved. This particular style plugged into an electrical outlet and so I didn’t have any extra electrical components to consider.
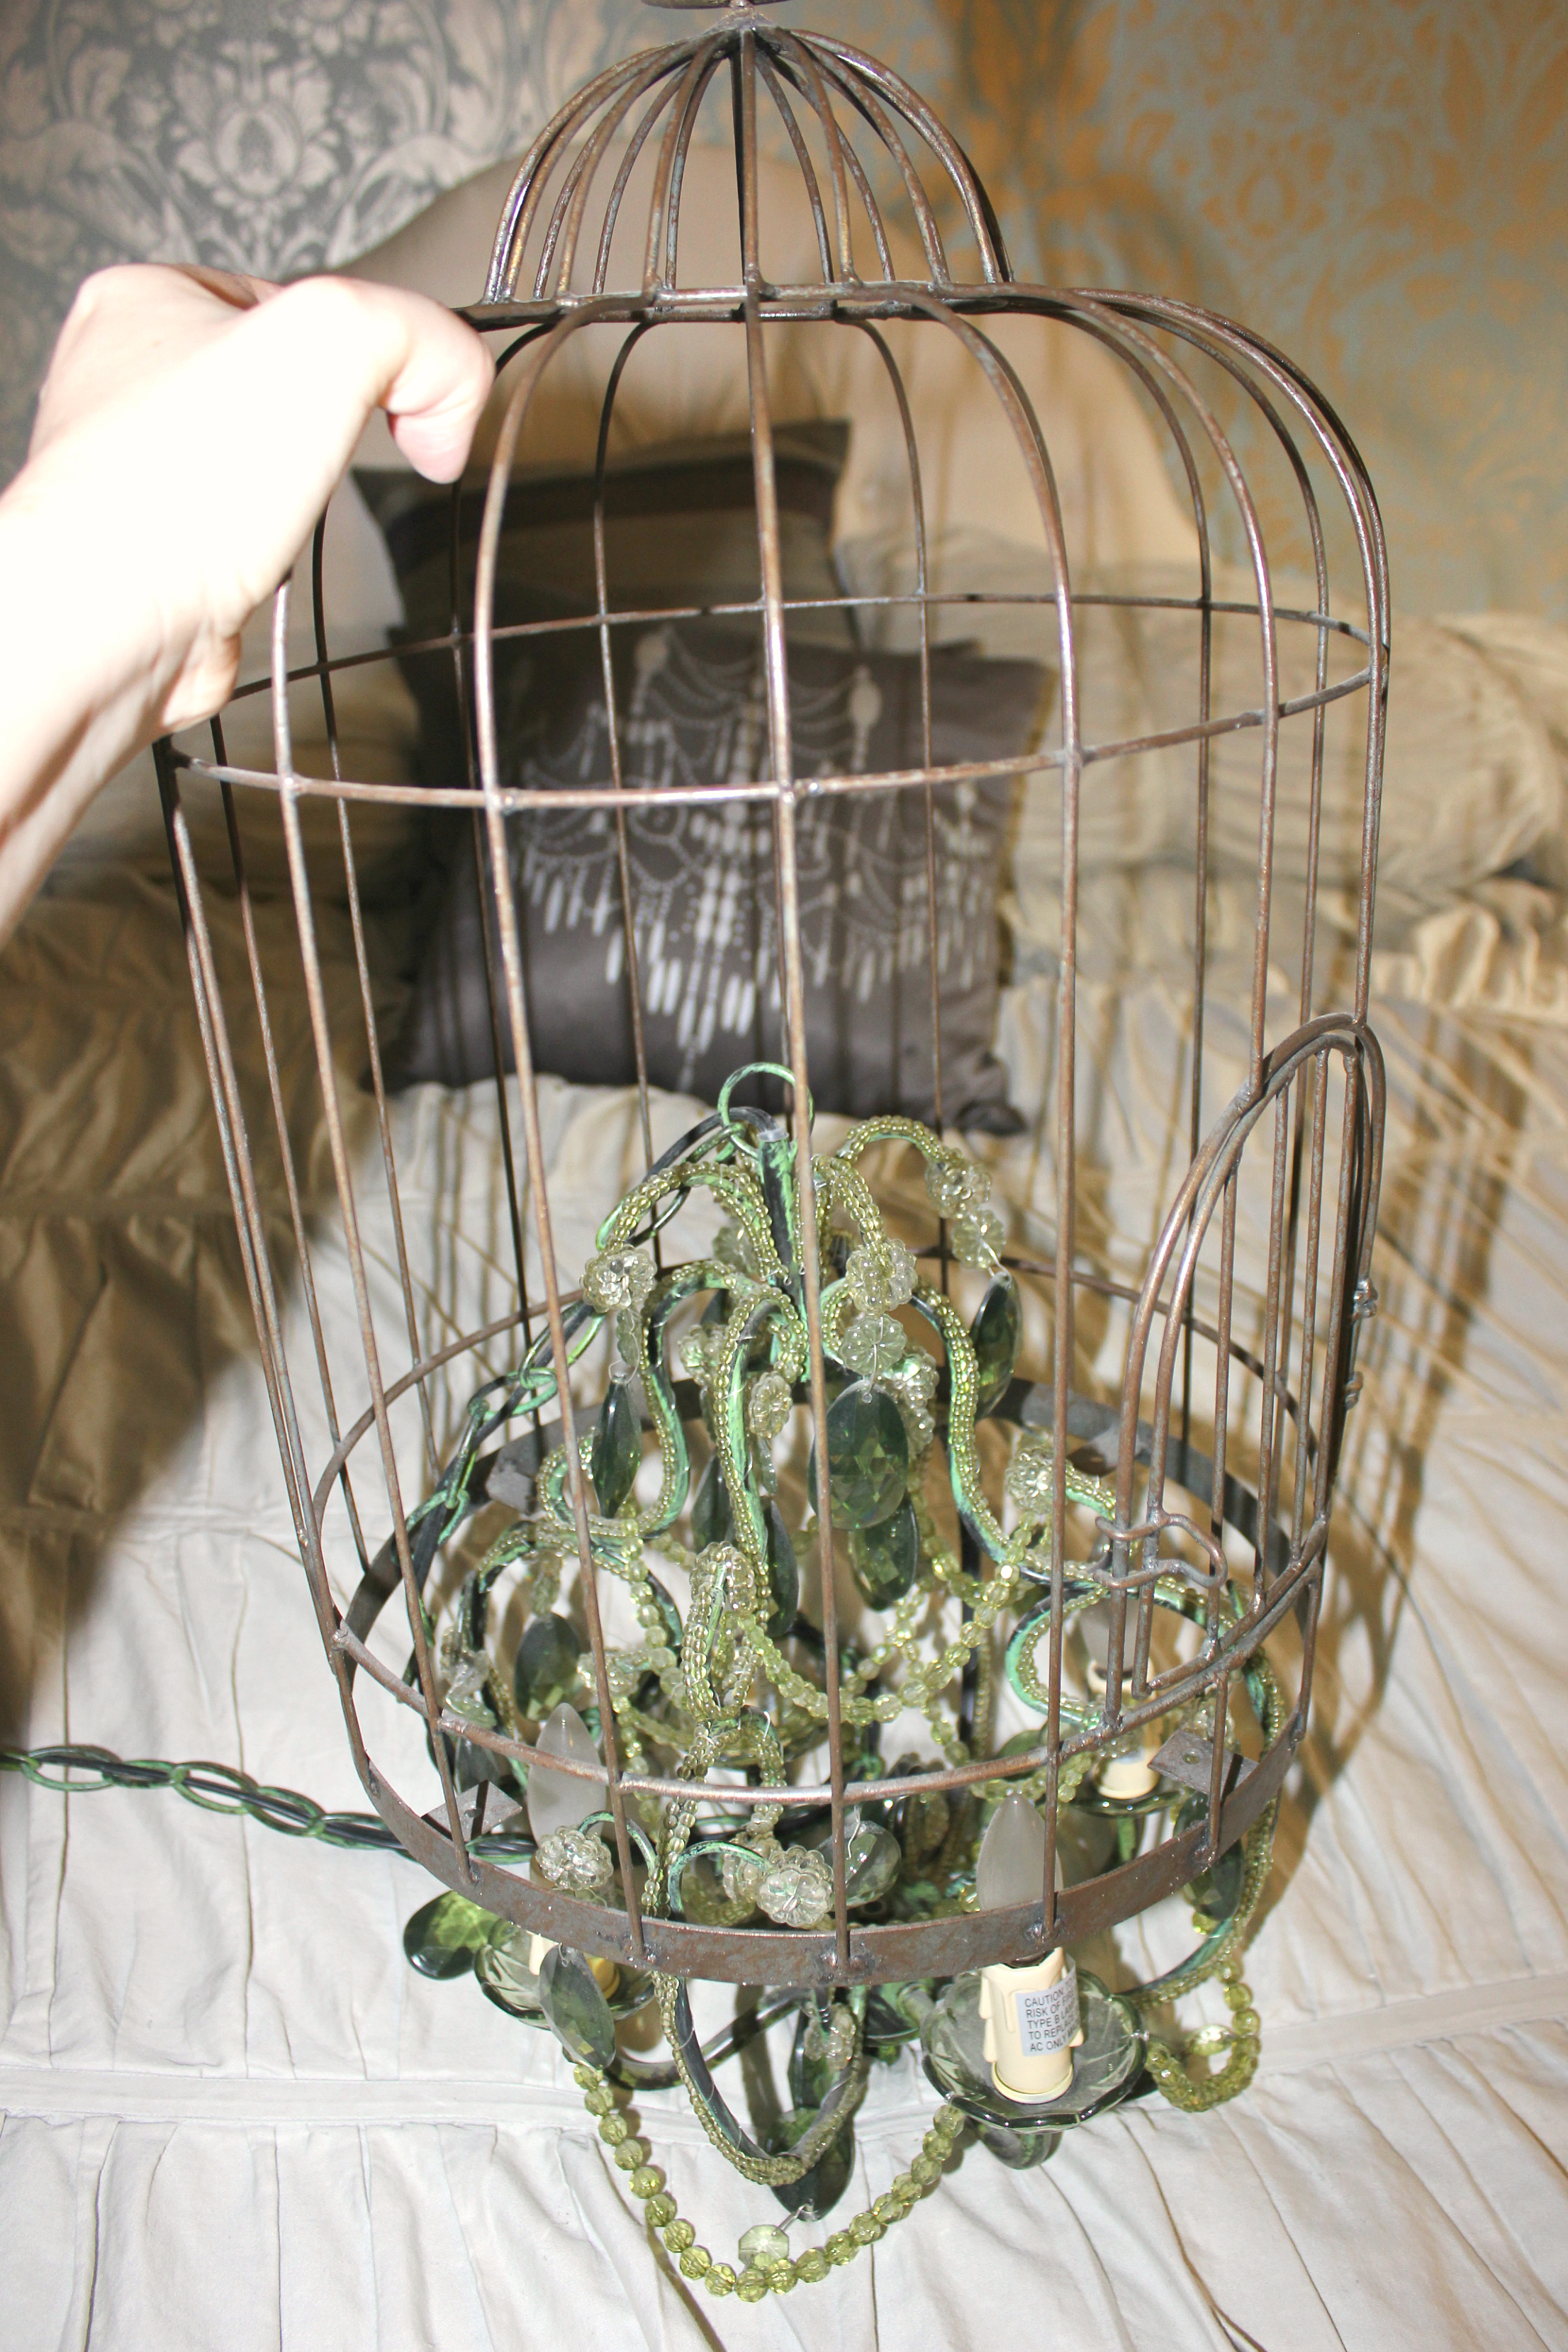
Step 2: Aquire a birdcage of suitable measurements. Not only will it need to be large enough to fit the chandelier, it will also need to have a removable base.
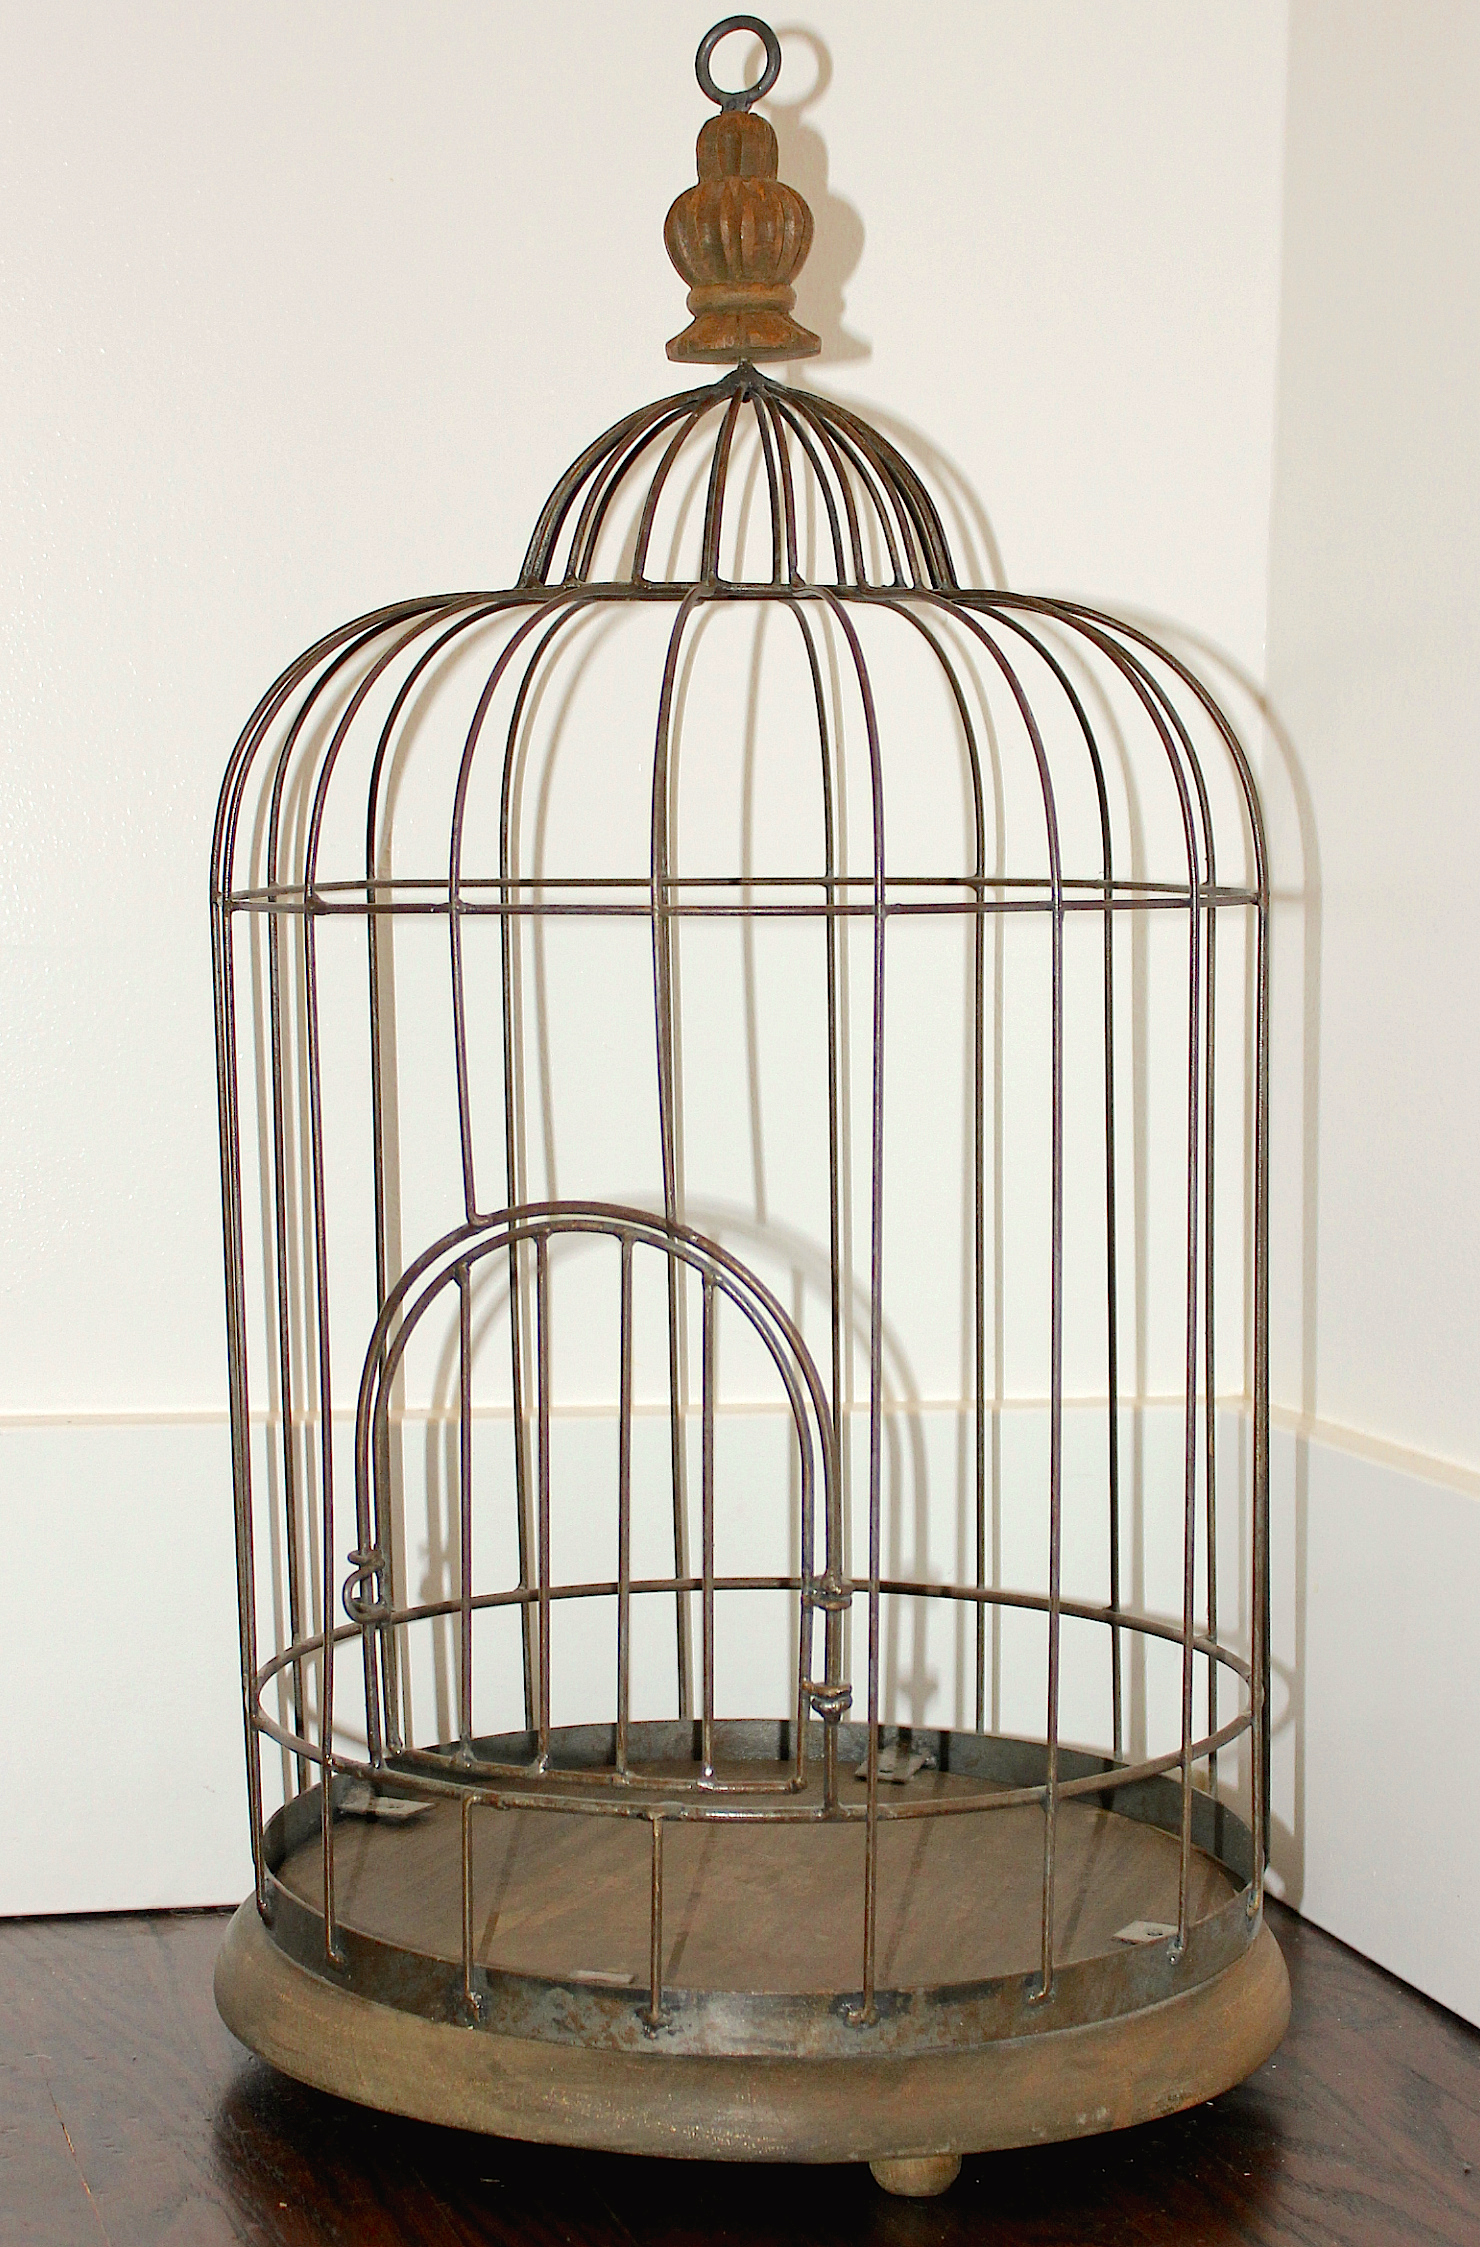
Step 3: Detach the base. This one had four small phillips screws attaching the wooden base to the cage.
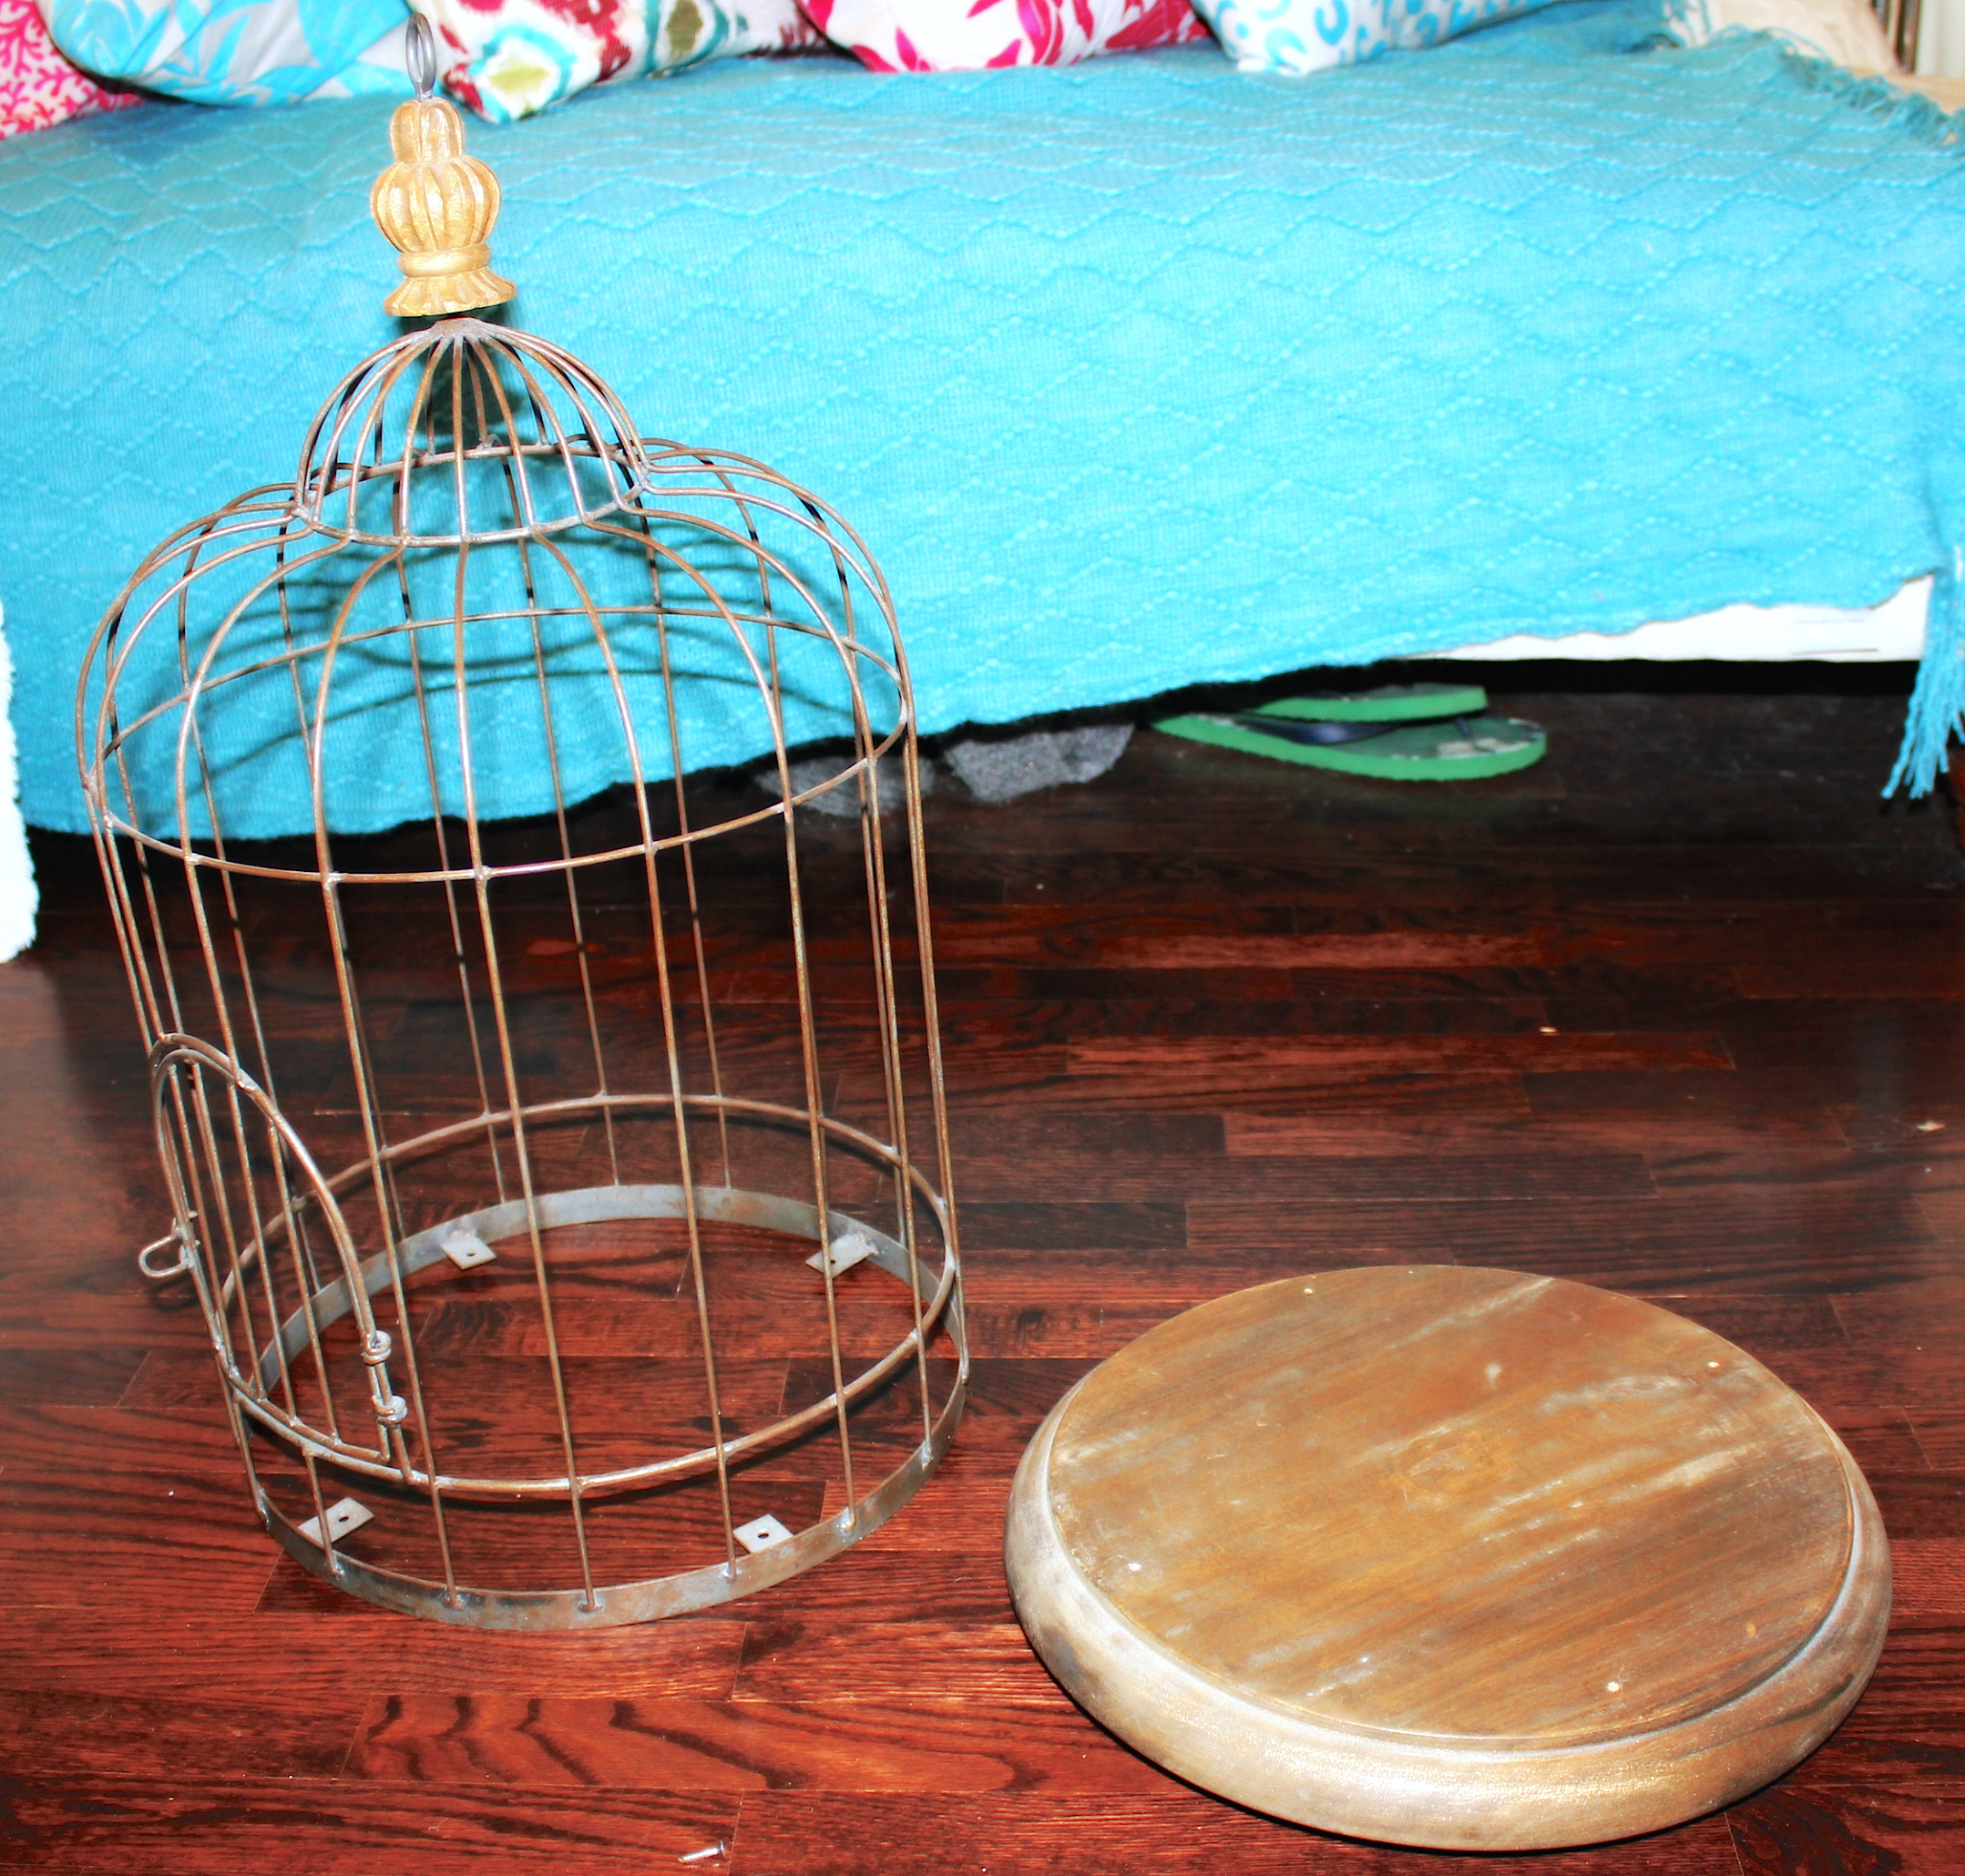
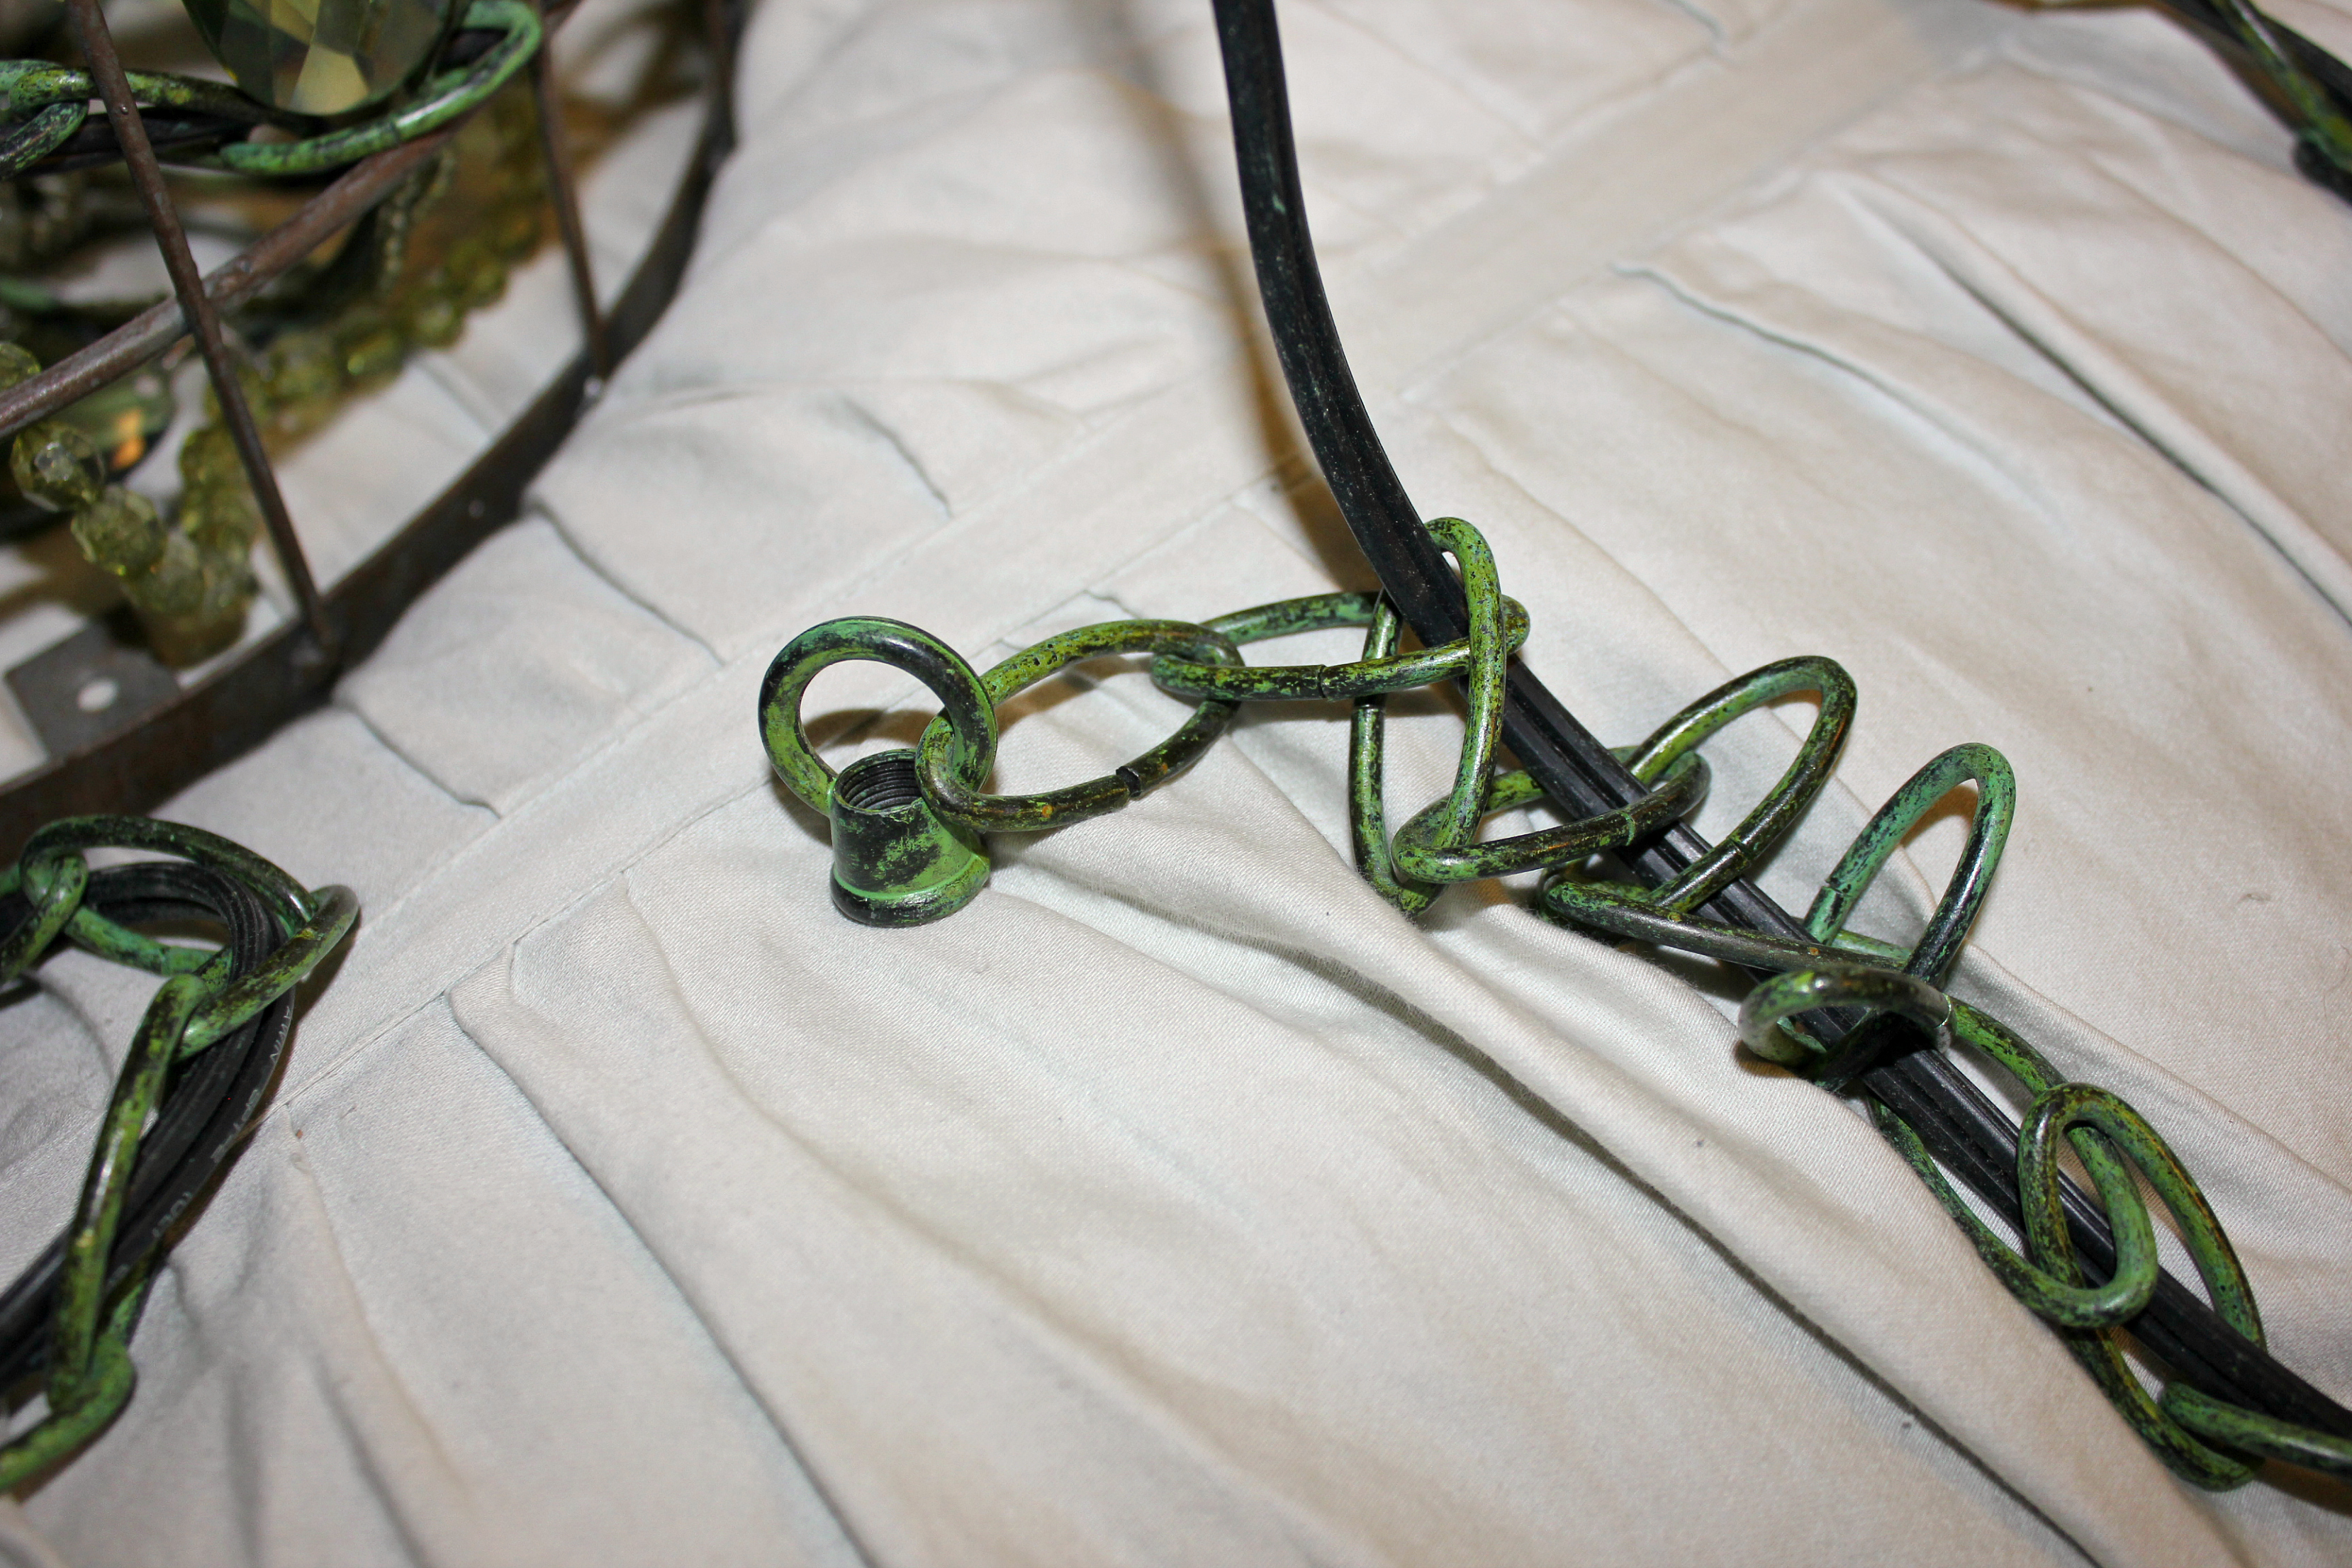
Step 4: Using 2 sets of pliers, detach the bottom 2 links of the chain on the chandelier. This chandelier’s chain had several extra links at the bottom, otherwise you could purchase links or other suitable hardware at any home improvement store.

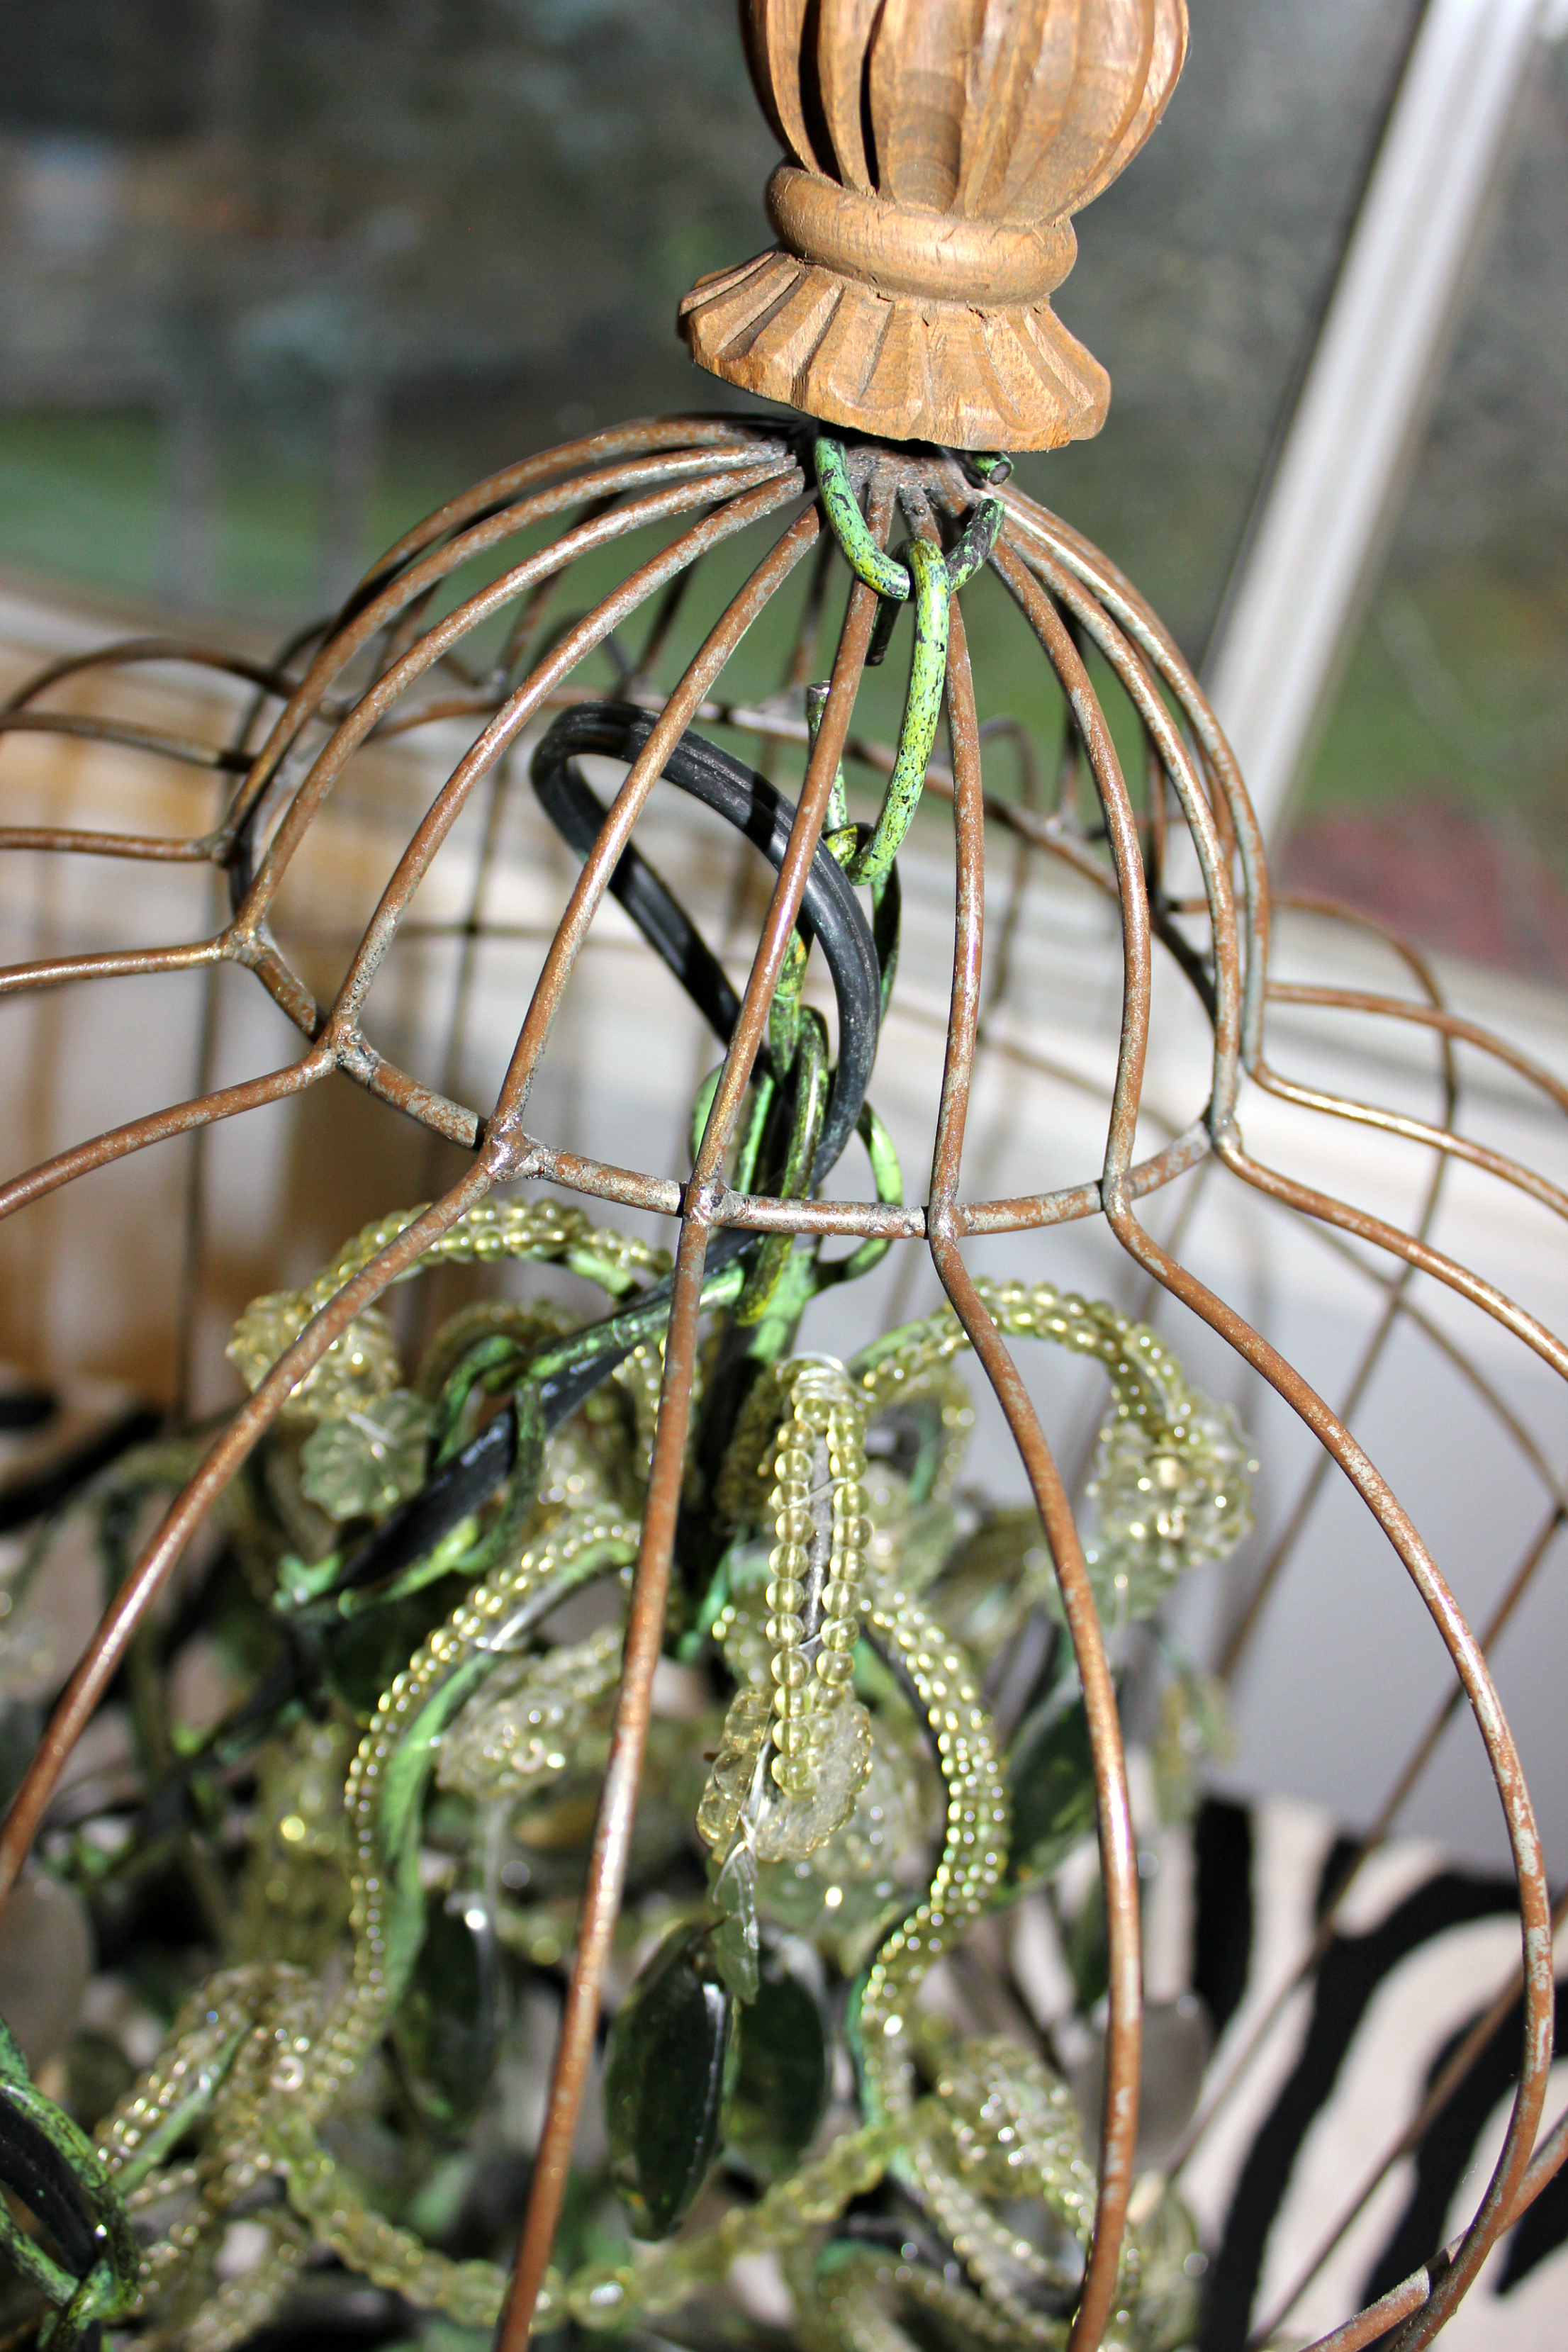
Step 5: Next carefully slide the birdcage top down over the chandelier. I found this easiest accomplished on something soft, like a bed, or a couple towels because the chandelier is not flat and you will find it is one of those moments where you could use two more hands.
Step 6: Next take the 2 links of chain you removed and loop them together.
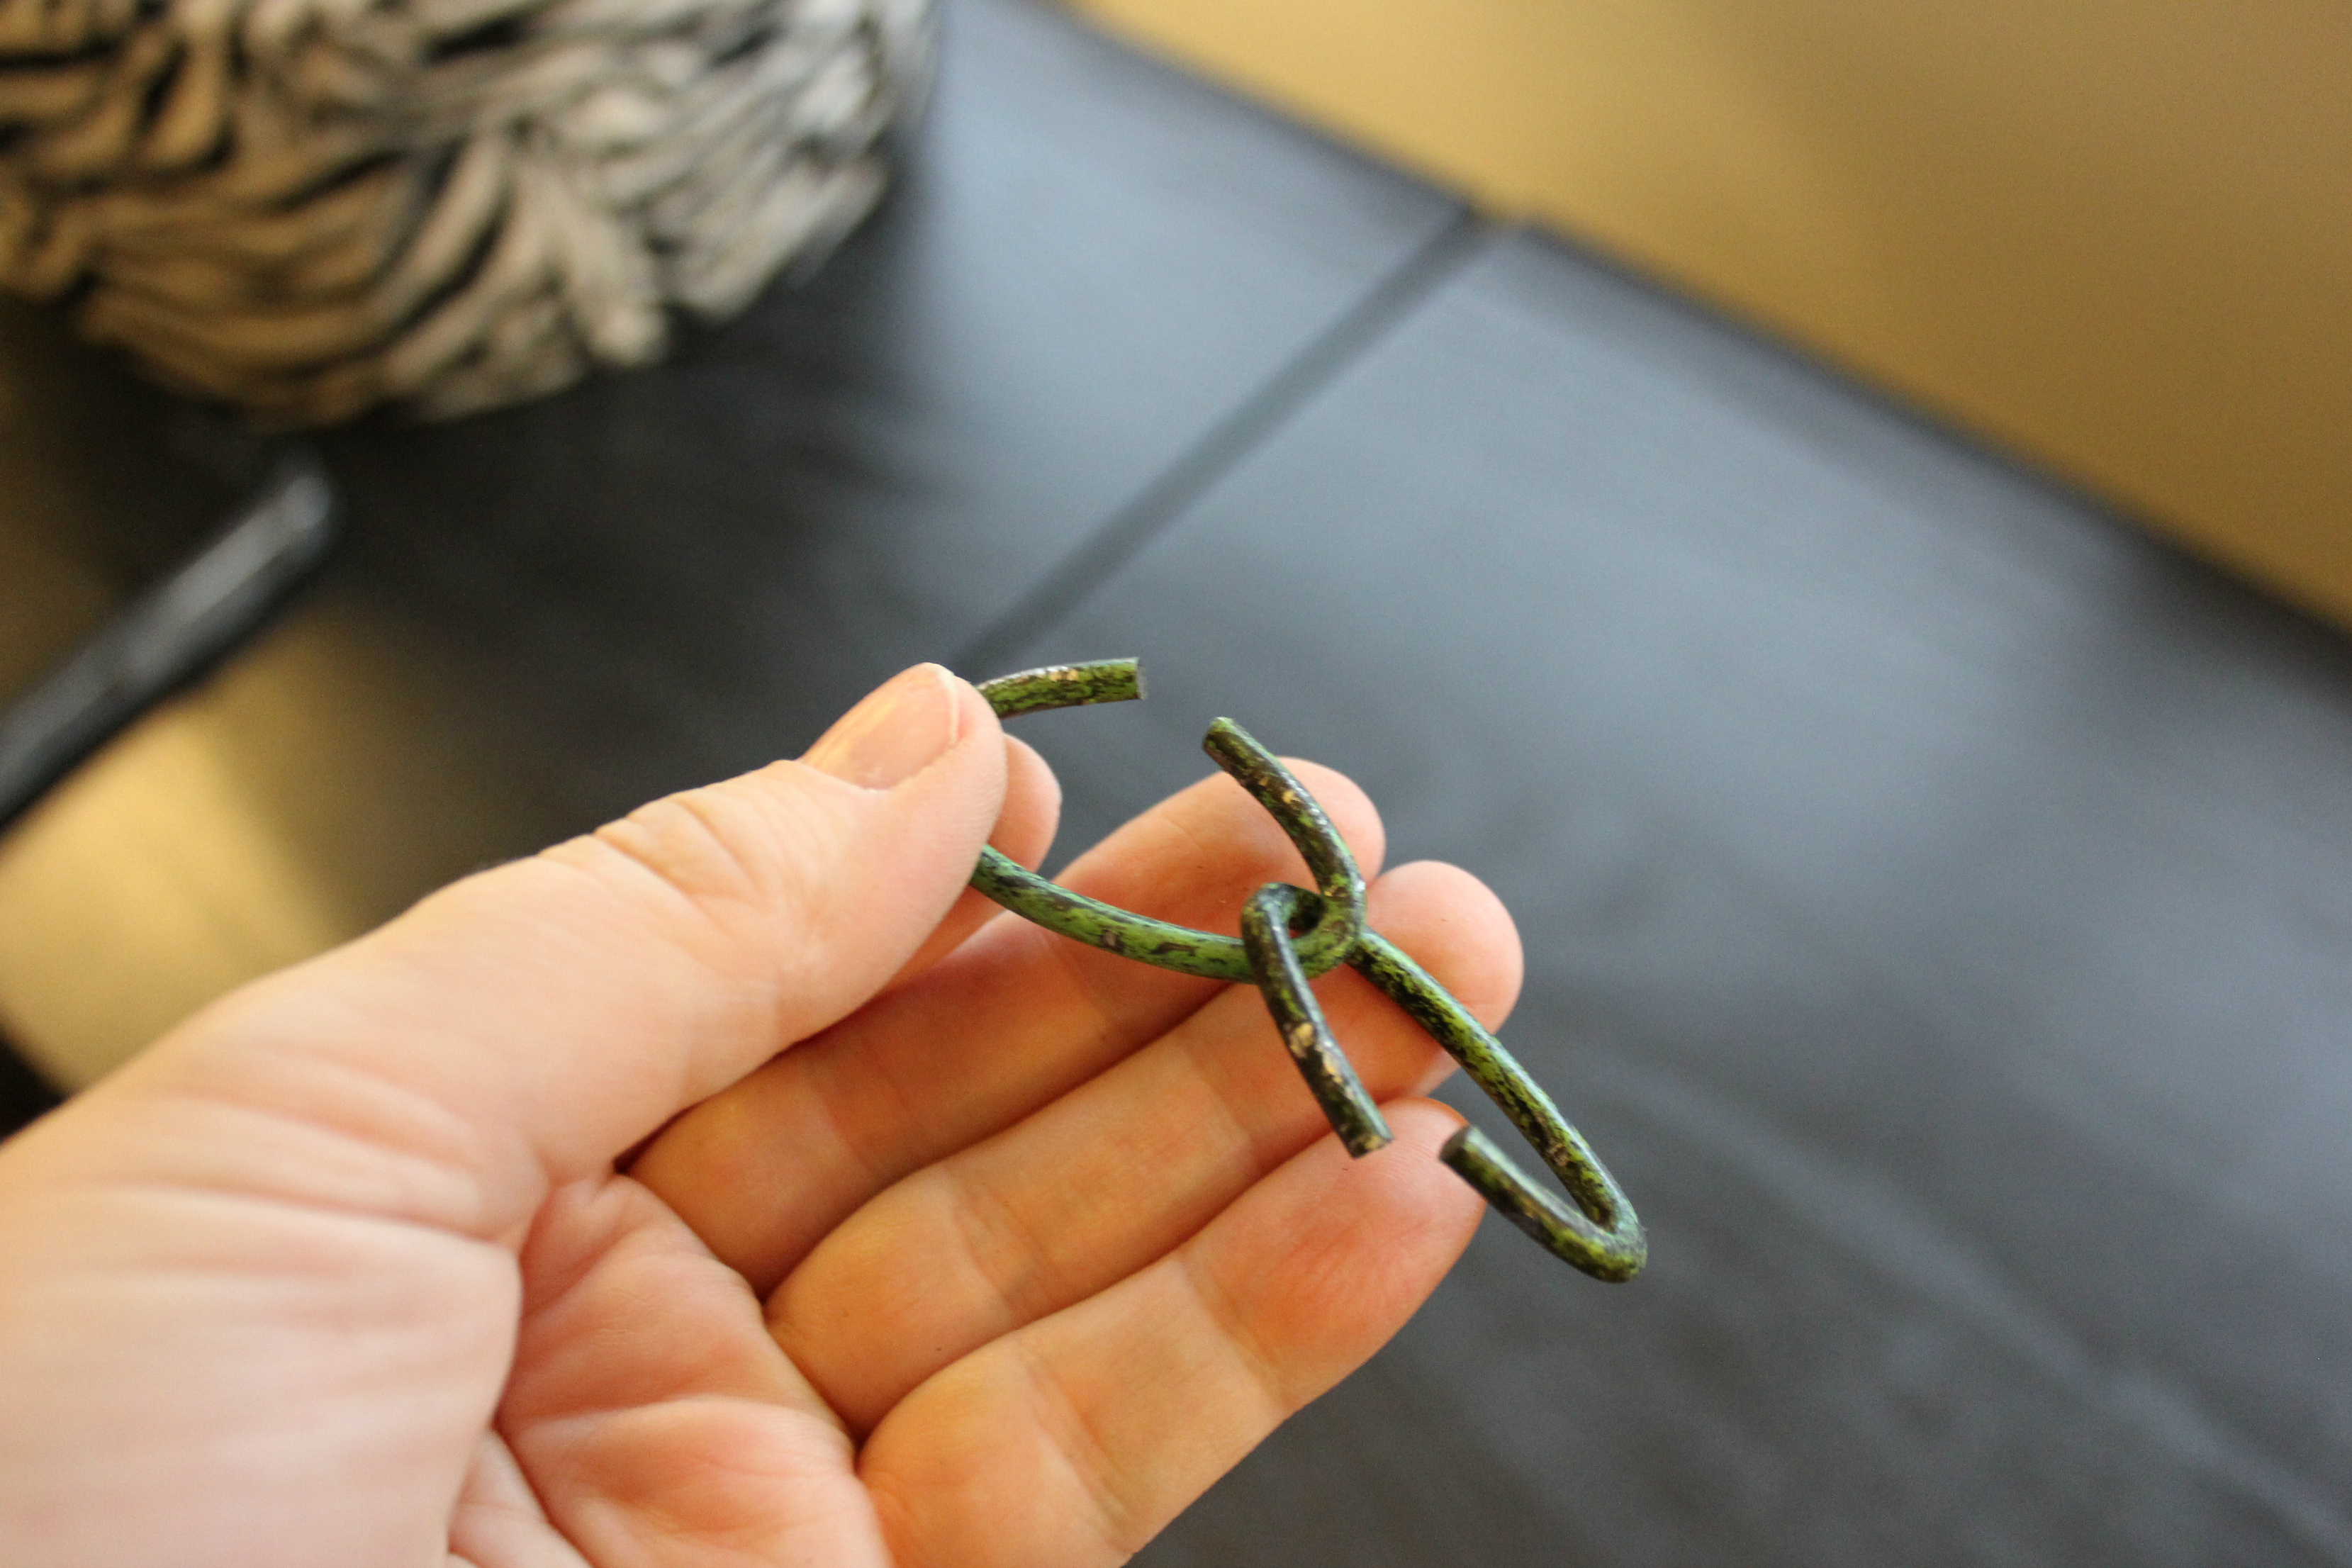
Step 7: Slip one of the links around the top of the bird cage, allowing the other to hang down inside.
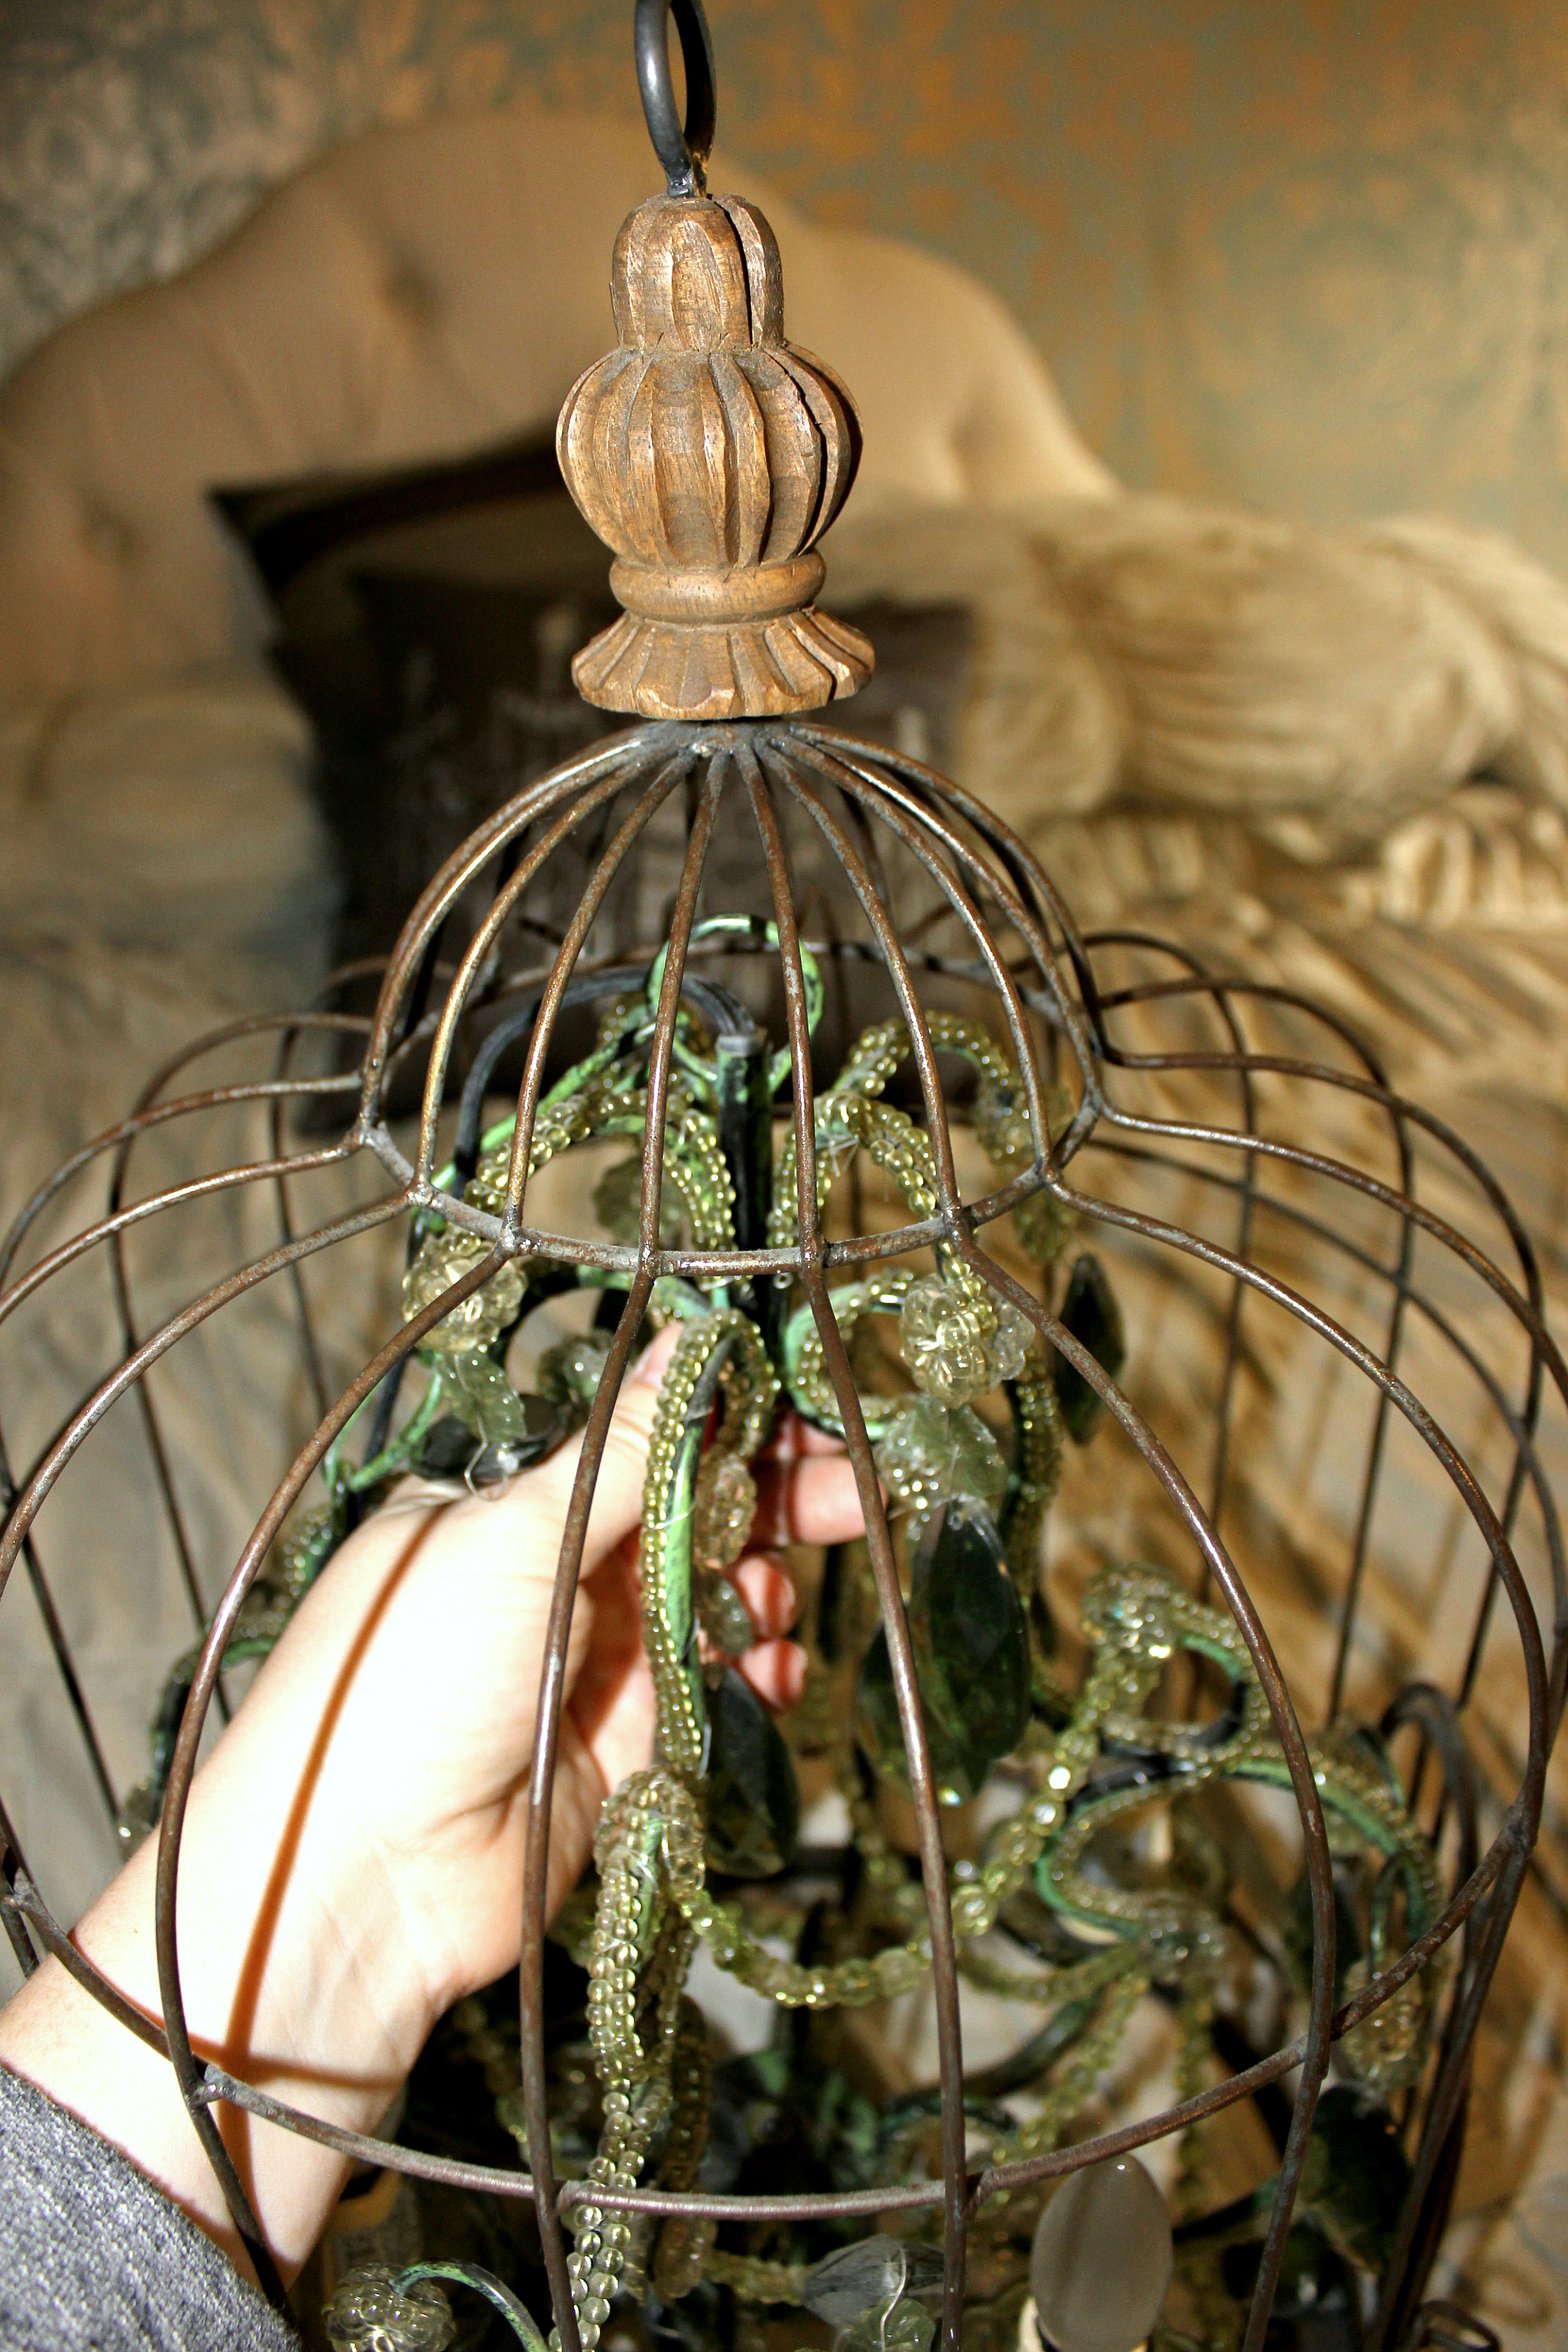
Step 8: Lift up the chandelier by the chain and attach to the hanging link (alternately it may be easier to remove the hanging link and loop it thru the chain and then reattach to the top). Never have my hands felt so large as trying maneuver them around the inside of this birdcage, but who’s not up to a good challenge!
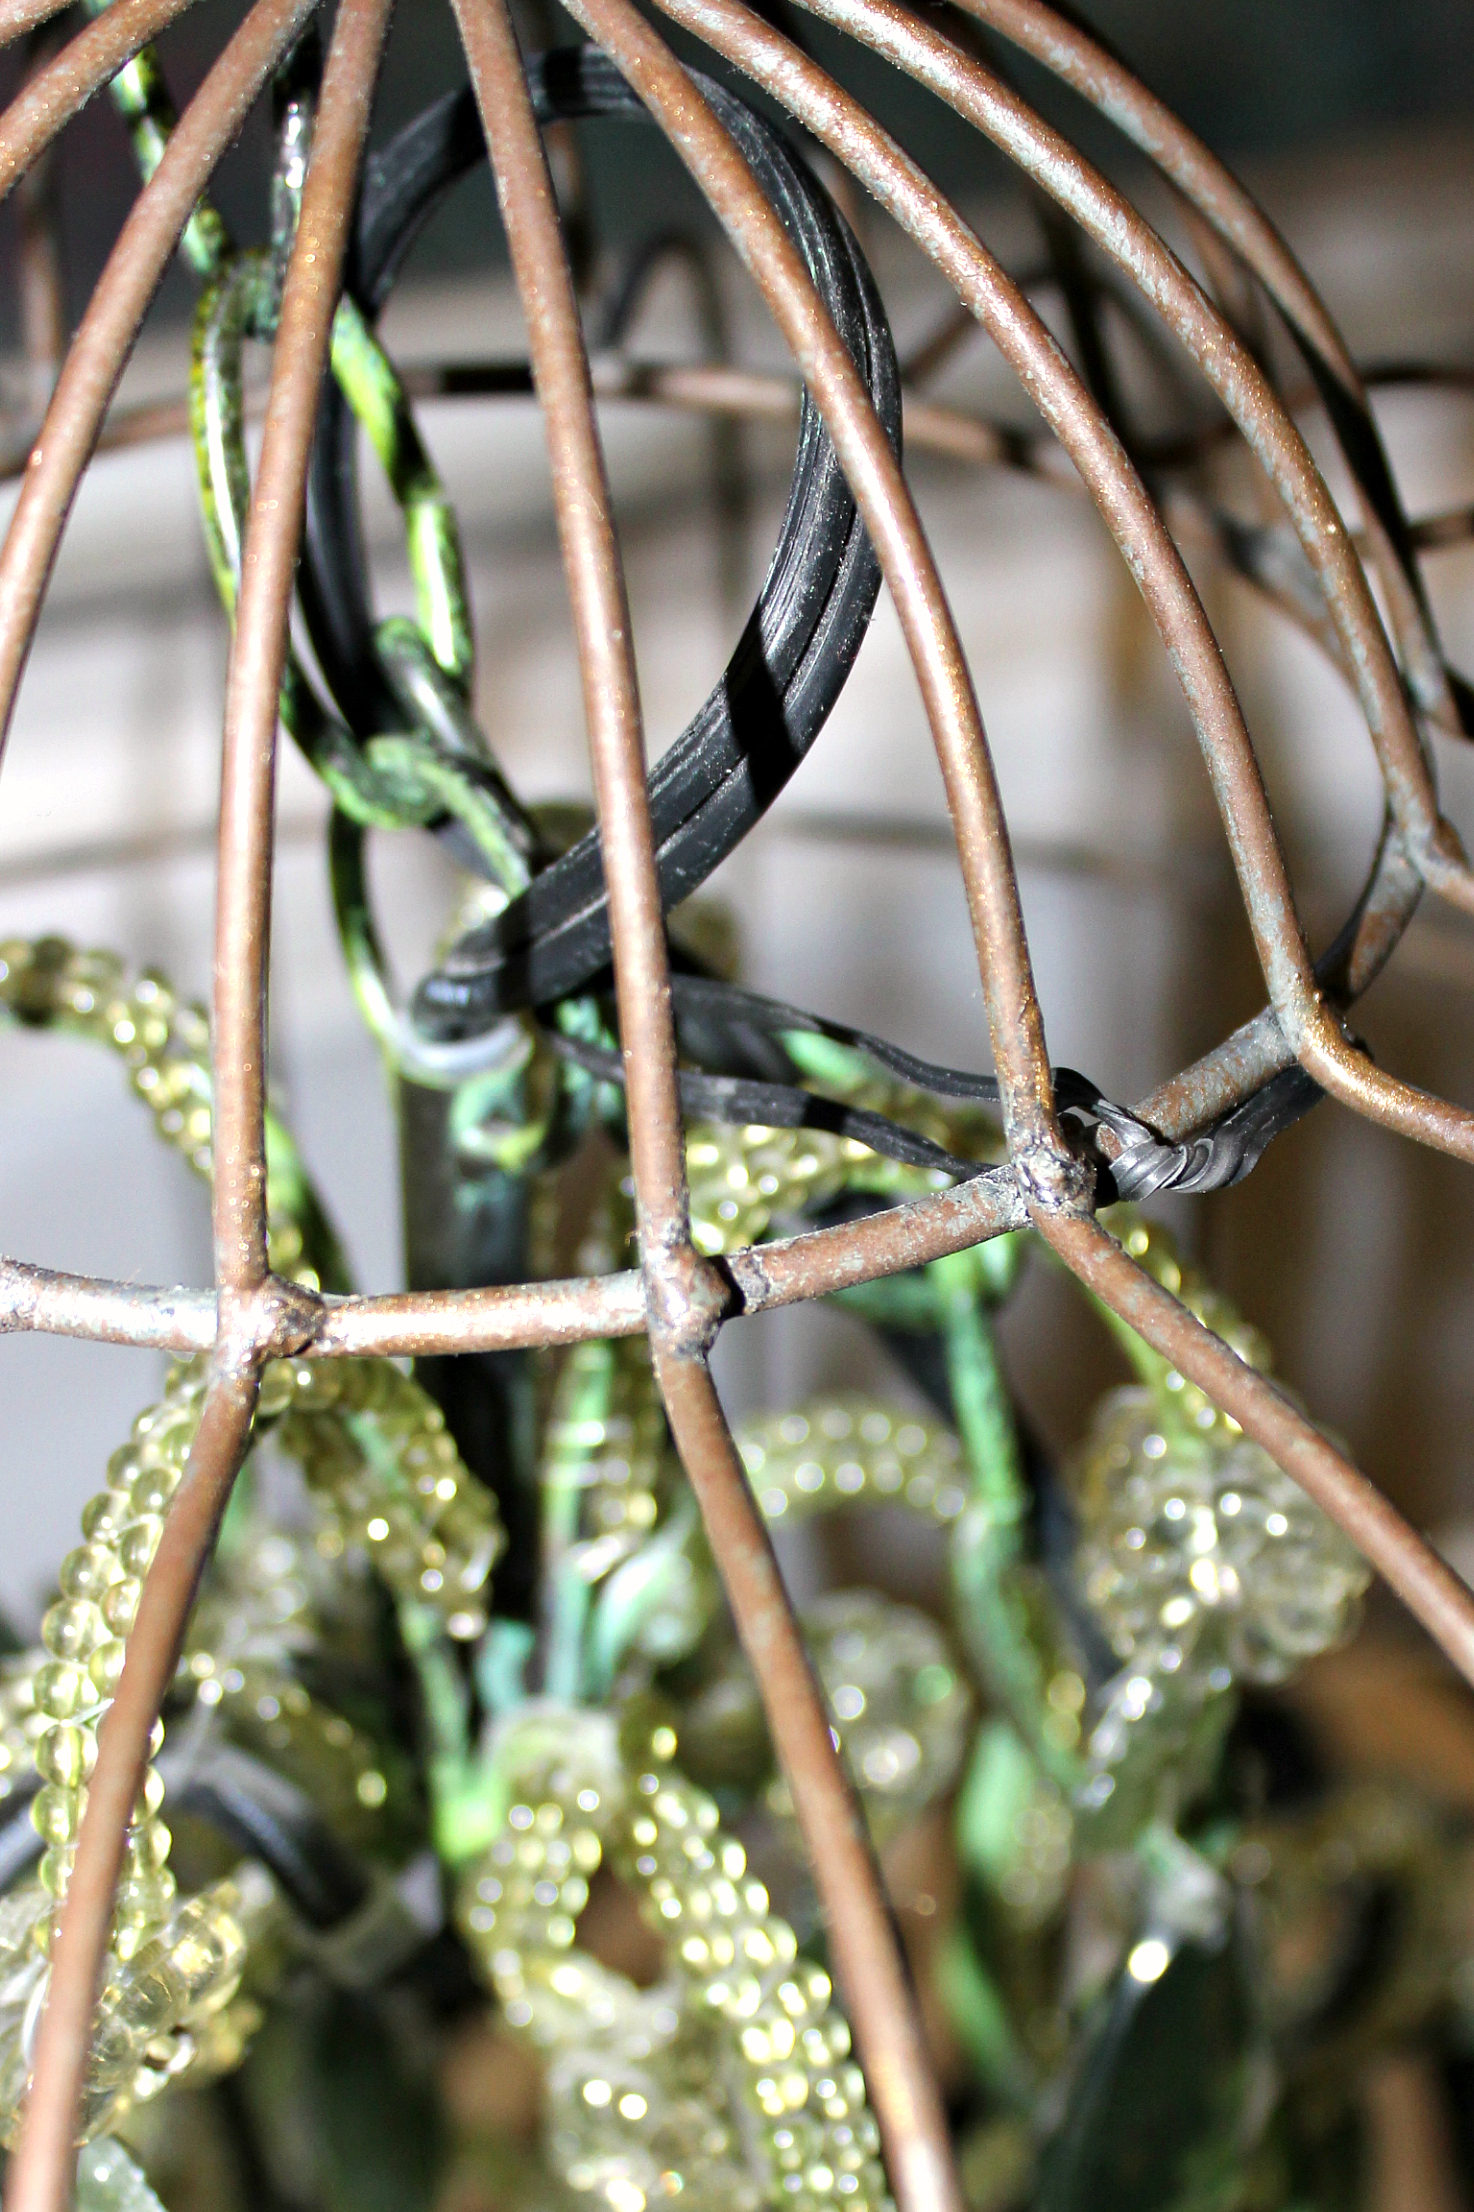
Step 9: Close the 2 links back up again. This is best accomplished with needle nose pliers, and two hands with no pictures.
If the links are off centre and cause the chandelier to pull to one side, use bendable wire (that sometimes comes with the chandelier) to pull the light back centre and twist off around one of the cage bars to keep in place.
Step 10: If a hanging light fixture is what you are looking for (and unlike me you actually still have space for one) this would be a great place to stop.
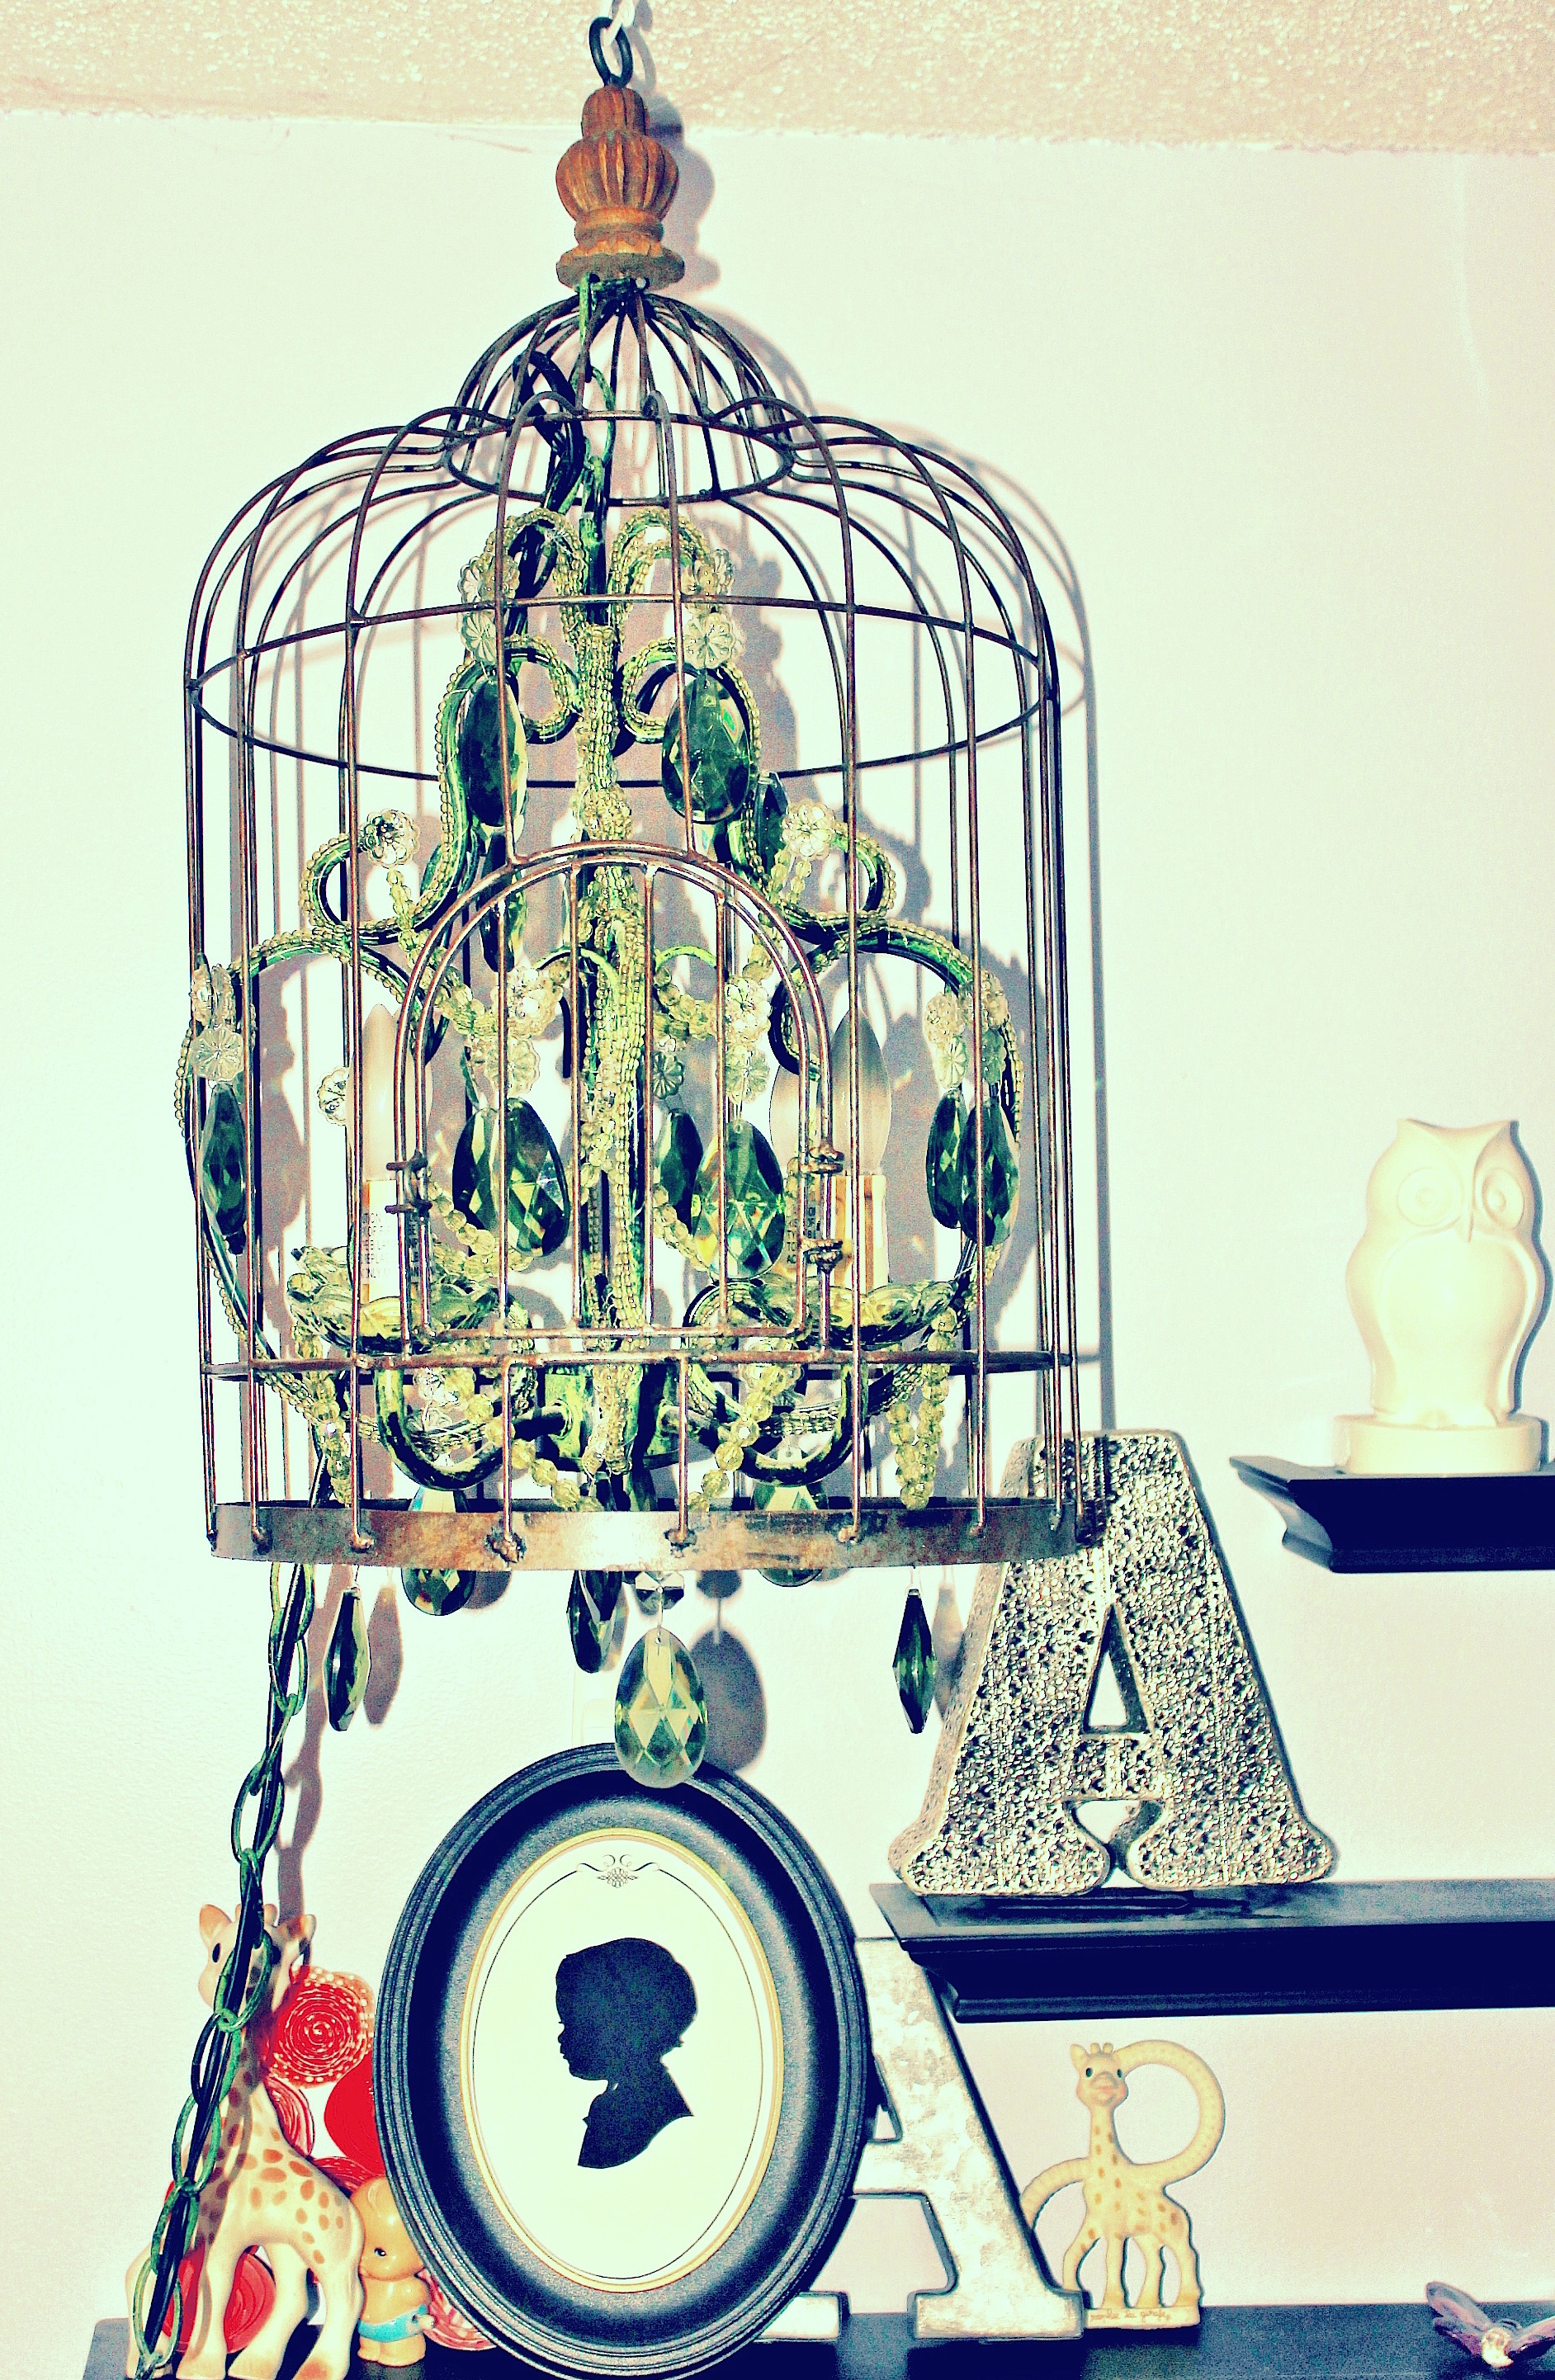
But in my case, this particular chandelier of a birdcage was destined to be a table lamp, so I continued on with step 11.
Step 11: Place the base of the birdcage on a hard surface and carefully align the chandelier and cage back in place on top.

Step 12: Using the same 4 screws removed earlier, reinstall the base back onto the cage and you are done!
Rejoice in the fact that you do not have to try to fit your hands in and around the bars of this particular birdcage anymore!
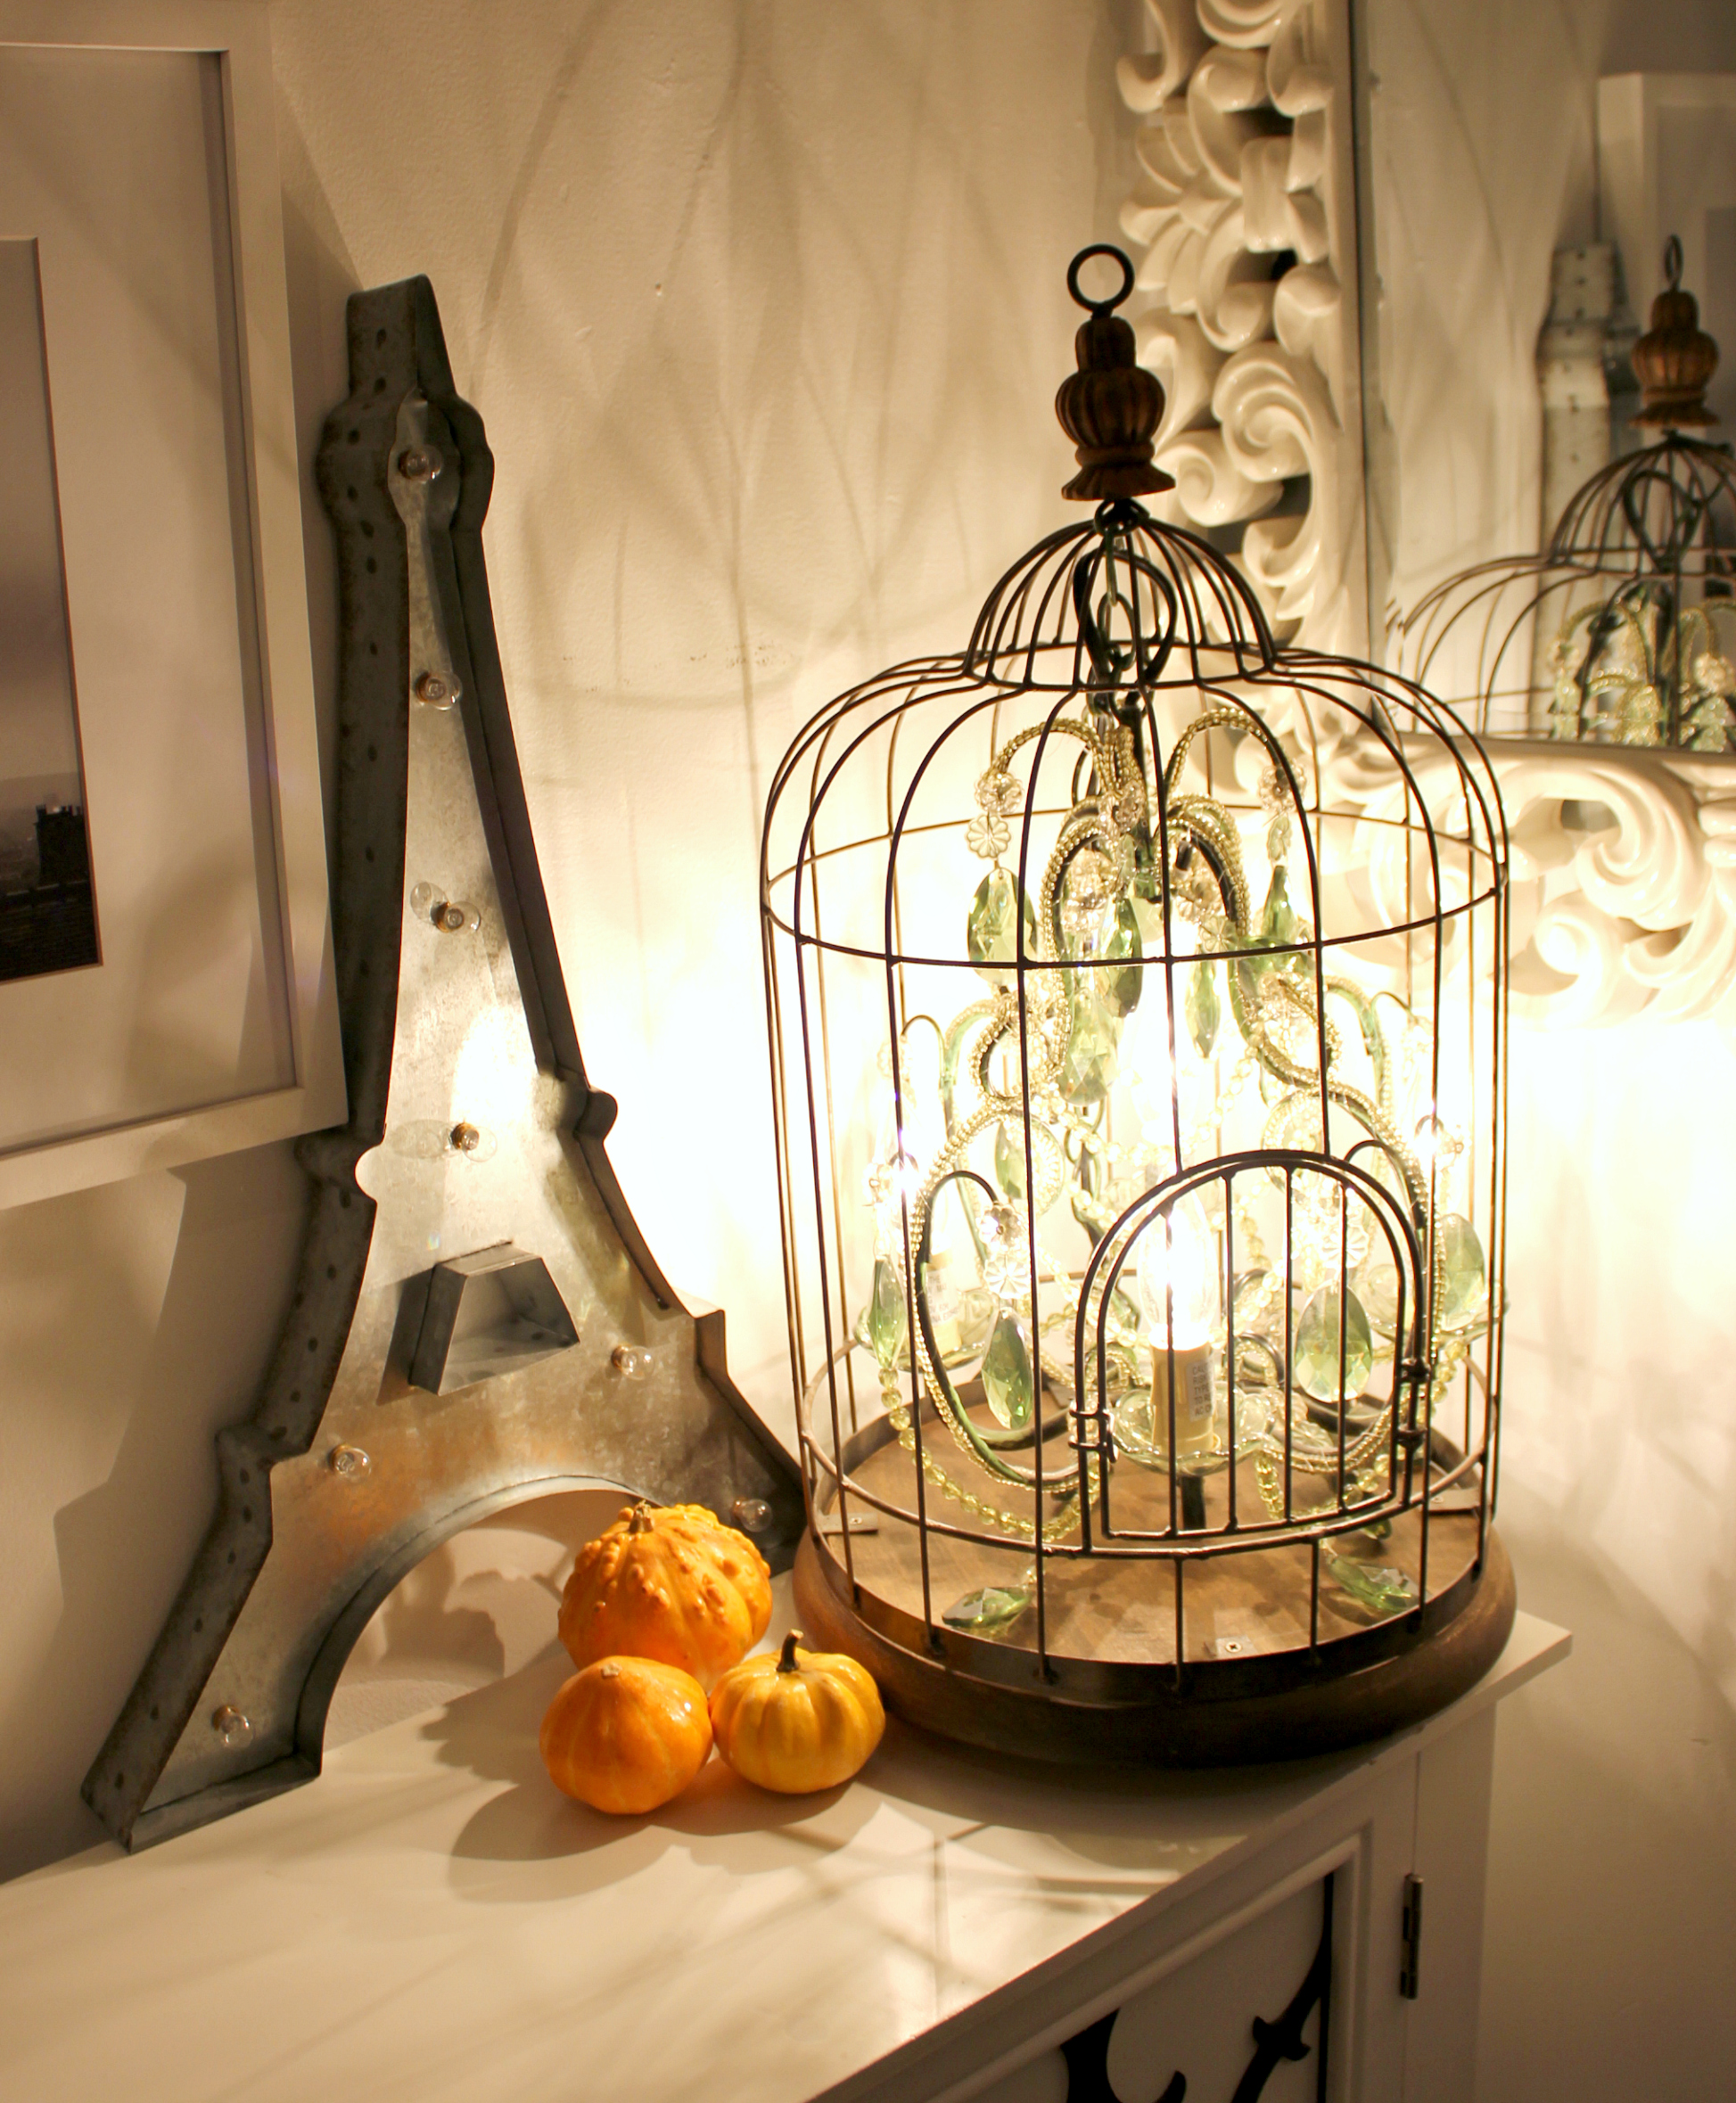
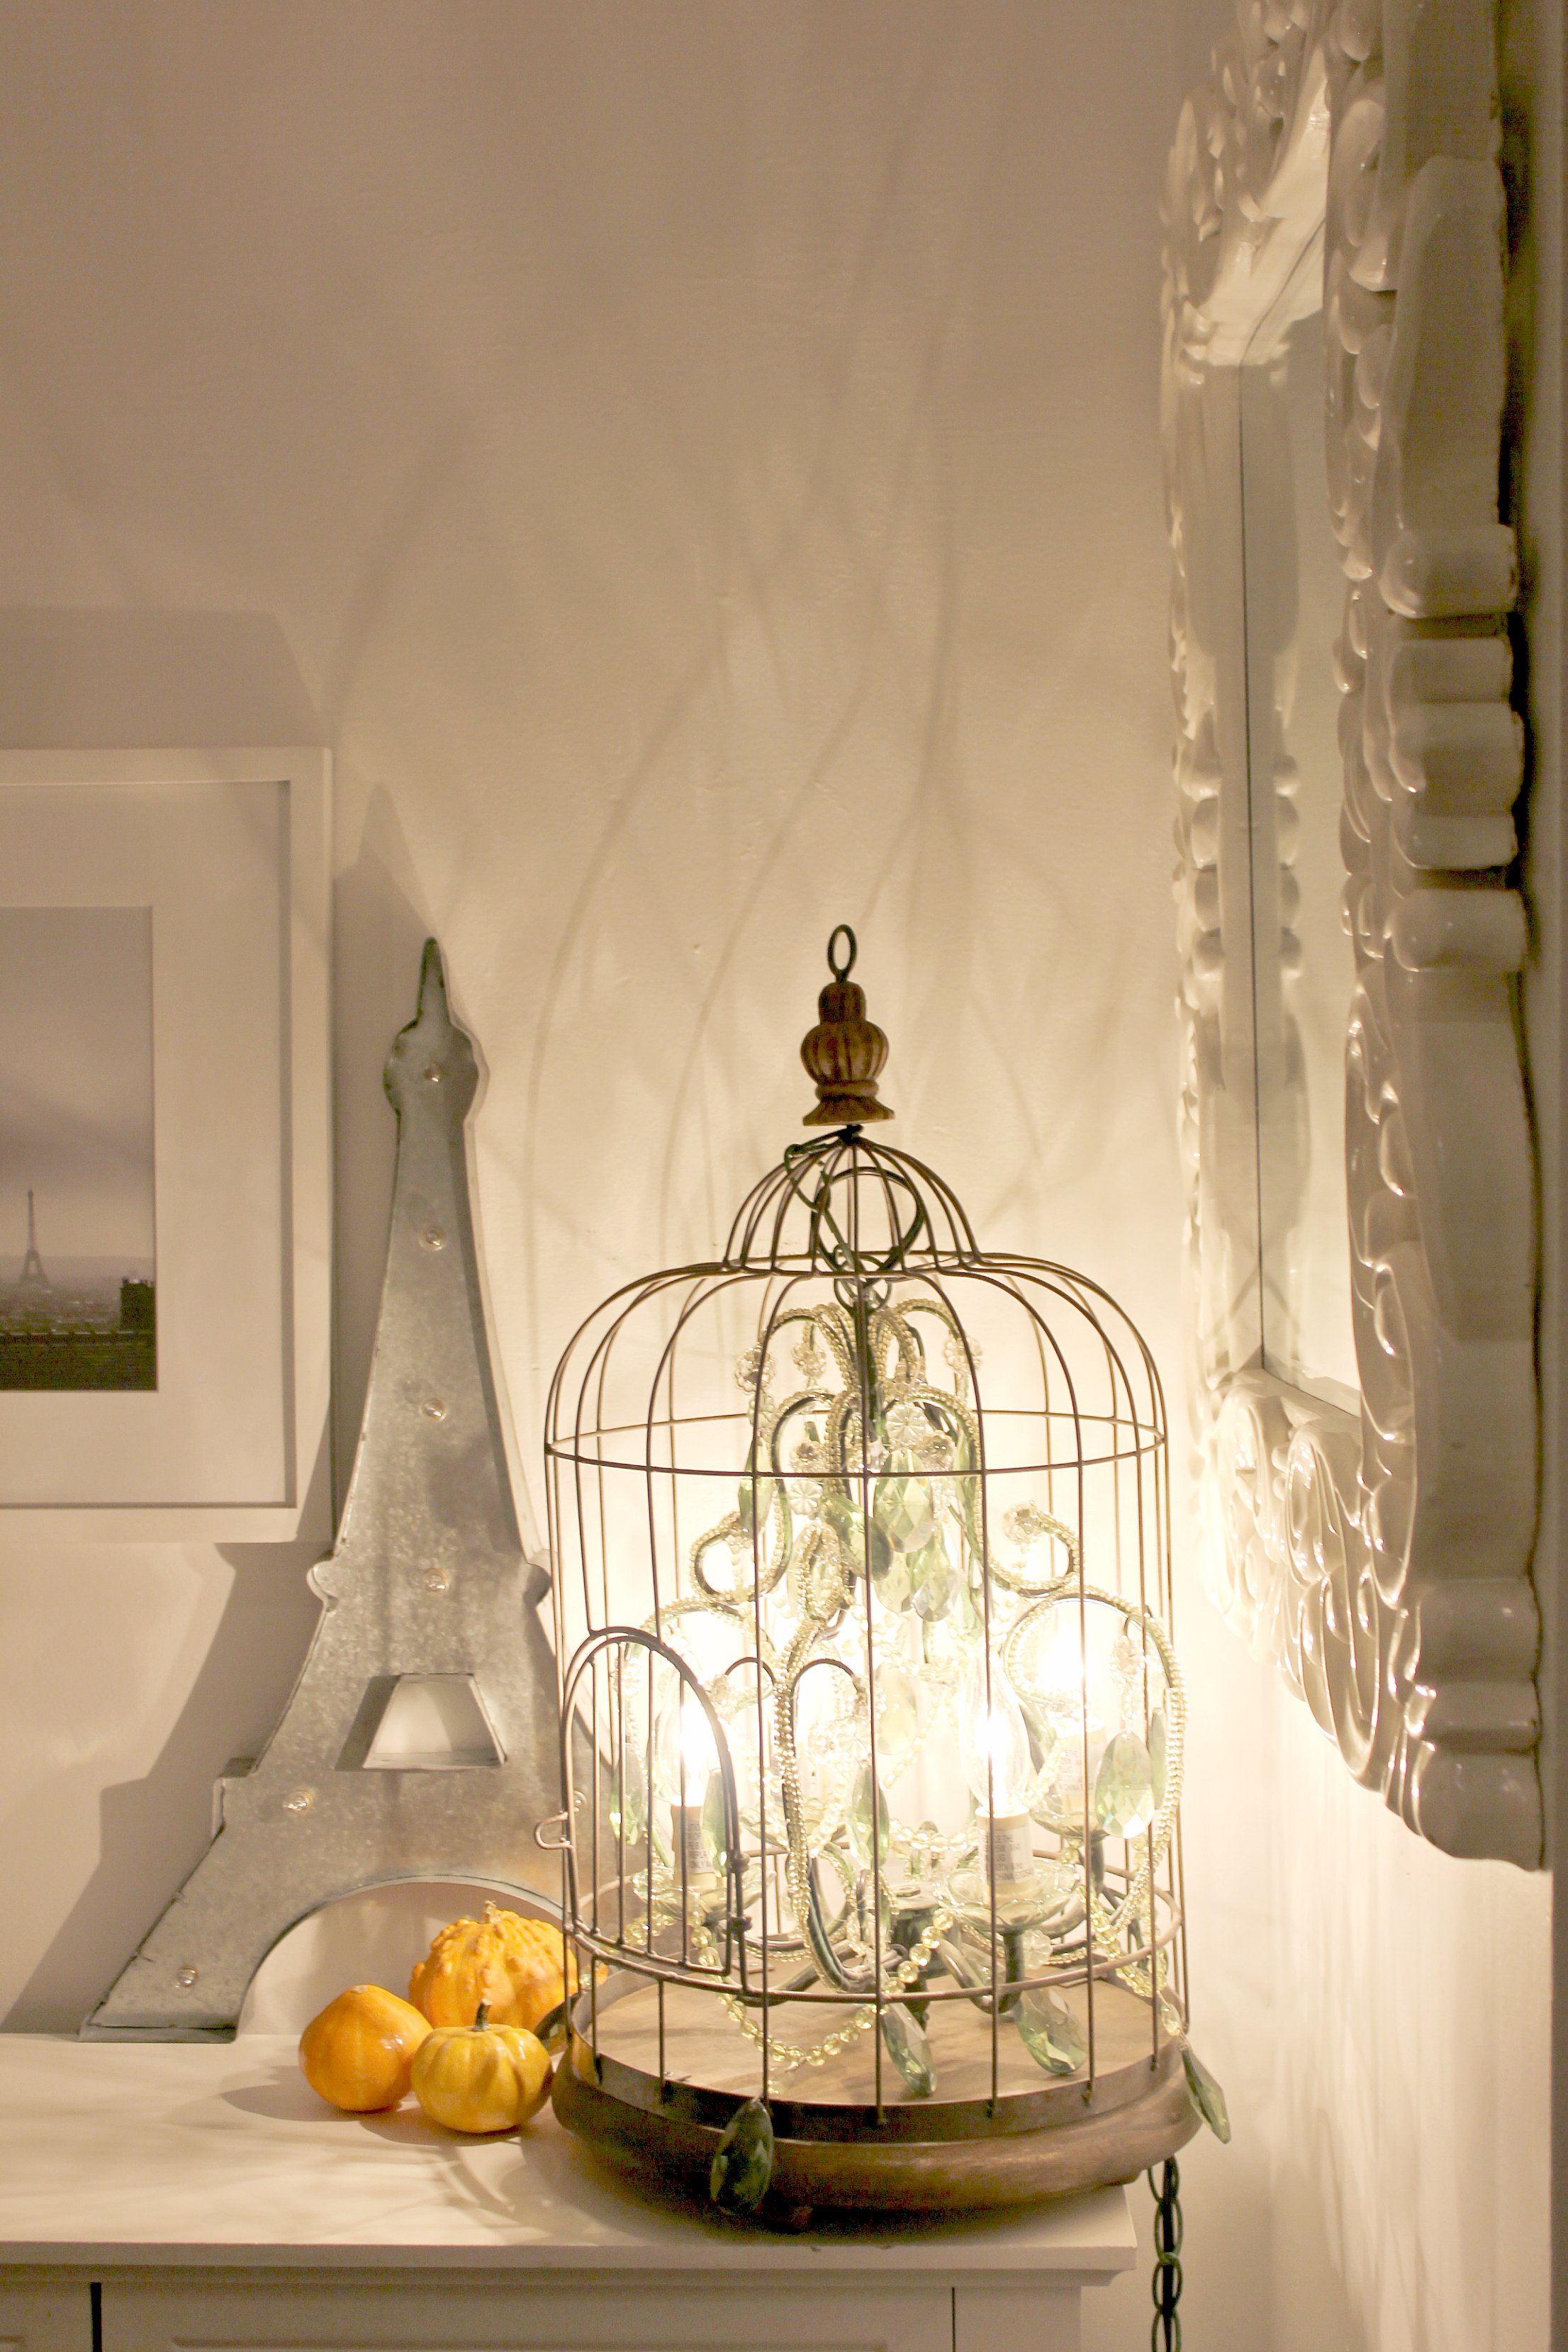
Wahoo! My very own birdcage chandelier shining in all it’s glory.
The post DIY Birdcage Chandelier appeared first on Creative Sides.
]]>The post Stack-O-Lantern Planter DIY appeared first on Creative Sides.
]]>
I’m not a green thumb in the slightest and don’t pretend to be. I have a reputation amongst local landscapers as a plant killer – it’s not my fault, I think I have too much love to give and the plants aren’t sure how to handle it. (If only I could exhibit a fraction of that affection in real life relationships, I might not be single!) I decided this year to attempt to work with live plants again, after a really long hiatus and a full ban on plant purchasing by my gardener.
I’m going to take you step by step through creating this fun and simple project that will give your garden a cute Halloween vibe.
Here’s what you will need:
• A piece of rebar
• Five plastic pumpkins
• Soil
• Small Plants
• Tools- a drill and a mallet

This project can be customized to your tastes in several ways. We used a 48” piece of rebar for our stack o lantern planter but you can make it longer or shorter depending on your space and what you want it to look like in the end. The 48” length gave me enough room for 5 pumpkins and still have enough length to pound roughly 8-10” into the ground.
You can also opt to use real pumpkins if you like but my reasoning against it is, the real pumpkins are significantly heavier, you have to cut them open and scoop out their guts (not my favorite thing) and they will get soft and begin to rot over time so while I know I’ll have to replace the plants annually, my creation is re-usable year after year after a quick 10 minute build.
Sounds easy so far right? I was surprised how easy this little project was and it looks adorable in the garden! I’m not the only one who thinks so, there are constantly people out front taking photos. (I was creeped out by this.)

Step 1: This is the one and only time you’ll need the drill. I love the feeling of a power tool in my hands so this project will likely lead to more ‘drills required’ DIY’s. Drill a hole in the bottom of your pumpkin and then drill another hole on the top of the pumpkin. This is where you will insert your rebar so to get the curved look, be sure you alternate the sides that you drill on.

Step 2: Pound that bad boy into the ground! Another fun part for me, I tend to enjoy using a mallet. Once you have your post in place grab your first pumpkin and push the rebar through your pre-drilled holes.

Step 3: Load up the pumpkin with dirt and place your plants in as you like. I used ornamental peppers because I’ve had less of them die on me in the past and they look cute. I paired the mini peppers with yellow pansies but you can use any plants you like. I think this would be fun with succulents or cacti as well!
Repeat steps 2 and 3 until you’ve used up all of your pumpkins.

The post Stack-O-Lantern Planter DIY appeared first on Creative Sides.
]]>The post Baby Carriage Diaper Cake appeared first on Creative Sides.
]]>
For my second attempt at turning diapers into a ‘cake’, Pinterest and I agreed on a baby carriage design. I thought it was a fun way to gift diapers to a new mom. I made sure that all the diapers were in fact usable by using elastics, ribbon and double sided tape to assemble this little carriage of diapers. So even though it looked cute at the baby shower it was actually functional in the long run as well.
 To Make A Diaper Cake Baby Carriage You Will Need:
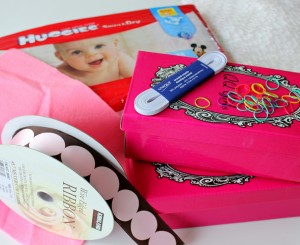
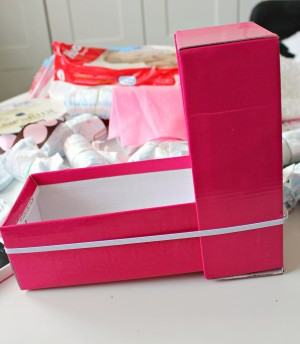
2 kids size shoe boxes (about 8″x 4″)….bigger boxes work well too, they just require more diapers and result in a larger carriage
Diapers (I used 38 Huggies size 2)
Tiny elastics (I find the rainbow loom style from the dollar store work great)
2 Large elastics or 2 lengths of elastic and two safety pins
Thick decorative ribbon
Scissors
Double-sided tape
Small doll (optional)
Step 1: Put one box into the other to form an ‘L’ shape. This will be the base of the carriage. Make sure the boxes are a snug fit, otherwise glue into place. Take a large, thick elastic or create your own by safety pinning two separate lengths of elastic to fit the box, one horizontally and one vertically. Attach the elastic that runs vertically first and then place the elastic that will run horizontally along the base overtop.

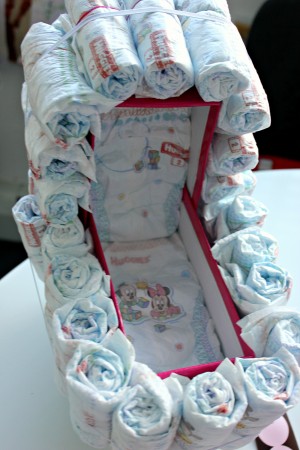
Step 2: Roll the diapers one by one and securing with the tiny elastics (white or clear work best because you don’t see them). The rainbow loom elastics work well because they are thick, if using the thinner tiny hair elastics, you may need 2 per diaper.

Step 3: Place the diapers around the carriage by slipping each one under the elastic around the outside of the box that forms the base of the carriage.
Step 4: Once the base of the carriage is covered, begin working your way up and over the top of the carriage in the same way, with rolled diapers slipped horizontally under the elastic.

NOTE: Make sure the elastic that runs vertically goes on first beneath the elastic that runs horizontally.
Step 5: Take a diaper (unrolled) and cover the exposed back of the box. Tuck in the top and bottom under the rolled diapers to secure.

Step 6: Line the inside of the carriage with two diapers.
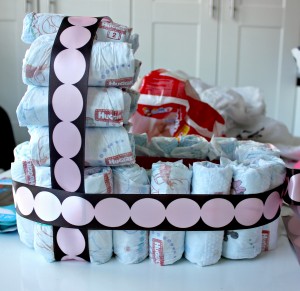
Step 7: Next, make the wheels by putting 4 rolled diapers together with an elastic for each wheel.


Step 8: Cut a length of ribbon long enough to wrap around the carriage and cover the elastic. Using double-sided tape attach the two ends overlapping and together, making sure to pull the ribbon tight so that it will stay in place.
Step 9: Next measure and cut a length of ribbon to cover the elastic running up and over the carriage, securing again with the double sided tape, once the ribbon has been pulled taut in place.
Step 10: Cover the elastic on the wheels with ribbon as well, and using the double-sided tape or hot glue (on the ribbon not the diapers), attach the wheels to the underside of the carriage on the exposed bottom of the box.

Step 11: Create a bow out of the ribbon by folding the ribbon into a bow shape and wrapping a 1.5″ piece of ribbon around the centre and using the double-sided tape or glue to secure in the back. Use the double-sided tape to attach to the front of the carriage.
Step 12: Using the same process, create a slightly smaller bow and attach it to the top of the carriage.
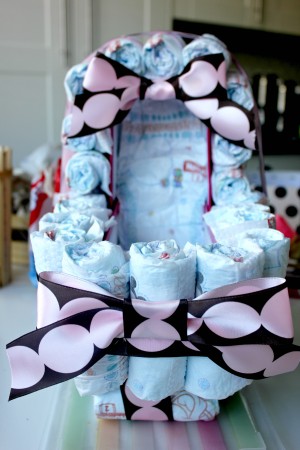
Step 13: Create a small bow for the back, I did this by attaching a clear elastic to the centre of the ribbon and then attaching to the back with more double-sided tape (this is the only diaper that actually had something adhered to it, because I wanted them all to be usable).

Step 13: Lastly, and this is optional (unless you are my daughters in which case this step becomes completely mandatory), add a small doll to the carriage 

And there you have it, a mini baby carriage out of diapers!!
Inspiration for this design came from www.myloveofstyle.com
This post may contain affiliate links. See our disclosure policy for more information.
The post Baby Carriage Diaper Cake appeared first on Creative Sides.
]]>