The post Bat Minion Halloween Door appeared first on Creative Sides.
]]>
It all started with a vampire cape from the dollar store. No one wanted to wear it, it didn’t even get much love sitting in the dress up box. I removed the collar of the cape and spread out the vinyl and started thinking about what I could use it for.
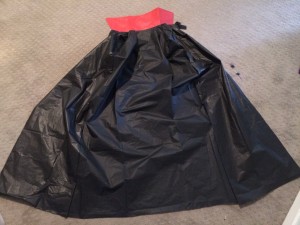
Ah ha! I had a yellow plastic table cloth left over from a recent birthday party. Given my kid’s love for all things superheroes and Minions, this lonely cape would get a new a new life and decorate our front door for Halloween. Behold: Bat Minion!
You will need:
White card stock or cardboard
Black plastic/vinyl cloth (I used a vampire cape)
Stencil or print out of Batman logo
Yellow plastic table cloth
Googly eye (optional)
Paint – gray, white, red, black, brown
Paint brushes
Tape
Scissors
Pencil
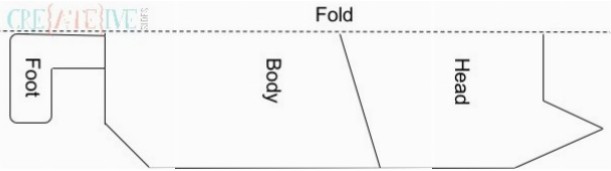
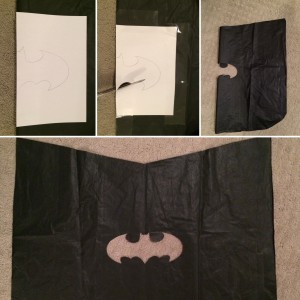
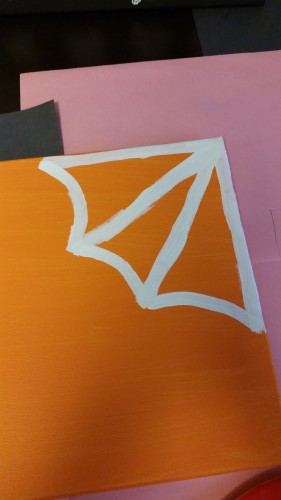
Step 1: If using the vampire cape, remove the collar. With your material folded in half, cut out the shape of the mask, body and feet. Take the folded body portion and tape the batman logo on the fold and cut out. Tape the feet to the body.
Step 2: For the eye, trace a large circle on card stock or cardboard with a bowl or other circular object. With a slightly smaller bowl, draw another circle. Use gray paint around the edges and brown and black paint for the iris. You can also use a googly eye from the dollar store for the iris.
Step 3: For the mouth, paint and cut out a mouth on cardstock. Make it as spooky or happy as you wish.
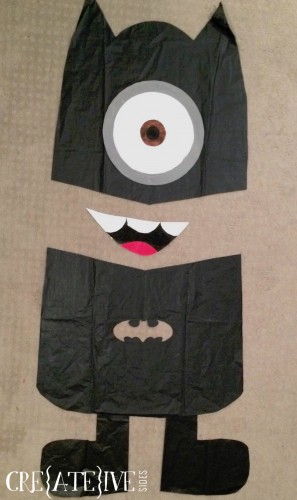
Step 4: Now you have all of your pieces, its time to set up! If your front door is painted, test in an inconspicuous spot to make sure your tape does not peel off the paint. Tape the yellow tablecloth to your front door. Make a very small cut and carefully push the tablecloth over the door handle. Repeat for the deadbolt. Tape the body and feet to the door. Repeat for the head, mouth and eye.
Happy Halloween!
The post Bat Minion Halloween Door appeared first on Creative Sides.
]]>The post Easy Halloween Handprint & Footprint Craft appeared first on Creative Sides.
]]>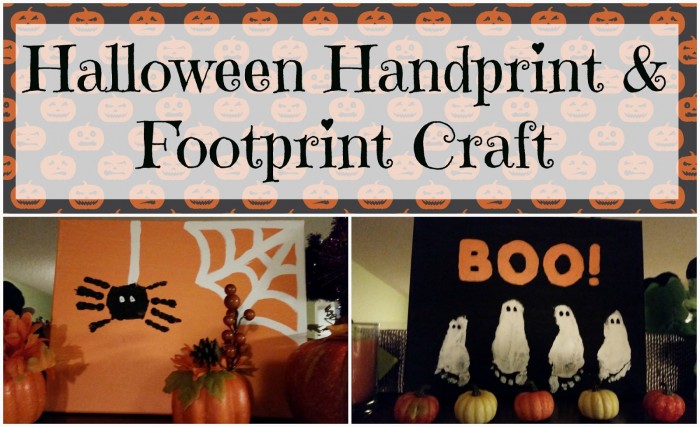
If you’re looking for a last-minute Halloween Craft to do with the kids this year, this is it! It’s easy and looks great, and you’ll be able to display it for years to come. I chose to make two canvas prints, a spider with a web and a ghost family. Here’s how!
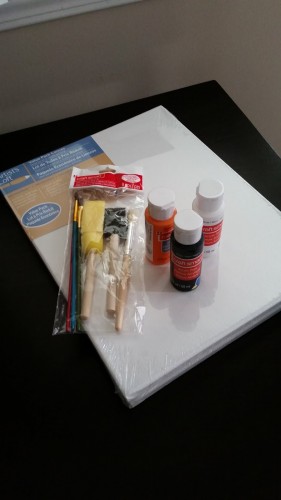
You will need:
Acrylic paint
A canvas or two
Paintbrushes (I used a fat and skinny brush, plus the black foam one)
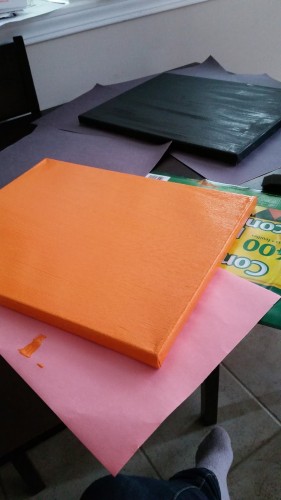
Step 1: Paint your canvas(es)
Use the foam brush to cover the entire canvas, even the sides, and let it dry. Black may need more than one coat to fully cover
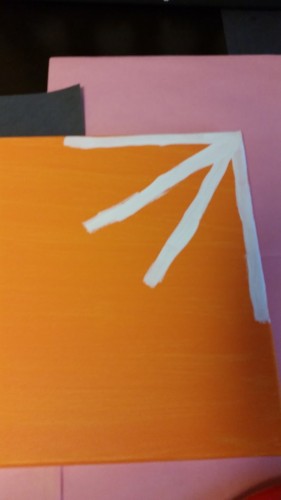
Step 2: Paint the spider web
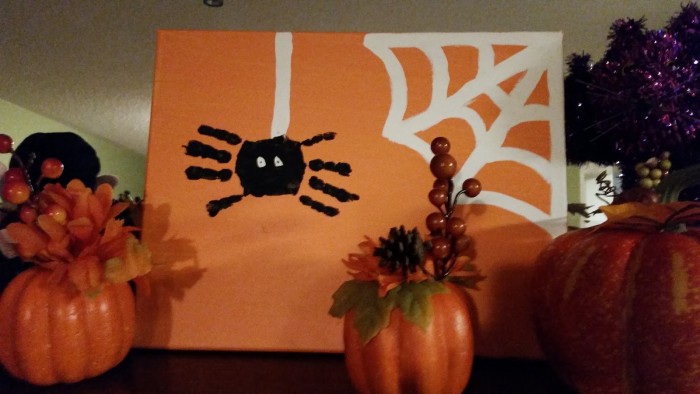
I painted the web next because I wanted it to be there before I added the hand spider, to make sure it went in the correct place and that I had enough room.
I made the base of the web like this and then I connected the strands inside the web and made a small strand hang down on the left hand side for the spider, and let them dry.
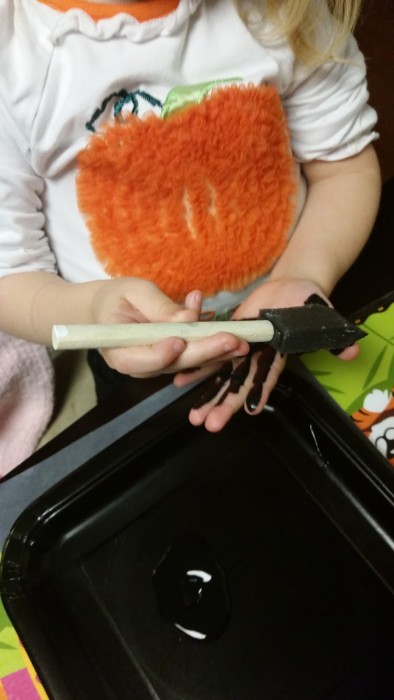
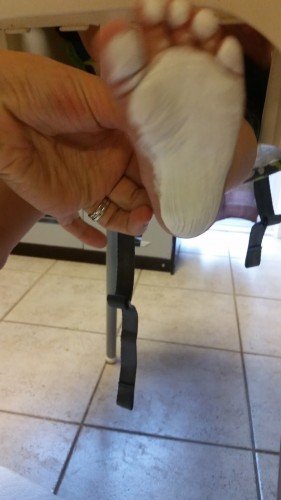
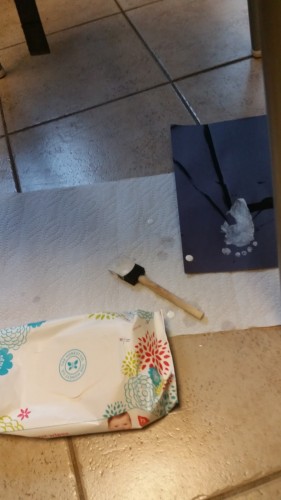
Step 3: Add in your child’s hand and footprints
For the spider, I used my 3 year old’s hands. It works best to paint the entire hand minus the thumb, and put two handprints together in opposite directions. I actually let her paint her own hand and then just wiped off the paint on her thumb with a wipe before pressing it down to make the spider.
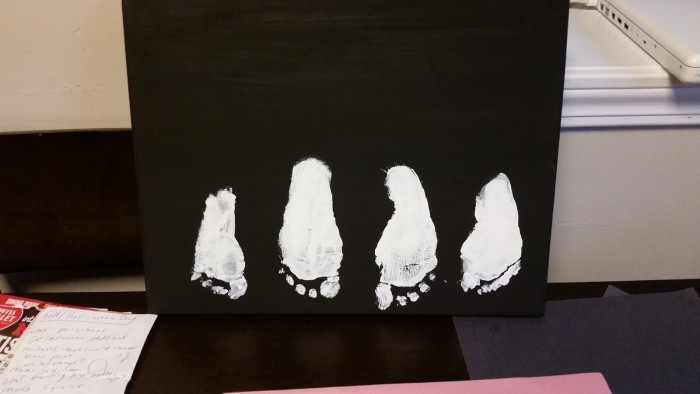
For the footprint ghosts, I used both my 1 year old and 3 year old’s footprints to make a little ghost family (just like our family of 4!)
I had the brilliant idea to do my little guy’s feet when he was in the high chair and I highly recommend this if you’re doing a baby or even toddler’s feet! I did a tester on a scrap piece of paper and had wipes and paper towels handy and it worked out very well.
Step 4: Add lettering and other details
I traced letter magnets from my fridge in pencil for the BOO, and then filled them in with orange paint using a small paintbrush. I added eyes for the ghosts and spider with the sponge brush. I was going to add writing to the spider print but decided against it. In hindsight I probably should have made the web bigger or the spider further down, but I still like it as is.
Here are the finished products!
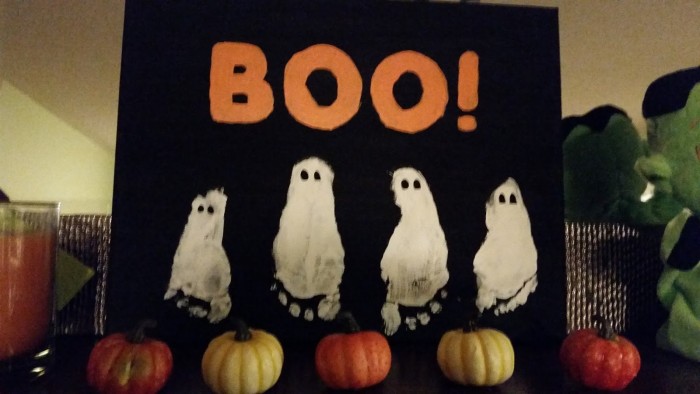
The kids and I love them, and they look great on our Halloween-themed mantel too!

This craft would work great with regular paint on construction paper too, but I love that we can display these every year, and look back and see how much the kids’ hands and feet have grown!
The post Easy Halloween Handprint & Footprint Craft appeared first on Creative Sides.
]]>The post Pumpkin Rice Krispie Treats appeared first on Creative Sides.
]]>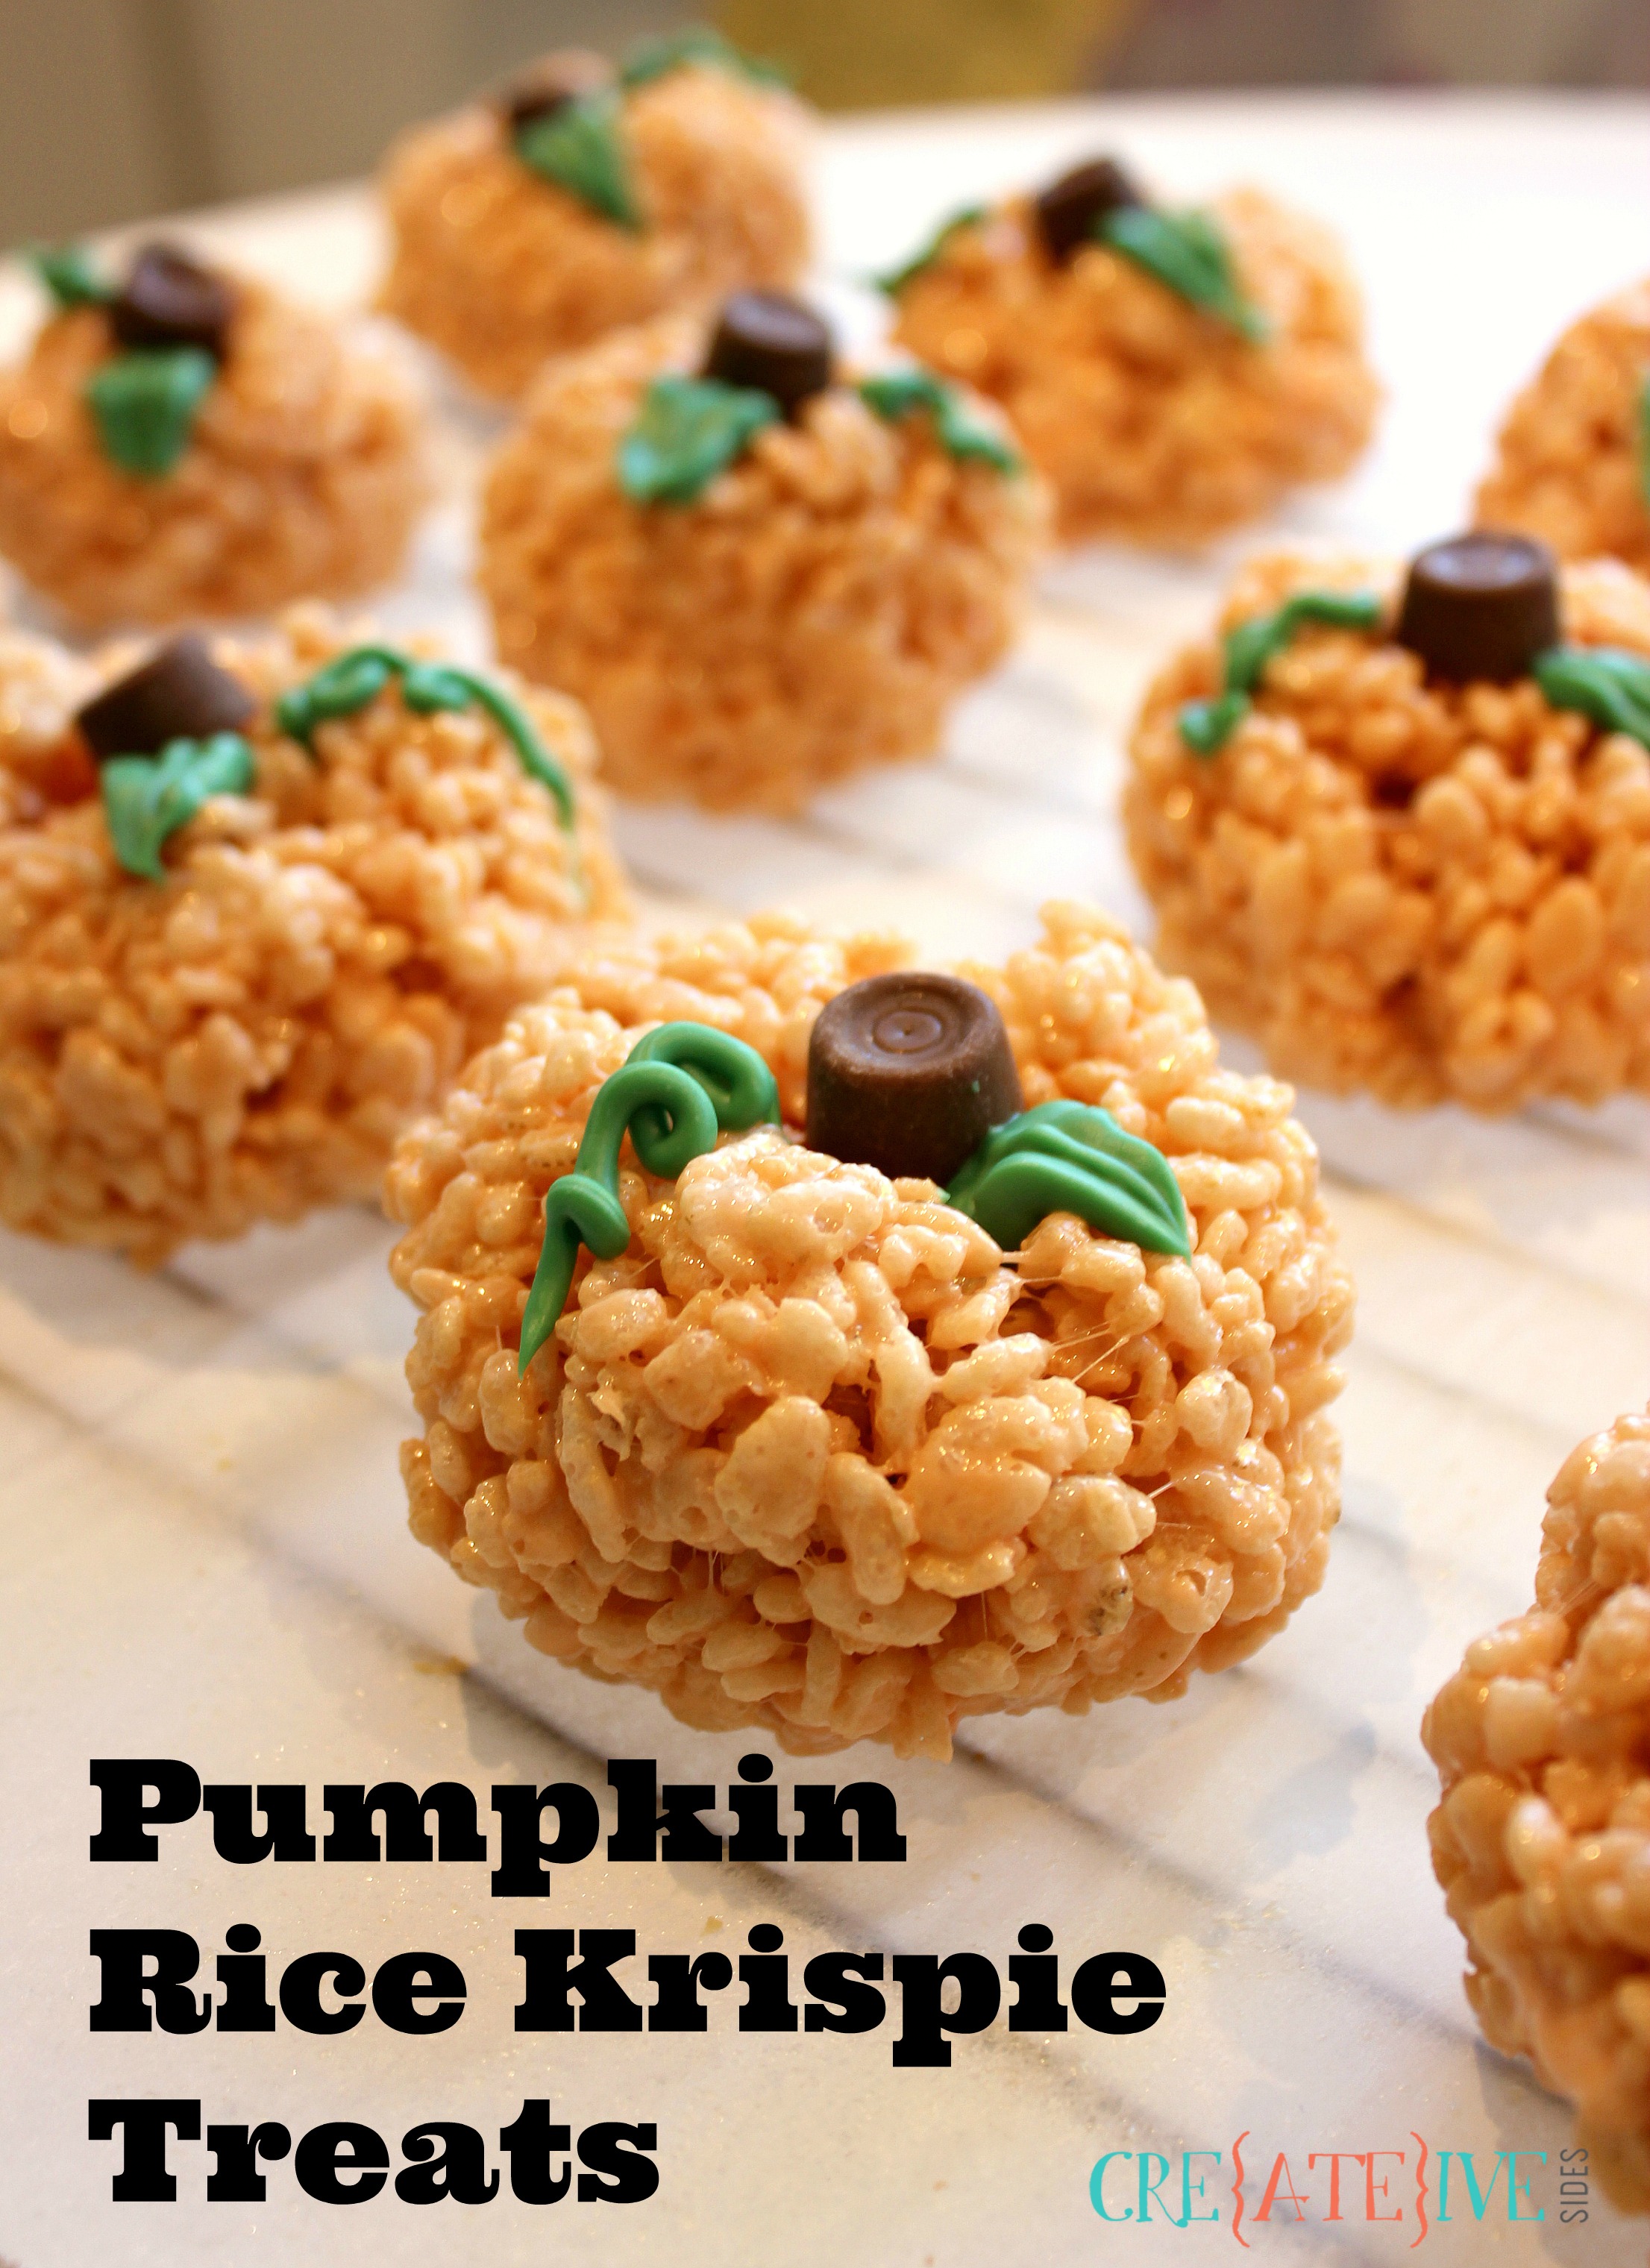
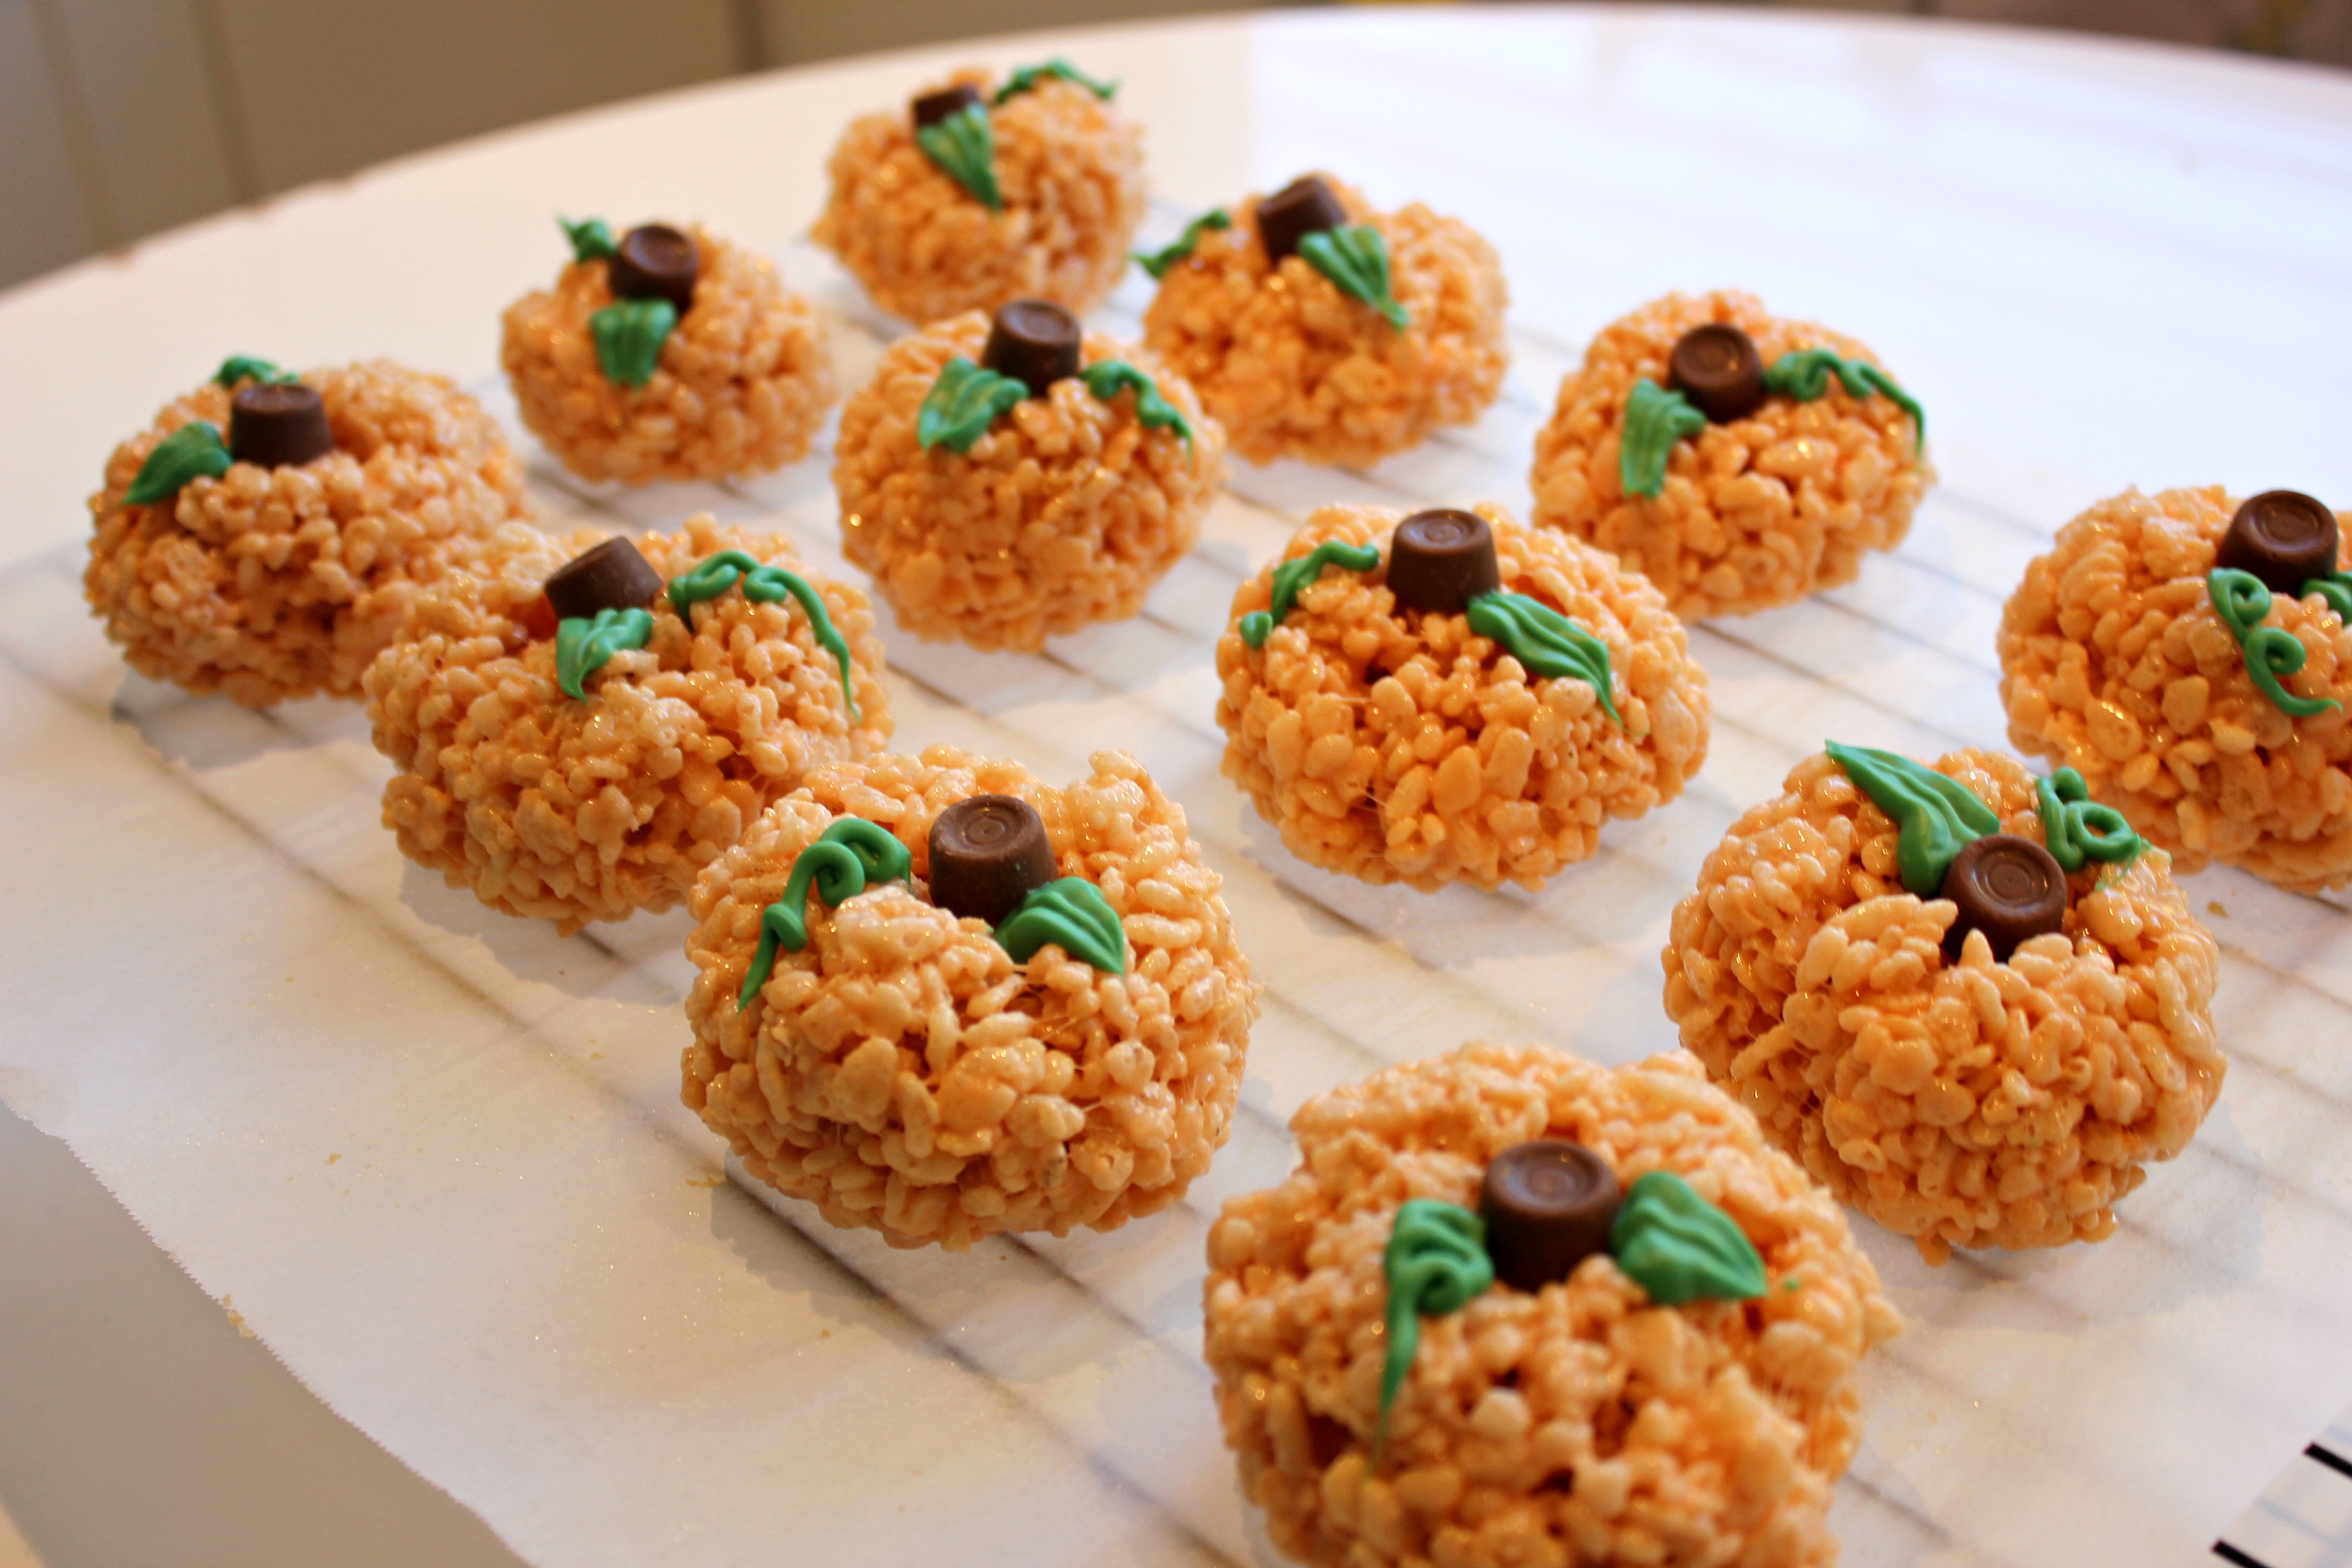
There is no denying that summer is gone. We wear sweaters now and say things like “no, it’s a school night!” and never think twice anymore about warming up the place too much by turning on the oven. Sometimes I find myself reluctant to immediately embrace fall because it means admitting summer is gone, but really autumn days are so beautiful, the colours are so terrific and all the fall fashions are pretty incredible too! So, here I am embracing fall with reckless abandon and creating some pumpkin Rice Krispie treats for Peyton and her classmates to enjoy. These are a fairly simple variation of classic Rice Krispie squares and come together just about as quickly.
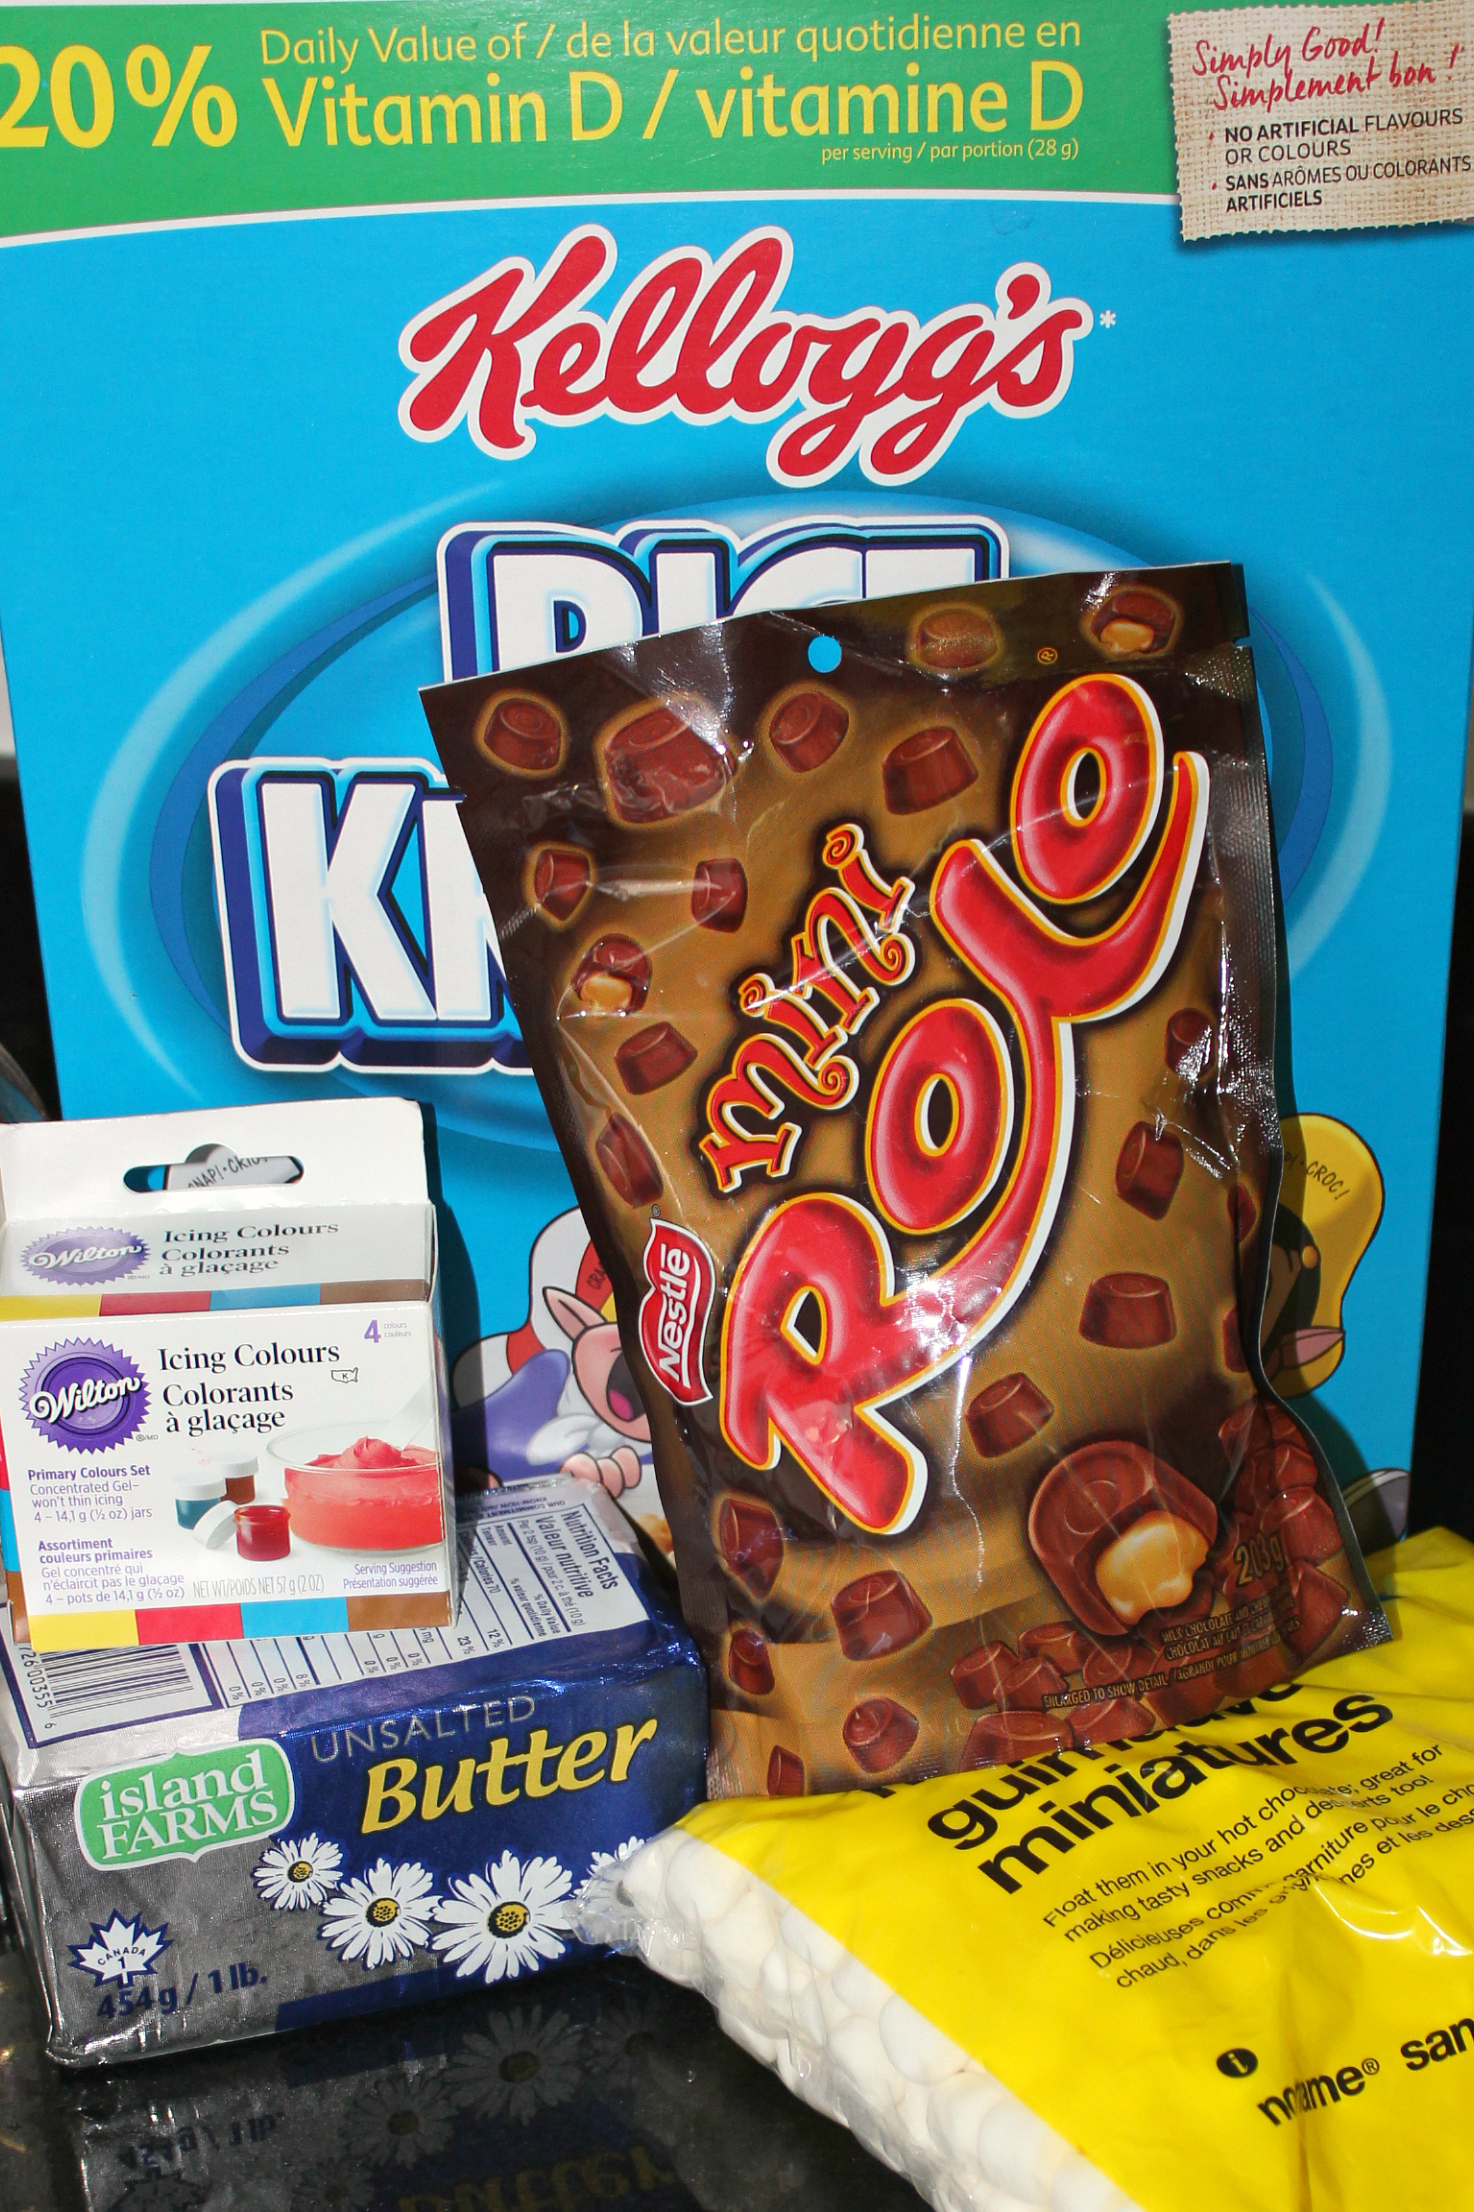
Ingredients (yields 12):
3 Tbsp butter
250g marshmallows (approx 4 cups of mini marshmallows)
5 cups of Rice Krispies
1 tsp vanilla (optional)
Orange (or red and yellow) Wilton Gel Icing Colours
Mini Rolos ( 12 for pumpkin stems)
1/4 cup dark green Wilton Candy Melts
Non stick cooking spray
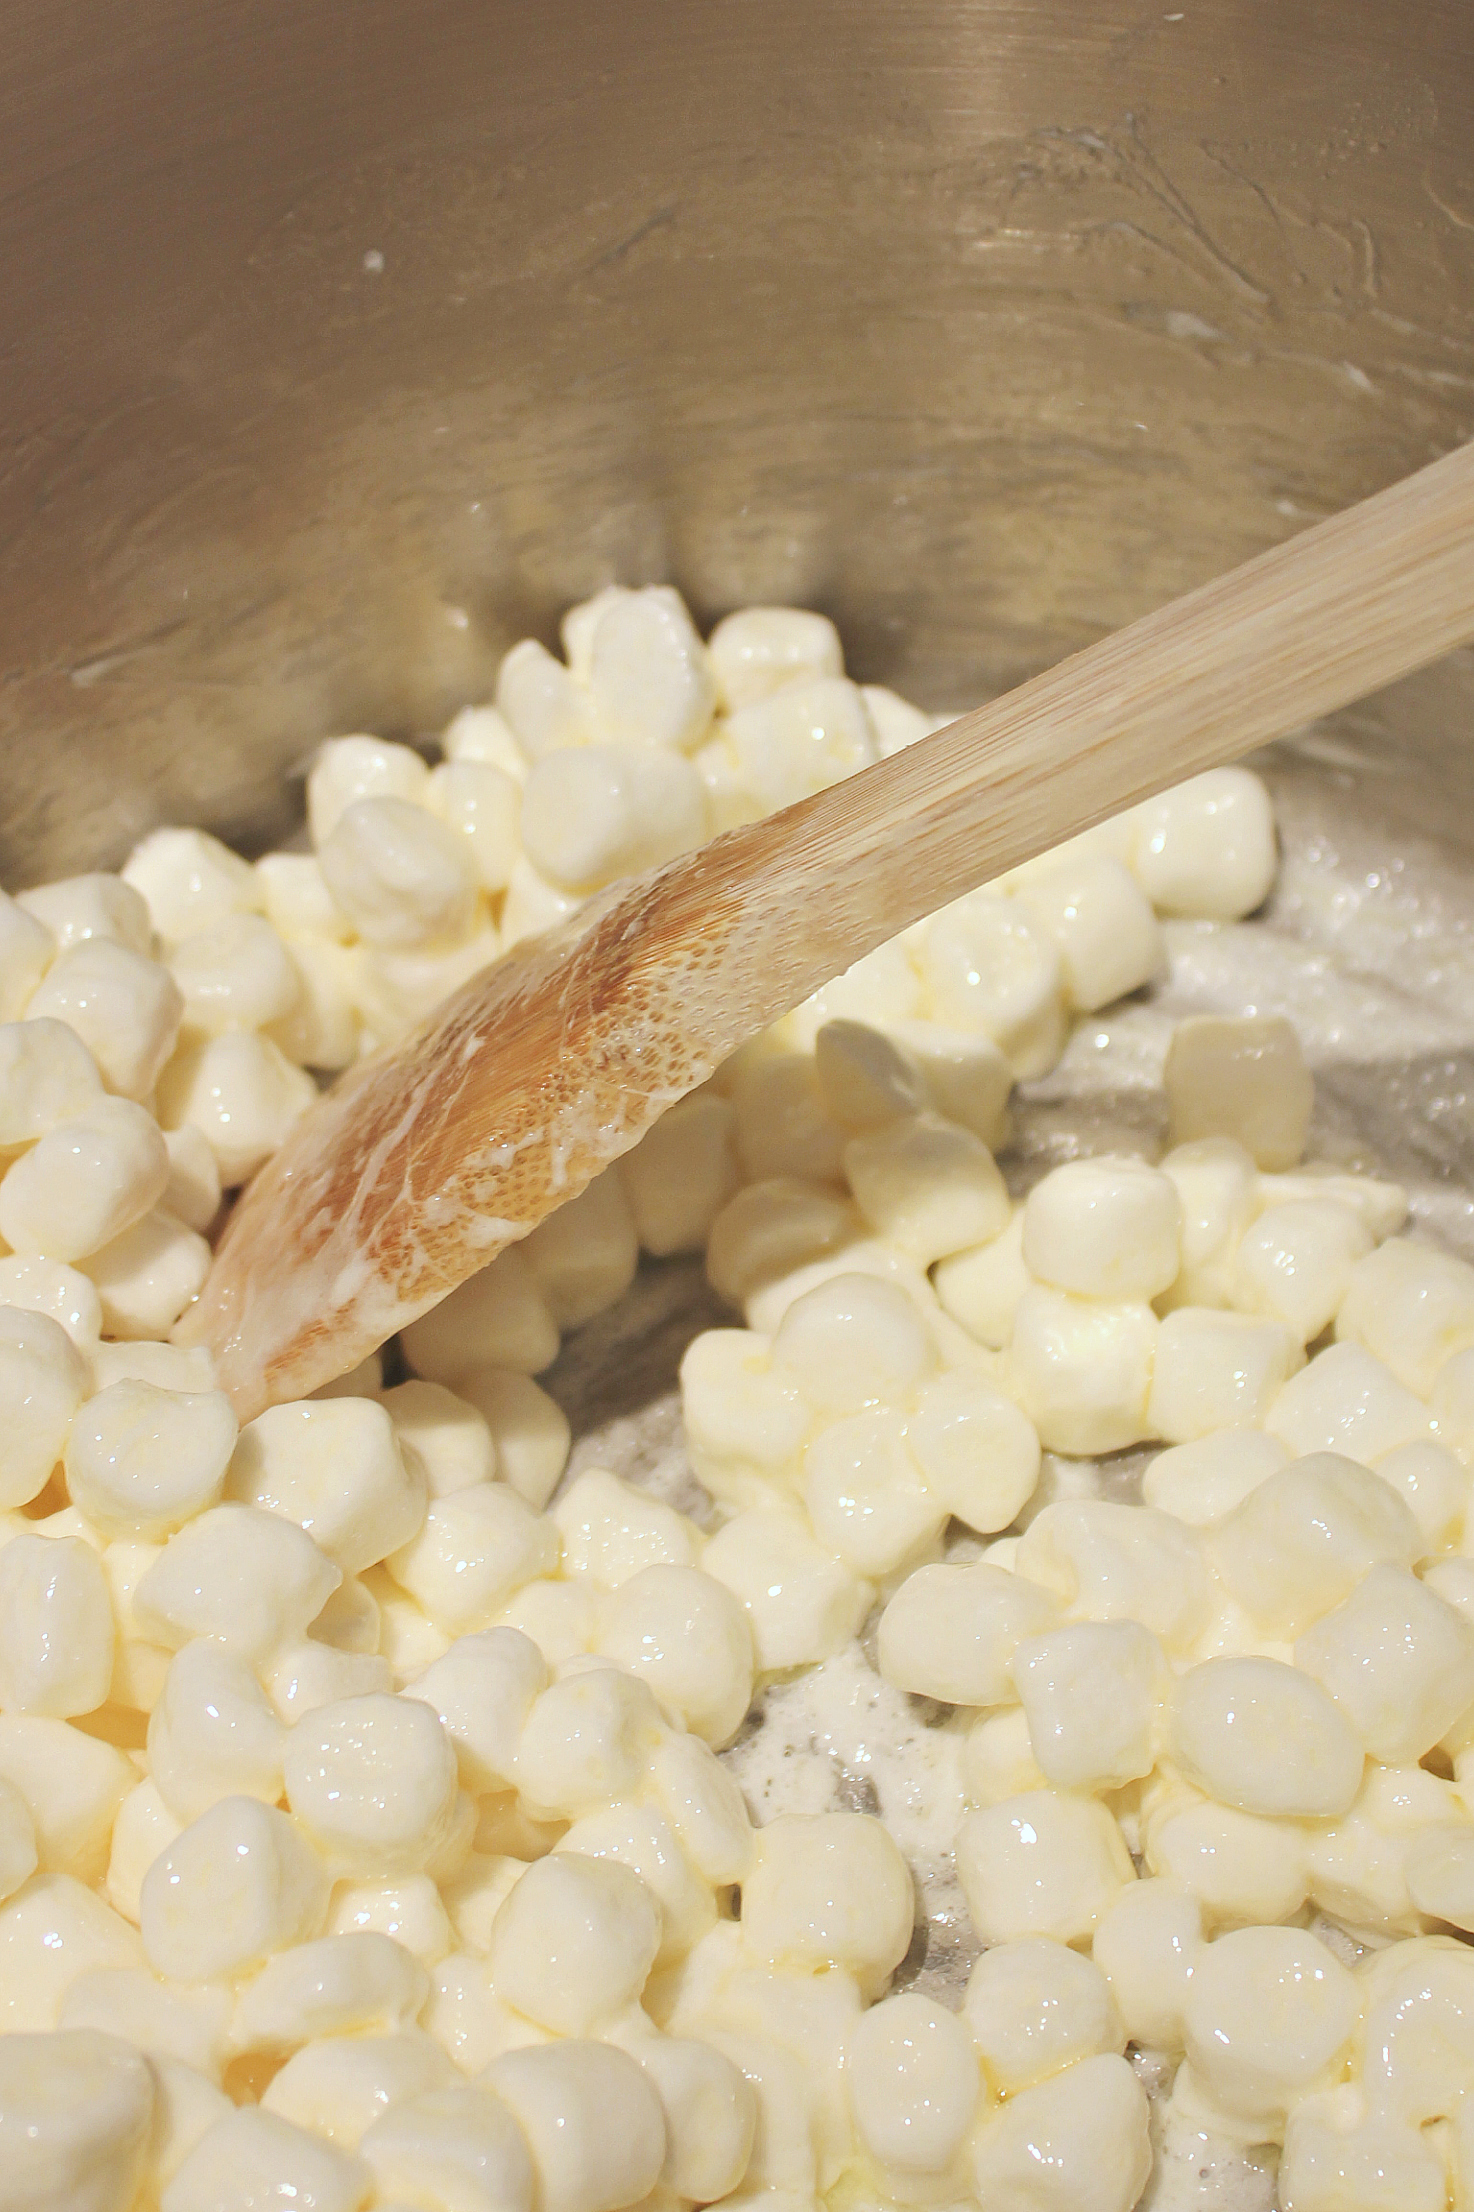
Step 1: In a large pot melt butter and marshmallows over medium heat, stirring until nearly completely melted. Turn off heat.
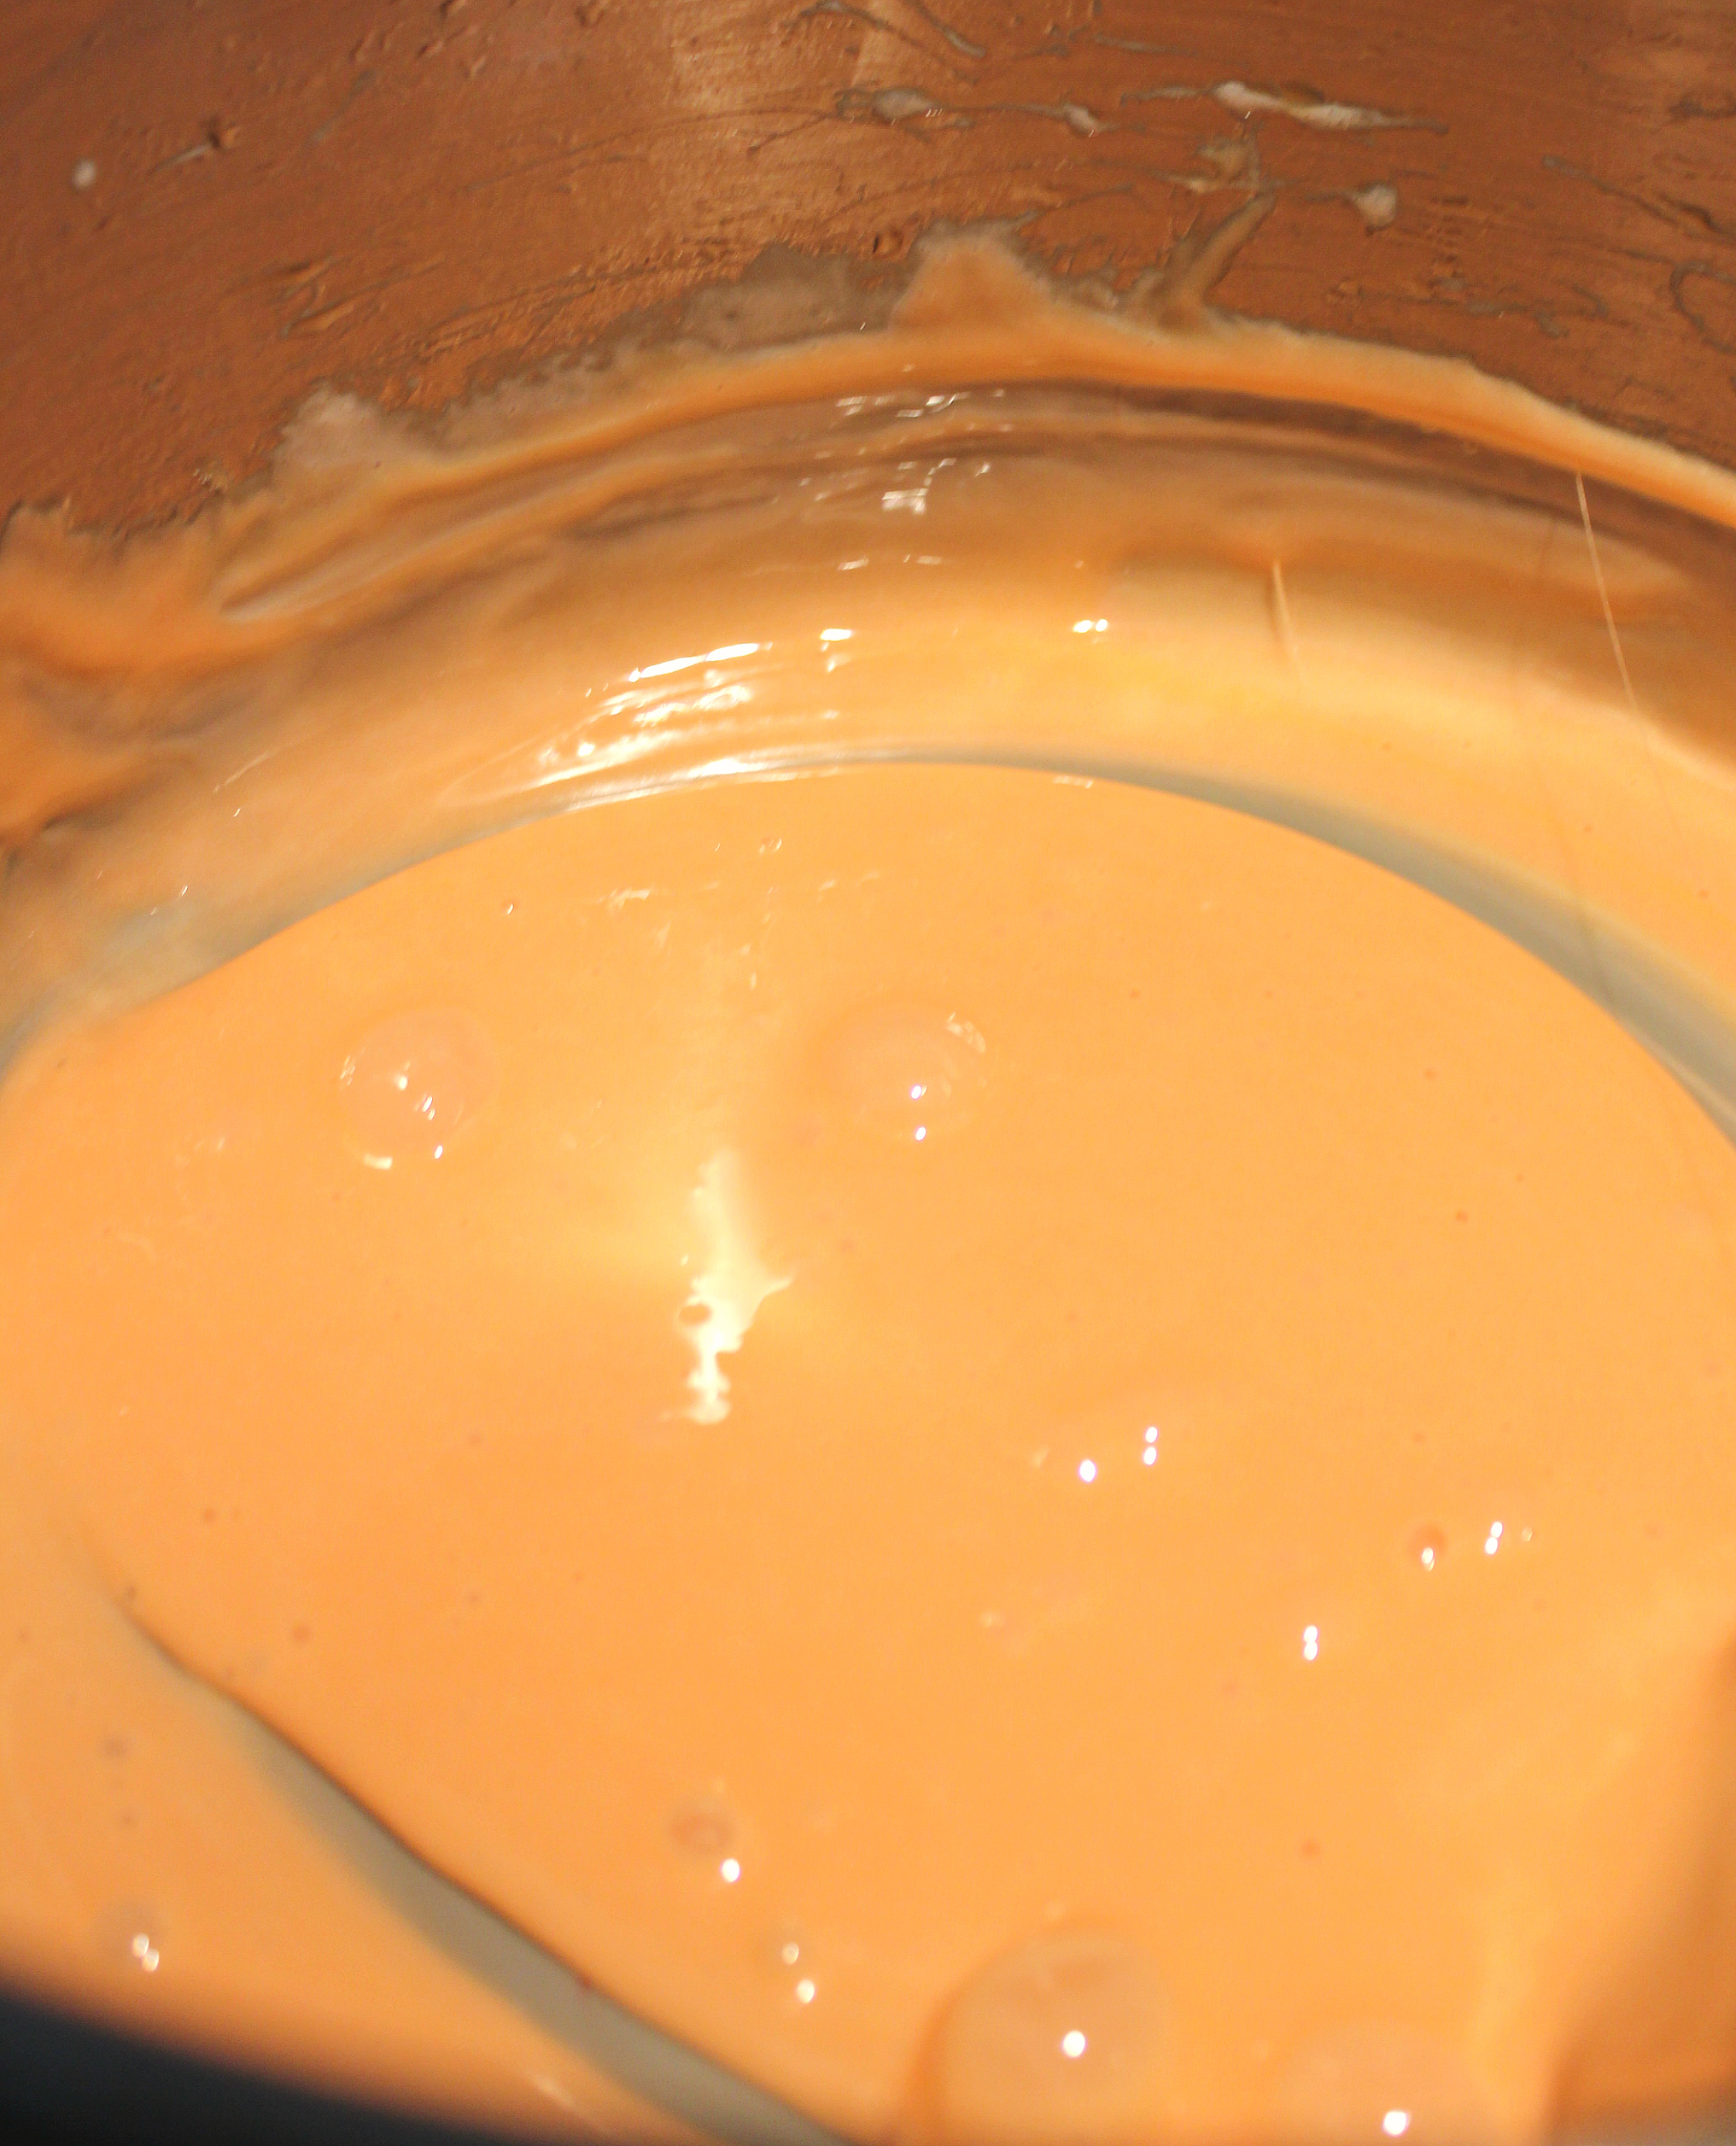
Step 2: Mix in vanilla, if using, and then add colouring until as orange as you dare, keeping in mind that once the rice cereal is mixed in the colour will not be as strong.
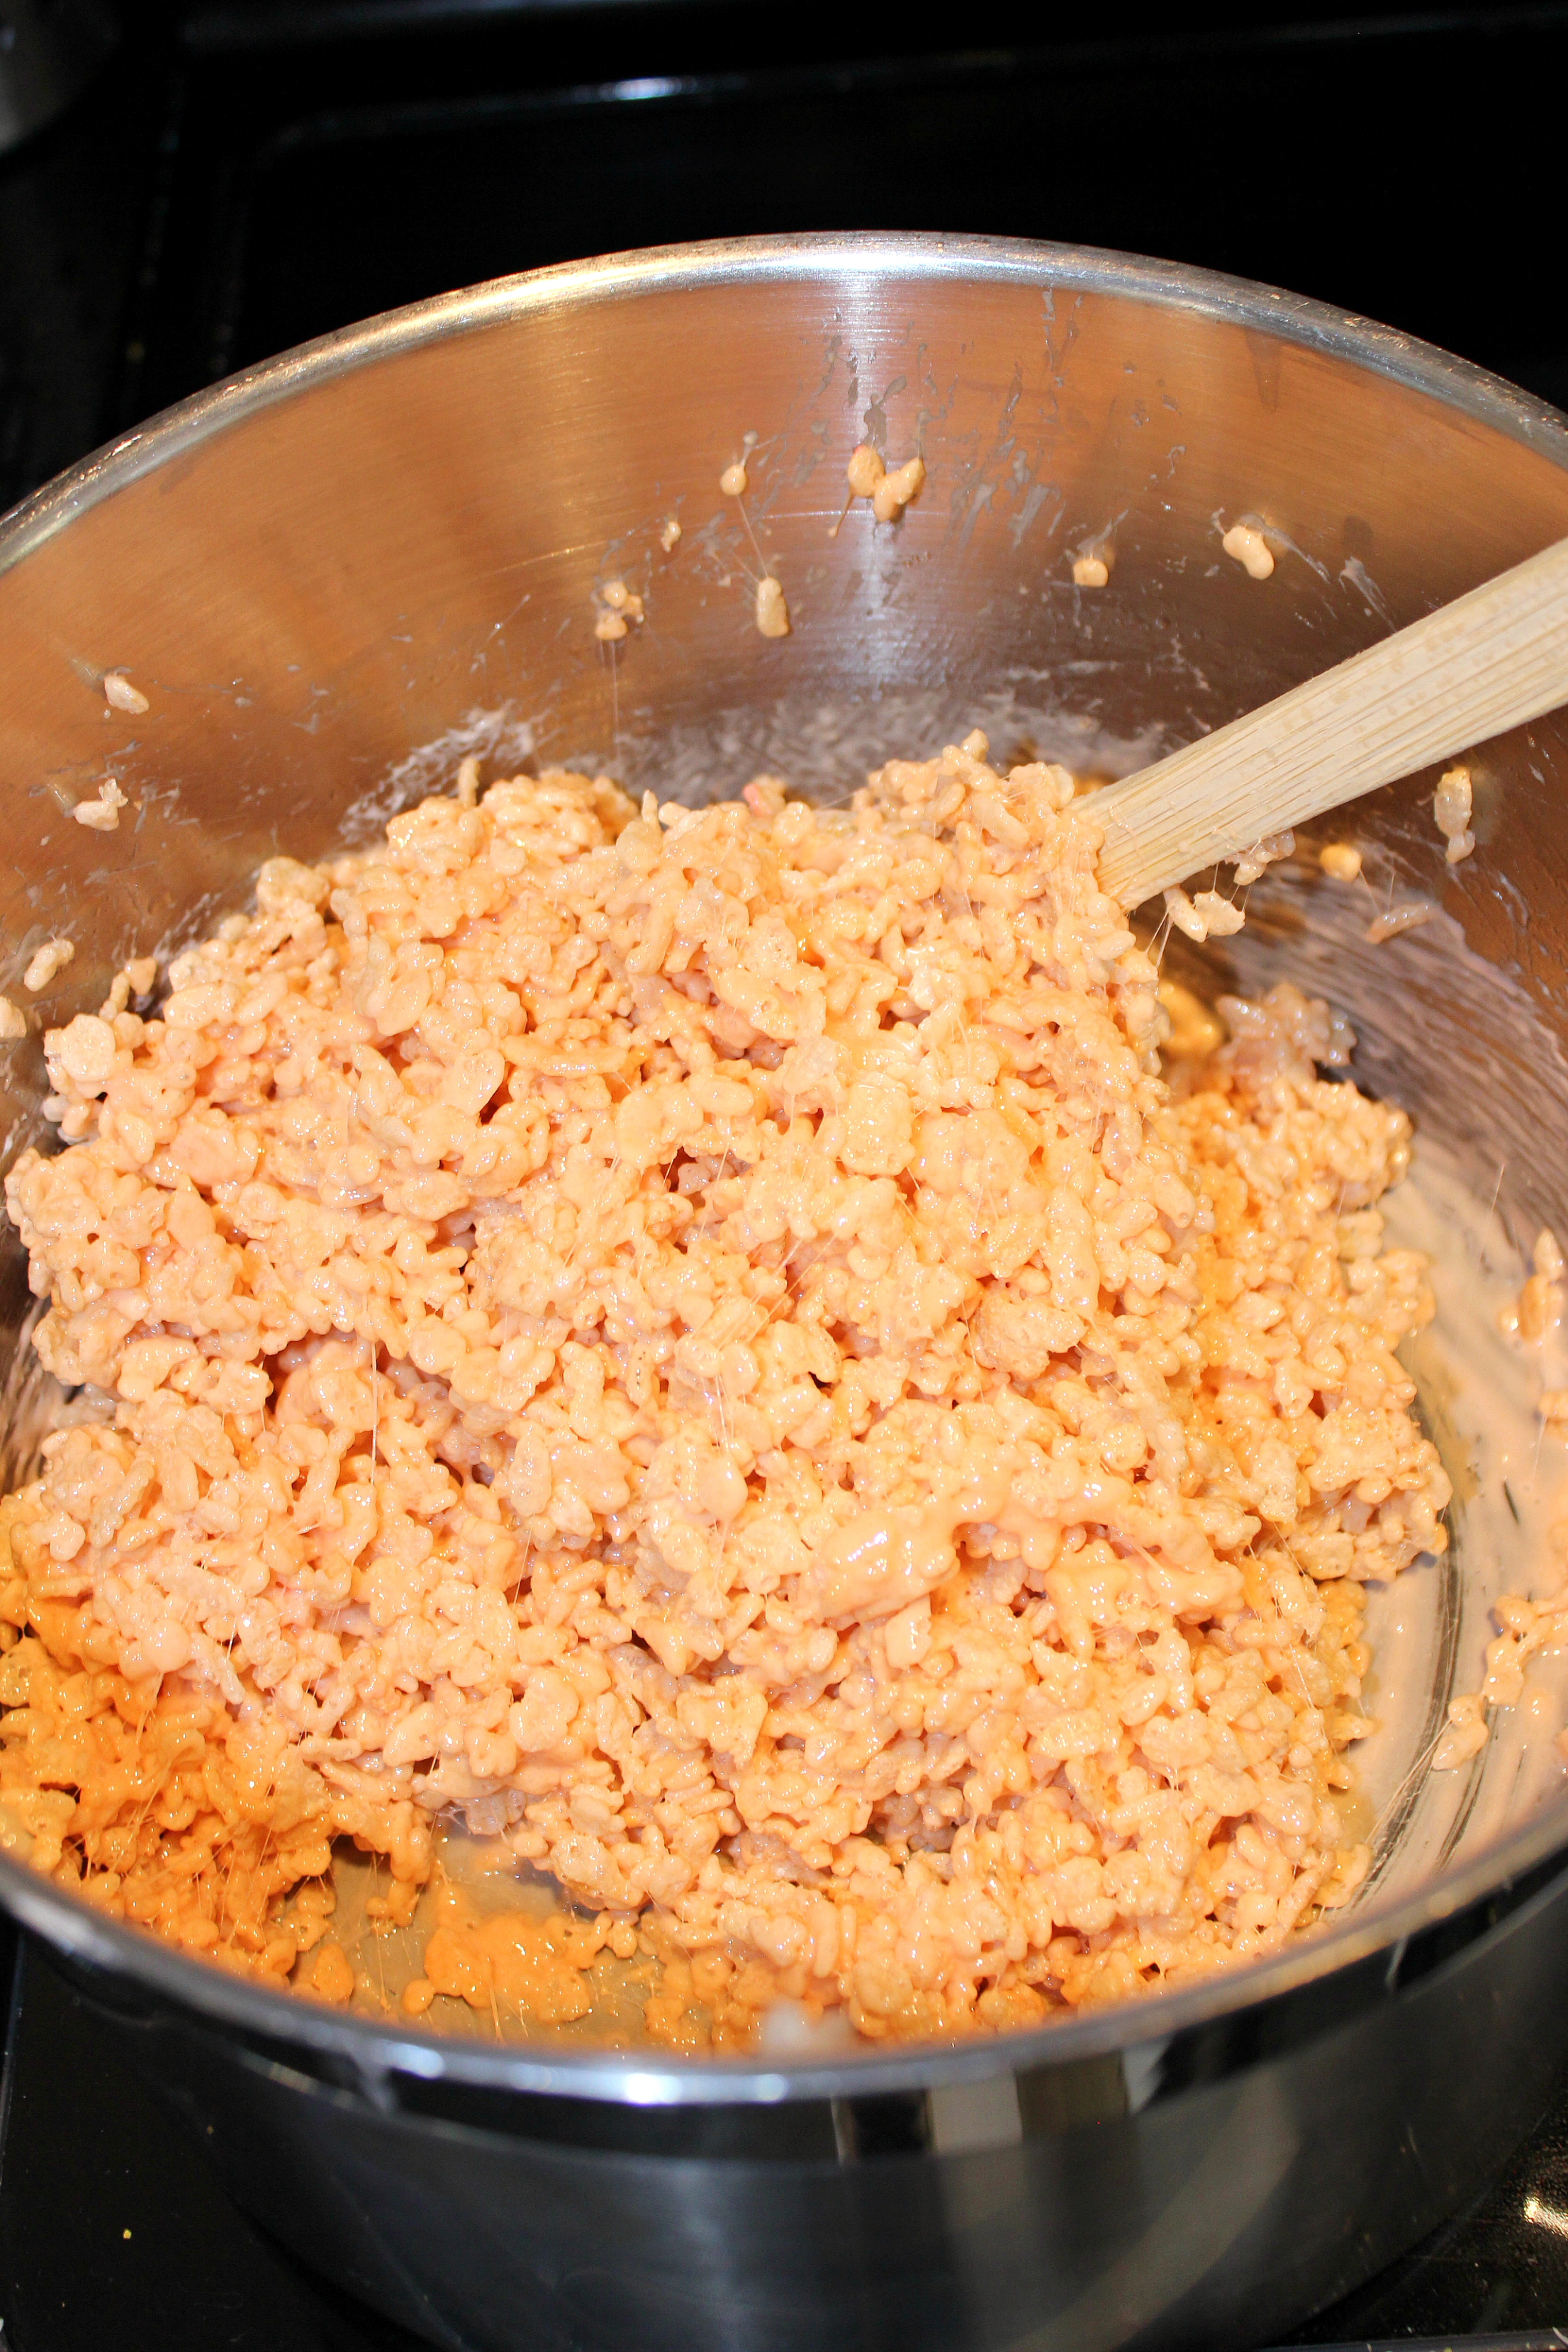
Step 3: Working quickly, pour in the five cups of rice cereal and stir until evenly combined.
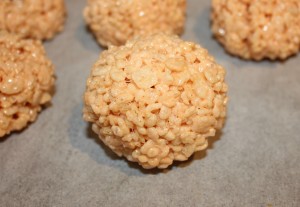
Step 4: Next spray your hands with non stick cooking spray (this makes all the difference between success and a sticky mess) and start shaping the Rice Krispie mixture into balls with your hands (think making small snowballs and firmly roll into a ball between hands) and placing on a parchment lined tray.
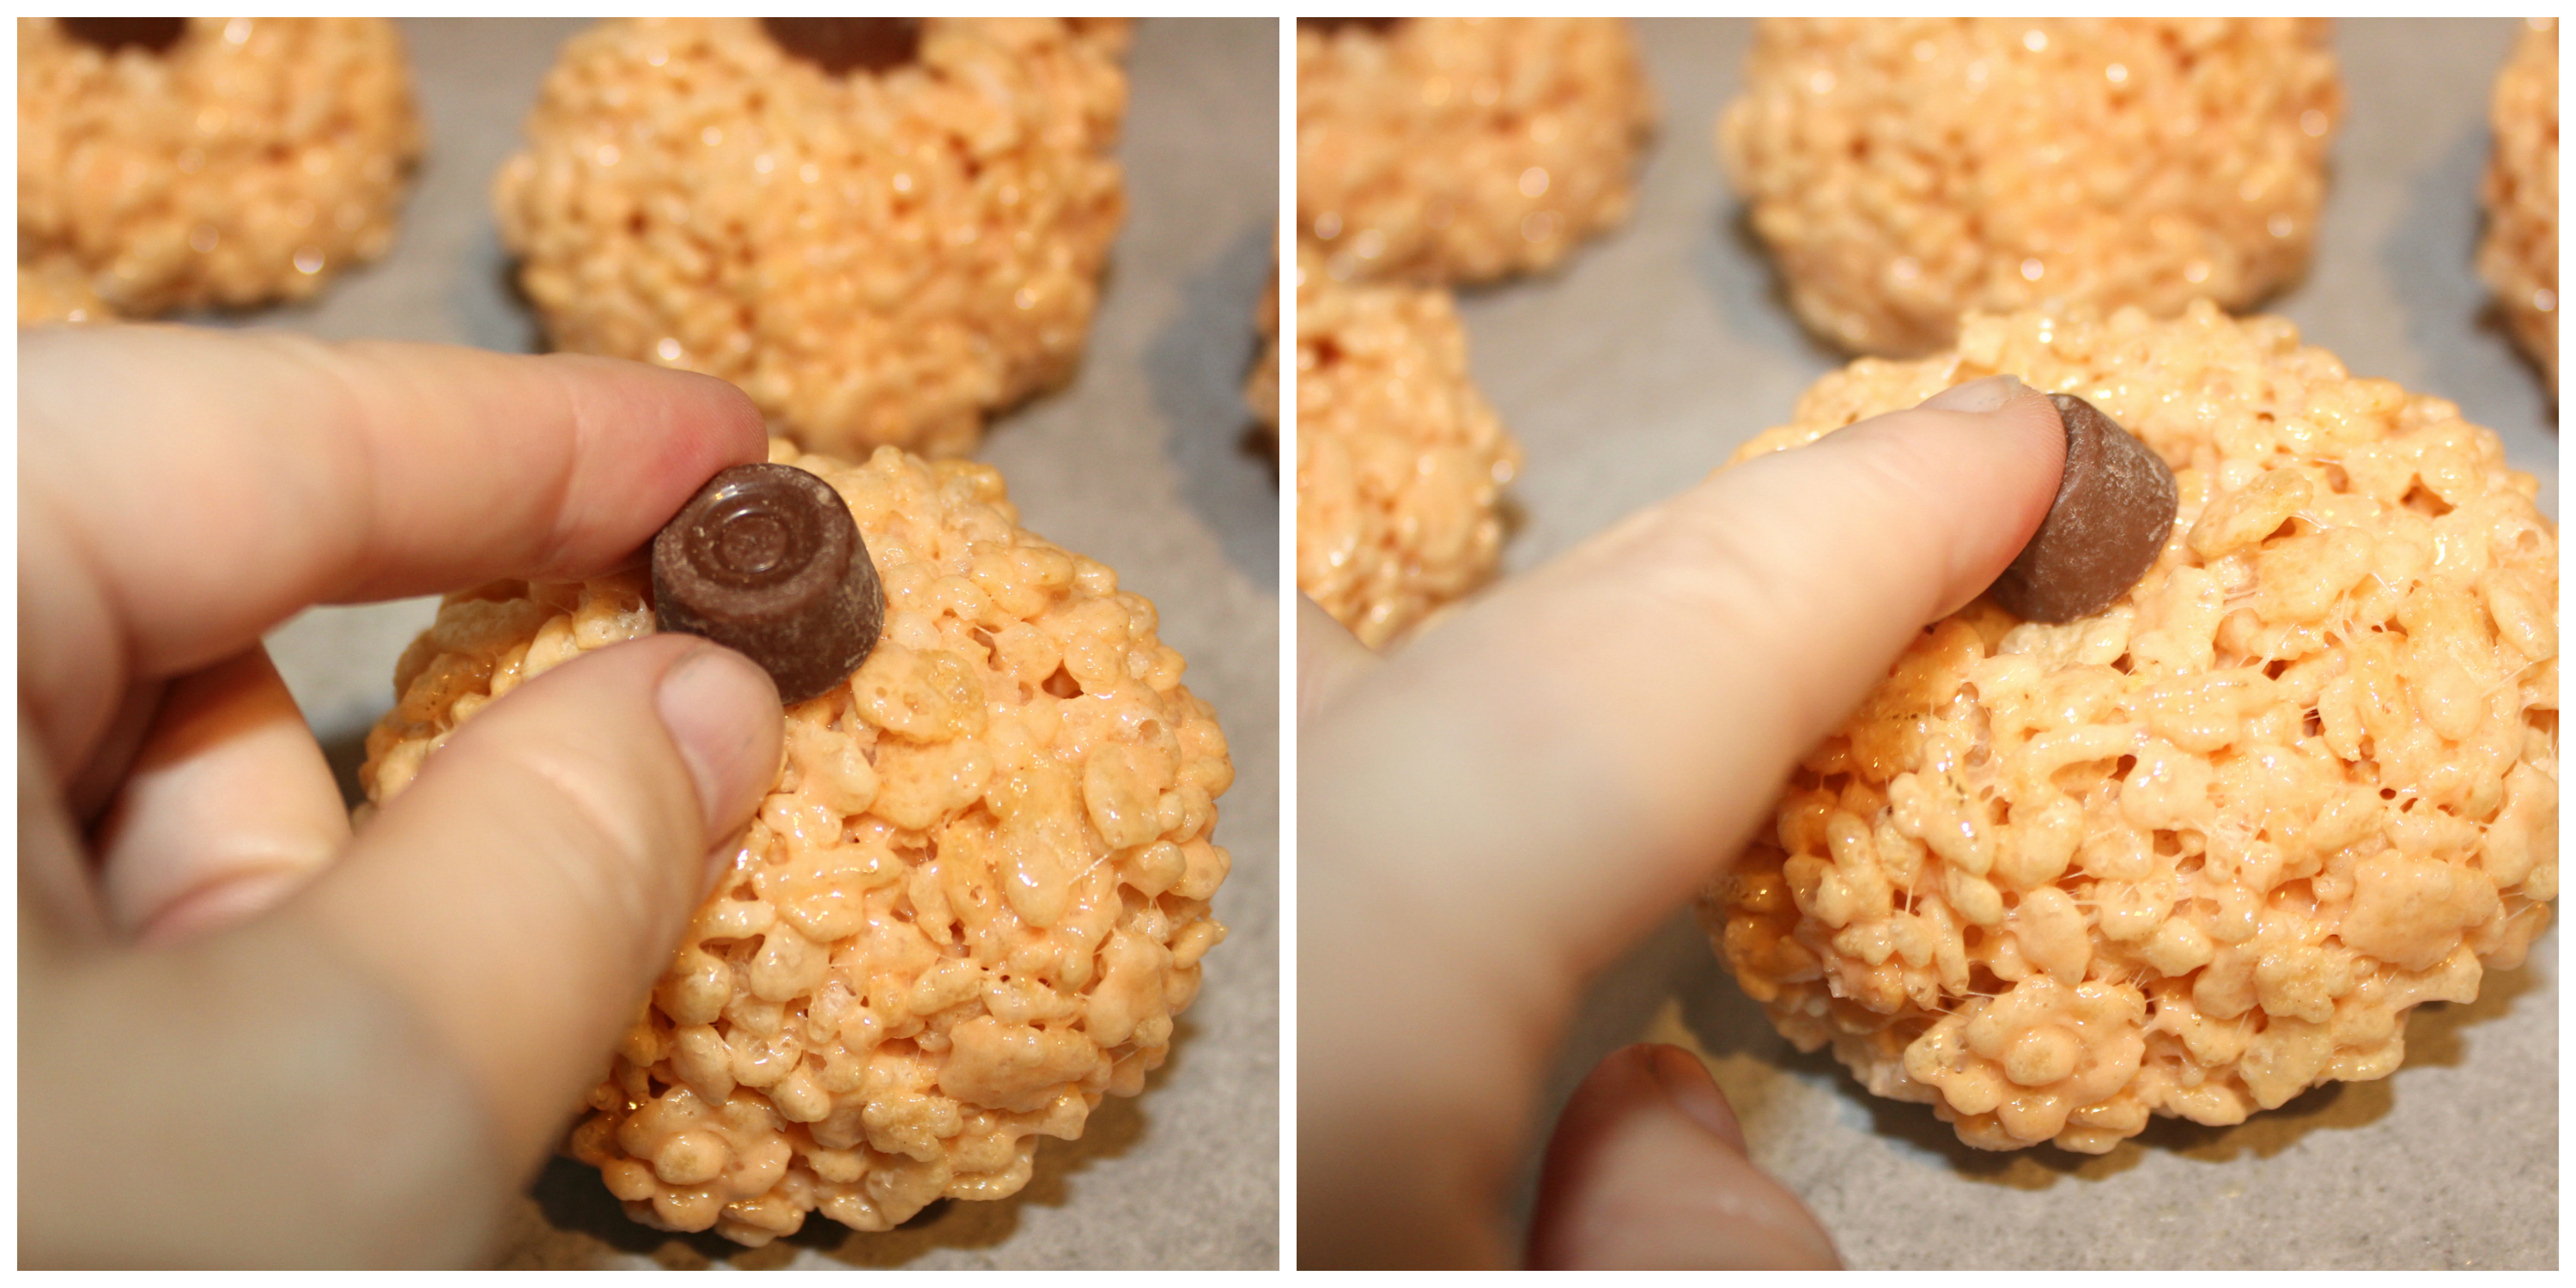
Step 5: Take a mini Rolo and press down into the centre, causing the pumpkin shape.
Step 6: Prepare a piping bag with a medium sized leaf tip (like Wilton #69), and melt the green Candy Melts in the microwave for 30 seconds and stir. Continue in 10 second increments and stirring until completely melted. Pour melted Candy Melts into piping bag and pipe a leaf on each pumpkin top.
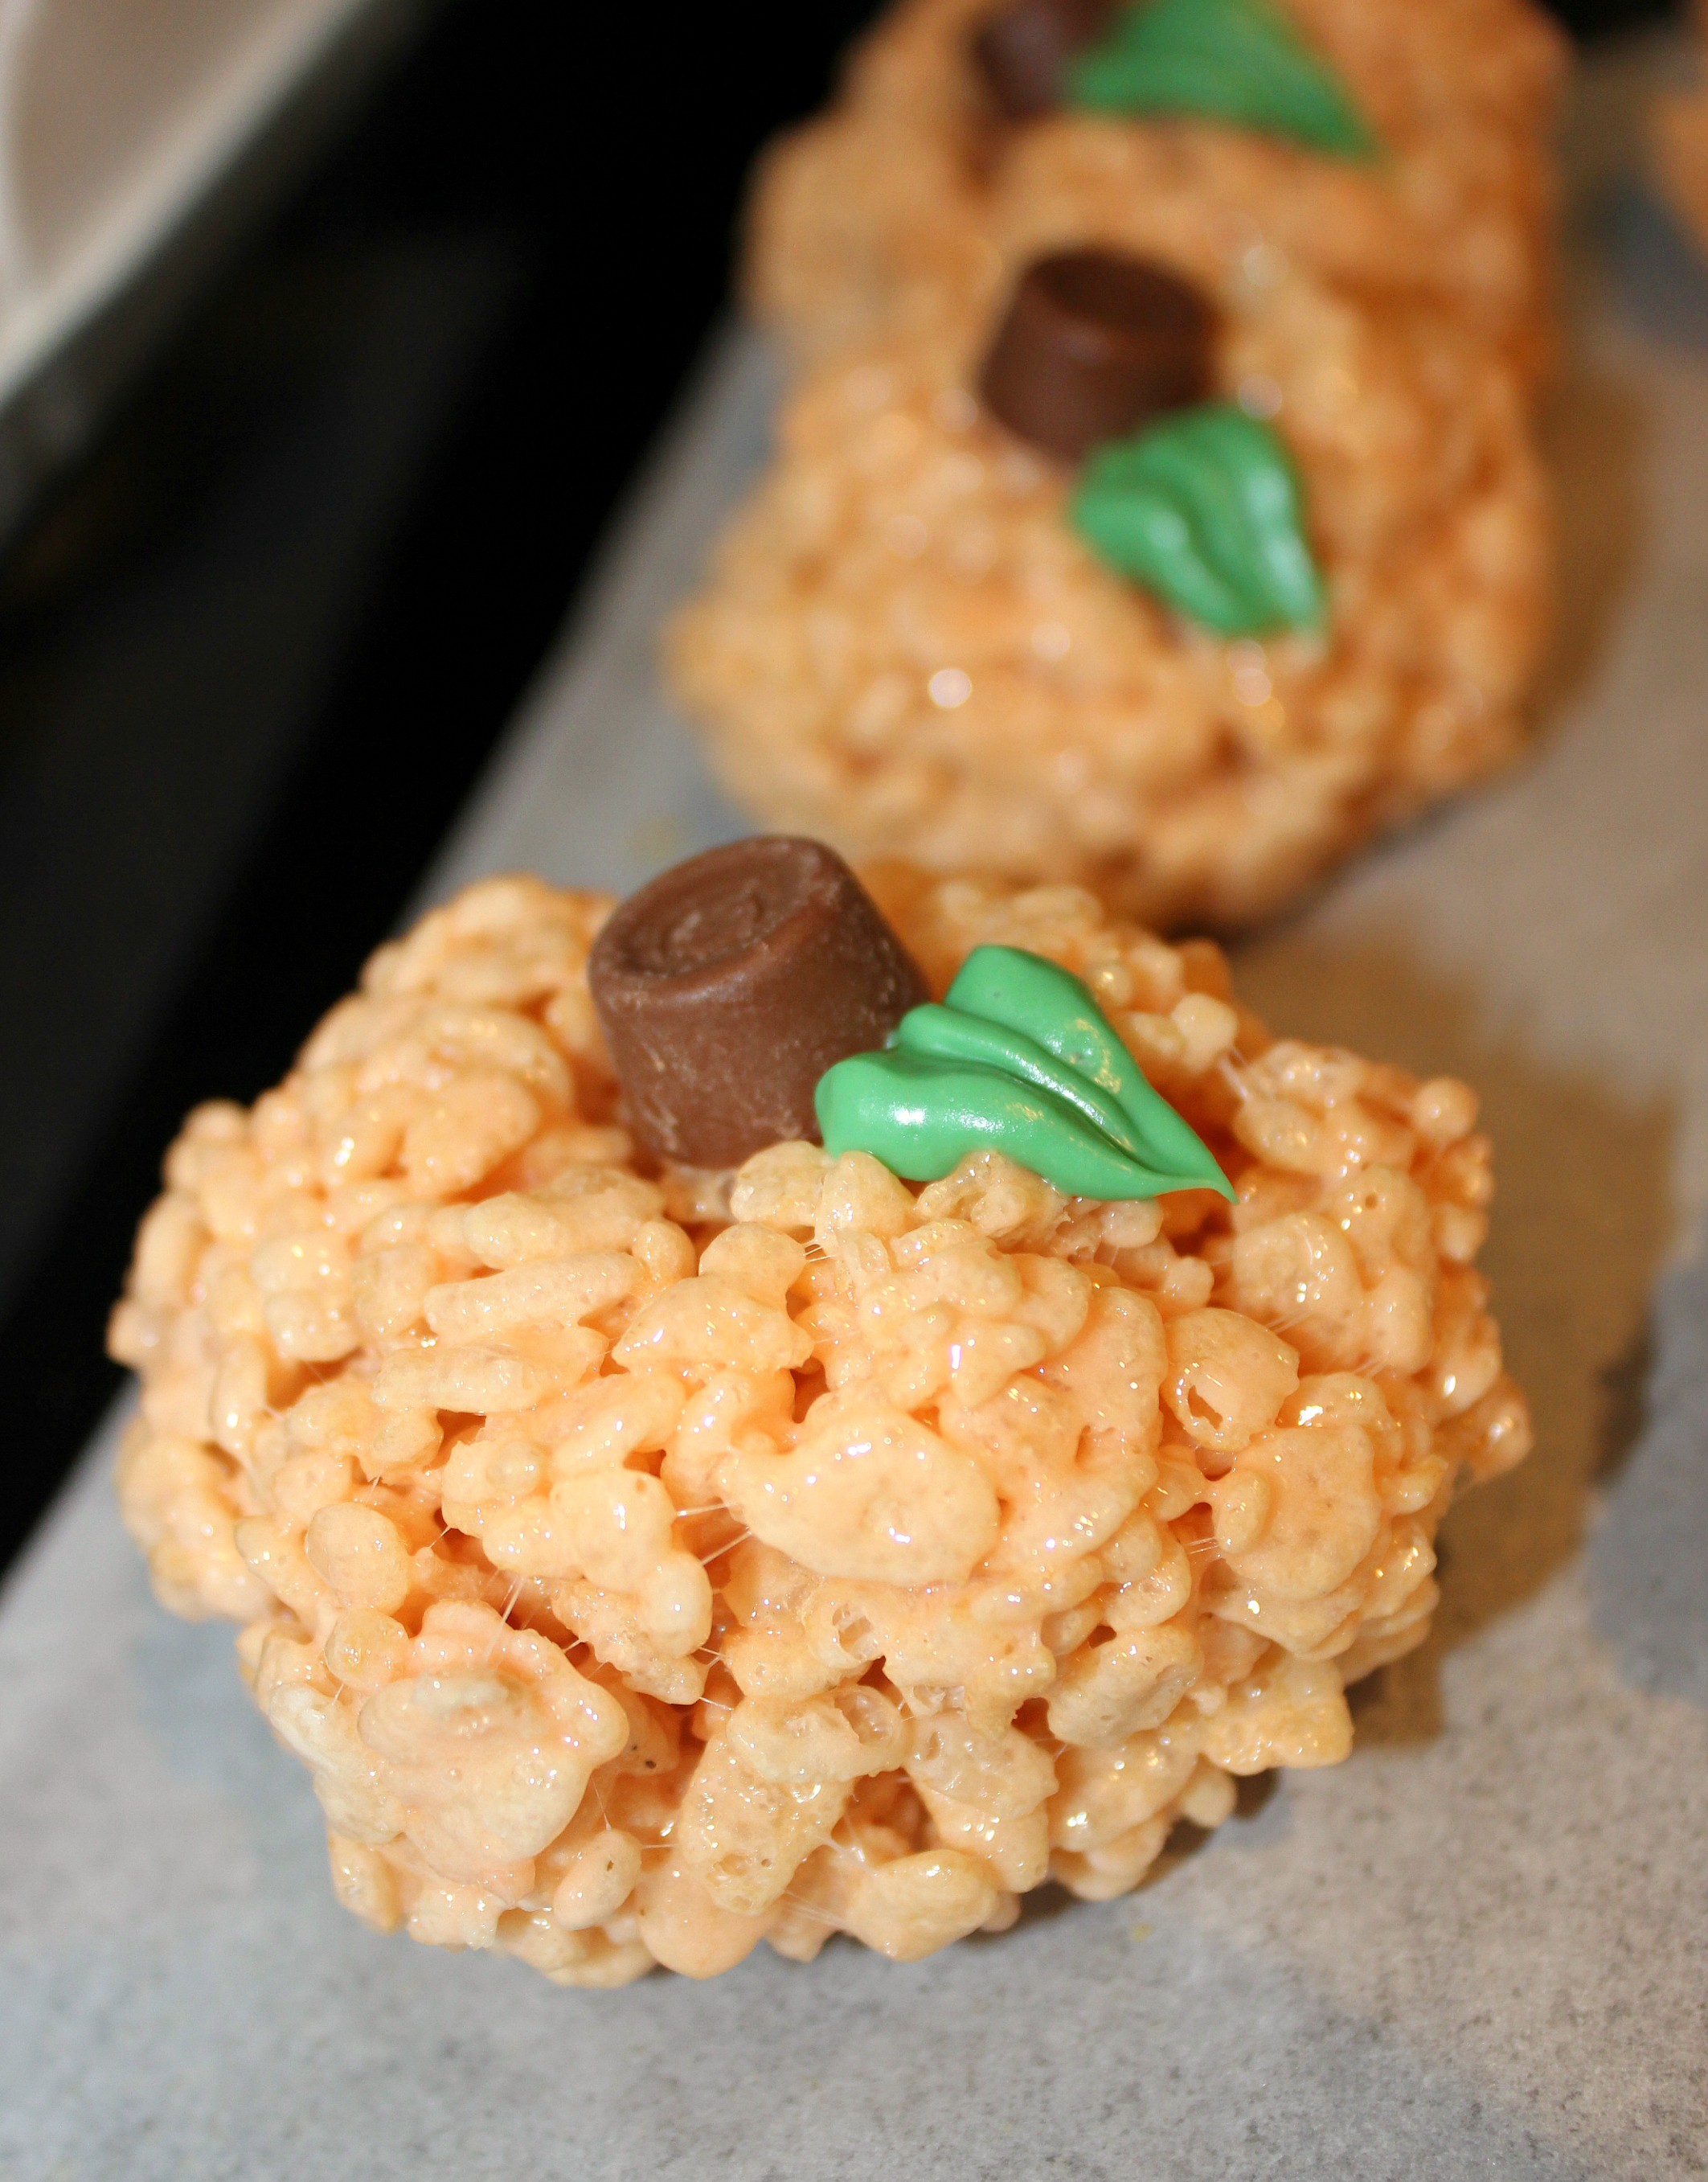
Step 7: Change to a small round tip on the piping bag and add a tendril coil to each of the pumpkins.
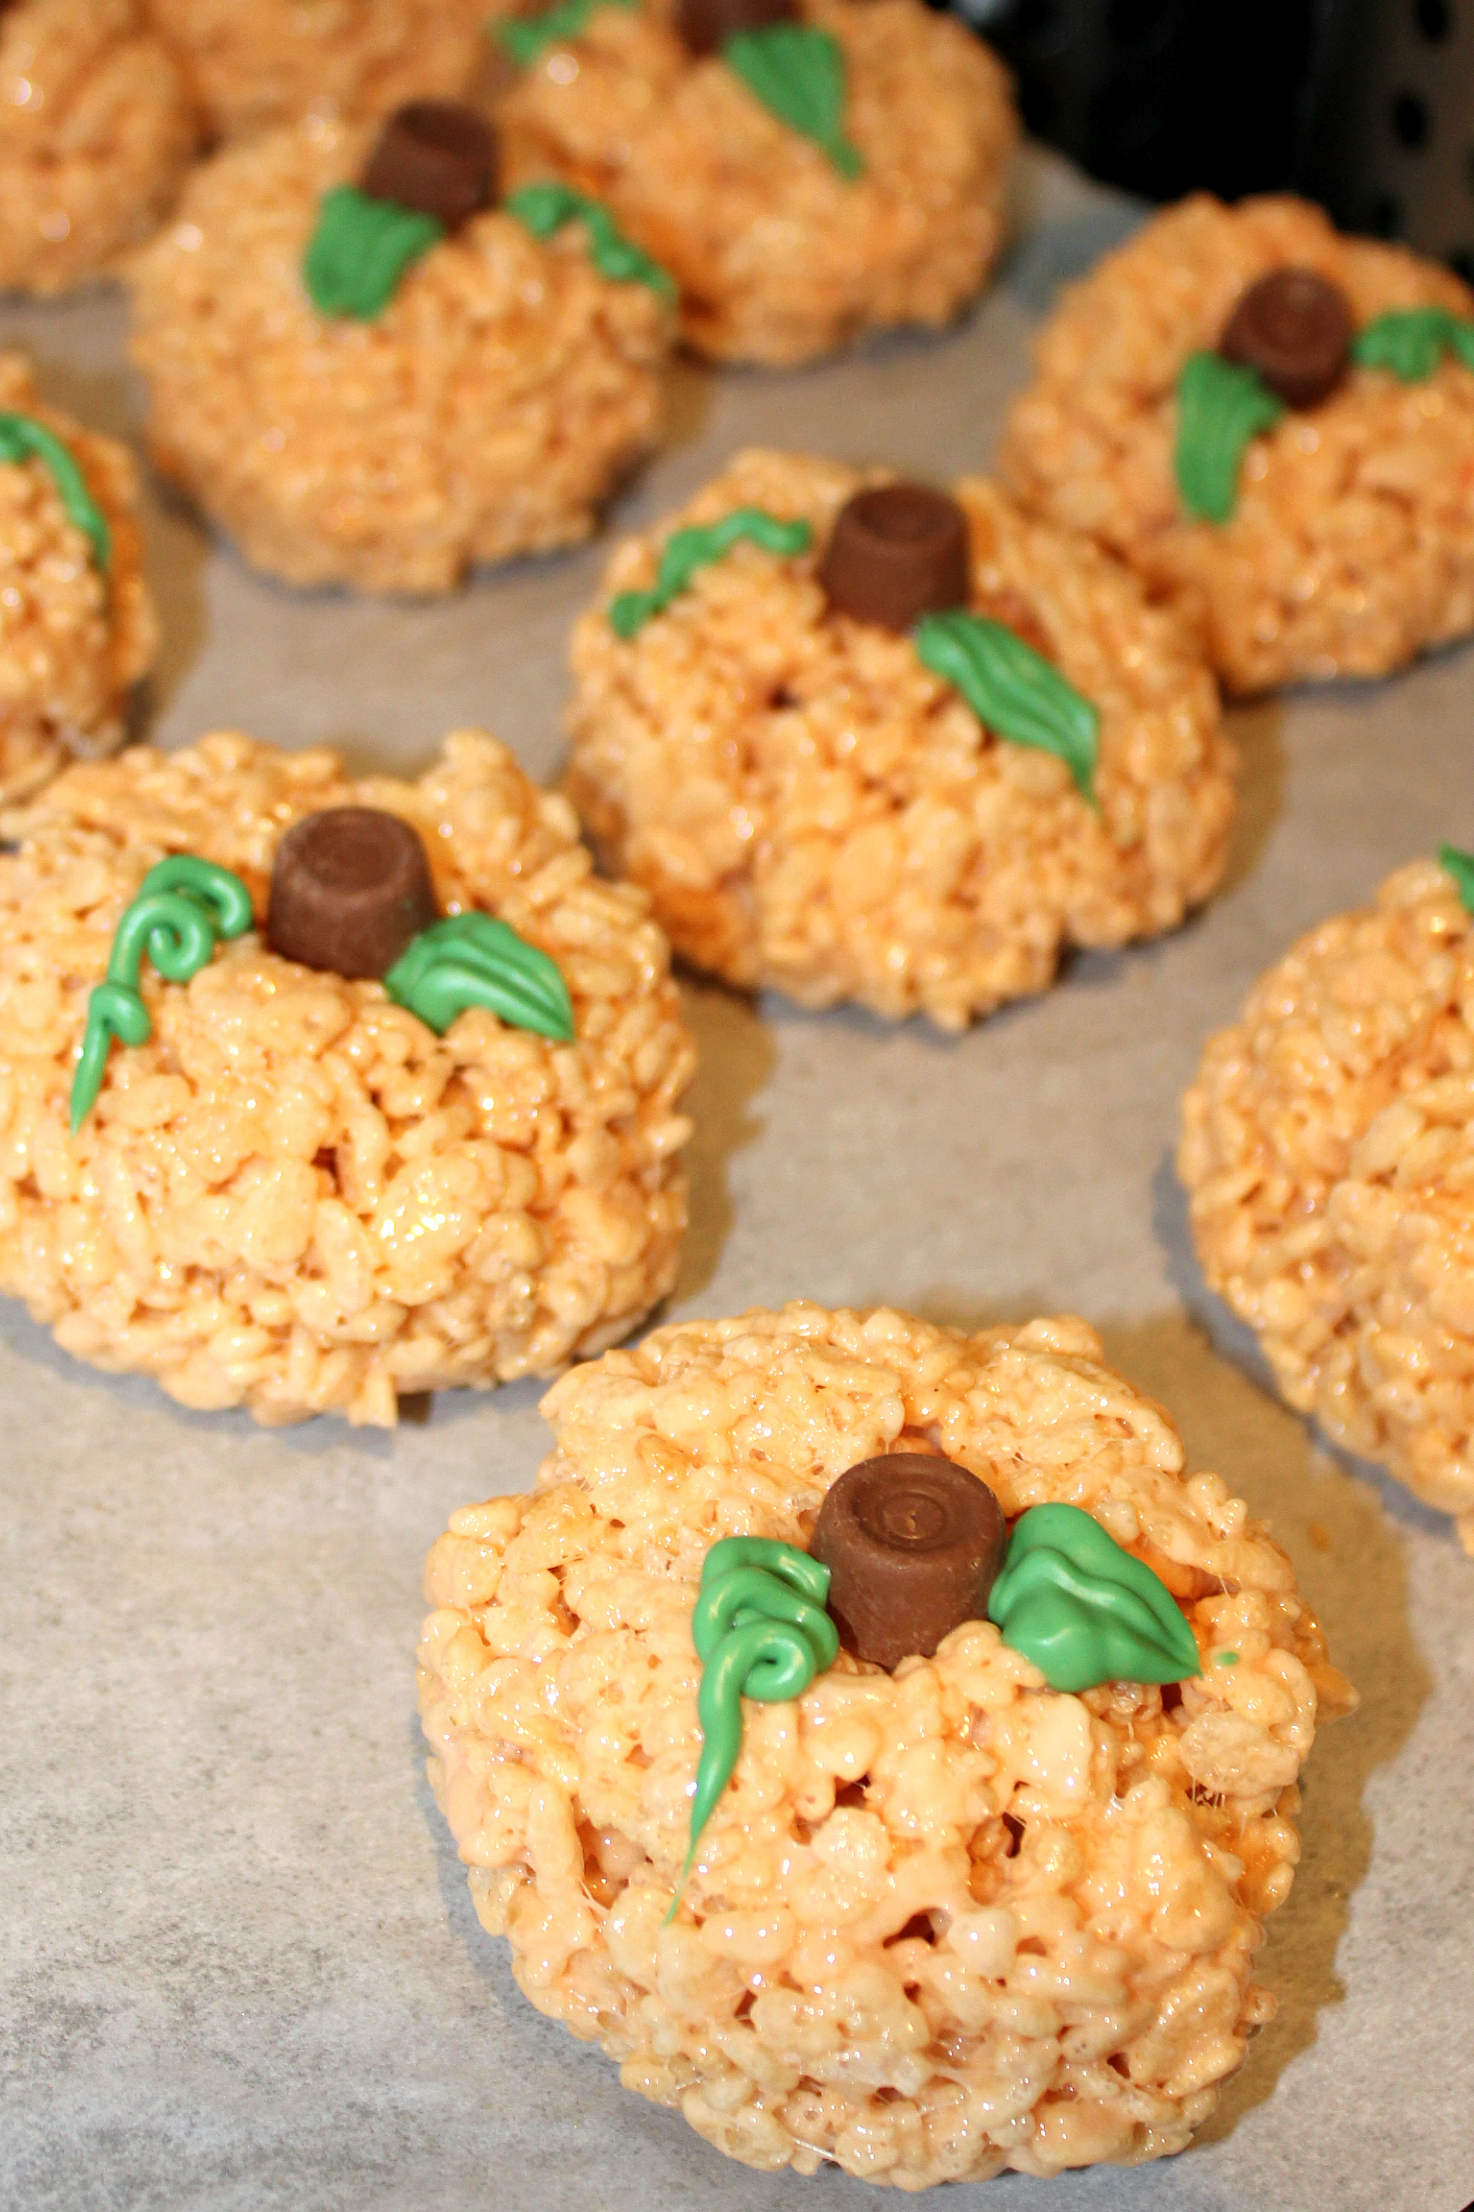
Step 8: Step back and think “hello autumn!” and allow everything to harden and set. Store in an airtight container at room temperature and then go run around embracing everything autumn and fall related!!!!
- 3 Tbsp butter
- 250g marshmallows (approx 4 cups of mini marshmallows)
- 5 cups of Rice Krispies
- 1 tsp vanilla (optional)
- Orange (or red and yellow) Wilton Gel Icing Colours
- 12 Mini Rolos
- 1/4 cup dark green Wilton Candy Melts
- Non stick cooking spray
- In a large pot melt butter and marshmallows over medium heat, stirring until nearly completely melted. Turn off heat.
- Mix in vanilla, if using, and then add colouring until as orange as you dare, keeping in mind that once the rice cereal is mixed in the colour will not be as strong.
- Working quickly, pour in the five cups of rice cereal and stir until evenly combined.
- Spray your hands with non stick cooking spray (this makes all the difference between success and a sticky mess) and start shaping the Rice Krispie mixture into balls with your hands (think making small snowballs and firmly roll into a ball between hands) and placing on a parchment lined tray
- Take a Mini Rolo and press down into the centre, creating the pumpkin shape.
- Prepare a piping bag with a medium sized leaf tip (like Wilton #69), and melt the green Candy Melts in the microwave for 30 seconds and stir. Continue in 10 second increments and stirring until completely melted. Pour melted Candy Melts into piping bag and pipe a leaf on each pumpkin top.
- Change to a small round tip on the piping bag and add a tendril coil to each of the pumpkins.
- Allow everything to harden and set. Store in an airtight container at room temperature.
Inspiration found and recipe adapted from here at Grin and Bake It
The post Pumpkin Rice Krispie Treats appeared first on Creative Sides.
]]>The post Stack-O-Lantern Planter DIY appeared first on Creative Sides.
]]>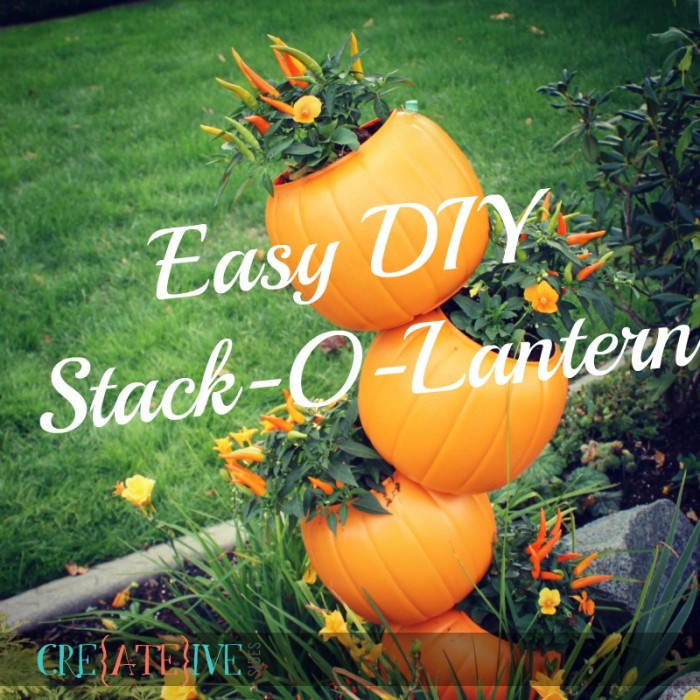
I’m not a green thumb in the slightest and don’t pretend to be. I have a reputation amongst local landscapers as a plant killer – it’s not my fault, I think I have too much love to give and the plants aren’t sure how to handle it. (If only I could exhibit a fraction of that affection in real life relationships, I might not be single!) I decided this year to attempt to work with live plants again, after a really long hiatus and a full ban on plant purchasing by my gardener.
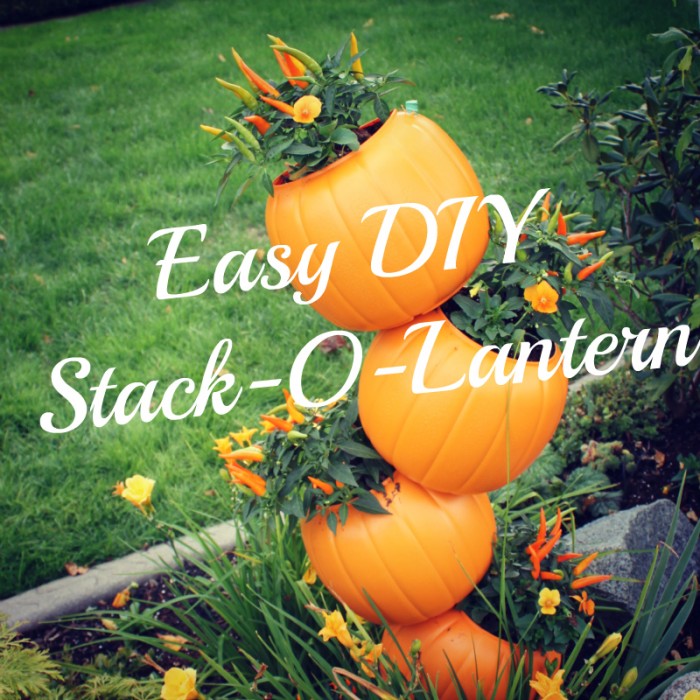
I’m going to take you step by step through creating this fun and simple project that will give your garden a cute Halloween vibe.
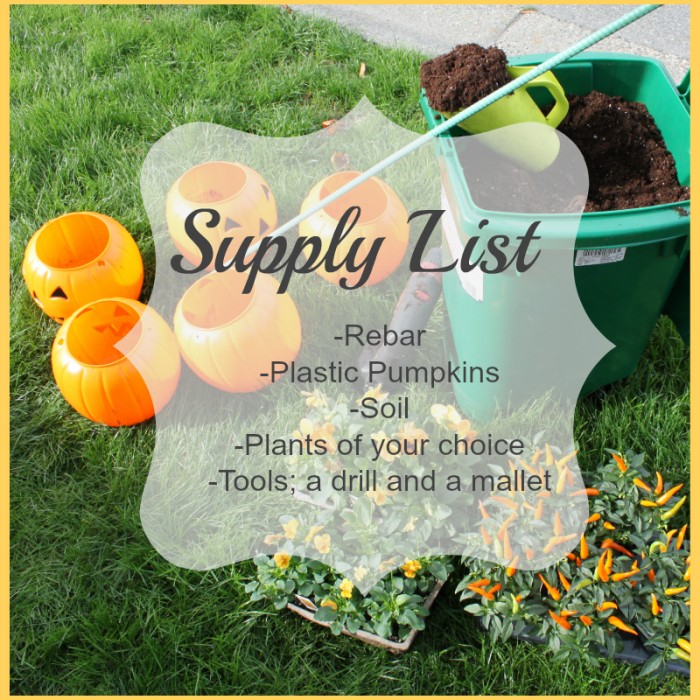
Here’s what you will need:
• A piece of rebar
• Five plastic pumpkins
• Soil
• Small Plants
• Tools- a drill and a mallet
This project can be customized to your tastes in several ways. We used a 48” piece of rebar for our stack o lantern planter but you can make it longer or shorter depending on your space and what you want it to look like in the end. The 48” length gave me enough room for 5 pumpkins and still have enough length to pound roughly 8-10” into the ground.
You can also opt to use real pumpkins if you like but my reasoning against it is, the real pumpkins are significantly heavier, you have to cut them open and scoop out their guts (not my favorite thing) and they will get soft and begin to rot over time so while I know I’ll have to replace the plants annually, my creation is re-usable year after year after a quick 10 minute build.
Sounds easy so far right? I was surprised how easy this little project was and it looks adorable in the garden! I’m not the only one who thinks so, there are constantly people out front taking photos. (I was creeped out by this.)
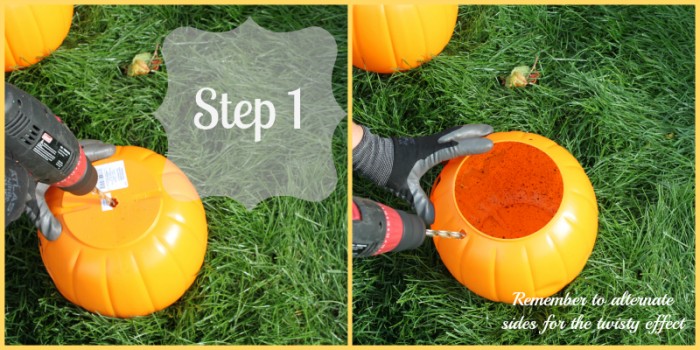
Step 1: This is the one and only time you’ll need the drill. I love the feeling of a power tool in my hands so this project will likely lead to more ‘drills required’ DIY’s. Drill a hole in the bottom of your pumpkin and then drill another hole on the top of the pumpkin. This is where you will insert your rebar so to get the curved look, be sure you alternate the sides that you drill on.
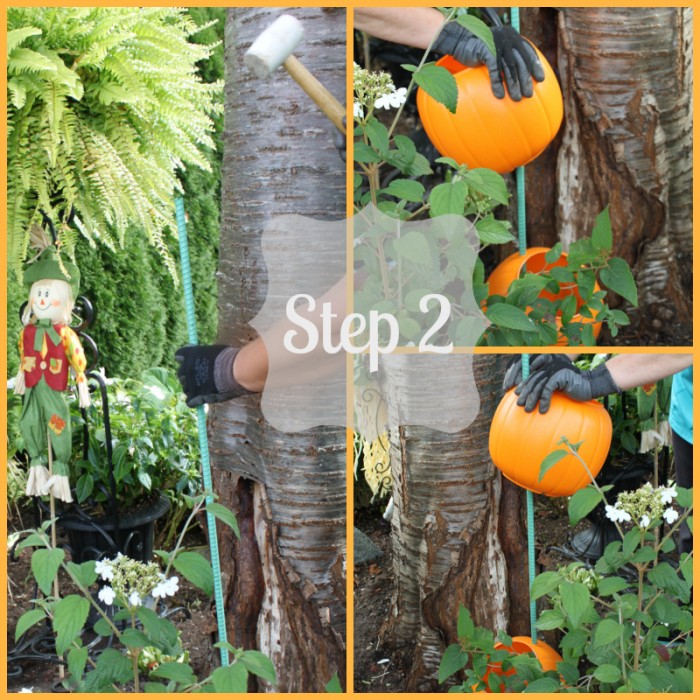
Step 2: Pound that bad boy into the ground! Another fun part for me, I tend to enjoy using a mallet. Once you have your post in place grab your first pumpkin and push the rebar through your pre-drilled holes.
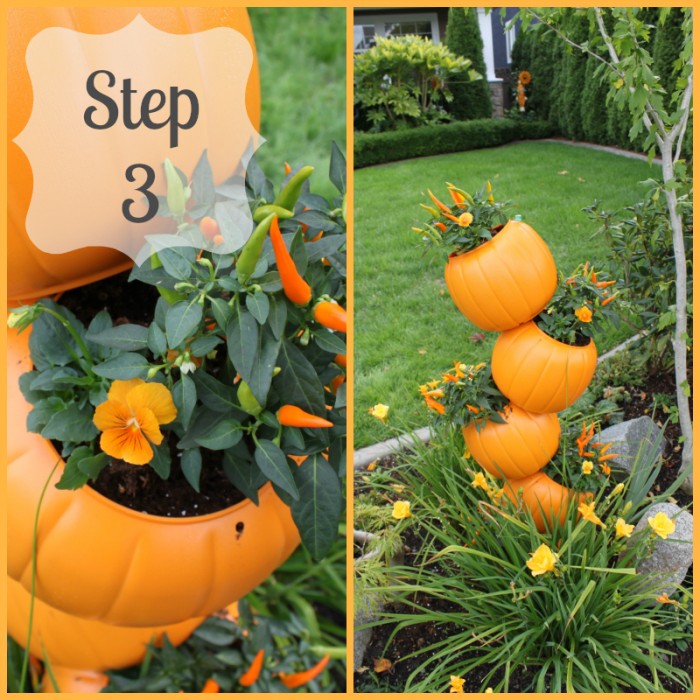
Step 3: Load up the pumpkin with dirt and place your plants in as you like. I used ornamental peppers because I’ve had less of them die on me in the past and they look cute. I paired the mini peppers with yellow pansies but you can use any plants you like. I think this would be fun with succulents or cacti as well!
Repeat steps 2 and 3 until you’ve used up all of your pumpkins.
The post Stack-O-Lantern Planter DIY appeared first on Creative Sides.
]]>The post Easy Paper Pumpkin Craft appeared first on Creative Sides.
]]>This craft is great for kids but works well as an “adult” craft for decor as well. Here’s how I made them!
How To Make Paper Pumpkins
Items Needed:
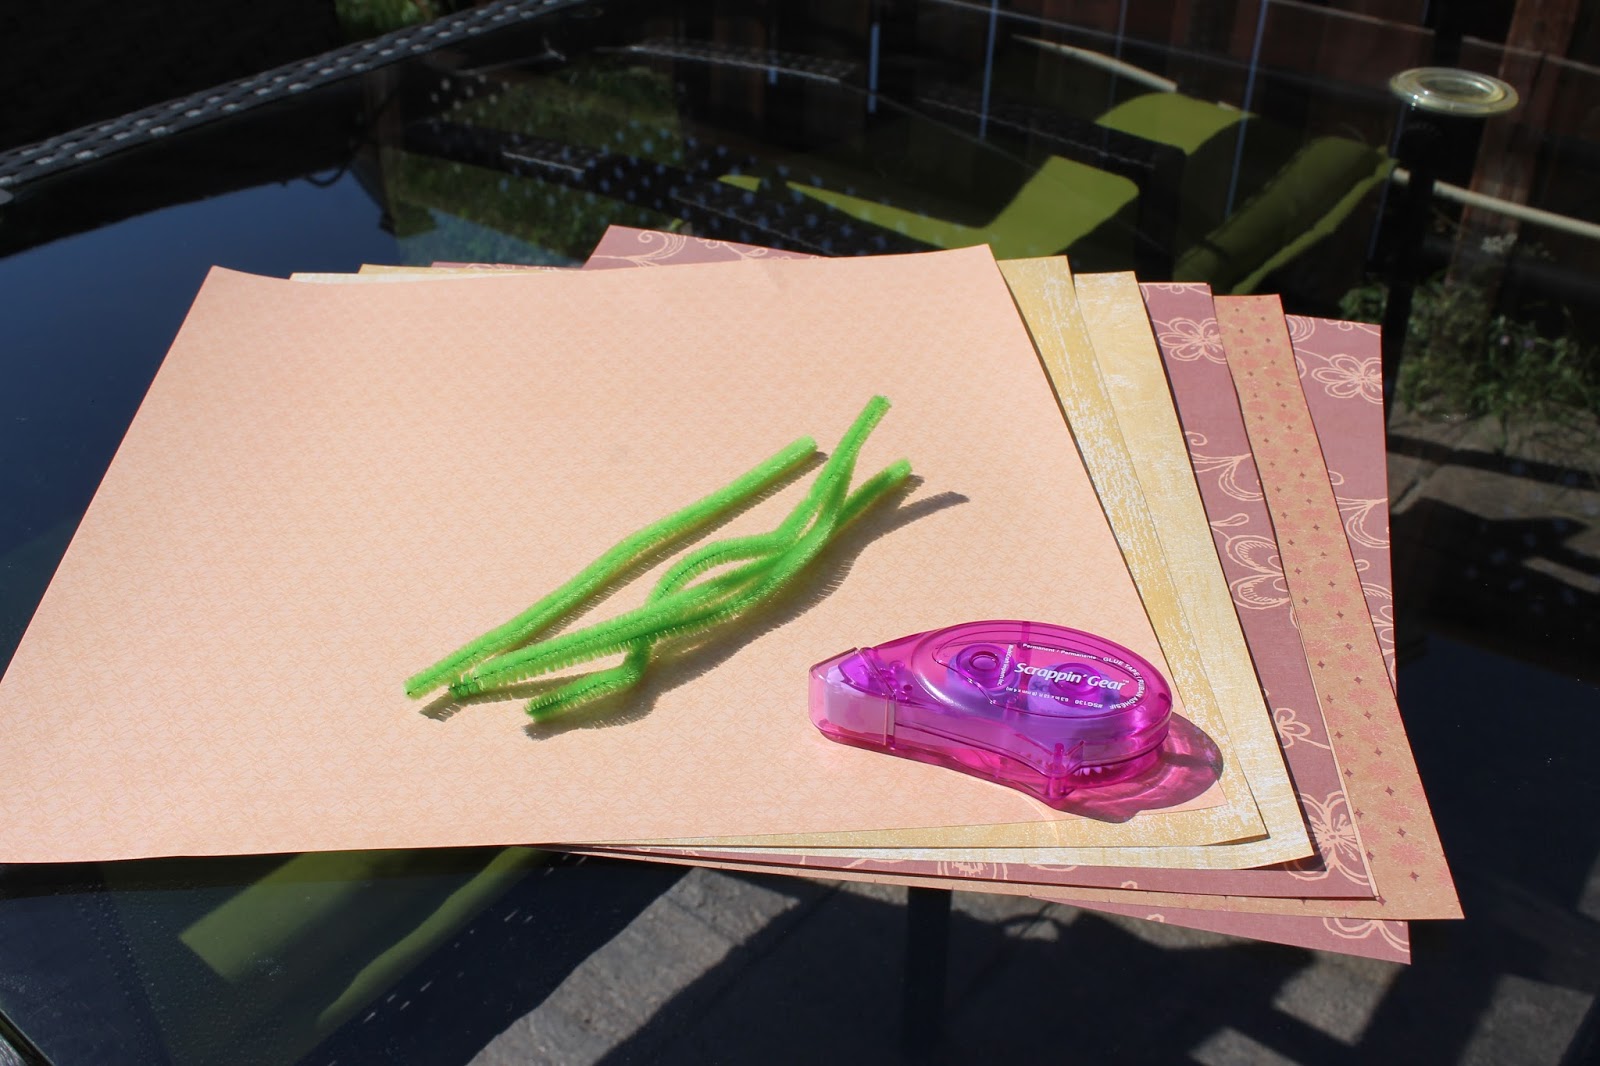
Orange Scrapbook Paper or Orange Construction Paper
Green Pipe Cleaners
Double Sided Scrapbook Tape
Scissors
Circle Template (to trace)
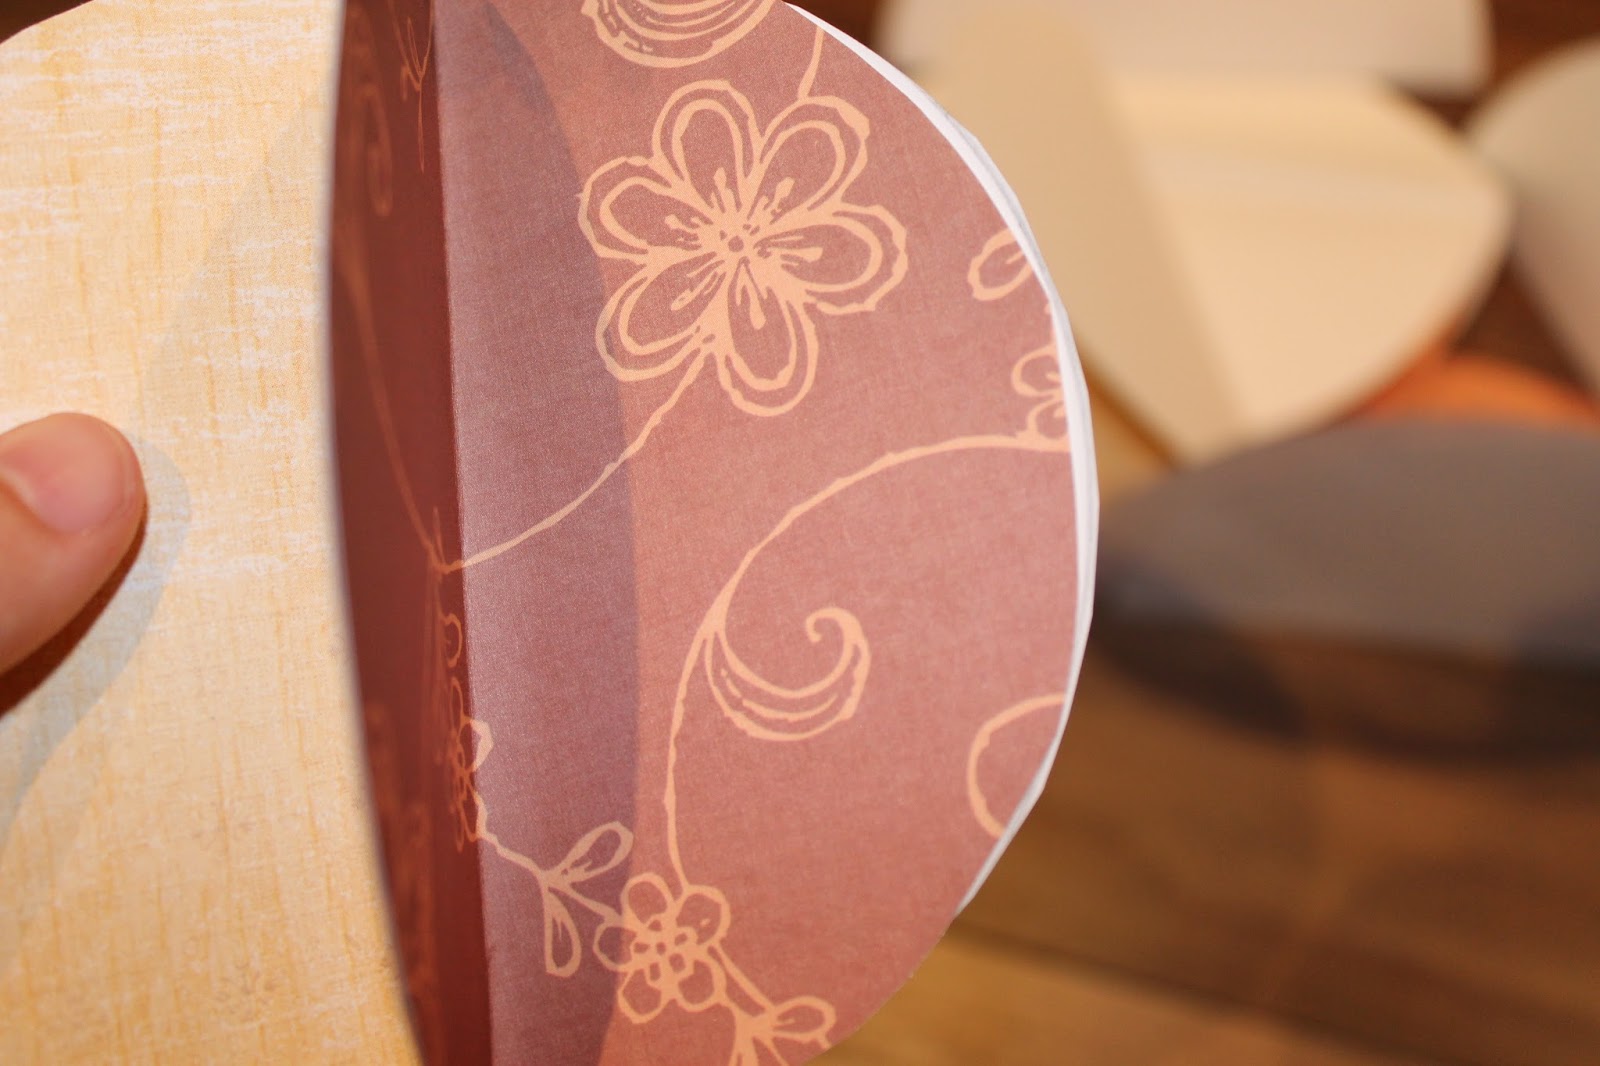
Step 1: Collect orange scrapbook paper in various patterns. If you’re doing this as a kids’ craft, construction paper is a good material as well. I used pipe cleaners for the stems and double sided scrapbook tape as an adhesive.
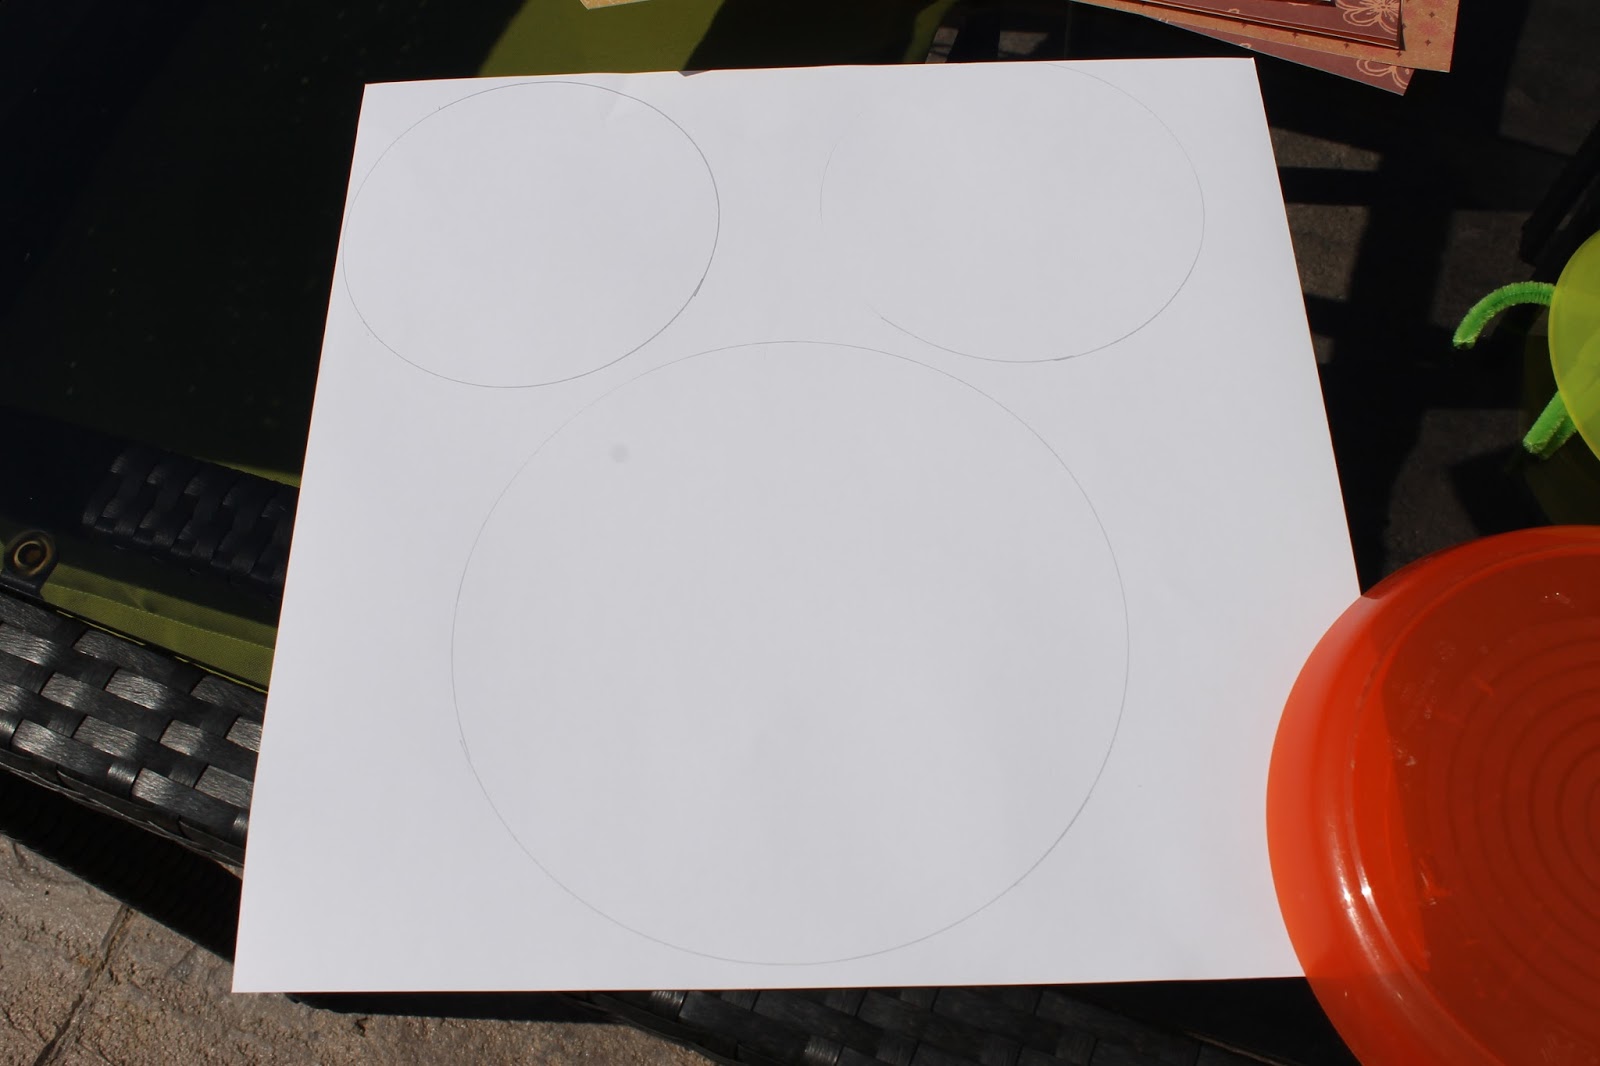
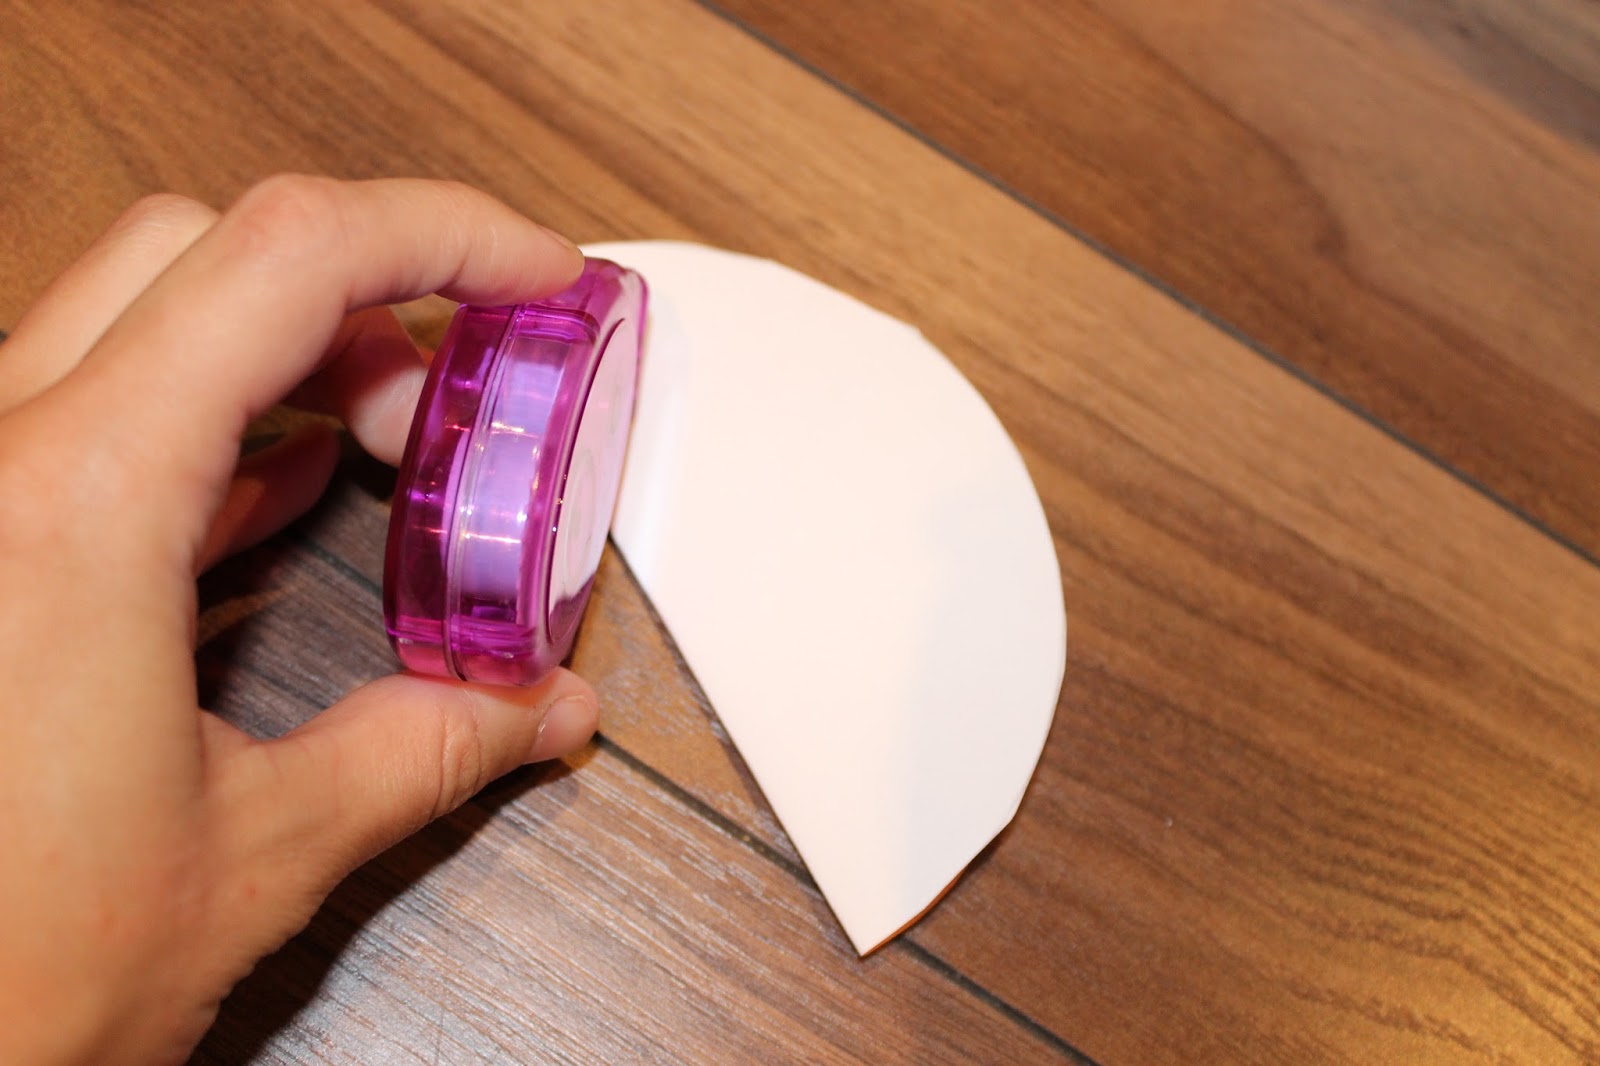
Step 2: Trace circle on the non-pattern side of the paper. I wanted my pumpkins to be two different sizes, so I traced two sizes of circles (thank you Ikea children’s dishes!) onto the back of my paper.
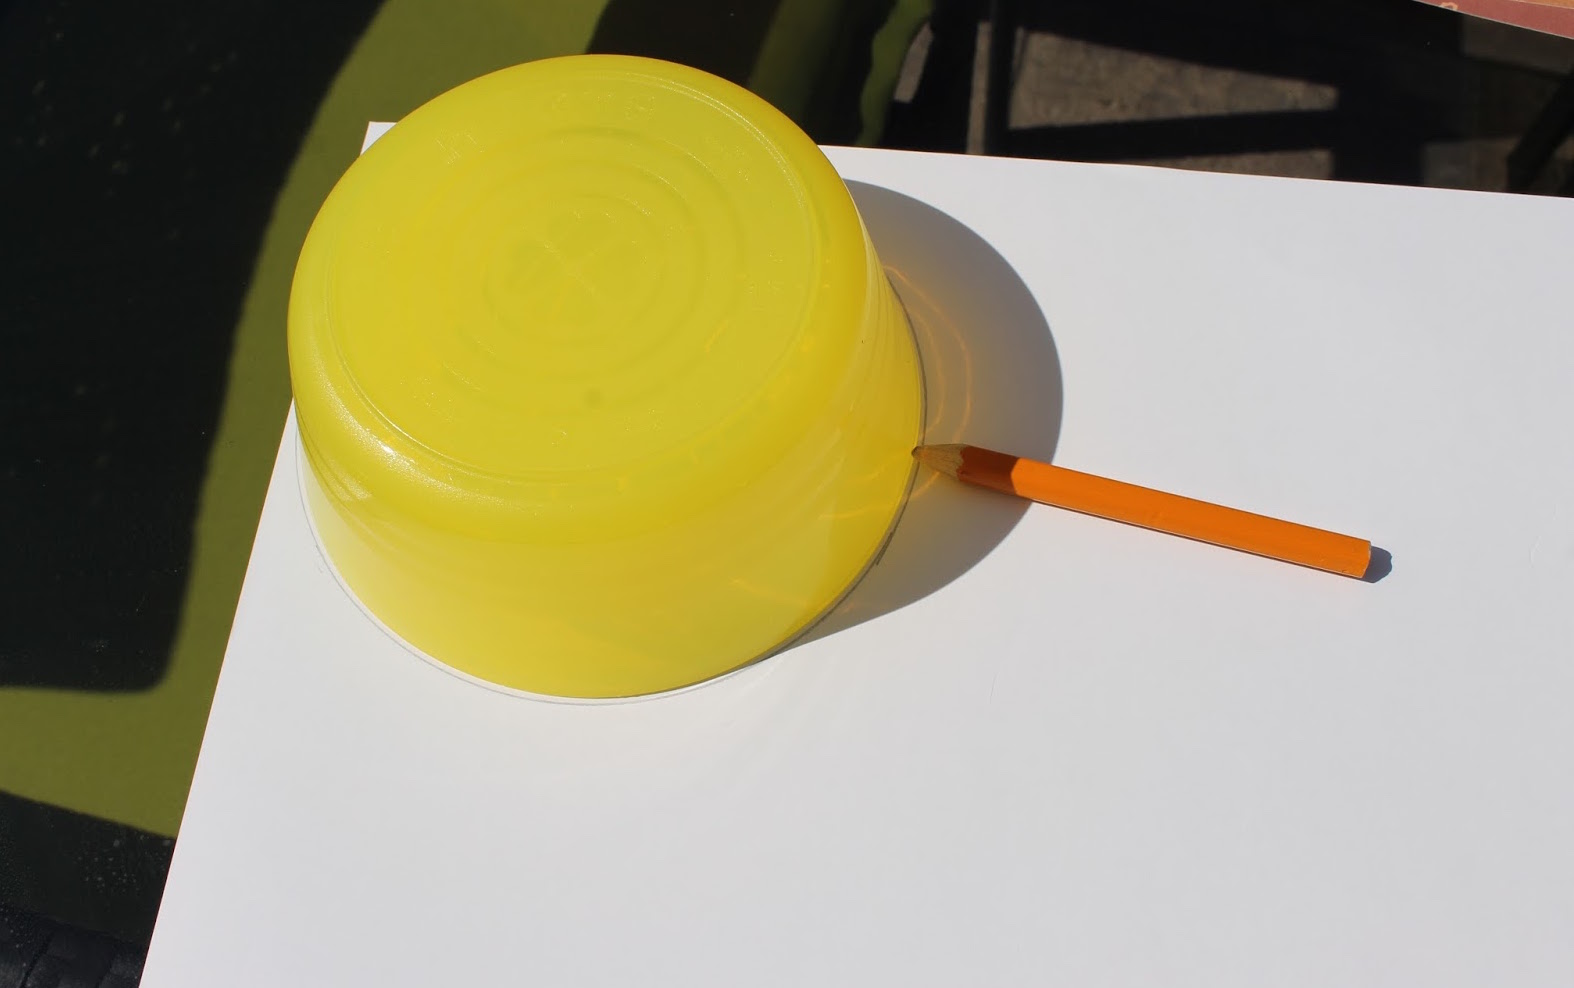
I was able to fit 2 small circles and one large on each sheet of paper.
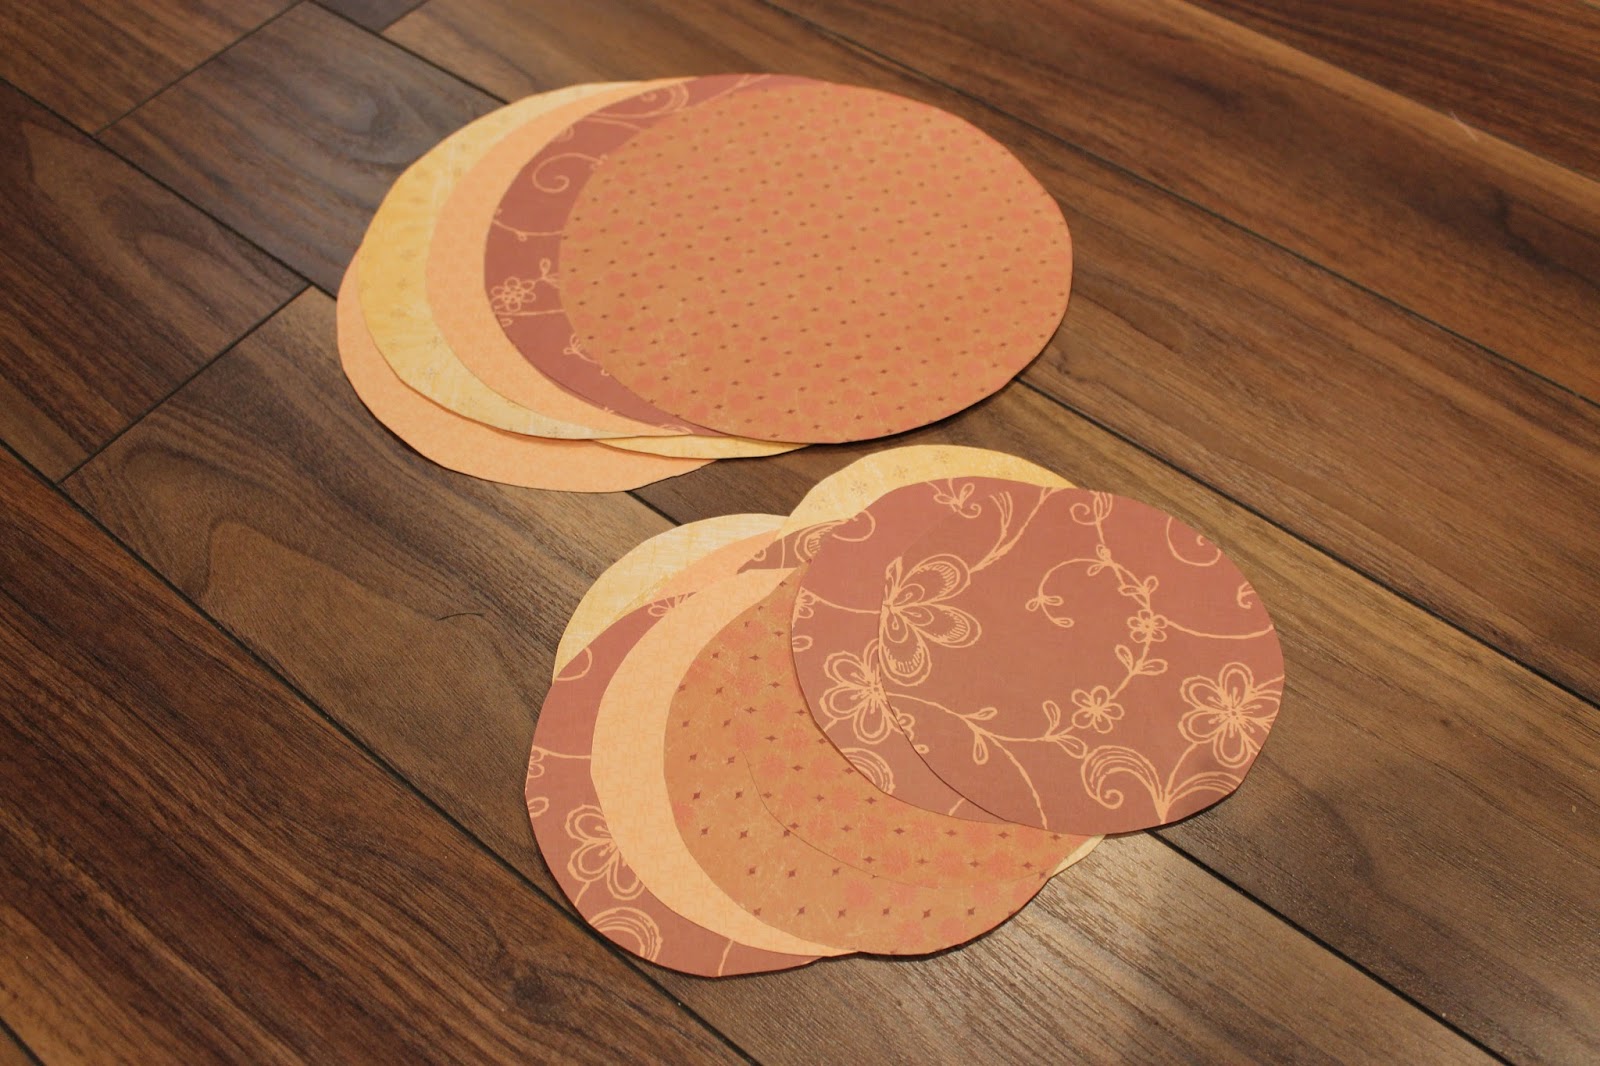
Step 3: Cut out circles. I used 7 paper circles to make each pumpkin, but these pumpkins can be made with as little as 3 or 4 circles, or even more!
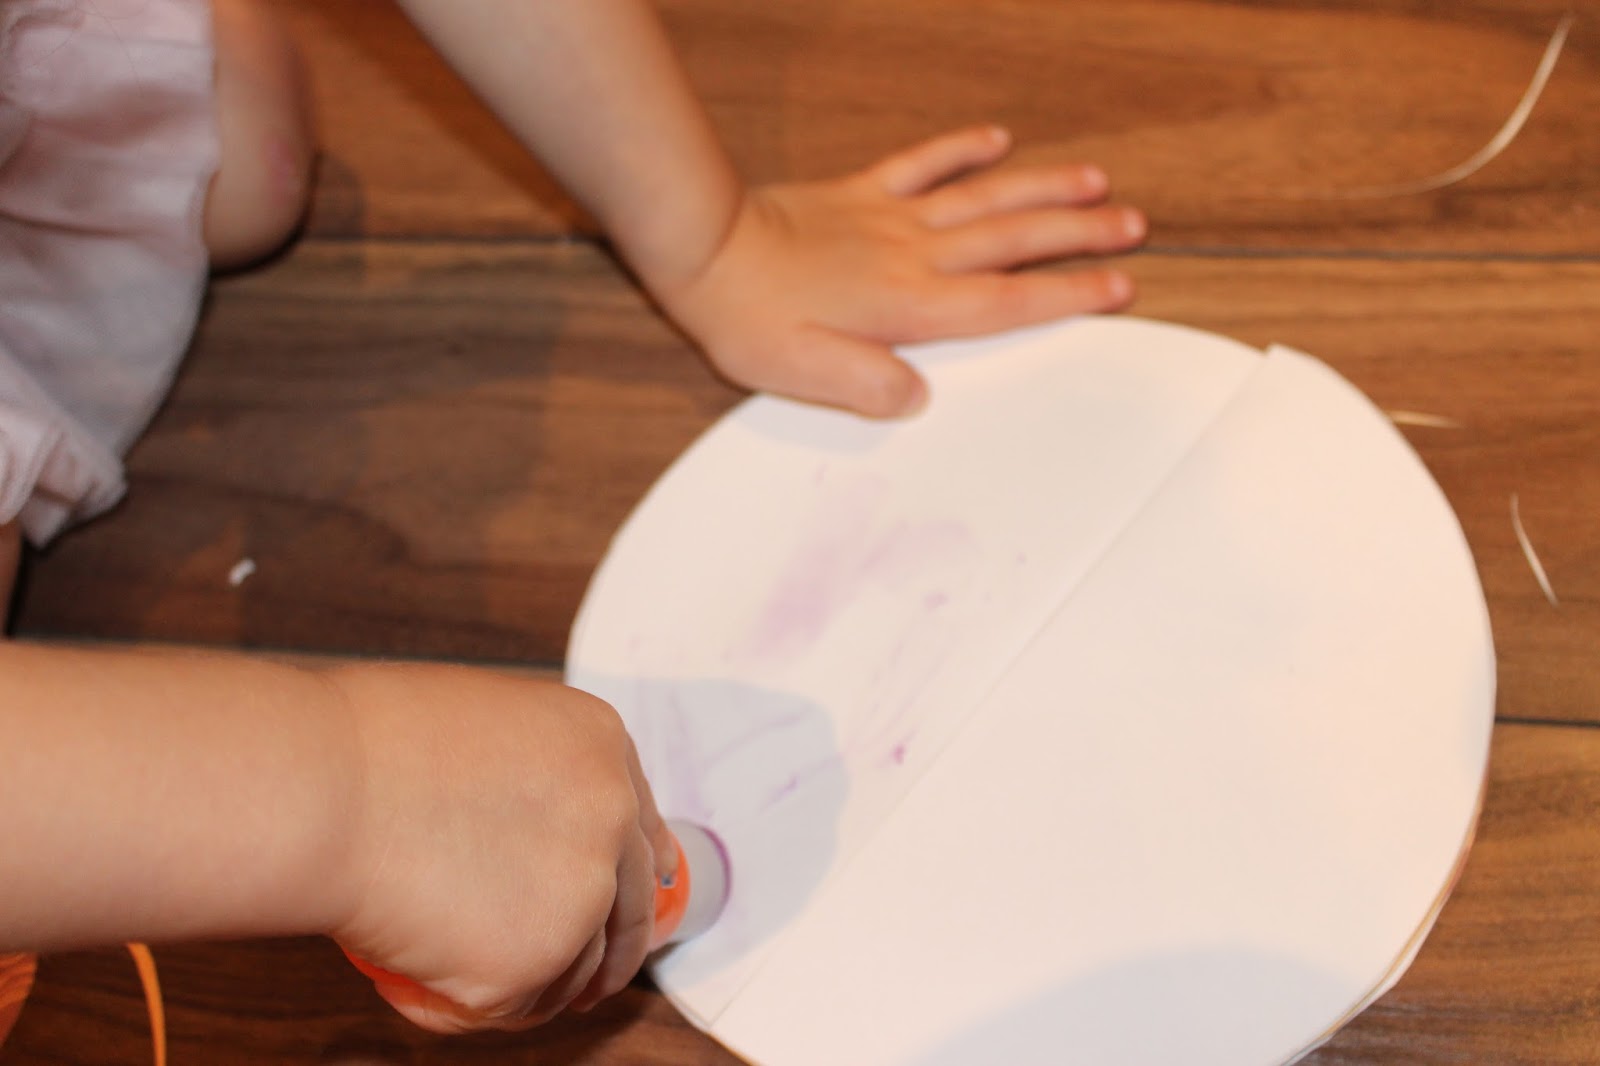
Step 4: Fold each circle in half with the “wrong” side out
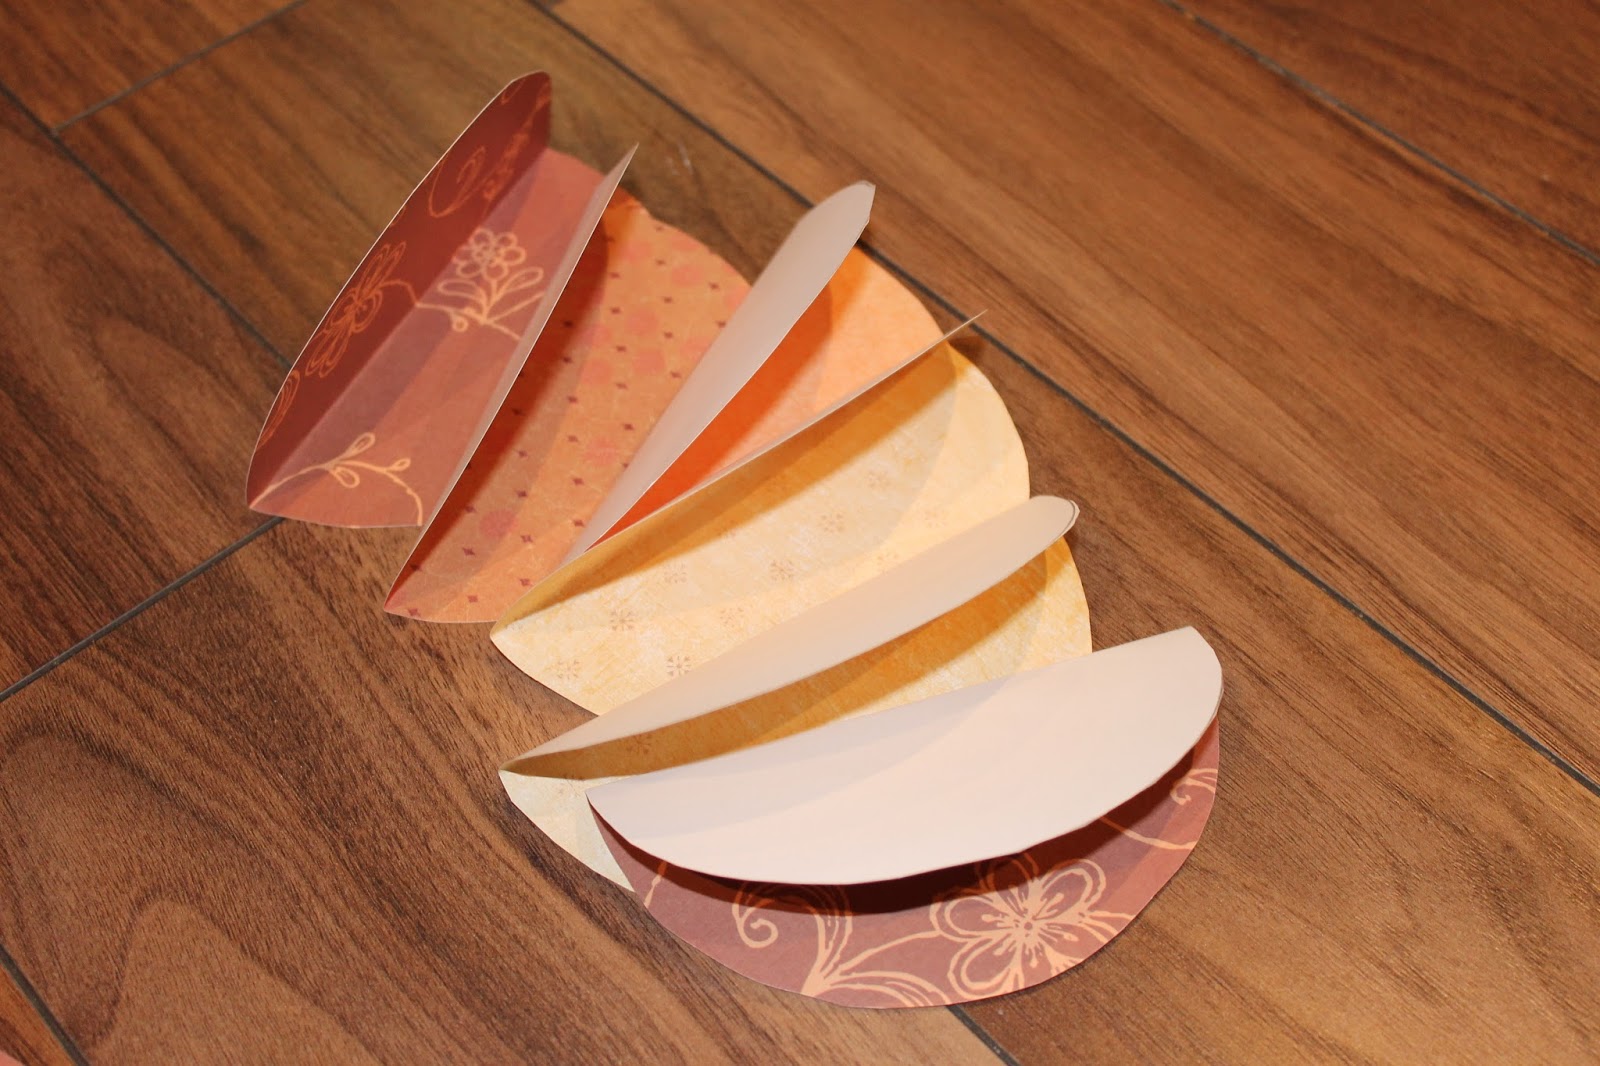
Step 5: Attach the circles together one by one, using the double sided tape. Be careful NOT to attach the first and last halves together prior to completing step 6.
I prefer double sided tape for paper crafts because it’s not messy and it’s super sticky, but my toddler helped me using a glue stick, and it worked well too!
Step 6: Twist 2 green pipe cleaners together to make the stem. Twirl a third piece around your finger and attach to the first piece making a ’t’ shape.
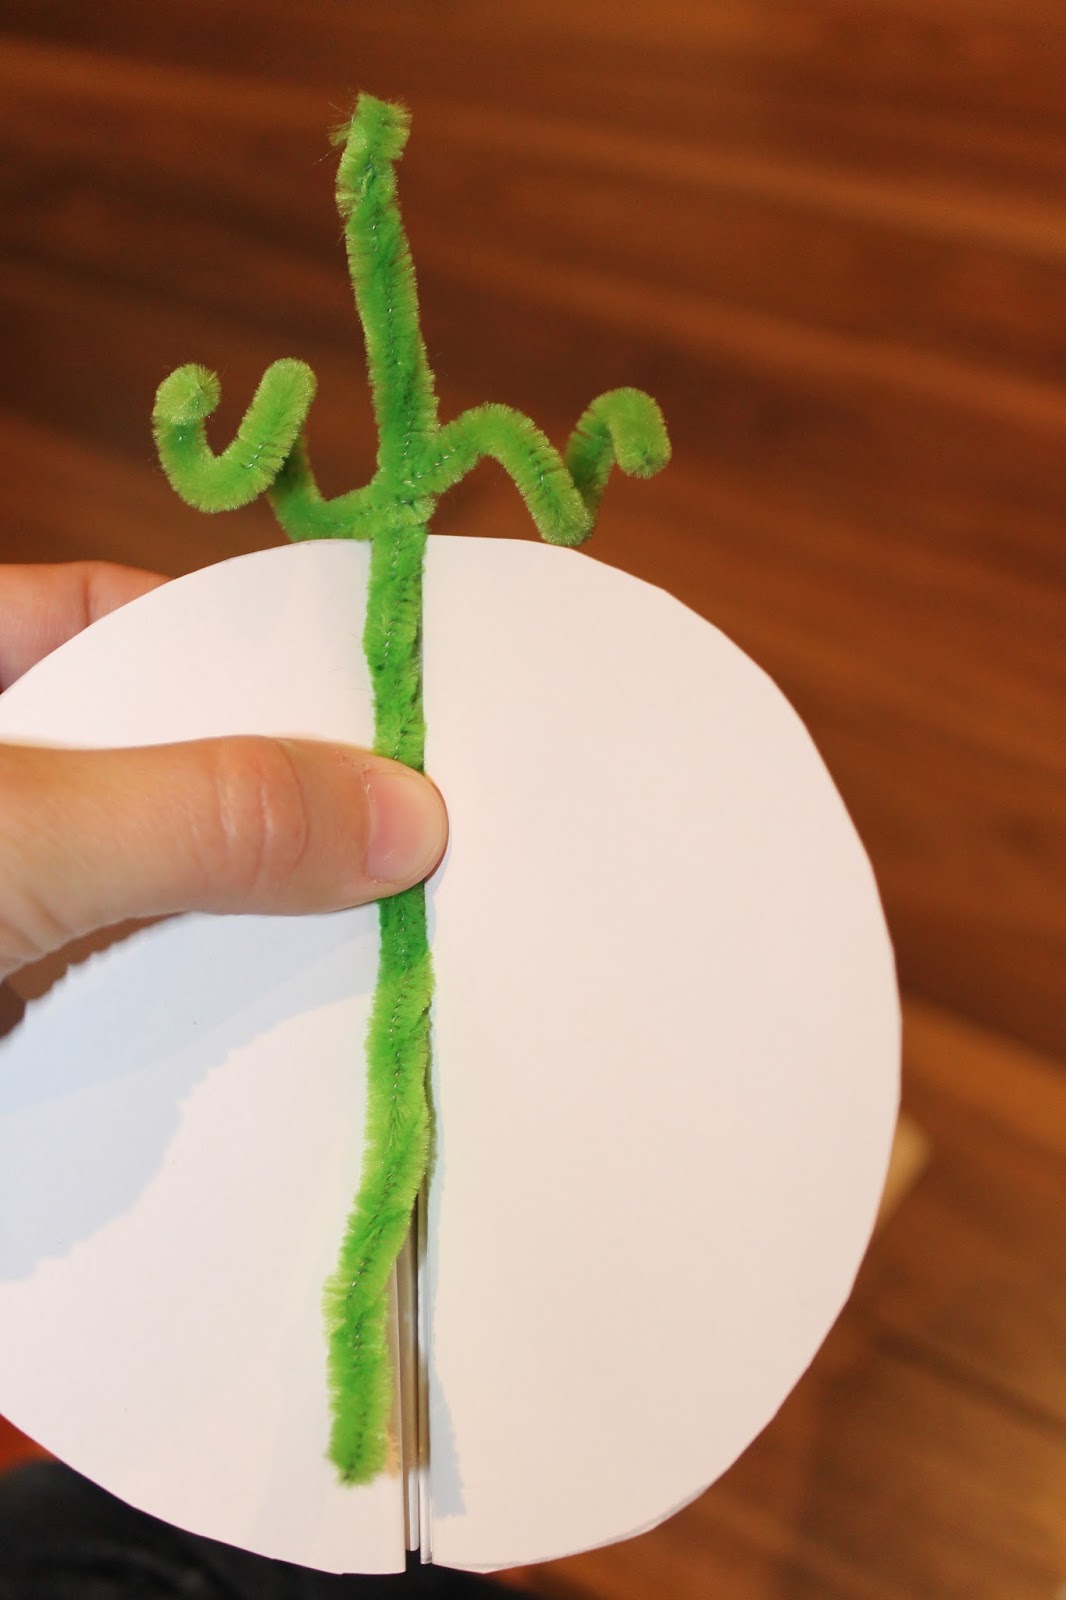
Step 7: Insert the pipe cleaner stem before attaching the last 2 halves together.
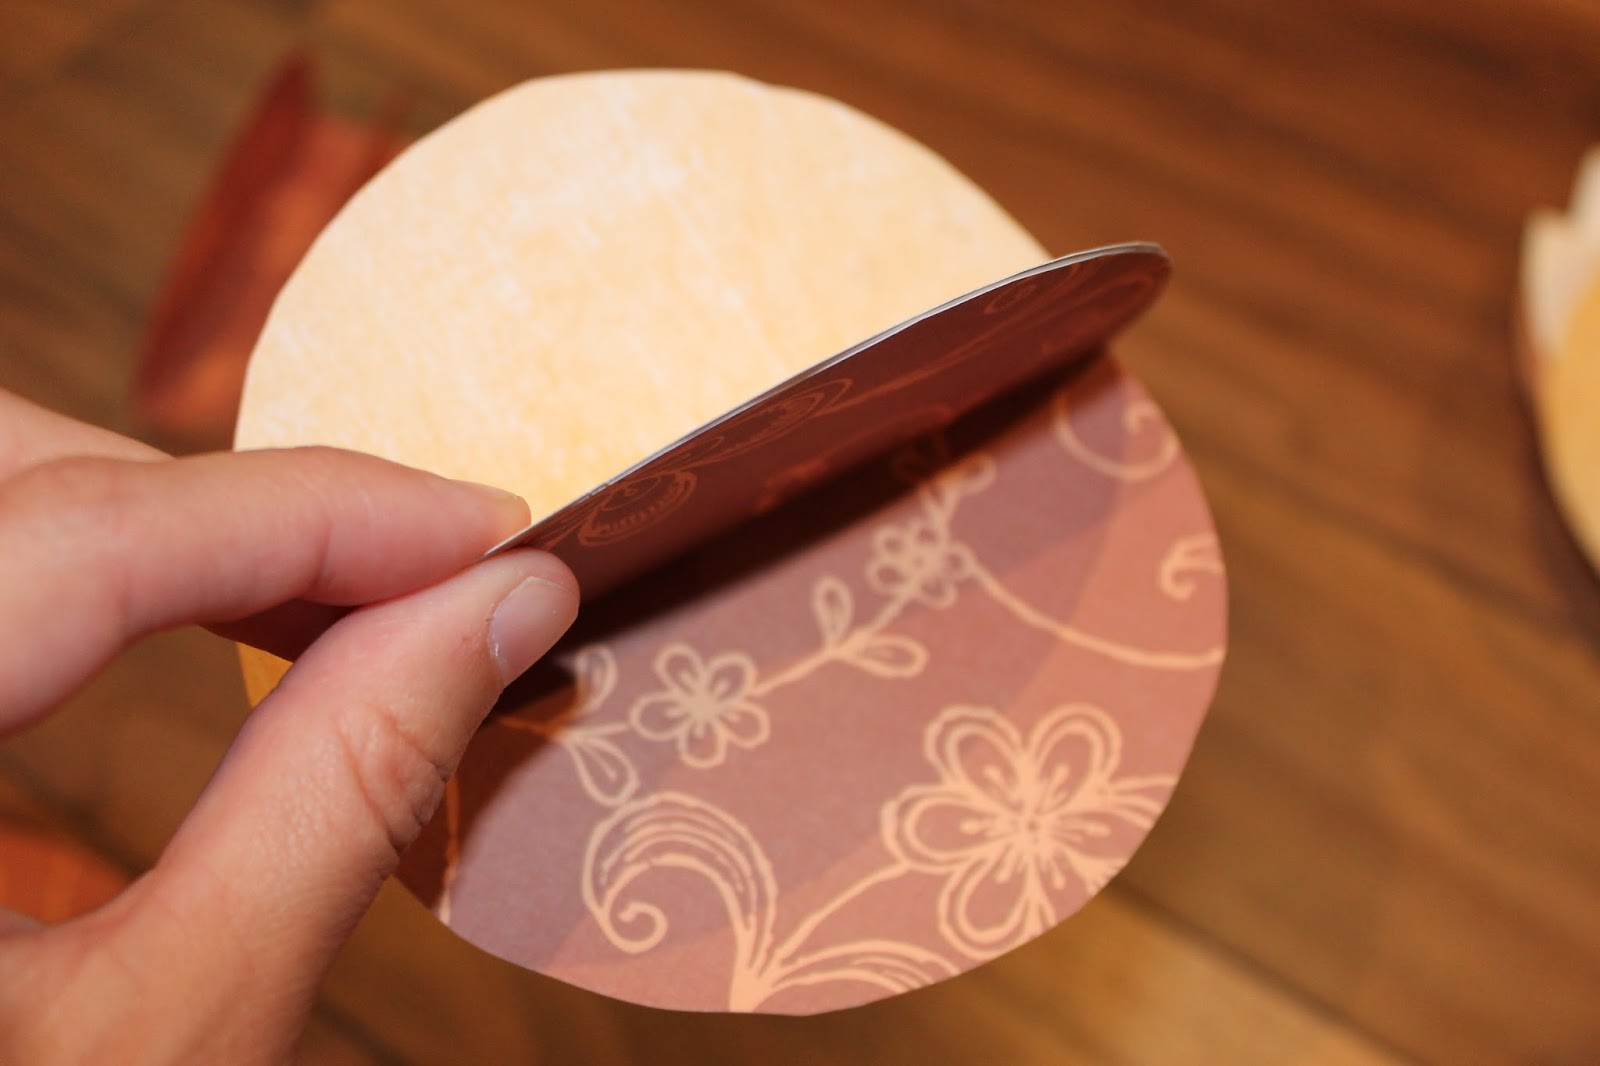
Step 8: Use scissors to trim up the edges where white is showing and cut the bottom off of each pumpkin so they stand up.
And voila! Cute and easy paper pumpkins!
This post originally appeared on livinginhisway.ca
This post may contain affiliate links. See our disclosure policy for more information.
The post Easy Paper Pumpkin Craft appeared first on Creative Sides.
]]>