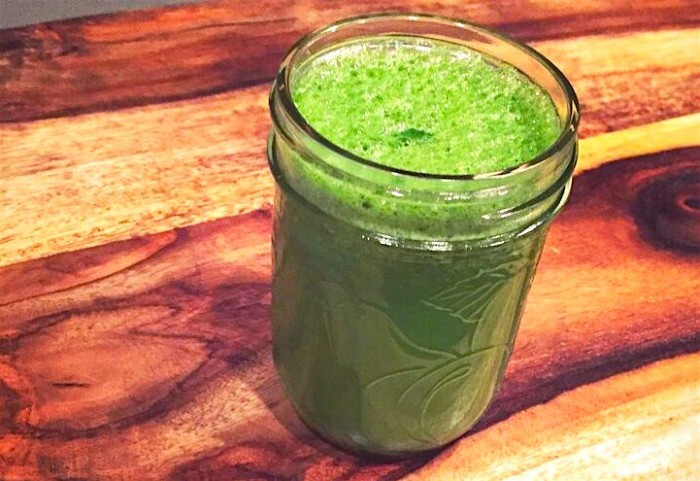
The post Tropical Green Juice appeared first on Creative Sides.
]]>Ingredients
1 handful parsley
1 handful mint
3 – 4 kale leaves
1 lime, zest removed but leave as much pith (the white stuff in between the skin and the fruit) as possible
1/2 pineapple, peeled
1 green apple, cored

Directions
Feed fruits and vegetables through your juicer. I have an Omega J8006 which is a masticating juicer so I do my herbs first, followed by leafy greens and citrus, and I leave my hardest fruits and veg for the end to sort of “clean” as much out of the machine as possible.
Serve over ice. Makes two juices (quantity varies because of natural products).
- 1 handful parsley
- 1 handful mint
- 3 - 4 kale leaves
- 1 lime, zest removed but leave as much pith (the white stuff in between the skin and the fruit) as possible
- 1/2 pineapple, peeled
- 1 green apple, cored
- Feed fruits and vegetables through your juicer, herbs first, followed by leafy greens and citrus. Leave hardest fruits and veg for the end to sort of "clean" as much out of the machine as possible.
- Serve over ice.
The post Tropical Green Juice appeared first on Creative Sides.
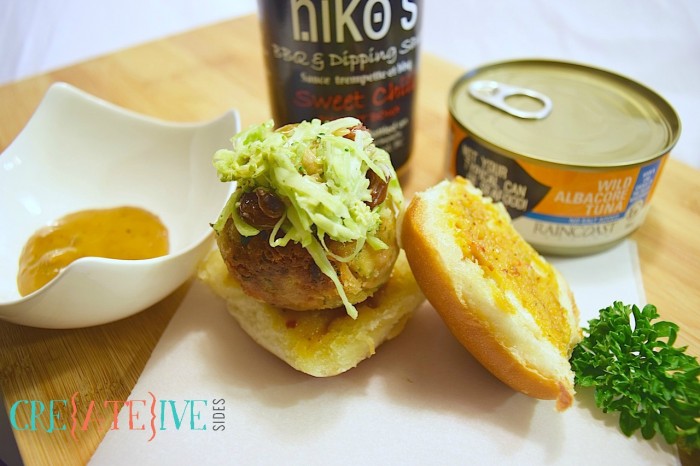
]]>The post West Coast Tuna Sliders and Salmon Cucumber Rolls appeared first on Creative Sides.
]]>Tuna Sliders
- 1 tbsp extra virgin olive oil
- 1 clove garlic, minced
- 1 red chili, minced
- 1 rib celery, finely diced
- ¼ tsp celery seeds
- ¼ tsp sea salt
- ¼ tsp pepper
- 1 egg, beaten
- 3 green onions, thinly sliced
- ¼ cup fresh parsley, minced
- 1 tbsp heavy cream
- 1 tbsp Dijon mustard
- 2 cans Raincoast Wild Solid White Albacore Tuna
- ⅓ cup dry breadcrumbs
- 2 tbsp all-purpose flour
- Canola oil
- 8 buns/dinner rolls
- Niko's Sweet Chili Dipping Sauce (found at St. Jean's Cannery and Smokehouse)
- Broccoli Kale Coleslaw
- Heat olive oil in a pan over medium heat and sauté the olive oil, garlic, red chili, celery, celery seeds and salt and pepper. Remove from heat and set aside.
- In another bowl, mix together egg, green onions, parsley, cream, dijon mustard, two cans of tuna, and breadcrumbs. Add in the chili, garlic, celery mixture and combine well.
- Shape mixture into small patties and dredge in flour.
- Place the patties in the freezer for 10-12 minutes.
- Heat the canola oil in a large frying pan. Fry the patties for 5-7 minutes, until crispy and heated through.
- Toast the buns and brush with Niko's Sweet Chili BBQ & Dipping Sauce
- Top the buns with the tuna patty and coleslaw and serve with a side of dipping sauce.
- You may also substitute Raincoast Trading Wild Solid White Albacore Tuna - No Salt for a lower sodium option.
St. Jean’s has been an important part of my family’s table for many years. They still process all the fish my dad catches and each time we travel to see my husband’s family in France, we stock up on cans of salmon and frozen filets and bring them as gifts. Canned Salmon as gifts, you say? Not Nanaimo Bars? Yes, it is a huge hit every year. Next year we’ll be bringing the dips and marinades.
After finding out St. Jean’s Cannery acquired Raincoast Trading in 2013 I was happy that the standards of sustainable catching (hook and line caught – no nets, yay dolphins!) and processing (these guys know their stuff) will continue to be top notch. All of their fish is sustainably sourced in the Pacific Northwest off the coast of BC. All wild – not farmed.
Raincoast Trading Tuna and Salmon is only cooked once during the canning process and there are no preservatives. It is not packed in water – just the fish and all of its natural oils and nutrients. This means the tuna provides as much as 8 times the Omega 3 Fatty Acids compared to other commercial brands. As for quality, open a can of salmon or tuna from a competitor brand and a can from Raincoast Trading and do a side by side comparison to see the difference – it’s striking.
Raincoast Trading products are available at most major grocery retailers in Canada as well as online at Amazon.ca
Salmon Cucumber Rolls
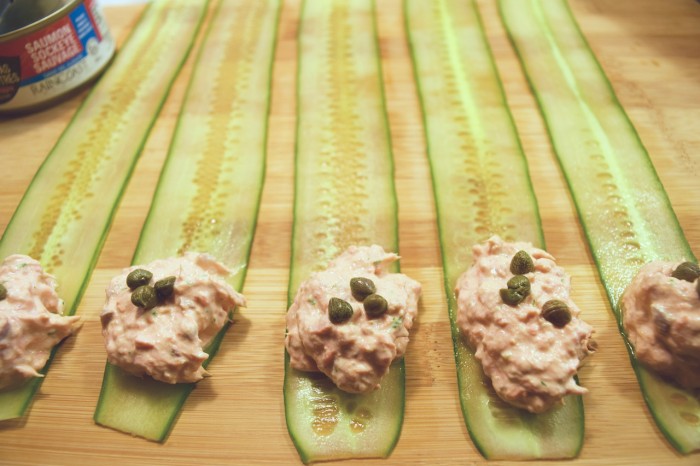
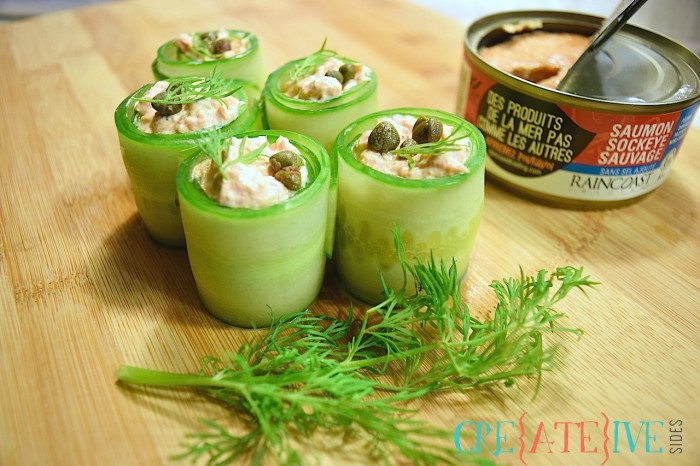
- 1 can Raincoast Trading Wild Sockeye Salmon - No Salt
- 1/2 cup cream cheese
- 1/4 cup firm goat cheese
- 1 tbsp lemon juice
- 1 tbsp fresh dill, minced
- 1/2 tsp sea salt
- 1/2 tsp fresh ground pepper
- 1 english cucumber, very thinly sliced lengthwise using a mandolin
- 2 tbsp capers
- Sprigs of fresh dill for garnish
- In a mixing bowl, combine salmon, cream cheese, goat cheese, lemon juice, dill, salt and pepper. Mix until well combined.
- Place 1 tbsp of mixture at the end of each cucumber slice and add a few capers on top. Roll up the cucumber tightly using a toothpick to secure if needed.
- Garnish with remaining fresh dill

This project is supported by the BC Government’s Buy Local Program; delivered by the Investment Agriculture Foundation of BC with funding from the BC Ministry of Agriculture. #BCBuyLocal
Disclaimer: Although this post has been generously sponsored and compensated by Raincoast Trading, the opinions and language are my own. If I would not serve it to my family, I would never suggest you serve it to yours.
The post West Coast Tuna Sliders and Salmon Cucumber Rolls appeared first on Creative Sides.
]]>The post Black Bean Sweet Potato Soup appeared first on Creative Sides.
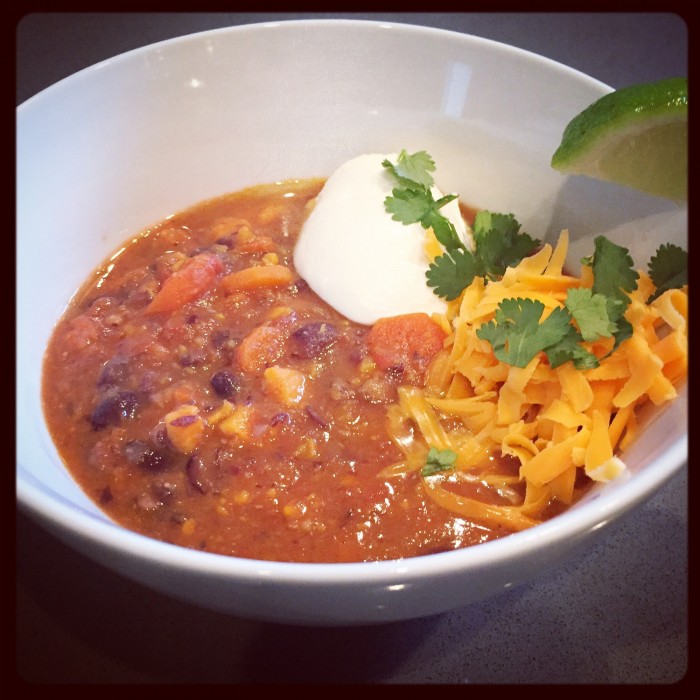
]]>This Black Bean Sweet Potato soup is quick and easy to throw together, full of vitamins and minerals, and is comprised wholly of ingredients I always have in my pantry (a major win in my books). It can be jazzed up with shredded cheese and sour cream or left plain and simple. The recipe makes a lot but it freezes well.
- 2 tablespoons olive oil
- 1 onion, finely diced
- 4 carrots, sliced (approximately 1 cup)
- 1 sweet potato, finely diced (approximately 3 cups)
- 3 cloves garlic, minced
- 1/2 teaspoon cumin
- 1 x 796mL can diced tomatoes, with juice
- 2 x 540mL can black beans, drained and rinsed well
- 4 cups vegetable or chicken broth
- salt and pepper to taste
- Heat olive oil in large soup pot over medium high heat. Add onions, carrots, and sweet potatoes and cook until softened, 7 - 10 minutes.
- Add garlic and cumin and cook, stirring constantly, for another minute or two.
- Add tomatoes with their juice, beans, and broth. Bring to a boil and cook until vegetables are completely tender, anywhere from 5 - 15 minutes depending on how big you sliced your veg.
- You can leave this soup as-is or you can blend all (or part) of it for a smoother consistency. I like to use my immersion blender and blend in quick bursts to end up with a sort of half-smooth-half-chunky consistency.
- Serve with sour cream, shredded cheese, sliced green onions, fresh cilantro, lime wedges, hot sauce, etc. The sky's the limit.
A version of this post originally appeared on Hillary with 2 Ls.
The post Black Bean Sweet Potato Soup appeared first on Creative Sides.
]]>The post Salmon with Avocado Dill Yogurt Sauce appeared first on Creative Sides.
]]>
Here on the West Coast of Canada, there are a few things we know to be true:
- We live in the tropics of Canada – yes it rains, but not nearly as much as we say it does because then everyone would want to move here.
- We can BBQ all year round without having to shovel snow to reach our BBQ – you don’t have to shovel rain… see #1.
- We are lucky to have an abundance of fresh local ingredients available within 100 miles.
- West Coast Spirit… easily observed in a gathering of great people, relaxed, welcoming, and – more often than not – planned on the spur of the moment.
Some of our best and most memorable gatherings are planned at the last minute. Friends coming over? Put some ice in a bucket with your beverage of choice, throw a salmon on the BBQ and whip up this tasty sauce. This sauce is quicker to prepare than the salmon and is a crowd pleaser. It adds a lot of flavour and interest to a simple meal and it lets you spend more time with your friends than in the kitchen.
What’s the secret to this easy sauce? Olympic Natural Yogurt. I’ve raved about it before in my Coconut Lime Banana Bread recipe. I love it because it’s so versatile and can be used at breakfast, lunch and dinner. Does this make me a Yogurt Aficionado?
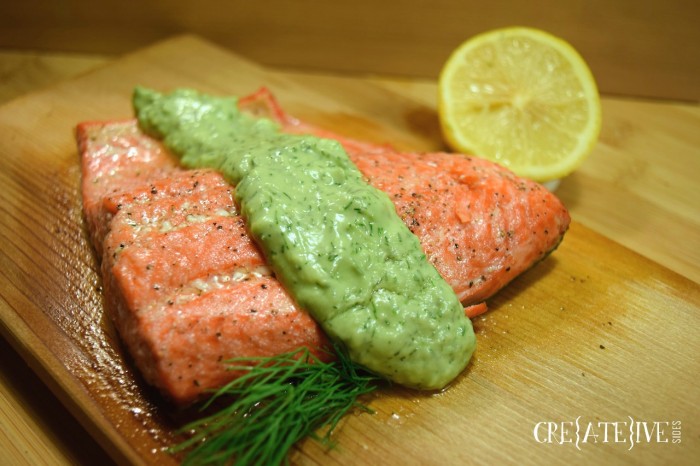
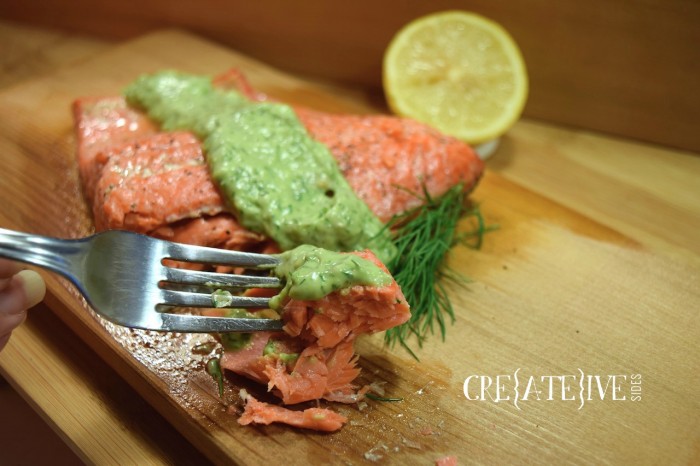
Cedar Planked Salmon with Avocado Dill Yogurt Sauce
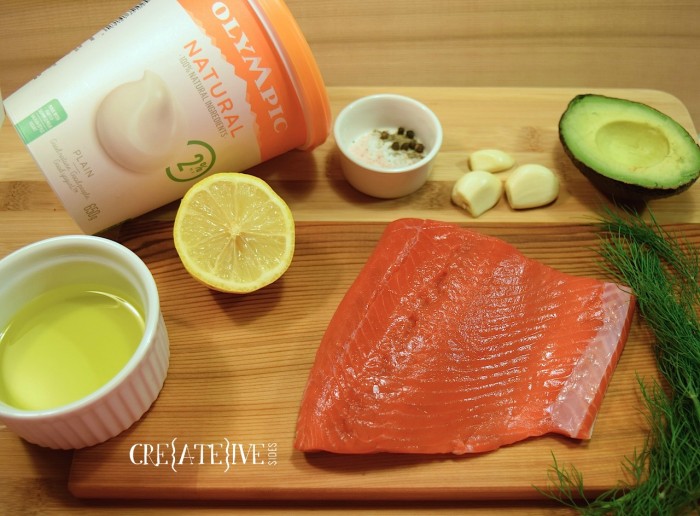
Ingredients
1 avocado
½ cup Olympic Natural Plain yogurt
3 tbsp dill (chopped)
1 clove garlic (pressed)
2 tbsp lemon juice
Salt
Pepper
4 salmon fillets
1 tbsp olive oil
Cedar Plank or parchment lined baking tray
Instructions
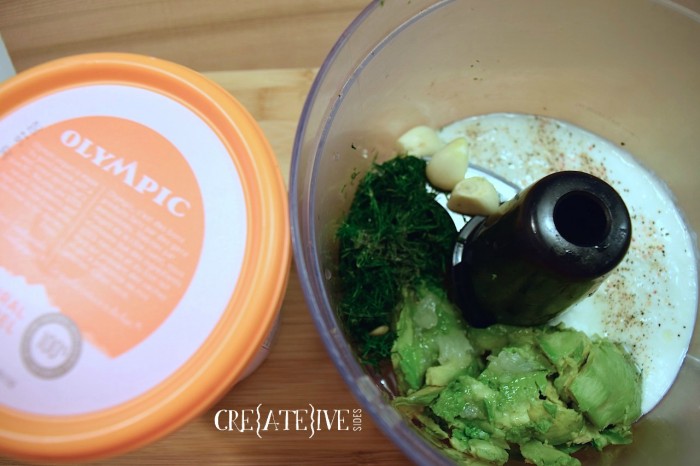
Avocado Dill Yogurt Sauce
- In a food processor, combine avocado, Olympic Natural yogurt, dill, pressed garlic, lemon juice, salt and pepper until smooth and creamy.
- For garlic lovers you can blend the cloves of garlic whole but you may end up with small chunks in the sauce. If you prefer a smoother sauce, press the garlic first.
Cedar Plank Salmon (Baked)
- Submerge your cedar plank in water for 2-6 hours prior to cooking. Weigh down the plank with a heavy object.
- Preheat oven to 400 degrees
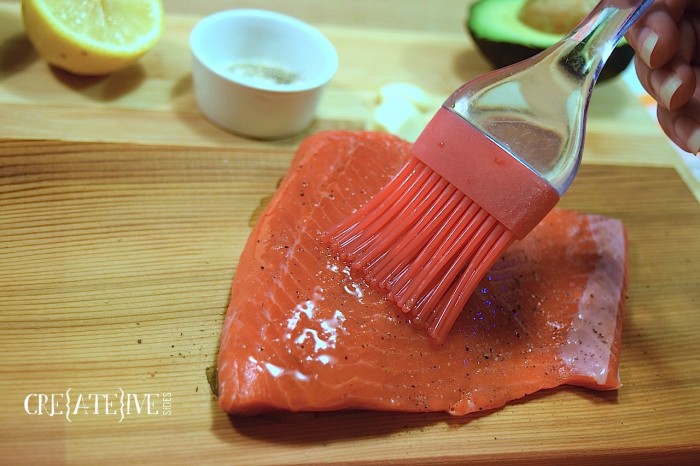
- Place salmon skin side down on cedar plank.
- Brush olive oil on salmon then season with salt and pepper.
- Bake for approximately 10-15 minutes depending on thickness of your fillets. A good rule of thumb is 10 minutes of baking time for each 1” of thickness.
- Serve topped with Avocado Dill Yogurt Sauce
Cedar Plank Salmon (BBQ)
- Complete Steps 1-4 as above
- Place the plank on a preheated hot grill. Turn down to low and close the lid.
- Keep the lid closed as much as possible. Plank should smoulder not flame. If the plank starts to flame, spritz the plank with a spray bottle of water.
- Serve topped with Avocado Dill Yogurt Sauce
As mentioned in my previous post, Olympic products are made right here on the west coast in Delta, B.C. with 100% natural ingredients and fresh milk from cows who live close to their dairies. The milk has a shorter commute than my husband does to go to work. It’s that fresh!
Olympic’s packaging has a great new look and easily spotted in the grocery isle (as well as my fridge – my husband and I both went to the store and picked up yogurt last Tuesday without telling the other. I’ll be referencing these recipes over the next few weeks as I have approximately 3kg of yogurt in my fridge. Thank goodness it’s Back to School time!)
Disclaimer: Although this post has been generously sponsored by Olympic, the opinions and language are my own. If I would not serve it to my family, I would never suggest you serve it to yours.
The post Salmon with Avocado Dill Yogurt Sauce appeared first on Creative Sides.
]]>The post Cold Brew Coffee appeared first on Creative Sides.
]]>
The weather is warming up which means it’s the season of flip-flops, late evening sunsets, and my favourite summer staple: cold brew coffee. Don’t confuse cold brew with iced coffee; this isn’t your traditionally brewed coffee poured over ice. Cold brew takes time and a little love but it’s worth the wait. Removing heat from the brewing process removes coffee’s acidity so you end up with a coffee concentrate that’s subtly sweet. It’s also ridiculously cheap to make so wave goodbye to your overpriced lattes and embrace the magic that is making a week’s worth of coffee for just a couple of bucks.
Ingredients
1 cup coarsely ground coffee
4 cups cold-to-room-temperature water
Directions
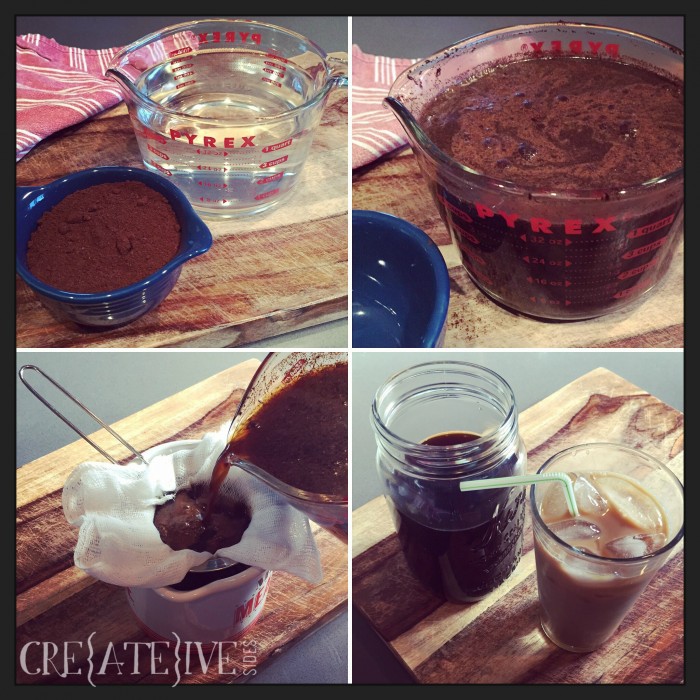
Pour 4 cups of (not hot) water into a container that gives you a bit of stirring room at the top once you add your coffee. Sprinkle coffee over the top and give your mixture a gentle stir to incorporate your grounds and make sure they aren’t dry. Cover container with plastic wrap and store at room temperature for 12 – 24 hours.
Strain mixture through cheesecloth or a very fine sieve. Cover tightly and store in the fridge.
This makes approximately 3-3/4 cups of coffee concentrate. Serve over ice with water or milk, depending on how you like your brew. I’m a fan of a 1:1 coffee concentrate to water ratio with a healthy splash of cream and a dash of maple syrup but half the fun is playing around with ratios and additions to find your perfect cup o’ (cold) joe.
The post Cold Brew Coffee appeared first on Creative Sides.
]]>The post Apricot Glazed Pork Kebabs appeared first on Creative Sides.
]]>
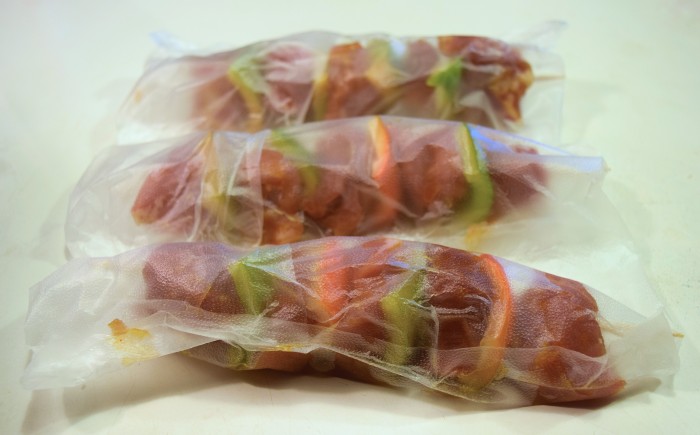
Freeze-Ahead Apricot Glazed Pork Kebabs
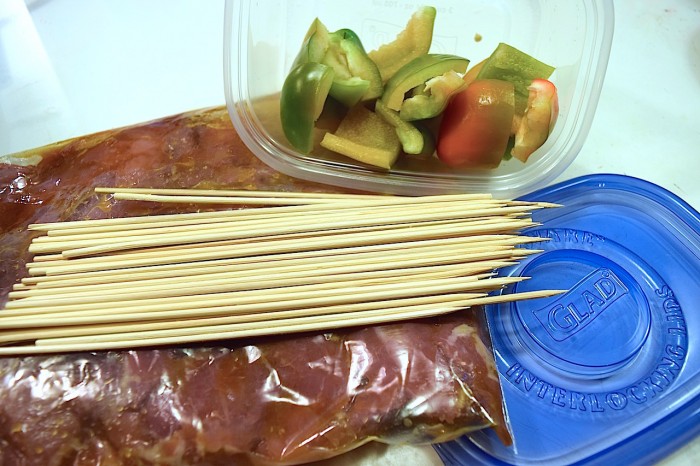
If you are planning to make this meal to freeze, follow the recipe below but mix the pork AND the peppers in with the marinade. Then, once you have threaded the skewers, my secret tip is to seal them individually with GLAD® Press’n Seal. I lay out a sheet (textured side up) that is twice as long as the skewers plus an extra inch. Then I lay 3-4 skewers side by side, leaving an inch between each skewer, plus an inch on either end. I fold the sheet length wise overtop of the pork kebabs and run my finger along each edge to seal. Then I run a finger in between each kebab to seal them off individually and voilà! No more fighting with kebabs that are stuck together! You can place each packet into a GLAD® Freezer Bag and you’re good to go.
One thing to note: some people prefer their kebabs with extra crisp vegetables. If this is you, I would recommend freezing meat-only kebabs, and making separate vegetable kebabs the same day you’ll be eating them. If you’re not so picky about the texture of the vegetables, or like them a bit softer, you’re good to freeze.
To cook, thaw the pork kebabs overnight in the refrigerator, or for a few hours on the counter. Then grill away!

- 8 oz jar of apricot jam
- 2 tbsp soy sauce
- 1 tbsp lemon juice
- 4 garlic cloves, minced
- 1 tbsp chipotle child powder
- salt & pepper
- 2 lbs pork tenderloin, cubed
- 1 green pepper
- 1 sweet pepper
- Warm apricot jam in the microwave for 1 minute
- In a mixing bowl, combine jam, soy sauce, lemon juice, garlic and chill powder, stirring well
- Cube pork tenderloin and place into a large zipper plastic bag
- Pour 3/4 of the mixture into the bag with the pork and let it marinade for at least 30 minutes
- Chop green and sweet peppers
- Preheat BBQ to medium heat
- Alternate threading pork and pepper cubes onto bamboo or metal skewers
- Dust with salt and pepper, and additional chili powder to taste
- Place skewers on the BBQ and baste with remaining apricot mixture
- Cook for 3 minutes and turn
- Baste other half and cook for an additional 4 minutes or until done.
- If you don't have a BBQ, the kebabs can be cooked in the oven at 375°F for 25-30 minutes
I’m a big fan of weekly meal planning and prepping. You can find more prepare-ahead recipe ideas here, plus be sure to check out my meal planning tips too! Happy cooking!
All on the table disclaimer: Although this post has been generously sponsored by GLAD®, the opinions and language are my own. If I would not use it with my family, I would never suggest you use it with yours. Read our full disclosure statement here.
The post Apricot Glazed Pork Kebabs appeared first on Creative Sides.
]]>The post Toasted Coconut Lime Banana Bread #OlympicDairyGood appeared first on Creative Sides.
]]>
Being married to a Frenchman, yogurt is a must have in our house. Walking the grocery aisle in France, it’s quite impressive to see the selection of yogurt available. In Canada, the entire aisle devoted to the many options of chips and pop/soda available has the same square footage devoted to the different kinds of yogurt. I’ll take a picture on my trip this summer and post it for you; it’s quite something to see!
Here at home in British Columbia, we are surrounded by an abundance of farms, so we try to eat fresh, local ingredients whenever possible. A few great farm to table recipes can be found here.
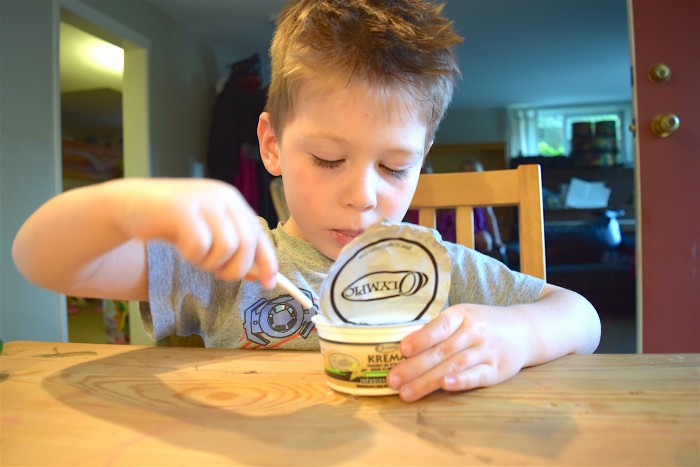
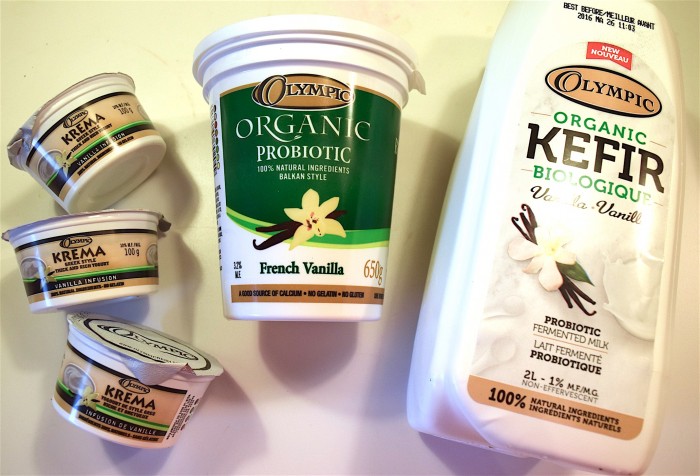
I was happy to hear that Olympic Dairy products are made close to home in Delta, BC and made from 100% natural ingredients. We regularly stock our fridge with Olympic Krema Greek Style Thick & Rich Yogurt and the larger tubs of Olympic Organic Probiotic Yogurt. They are handy for lunches, and my little ones can help themselves from the fridge in the morning (especially on Saturdays when morning cartoons are on – thank you Olympic for those precious extra minutes to sleep in!)
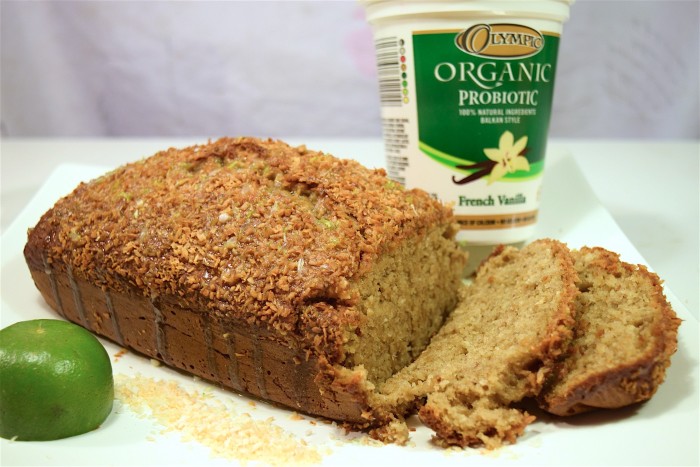
One of our favourite family recipes is Toasted Coconut Lime Banana Bread. I must warn you though… be prepared to have the entire loaf disappear as if by magic. I have never had a loaf last more than 3 hours in our house. It’s that good!
Toasted Coconut Lime Banana Bread
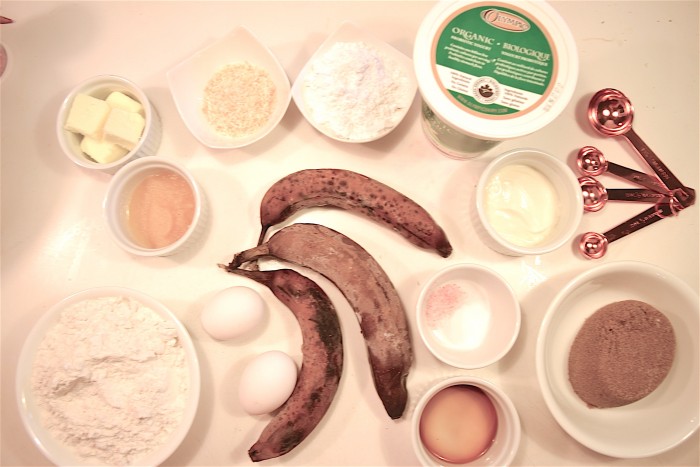
Ingredients:
2 cups flour
3/4 tsp baking soda
1/2 tsp salt
2 eggs
3/4-1 cup sugar
1/4 cup softened unsalted butter
1/4 cup Olympic Organic Probiotic Vanilla Yogurt
1 to 1 1/2 cups mashed bananas (approx 3 bananas)
3 tbsp applesauce or apple juice
1/2 tsp vanilla
1/2 cup coconut flakes
1-2 tbsp coconut to sprinkle on top of bread
Glaze:
1/2 cup icing sugar
1 1/2 tbsp fresh lime or lemon juice (approx 1 lime; you may substitute store-bought lime or lemon juice if needed)
Step 1: Preheat your oven to 350°F. Prepare your loaf pan by cutting out a piece of parchment paper to fit in the bottom of the pan.
Step 2: In a shallow baking/cookie pan spread the coconut. Place in preheating oven for a few minutes often checking to make sure it does not burn. The coconut is ready once it is pale to golden brown.
Step 3: Mix flour, baking soda and salt together in a bowl. Set aside.
Step 4: Beat together eggs, butter, and sugar on medium speed for 1 minute. If your butter isn’t softened stick in the microwave for 5 seconds at a time. Don’t let the butter melt!
Step 5: Add Olympic Organic Probiotic Vanilla Yogurt, bananas, applesauce, vanilla, ½ cup toasted coconut and mix until well blended.
Step 6: Add in the dry ingredients and mix until just blended.
Step 7: Pour mixture into your prepared loaf pan and top with 1-2 tbsp of coconut.
Step 8: Place in preheated 350° oven for approximately 1 hour.
Step 9: Prepare the glaze while your loaf is baking. Whisk together lime juice with ½ cup of icing sugar. You want a slightly runny consistency. Add more icing sugar or lime juice as needed.
Step 10: When your loaf is done, place on a cooling rack for 5 minutes. Do not let it cool completely! Remove the loaf from the pan and place on a cooling rack with a plate or pan underneath. Drizzle the glaze over the top and let it drip over the sides.
Step 11: Slice and enjoy!
You could also substitute with Olympic’s refreshingly smooth NEW Vanilla Kefir. Kefir is a probiotic, fermented milk that contains 2 billion probiotics (per 250 ml) and is great for a healthy digestive flora. Olympic Kefir is organic, contains 10 different bacterial cultures and is low fat with only 1% M.F. The Olympic Organic Kefir also can be found in plain or strawberry flavour.
Disclaimer: Although this post has been generously sponsored by Ultima Foods, the opinions and language are my own. If I would not serve it to my family, I would never suggest you serve it to yours.
The post Toasted Coconut Lime Banana Bread #OlympicDairyGood appeared first on Creative Sides.
]]>The post Refurbished Vanity DIY appeared first on Creative Sides.
]]>
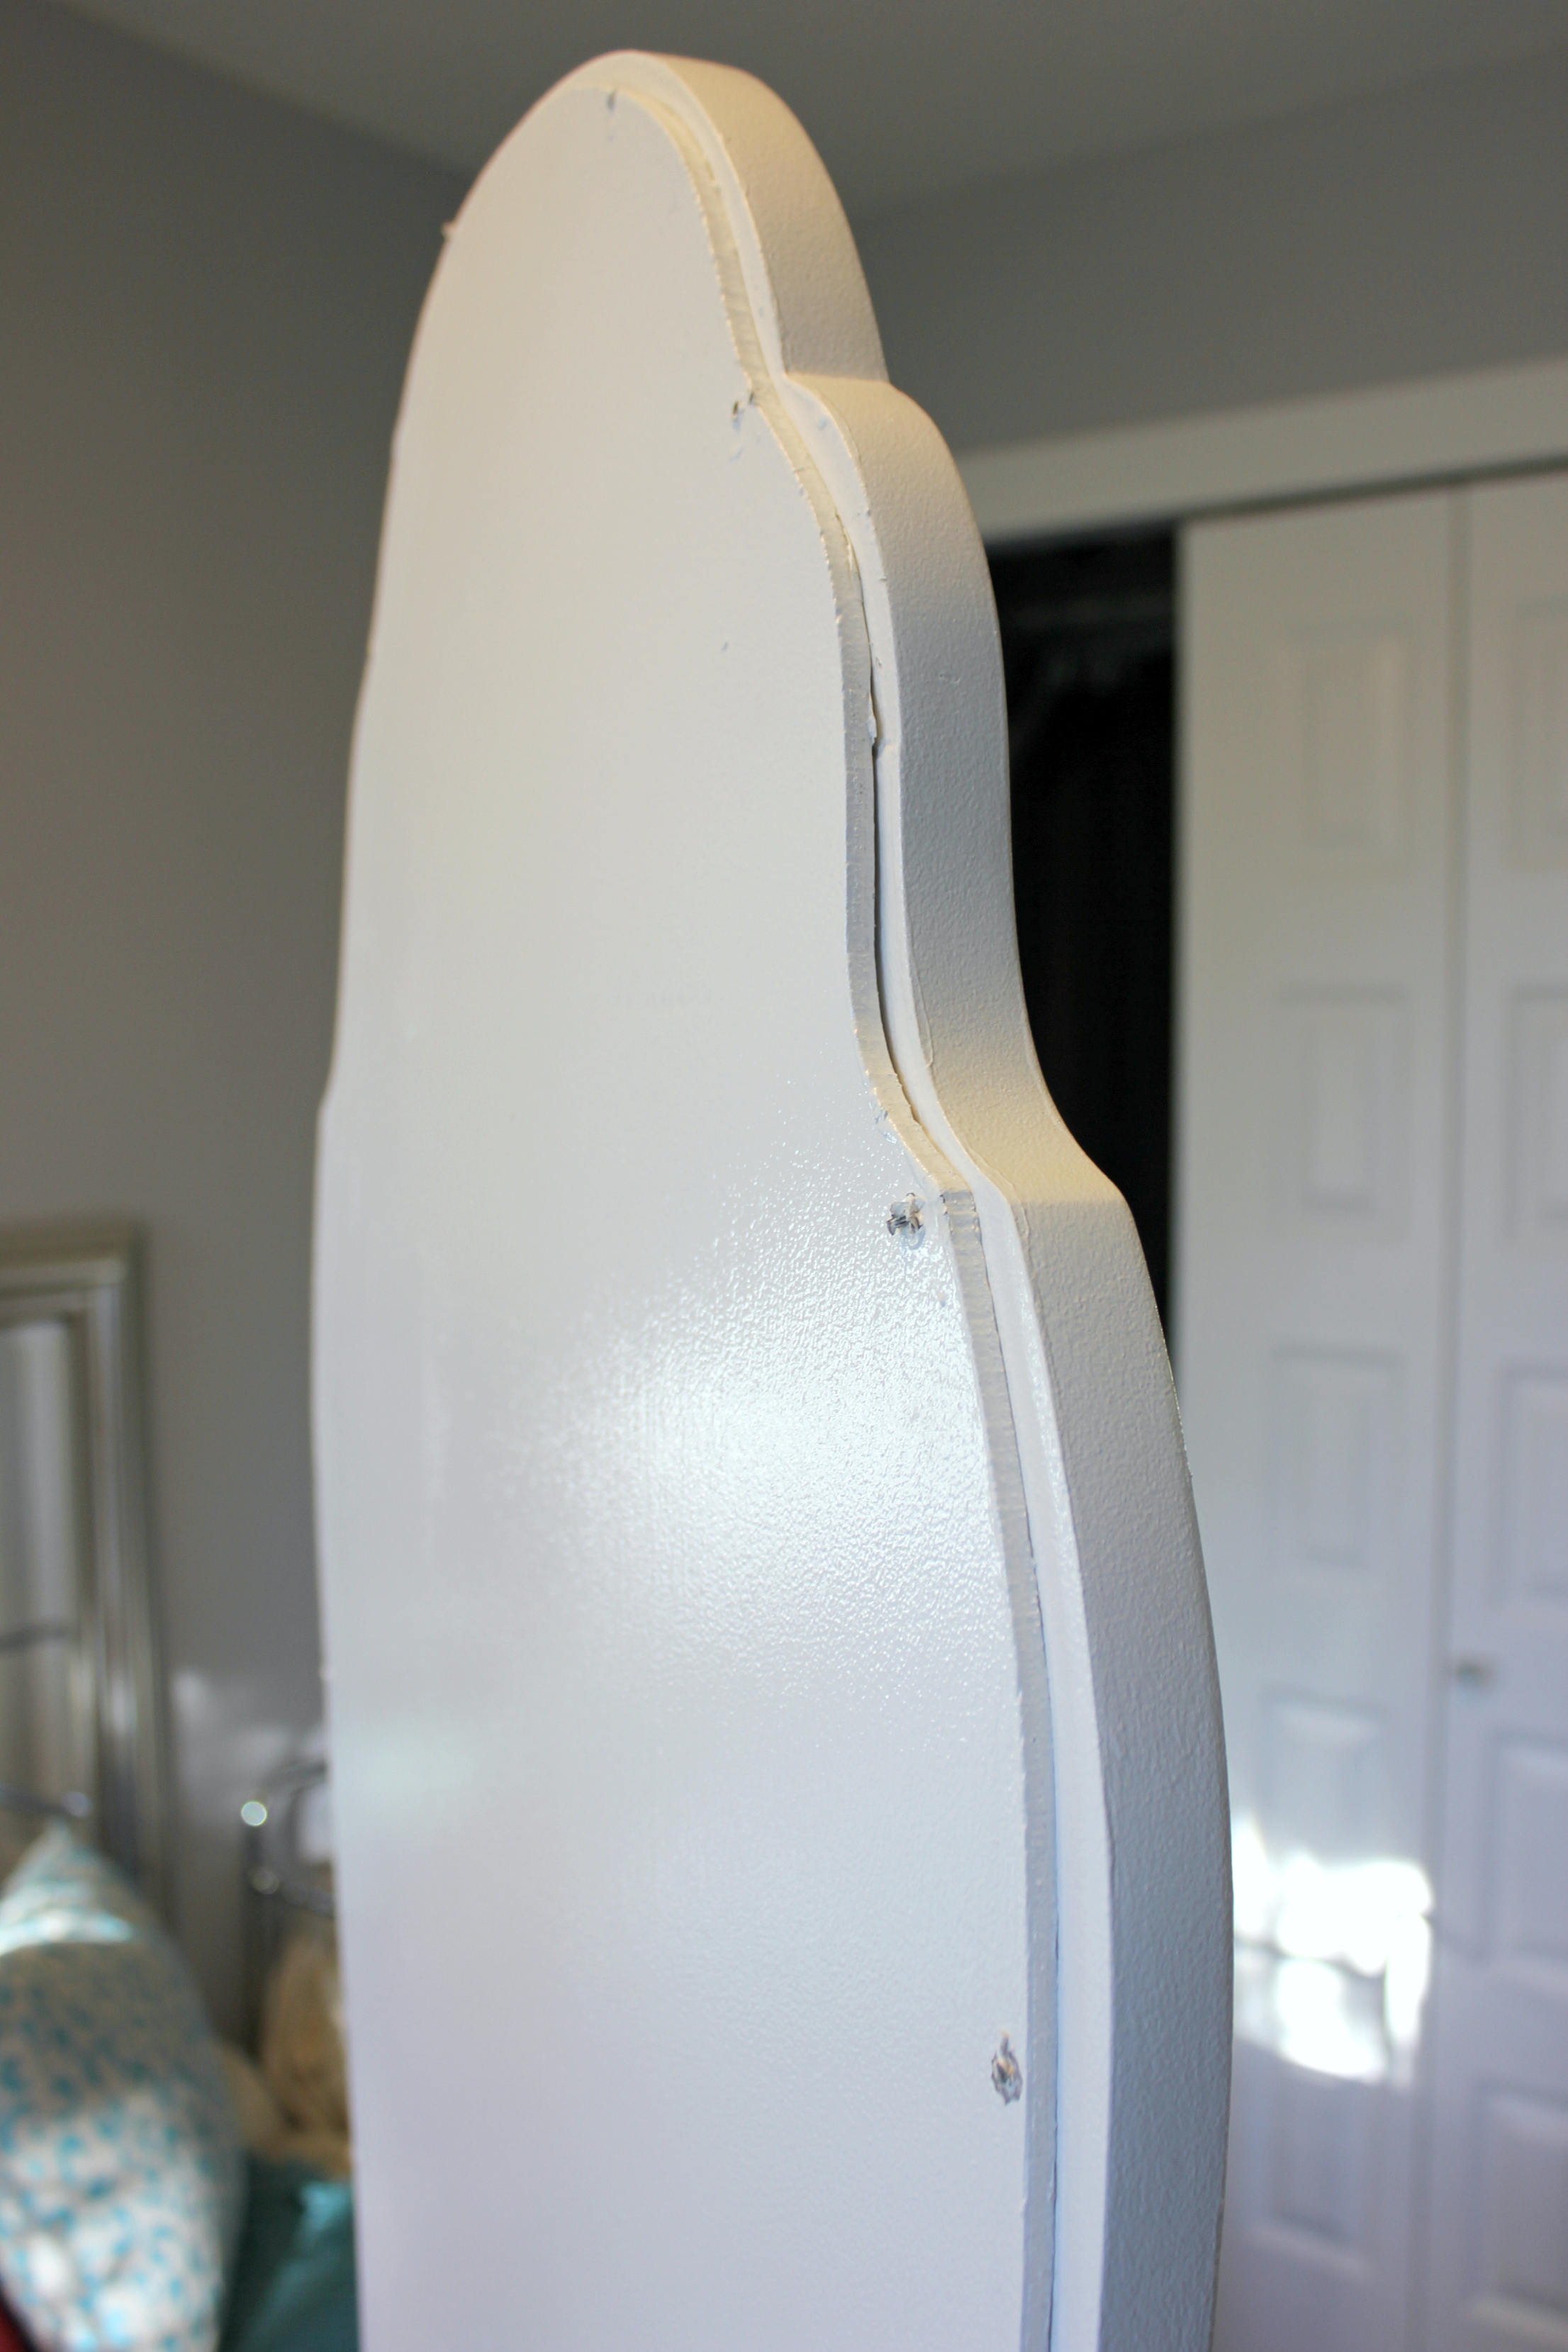
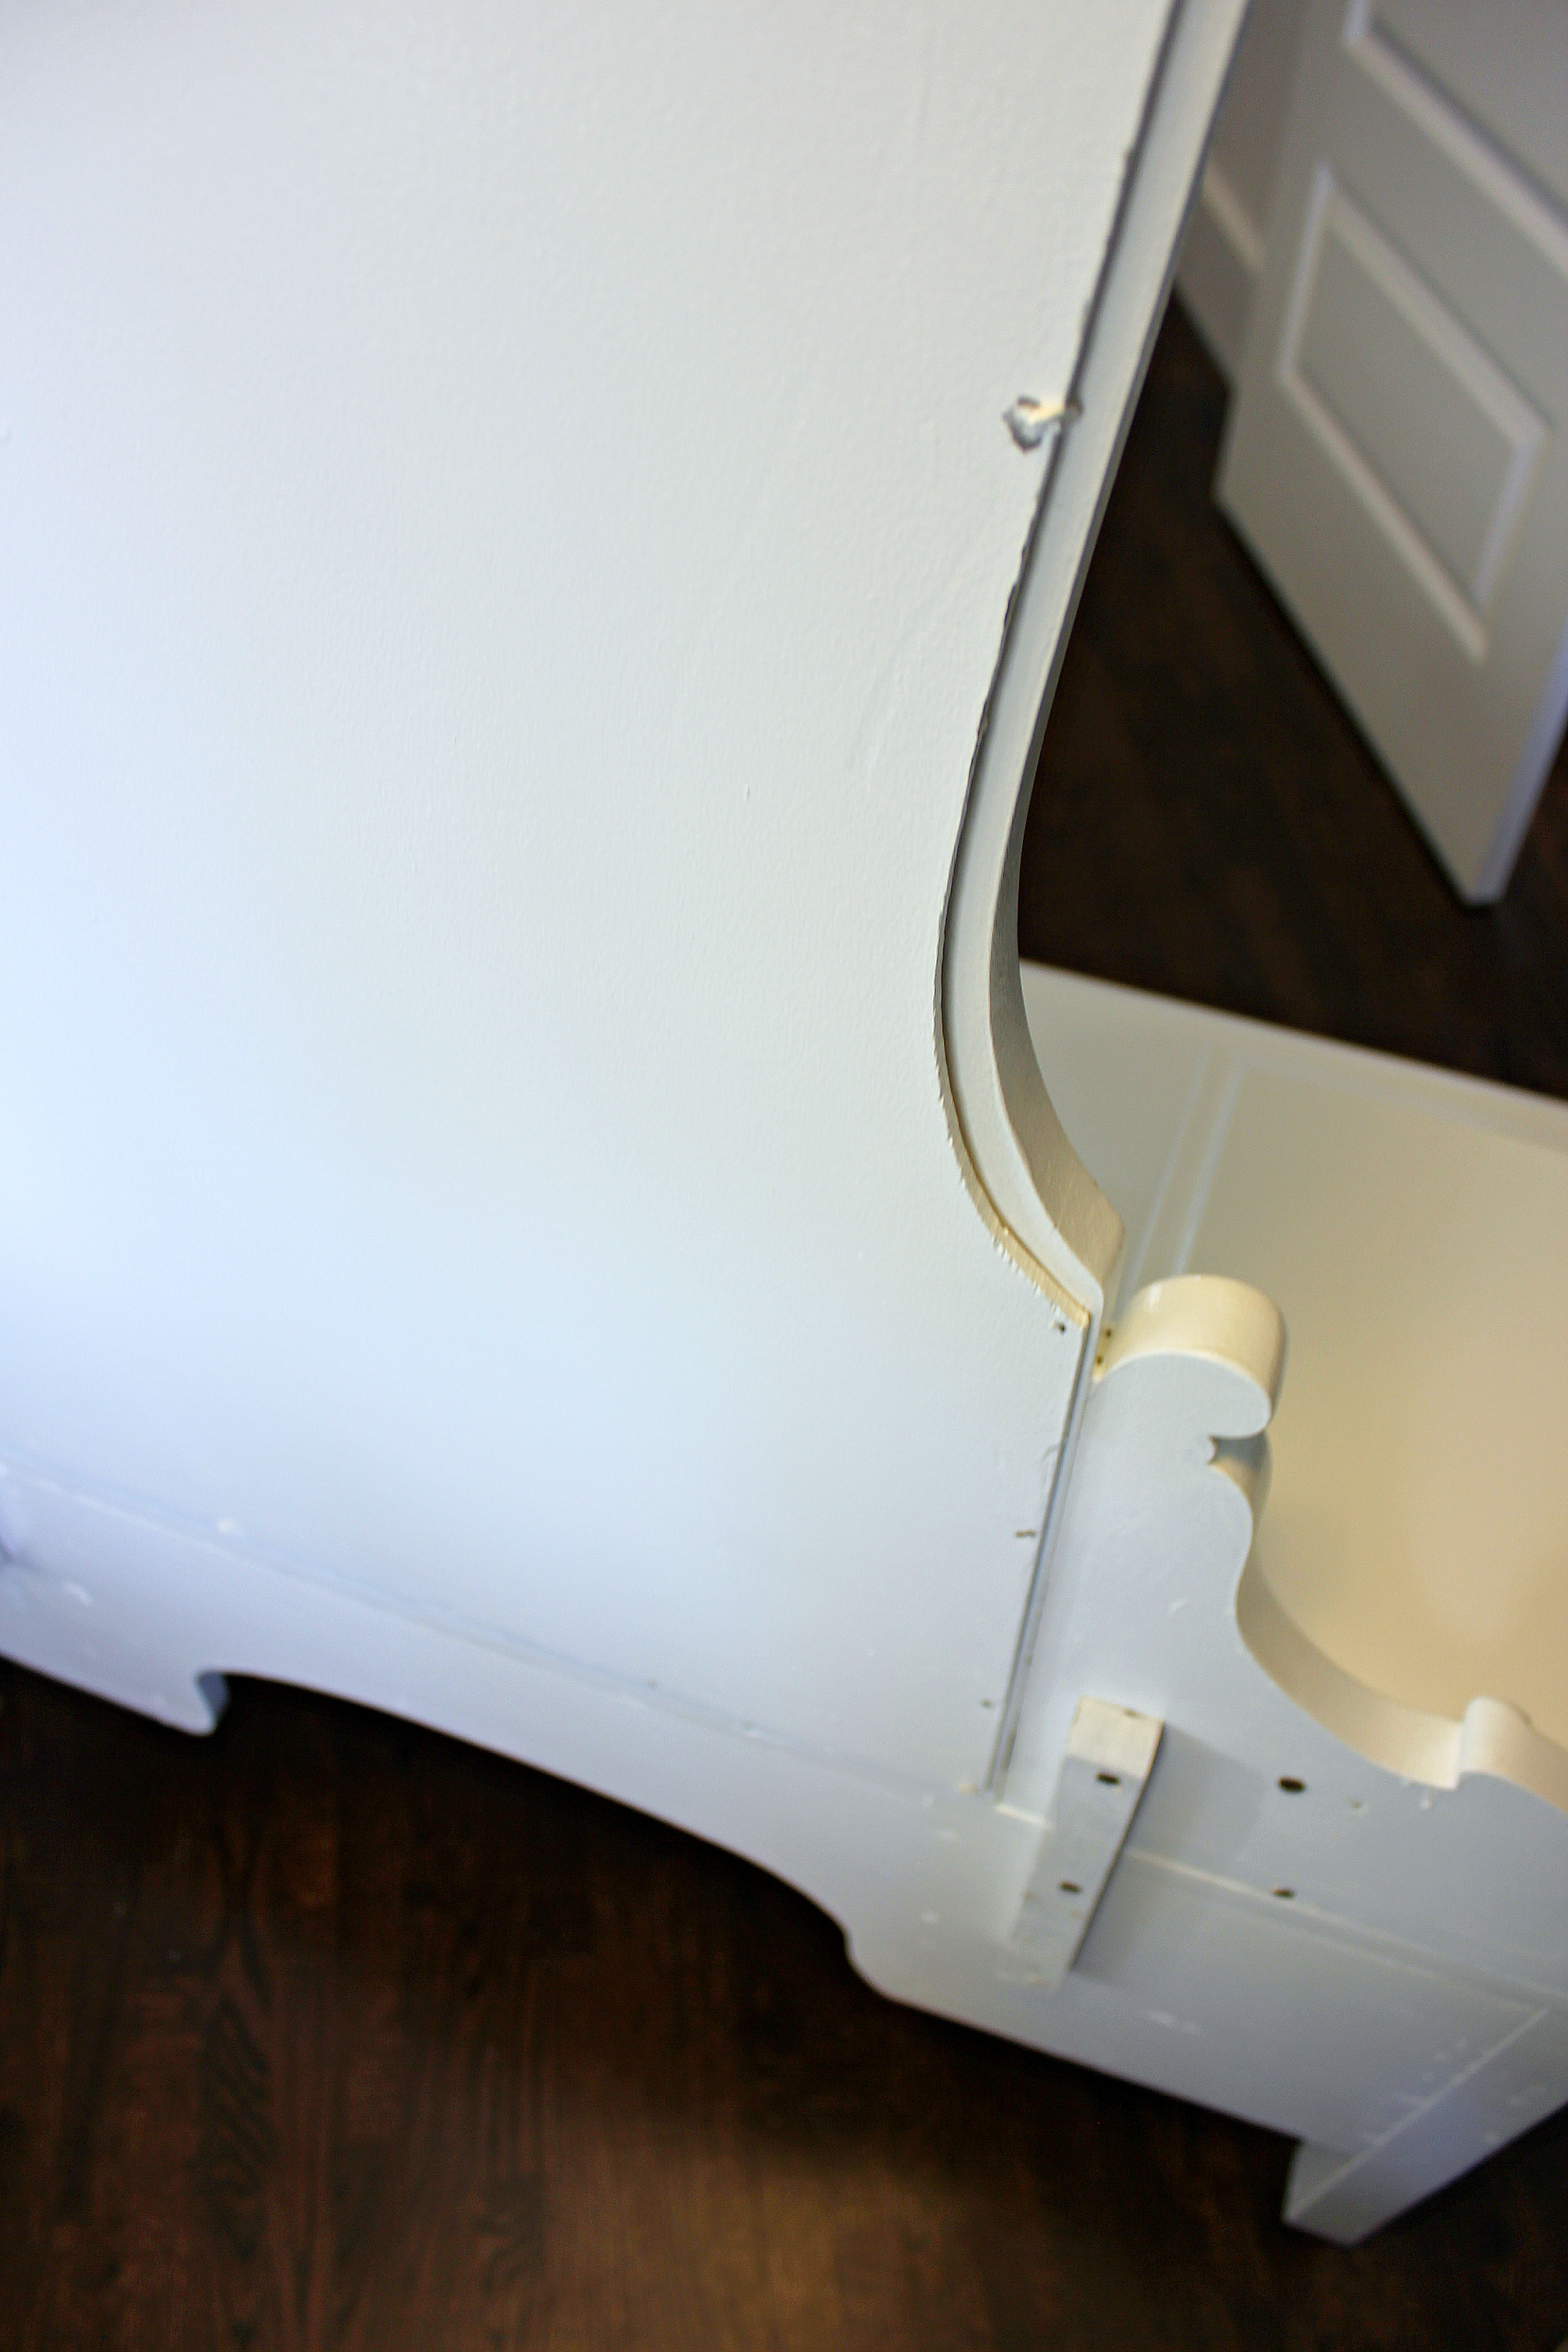
In an effort to transform our youngest daughter’s room from a nursery to a little girl’s domain, we had a couple projects up our sleeves. The first of these was refinishing this beautiful antique child’s vanity that my husband had acquired from a second hand store several years back. It was finally it’s moment to come up from the basement and shine!
Before:

Just bursting with potential! You can see why the Hubster, with his woodwork loving ways, brought this gem home. I mean really, can’t you just see the potential bursting all over the place already?!
Refurbished Vanity DIY
Tools and Supplies:
Finishing nails (we saved the original)
Screws (we saved the original)
Sandpaper – 20, 120 and 200 grit
Orbital Sander (optional)
Lint free cloth
Drop Cloth or Plastic (optional – to protect your work area)
Painters Tape
Smooth 4″ Foam roller
2″ Paint Brush
Paint Tray
Zinsser Cover Stain Interior/Exterior Primer-Sealer Stain Killer
Benjamin Moore’s High-gloss Latex Paint in Chantilly lace (OC-65)
Hammer
Drill and corresponding bits
Hardware (handles/pulls)
Step 1:
The first order of business was taking it apart. We removed the mirror by detaching it from the unit. Then we took off the wood backing and removed the mirror itself, putting it carefully aside. It is important to remove the mirror so that the inside edge of the vanity frame can be painted. This way you will not see a dark reflection of unpainted wood along the outer edge of the mirror when it is finished.

Step 2:
Next came the sanding. All the sanding! My husband’s perfectionist tendencies come in very handy for these sorts of things. We wanted to make sure any sort of finish or varnish had been removed before proceeding. This was achieved with an 80, 120 and then a 200 grit sand paper on an orbital sander.

Step 3:
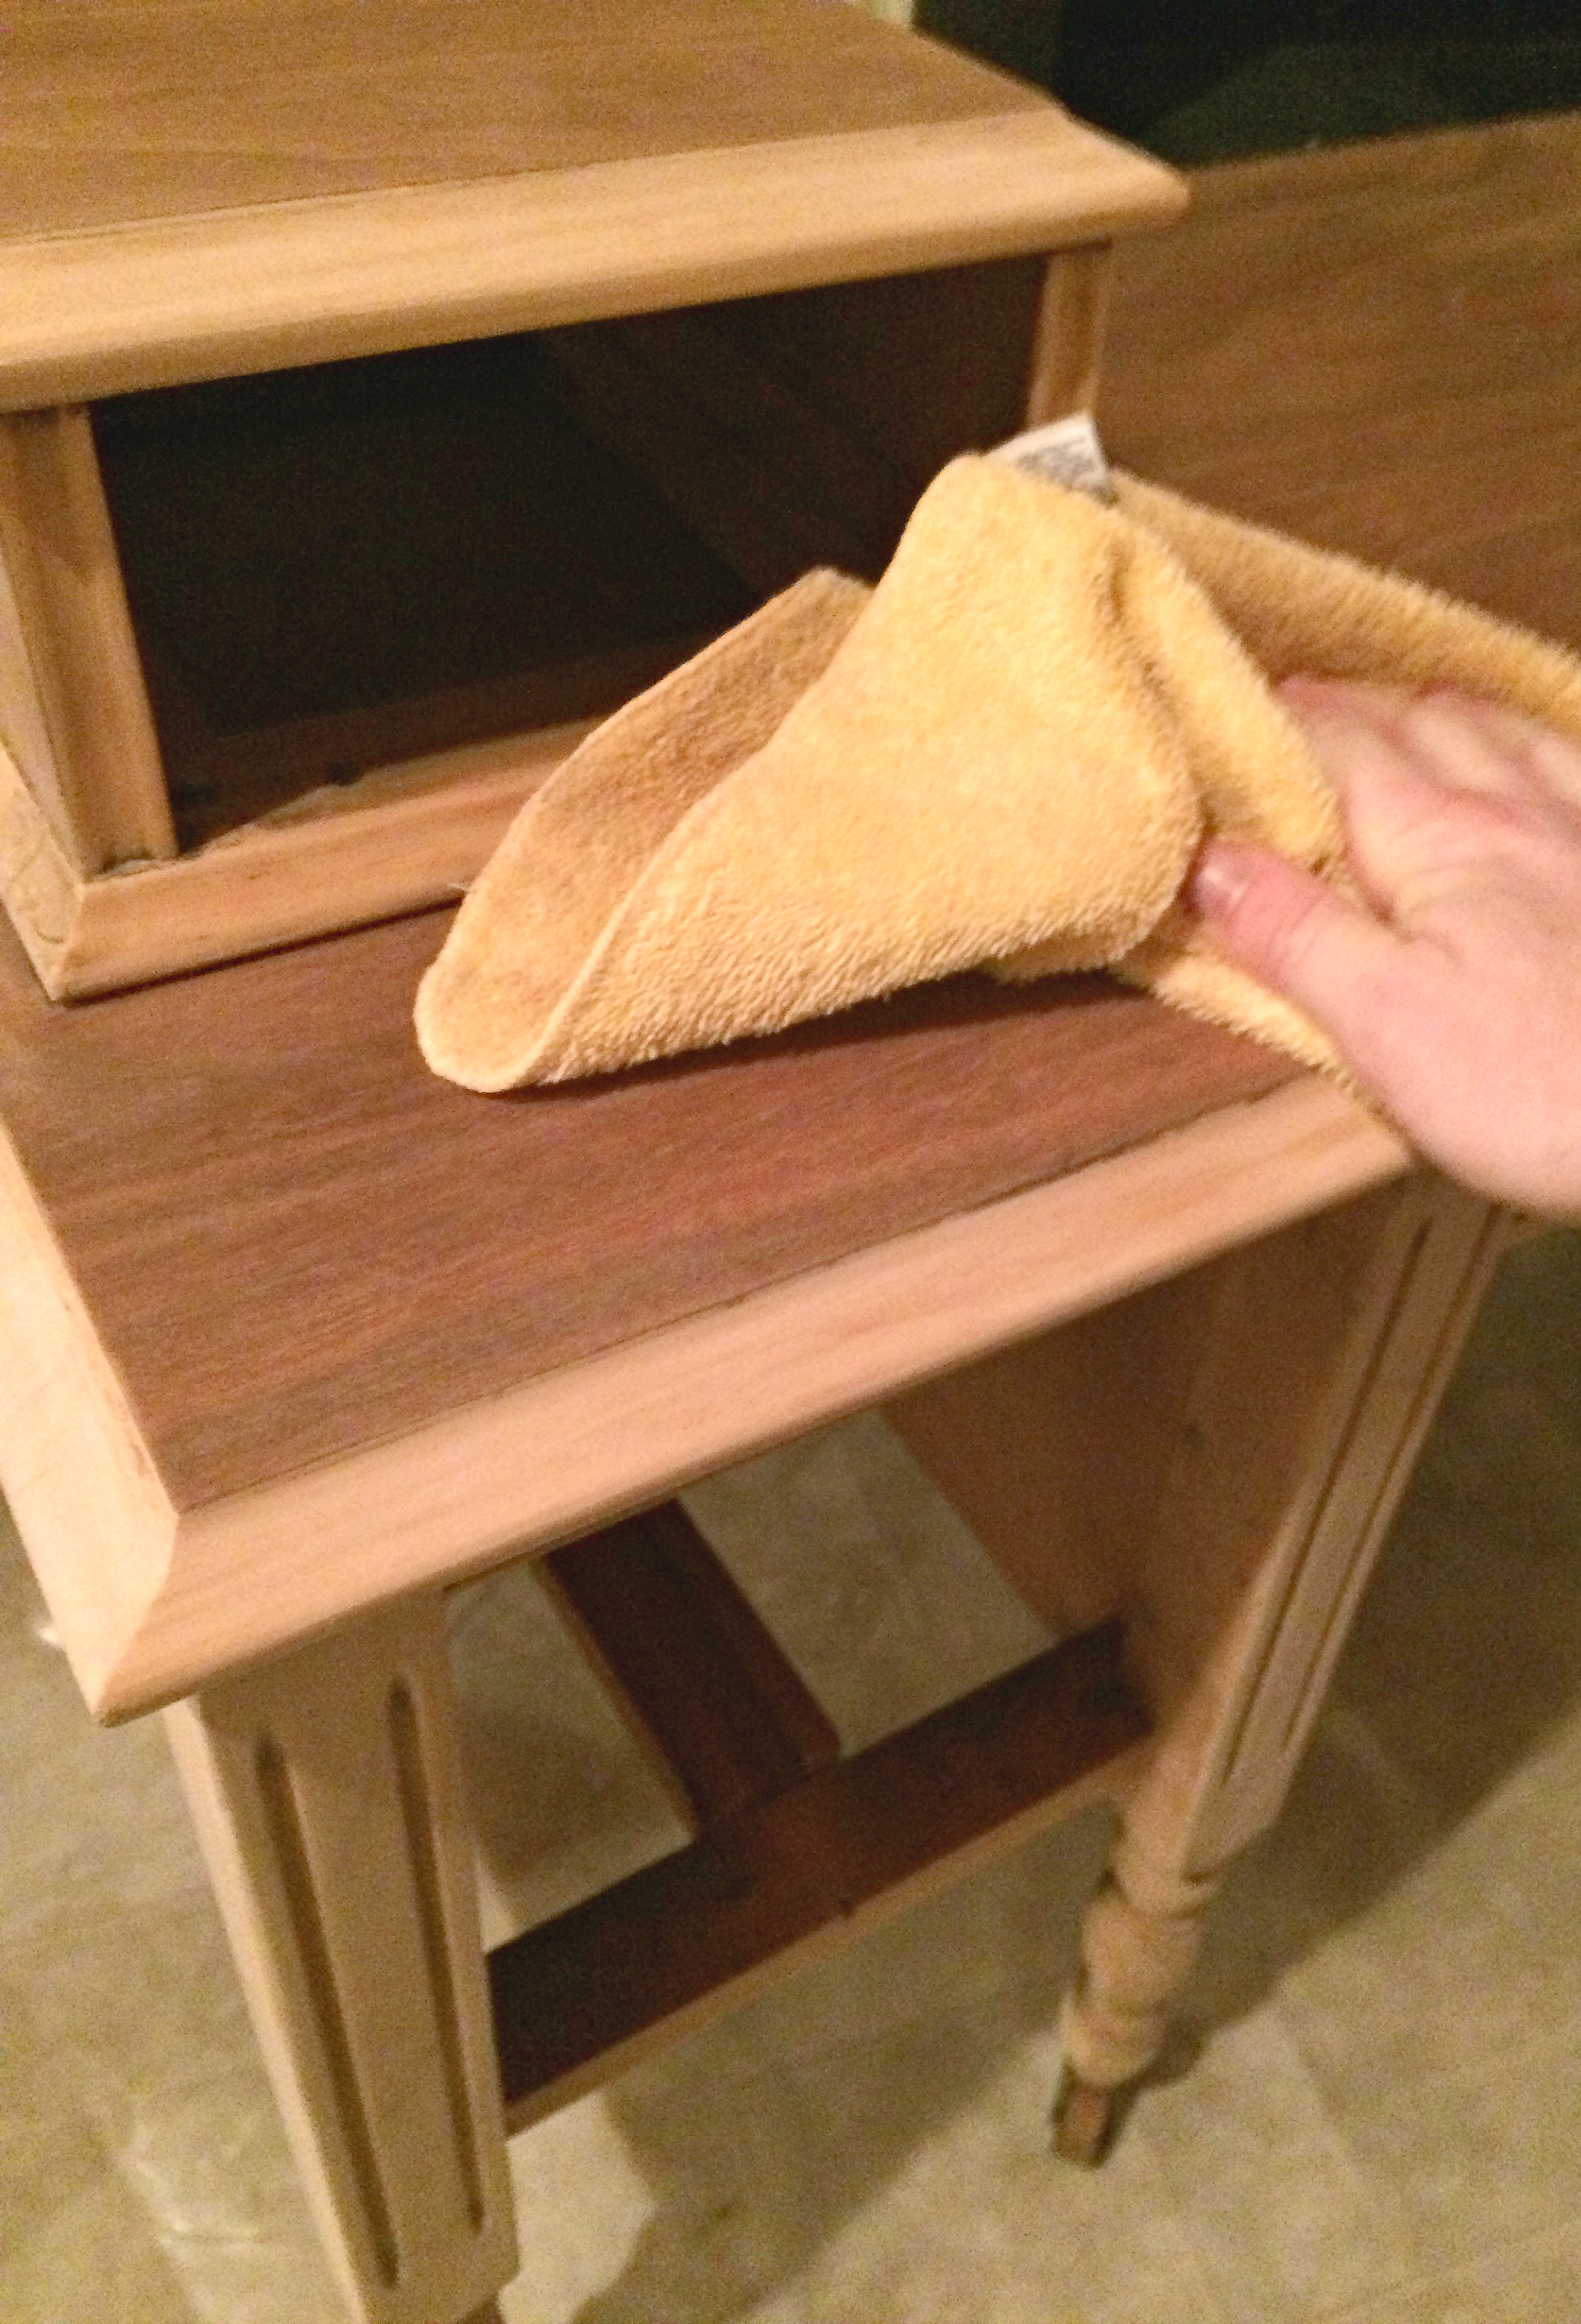
Carefully wipe down any and all dust with a damp cloth.
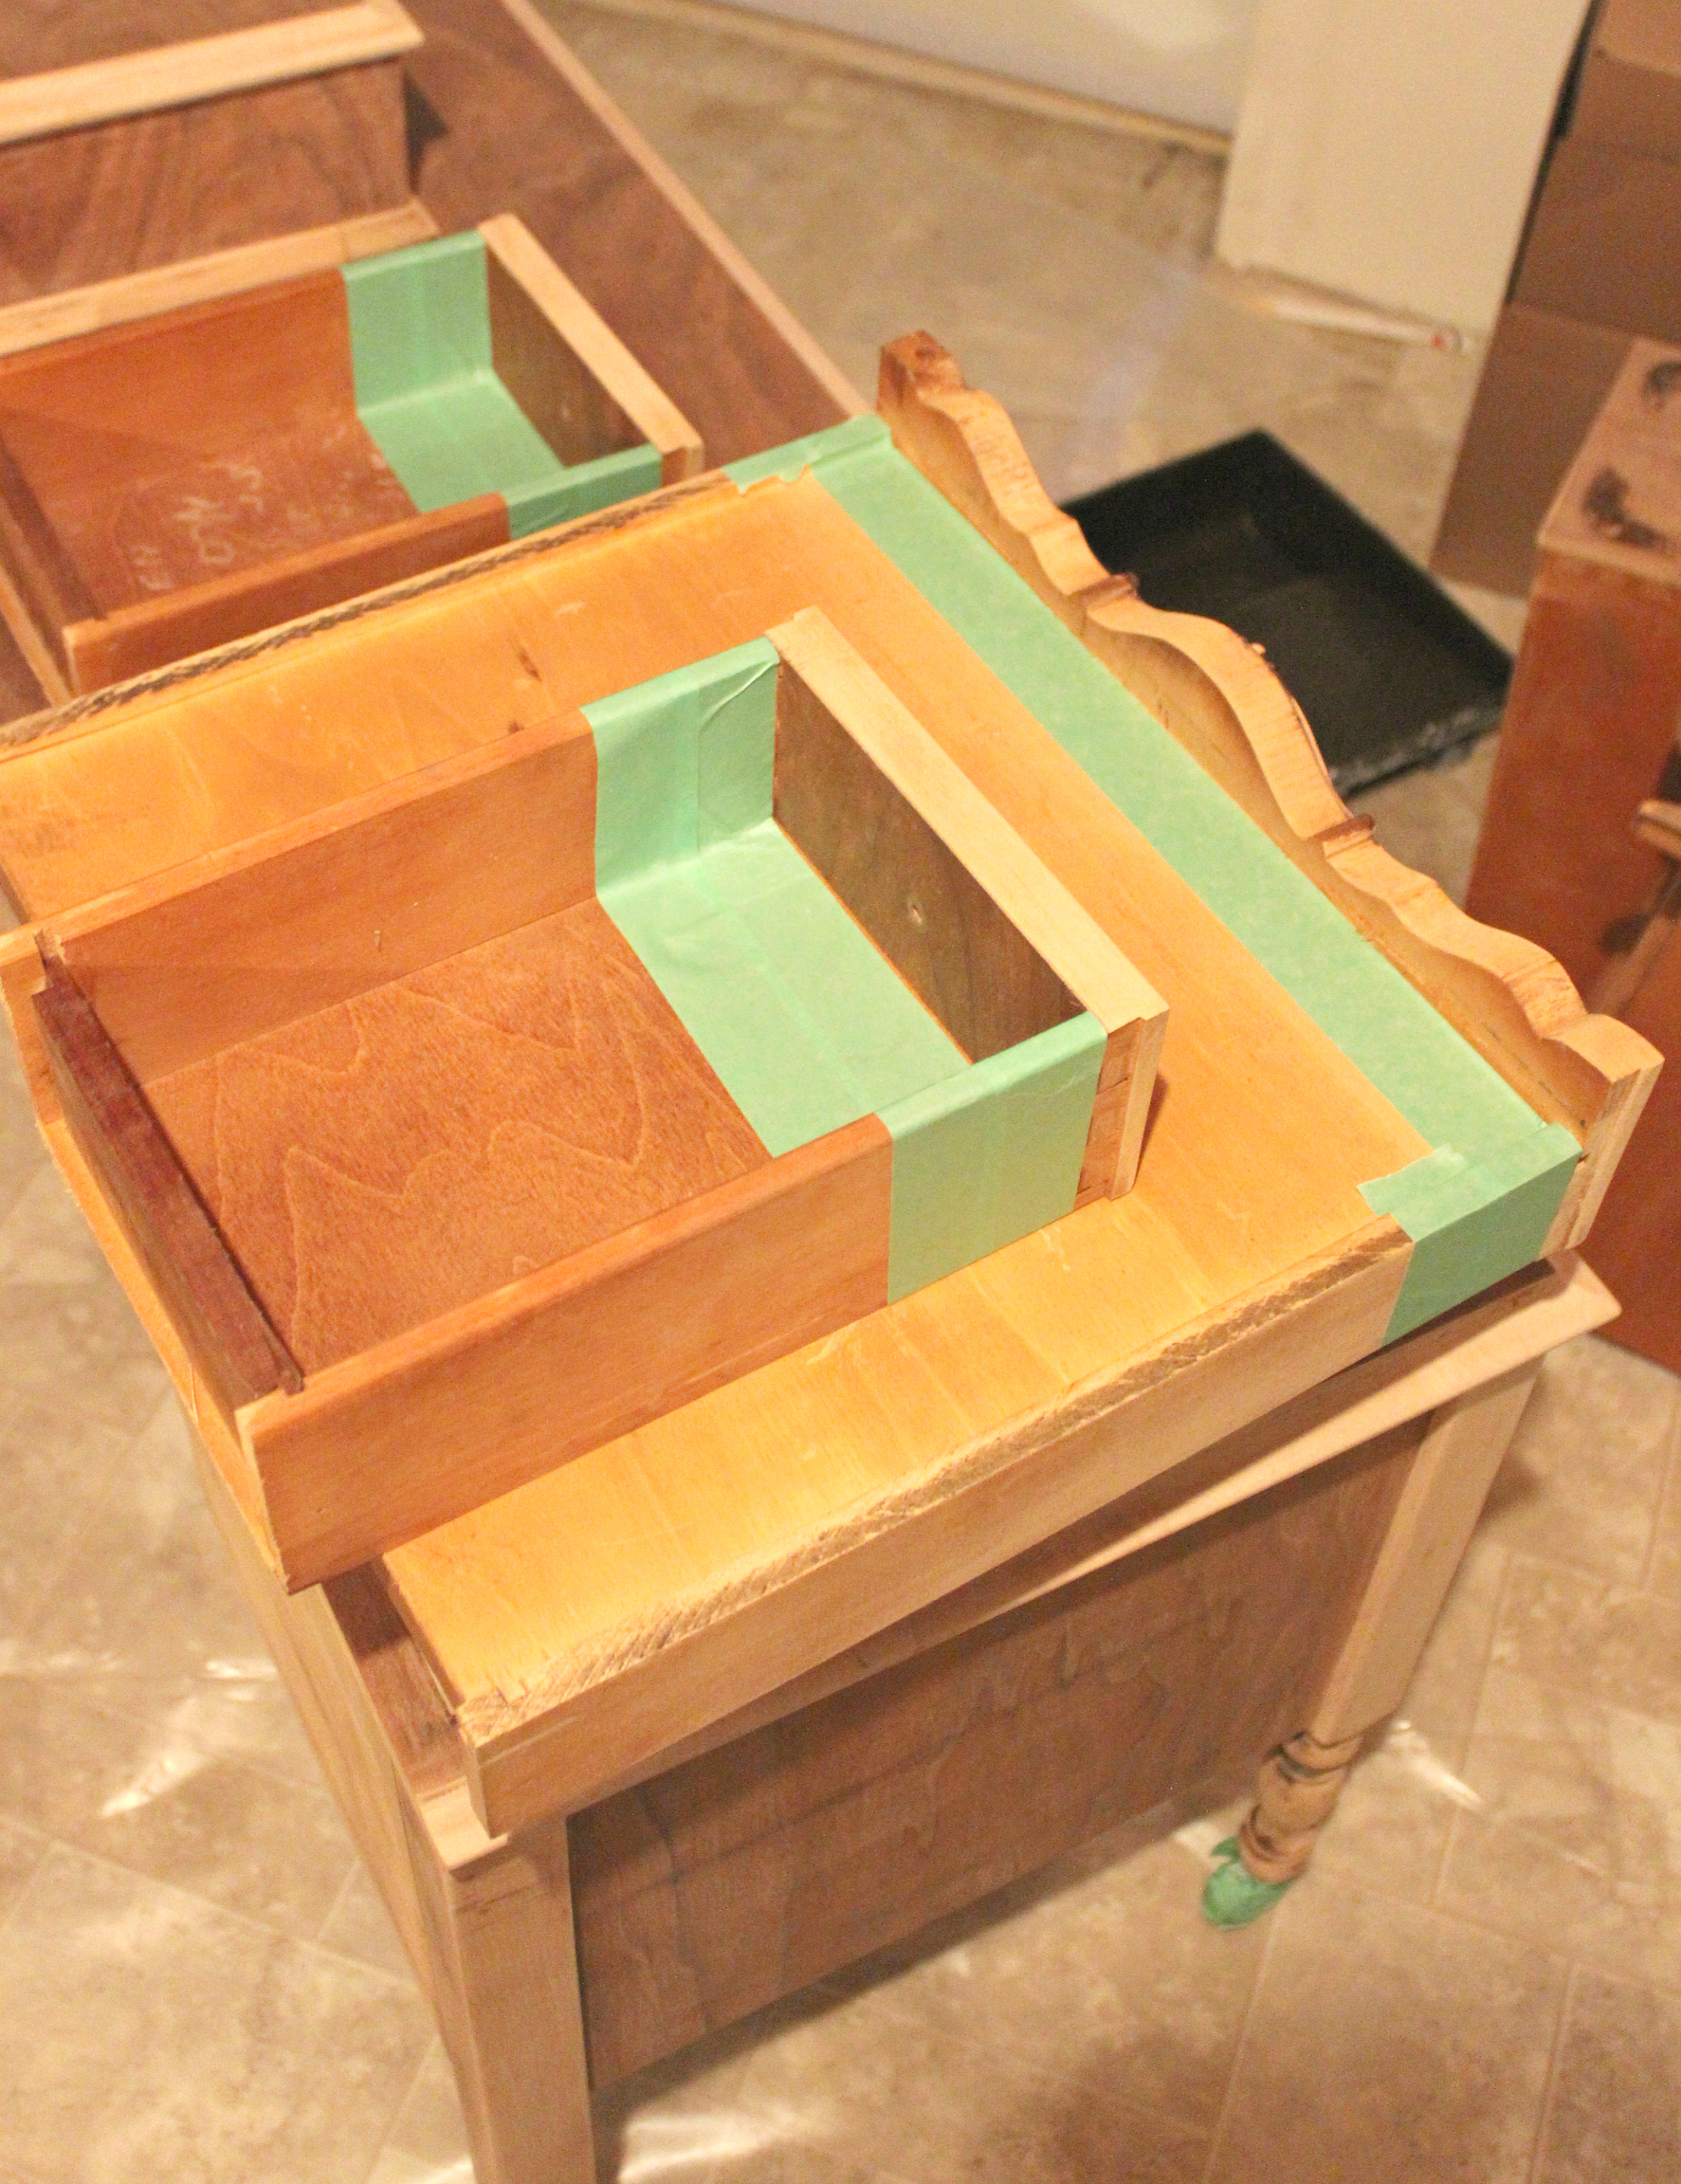
Step 4:
Next he taped off inside the drawers with painters tape so there would be straight lines where the paint stopped. This makes a much more finished look when the drawers are opened. He also taped off the casters on the bottom of the unit, alternatively you could just remove them.
Step 5:
Then we meticulously applied a coat of primer, paying extra attention to any detail and being mindful for drips. We used a paint brush for all the detail work and then finished off with a smooth faced foam roller. We used Zinsser Cover Stain Primer-Sealer Stain Killer so as to give a good solid coat that wouldn’t allow any lingering stain that is embedded in the woodgrain to seep through later. We have used this product multiple times before on other projects with happy results. Allow to dry completely.

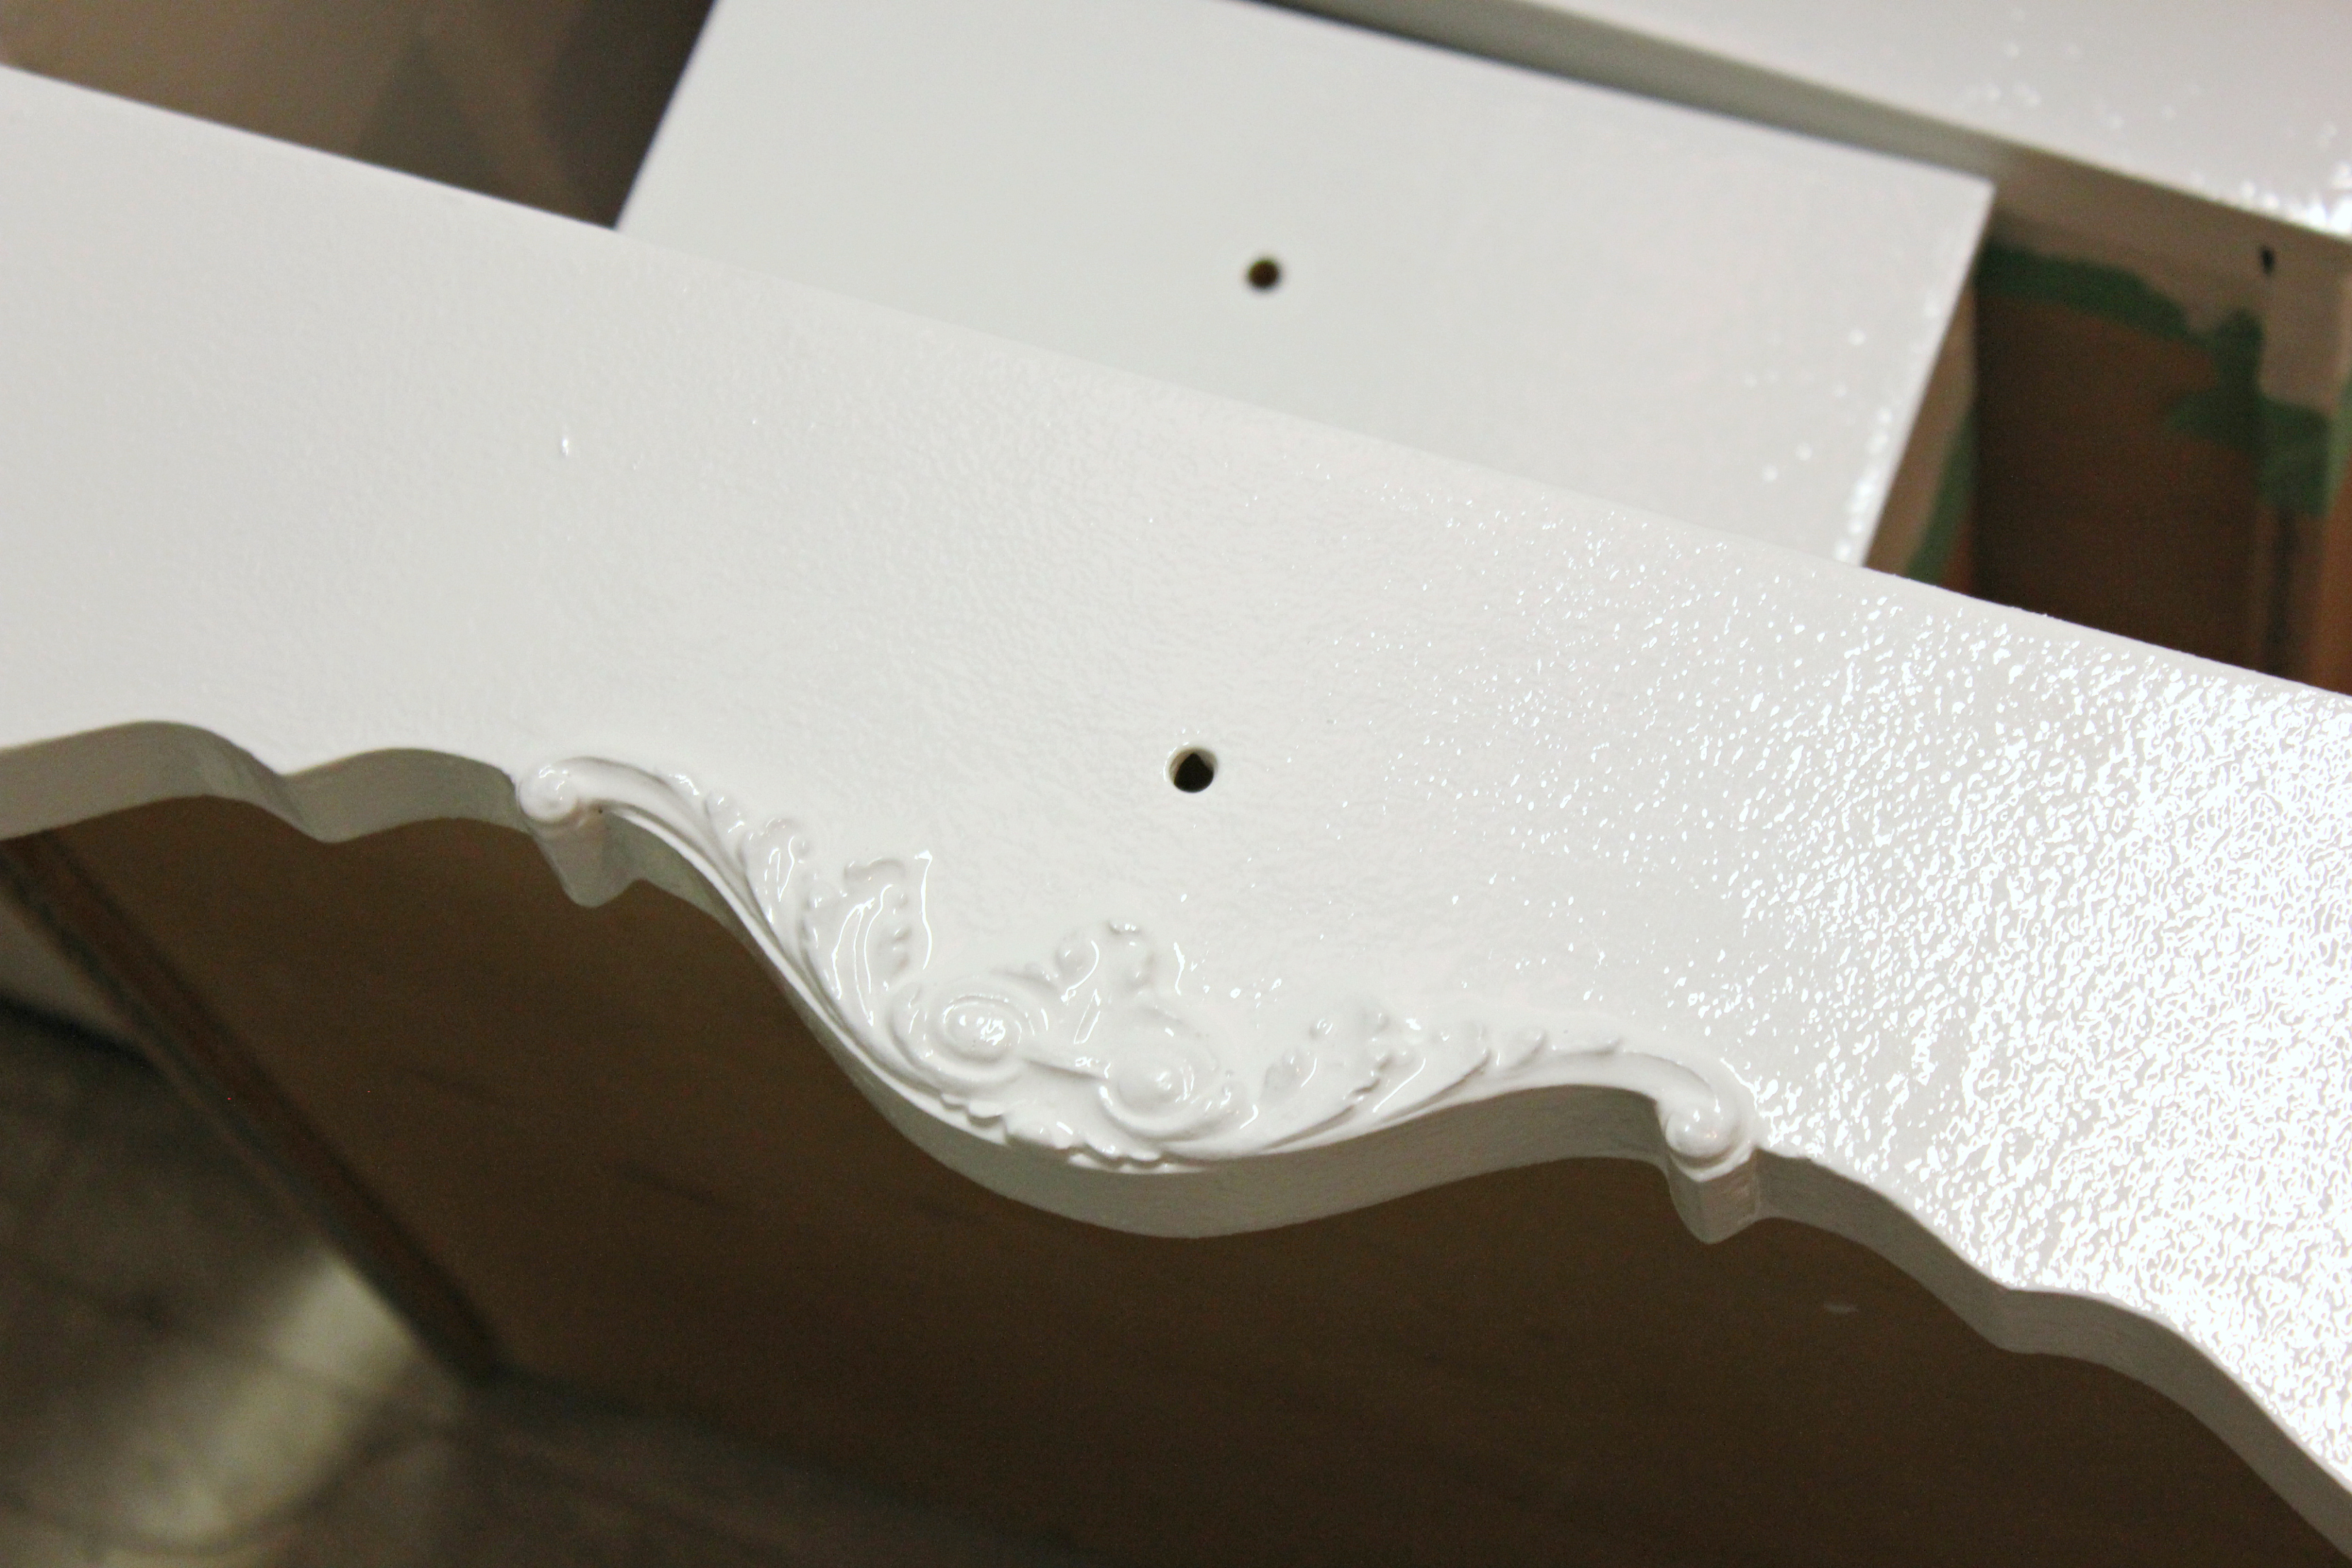
Step 6:
Once completely dry, we applied two coats of Benjamin Moore’s High-gloss latex paint in Chantilly Lace (OC-65). A few minutes after applying the first coat, check to ensure that paint runs have not formed. If they have, be sure to quickly smooth with the paint brush or roller before the paint dries. Then allow time for the first coat to dry completely before applying the second coat.


Step 7:
Allow the paint to dry and cure according to directions (we gave ours a week). Also make sure you allow this to take place without the drawers in place or they may get stuck.


Step 8:
Once the paint was no longer soft, we put the mirror back in place and the wood backing was secured with the original finishing nails. Then it was reattached to the unit with the original screws, saved from disassembly. It took both of us, one holding the mirror in place while the other attached it to the back of the vanity.
Step 9:
Next, if you are anything like me, dance your way to Anthropologie, overjoyed to finally have a reason to actually purchase some of their amazingly beautiful handles, rather than just oohing and ahhing at your every visit!
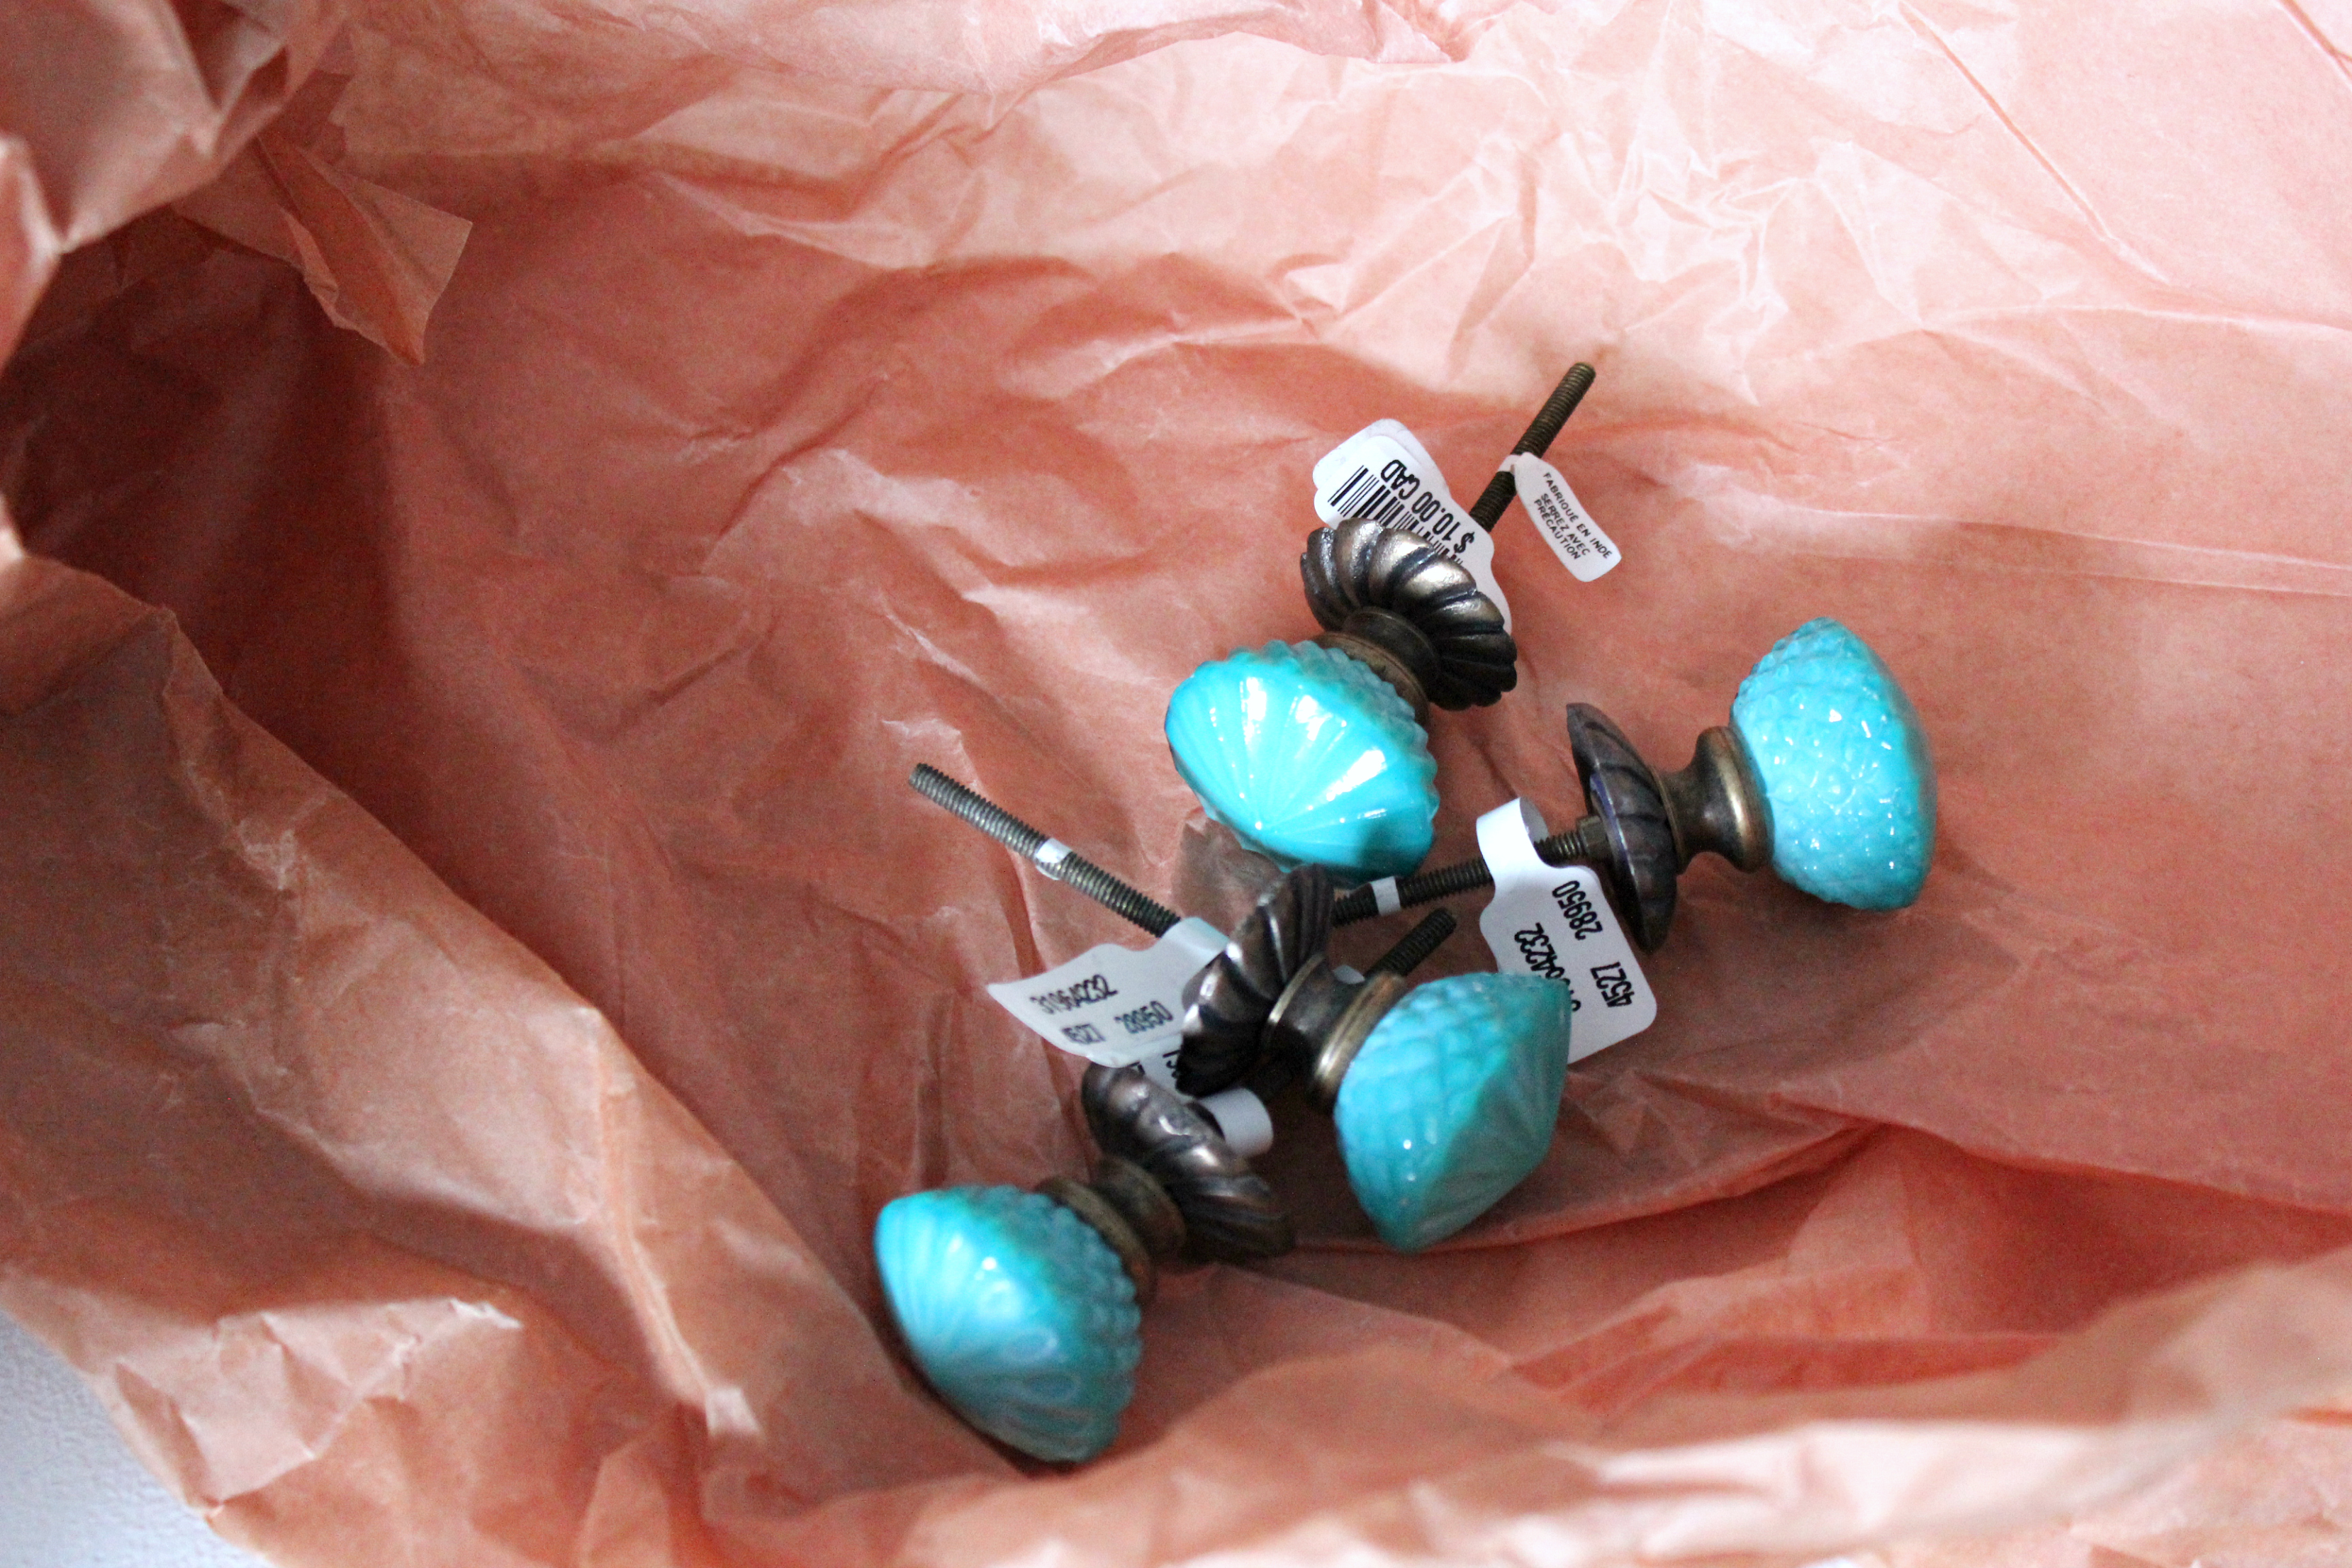

Step 10:
Install the new hardware. We went with a turquoise glass and oh man I am so in love. They look like jewelry!

And there it is. All done!

I was very pleased with this beautiful vanity, and not just because I didn’t have to do any of the sanding! Acacia especially loves that her father bought it for her. I think it also doesn’t hurt that her older sister doesn’t have one (she has her own desk instead – an antique roll top secretary, also refinished by her father). You can tell both father and daughter are proud of it and I like that! Even the following day when I walked into Acacia’s room, I found her sitting in front of her new vanity happily listening to her jewelry box play music and watching the little ballerina inside of it twirl. Appears I am not the only one pleased.

The post Refurbished Vanity DIY appeared first on Creative Sides.
]]>The post Two Tier Flower Power Cupcakes appeared first on Creative Sides.
]]>
Maybe it’s the string of teasingly sunny days we have experienced lately after weeks of rain. Perhaps it’s the fact that my oldest has the flu again a whole two and half weeks after the last bout. Whatever the cause, I find myself longing for spring and I feel like it’s just around the corner.
I may just be feeling this way because I need to hold out hope for a time with less runny noses, but I did see the first inclinations of cherry blossoms on my block the other night. When Travis got home from work I ran out of the house as fast as I could rushing around the block to soak up any sun left and stretch my legs after being stuck inside all day with a sick kid!
Safe to say I think we need spring and what better way to celebrate and coax on springtime than with a double decker cupcake covered in charming flowers?! Better yet, made with simple flower petals out of marshmallows! Yeah, you’re right, there simply is no better way to prepare for warmer weather and bathing suits than with not one, but two cupcakes.

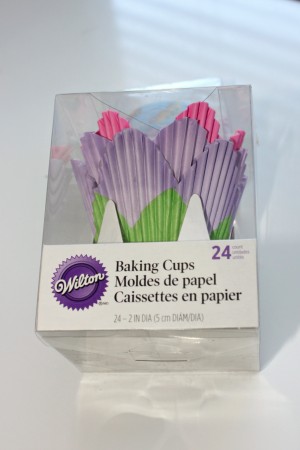
My initial inspiration came from these Wilton cupcake liners I found at Micheals, pink and purple, in both mini and regular size.
Flower Cupcake Instructions
What you will need:
Vanilla cupcake batter (either homemade or a mix works well)
Vanilla frosting
Multi-coloured miniature marshmallows
Wilton Sprinkles in Pink and Purple Sparkling Sugars.
Paper cupcake liners (optional). I chose Pink and Lavender Petal Baking Cups from Wilton
Kitchen scissors
Small ziplock bags
Step 1: Bake a batch of both mini and full sized cupcakes and allow to cool.
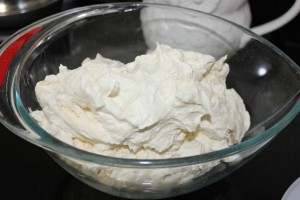
Step 2: Make a fluffy vanilla frosting. I left it white, because it gets mostly covered, but it would be great if it was pink or yellow as well.

Step 3: I choose to use multi-coloured miniature marshmallows and picked out the colours I wanted – pink and yellow.
Step 4: Next place sparkling sugar in a ziplock bag (about a 1/4 of cup). I did one with purple and another with pink.
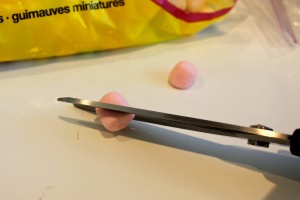
Step 5: Cut each marshmallow diagonally in half with sharp kitchen scissors.
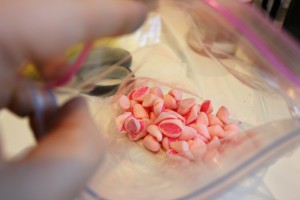
Step 6: Once the marshmallows are cut, place in the ziplock with the decorating sugar and shake. The sugar will adhere itself to the cut, sticky side.
Step 7: Generously frost the bottom, larger cupcake. Frost the mini cupcake and place in the centre, on top of the larger, frosted cupcake to make two tiers.
Step 8: Place the marshmallows, sugar side up onto the frosting as petals, in circular patterns.

Step 9: On the top cupcake, begin with the petals in the centre and work your way out, creating a flower from the marshmallow petals.


Enjoy!
The post Two Tier Flower Power Cupcakes appeared first on Creative Sides.
]]>The post Kale Citrus Salad appeared first on Creative Sides.
]]>
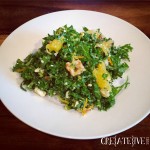
- 1 navel orange, zest and flesh
- 2 tbsp olive oil
- 2 tbsp apple cider vinegar
- juice of 1/2 a lemon
- 1 tsp Dijon mustard
- 1 tsp honey
- 3 green onions, finely sliced
- 1 small bunch fresh mint, finely sliced (chiffonade) - approximately 1 heaping tbsp
- 1/2 cup crumbled feta cheese
- 4 - 6 kale leaves, finely sliced (chiffonade) - approximately 4 cups
- 1/4 cup chopped walnuts
- salt and pepper to taste
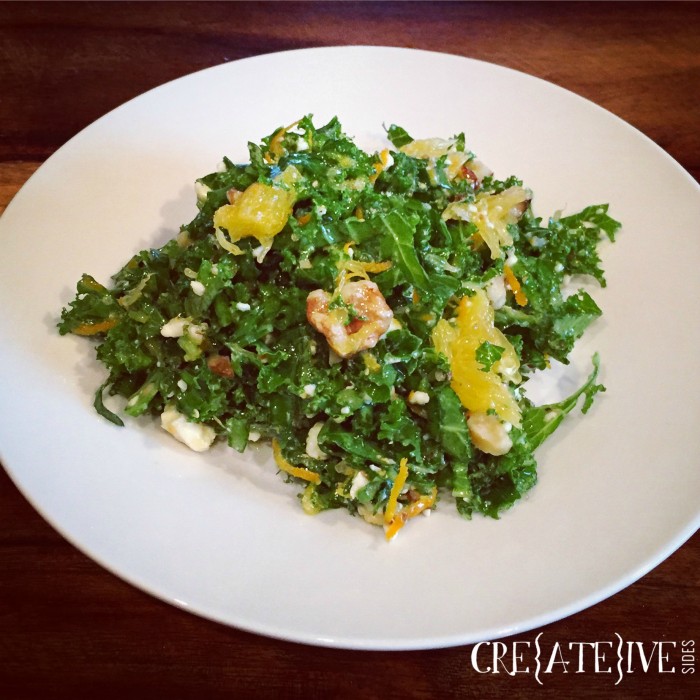
- Zest orange into large mixing bowl.
- Supreme the orange, chop, and add to mixing bowl with olive oil, apple cider vinegar, lemon juice, mustard, honey, green onions, mint, and feta cheese. Mix well.
- Add kale and walnuts and toss until lightly coated with dressing. Season with salt and pepper.
The post Kale Citrus Salad appeared first on Creative Sides.
]]>