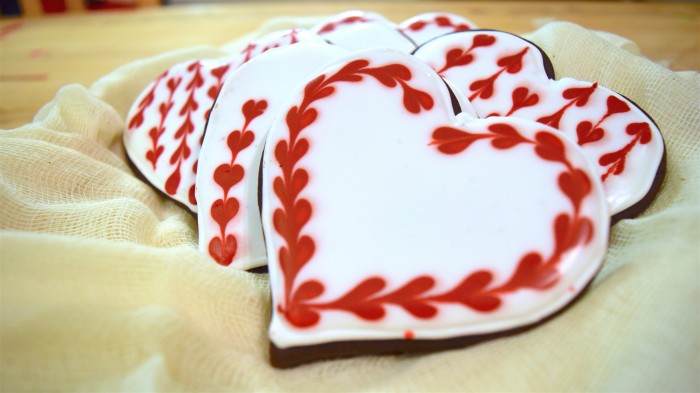
I’ve been drooling over cookies decorated with royal icing for a long time, pinning them away for later but never getting around to trying them out. I decided that would end this Valentine’s Day, and set out to make a simple yet pretty cookie that my daughter could bring to school.
Chocolate Sugar Cookie Recipe
I started with a recipe I found here on Annie’s Eats and made some slight tweaks to come up with a tasty cookie with an incredible texture.

- 1 1/2 cups all purpose flour
- 2/3 cup cocoa powder
- 3/4 cup salted butter (room temperature)
- 1 1/2 cups powdered sugar
- 2 eggs
- 1/2 tsp vanilla extract
- 1/2 tsp caramel extract
- Combine butter and sugar in medium speed until fluffy and well mixed
- Add in eggs, vanilla and caramel and continue to mix
- In a separate bowl, combine flour and cocoa powder
- Add dry ingredients to wet, mixing on low speed
- Remove dough from bowl and wrap tightly in plastic wrap
- Refrigerate 1-2 hours
- Preheat the oven to 325 F
- Line your baking sheet with parchment paper
- Sprinkle cocoa powder on your work surface to prevent sticking
- Roll out chilled dough to desired thickness (I like 1/4 inch)
- Use cookie cutter of choice to cut out cookies and place them on the baking sheet
- Bake 10-15 minutes depending on thickness and size
- Remove from oven and let the cookies rest on the baking sheet for 5 minutes before transferring to a wire rack
- Cool completely prior to decorating
Royal Icing Recipe
The Royal Icing I found to be a bit more tricky. Every recipe I looked at has slight variations on the amounts of the 3 ingredients: powdered sugar, meringue powder and water. I followed one recipe and it was so lumpy and cement-like that I was sure my brand new stand mixer was going to die. As I played around with the amounts and got a bit more confident, I realized that it’s practically impossible to mess up! If its too thick, add more water. Too thin, more sugar.

- 1 package (1 kilo/4 1/2 cups) powdered sugar
- 1/3 cup warm water
- 3 tablespoons meringue powder
- Sift powdered sugar into a large bowl
- Add in water and meringue powder
- Mix on low speed until blended
- Mix on medium-high speed for 7-10 minutes, until stiff and with a matte finish
- Icing consistency will be affected by the temperature and humidity of your environment. You may find that you need more water or more sugar than listed above. Measurements are not strict, adjust as needed to achieve desired consistency.
Decorating Cookies with Royal Icing
I was a little apprehensive when I was finally ready to decorate the cookies; visions of Pinterest fails danced in my head. I did my best to mitigate that outcome by setting up my space as best I could.
Here are the items you’ll need:
Royal Icing
Sugar Cookies
Airtight Containers
Icing Colour
Squeeze Bottle
Icing Bag
Wilton Decorating Tip #2 or #3
Spoon
Toothpick
Parchment Paper
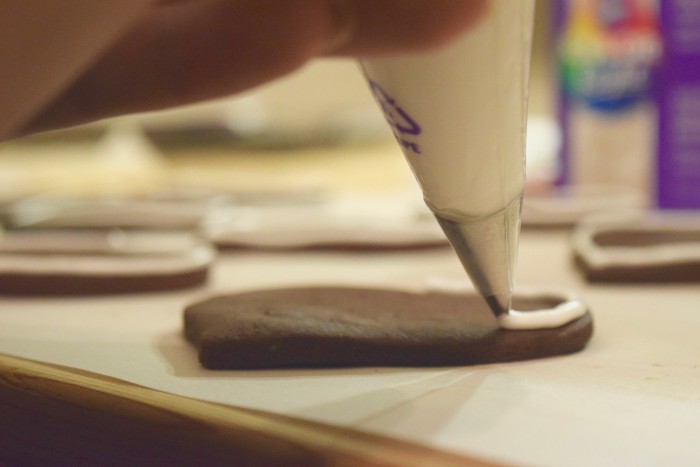
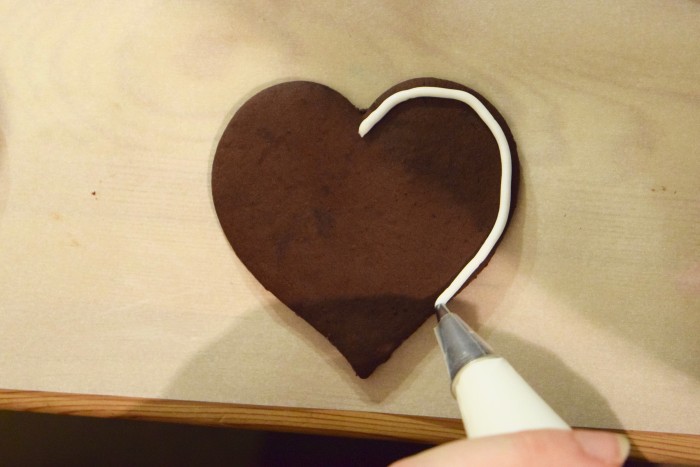
Step 1 – Before you really start: Divide royal icing into 2 airtight containers. Roll out the parchment paper and place your cooled cookies on top. Fit icing bag with Wilton decorating tip #2 or #3 and fill with thicker royal icing. Outline the edges of each cookie with the this icing.
Step 2: Let the outlines dry for 1 hour.
Step 3 – Setting up your Space: While you’re waiting for the cookies to dry, you can get your decorating space ready. Colour 1 container of royal icing red with Wilton Colour Right™ Performance Colour System (40 drops red, 4 drops crimson). Thin both containers of icing by adding a spoonful of water and mixing until you have the desired consistency. Pour red royal icing into squeeze bottle.
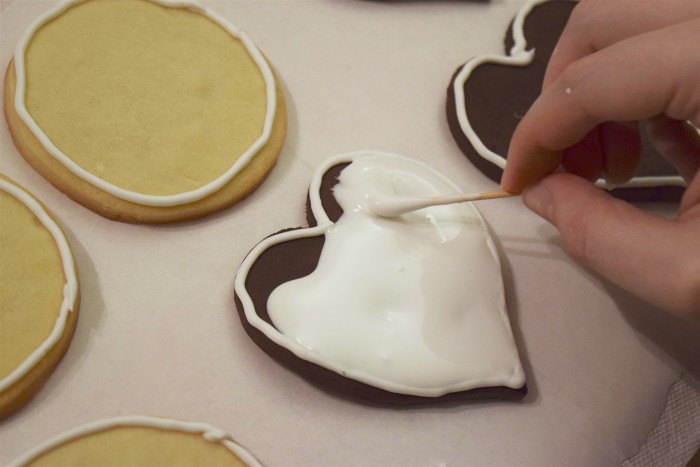
Step 4: Spoon the thinned white icing onto the center of the cookie.
Step 5: Using a toothpick, spread the icing until it touches the outline all around the cookie.
Step 6: Shake the cookie to settle the icing and tap firmly (without breaking the cookie) to bring any air bubbles to the surface. Pop the bubbles with your toothpick.
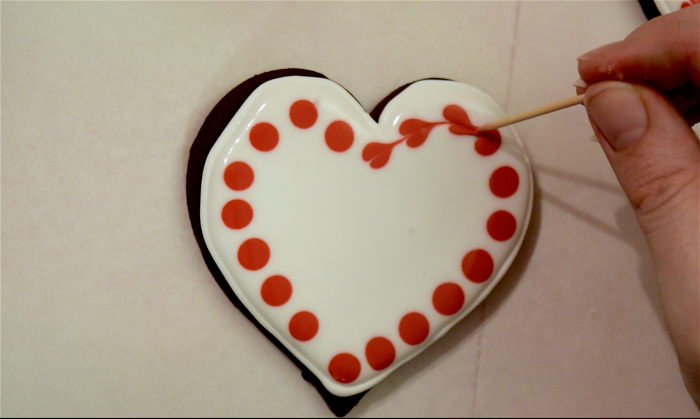
Step 7: Using the squeeze bottle, carefully dot the red icing all around the cookie, about 1/3 of an inch from the edge.
Step 8: Drag a toothpick through the red dots in one continuous motion.
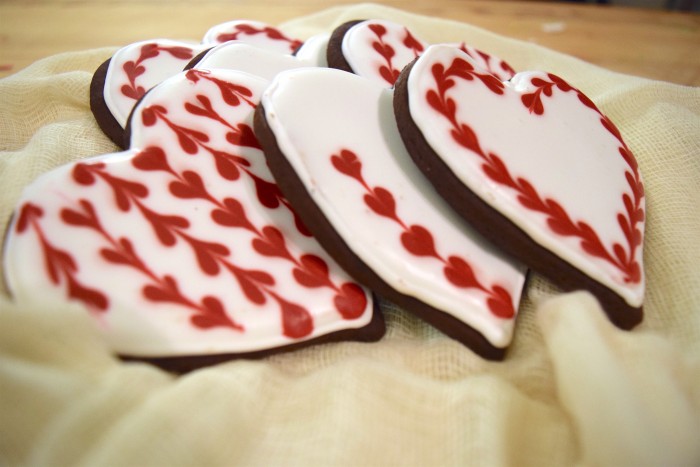
Et voilà! A simple technique with beautiful results. You can use the same steps to create a lot of different heart patterns. Variety is the spice of life after all.
Latest posts by Heather van Mil (see all)
- Keep Children Safe by Making the Right Choice of Window Blinds - May 24, 2017
- Why You Should Use Canadian Ingredients For Your Next Recipe - April 6, 2017
- Small Spaces and How to Maximize Them - April 5, 2017


Leave a Reply