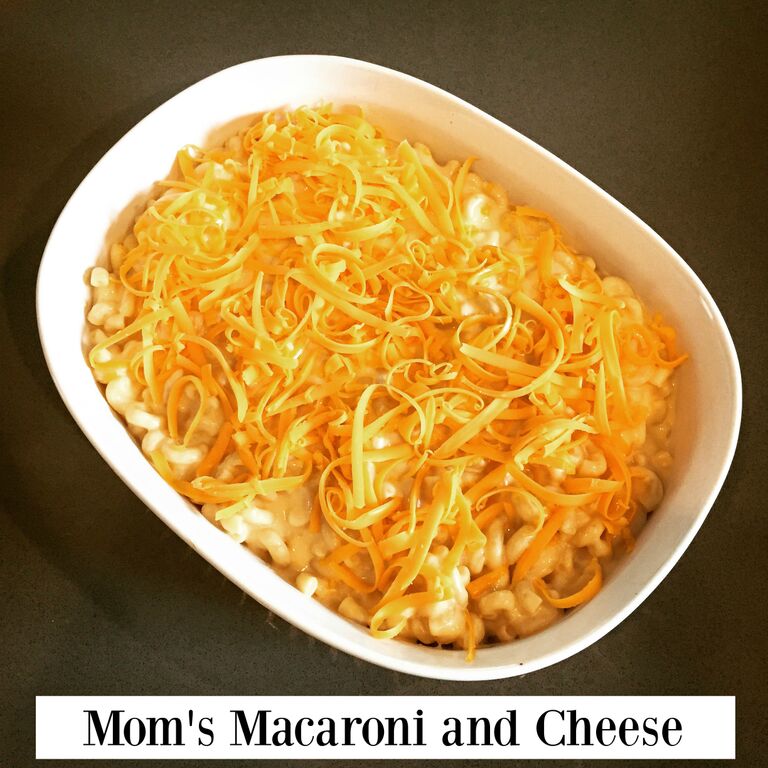
My mom has made the same macaroni and cheese since my siblings and I were little kids. Macaroni and cheese night was the best night. Looking back on it now, macaroni and cheese night was probably a “stretch the pay cheque until grocery day” meal or a “I cannot give a single more eff” meal for my mom but to us kids it was a special treat. I will never forget the day my dad tried to make mom’s macaroni and cheese. My mom was in the hospital giving birth to either my little sister or brother so my dad was taking care of me and my older sister. He made my mom’s macaroni and cheese but decided to give it a little flair in the form of onions, green peppers, black pepper, and olives. Have mercy. I’m still not over it.
Ingredients
3 cups dry elbow macaroni pasta
2 tablespoons butter
2 heaped tablespoons all-purpose flour
4 cups milk (I use whole milk because I am sinful but you can use 2% if you want a lighter sauce. If you use skim milk I will give you side eye so hard.)
1 teaspoon mustard (pro tip: don’t use grainy mustard if you plan to serve this to a picky child or they will ask you why you put “nuts” in the cheesy pasta and you will die a little inside.)
1 tablespoon Worcestershire sauce (optional but it really enhances the cheesiness so I don’t recommend skipping it unless you’ve got vegetarian concerns.)
2 cups grated cheddar cheese (I use old cheddar and it is decadent but regular cheddar is fine too.)
salt and pepper to taste
Directions
Step 1: Preheat oven to 350F.
Step 2: Prepare macaroni per “al dente” instructions on the bag. Drain and set aside.
Step 3: Melt butter over medium-high heat in medium-sized saucepan. Add flour and cook, stirring constantly, until butter and flour are combined well and the mixture has begun to smell a bit nutty, about 90 seconds – two minutes. If the roux starts to darken, turn down the heat.
Step 4: Add the milk slowly, whisking vigorously. I usually add the milk cup by cup, taking time to whisk and thicken the sauce between cups. Cook until sauce is thickened to the consistency of runny yogurt. Remove from heat and whisk in mustard and Worcestershire sauce.
Step 5: Now! This is important. If your sauce came anywhere close to a boil, it is too hot to stir in your cheese right now. Your cheese sauce will curdle. You will cry. Your macaroni and cheese will not be as good as my mom’s macaroni and cheese. It is worth your time to sit and wait and be patient for five minutes. Go make a cup of tea. Take a few deep breaths. Come back in five minutes.
Step 6: Right! We’re back. Stir grated cheese into your sauce, reserving about 1/2 cup to sprinkle on top. Taste and season with salt and (white) pepper. Mix sauce into pasta, spread into a casserole dish, top with grated cheese, and bake for 15 – 25 minutes until bubbly. Enjoy!
Step 7: If you’re not serving a toddler and want to fancy things up a bit, skip the melted cheese on top and make a nice crunchy topping from a couple of tablespoons of melted butter and about 1/4 – 1/2 cup of panko bread crumbs. If you want to get really decadent, you could also mix some crispy fried bacon bits and green onions into the panko mixture. Just don’t bring that nonsense around me or my older sister.
Serves six.
Pro-tip: Instead of reheating the leftovers in the oven, I like to scoop the mac and cheese into a saucepan and reheat on the stove with a bit of extra milk to prevent the pasta from drying out.
This post originally appeared at Hillary with 2 L’s

Mom’s Macaroni & Cheese
2015-11-17 11:41:23
Serves 6
- 3 cups dry elbow macaroni pasta
- 2 tablespoons butter
- 2 heaped tablespoons all-purpose flour
- 4 cups milk (whole or 2%)
- 1 teaspoon mustard (pro tip: don't use grainy mustard if you plan to serve this to a picky child)
- 1 tablespoon Worcestershire sauce
- 2 cups grated cheddar cheese
- salt and pepper to taste
- Preheat oven to 350F.
- Prepare macaroni per "al dente" instructions on the bag. Drain and set aside.
- Melt butter over medium-high heat in medium-sized saucepan. Add flour and cook, stirring constantly, until butter and flour are combined well and the mixture has begun to smell a bit nutty, about 90 seconds - two minutes. If the roux starts to darken, turn down the heat.
- Add the milk slowly, whisking vigorously. I usually add the milk cup by cup, taking time to whisk and thicken the sauce between cups. Cook until sauce is thickened to the consistency of runny yogurt. Remove from heat and whisk in mustard and Worcestershire sauce.
- Now! This is important. If your sauce came anywhere close to a boil, it is too hot to stir in your cheese right now. Your cheese sauce will curdle. It is worth your time to sit and wait and be patient for five minutes.
- Stir grated cheese into your sauce, reserving about 1/2 cup to sprinkle on top. Taste and season with salt and (white) pepper. Mix sauce into pasta, spread into a casserole dish, top with grated cheese, and bake for 15 - 25 minutes until bubbly.
- Optional: Skip the melted cheese on top and make a nice crunchy topping from a couple tablespoons of melted butter and about 1/4 - 1/2 cup of panko bread crumbs. If you want to get really decadent, you could also mix some crispy fried bacon bits and green onions into the panko mixture.
By Hillary with 2 L's
Creative Sides https://creativesides.ca/
The post Mom’s Macaroni and Cheese appeared first on Creative Sides.
]]>