The post Keep Children Safe by Making the Right Choice of Window Blinds appeared first on Creative Sides.
]]>
Parenting can be an overwhelming task, especially since there is simply no easy way to keep track of all the things that need to be done in a day when you’ve got so many things going on at once. From being employed to running errands, and dropping the kids to and from school, things like home maintenance can often be the last thing on a busy parent’s mind. As a result, it’s easy to forget to completely child-proof your home, especially if you make design changes like choosing new window treatments over a long period of time. Unfortunately, such memory lapses can be very dangerous. Dubbed the “silent killer”, window blind cords are one of those seemingly innocuous things that adults don’t realize can pose a threat to children; hundreds of children have passed away from strangulation upon getting caught in these cords.
Because of this potential danger, Health Canada has decreed that all Canadian-made window treatments, as well as those products sold in the country must be child-proofed with cord/chain tension devices. That being said, the rise of e-commerce businesses has resulted in many customers purchasing window treatments that do not necessarily conform to regulations.
As such, it bears to keep in mind that legacy or unregulated products, or even products that are improperly installed can pose a serious risk to children. Here are a few tips for those of you who would like to re-think your window treatment options for your family’s home:
Go Cordless
These days, it seems like just about everything is going wireless. And why not? If it’s within your budget, automated window coverings are a great cordless option for a child-proof home. They come in a range of different prices, and so you don’t need to shell out an arm and a leg for them. Cellular shades make for great alternatives to corded blinds at a relatively affordable price.
Take Your Time
If you’re in need of a more wallet-friendly solution, and cannot commit to changing all your blinds at once, you could also opt for changing your window treatments over an extended period of time as well. Simply start by the rooms most used by the kids – their bedrooms, the family room, etc. In the meantime, you can follow a few other solutions to keep those pesky cords from causing trouble.
Move the Furniture Around
If going cordless isn’t an option for you, one of the first steps to take in childproofing your window treatments is to move some furniture around. Kids are adept climbers, and if the bed, a desk, a chair – anything really – is close enough to a window, they’ll climb it at one point or another. If a child gets his or head caught within the cords of the window blinds, they’ll be at risk of strangling themselves.
Double Check the Installation
We all know how exasperating home renovations can be. It’s easy to make small, unnoticeable mistakes or to do a sloppy job at the end of a long day. Make sure that the window blinds are actually properly installed, cords are not super slack, and that cord-restraining devices are secure. On that note, if you’ve just purchased a new product, read the safety label to find out if it falls under new safety regulations. While all corded window treatments manufactured are supplied with a warning label and are within regulation, not every company will be as scrupulous.
The Tuck Doesn’t Cut It
We’ve all heard of the old saying, “out of sight, out of mind”. Many people seem to think that simply tucking the cords of their blinds out of sight will keep their kids from harm, but this isn’t necessarily the case. Any child with a love of climbing will find that cord faster than they can say “uncle”, and a gust of wind or the slam of a door could easily dislodge a cord that is tucked away on top of the blinds. Instead, you could opt for cutting the cord, in which case you’ll be limited to using the tilt wand to adjust the slats. You could also purchase cord cleats to deal with excess cords. This a very economical solution, but depends on adults to use them properly and consistently after handling the blinds.
Ultimately, going cordless is the only solution guaranteed to keeping your window blinds child-proof. While you can follow our helpful hints to deal with legacy or unregulated products, if you decide to upgrade your window treatments, do your due diligence by purchasing commercial window coverings supplied with a warning label, and that fall under Health Canada’s consumer regulations.
The post Keep Children Safe by Making the Right Choice of Window Blinds appeared first on Creative Sides.
]]>The post Why You Should Use Canadian Ingredients For Your Next Recipe appeared first on Creative Sides.
]]>
As a discerning home chef, you want to source the very best of ingredients for your next dish to impress and nourish your friends and family. You want to be proud of the food you put on your table and present to your guests. You can wow them with exotic finds from all the corners of the earth, but it turns out you don’t have to venture far from home to find what you need to make your next dinner party a success. Why use Canadian ingredients for your next recipe? These are a few reasons:
Reduce Your Carbon Footprint
Give the planet a break. Food that doesn’t have to travel as far has less of an impact on the atmosphere, climate change and contributes fewer pollutants to the air we breathe. You can reduce your carbon footprint by choosing Canadian ingredients when you prepare your next culinary masterpiece at home.
Contribute to the Canadian Economy
When you buy food grown in Canada, you are doing your part in supporting the Canadian economy. You are putting money in the pockets of Canadian farmers, Canadian truckers, Canadian feed stores and Canadian families. Buying Canadian is a great way to give back to your community and support the people in your own neighbourhood.
Add Local Flavour
Behind every one of Agropur’s Canadian products is a cooperative of passionate and committed dairy producers. These products taste like home. You can wander the entire earth and find beautiful places, but like Dorothy in the Wizard of Oz says, “There’s no place like home.” There’s no taste like home, either. Taste for yourself.
Reduce your carbon footprint, contribute to the Canadian economy and add local flavour by choosing Canadian ingredients for your next recipe. It’s as simple as that. Now, go make something to be proud of that tastes like home!
Our friends at Agropur sponsored this post but we agree with supporting Canada by enjoying delicious dairy products that taste like home. You can find them on Facebook and Twitter.
The post Why You Should Use Canadian Ingredients For Your Next Recipe appeared first on Creative Sides.
]]>The post Small Spaces and How to Maximize Them appeared first on Creative Sides.
]]>
How to maximize space in a small apartment
If you happen to live in a booming urban environment, you may notice that the cost of living space is at somewhat of a premium. The solution to this is often to live in smaller spaces. Many of us have lived in small spaces at some time in our lives, and many of us still do – especially when you’ve found that perfect apartment close to work and right next to the grocery store. But how can you escape that feeling of living in a tiny box? There are a few small space solutions that can help you to really open up your space and make the most of it.
Think Vertically
It’s important to remember that every room has eight corners! One way to maximize your space is by thinking vertically rather than horizontally. Floor to ceiling bookshelves are a great way to make use of wall space. Cabinets too! You can also think about exploiting the spaces between the tops of furniture and the ceiling. Think of hanging or high-mounted elements, which will draw the eye upwards.
Storage Solutions
In the same way, consider storage nooks, bespoke built-ins and tailored furniture to make use of every available portion of space. For example, try retractable pantry drawers for small appliances. To reduce clutter, make sure that items can easily be shut away or grouped by category. Open storage can also draw the eye upward; balance this against the amount of clutter you have on your shelves.
Opening Up
Doors and walls are so last century! Consider using room dividers in place of walls to let your space breathe. If you want to go further, consider glass walls, which can separate spaces without visually dividing a room. Curtains are also useful where privacy is required, and can make one wide open room into two very easily. And try increasing your window to wall ratio; larger windows let in more light, which can really make your space seem more open and free.

Less is More
It’s a lot easier to minimize clutter if you don’t have any clutter. Embracing a minimalist lifestyle can not only make your space go further but also cuts down on the need for consistent consumption of consumer goods, saving money as well. A win-win. In terms of furnishings, maximize your square footage by using small, easily moveable pieces of furniture. As an alternative, use fewer, larger pieces of quality furniture – this may seem counter-intuitive, but this can make a room feel grander. But choose which technique you want to use – don’t mix and match!
Mirror, Mirror
The cunning placement of mirrors can do wonders for opening up a space. Using them can easily double the size of a room, for example by mimicking doorways and windows. An alternative is to use reflective metallic subway tiles; reflecting more light will also help the space feel larger. Other visual tricks include see-through furniture made of glass, Lucite or Plexiglas – either that or mounting the mirrors or tiles on the furniture themselves.
Zone Warfare
Think about all the things you do in your house or apartment –work, sleep, eat, relax – and consider separate zones for each activity. You can place different types of furniture and demarcate the zones by using multiple seating areas, a table and chair, or a tented bed. If you don’t want to go this route, go the other way: find elements that have multiple functions, like a table that can function as both dining table and desk, or deep sofa beds. Try ensuring that each furniture piece is dual-use at least. That way you will waste as little space as possible.
Conclusion
Maximizing your space doesn’t have to be a chore – it can be a fun interior design project. Reduce clutter by thinking like a minimalist, and making use of storage space in an optimal fashion. Use visual tricks like mirrors, windows and glass walls to open up the interior, and make use of as much of your vertical space as possible. And consider the type and size of furniture you are using, where it’s placed and what it’s used for. Taken together, these tips should help you to feel like you’re living in a much larger space!
The post Small Spaces and How to Maximize Them appeared first on Creative Sides.
]]>The post Cheers To The Holidays appeared first on Creative Sides.
]]>These are some ideas of some magical drinks for your holiday party:

The nice thing about the sangria is you can make it a couple days ahead. The liqueur we love most for this drink is made with 100% BC raspberries and there are no colourings, chemicals or preservatives used in its production. Pure flavour from pure ingredients make pure fun.

Spice up your holiday season with a spicy seasonal beverage. This warm, luxurious drink pairs nicely with the most blustery of winter days. The cherry and apple flavourings go together like mistletoe and kisses and unite to bring out the very best of the season.

The raspberry liqueur tastes just like fresh picked raspberries (but with a punch) because it’s made from 100% locally grown fruits from British Columbia. You might not be home for the holidays, but your drink will taste like you are right where you belong.

Rosemary Cranberry Simple Syrup Recipe:
Keep it simple this holiday season with this simple syrup for your cocktails that adds remarkable dimension. Suitable for use in alcoholic or non-alcoholic creations, this syrup is easy to make but tastes great.
Drink in the best of the season with these delicious drink recipes. Hosting a memorable event is easy with these fruity treats that are sure to impress your guests. Pop into your local Metro to get everything you need to be ready for your event yet. Tis the season to stock up for entertaining, and Metro has you set in that department so you can sit back, relax and enjoy. Cheers to a happy holiday party!
Disclaimer: Although this post has been sponsored, the opinions and language are my own. If I would not serve it for my family, I would never suggest you serve it to yours.
The post Cheers To The Holidays appeared first on Creative Sides.
]]>The post Focus And Clarity In A Mug appeared first on Creative Sides.
]]>As someone who deals with chronic pain, cares for two small kids, and is growing a business where I work from home, my brain is taxed to the limit. It takes laser focus to get through all that stuff with a smile on my face and the kids by my side. So many days I have just wished that things would come easy, just this once. I am thankful to be so busy, but I need a little kick in the morning to get through everything on my to-do list. Or even to make a teeny-tiny dent.
Bulletproof Coffee in my cup gives many, many kicks to get me moving. I’m moving on my business goals, I’m moving on my mommy goals and I’m even moving on my blogging goals. I even got my husband to switch over from the “dark side” (coffee with a gallon of milk and sugar.)

At the best of times I need an extra boost. This past few weeks have been even more full than usual, between planning my daughter’s winter birthday party and the Christmas tree needing a makeover. Beyond that, there’s the shopping and all of the events that come along with being a blogger at Christmas time. Events are like tinsel, bright and shiny but so tightly scheduled they get stuck together. This is prime time, baby.
How ever was I going to get it all done? I’m tired, I’m sore, I’m cranky and to be honest it all felt a bit much. Enter Bulletproof Coffee to save the day. Santa’s sleigh is pulled by 8 tiny reindeer, and my holiday season is pulled by the contents of my coffee mug. What the heck is this stuff, you ask?

Bulletproof Coffee is Upgraded Coffee blended with grass-fed unsalted butter & Brain Octane Oil. It’s also low toxin, high performance & full of healthy fats to fuel me. It’s a way better energy source than sugar because you don’t crash. But what about the low-toxin part? Well, low-quality beans can actually contain mould. Gross. Upgraded Coffee beans are certified clean so you don’t have to worry about that. Thank goodness. I’ve got enough to worry about!
All that energy did me well. I decorated the Christmas tree with my family and I blogged all the blogs and wrote all the plans and wrangled all the kids and planned the most exciting birthday party ever. I had my best week yet! I was proud of everything I had accomplished and I didn’t feel like I was treading water at a polar bear swim anymore. I really needed this confidence boost Bulletproof Coffee delivers.

I thought I was a bit old to still believe in magic, but this season Bulletproof Coffee helped me believe in the magic of the season and in myself. That gift, my friend, is priceless. It turns out I really needed to give myself a break – a coffee break.
I’m so glad the rain (and brain fog) is gone and I can see clearly now. I’ve got Bulletproof Coffee in my mug and I can take on the world (even tinsel.)
The post Focus And Clarity In A Mug appeared first on Creative Sides.
]]>The post Finding Dory Cupcake Tutorial *VIDEO* appeared first on Creative Sides.
]]>Finding Dory Cupcake Tutorial
Cupcakes and Icing

Step 1: Make a batch of your favourite vanilla cupcakes, adding a small amount of Wilton’s Gel Icing Color in Royal Blue into the batter before pouring into the cupcake liners and baking. (I found both Finding Dory themed and plain blue cupcake liners at Michael’s that worked perfectly).
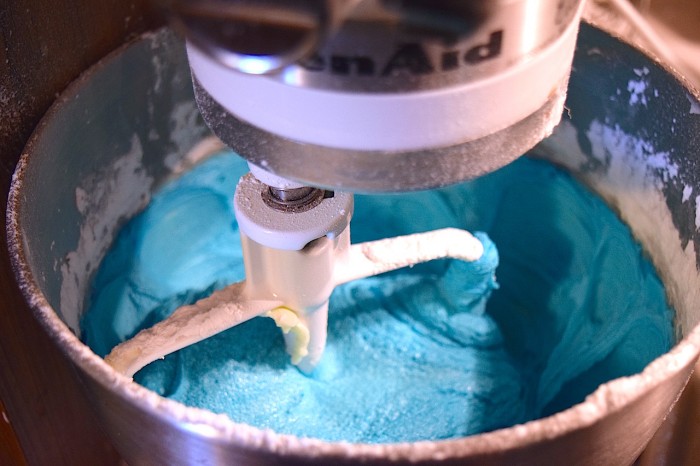
Step 2: While the cupcakes are baking, mix up your buttercream icing (this is my favourite recipe), again adding a small amount of Wilton’s Gel Icing Color in Royal Blue to the mix to match the cupcakes. Spoon the icing into an icing bag fitted with a 1M decorating tip.
Step 3: When the cupcakes are cooled, ice the tops with a simple swirl of the buttercream icing.
Finding Dory Royal Icing Topper
Step 4: Print a colour Dory outline to use as your guide. This one worked well for me.
Step 5: Whip up a batch of Royal Icing, and separate into 4 parts.
Step 6: Using Wilton’s Color Right Performance System, color your separated portions of Royal Icing Blue (20 drops of blue, 1 drop of black), Yellow (20 drops of yellow)and Black (20 drops of black), leaving a very small portion white.
Step 7: Place the printed Dory outline on a large cutting board or cookie sheet and cover with waxed or parchment paper. Secure waxed paper, leaving the dory outline free to reposition as needed.
Step 8: Pour royal icing into individual icing bags fitted with a #2 decorating tip. Use a decorating bag holder or tall glass to hold the bags, ensuring each bag stays upright with the tip flush against the bottom so no icing leaks while not in use.
Step 9: Begin tracing the outline in blue, and follow in black. Let it rest for 10 minutes or until partially set.

Step 10: Fill in the yellow parts of the fins and the white of the eye. Use a toothpick to place a dot of black in the centre of each eye. *note* in the images and video I started with a pink iris, however it was much too finicky and in the future I’ll omit the pink and stick with simple white and black eyes.
Step 11: Fill in the black are of the mouth and back, using a toothpick to spread and settle the icing in the large areas
Step 12: Fill in the blue of the body, using a toothpick to spread and settle the icing.
Step 13: Let finished toppers set for 4 hours, or overnight before placing on cupcakes.

Step 14: Serve and enjoy!
Watch the above steps in our handy-dandy Finding Dory Cupcake Topper Tutorial video.
If you’re looking for more Finding Dory Party Ideas, this is the place to find them!

The post Finding Dory Cupcake Tutorial *VIDEO* appeared first on Creative Sides.
]]>The post Apricot Glazed Pork Kebabs appeared first on Creative Sides.
]]>
Freeze-Ahead Apricot Glazed Pork Kebabs
If you are planning to make this meal to freeze, follow the recipe below but mix the pork AND the peppers in with the marinade. Then, once you have threaded the skewers, my secret tip is to seal them individually with GLAD® Press’n Seal. I lay out a sheet (textured side up) that is twice as long as the skewers plus an extra inch. Then I lay 3-4 skewers side by side, leaving an inch between each skewer, plus an inch on either end. I fold the sheet length wise overtop of the pork kebabs and run my finger along each edge to seal. Then I run a finger in between each kebab to seal them off individually and voilà! No more fighting with kebabs that are stuck together! You can place each packet into a GLAD® Freezer Bag and you’re good to go.

One thing to note: some people prefer their kebabs with extra crisp vegetables. If this is you, I would recommend freezing meat-only kebabs, and making separate vegetable kebabs the same day you’ll be eating them. If you’re not so picky about the texture of the vegetables, or like them a bit softer, you’re good to freeze.
To cook, thaw the pork kebabs overnight in the refrigerator, or for a few hours on the counter. Then grill away!

- 8 oz jar of apricot jam
- 2 tbsp soy sauce
- 1 tbsp lemon juice
- 4 garlic cloves, minced
- 1 tbsp chipotle child powder
- salt & pepper
- 2 lbs pork tenderloin, cubed
- 1 green pepper
- 1 sweet pepper
- Warm apricot jam in the microwave for 1 minute
- In a mixing bowl, combine jam, soy sauce, lemon juice, garlic and chill powder, stirring well
- Cube pork tenderloin and place into a large zipper plastic bag
- Pour 3/4 of the mixture into the bag with the pork and let it marinade for at least 30 minutes
- Chop green and sweet peppers
- Preheat BBQ to medium heat
- Alternate threading pork and pepper cubes onto bamboo or metal skewers
- Dust with salt and pepper, and additional chili powder to taste
- Place skewers on the BBQ and baste with remaining apricot mixture
- Cook for 3 minutes and turn
- Baste other half and cook for an additional 4 minutes or until done.
- If you don't have a BBQ, the kebabs can be cooked in the oven at 375°F for 25-30 minutes
I’m a big fan of weekly meal planning and prepping. You can find more prepare-ahead recipe ideas here, plus be sure to check out my meal planning tips too! Happy cooking!
All on the table disclaimer: Although this post has been generously sponsored by GLAD®, the opinions and language are my own. If I would not use it with my family, I would never suggest you use it with yours. Read our full disclosure statement here.
The post Apricot Glazed Pork Kebabs appeared first on Creative Sides.
]]>The post 3 Tips For Quick & Effective Meal Planning For Busy Families appeared first on Creative Sides.
]]>
As our own schedule has gotten more and more hectic, I’ve realized that planning ahead and being more organized is the only thing to stop the trend of shrinking wallets and expanding waistlines. Before you write this off as something you can’t manage, understand that I am the QUEEN of procrastination. Especially when it comes to my home, I really have a mental block against organization and preparedness. But when I was left with no choice, I found it wasn’t nearly as bad as I had feared. Here’s what I learned:
10 Tips For Weekly Meal Planning
Maximize Your Ingredients
This works in 2 ways. First off, there is no sense in buying a bunch of new ingredients when you can use what’s already at home. Before you start meal planning, make a sweep of your fridge, freezer and cupboards to see what you’re starting with. Secondly, plan your menu around several key ingredients. You don’t want every meal to be exactly the same, but having some overlapping ingredients means you can save time in prep and potentially save money in bulk purchasing as well. In my meal plan for this week I used chicken and peppers in many of my meals, but the overall menu is anything but boring. Flipp is a great app that lets you search by ingredient and helps you find low prices and great sales at nearby grocery stores. I do all my meal planning with it!
Location, Location, Location.
It may seem like a no brainer, but don’t forget to plan your storage. There’s nothing worse than spending the time to plan and prep a week’s worth of meals only to find you don’t have enough containers or space to store it all! Additionally, take some time to think through where everything is going to be stored. Will it be in the freezer or fridge? Not only do you need to make sure you have the space AND the right type of storage container for the location, but you also need to think about how your fresh ingredients will keep until you use them. I always knew certain foods needed to be stored in specific ways, but I could never remember the details. I printed out this handy reference page below and stuck it to my fridge so I don’t forget again! There’s nothing sadder than throwing out food before you have a chance to eat it.
Don’t Throw It Out!
There is almost always a use for every bit of food you’re cooking with. I have a container in the freezer where I toss my strawberry greens, and any fruit that is less than awesome for eating fresh and use them whenever I make a smoothie. I also have an ongoing collection of chicken and beef bones, along with less than fresh veggies in my freezer (I know, it sounds kind of creepy), and whenever it’s full, I toss it in my slow cooker with water and a ton of fresh herbs and make a delicious homemade broth! Point is, before you toss it, think if there’s another way to use it.
So What Are You Waiting For?
These are the tips that keep me sane, plus save me time and money when I’m doing my meal planning. Even if you’re hesitant like I was, I encourage you to give it a try and see how it goes. I bet you’ll be pleasantly surprised. There is NOTHING better then coming home at the end of a long day and having dinner all ready to go with minimal work on your part.
To get you started I’ve got a super simple, SUPER TASTY recipe that you can include in your first weekly meal plan. Check out this Apricot Glazed Pork Kebabs recipe, and get planning! If you’re stuck for other ideas, find more recipes here.
If you’re in need of storage solutions, I’m a big fan of GLAD®’s line up of food storage products that make my meal planning so much easier. I love their Deep Dish and Large FreezerWare™ containers for my main meals and the Press’n Seal wrap is my go-to when I’m portioning off individual things to be frozen, like my kebabs, or super saucy meat portions. They also are a great resource for tips and tricks to help your keep your food fresher, longer!
All on the table disclaimer: Although this post has been generously sponsored by GLAD®, the opinions and language are my own. If I would not use it with my family, I would never suggest you use it with yours. Read our full disclosure statement here.
The post 3 Tips For Quick & Effective Meal Planning For Busy Families appeared first on Creative Sides.
]]>The post Refurbished Vanity DIY appeared first on Creative Sides.
]]>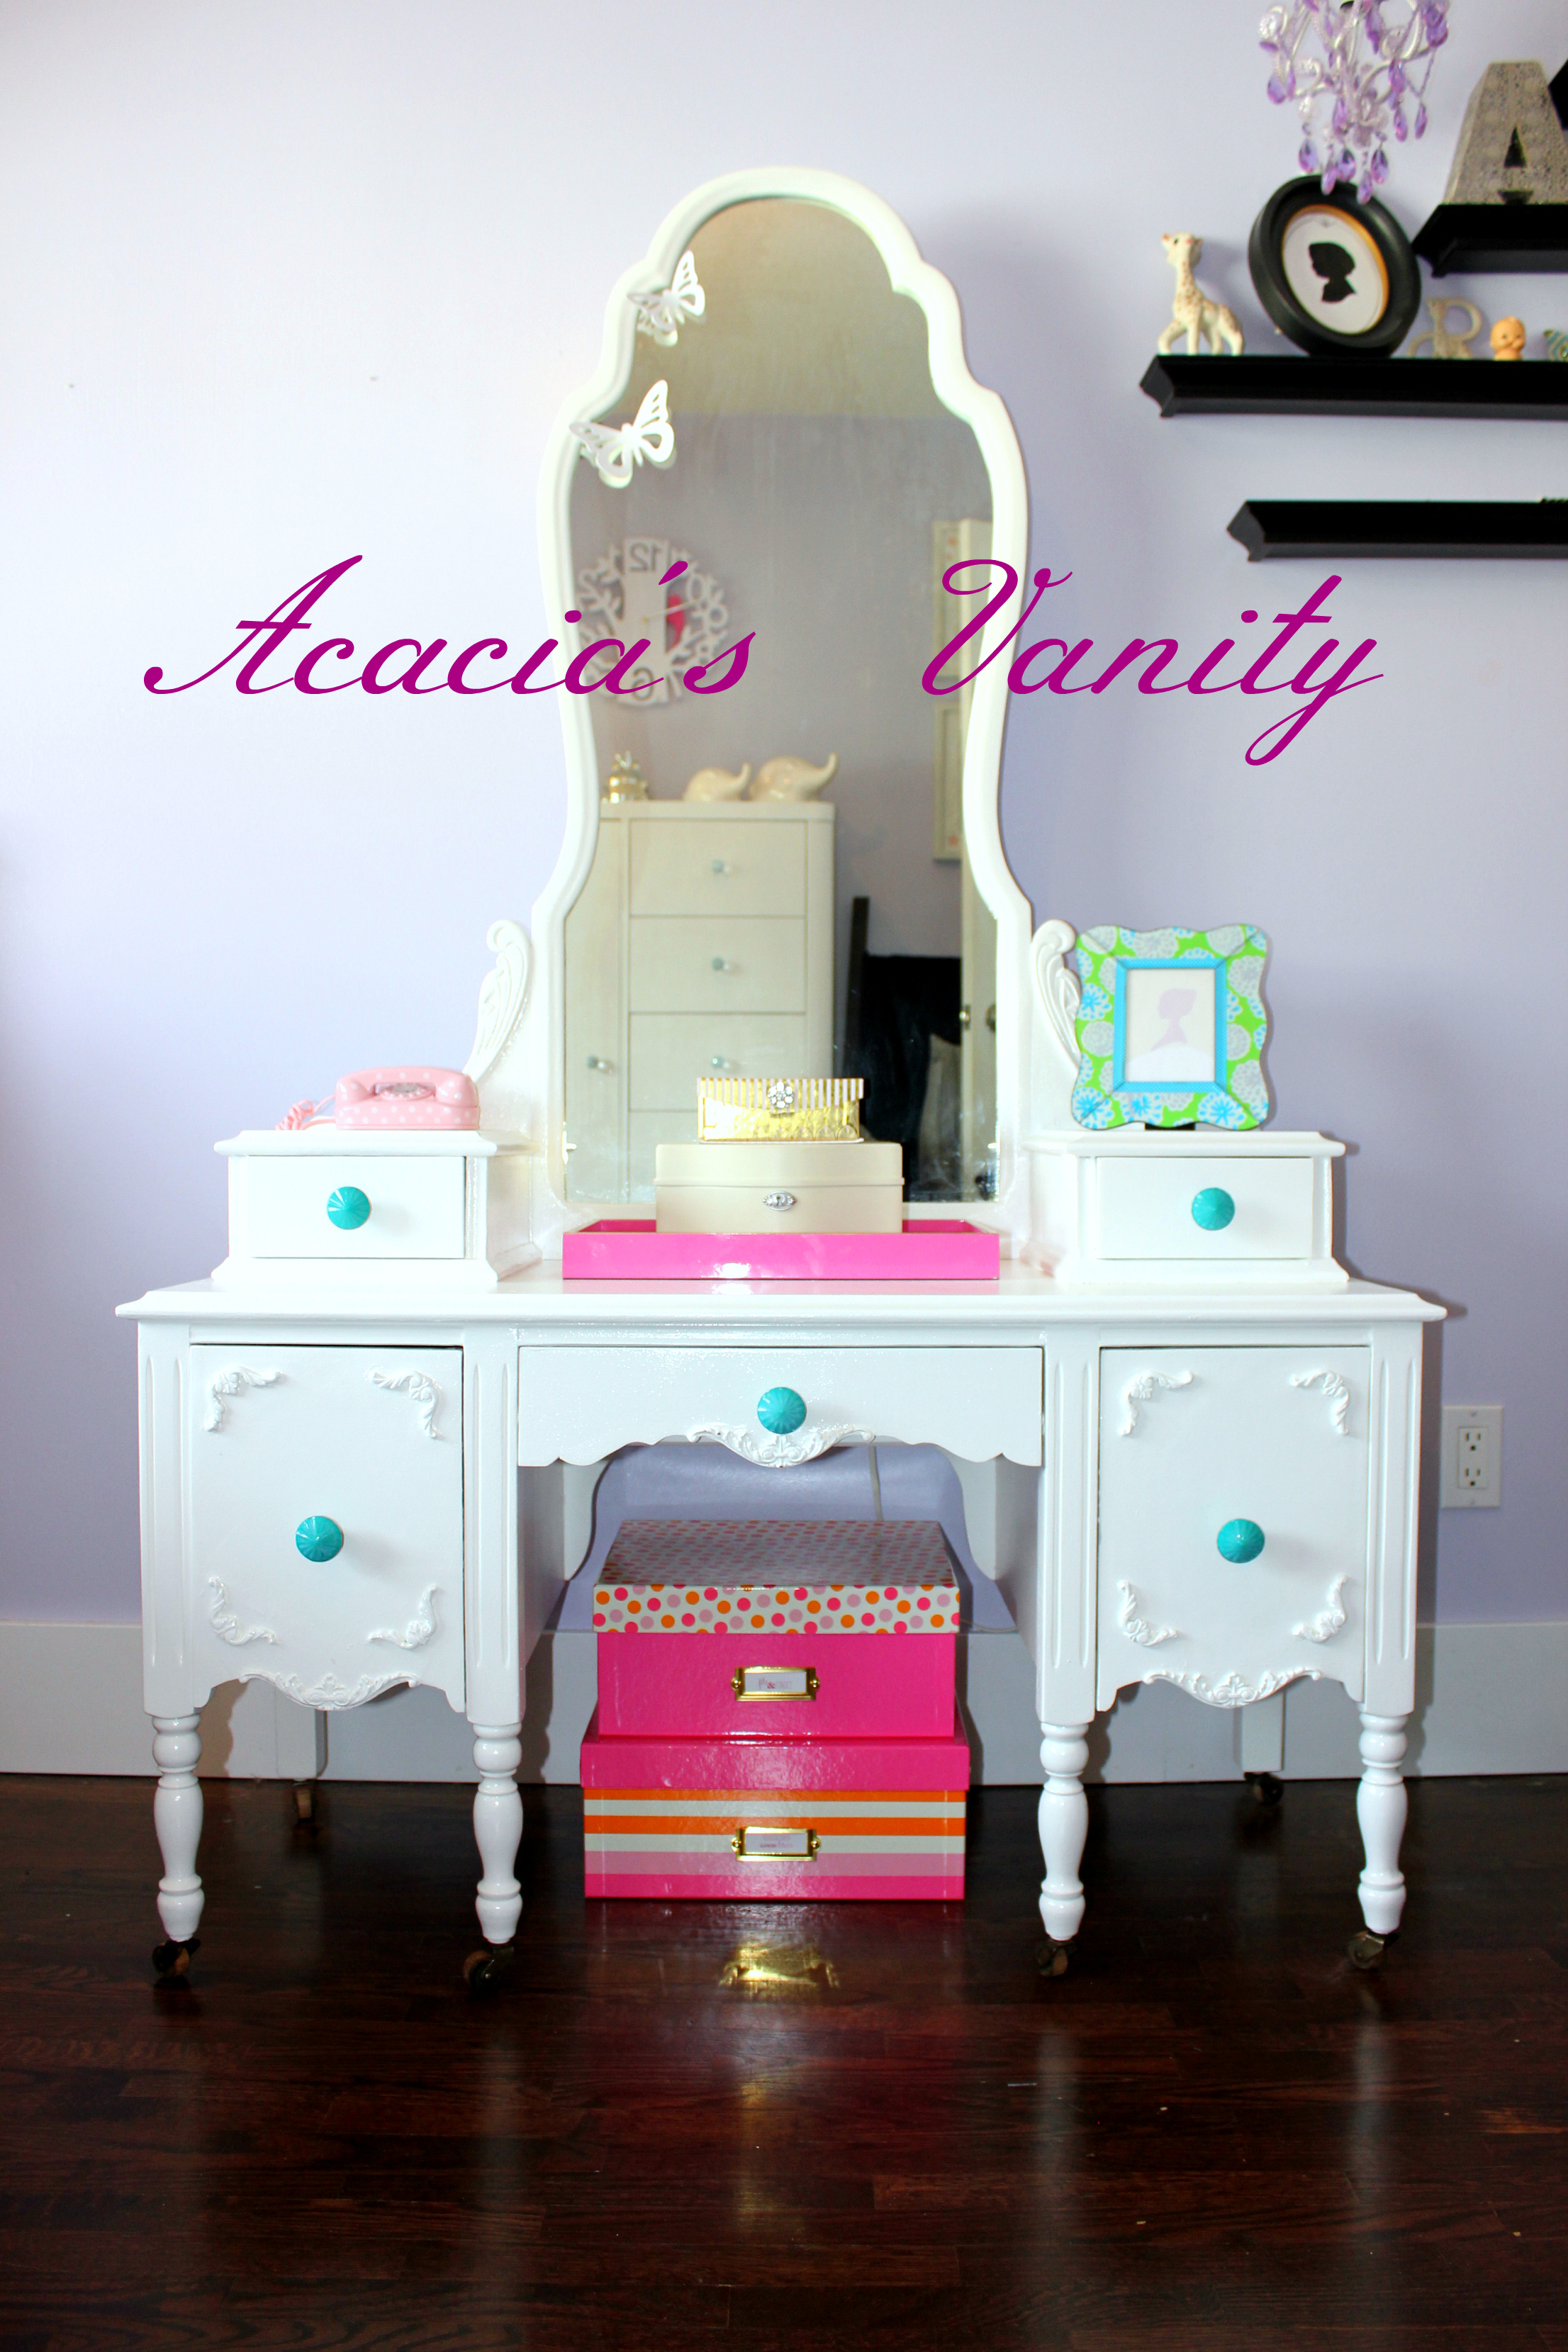
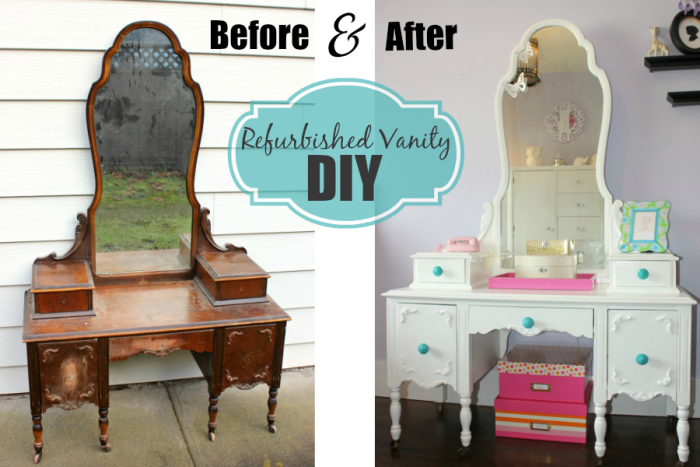
In an effort to transform our youngest daughter’s room from a nursery to a little girl’s domain, we had a couple projects up our sleeves. The first of these was refinishing this beautiful antique child’s vanity that my husband had acquired from a second hand store several years back. It was finally it’s moment to come up from the basement and shine!
Before:

Just bursting with potential! You can see why the Hubster, with his woodwork loving ways, brought this gem home. I mean really, can’t you just see the potential bursting all over the place already?!
Refurbished Vanity DIY
Tools and Supplies:
Finishing nails (we saved the original)
Screws (we saved the original)
Sandpaper – 20, 120 and 200 grit
Orbital Sander (optional)
Lint free cloth
Drop Cloth or Plastic (optional – to protect your work area)
Painters Tape
Smooth 4″ Foam roller
2″ Paint Brush
Paint Tray
Zinsser Cover Stain Interior/Exterior Primer-Sealer Stain Killer
Benjamin Moore’s High-gloss Latex Paint in Chantilly lace (OC-65)
Hammer
Drill and corresponding bits
Hardware (handles/pulls)
Step 1:
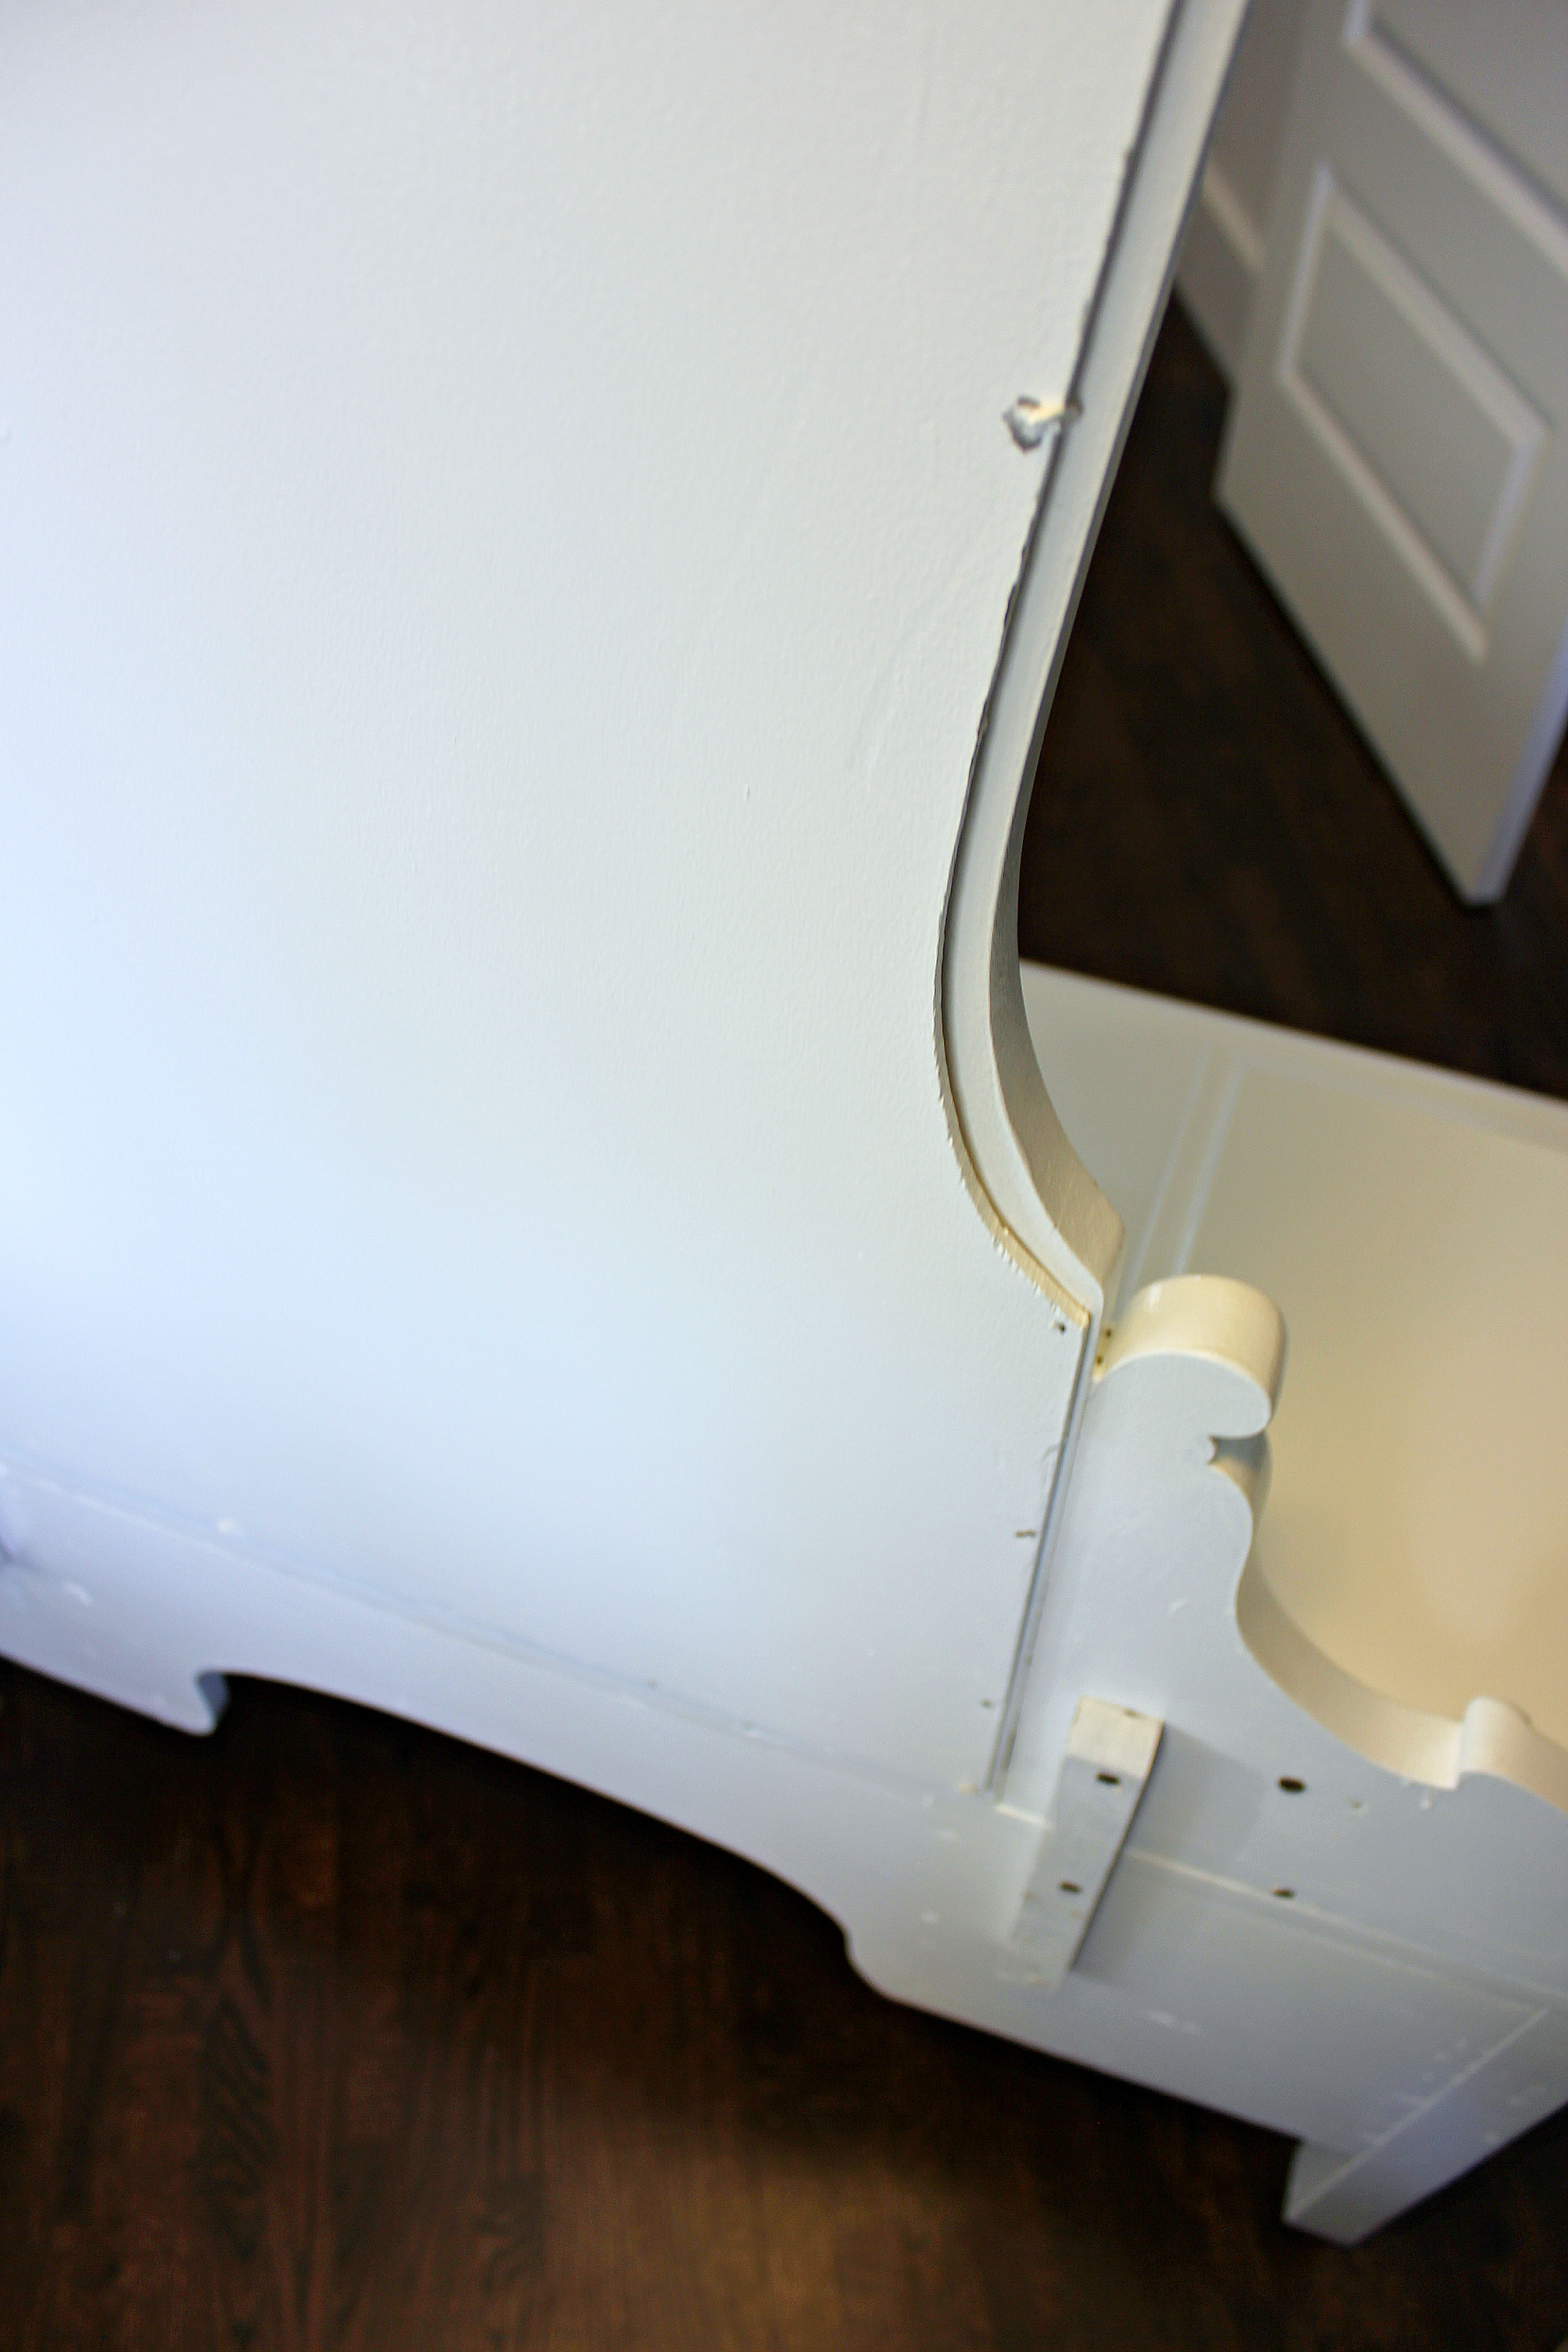
The first order of business was taking it apart. We removed the mirror by detaching it from the unit. Then we took off the wood backing and removed the mirror itself, putting it carefully aside. It is important to remove the mirror so that the inside edge of the vanity frame can be painted. This way you will not see a dark reflection of unpainted wood along the outer edge of the mirror when it is finished.

Step 2:
Next came the sanding. All the sanding! My husband’s perfectionist tendencies come in very handy for these sorts of things. We wanted to make sure any sort of finish or varnish had been removed before proceeding. This was achieved with an 80, 120 and then a 200 grit sand paper on an orbital sander.

Step 3:
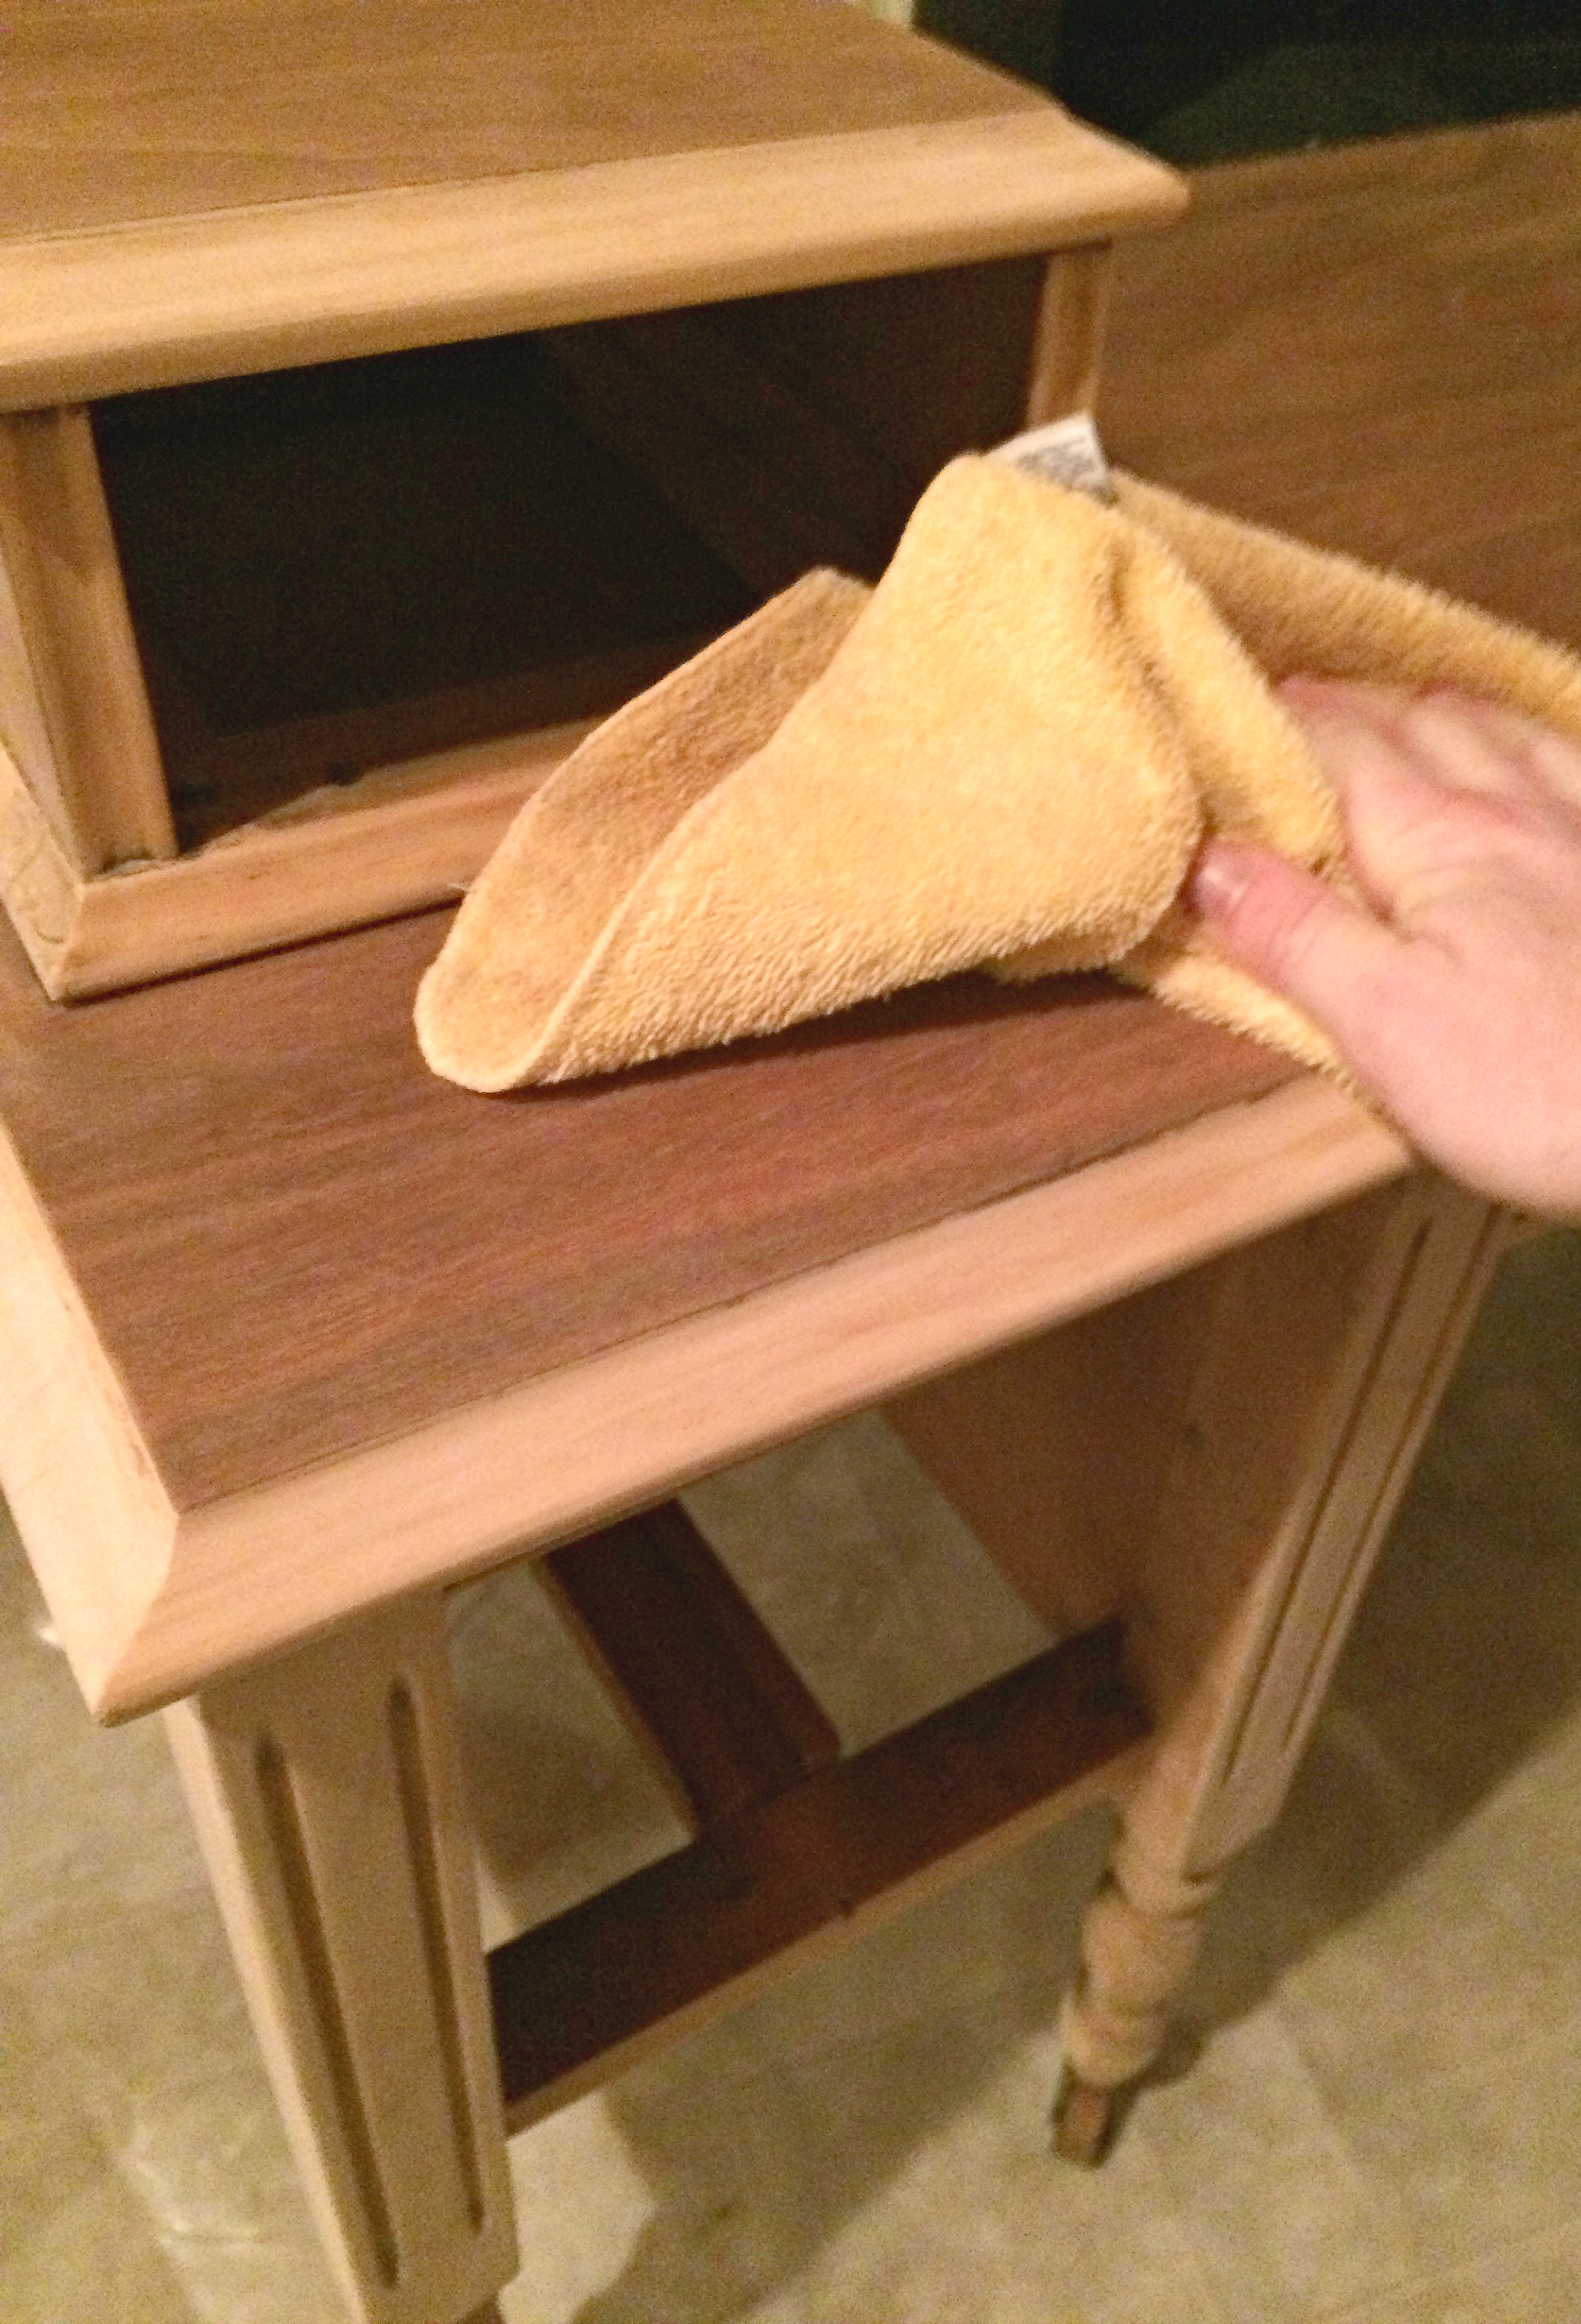
Carefully wipe down any and all dust with a damp cloth.
Step 4:
Next he taped off inside the drawers with painters tape so there would be straight lines where the paint stopped. This makes a much more finished look when the drawers are opened. He also taped off the casters on the bottom of the unit, alternatively you could just remove them.

Step 5:
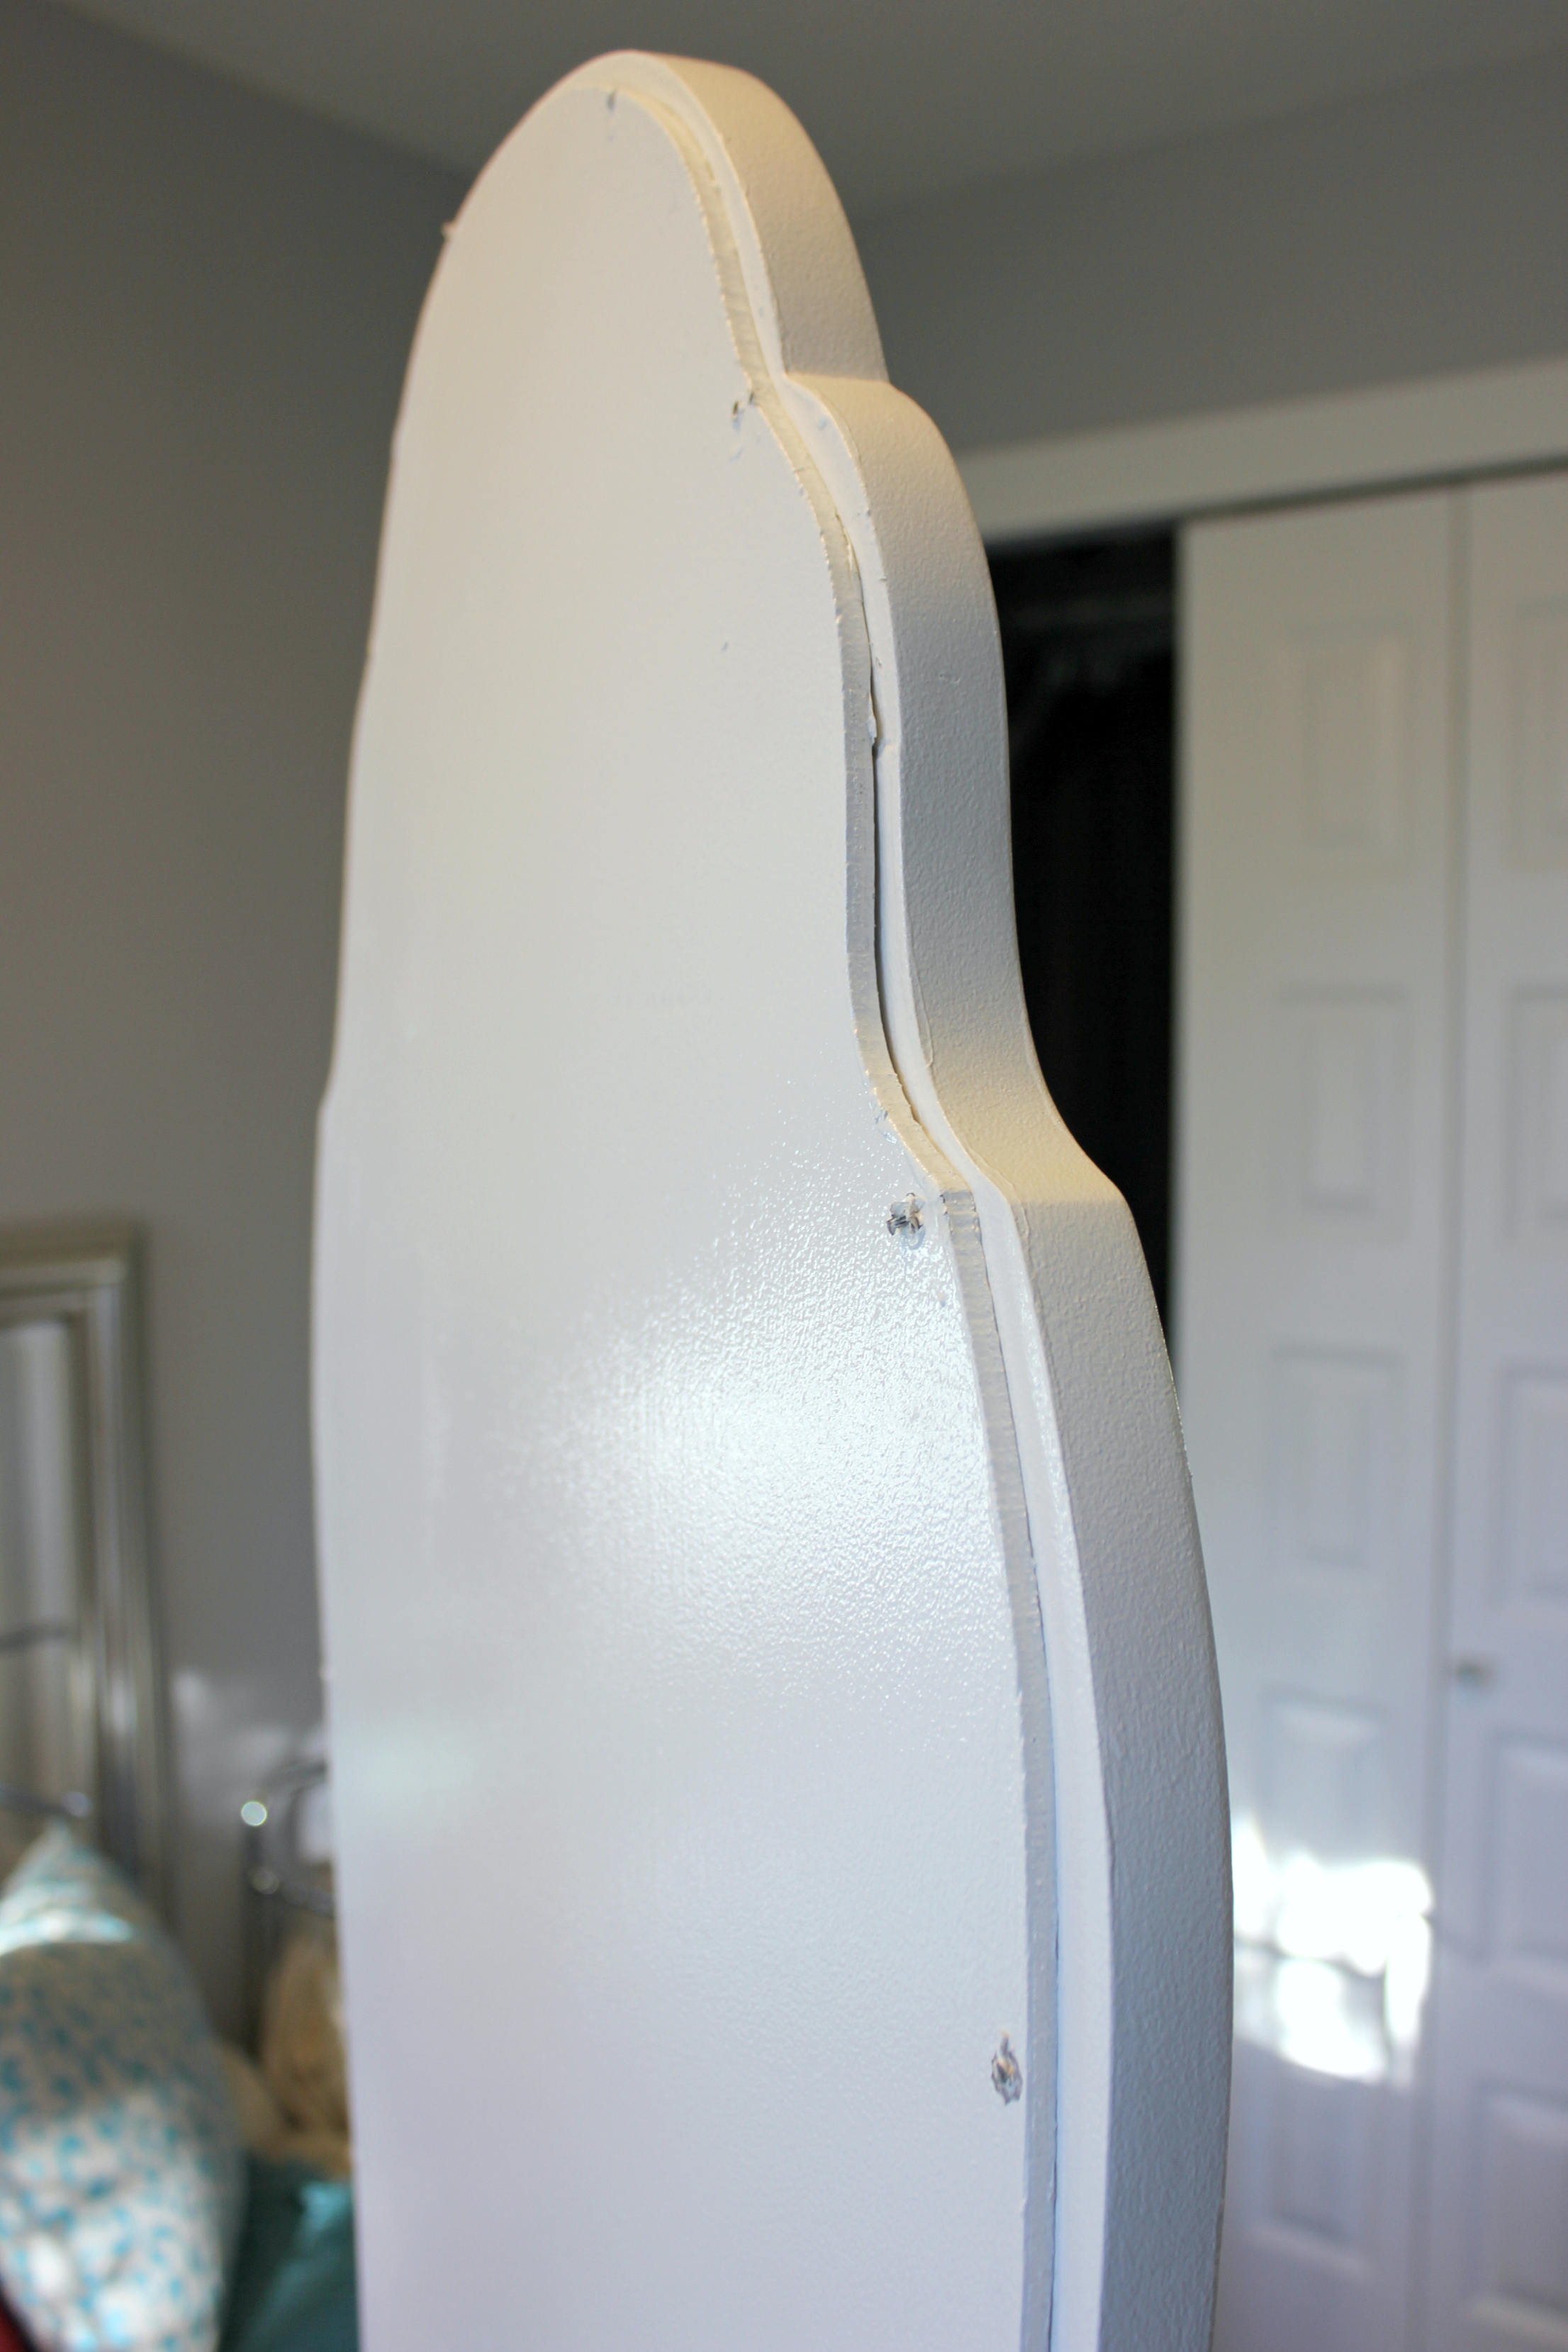
Then we meticulously applied a coat of primer, paying extra attention to any detail and being mindful for drips. We used a paint brush for all the detail work and then finished off with a smooth faced foam roller. We used Zinsser Cover Stain Primer-Sealer Stain Killer so as to give a good solid coat that wouldn’t allow any lingering stain that is embedded in the woodgrain to seep through later. We have used this product multiple times before on other projects with happy results. Allow to dry completely.

Step 6:
Once completely dry, we applied two coats of Benjamin Moore’s High-gloss latex paint in Chantilly Lace (OC-65). A few minutes after applying the first coat, check to ensure that paint runs have not formed. If they have, be sure to quickly smooth with the paint brush or roller before the paint dries. Then allow time for the first coat to dry completely before applying the second coat.


Step 7:
Allow the paint to dry and cure according to directions (we gave ours a week). Also make sure you allow this to take place without the drawers in place or they may get stuck.


Step 8:
Once the paint was no longer soft, we put the mirror back in place and the wood backing was secured with the original finishing nails. Then it was reattached to the unit with the original screws, saved from disassembly. It took both of us, one holding the mirror in place while the other attached it to the back of the vanity.
Step 9:
Next, if you are anything like me, dance your way to Anthropologie, overjoyed to finally have a reason to actually purchase some of their amazingly beautiful handles, rather than just oohing and ahhing at your every visit!


Step 10:
Install the new hardware. We went with a turquoise glass and oh man I am so in love. They look like jewelry!
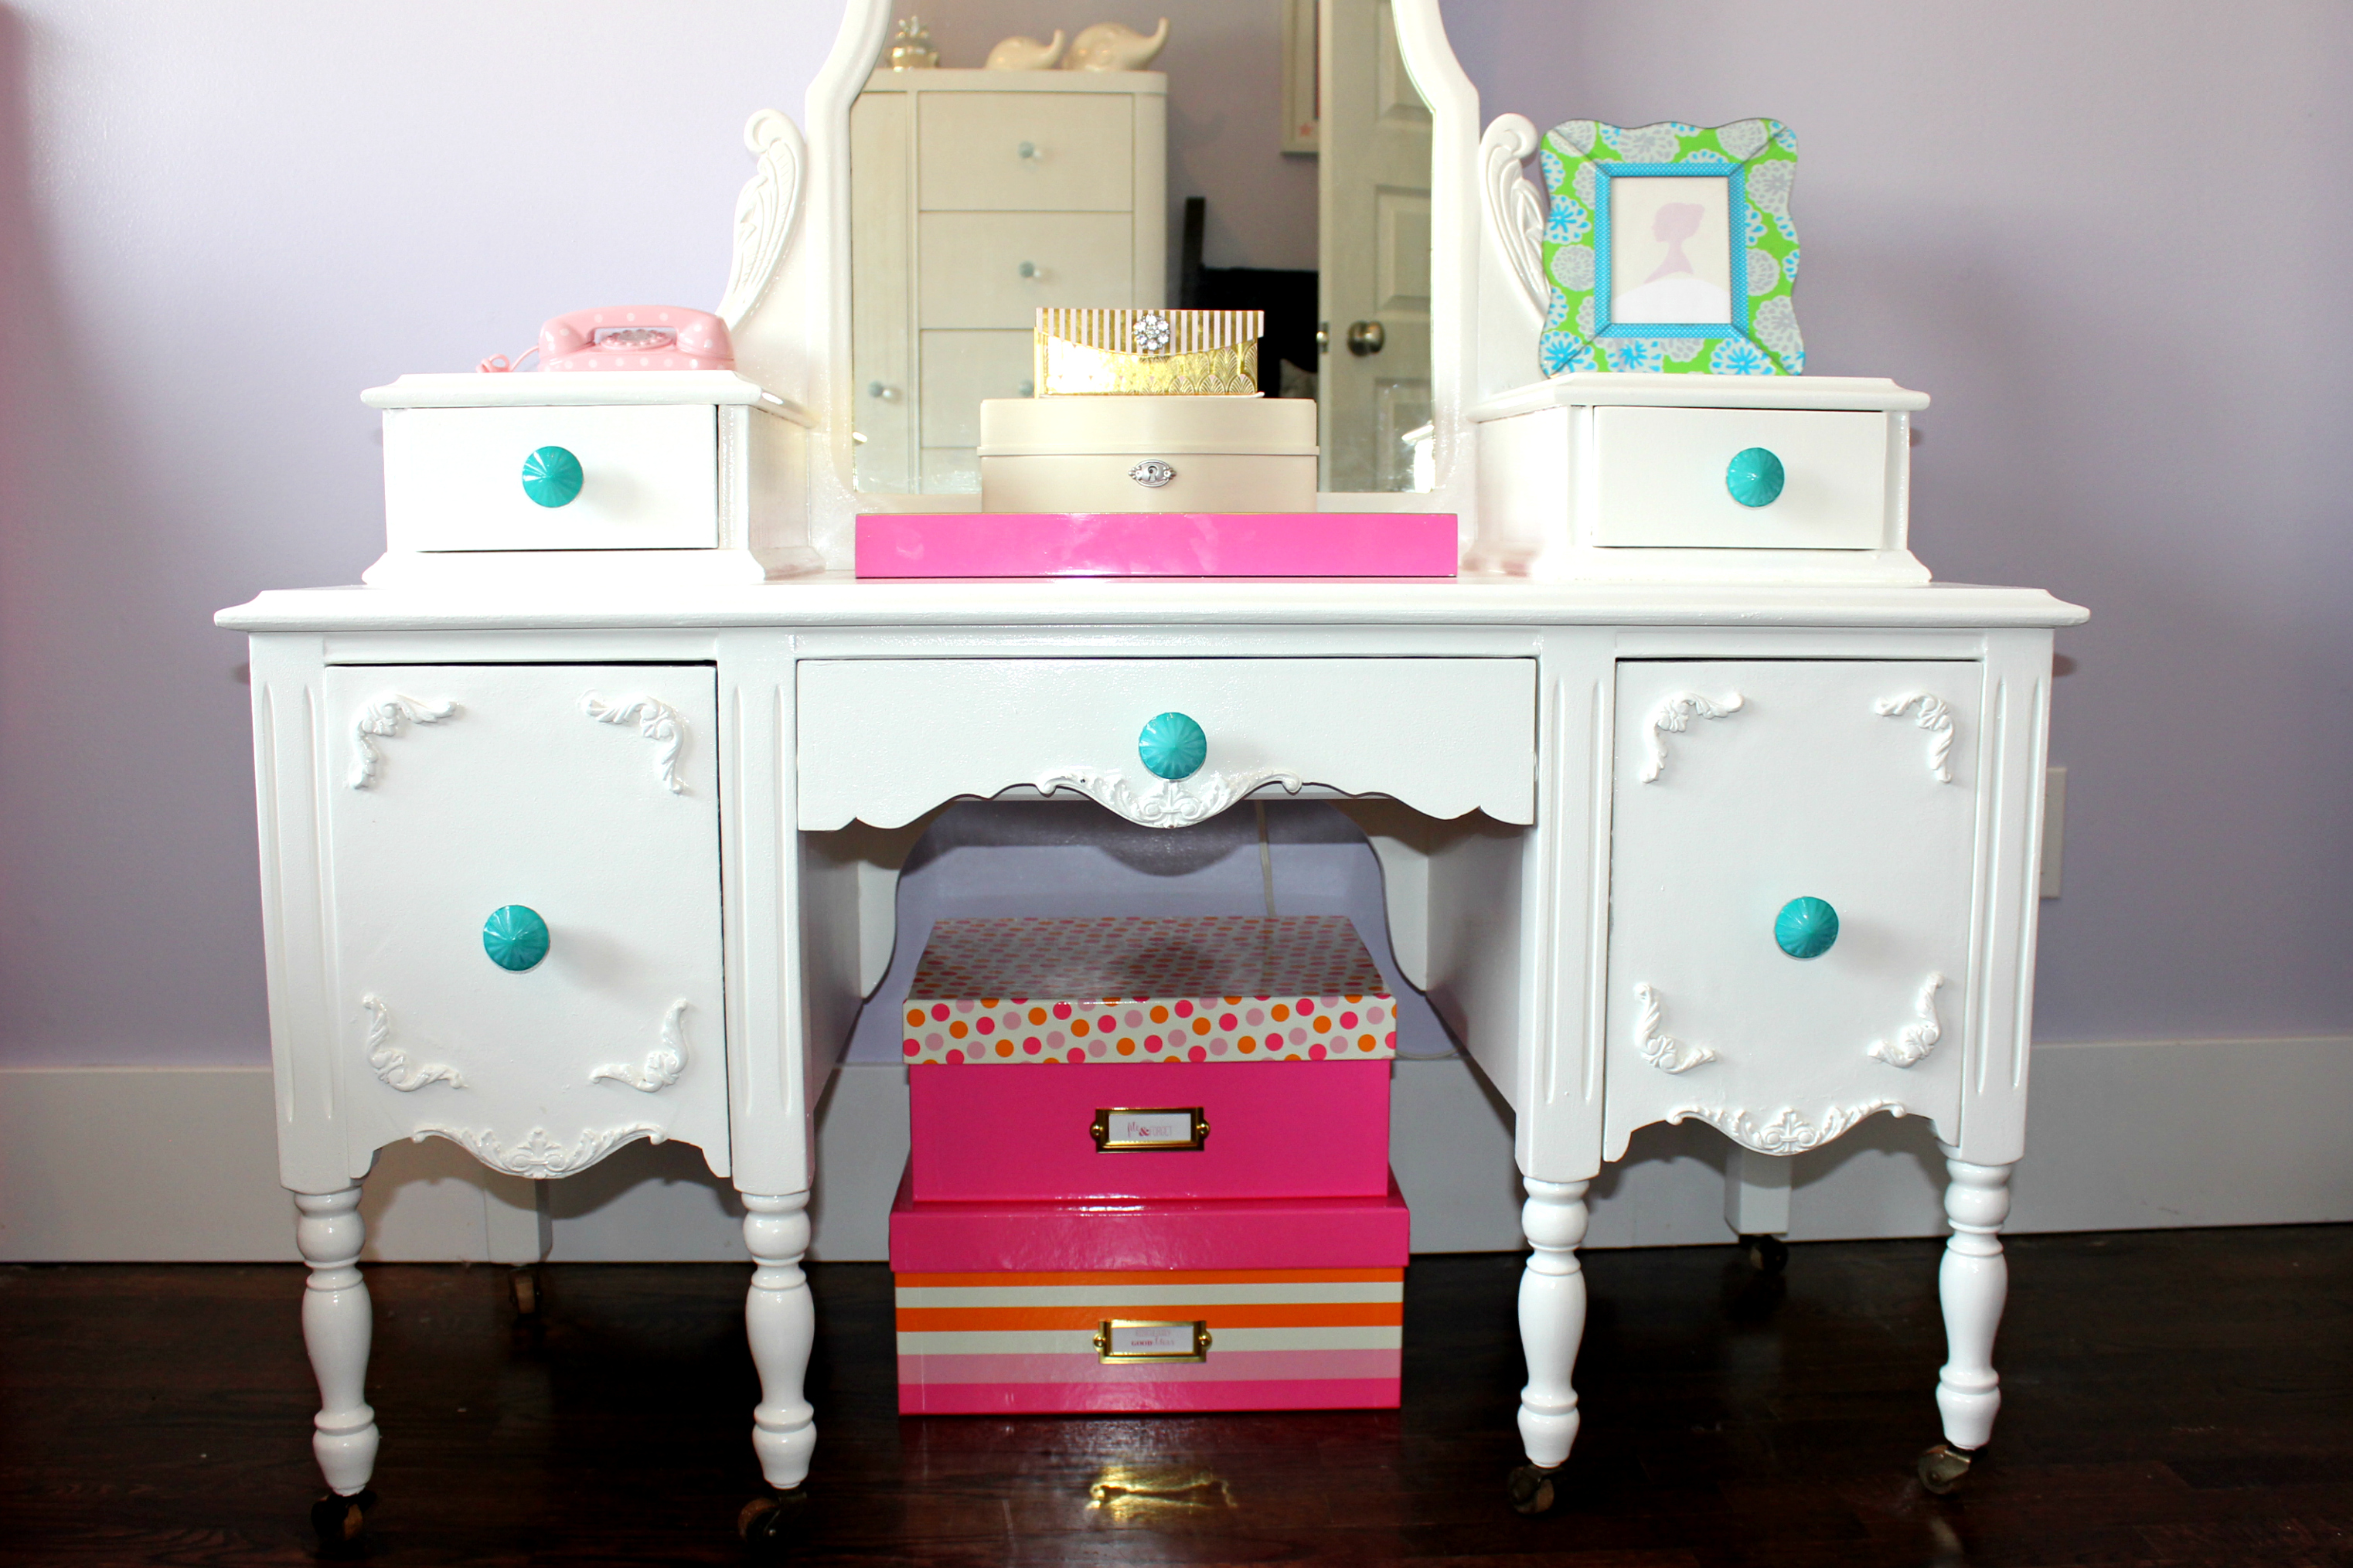
And there it is. All done!
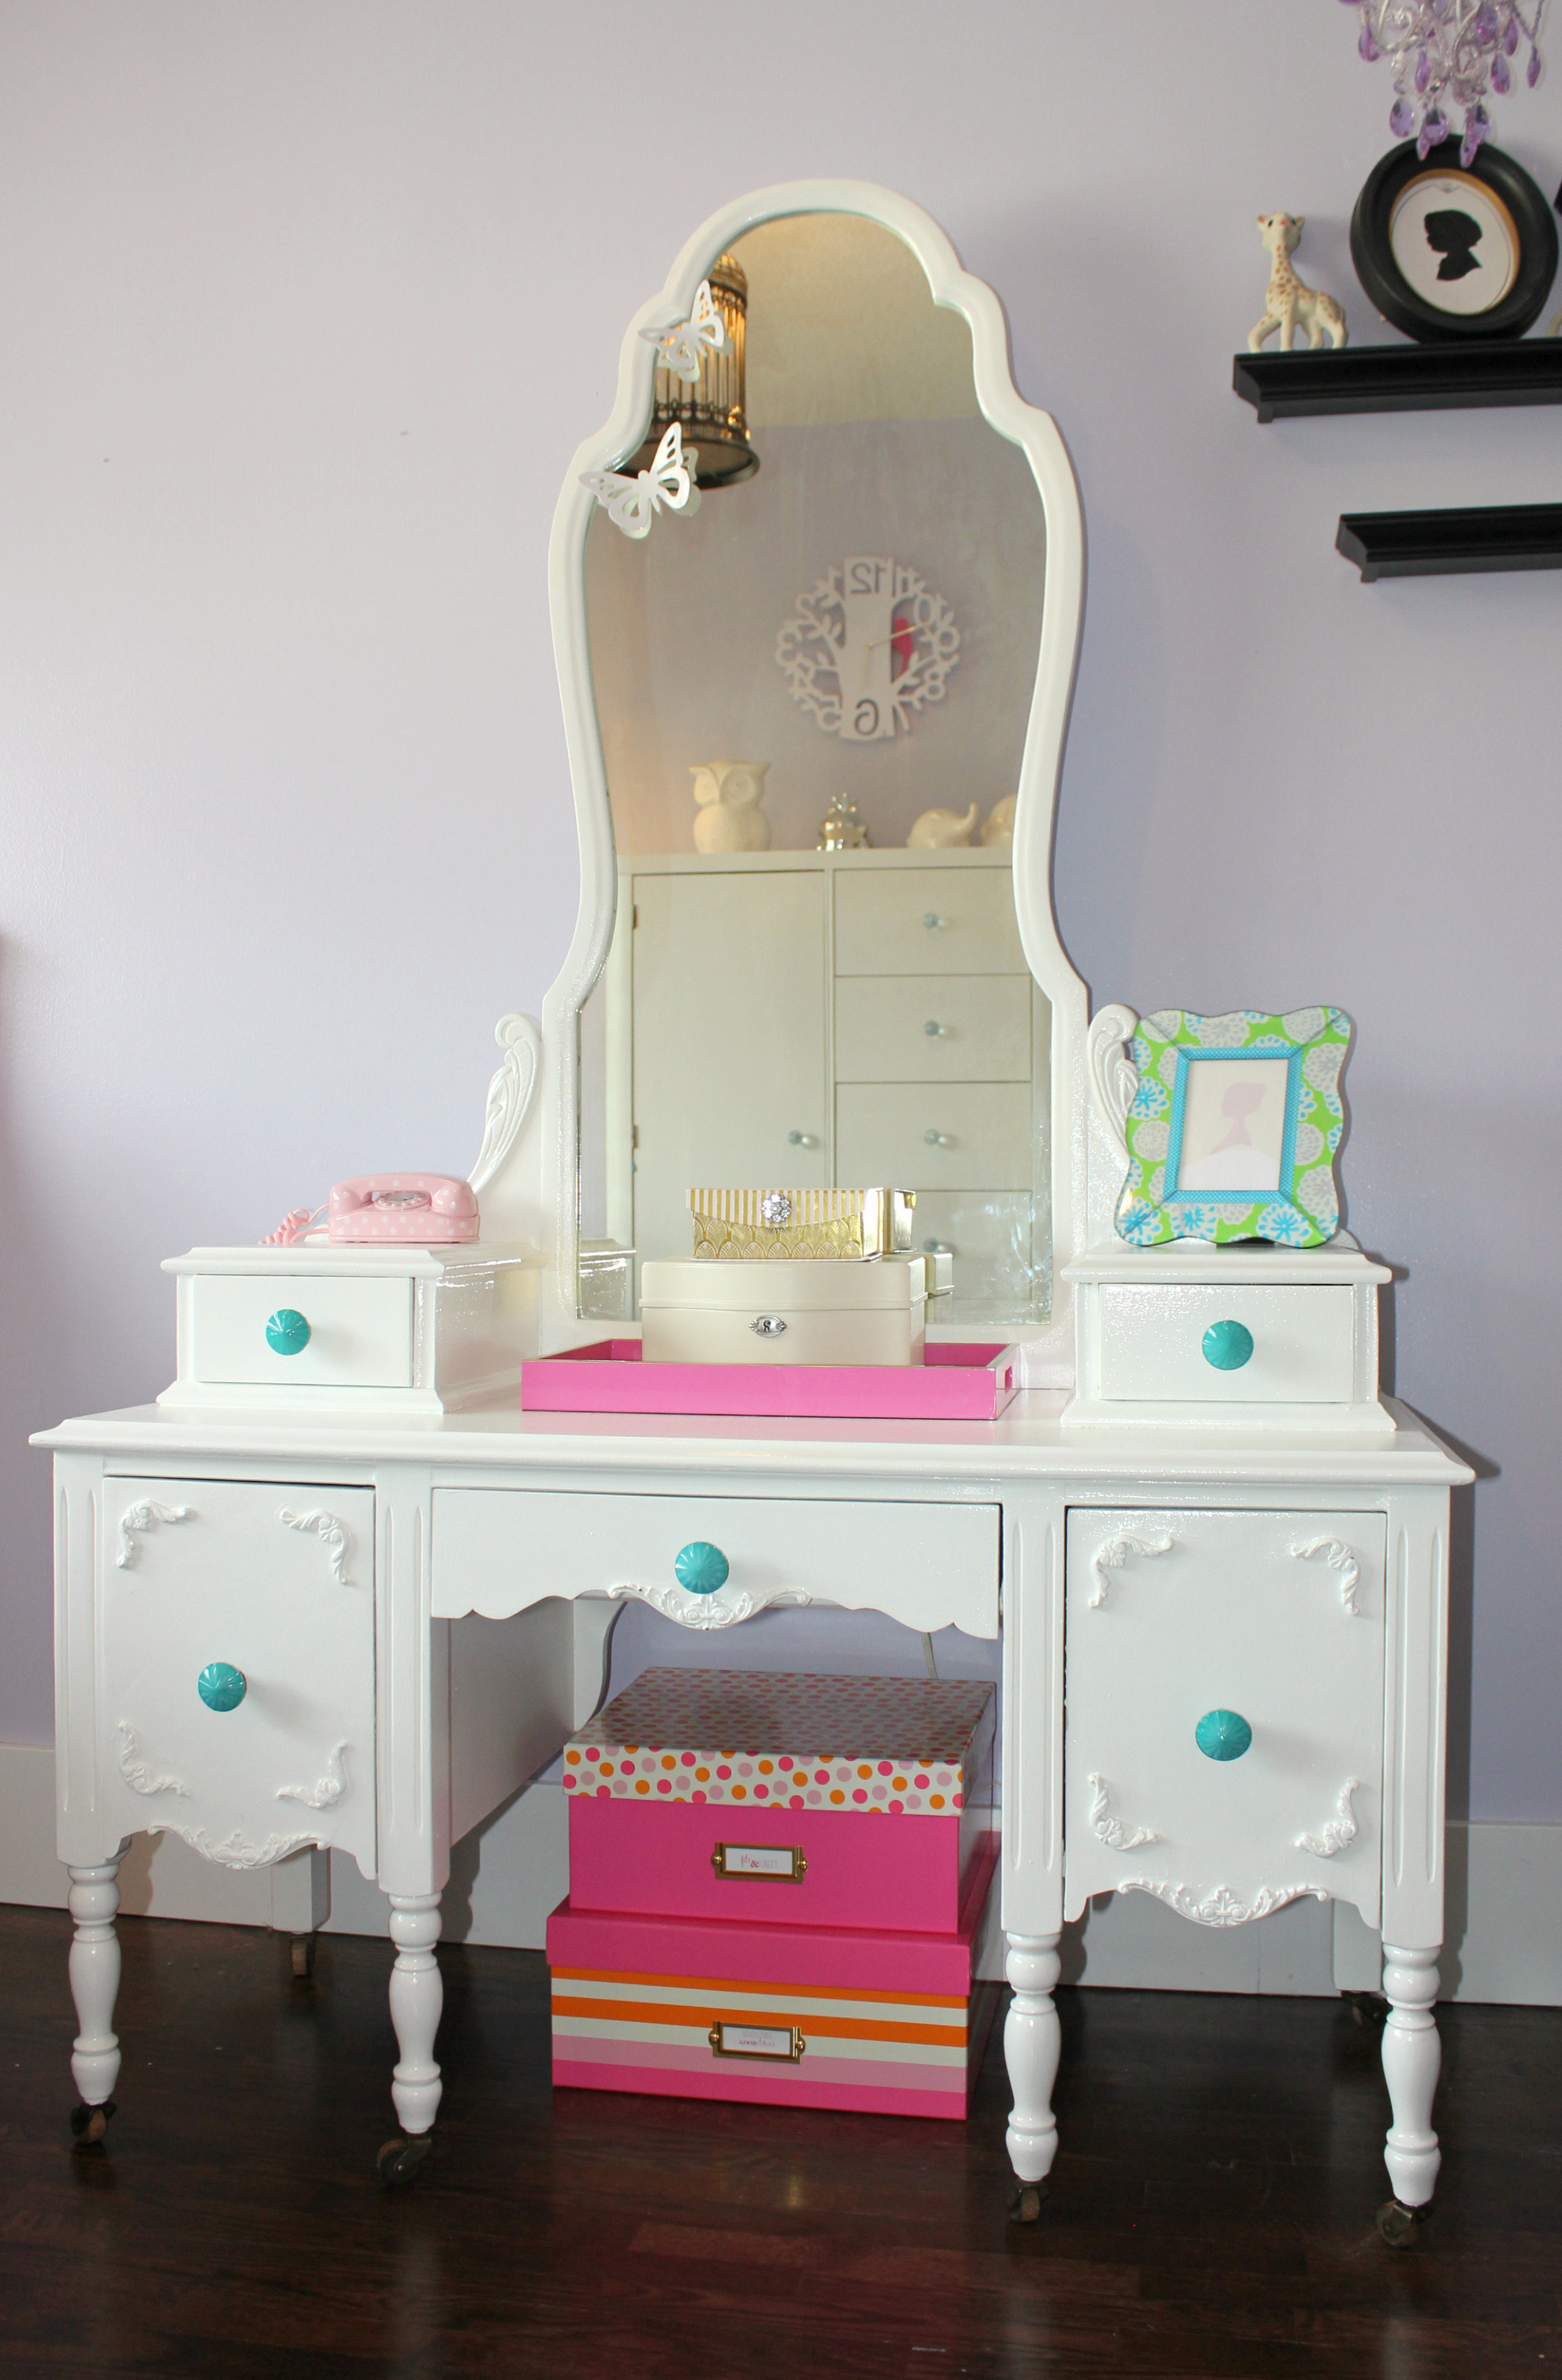
I was very pleased with this beautiful vanity, and not just because I didn’t have to do any of the sanding! Acacia especially loves that her father bought it for her. I think it also doesn’t hurt that her older sister doesn’t have one (she has her own desk instead – an antique roll top secretary, also refinished by her father). You can tell both father and daughter are proud of it and I like that! Even the following day when I walked into Acacia’s room, I found her sitting in front of her new vanity happily listening to her jewelry box play music and watching the little ballerina inside of it twirl. Appears I am not the only one pleased.
The post Refurbished Vanity DIY appeared first on Creative Sides.
]]>The post 4 Reasons Why You Don’t Want to Miss the Healthy Family Expo *GIVEAWEAY* appeared first on Creative Sides.
]]>
We are so excited for the 3rd annual Healthy Family Expo coming back to the Vancouver Convention Centre on Sunday March 6th from 10 am – 5pm. There are so many reasons why you’ll want to join this fun-filled day for families with kids aged 0-12, but here are our top 5 reasons not to miss out:
- The Food: If you know us at all, you know we kinda have a thing for food. The Healthy Family Expo doesn’t disappoint on that front, with over 35 Food and Drink exhibitors you can sample and shop your way through including Seattle Chocolates, Nudge, Kids Can Cook Gourmet, Good Drink, Glutenull Bakery, Boathouse Farms, Life Choice Natural Foods and so many more!
- The Fun: The Healthy Family Expo boasts the biggest Active Kid Zone in the Lower Mainland, with climbing wall, giant hamster ball track, fire truck bouncer, run bike & sportball areas, animal safari, DANCEPL3Y classes & more! This means that the kids will not only be entertained, but also have a place to run and climb and play, getting all their energy out. Happy, engaged kids = more peaceful time for parents to take in everything the Expo has to offer.
- The Rides: One of the highlights of our experience last year was getting to test drive the latest cars from Toyota Canada. They are back again this year offering on-site hybrid vehicle test-driving, and we all know who is going to be at the front of that line!
- The Swag: The team at the Healthy Family Expo really knows how to treat their guests right! Not only do they have daily giveaways happening NOW on their Facebook Event page, plus the giveaway you’ll find at the end of this blog post, but one lucky advance ticket purchase will win a $200 Expo shopping spree! That’s not all! The first 200 attendees receive child day ticket to the Sea to Sky Gondola AND there is a whopping $15,000 Grand Prize Showcase, including a 1-year lease on a Toyota Prius c to be won.
Those aren’t the only reasons to join the Expo of course, there are:
- 100+ Exhibitors, Shopping & Food Sampling
- Bobs & LoLo concerts at 11 am and 12:30 pm
- Jessie Farrell concert at 3 pm presented by Bolthouse Farms
- On-site hybrid vehicle test-driving with Toyota Canada
- Seventh Generation Baby Feeding & Changing Lounge & Active Baby Stroller Parking
- $1 from each ticket sale supports the Canucks Autism Network.
And don’t forget to RSVP that you’re GOING in the Expo Facebook Event to win thousands in prizing before the big day!
So how do you get there? Tickets are $12 in advance (www.healthyfamilyexpo.com/tickets or at Whole Foods Market or London Drugs) or $15 cash at the door. Kids under 12 are FREE! Of course you can always click on the image below and use our exclusive 2-for-1 coupon code CC241 to enjoy all the fun for half the price!

To kick off pre-Expo celebrations, Healthy Family Expo partners have teamed up to give one lucky Lower Mainland winner a healthy family prize package valued at over $1000, including:
- Family Summer Season’s Pass to Sea to Sky Gondola ($274+ value)
- $50 gift card to Whole Foods Market from Toyota Canada
- $50 photo book gift card from London Drugs
- Family tubing or sliding pass for Cypress Mountain ($75 value)
- Grass fed goodness prize pack from Rolling Meadow Dairy, Life Choices & Nudge ($150 value)
- $50 gift card from Active Baby
- Climbing date-night for two at Climb Base5 ($50 value)
- All Natural Whole House Cleaning Kit from AspenClean ($70 value)
- Gift basket of yummy cereals & rice bars from Envirokidz ($50 value)
- Child Sonicare electric toothbrush from PDG Pediatric Dental Group ($69)
- Foster Naturals shampoo & conditioner set from Modern Mama ($52 value)
- WaterBox prize pack from Happy Water ($50 value)
- Gift box full of healthy, delicious products from Love Child Organics ($50 value)
- REAL meat pet food gift basket from Holistic Choice ($50 value)
Enter through Rafflecopter below! Open to Vancouver Lower Mainland and Sea to Sky Corridor residents.
Winner will be announced at the Healthy Family Expo Facebook Party on March 3rd, 2016, and must collect prizes at the Expo at the Vancouver Convention Centre on March 6th, 2016.
The post 4 Reasons Why You Don’t Want to Miss the Healthy Family Expo *GIVEAWEAY* appeared first on Creative Sides.
]]>